How to add and use images as files instead of xcassets in XCode
Drag and drop the files into the project, set the targets and click finish. Use the images in the same way you use xcassets.

Drag and drop the files into the project, set the targets and click finish. Use the images in the same way you use xcassets.
SubscribeDownload open source projectStep One: Drag and Drop the Files

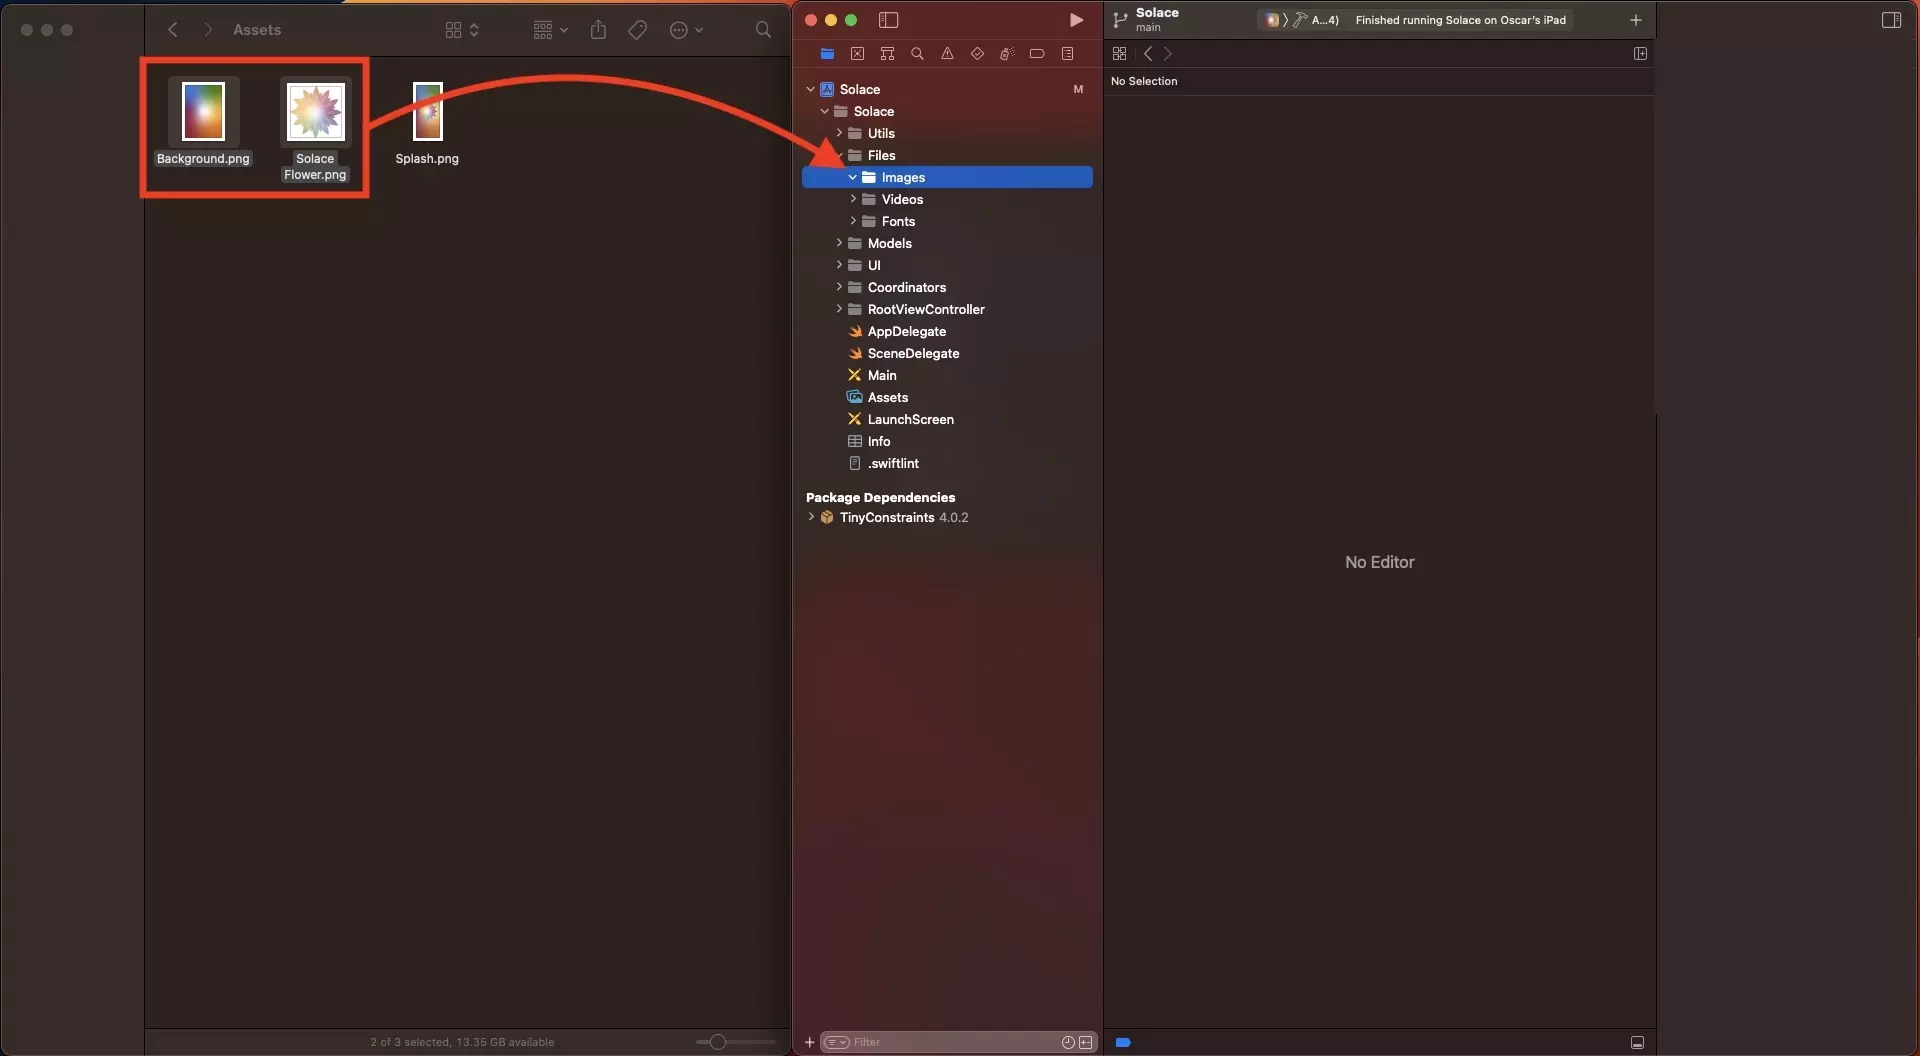
Drag and drop the images into the project.
We recommend that you hold all images under a Images folder within Files.
Step Two: Add to Project

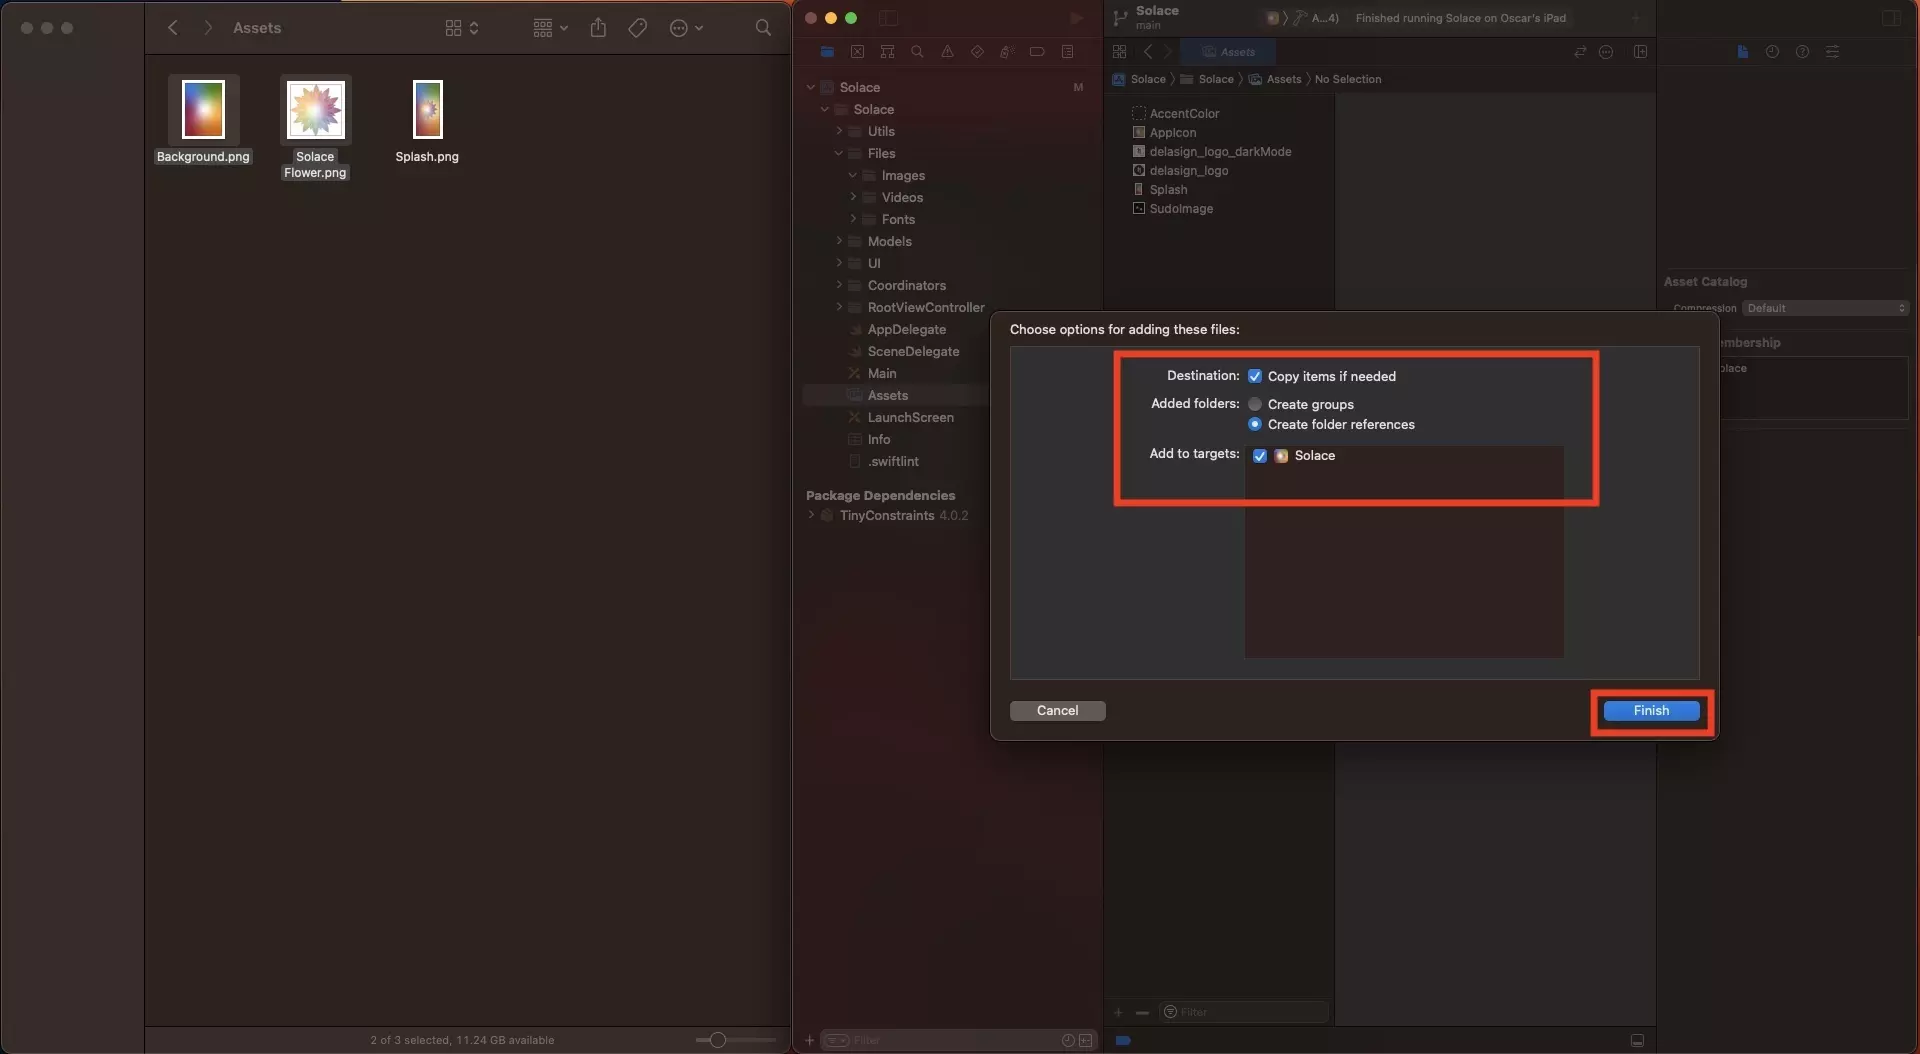
In the pop up that appears, make sure that Copy items if needed is checked off and that you have checked off the relevant targets for the project that will use these images.
Step Three: Use

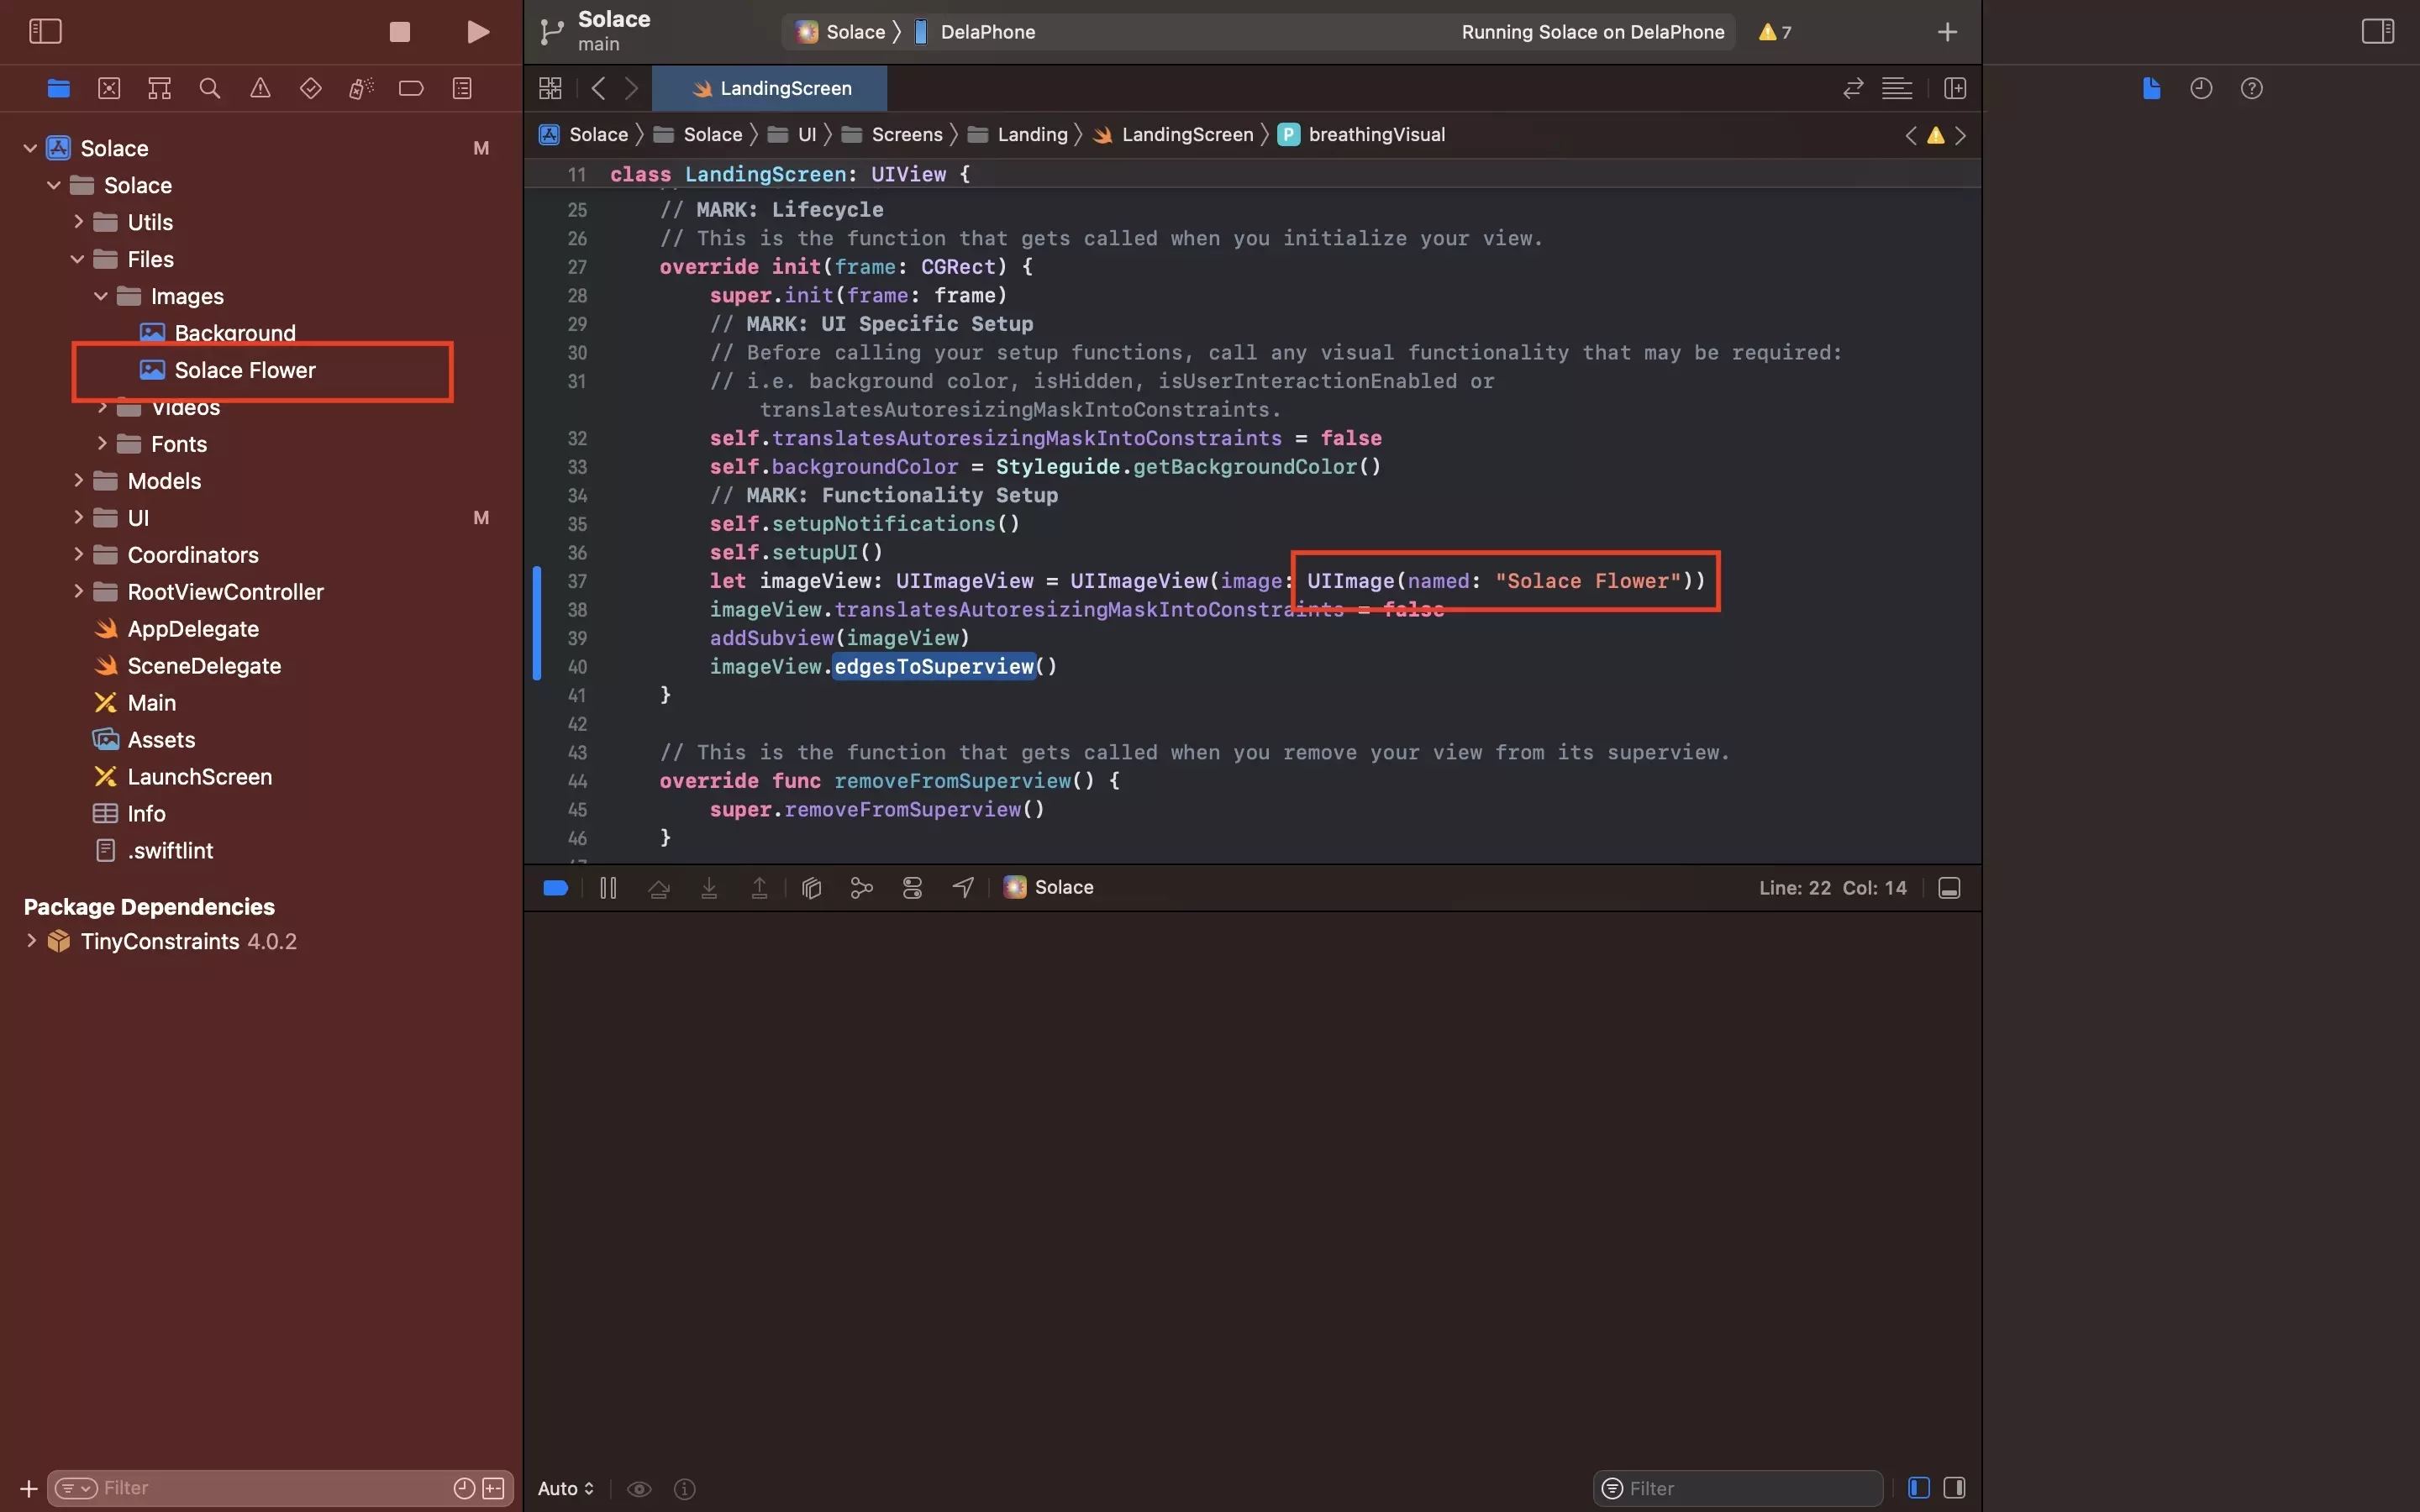
Local image files work the same was as xcassets, and can be added to an image view by using the name of the file.
We recommend that you add the names to a struct that holds all the references. To learn how to do this or how to add an image to a view, follow the tutorials below.