How to add and structure local images in Swift
A step by step tutorial on adding and structuring local images in Swift (iOS). Github repository included.

A step by step tutorial on adding and structuring local images in Swift (iOS). Github repository included.
The following tutorial walks you through the best practices for adding and structuring local images. The tutorial is available as part of the main branch on are open source project available below.
Step One: Add your local image
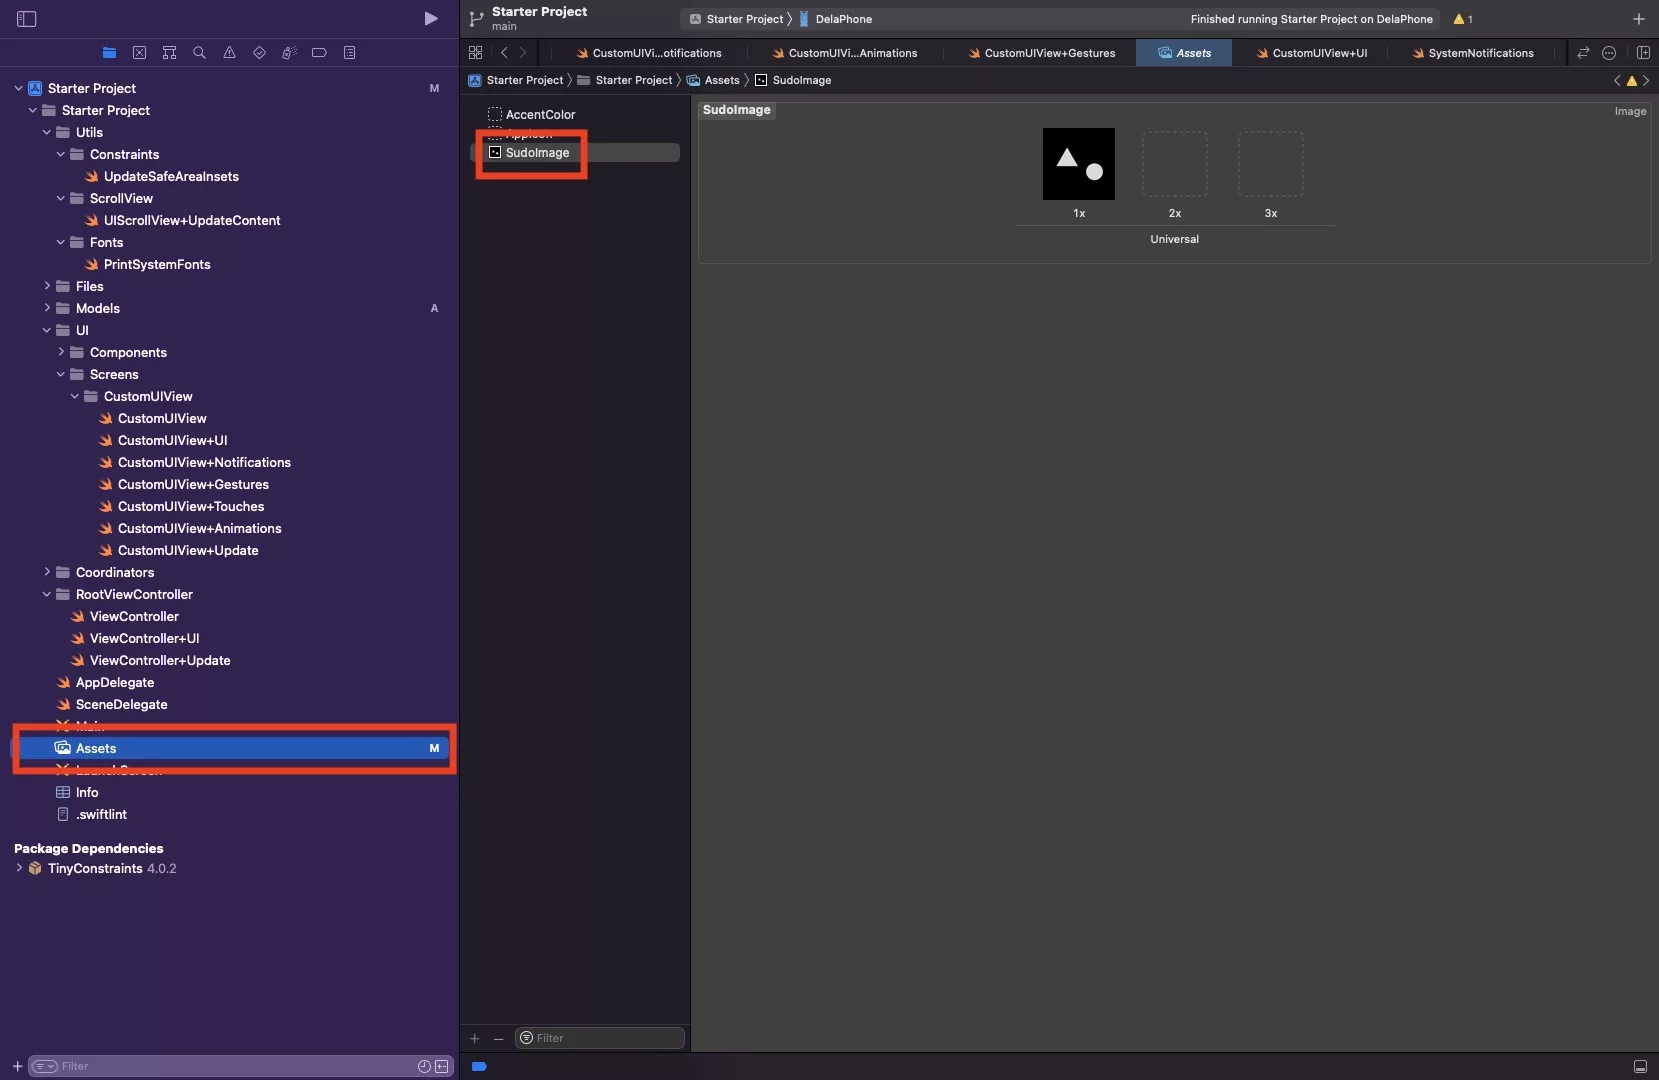
Drag and drop your image into Assets.xcassets.
We recommend that you export each image at 3x size, as we will be using individual scales.
The example shows how we drag and dropped in an image called SudoImage.png.
Step Two: Set single scale
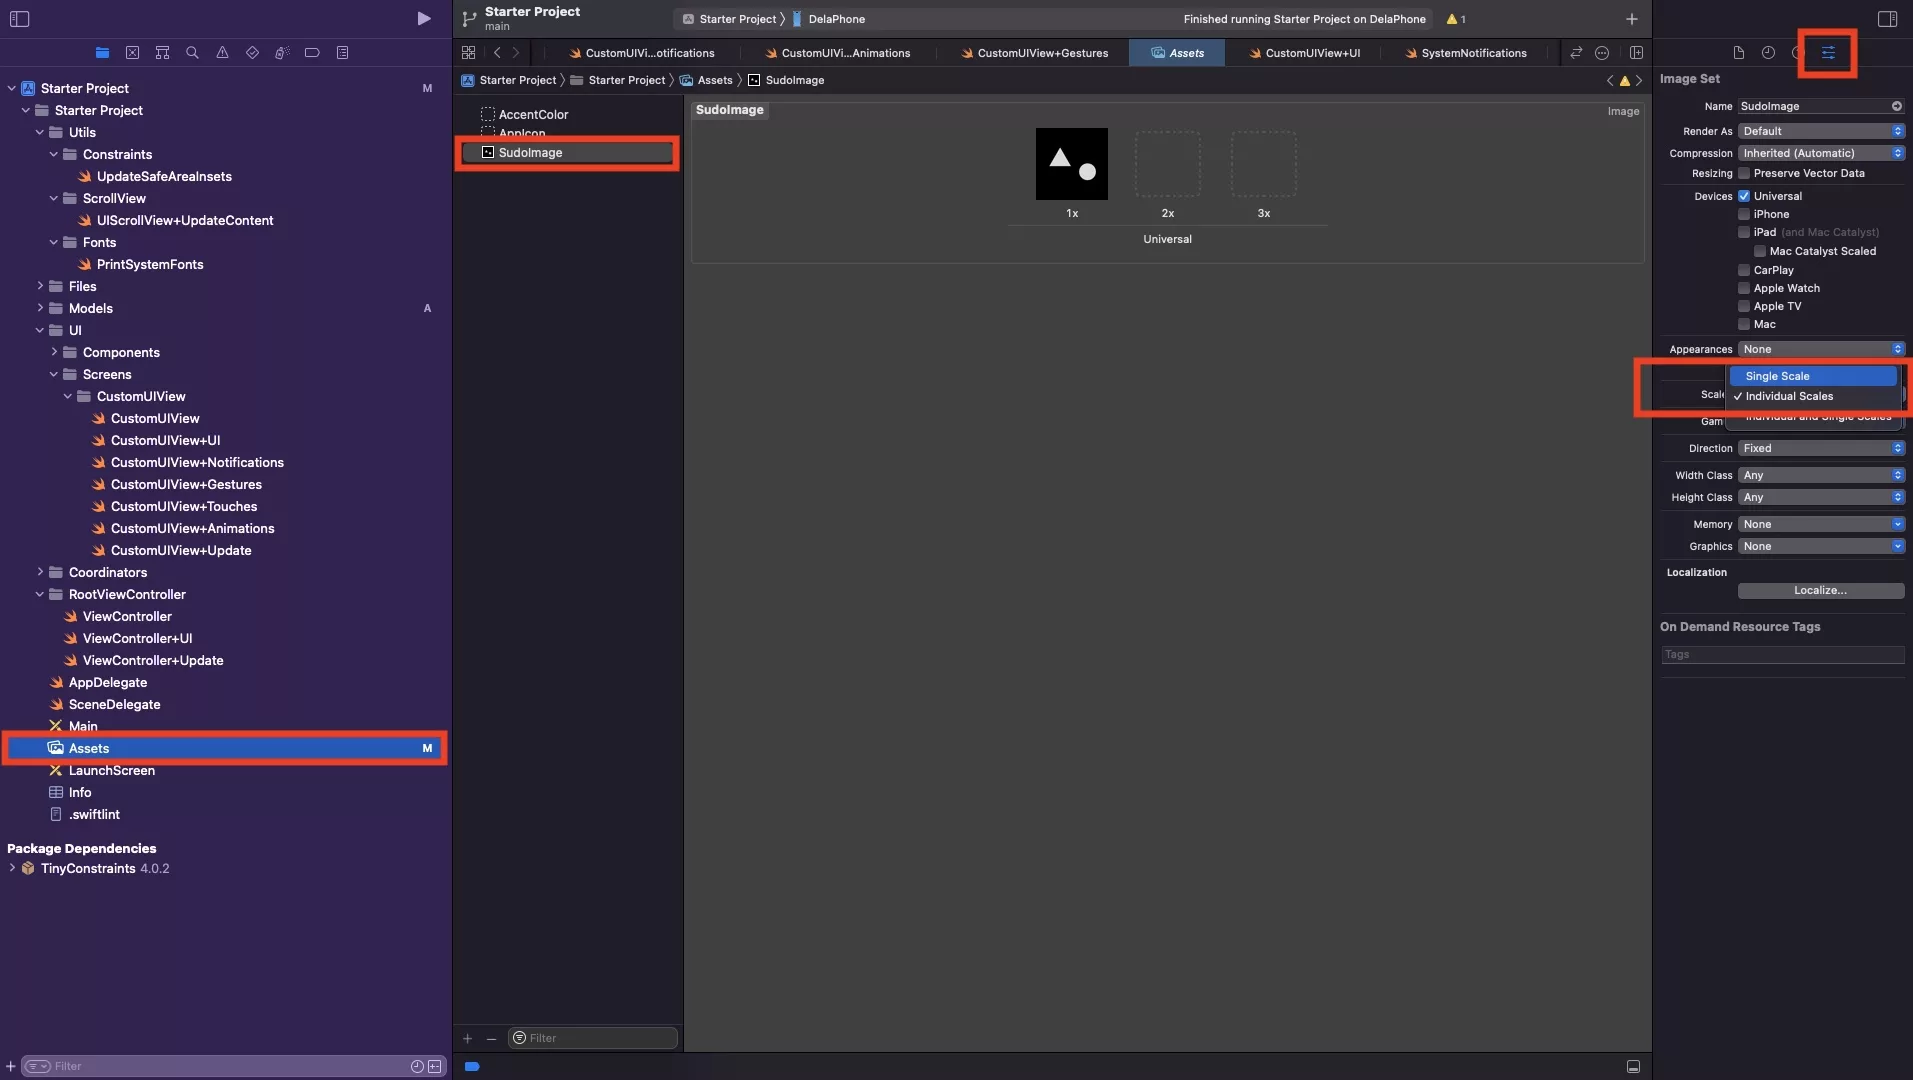
On the image that you added, on the attributes inspector - set the Scales to Single Scale.
This makes your app use a single image, instead of asking for three sizes: 1x, 2x and 3x.
Step Three: Create the UIImages model file
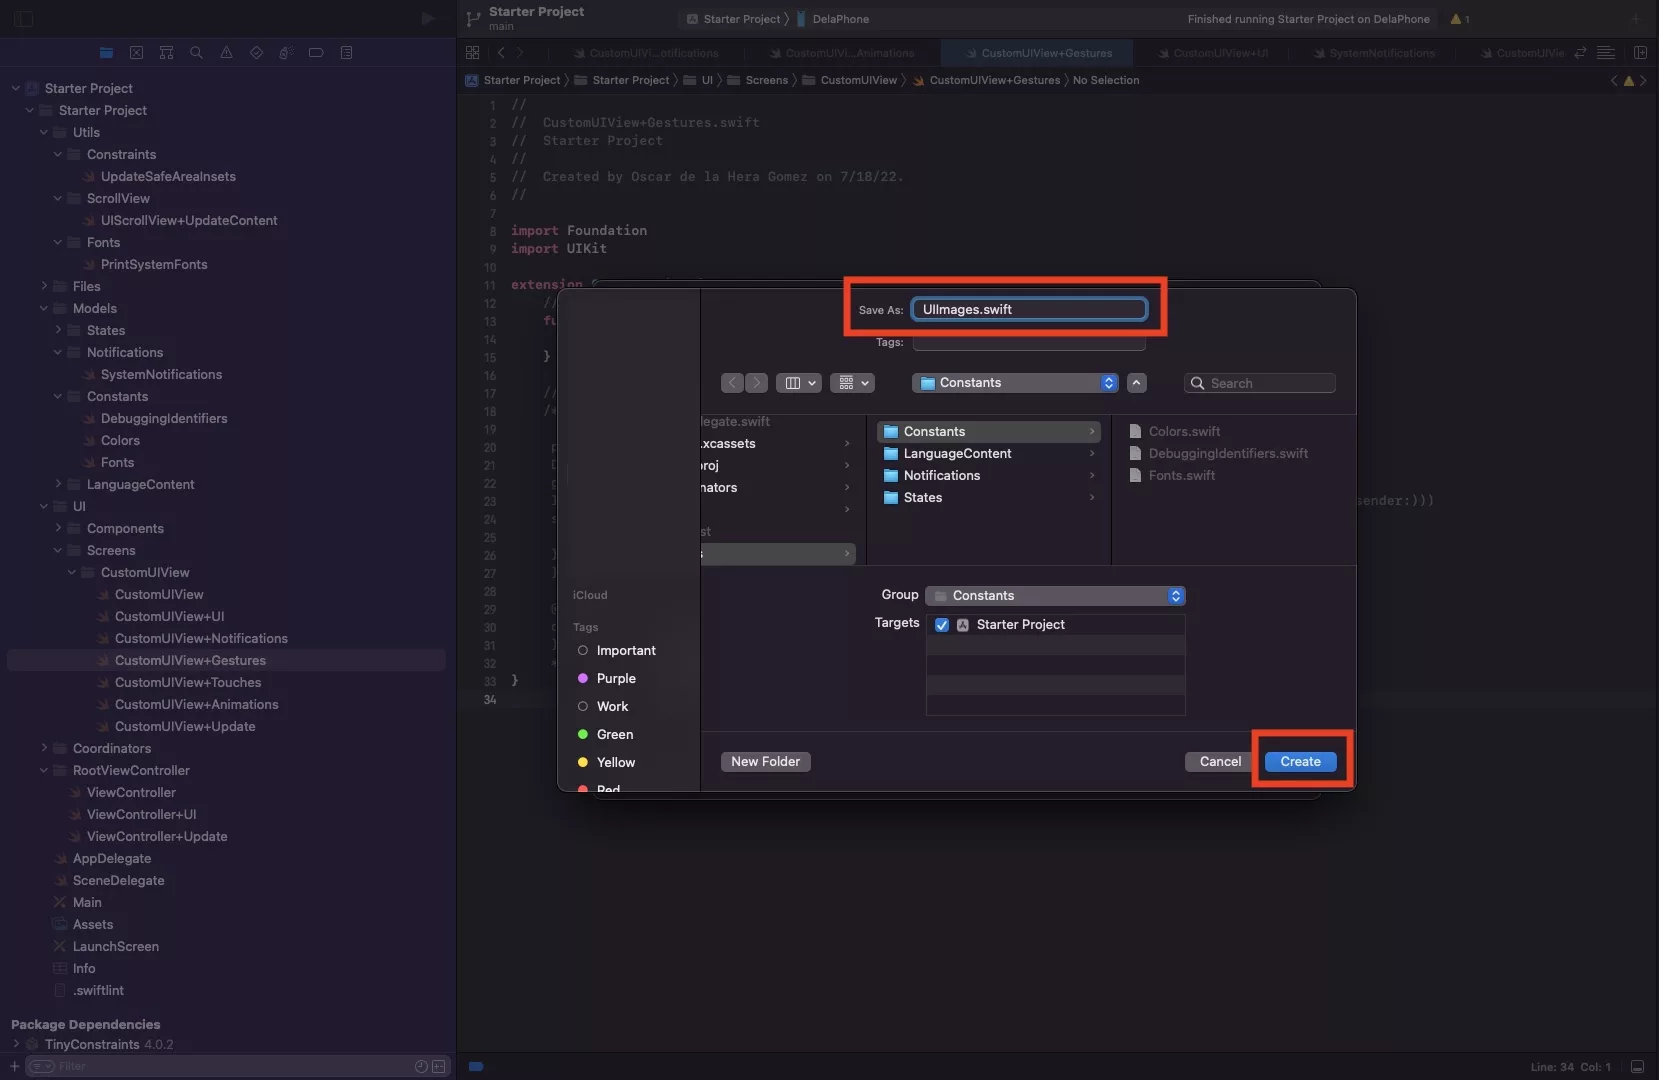
Under the Models folder, select the Constants folder and press Command + N.
This will select the Swift, iOS file type. Press Next.
After that enter the name of your file - UIImages.swift - and press Create.
Step Four: Create your reference struct
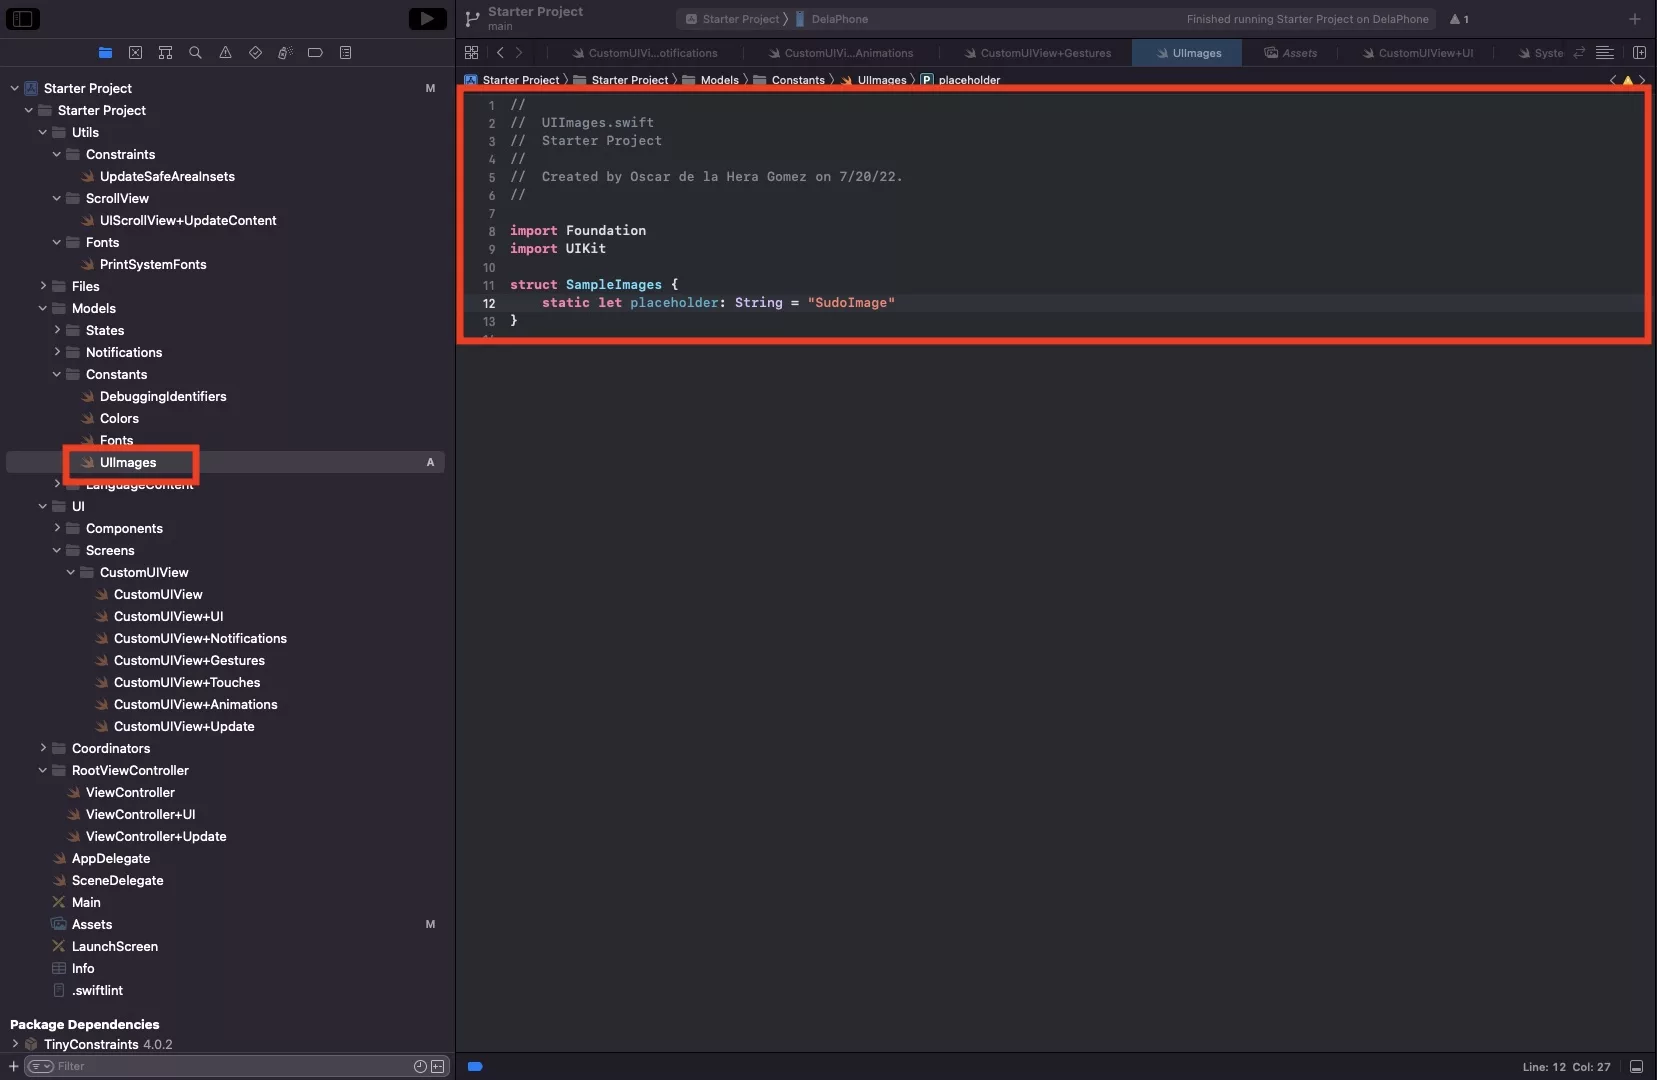
Create a struct that holds the image names that you are seeking to provide to the system.
We recommend that you break it down into things like HUDImages or ProductImages - something that groups things together in a logical sense.
As we are seeking to add an image to use as a placeholder image, we create a struct called SampleImages with a static string called placeholder that matches the name of the image that we added to the assets.xcassets.
Looking to add the image to your view?
Please consult our step by step tutorial available in the link below.
Any Questions ?
We are actively looking for feedback on how to improve this resource. Please send us a note to inquiries@delasign.com with any thoughts or feedback you may have.