How to add a pre-commit githook script during the build phase in XCode
A step by step guide on adding a pre-commit script to a git repo as part of the build phase to guarantee consistency across your team.

A step by step guide on adding a pre-commit script to a git repo as part of the build phase to guarantee consistency across your team.
SubscribeDownload Open Source Swift ProjectThe following tutorial demonstrates how to create a pre-commit githook script that first makes sure that a team member is committing to a valid branch and then runs SwiftLint to lint the project. It keeps tracks of the changes created by SwiftLint and commits the changes as part of the process.
Step One: Create the Folder
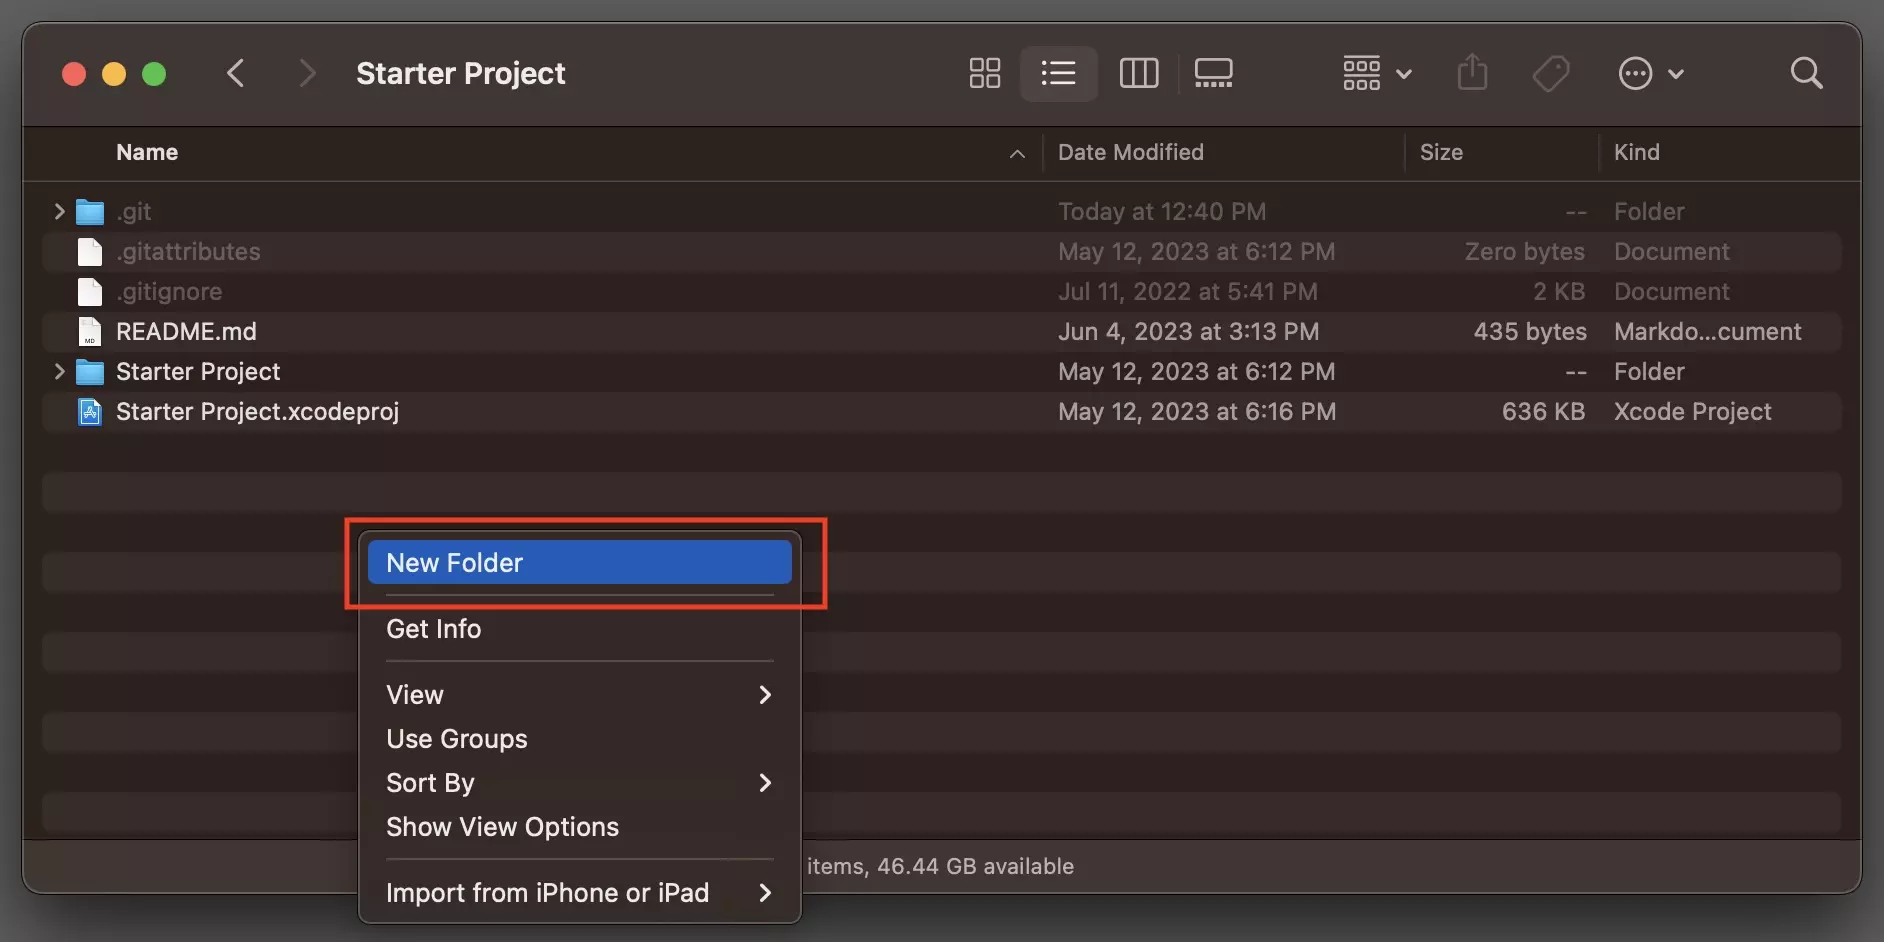
At the root of your git repository, create a new folder called .scripts.
Step Two: Create the pre-commit script
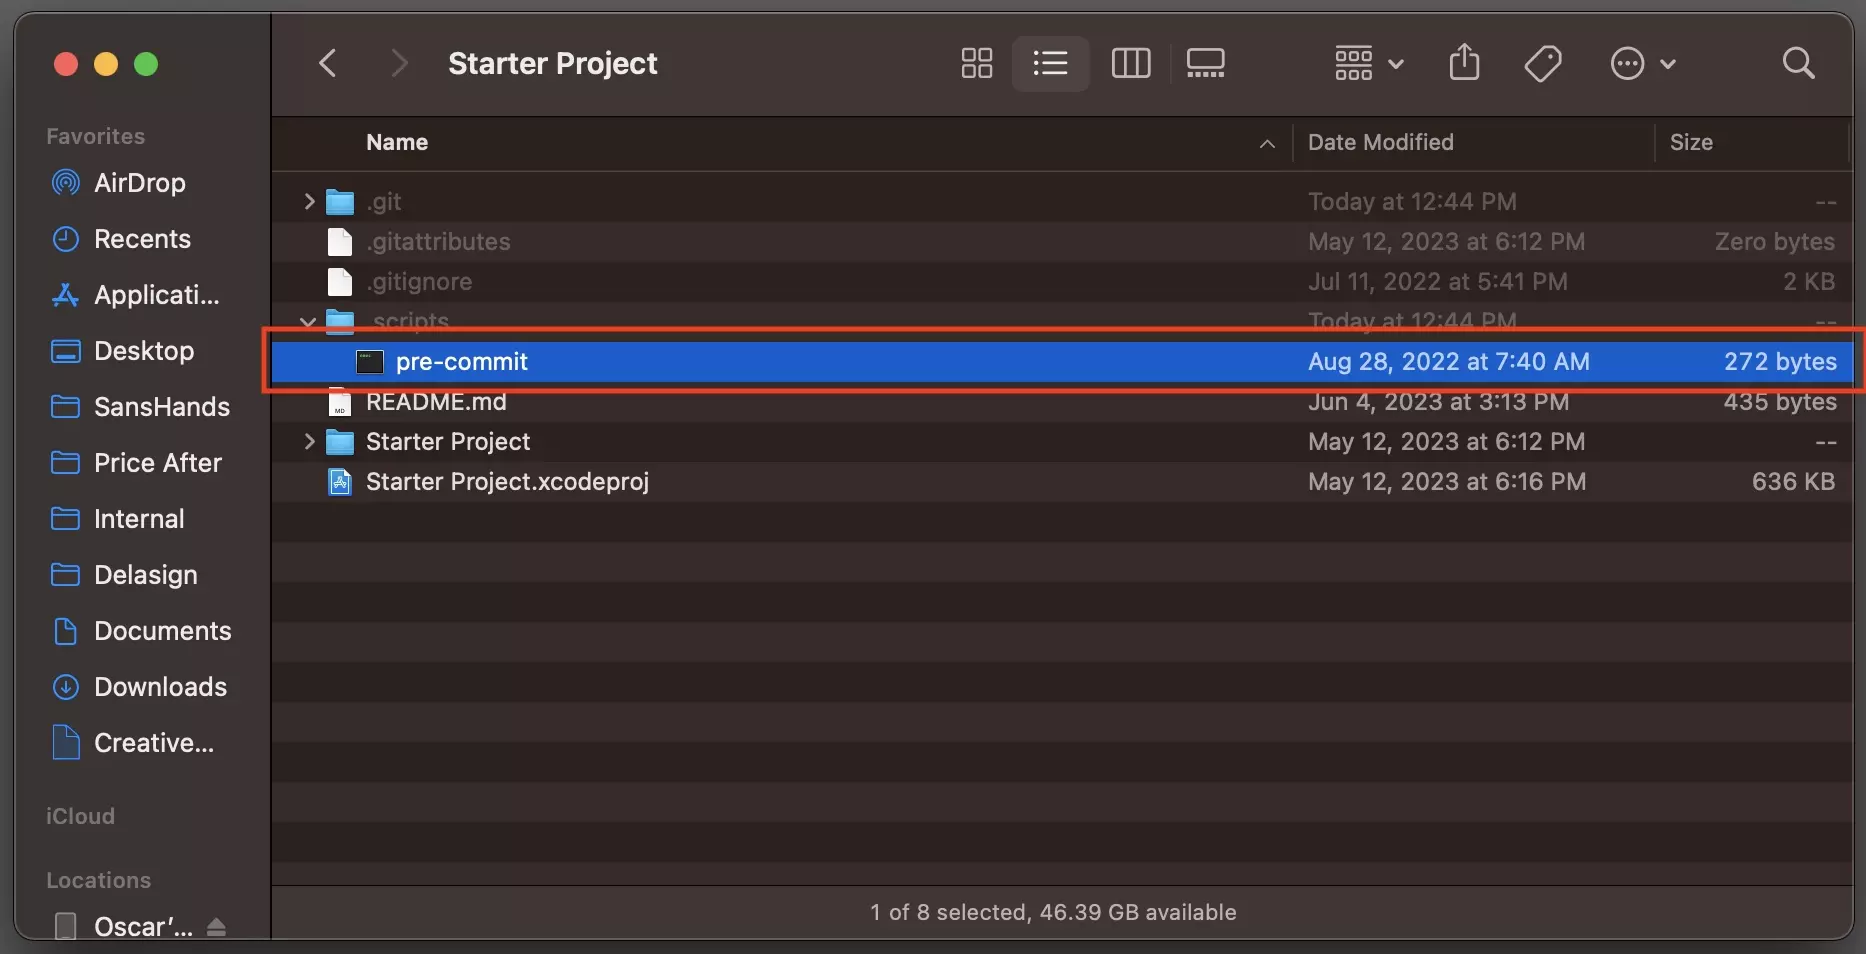
In the .scripts folder, create a new file called pre-commit.
Step Three: Complete the script
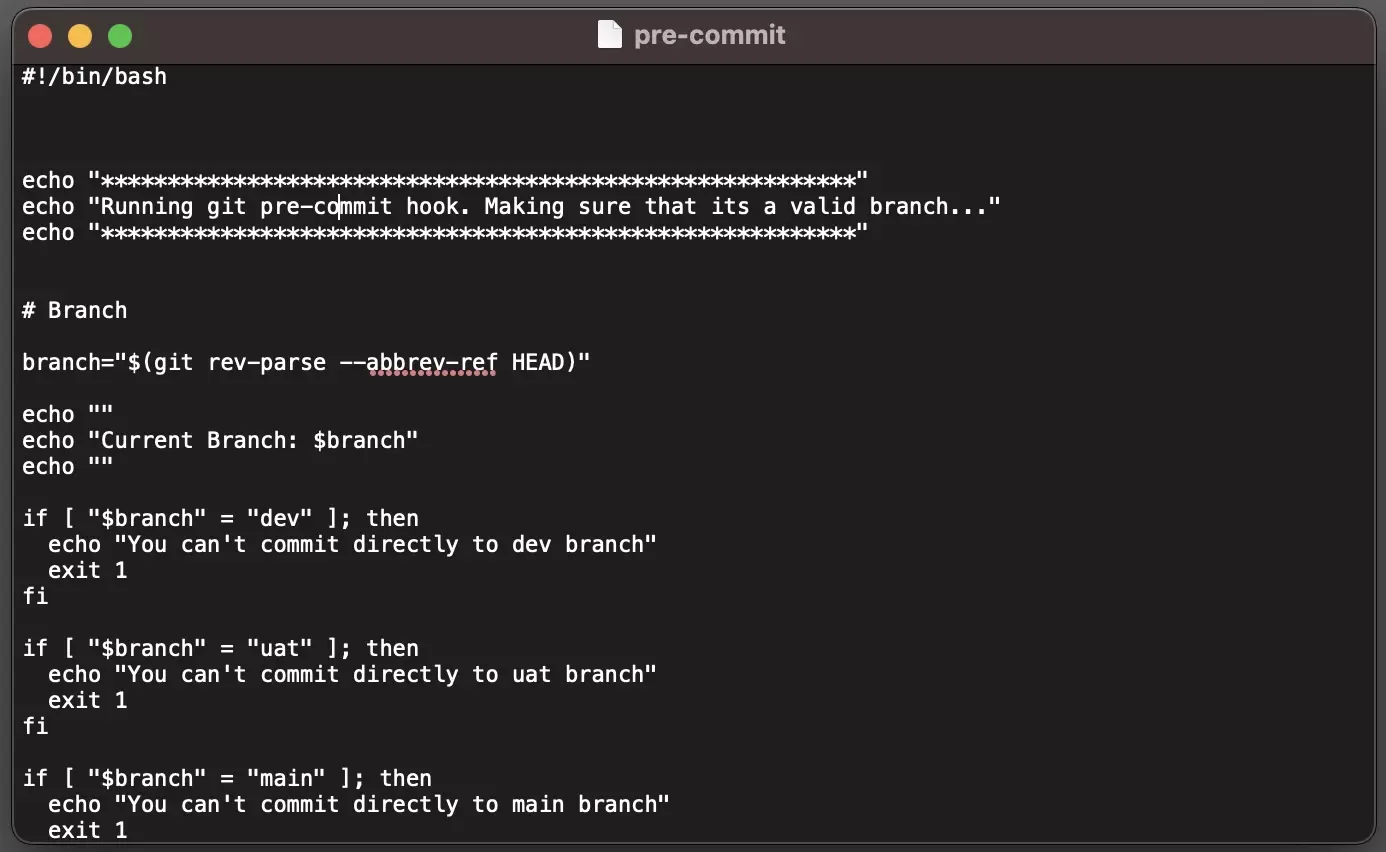
Open the script using a text editor and add the relevant code.
We have provided the pre-commit script available in our Open Source Swift project below.
Step Four: Add a Run Script
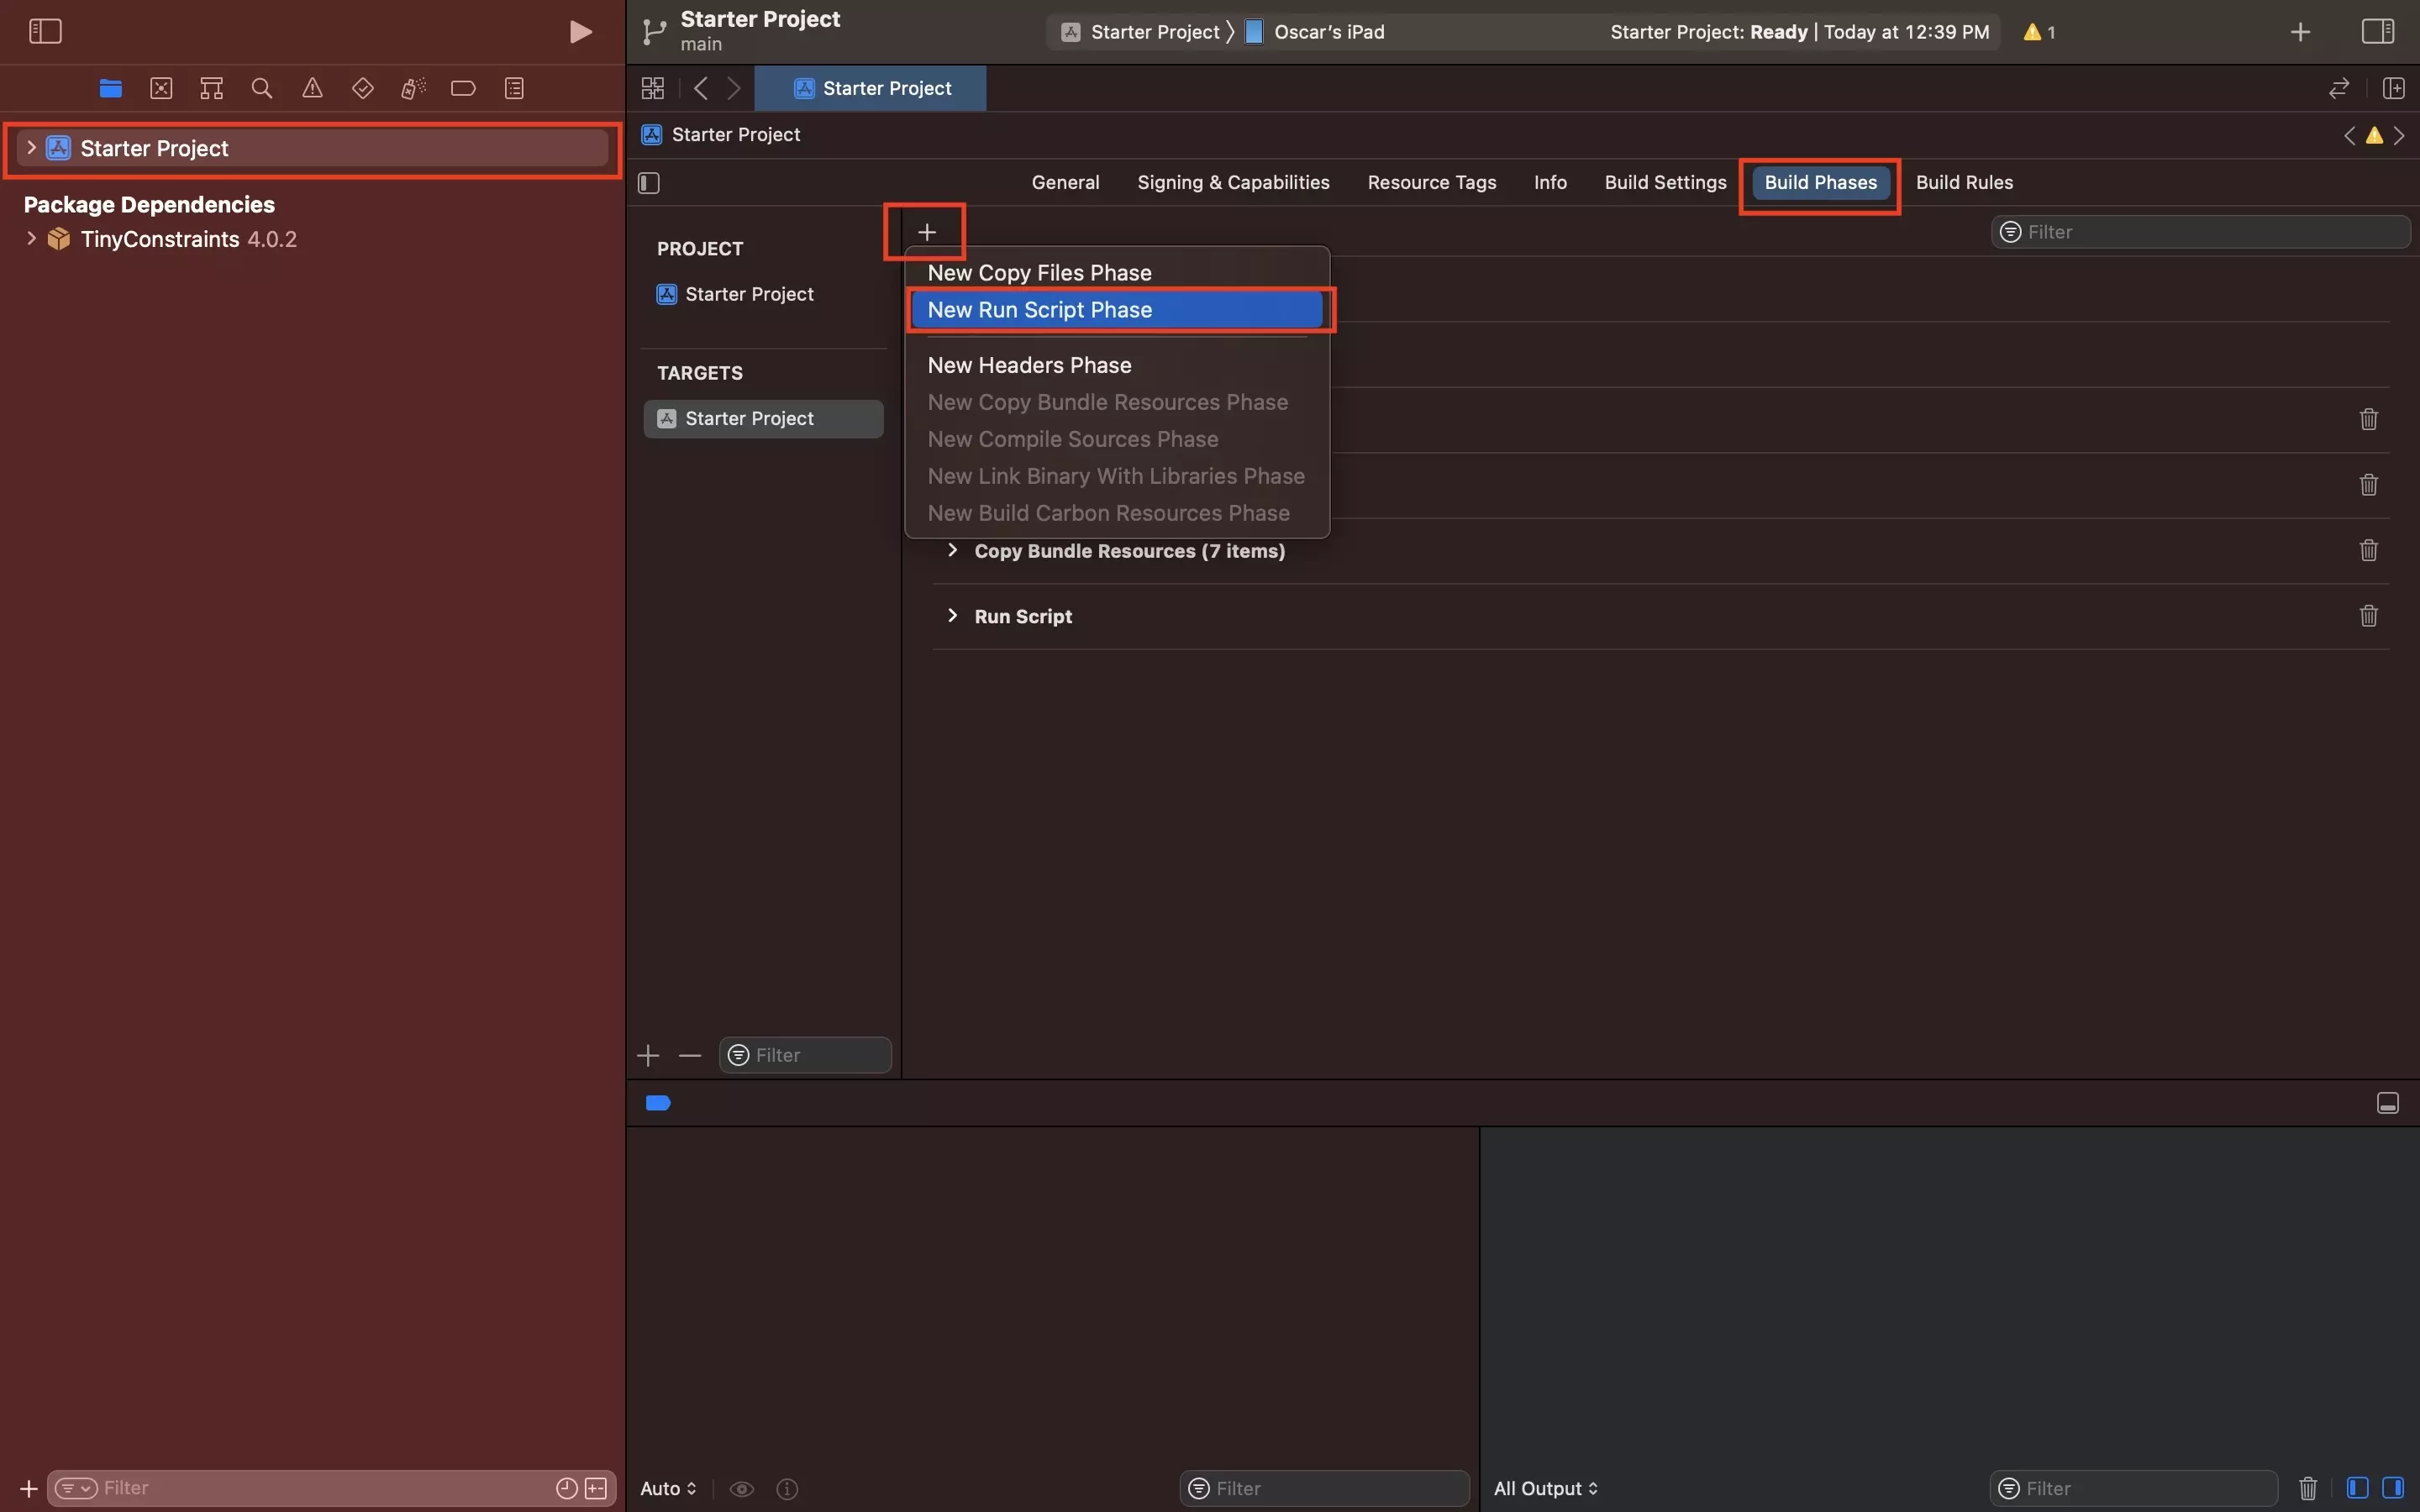
In the project in XCode, under Build Phases add a new Run Script.
Step Five: Complete the Run Script
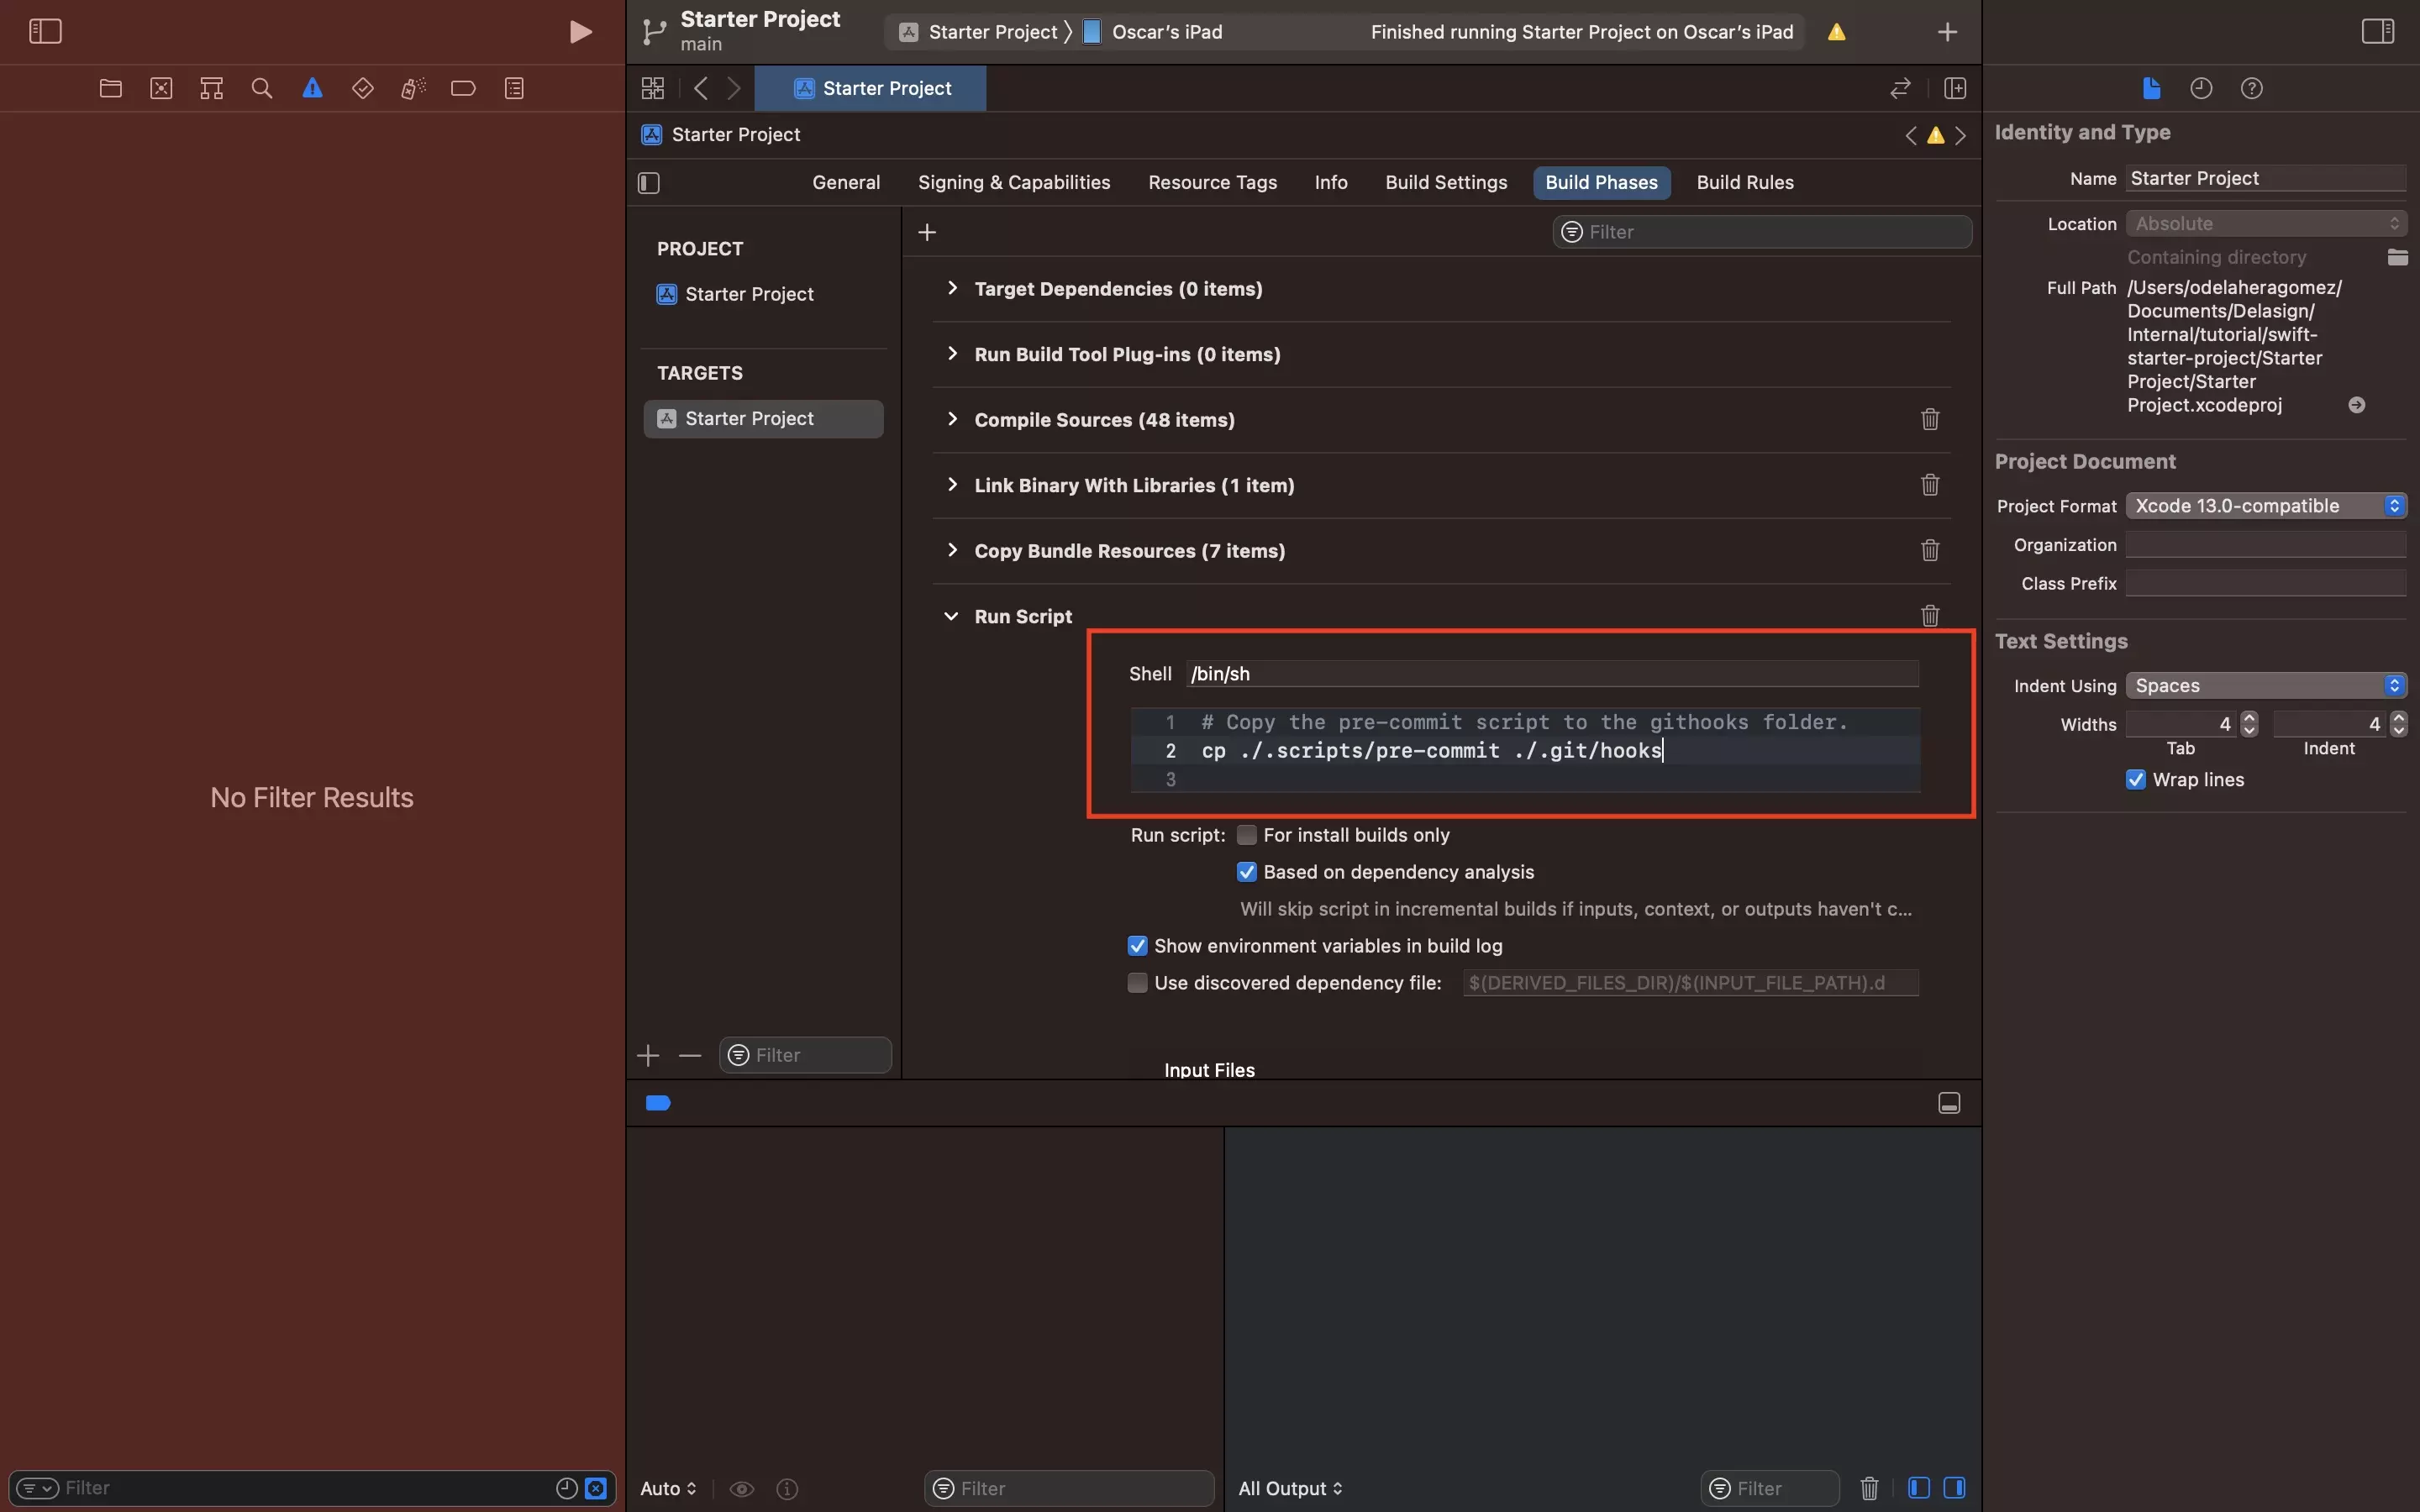
Copy the code below into the Run Script.
cp ./.scripts/pre-commit ./.git/hooksStep Six: Build
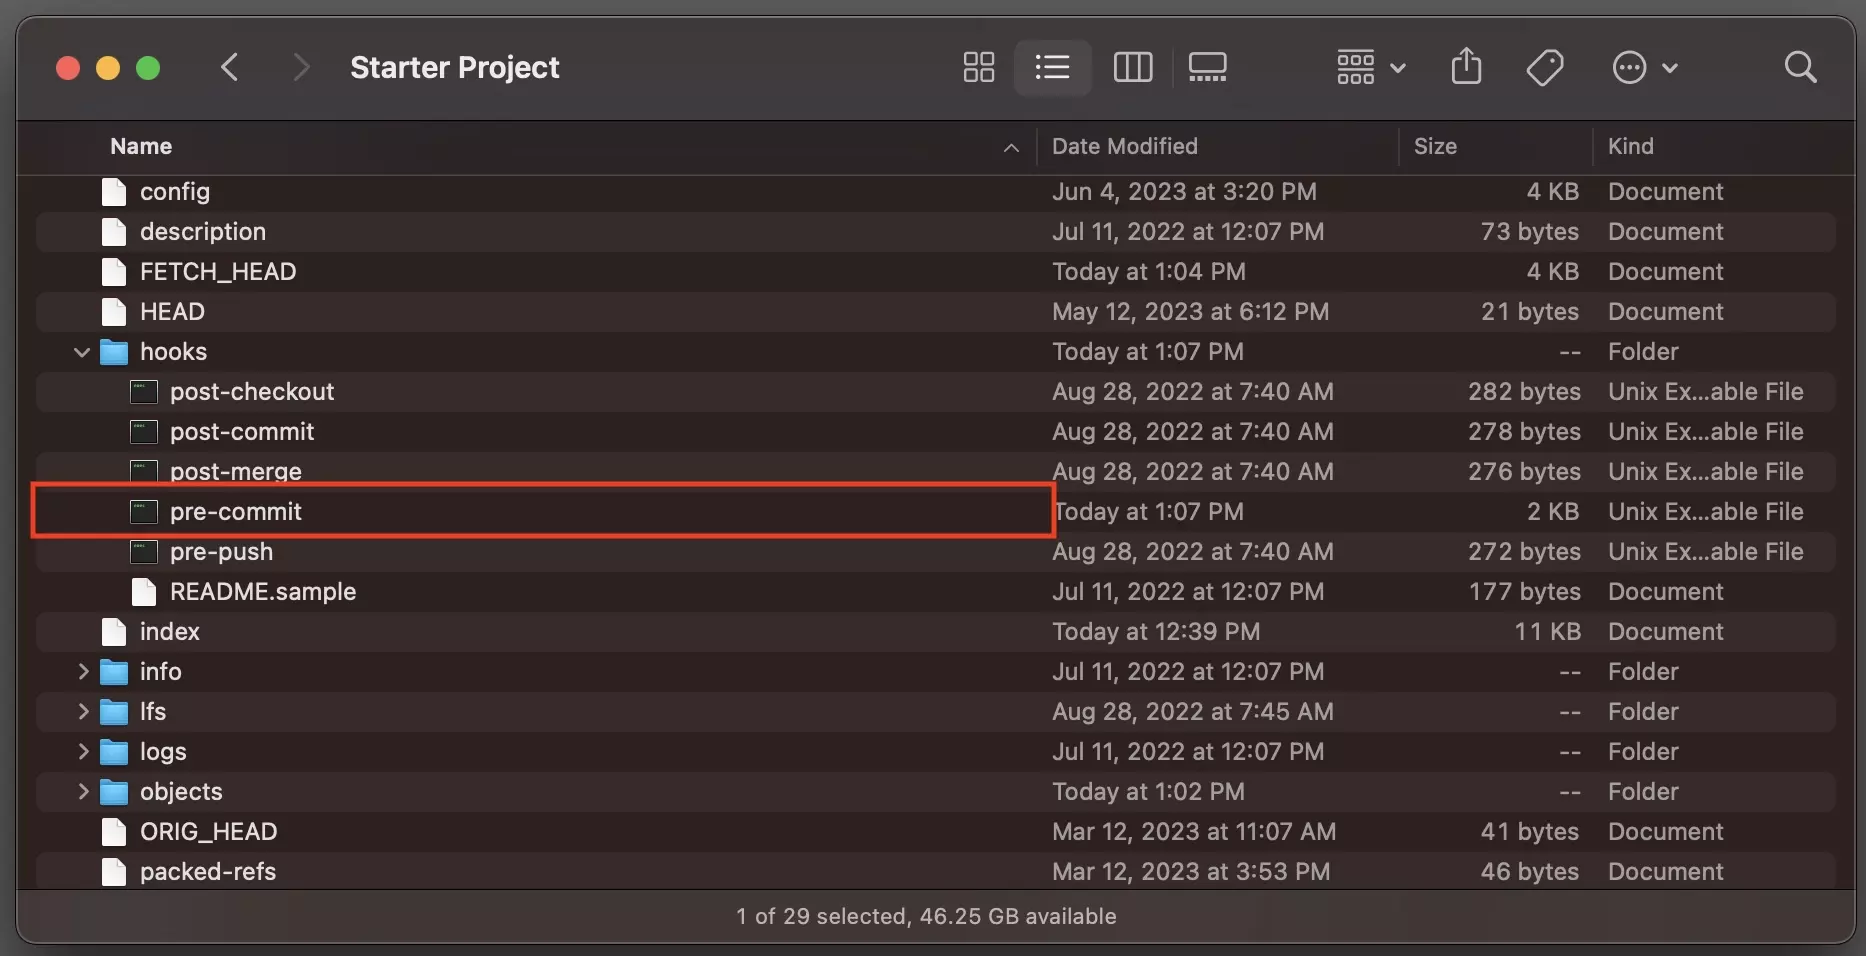
Build your project and confirm that the pre-commit script appears in the .git/hooks folder.
Are you getting a Sandbox error when building the project ?
To resolve this - in the project's s settings, select the relevant target and under "Build Settings", set "User Script Sandboxing" to No.
Step Seven: Test
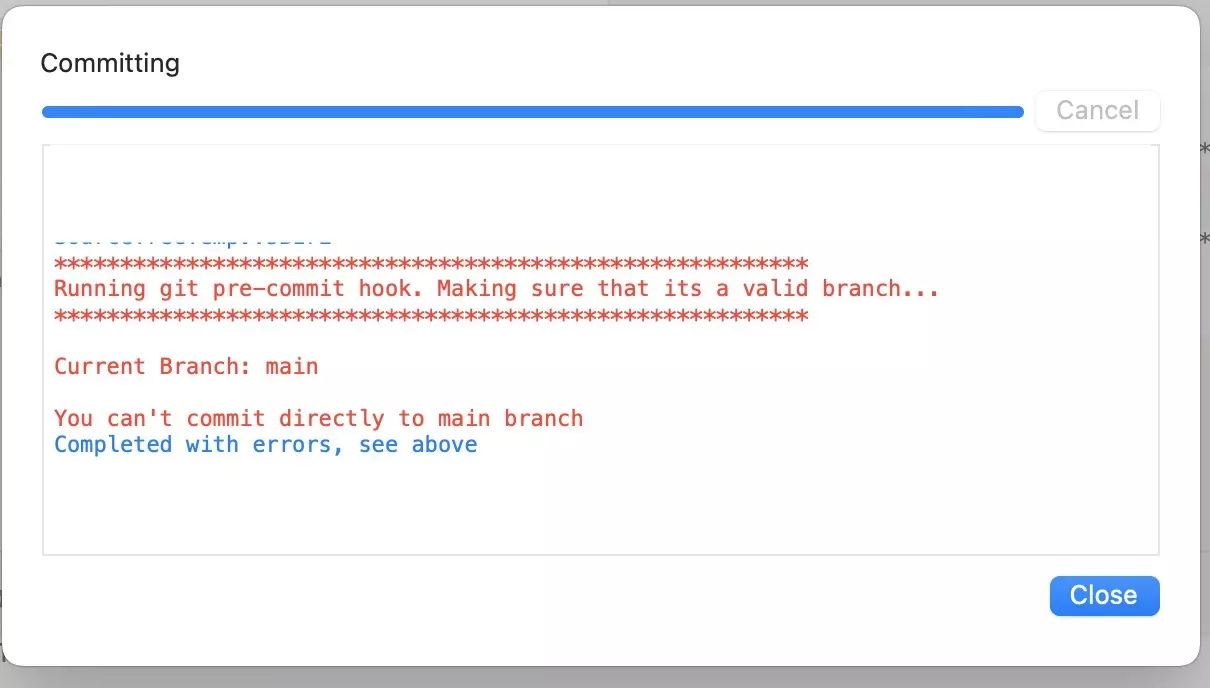
Attempt a commit to confirm that the changes went through.
Frequently Asked Questions (FAQ)
Why am I getting a Sandbox build error ?
The cp command is not permitted in a build script if "User Script Sandboxing" is turned on.
To resolve this - In the project's s settings, select the relevant target and under "Build Settings", set "User Script Sandboxing" to No.