How to update constraints in Swift
A step by step tutorial for updating constraints in Swift (iOS). Github repository included.
A step by step tutorial for updating constraints in Swift (iOS). Github repository included.
The following tutorial walks you through how to update constraints in Swift through the example of updating Safe Area Insets, and builds on our Open Source Swift starter project.
For those looking for the specific answer, it can be found in Step Two.
Please note this tutorial uses the TinyConstraints Swift package, which we added using the Swift Package Manager.
Step One: Create the extension file
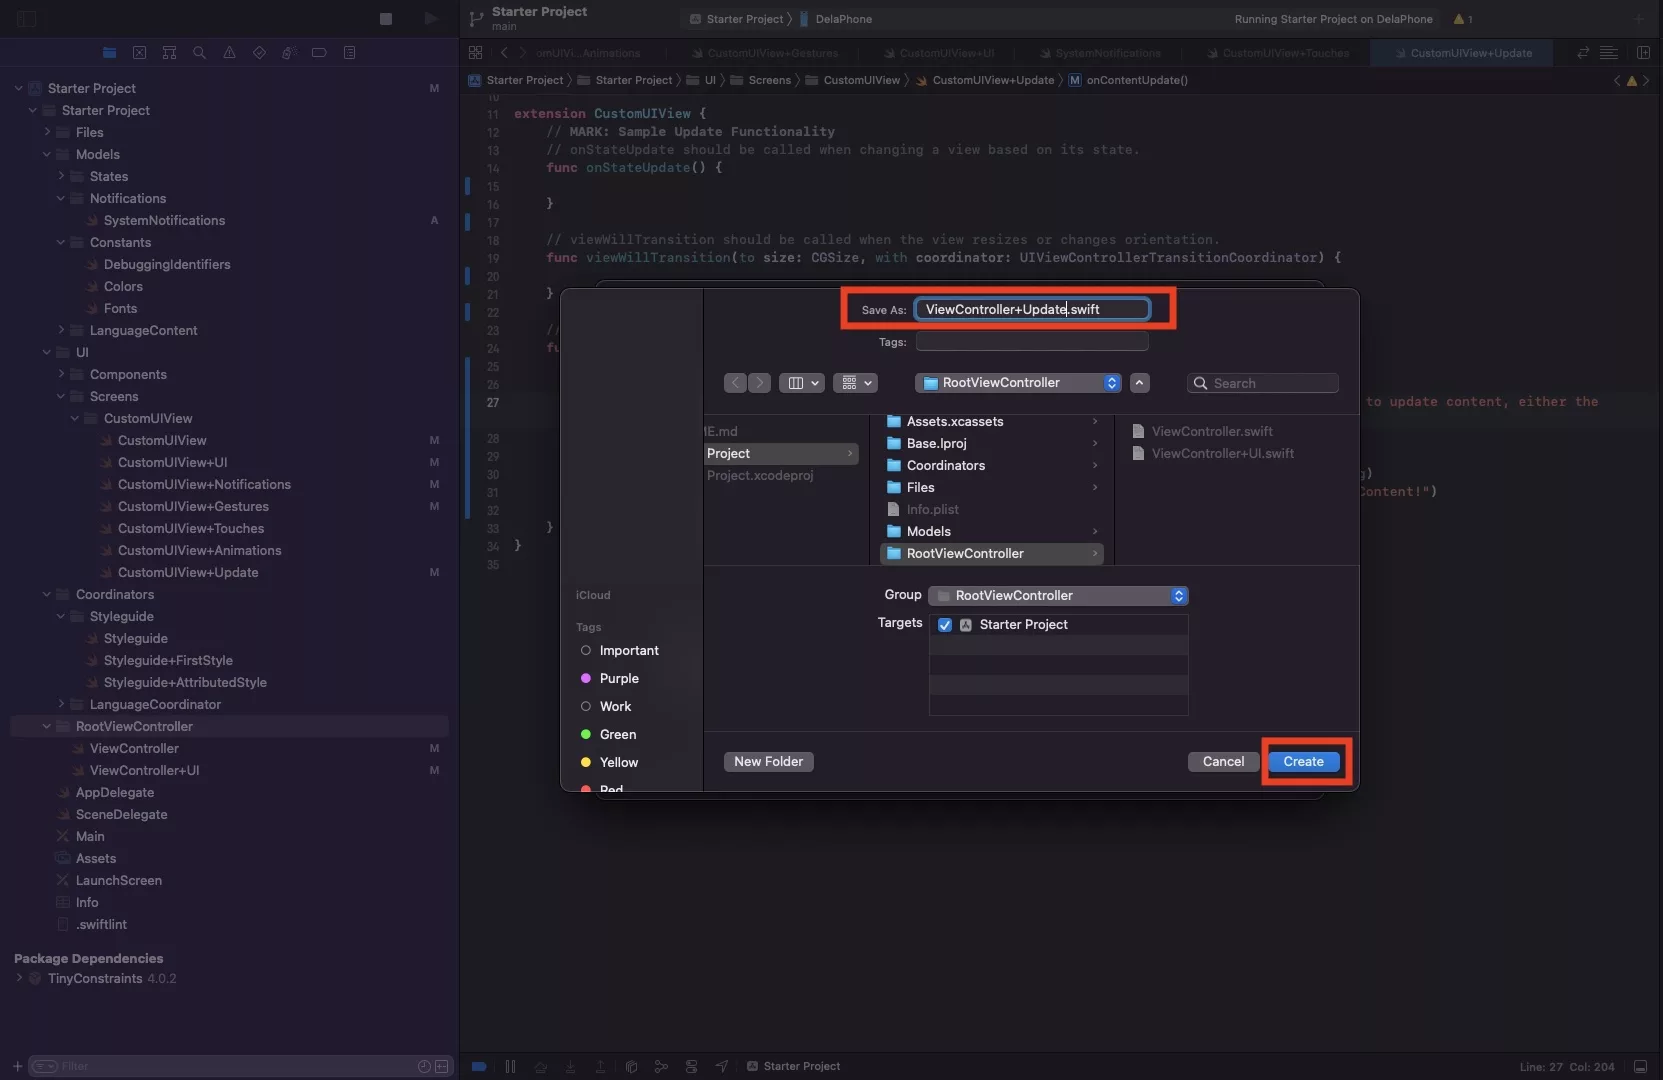
Select the RootViewController folder and press Command + N.
This will select the Swift, iOS file type. Press Next.
After that enter the name of your file - ViewController+Update - and press Create.
If you are curious as to why we created this extension, please read up on our recommendations for creating a structured custom UIView. The extensions apply to the UIViewController class.
Step Two: Code your extension
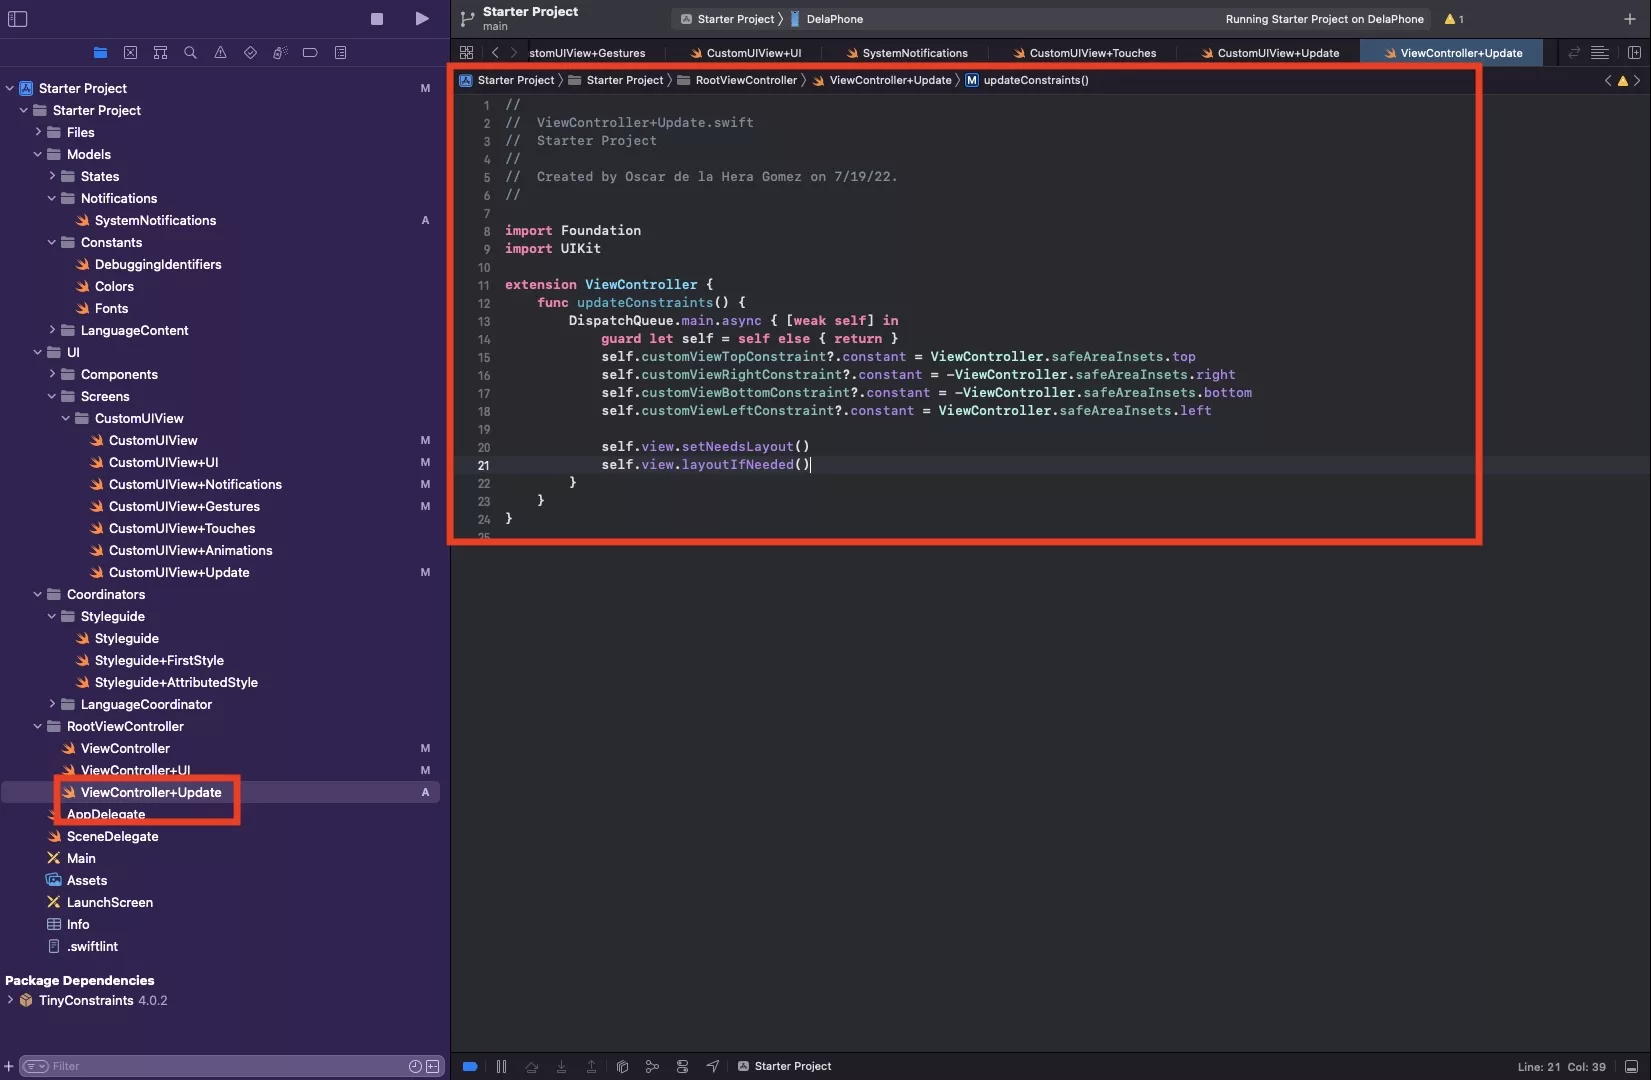
The code below creates an extension for the ViewController and adds an update function that updates the constraint constants - which can be considered the offsets.
At the end it calls self.view.setNeedsLayout() and self.view.layoutIfNeeded().
These two functions are what make the constraints update.
Step Three: Call the function when the safe area insets update
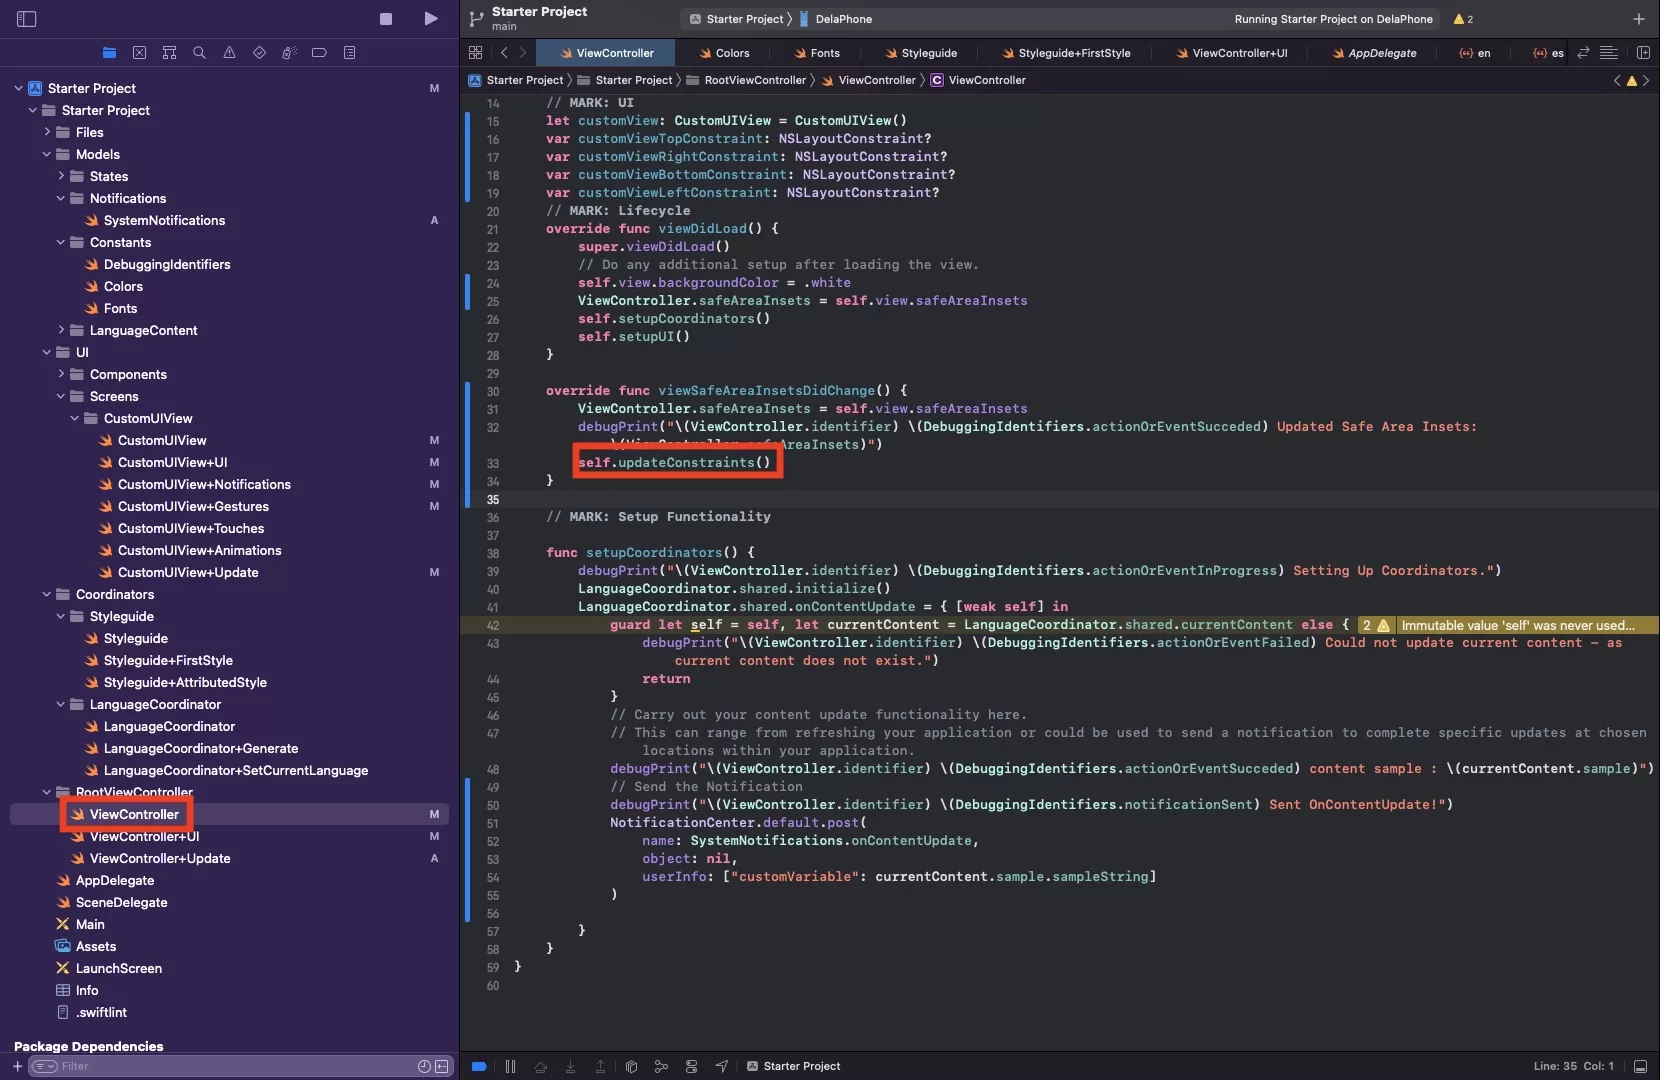
Call the updateConstraints function within the previously coded viewSafeAreaInsetsDidChange. This will call the constraints to be updated after updating the Safe Area Insets.
Step Four: Verify
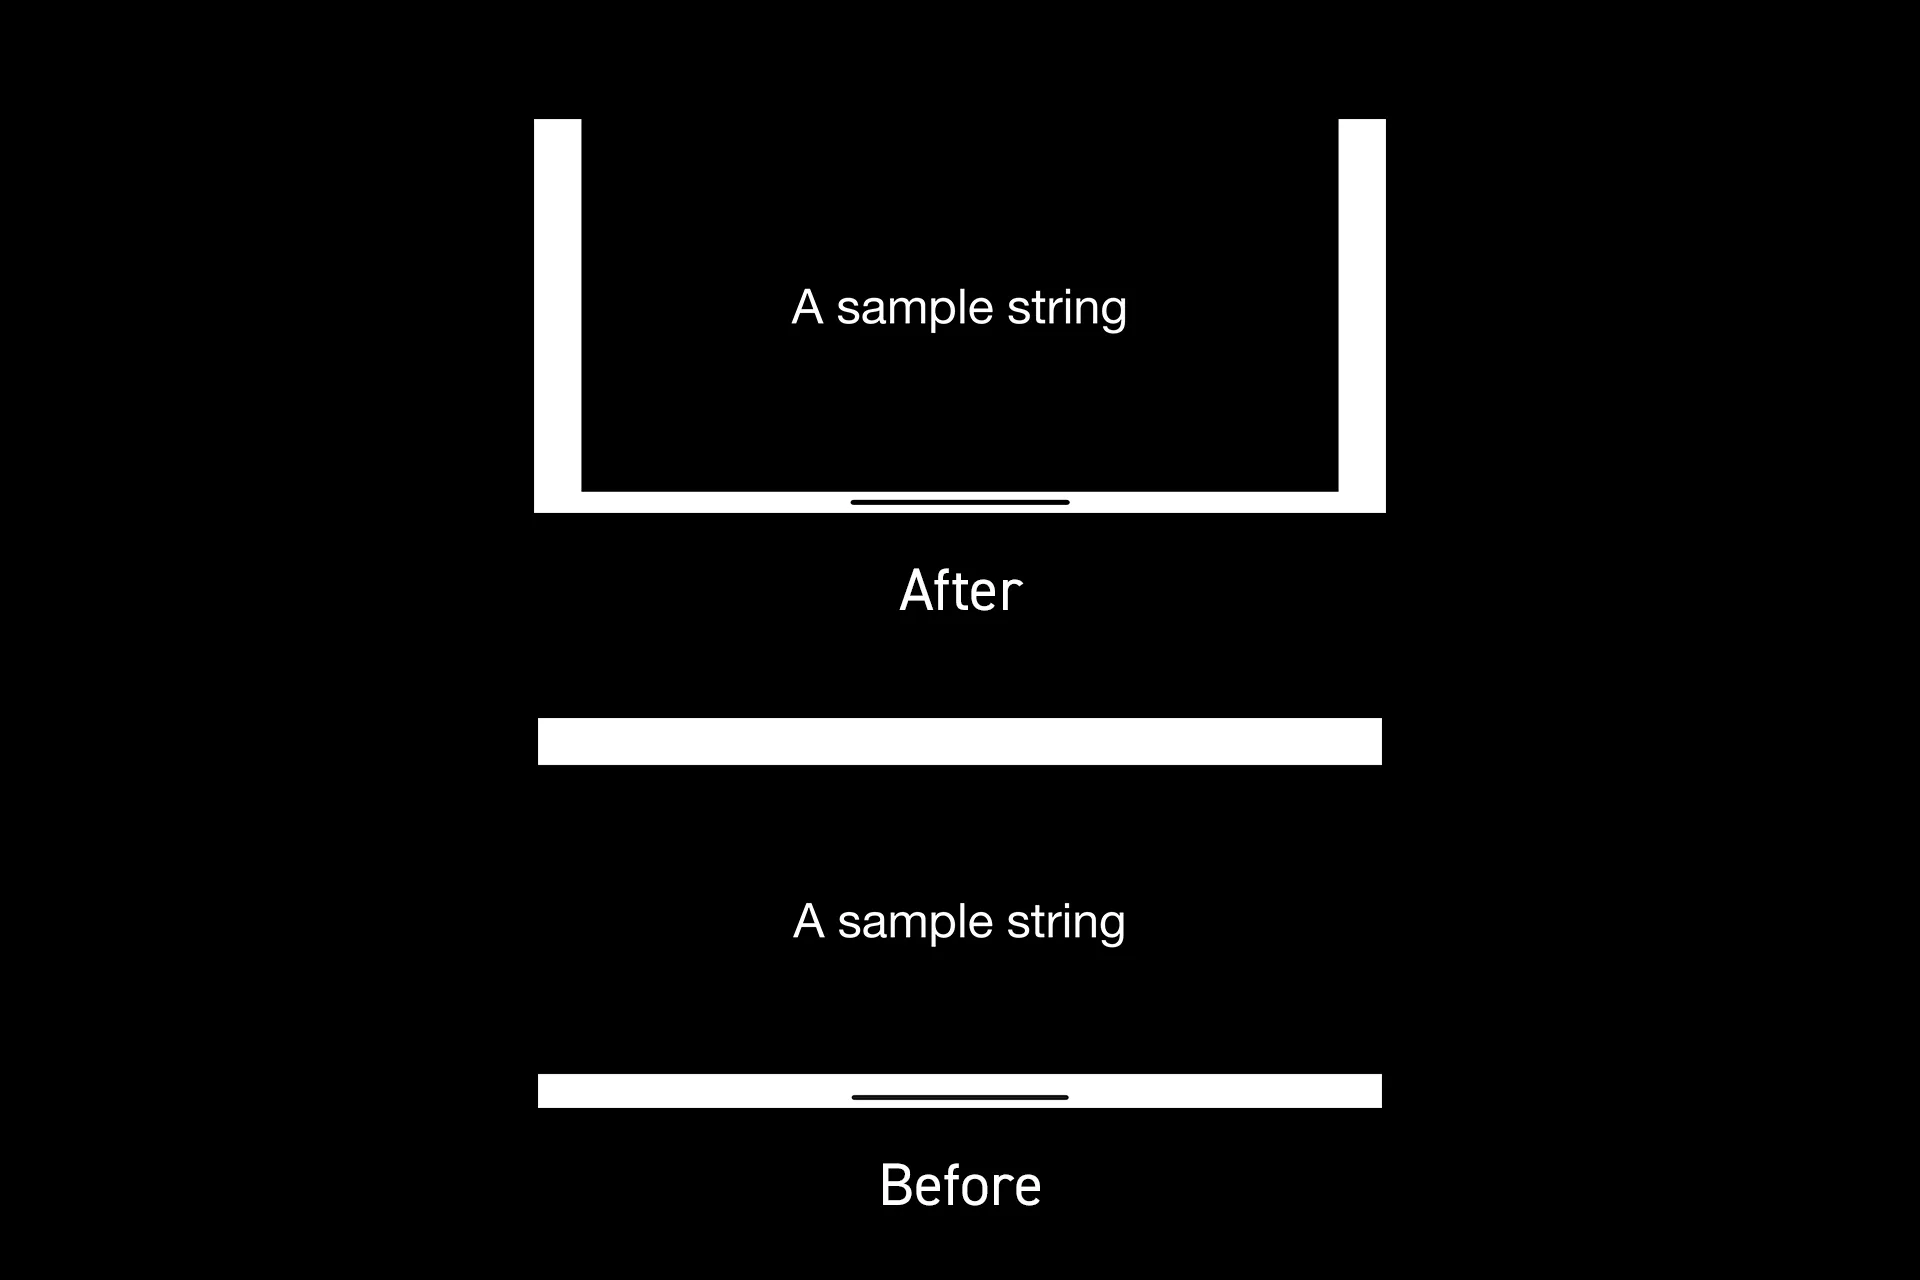
Run the app and rotate your phone, you should see the safe area insets update.
Any Questions
We are actively looking for feedback on how to improve this resource. Please send us a note to inquiries@delasign.com with any thoughts or feedback you may have.