How to observe device orientation changes in Swift
A step by step iOS tutorial on detecting when an iPhone or iPad changes orientation in Swift.

A step by step iOS tutorial on detecting when an iPhone or iPad changes orientation in Swift.
The following tutorial uses our Open Source Swift project to walk you through how to detect changes in orientation on an iPhone or iPad.
If you are looking for a tutorial that considers both device orientation changes as well as changes in the screen size to change layouts on MacOS or when multitasking on iPads, consult the tutorial in the link below.
We recommend that you clone our Open Source Swift Starter Project, checking out the main branch and carrying out the steps below. The changes can be found on the tutorial/device-orientation-observer branch.
git clone git@github.com:delasign/swift-starter-project.gitStep One: Begin observing UIDeviceChanges
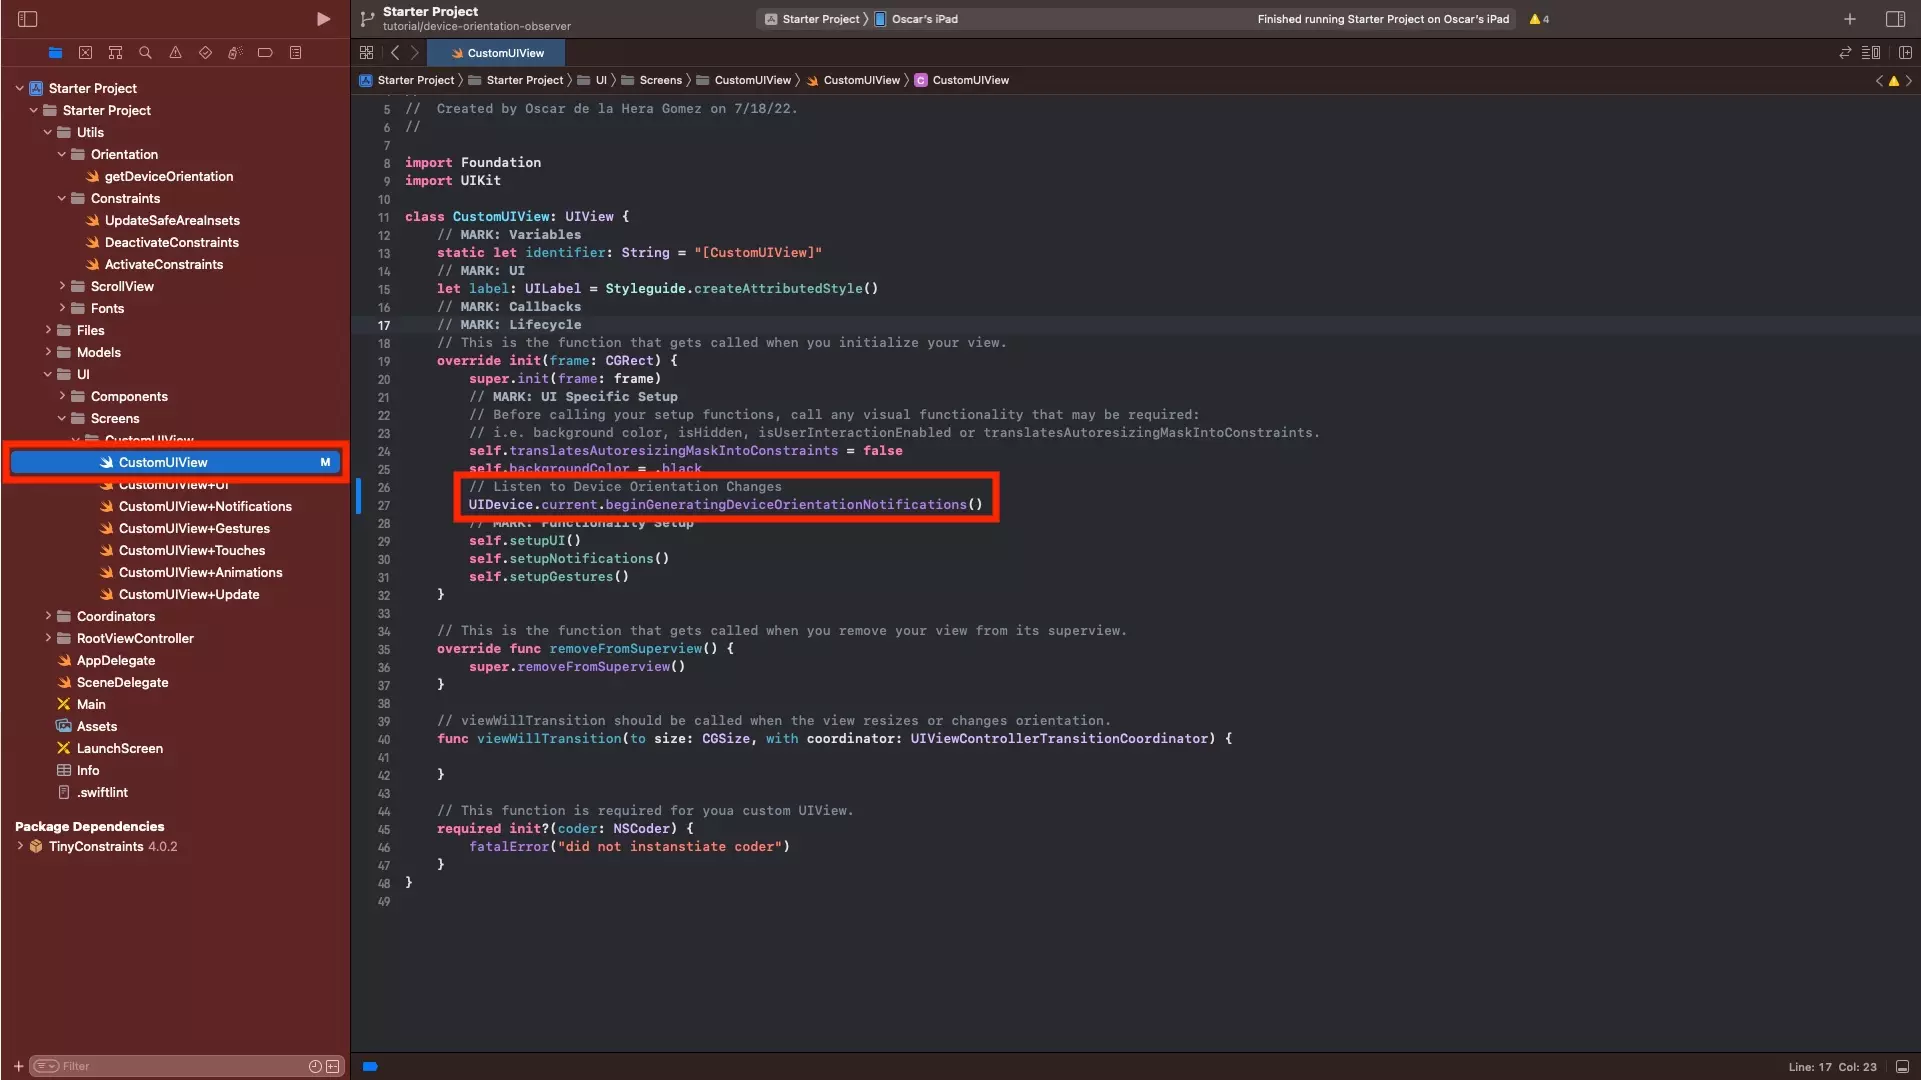
In CustomUIView.swift, in the init function, add the following line to begin to listen to orientation updates.
UIDevice.current.beginGeneratingDeviceOrientationNotifications()Step Two: Add the Notification Observer
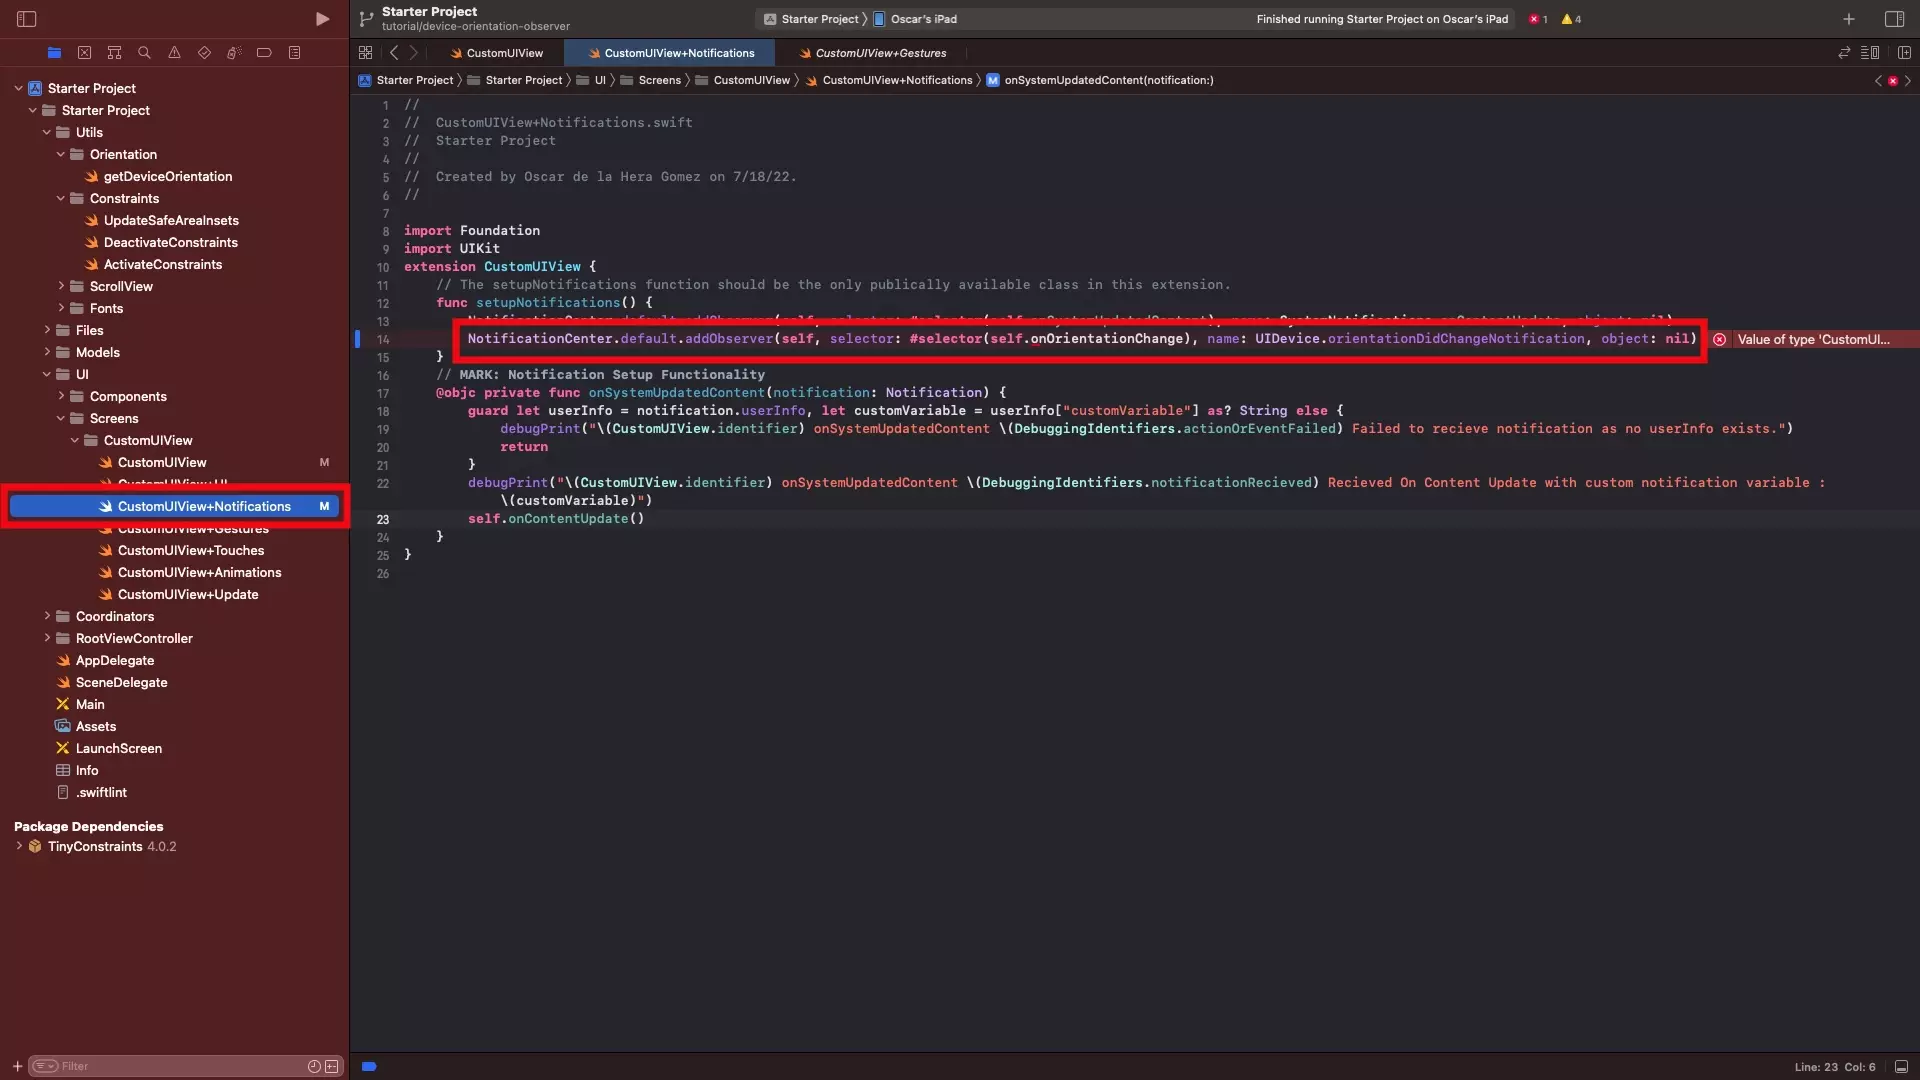
In CustomUIView+Notifications.swift, add a new Notification observer using the line below.
Please note that as part of our Open Source start project, CustomUIView initiates the notifications in the init function.
NotificationCenter.default.addObserver(self, selector: #selector(self.onOrientationChange), name: UIDevice.orientationDidChangeNotification, object: nil)Step Three: Add the Notification selector
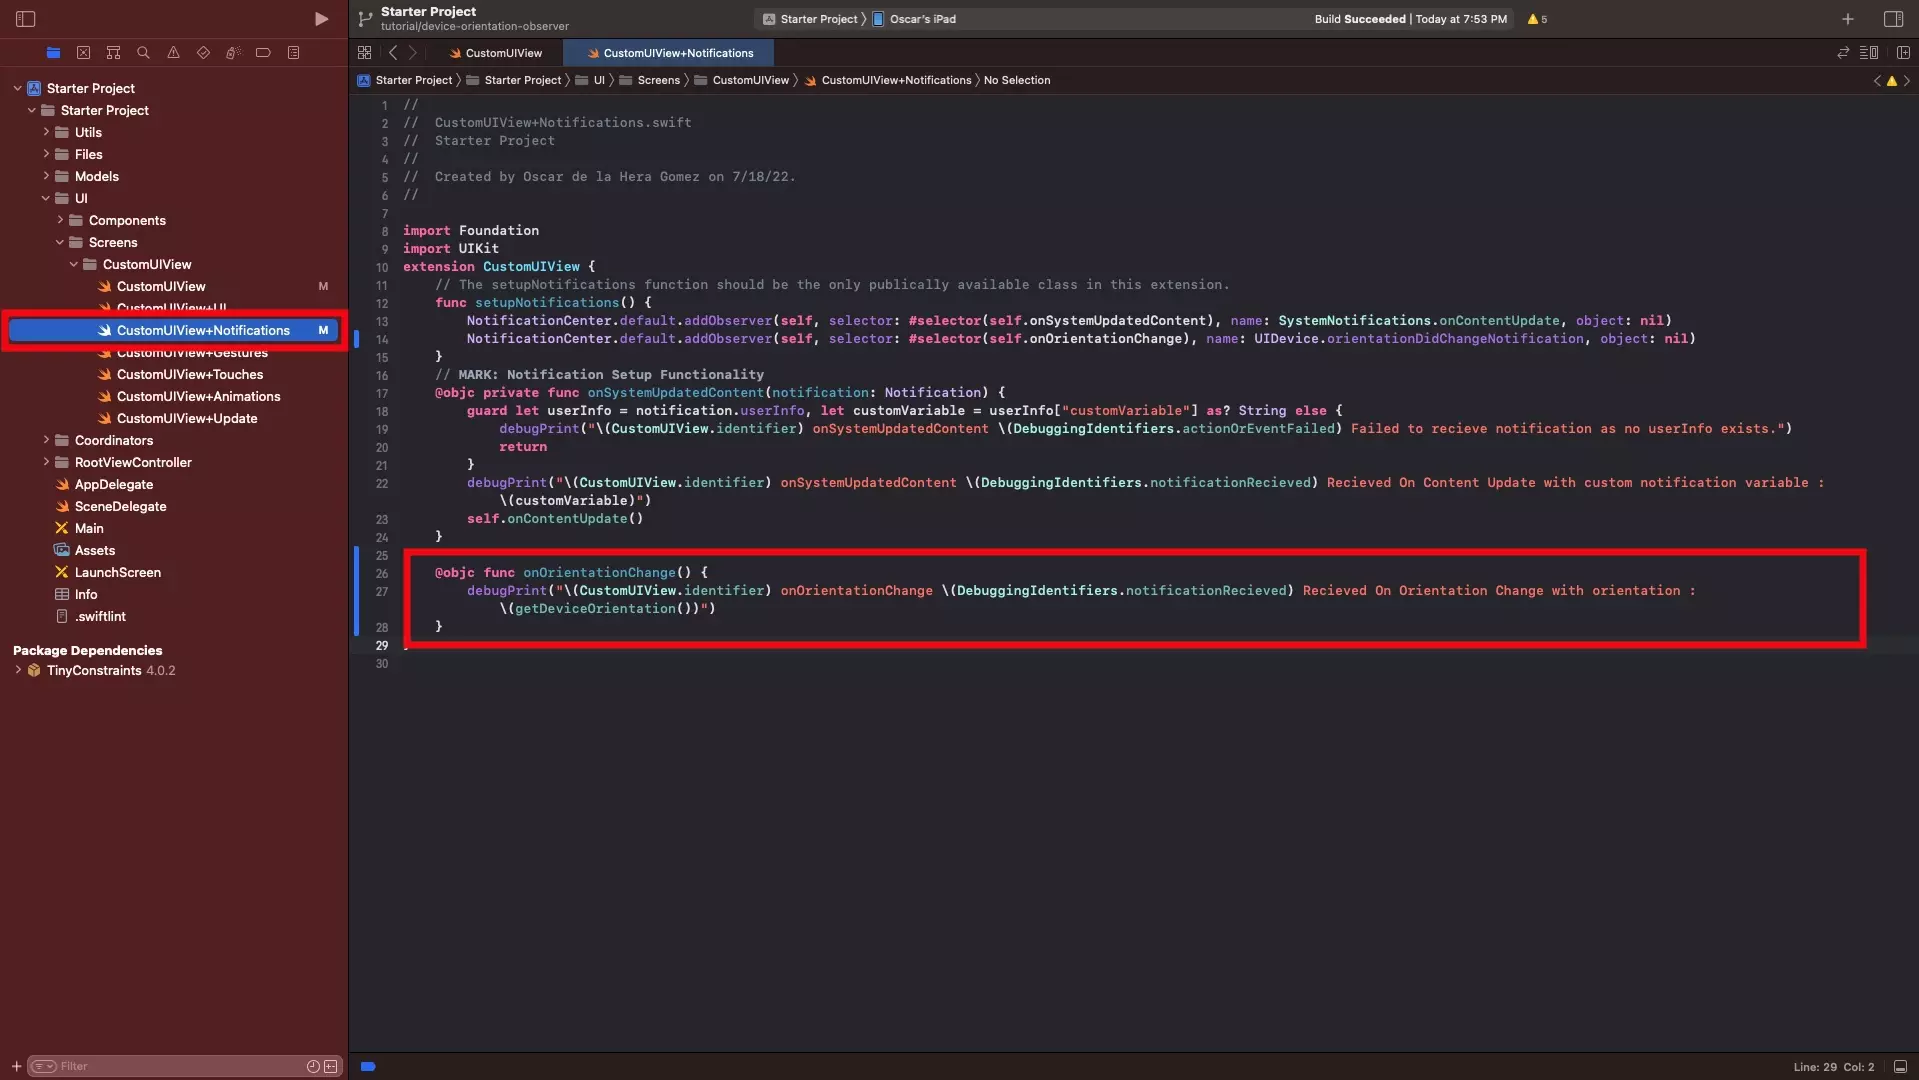
In CustomUIView+Notifications.swift, add a the selector using the code below.
Step Four: Verify
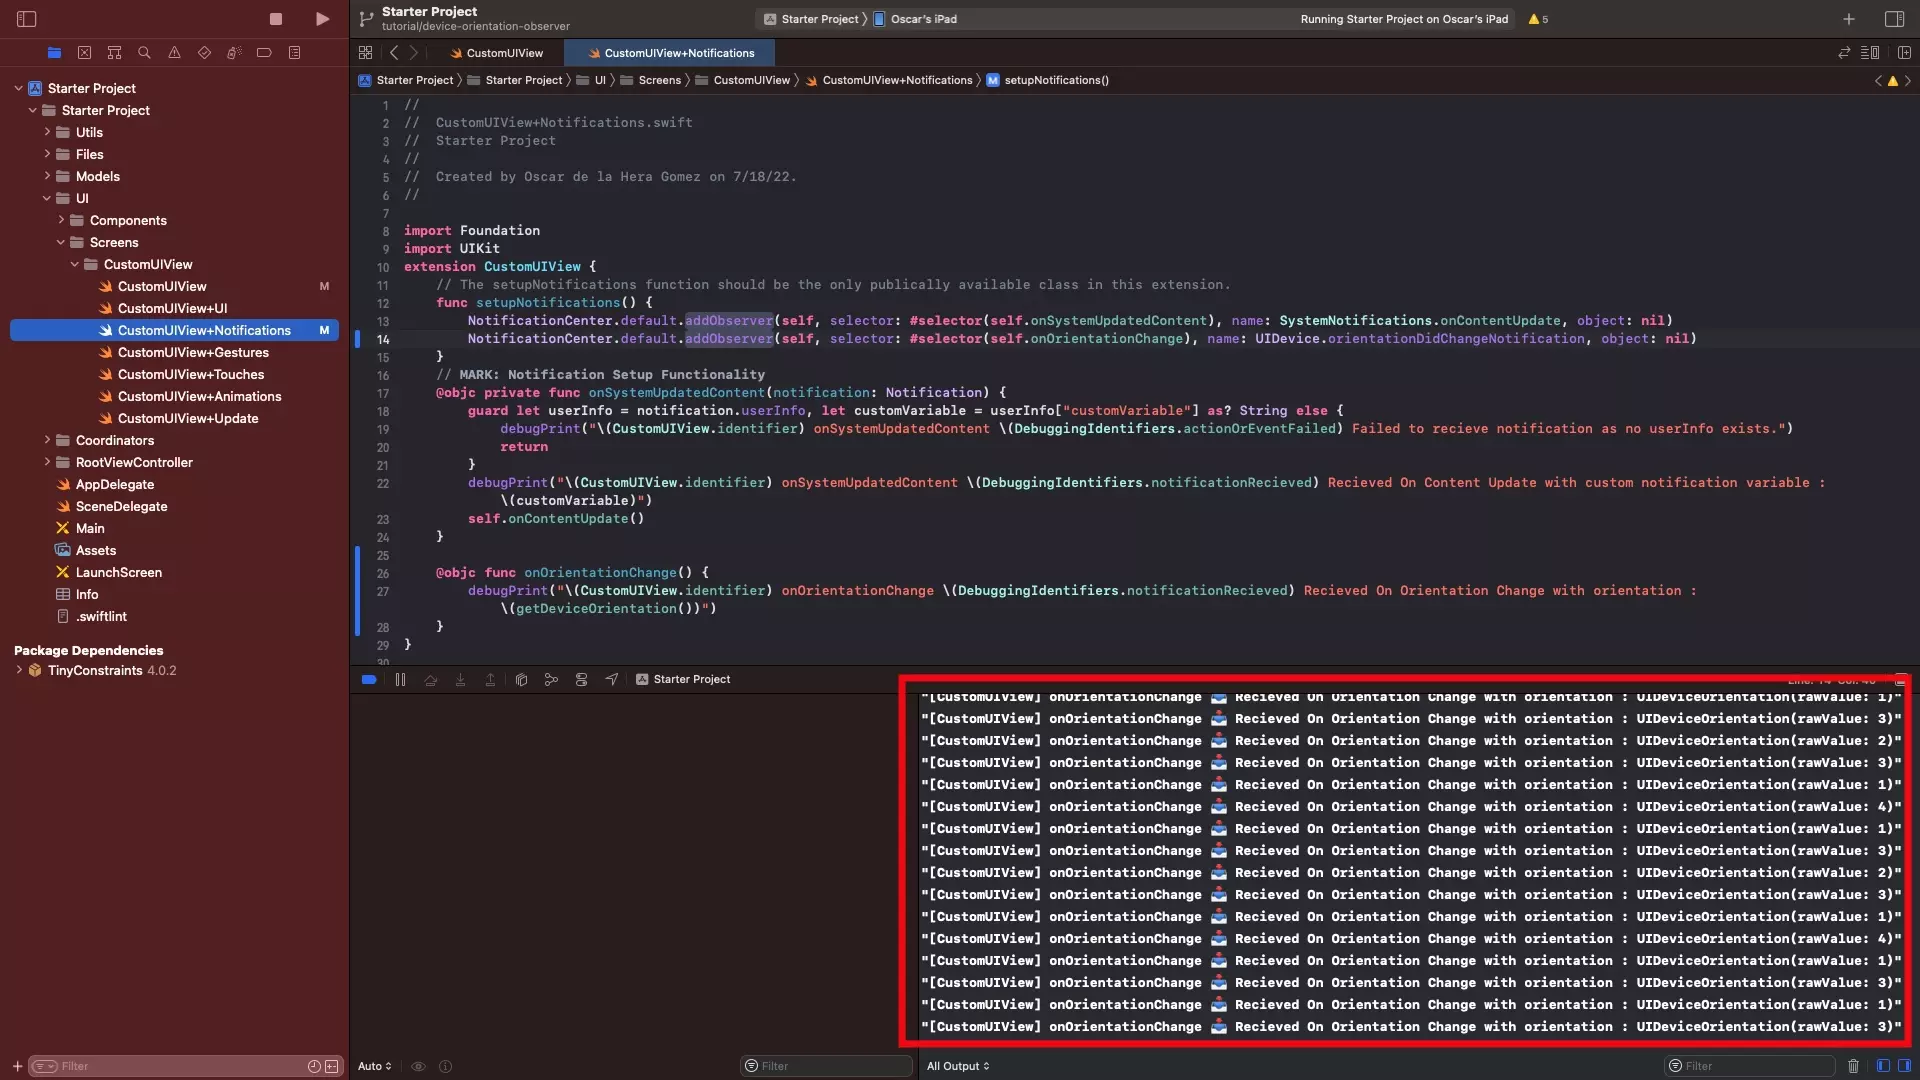
Run the app on XCode and as you should rotate it, the orientation should be printed on the console.