How to create a scroll indicator for a carousel in Swift
A step by step tutorial describing how to create a scroll indicator for a carousel in Swift (iOS). Github repository included.
A step by step tutorial describing how to create a scroll indicator for a carousel in Swift (iOS). Github repository included.
The following tutorial walks you through how to snap a carousel to position in Swift (iOS) using XCode. The project builds on our Open Source Swift project and two previous tutorials aimed at implementing a carousel, and snapping the carousel to a position in Swift.
This tutorial starts on the tutorial/snap-carousel-to-position branch and the changes are available on the tutorial/scroll-indicator branch of the repository found below.
Please note this tutorial uses the TinyConstraints Swift package, which we added using the Swift Package Manager.
What are we creating in this tutorial ?
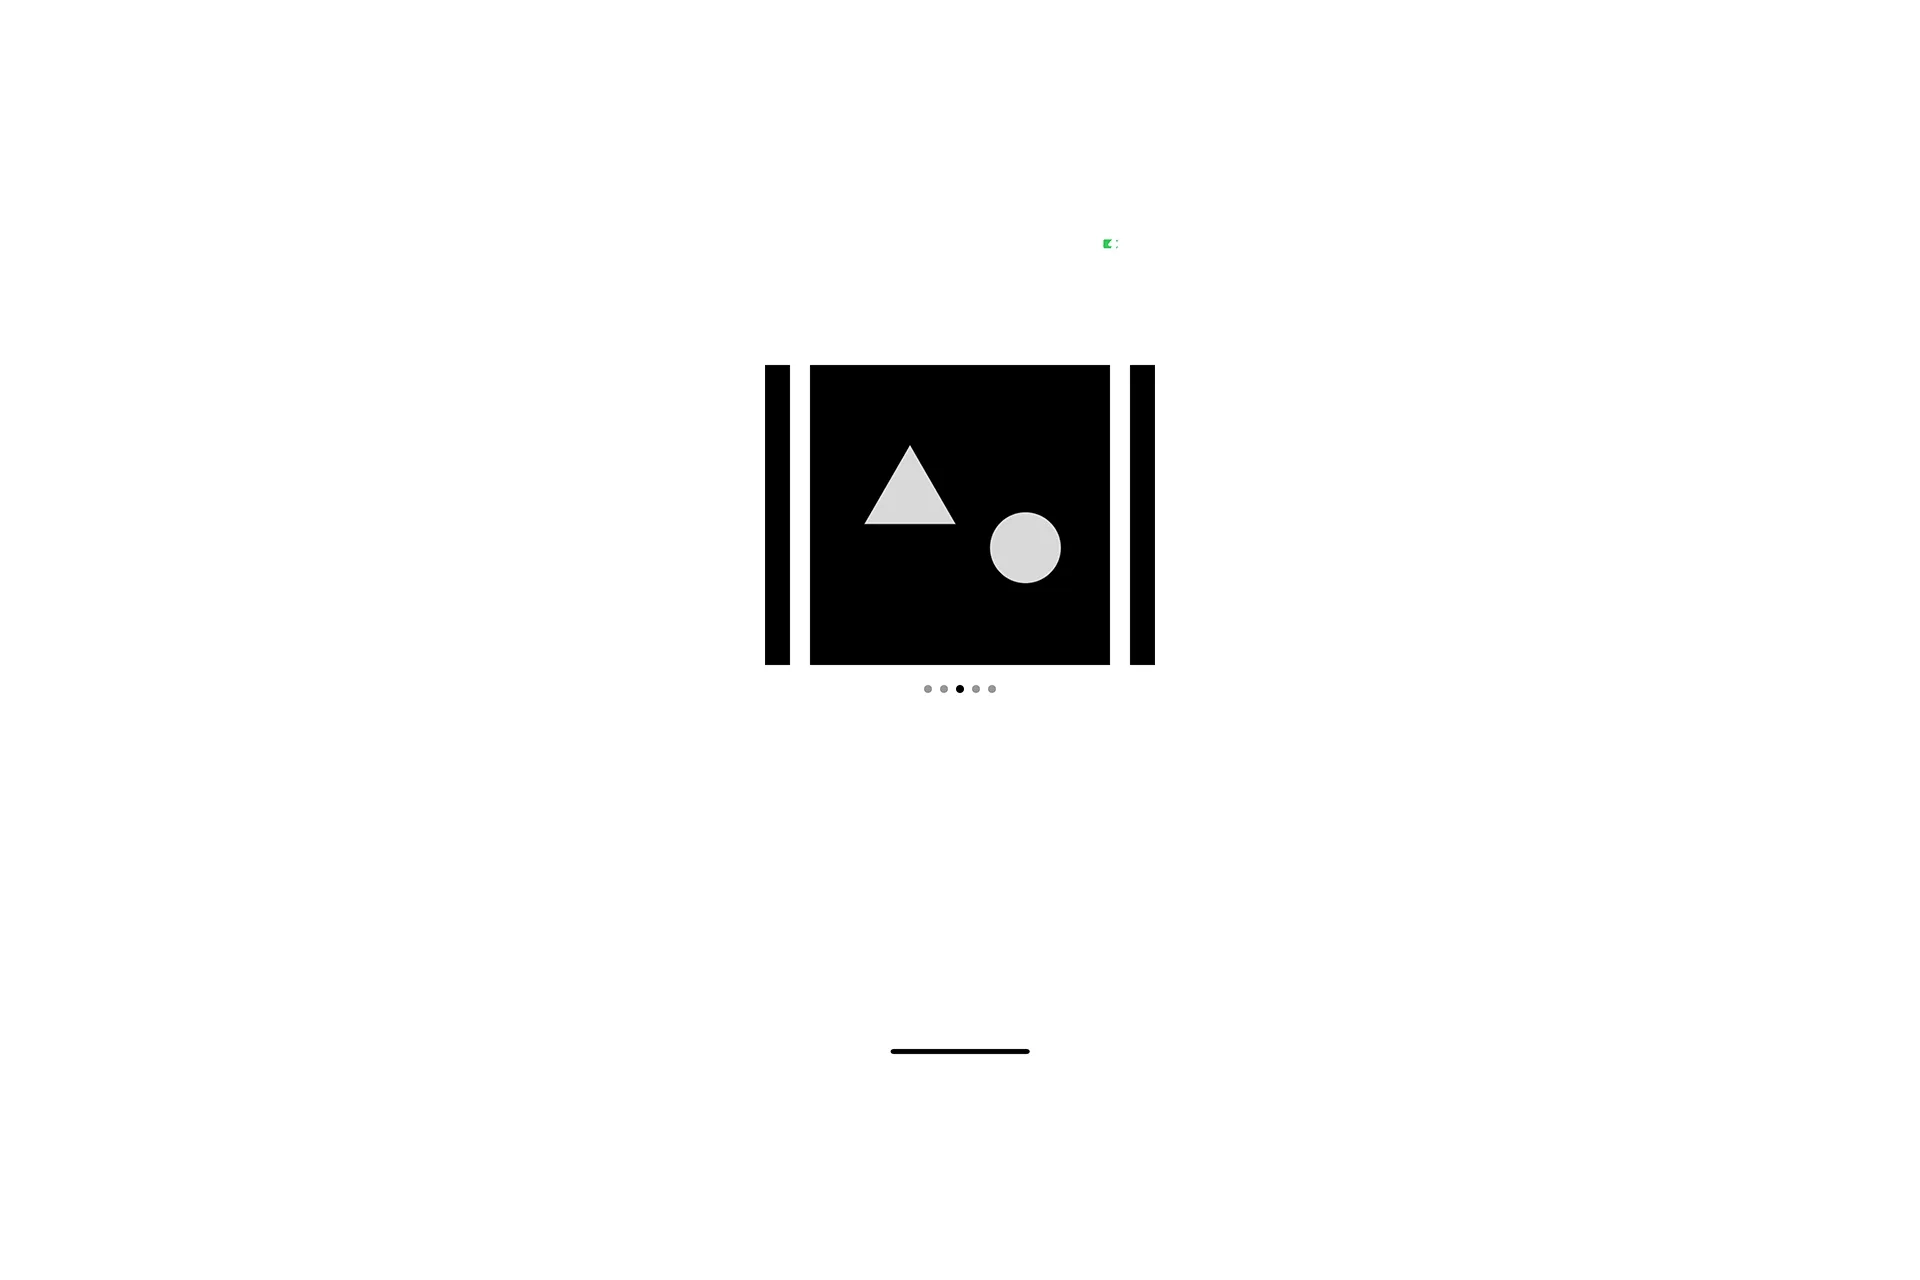
In this tutorial, we will build on the two previous tutorials that saw us create a custom carousel and then make it snap to position; and will add a scroll indicator that will change to show us what index we are at & which will allow us to switch carousel index on by tapping on an indicator.
Tutorial
We recommend downloading our open source project and checkout the tutorial/snap-carousel-to-position branch and carrying out the steps outlined below.
git clone git@github.com:delasign/swift-starter-project.gitStep One: Create your Scroll Indicator
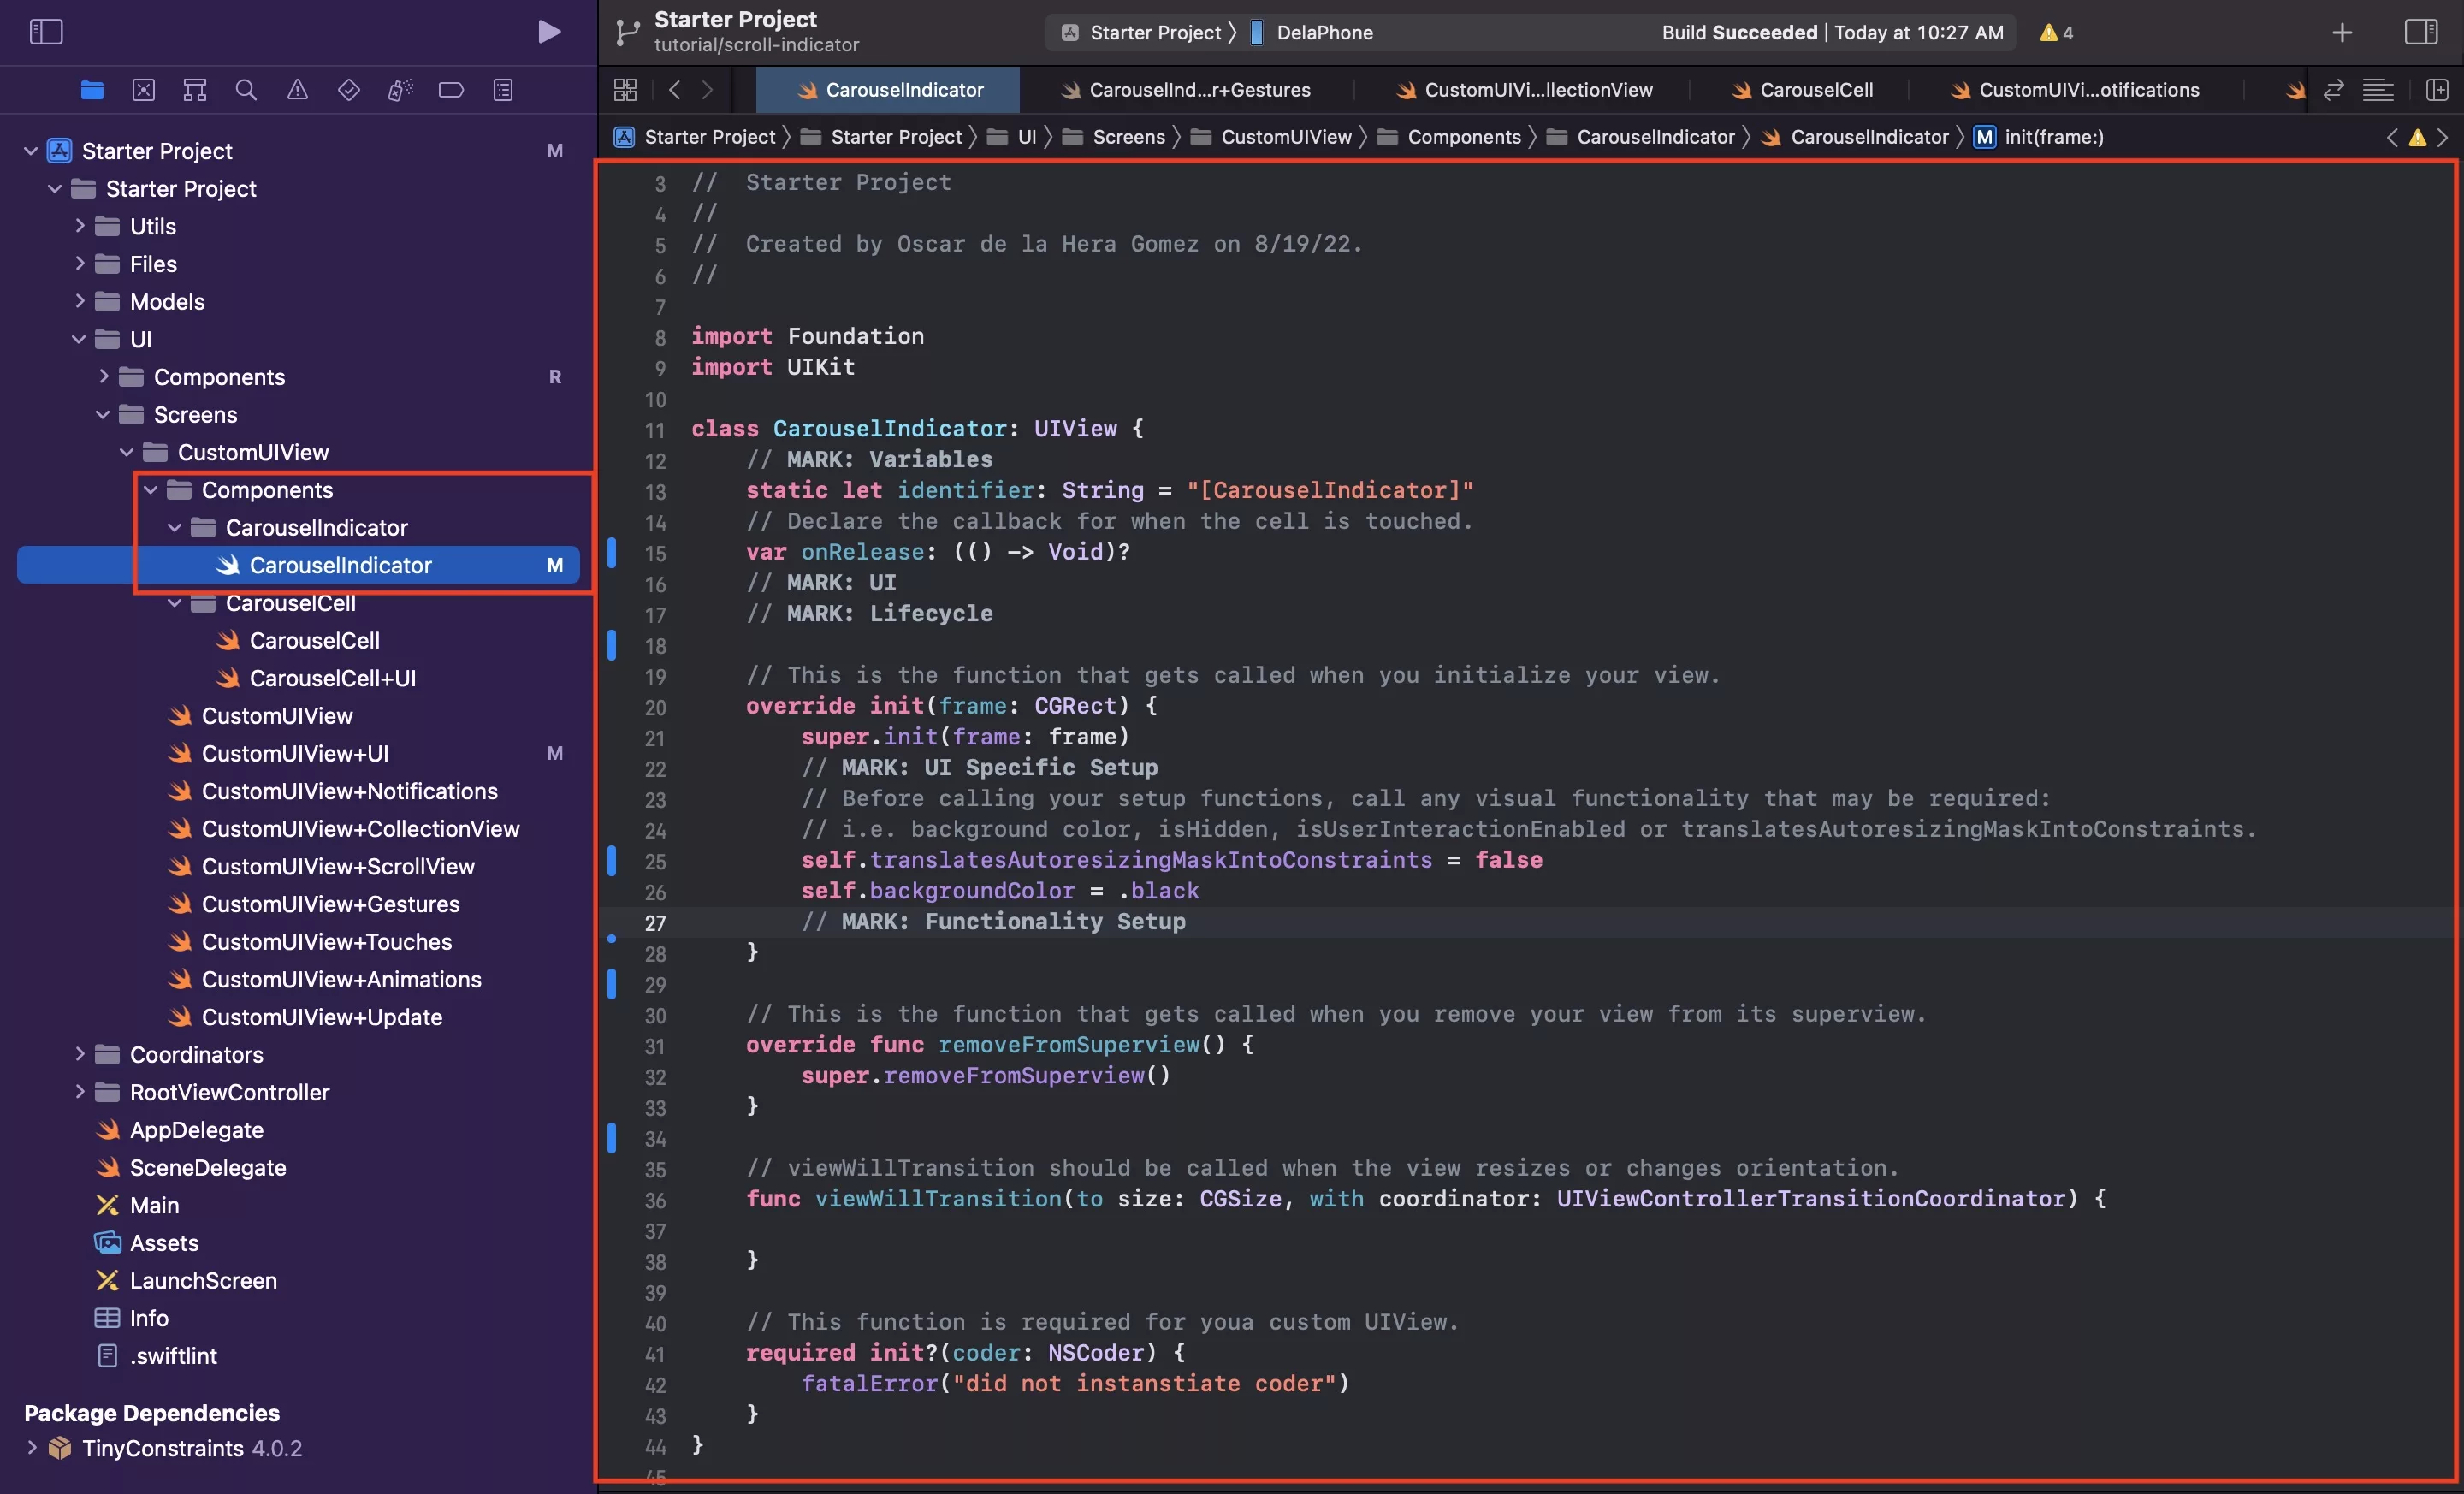
Under Components folder within the CustomUIView folder, within the Components folder, create another folder called CarouselIndicator.
Within this, create a new Swift file called CarouselIndicator.swift and paste in the code found below.
This code has declared a callback variable called onRelease which will get called which the indicator is tapped.
Step Two: Setup your Scroll Indicator Touches
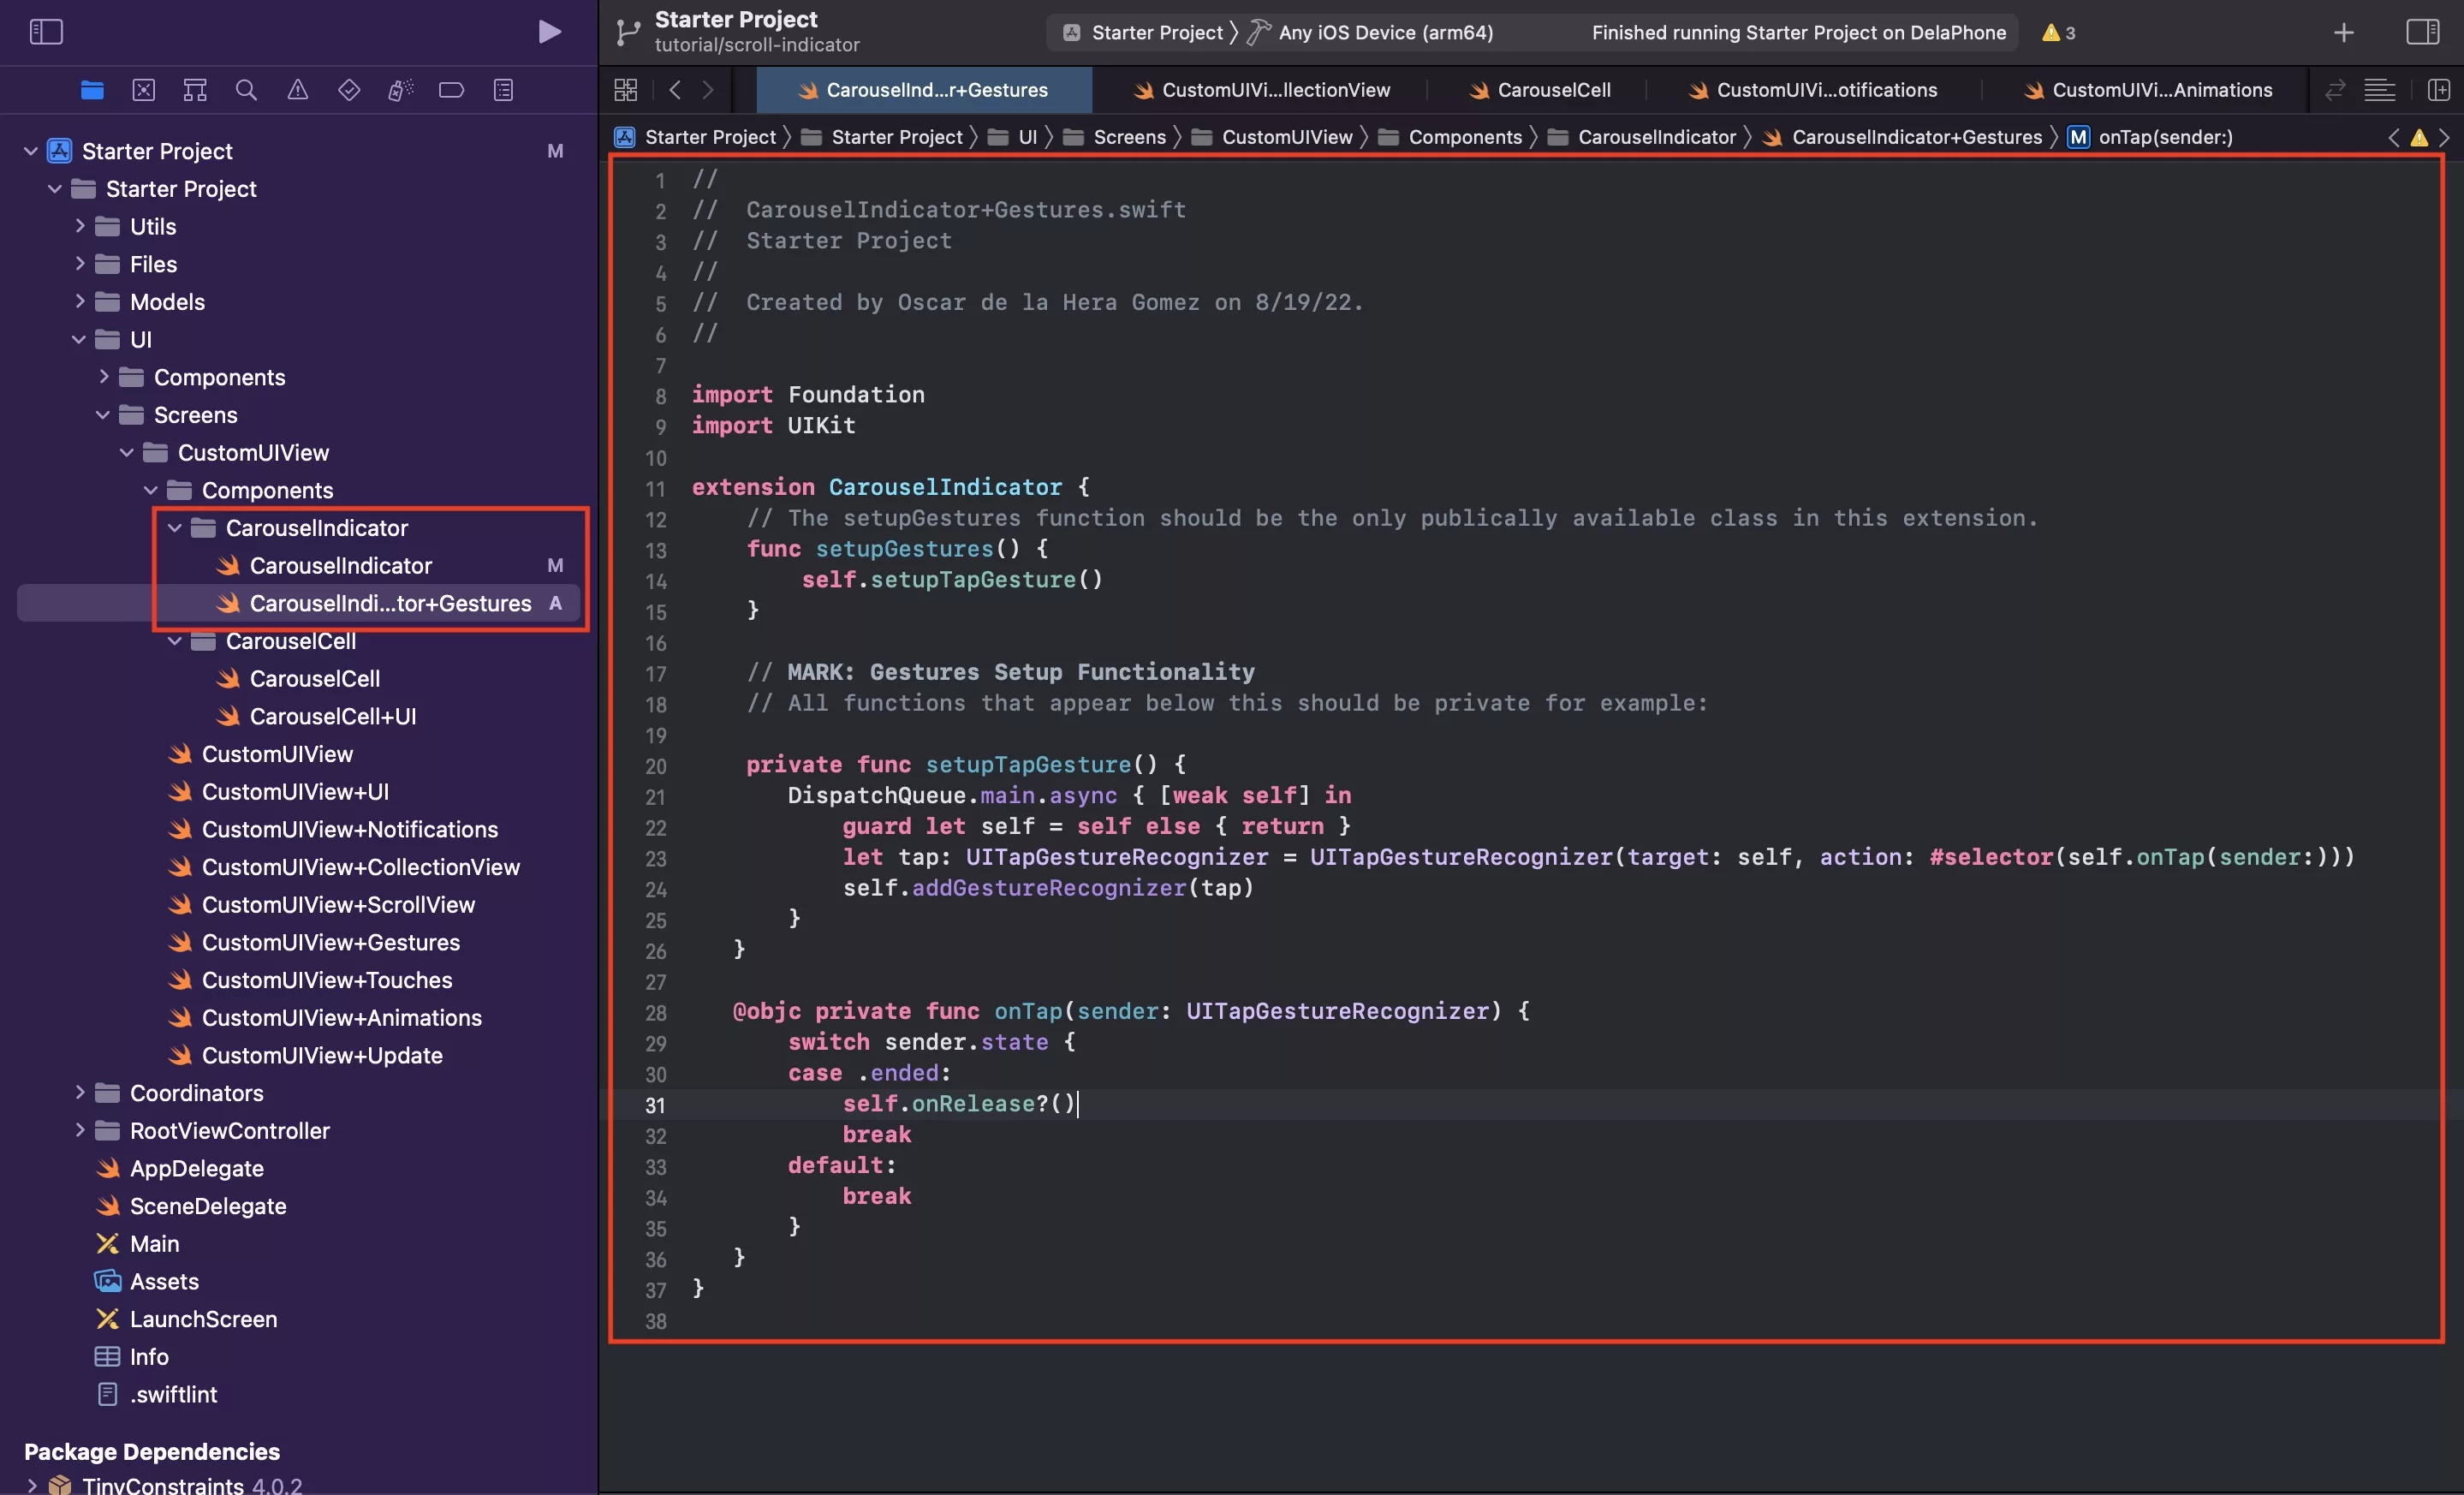
In the CarouselIndicator folder, create a new file called CarouselIndicator+Gestures.swift and copy the code found below.
This code sets up a tap gesture, which when ended, calls the onRelease callback (as shown on line 31).
Step Three: Call setup gestures
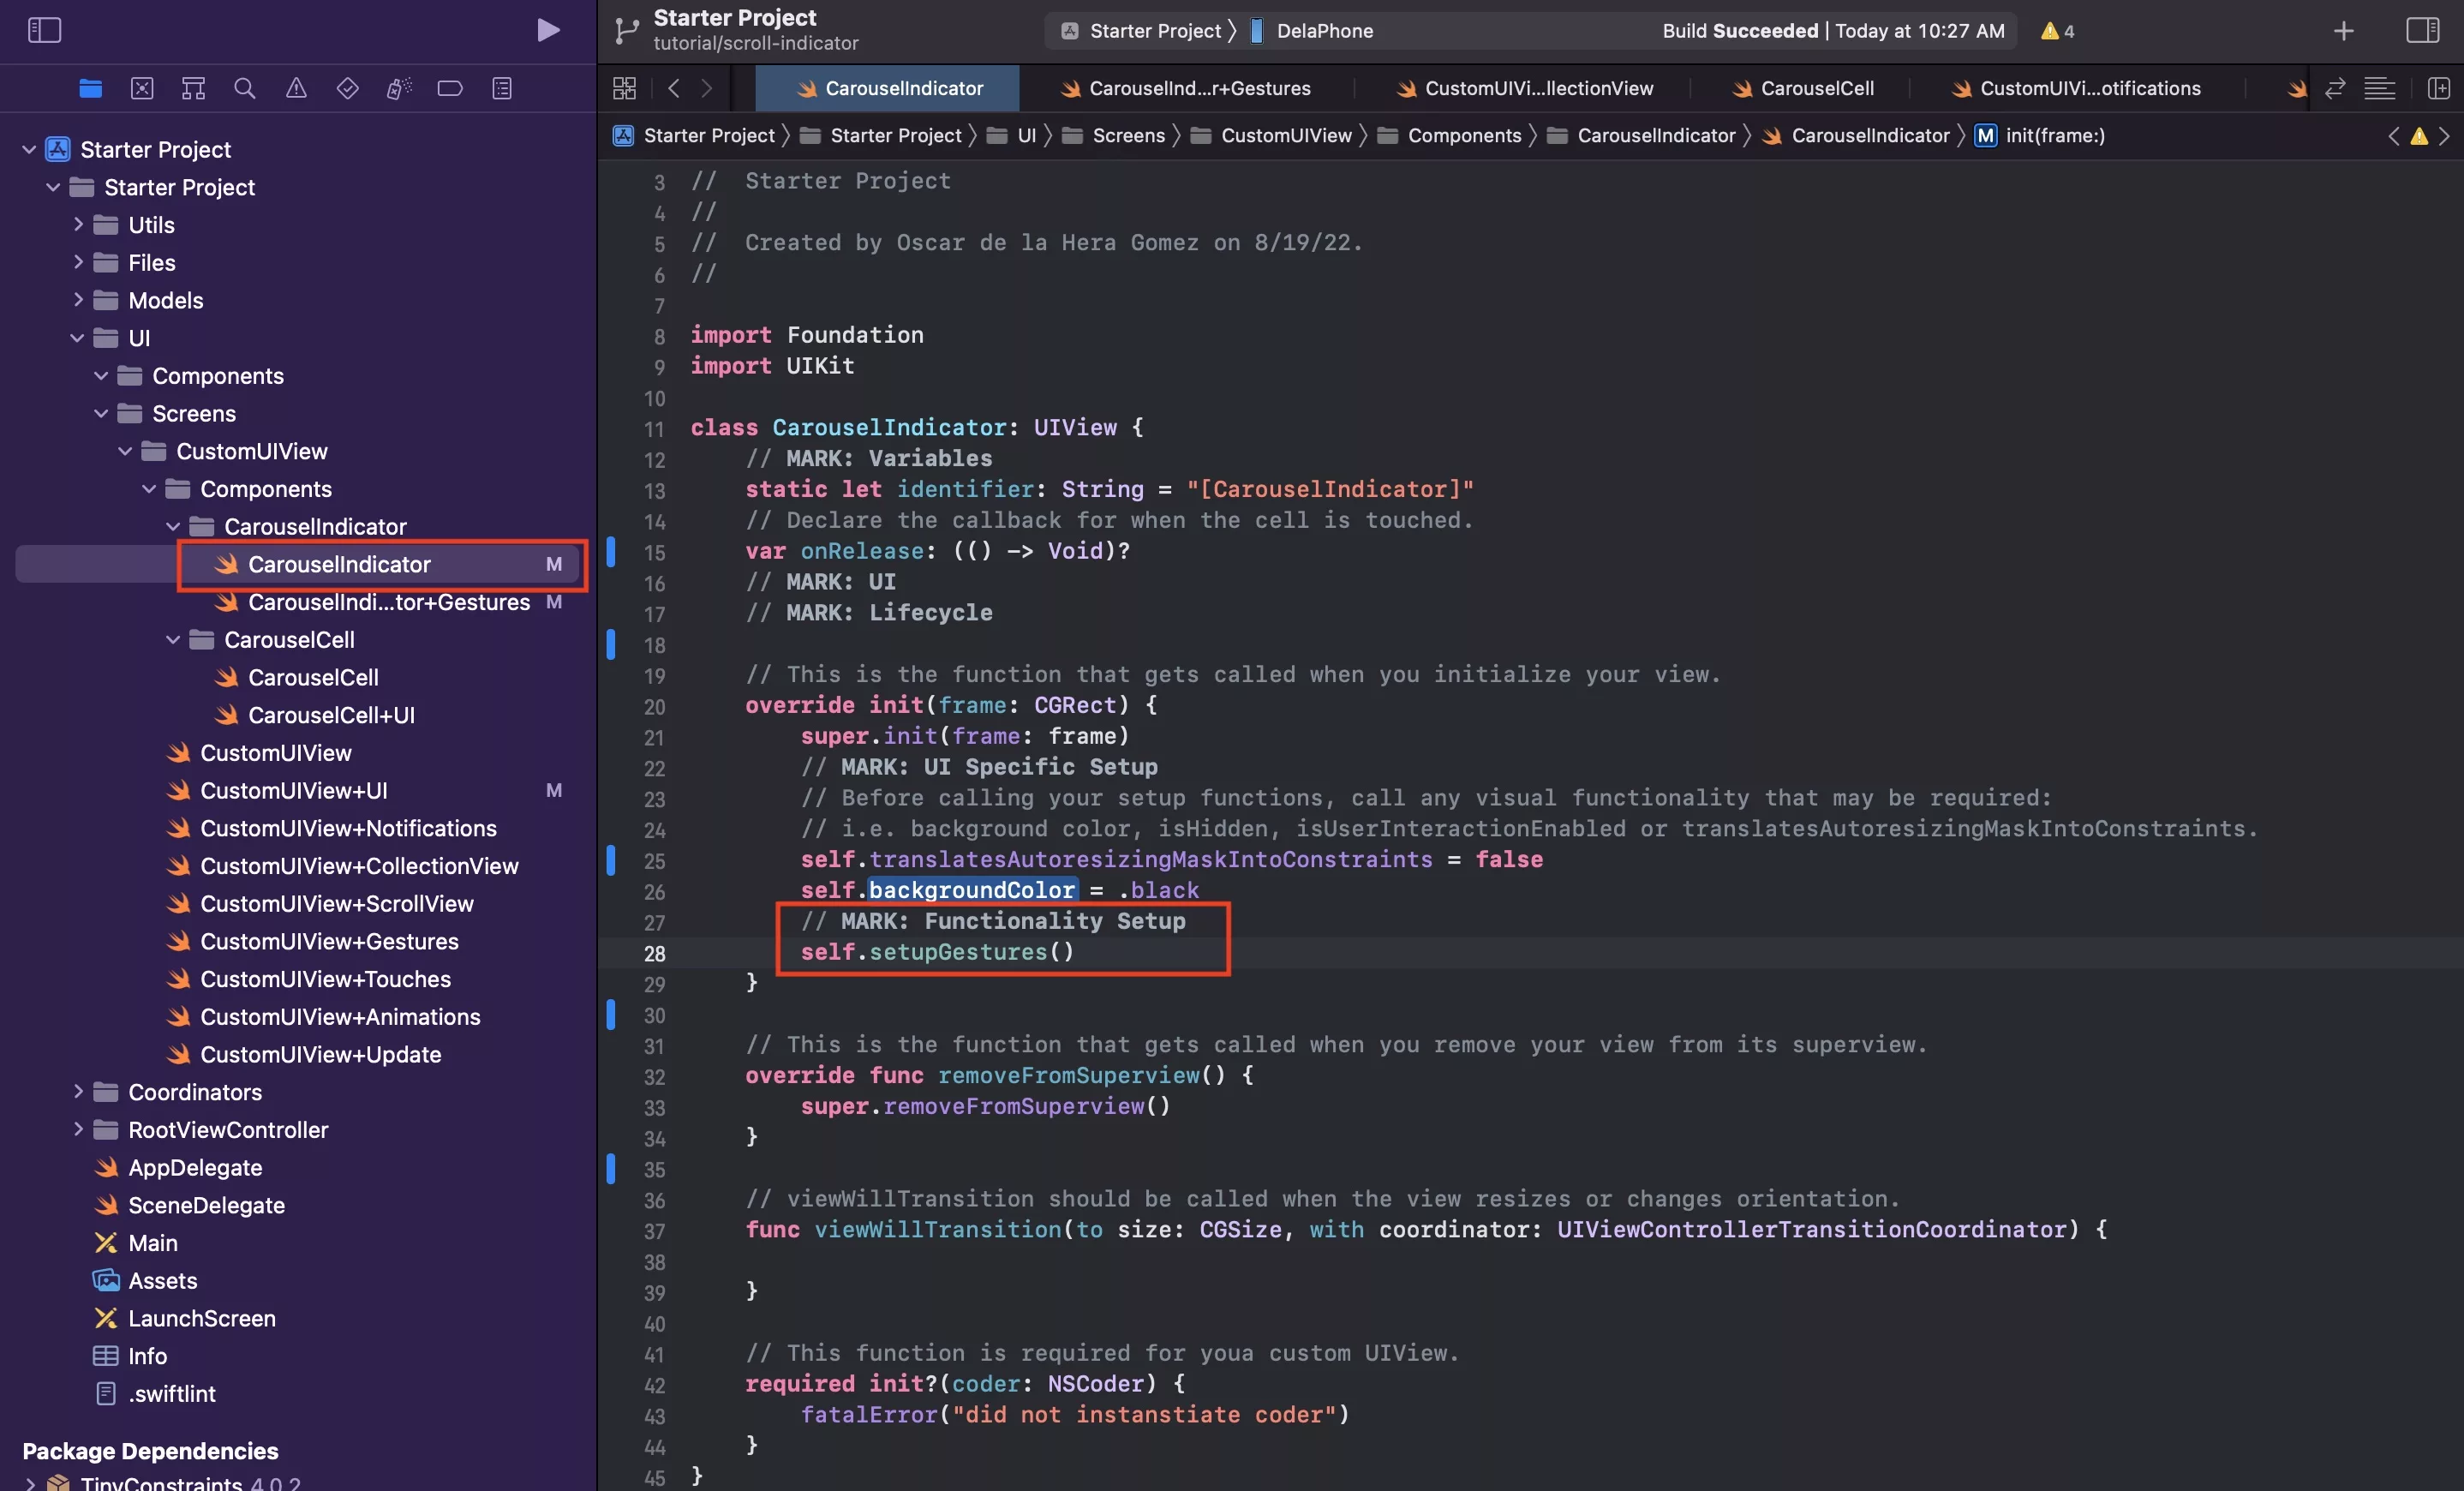
In CarouselIndicator.swift call the setupGestures function from the initializer.
Step Four: Declare the variables
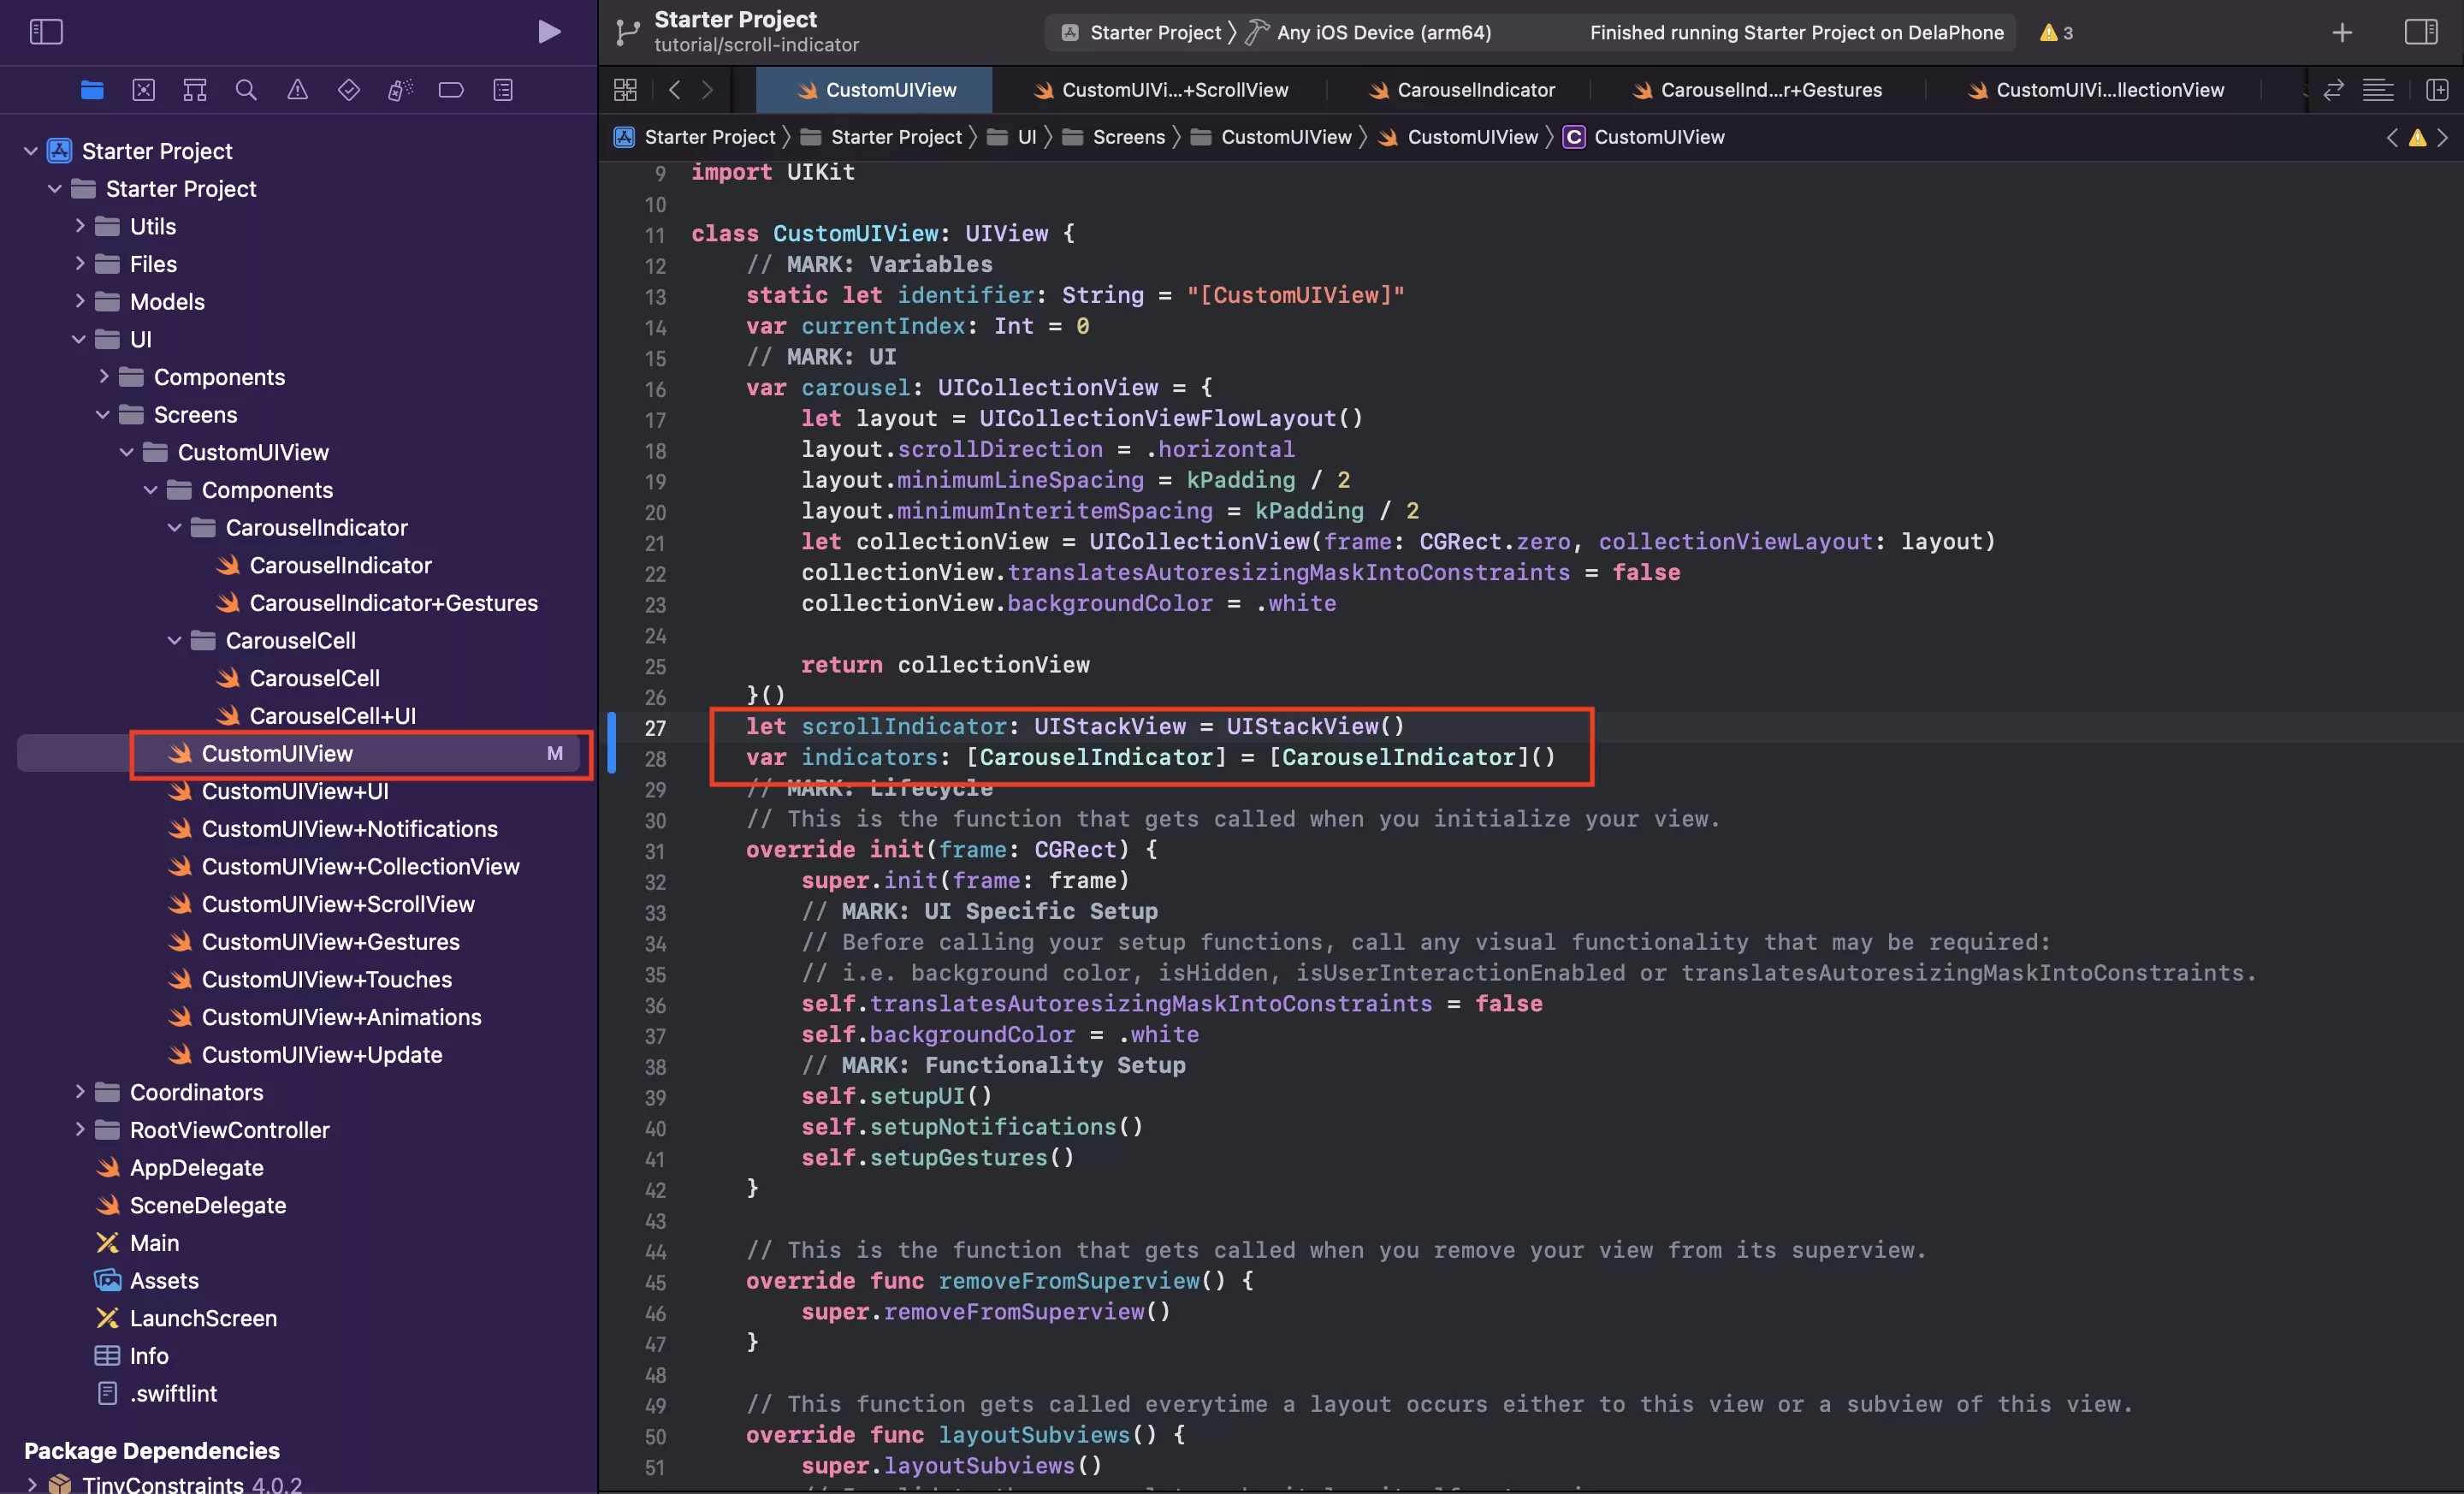
In CustomUIView.swift declare a constant for your scroll indicator as a UIStackView and declare a variable to keep track of the indicators as an array of CarouselIndicators. Sample code available below.
Step Five: Setup your Scroll Indicator
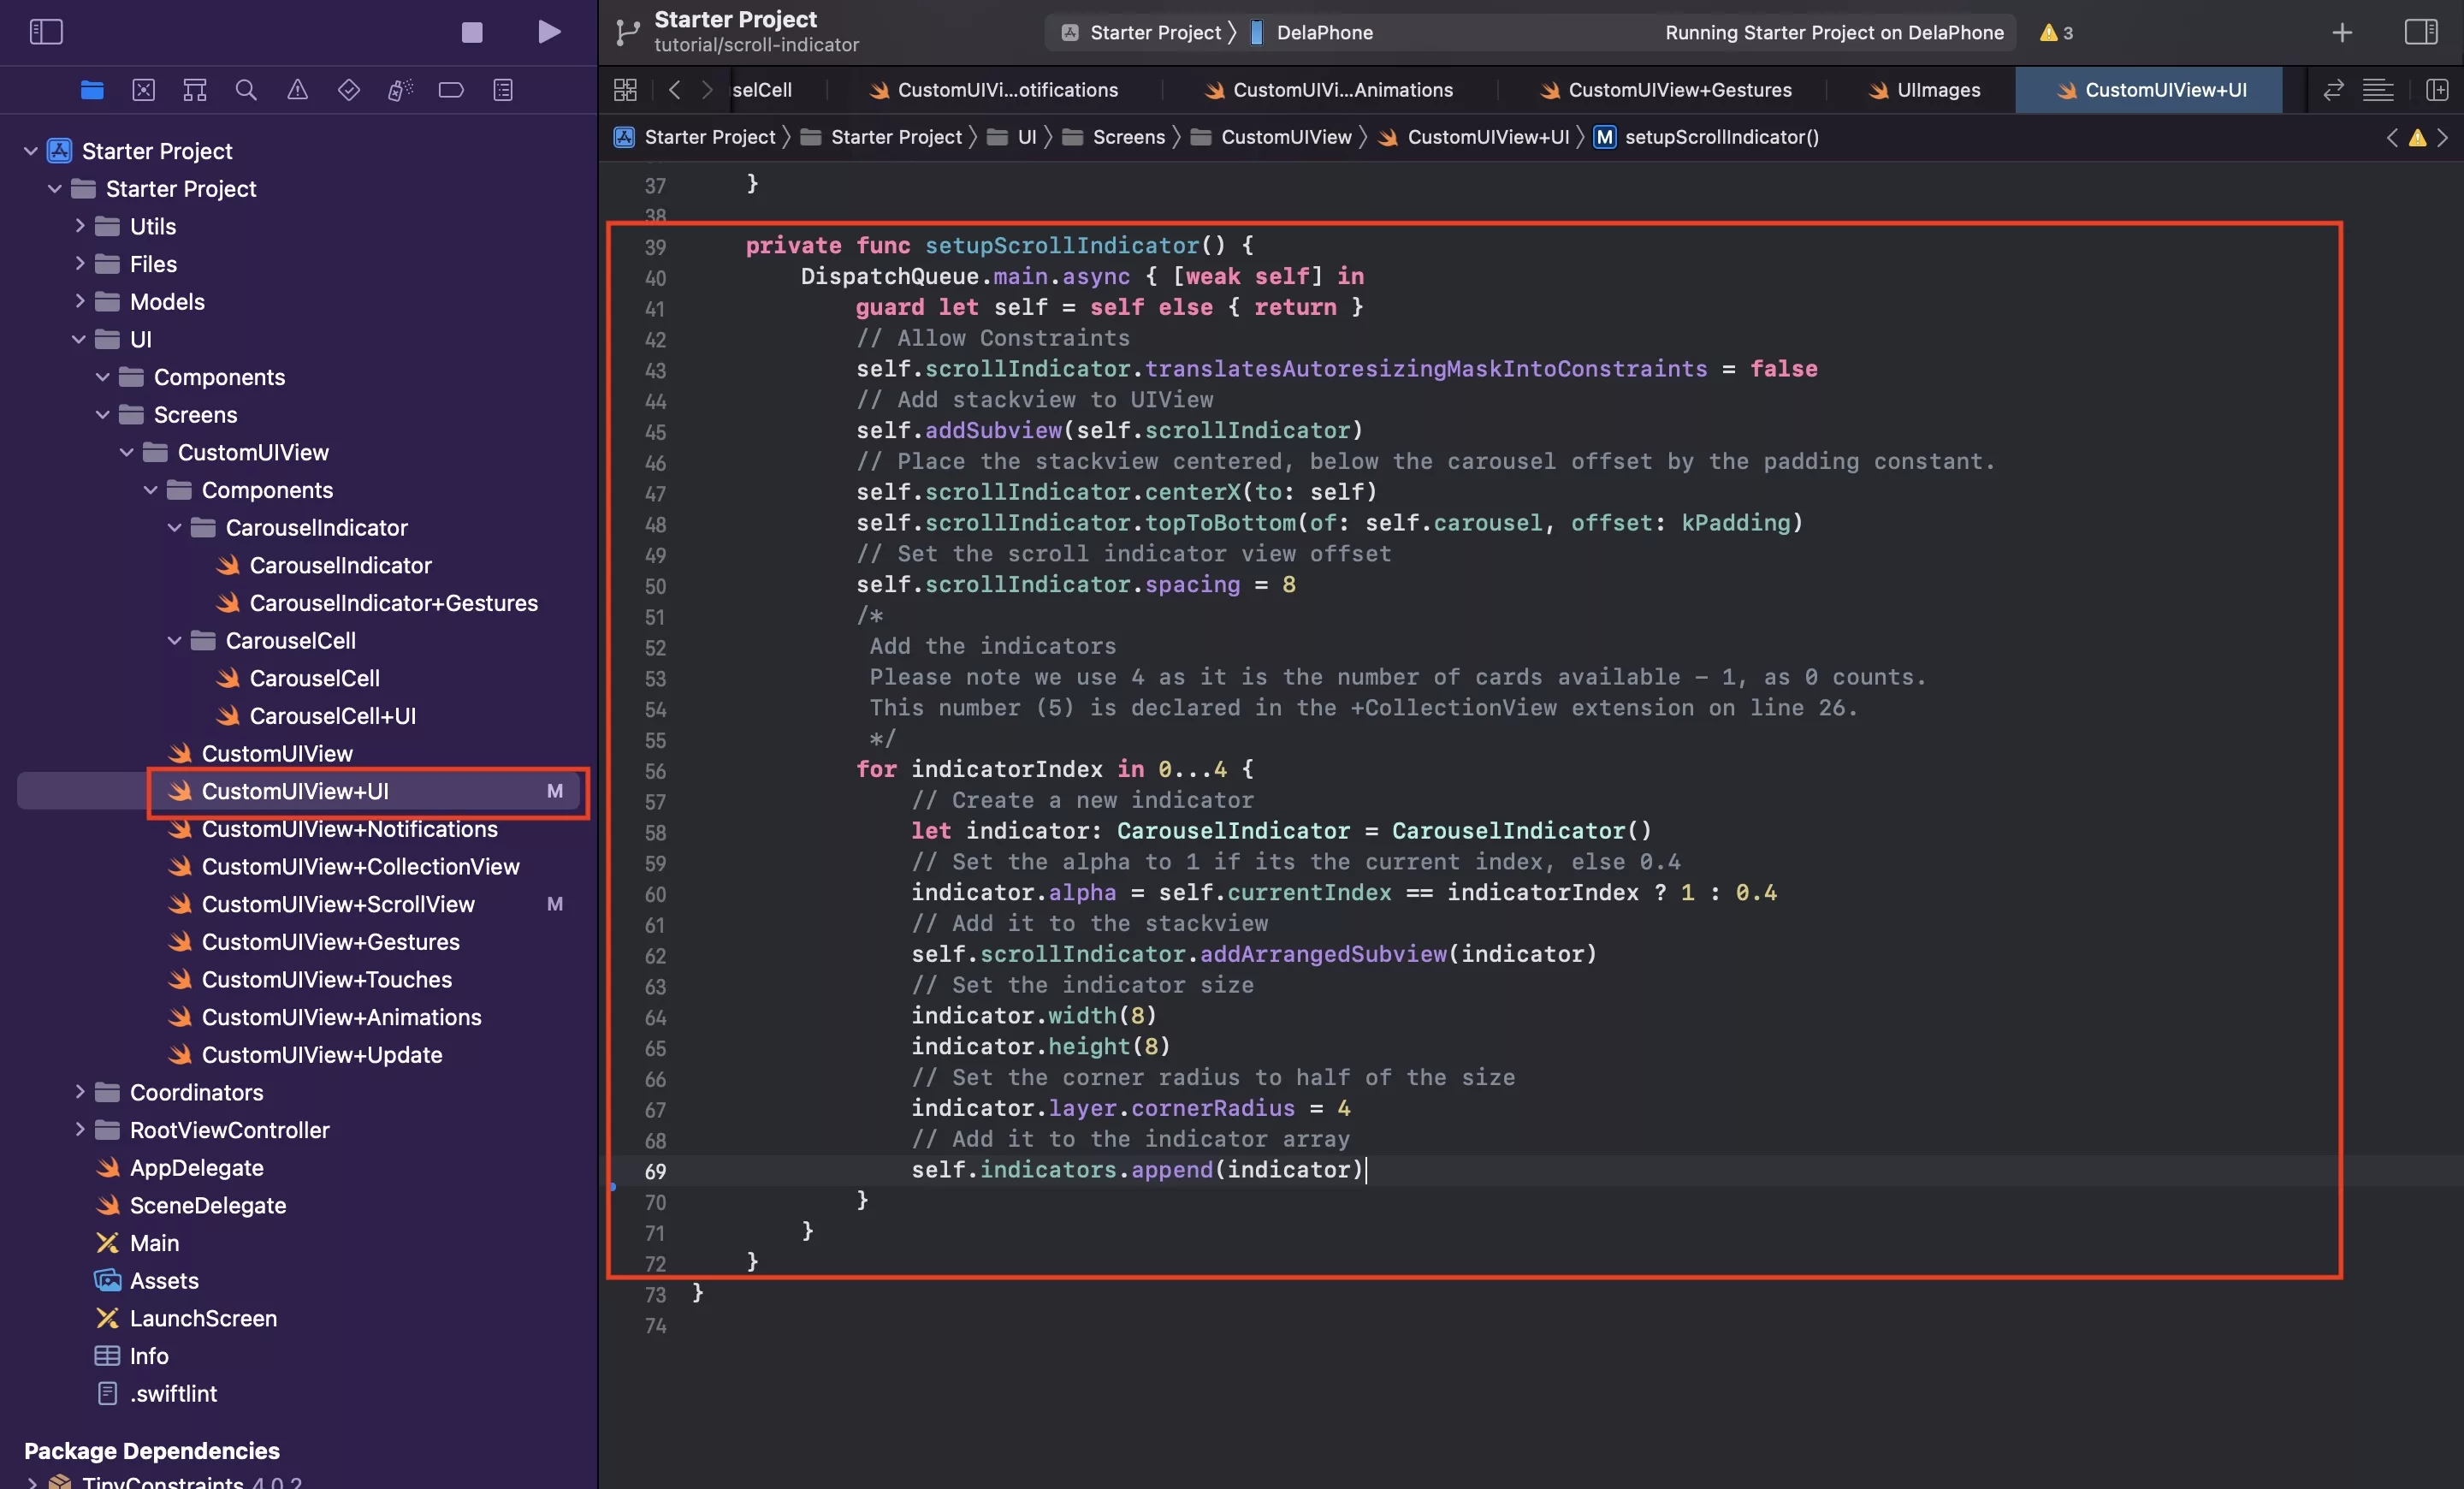
In CustomUIView+UI.swift update your code to the code found below.
This code is responsible for:
- Allowing the UIStackView to use constraints.
- Adding the UIStackView to the CustomUIView.
- Settings the UIStackView constraints.
- Setting the UIStackView spacing.
- Adding the indicators to the UIStackView.
- Setting the indicators alpha depending on the index.
- Setting the indicators constraints.
- Adding them to the indicators array to allow us to update them in later steps.
If you were to run the app in its current state it would look like this:

Step Six: Scroll to index on Tap
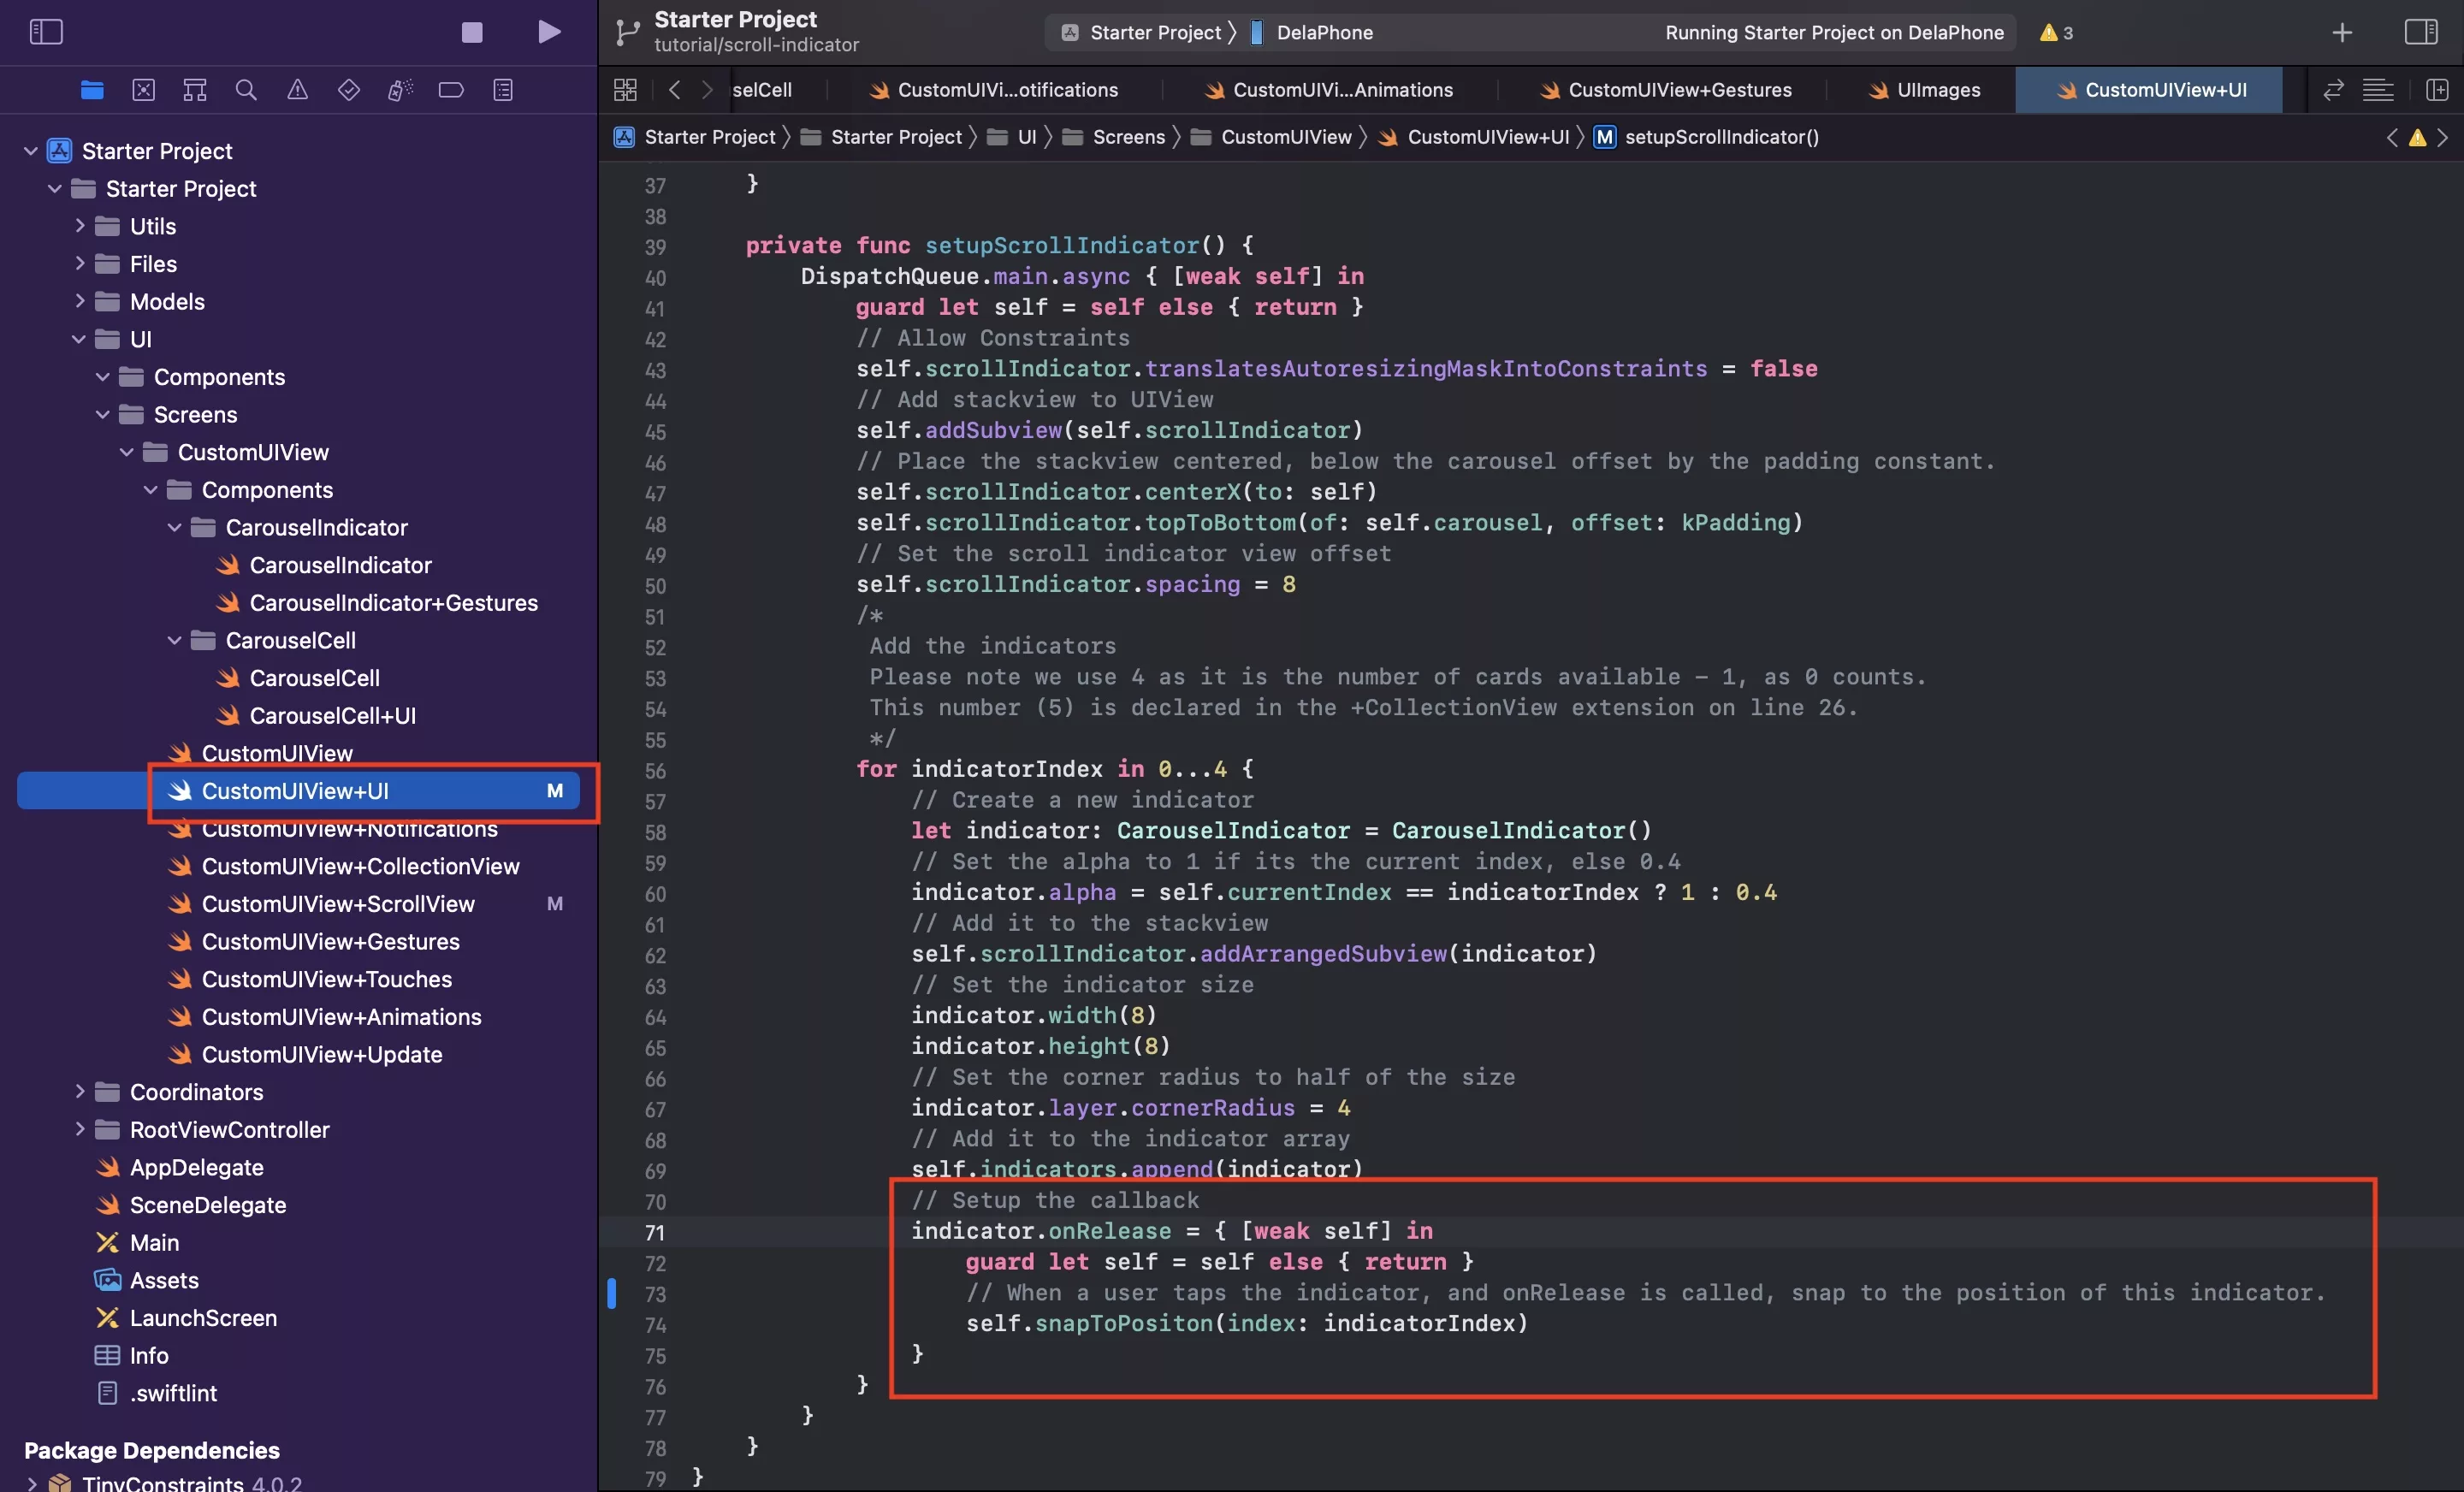
In the setupScrollIndicator function within CustomUIView, update the function to the code found below.
Step Seven: Update indicators on scroll
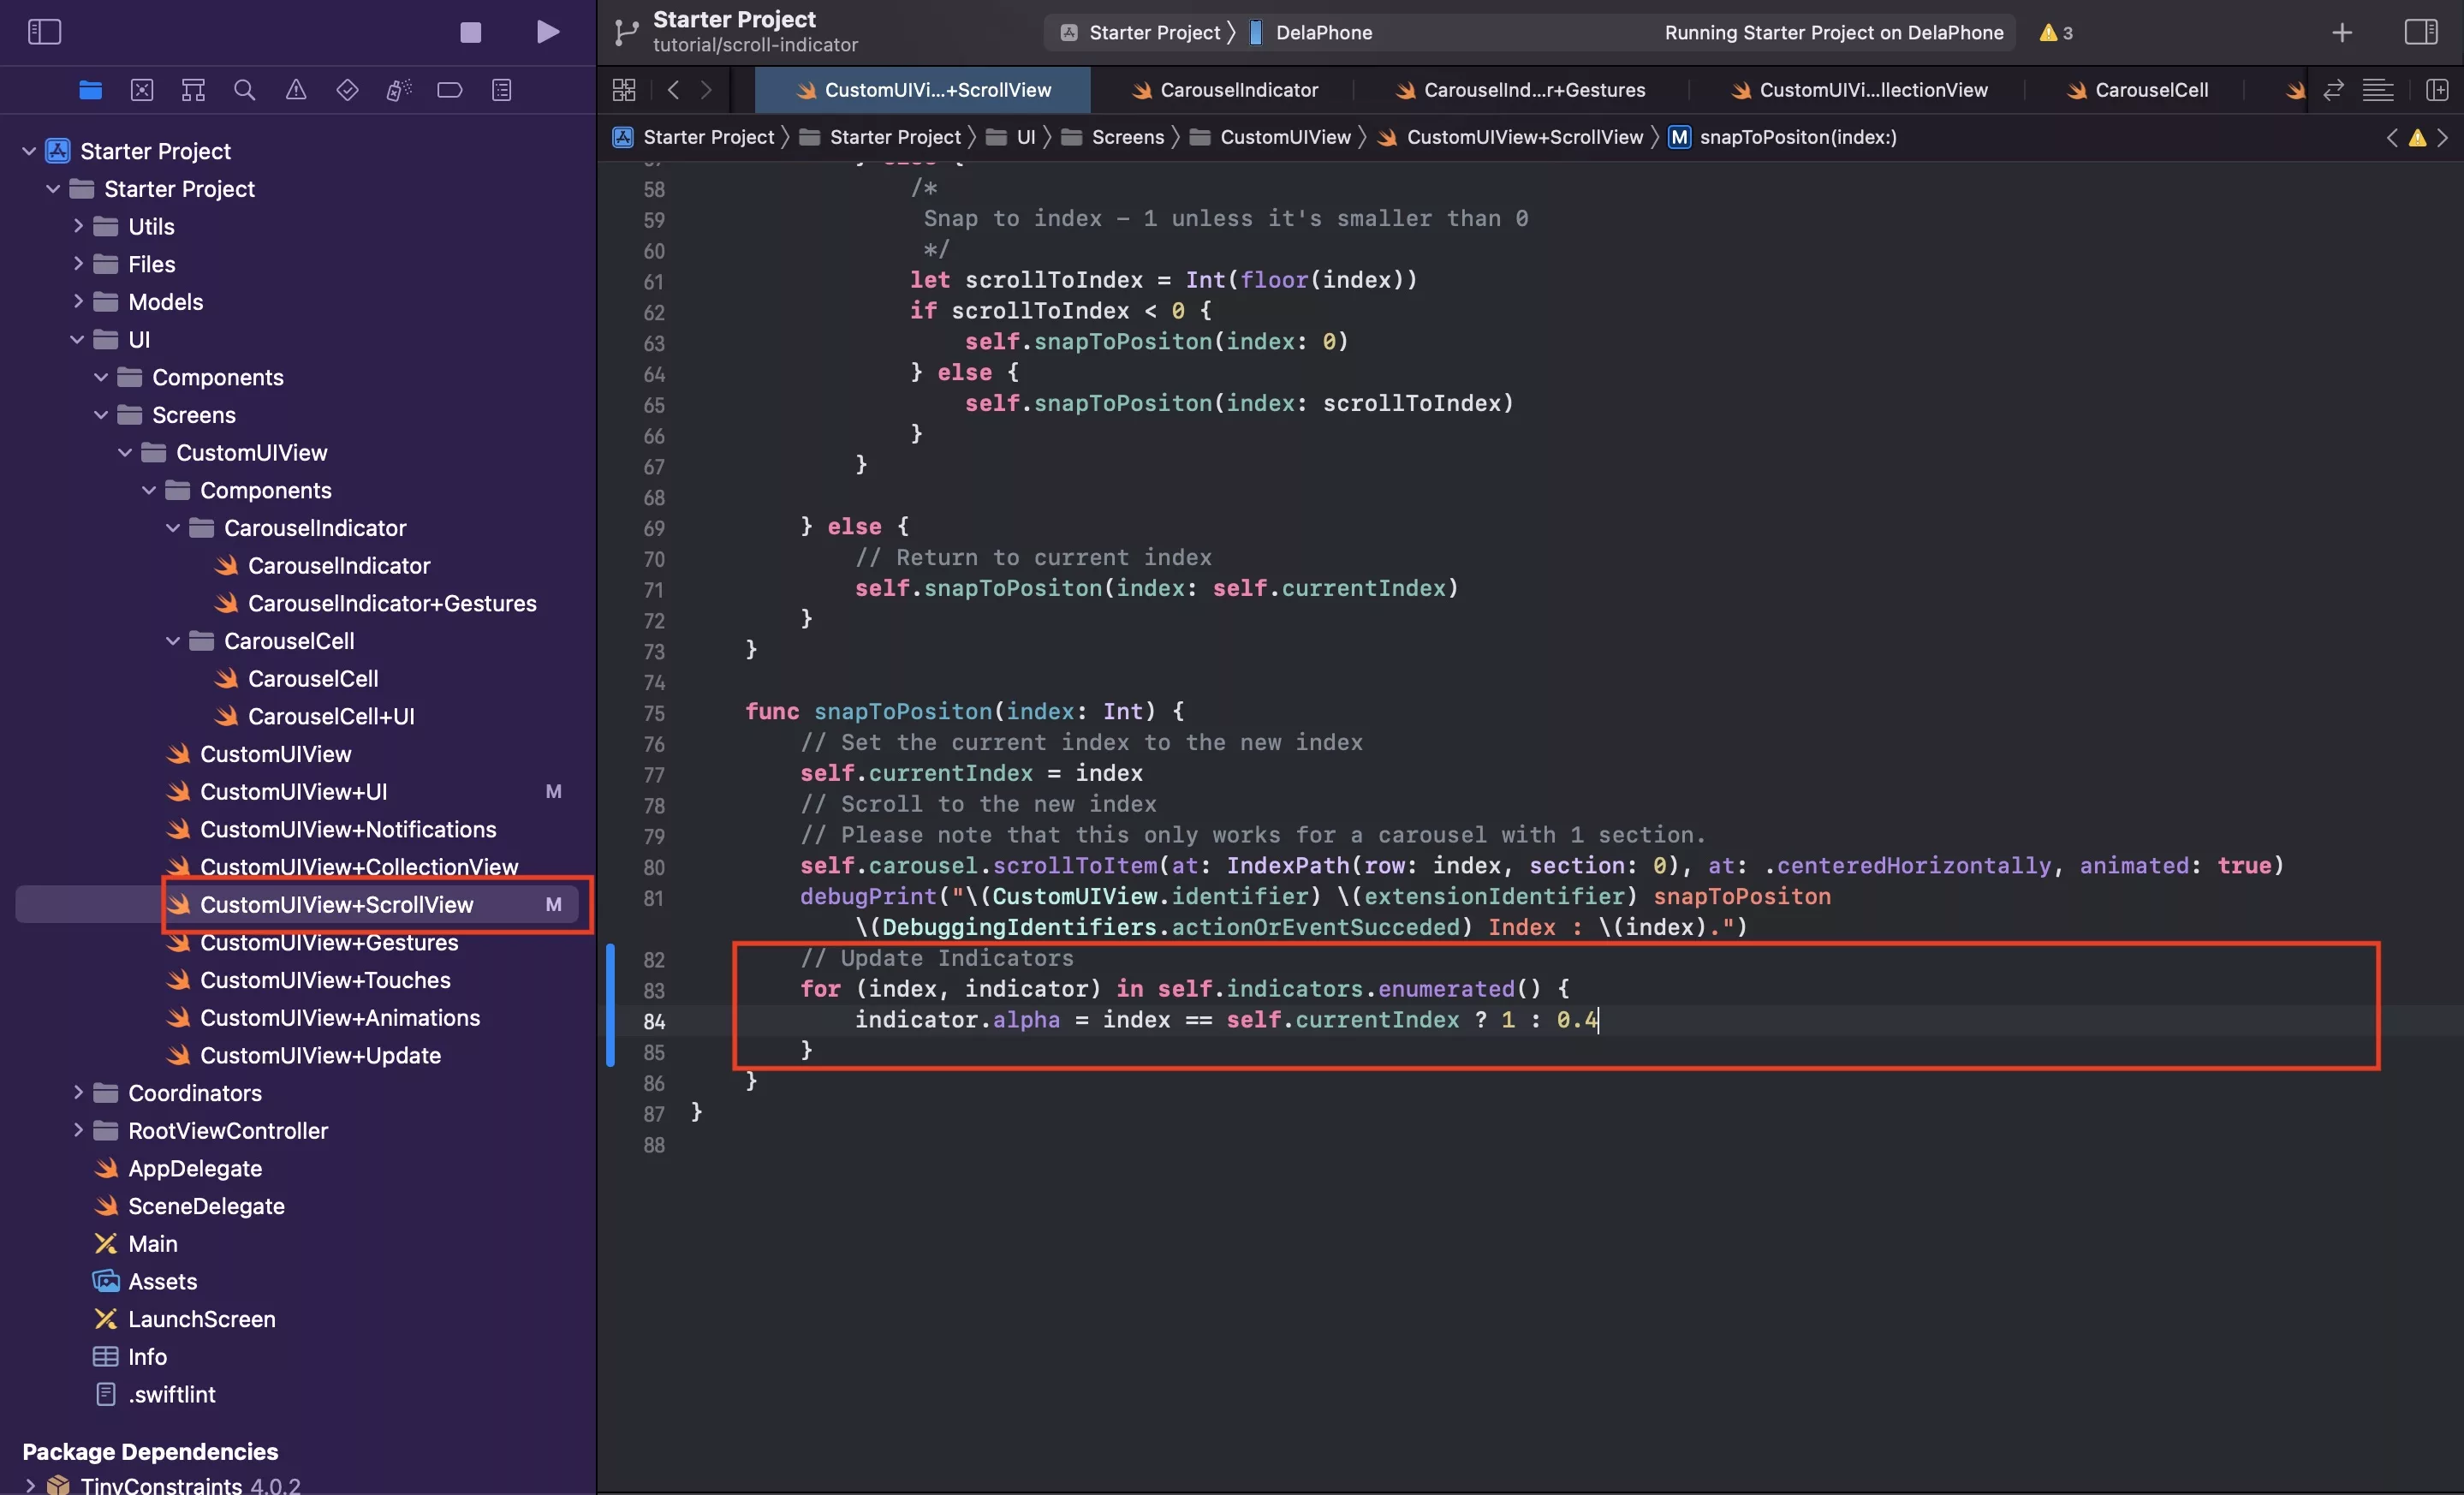
In CustomUIView+ScrollView.swift update your snapToPosition function to the code found below.
Step Eight: Verify

Run your code and see the scroll indicator update on scroll and scroll to index on tap.
Any Questions
We are actively looking for feedback on how to improve this resource. Please send us a note to inquiries@delasign.com with any thoughts or feedback you may have.