How to make an API call with a variable codable type in Swift
A step by step tutorial on making an API call with a variable codable type (i.e. Int, Float or String) in Swift (iOS), as ANY is not allowed. Github repository included.
A step by step tutorial on making an API call with a variable codable type (i.e. Int, Float or String) in Swift (iOS), as ANY is not allowed. Github repository included.
The following tutorial makes use of the Nasdaq Data Link, which is a premier source of financial, economic and alternative datasets that uses RESTFUL API's to process requests, to gather data and print it on the console.
This tutorial starts on the main branch of our Open Source starter project and we have not made the changes available on a branch due to the sensitive nature of the API keys.
Tutorial
We recommend downloading our open source project and carrying out the steps outlined below.
git clone git@github.com:delasign/swift-starter-project.gitStep One: Determine your API call
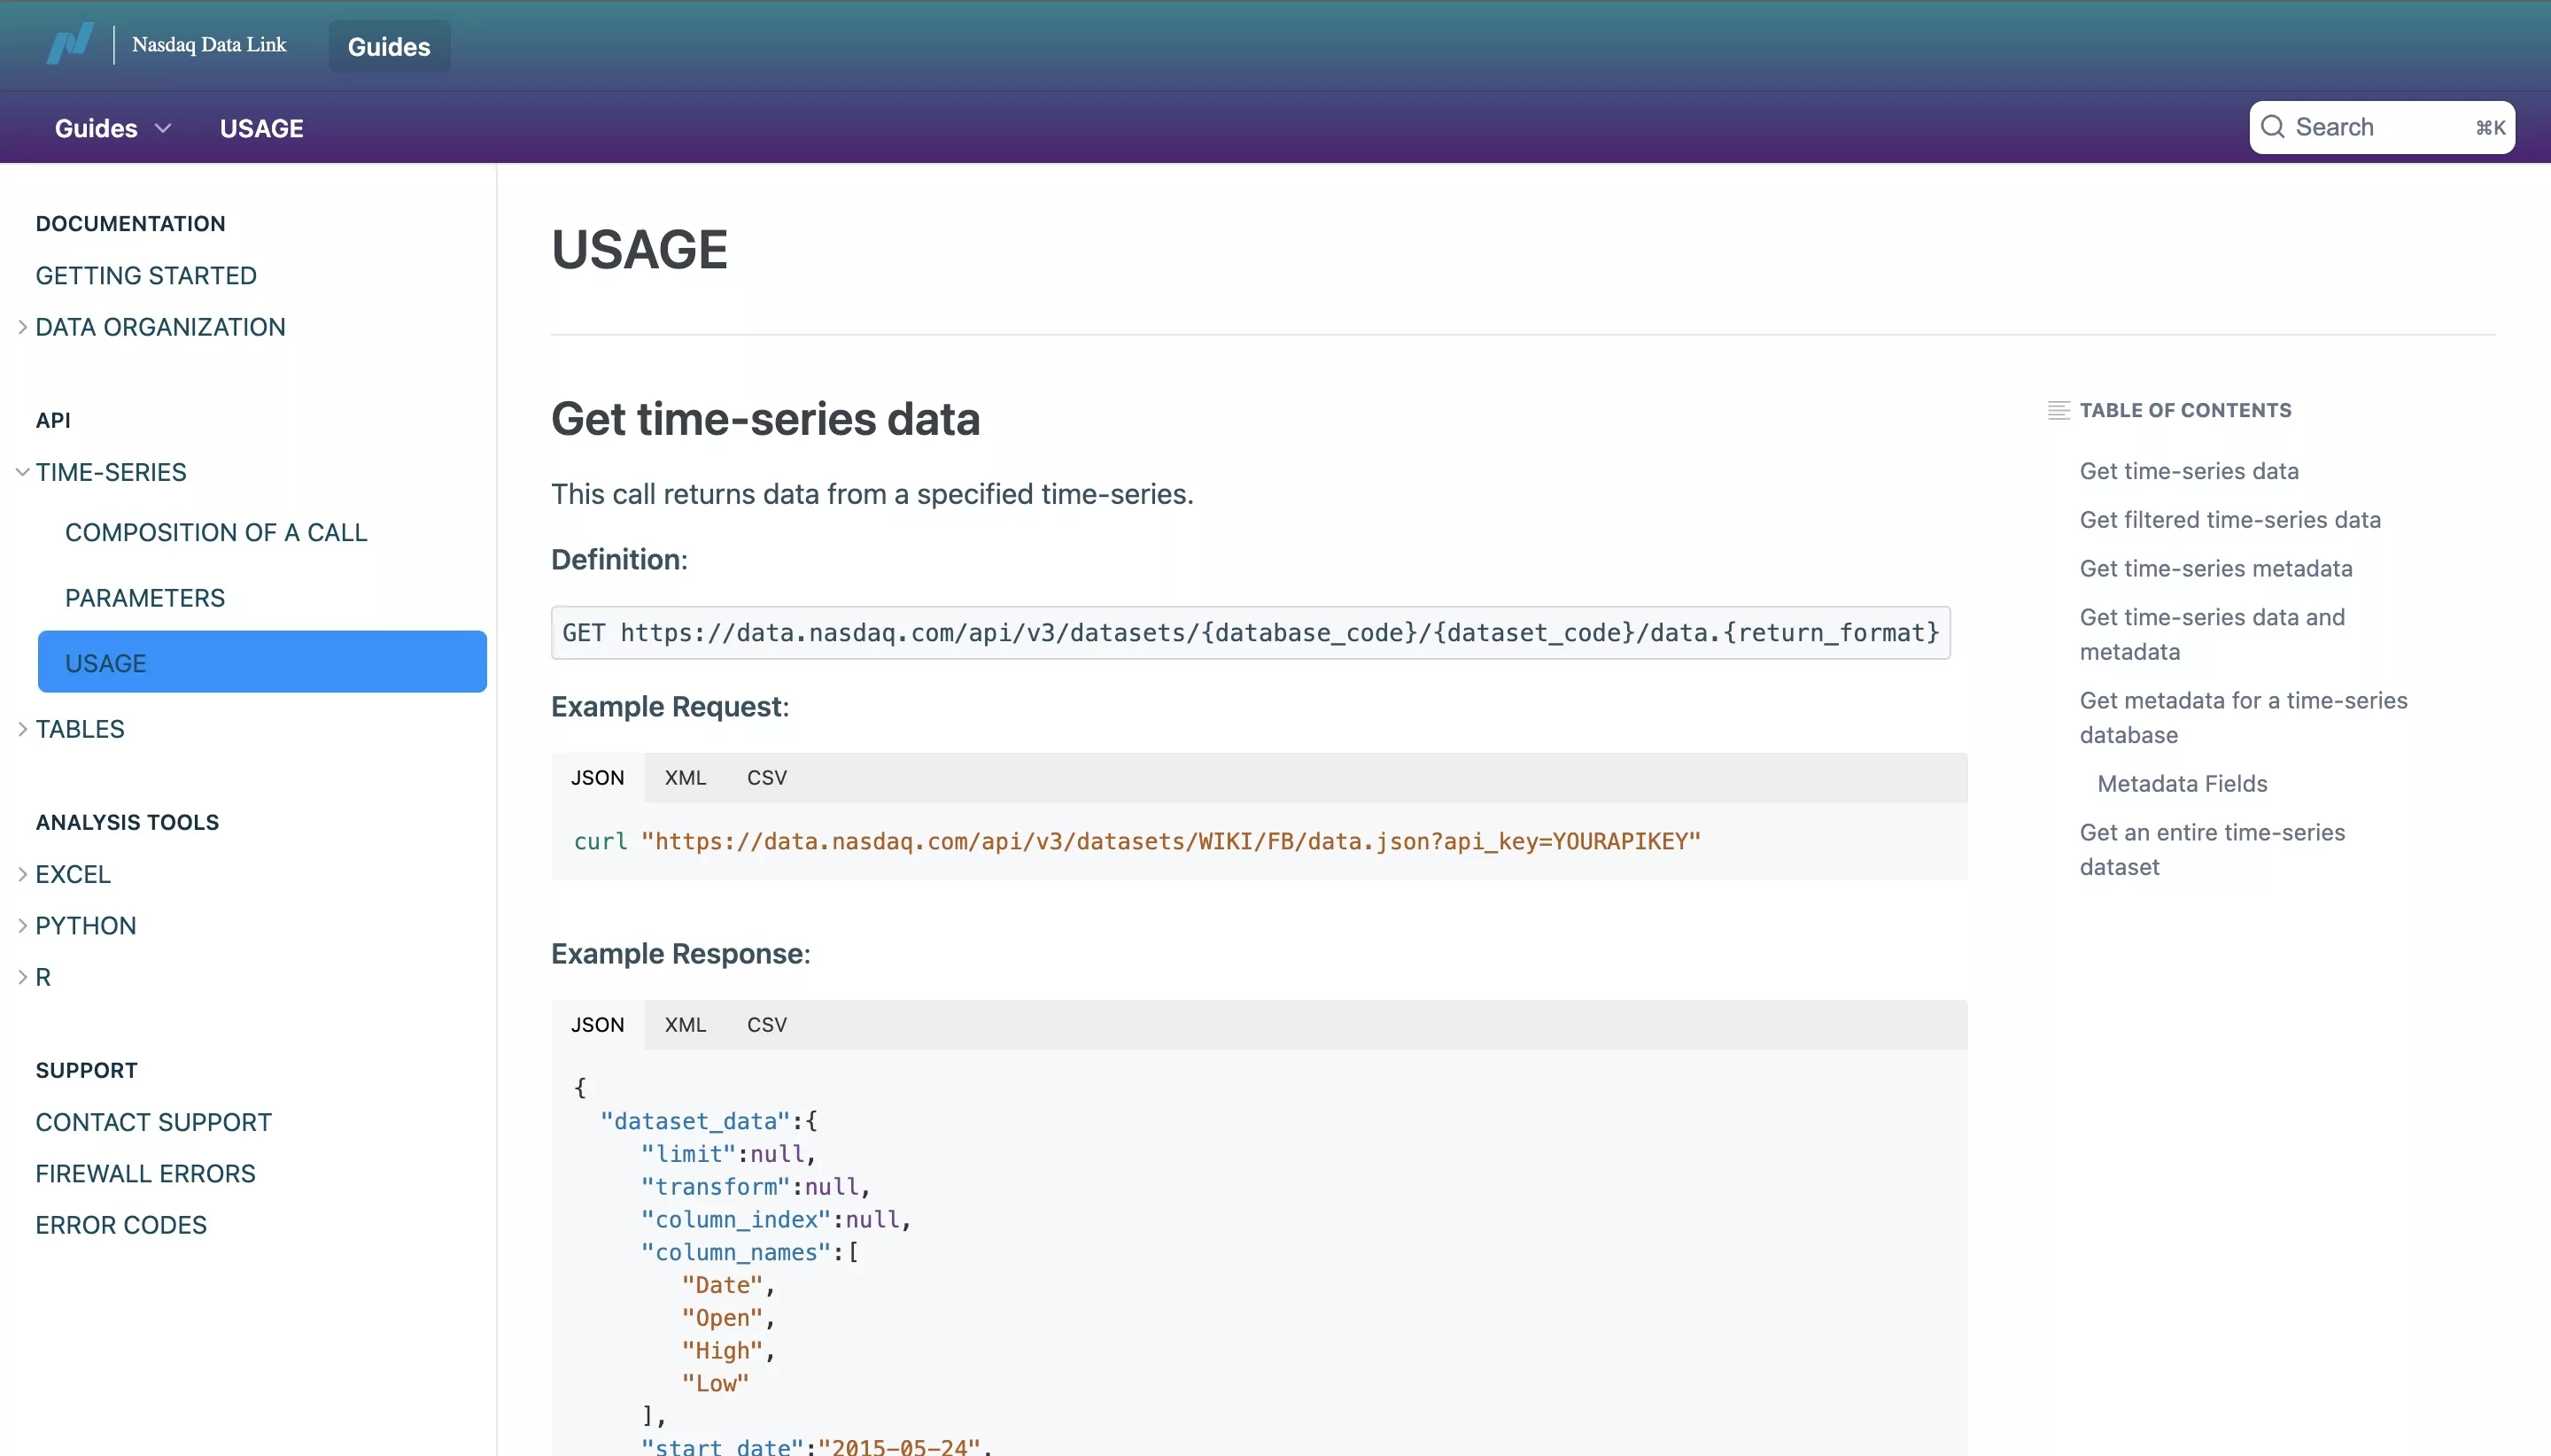
We determined the API request by making use of the Nasdaq Data Link documentation to discover their time-series API along with the sample request. Please note that you must create an account to receive an API Key.
Step Two: Update your Configuration
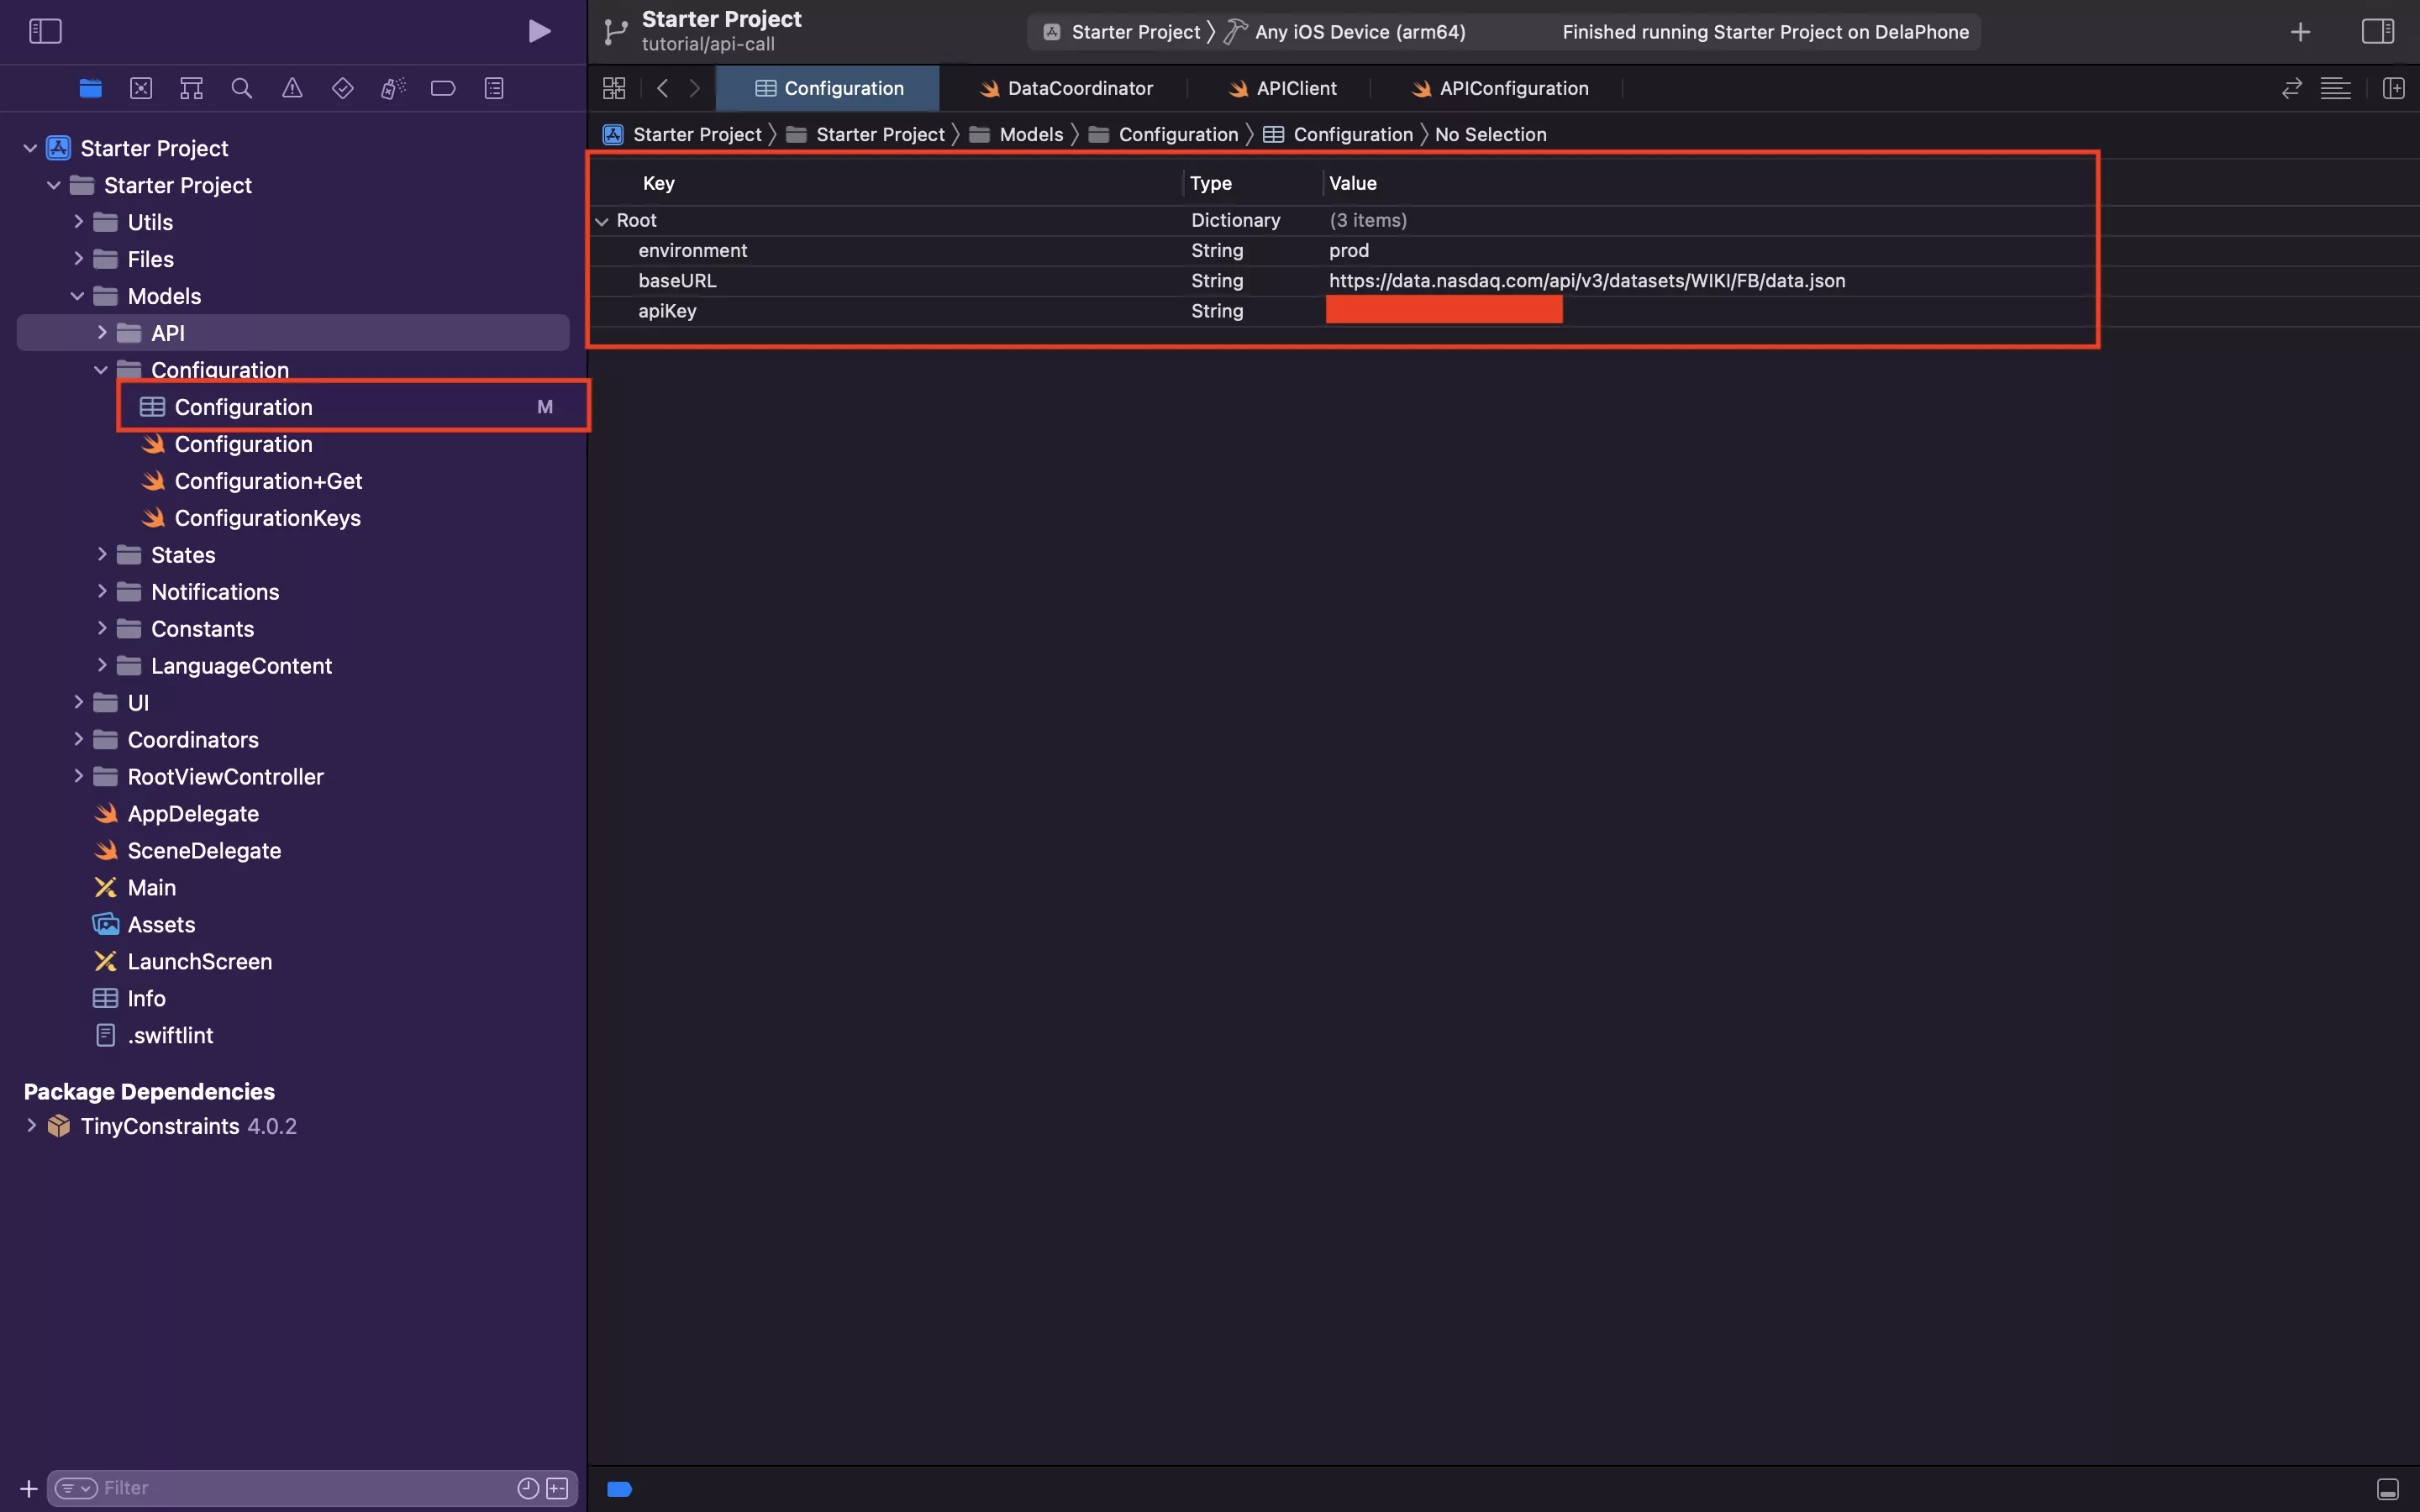
In Configuration.plist, update your baseURL and apiKey.
Step Three: Create the API Response Model
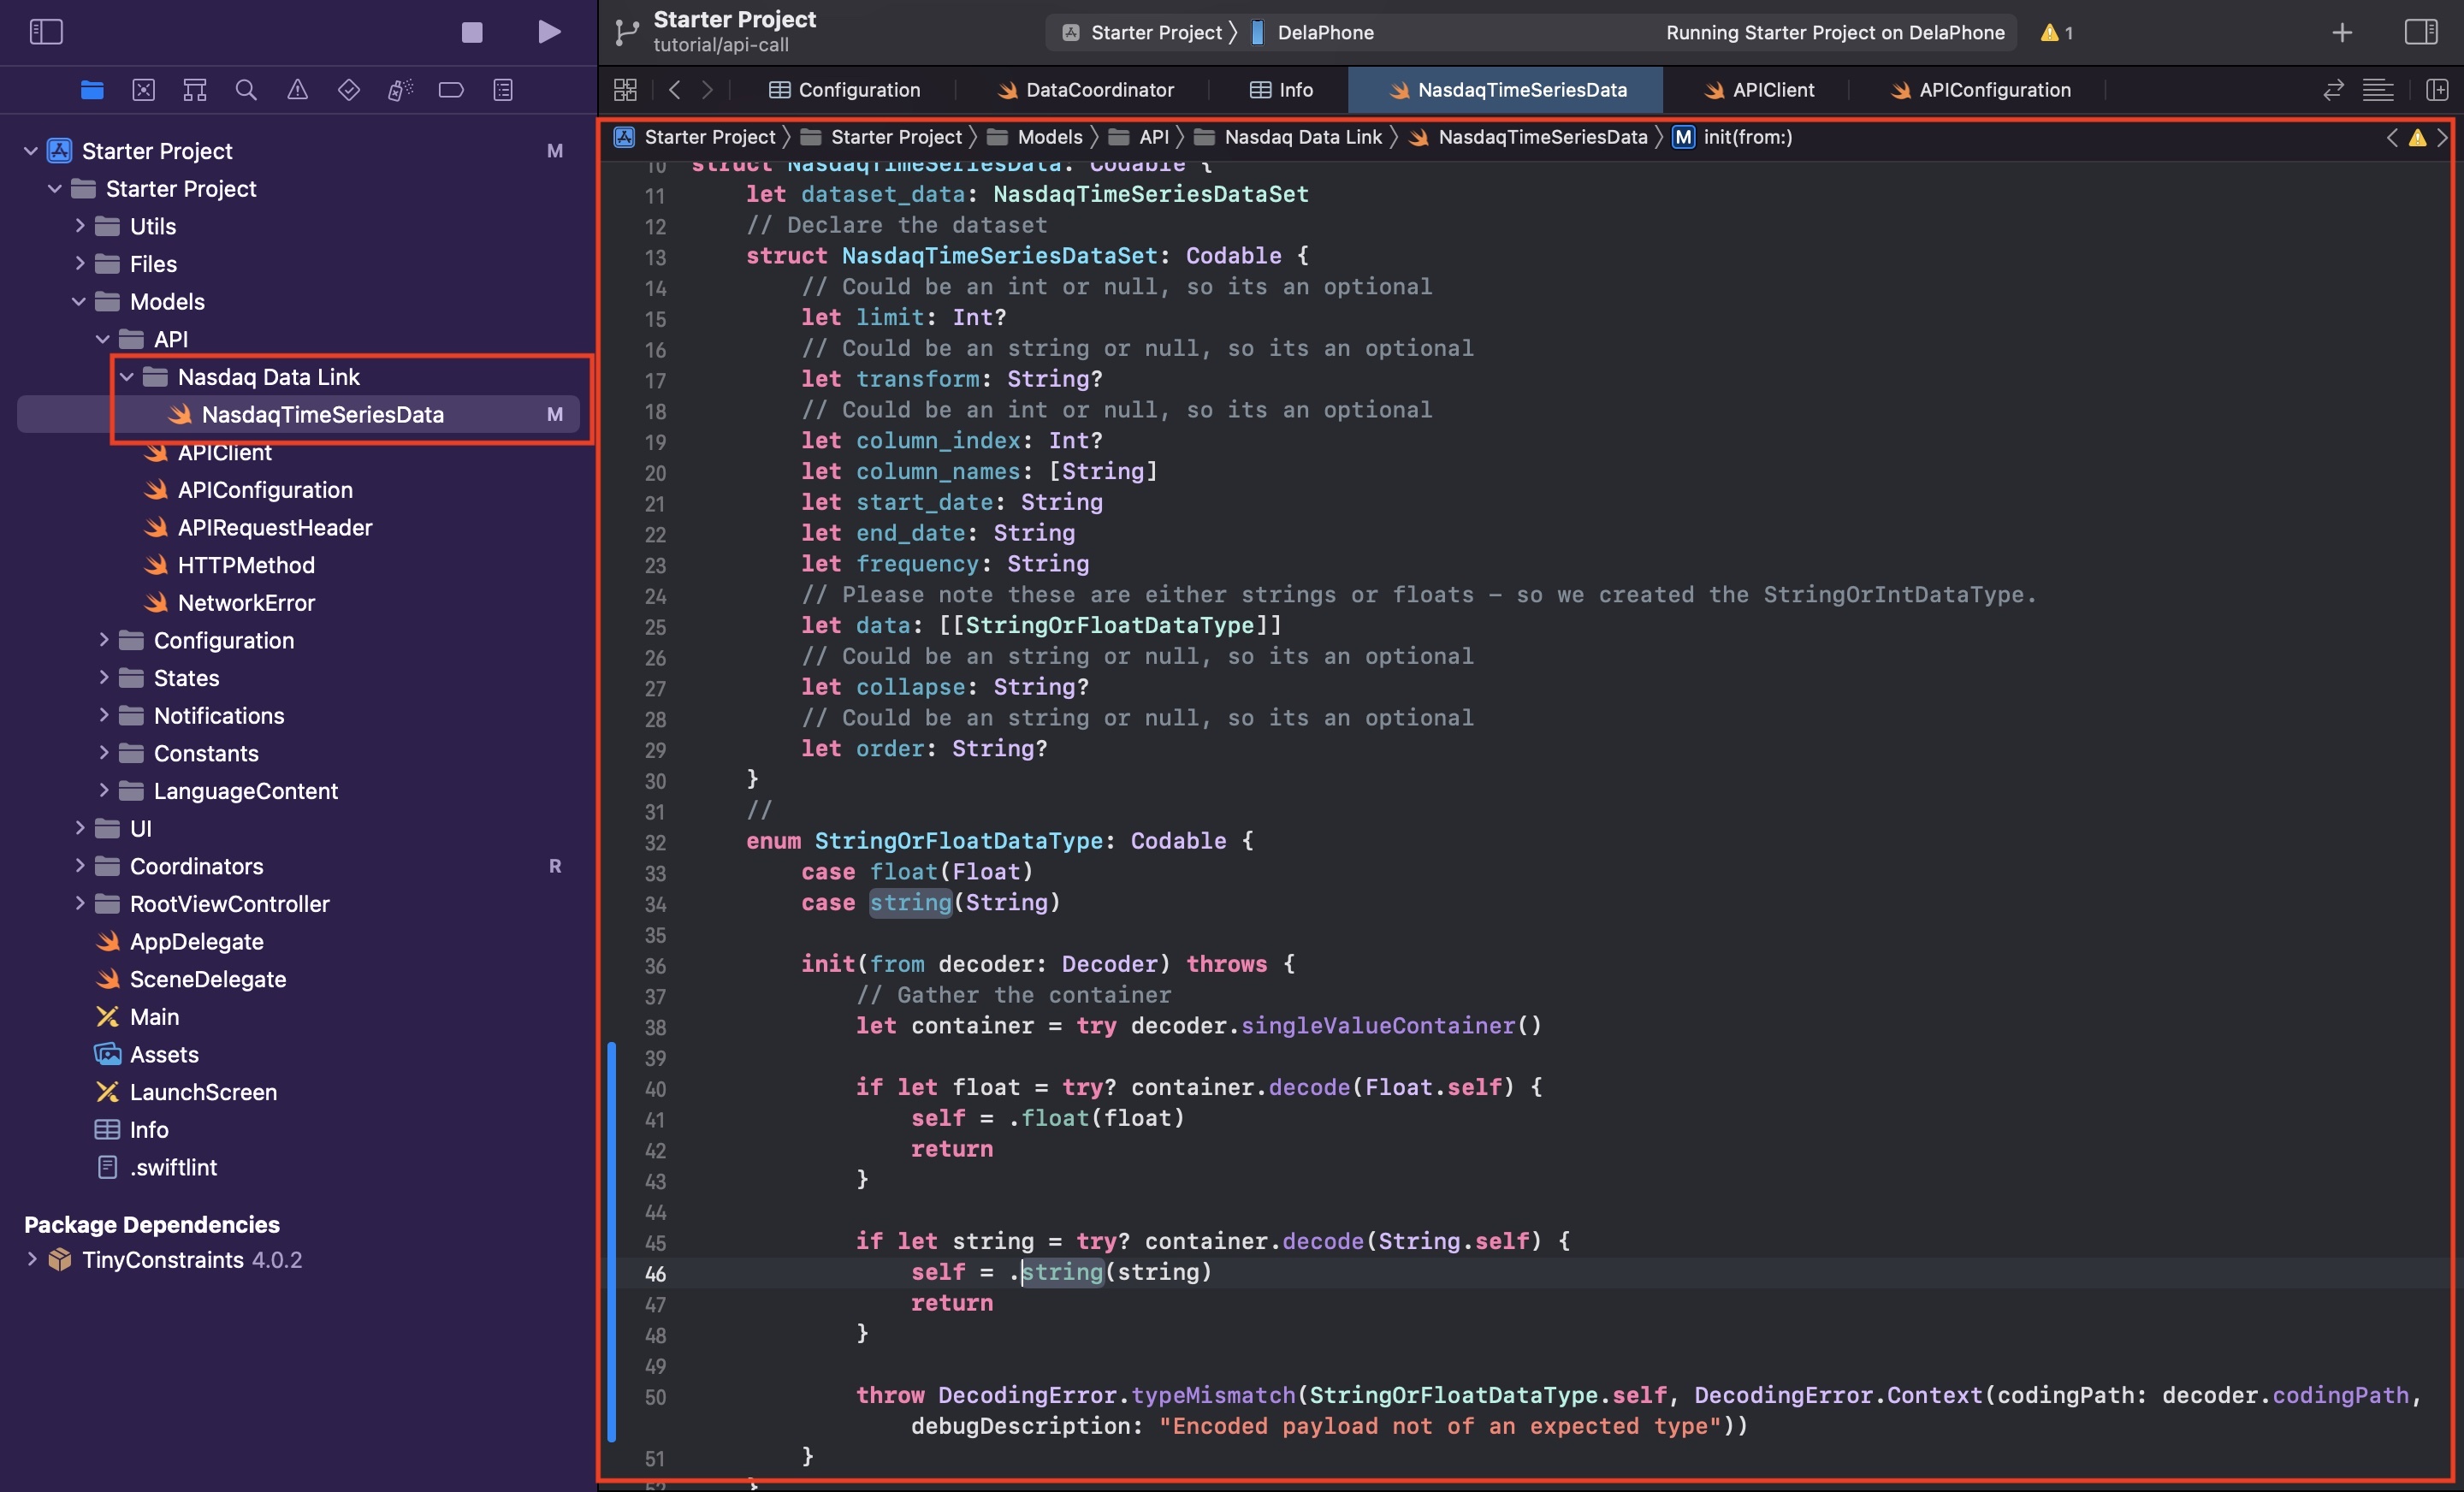
Under the API folder, create a new folder called Nasdaq Data Link. Within it create a new file called NasdaqTimeSeriesData.swift and paste in the code found below.
For information as to how we gathered the parameters pleased consult the link provided below.
Please note that the StringOrFloatDataType demonstrates how to create a Codable that has a variable type - in this case its either a String or a Float, but it could be any number of return types and must follow the pattern shown above.
Incase its not clear, the pattern involves:
- Creating an enum that is a Codable
- Declaring the types with the given return types (i.e. type(Type) as shown by .float(Float))
- Attempting to decode one by one, and if failed, return the error.
Step Four: Declare and initialize your API Client
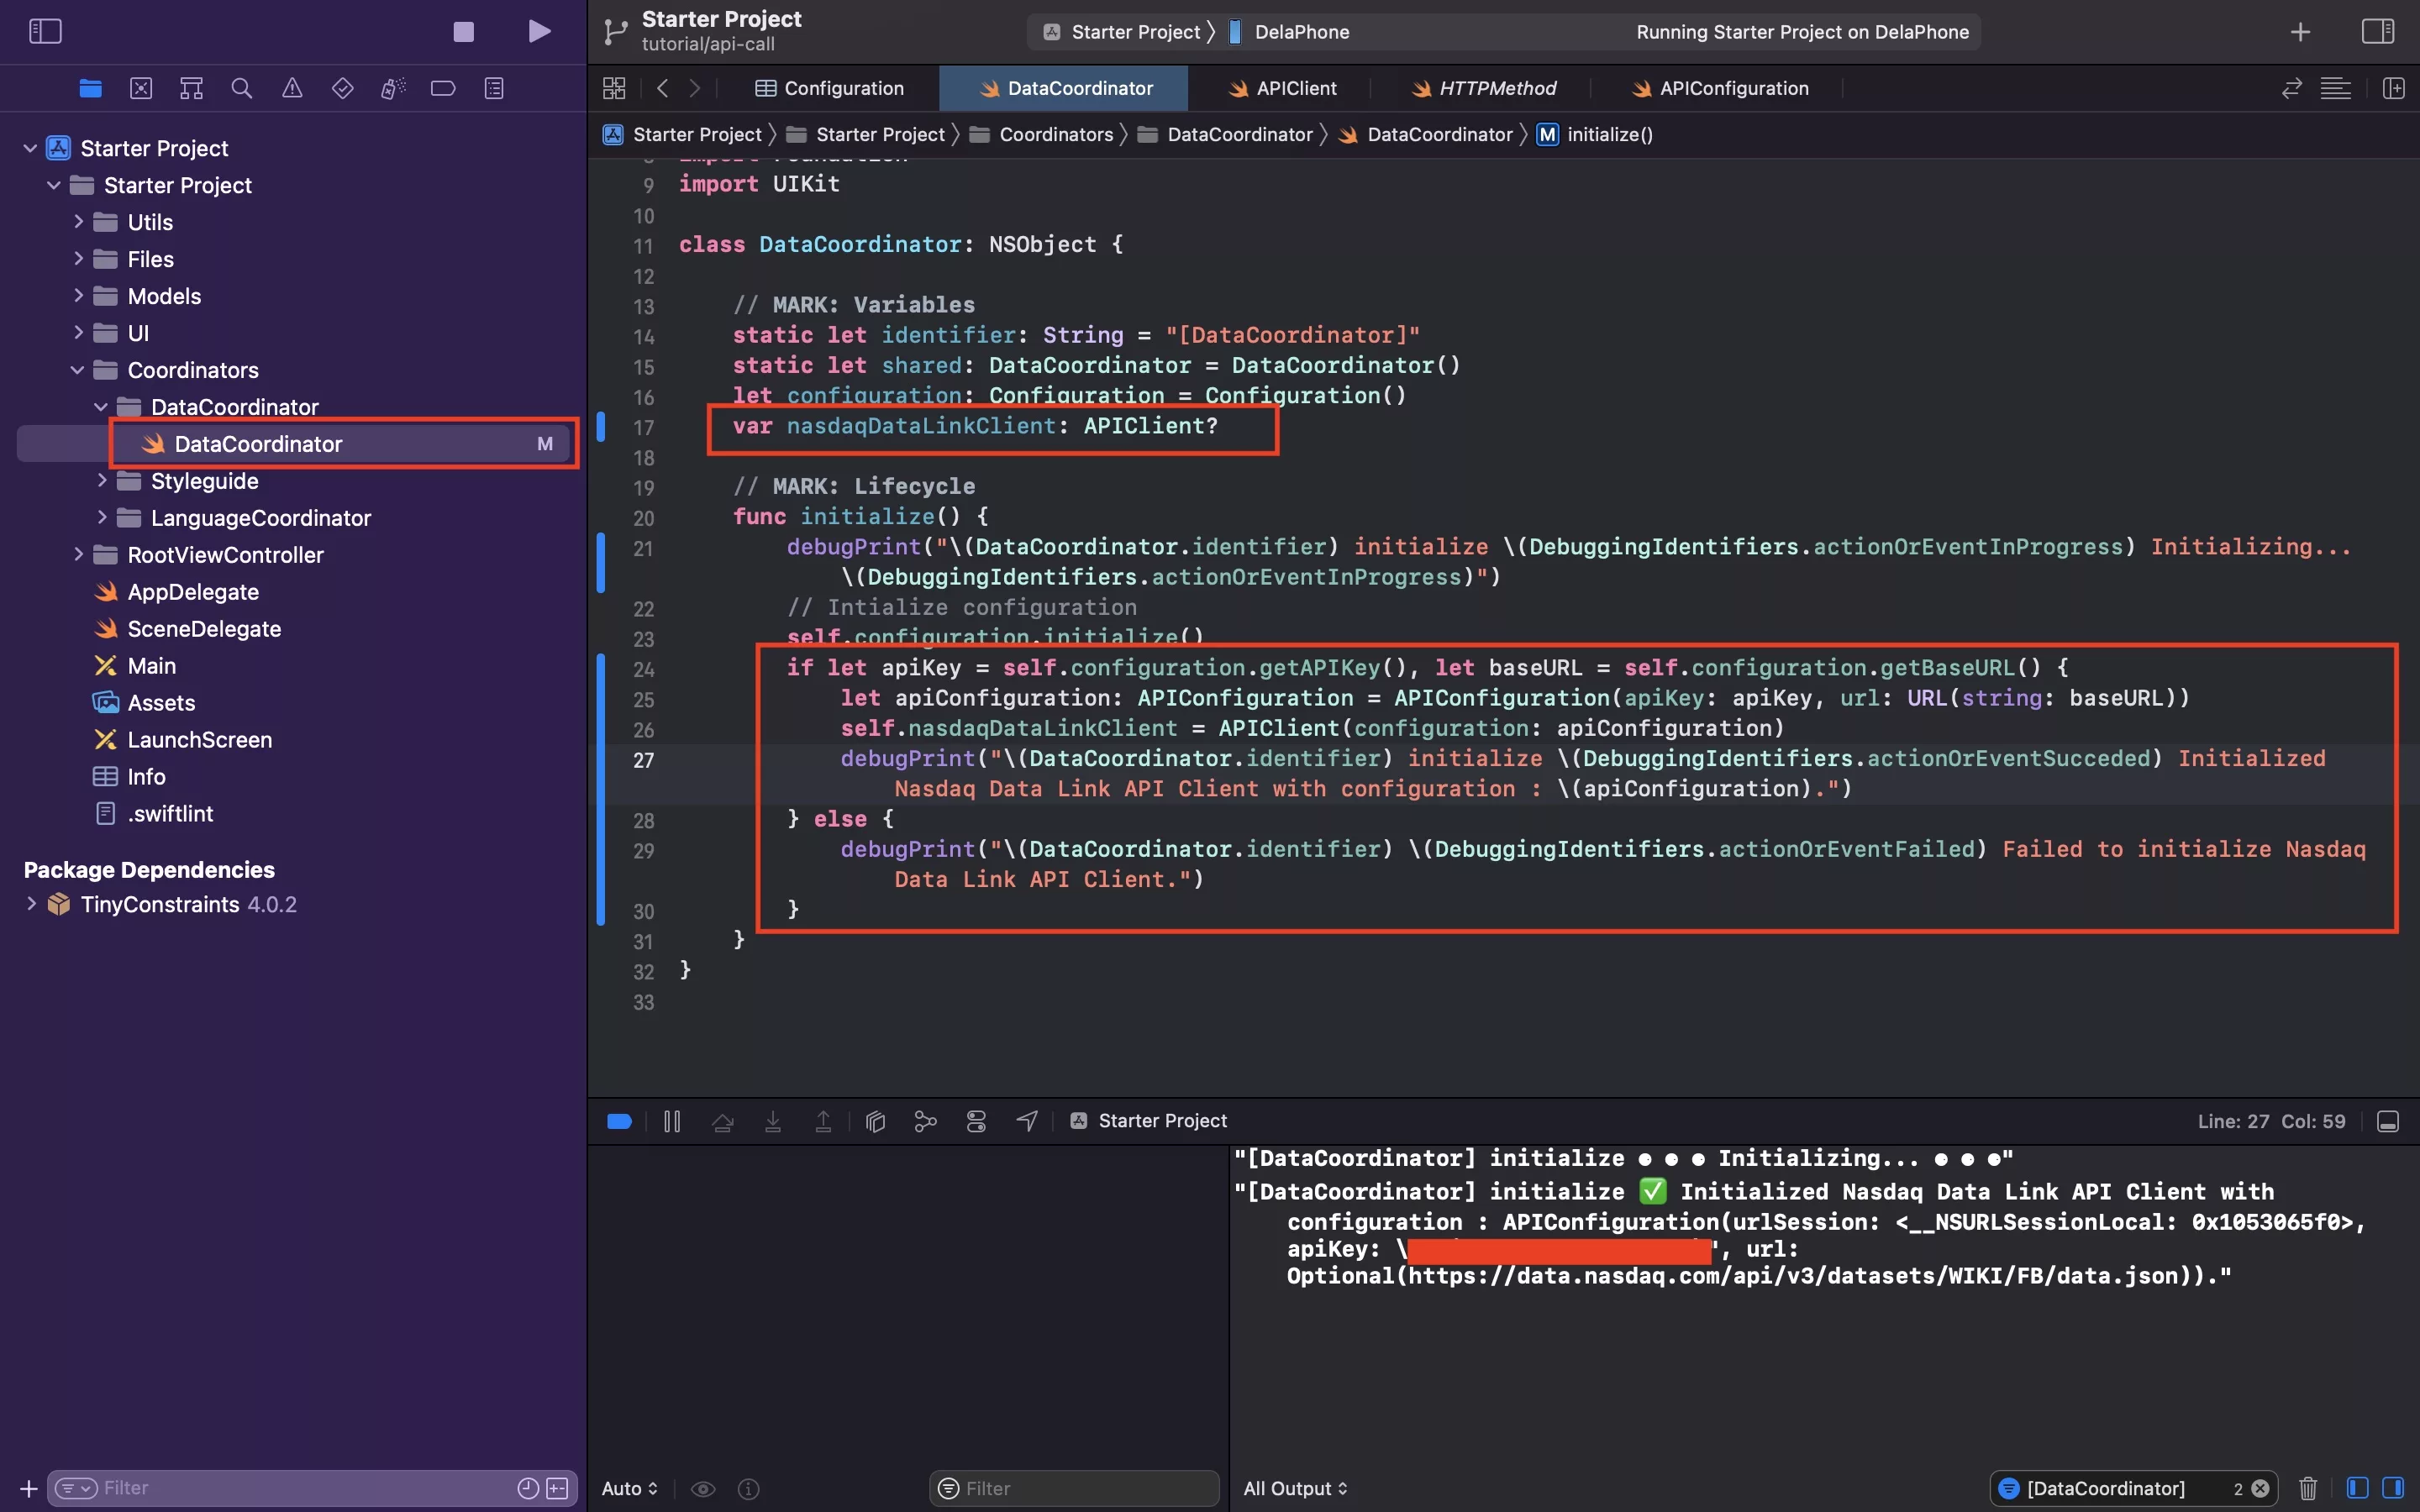
In DataCoordinator.swift declare a nasdaqDataLinkClient variable and initialize it.
Sample code available below.
Please note that the API call is part of the sample code, which is declared in the next step.
Step Five: Create the API Extension
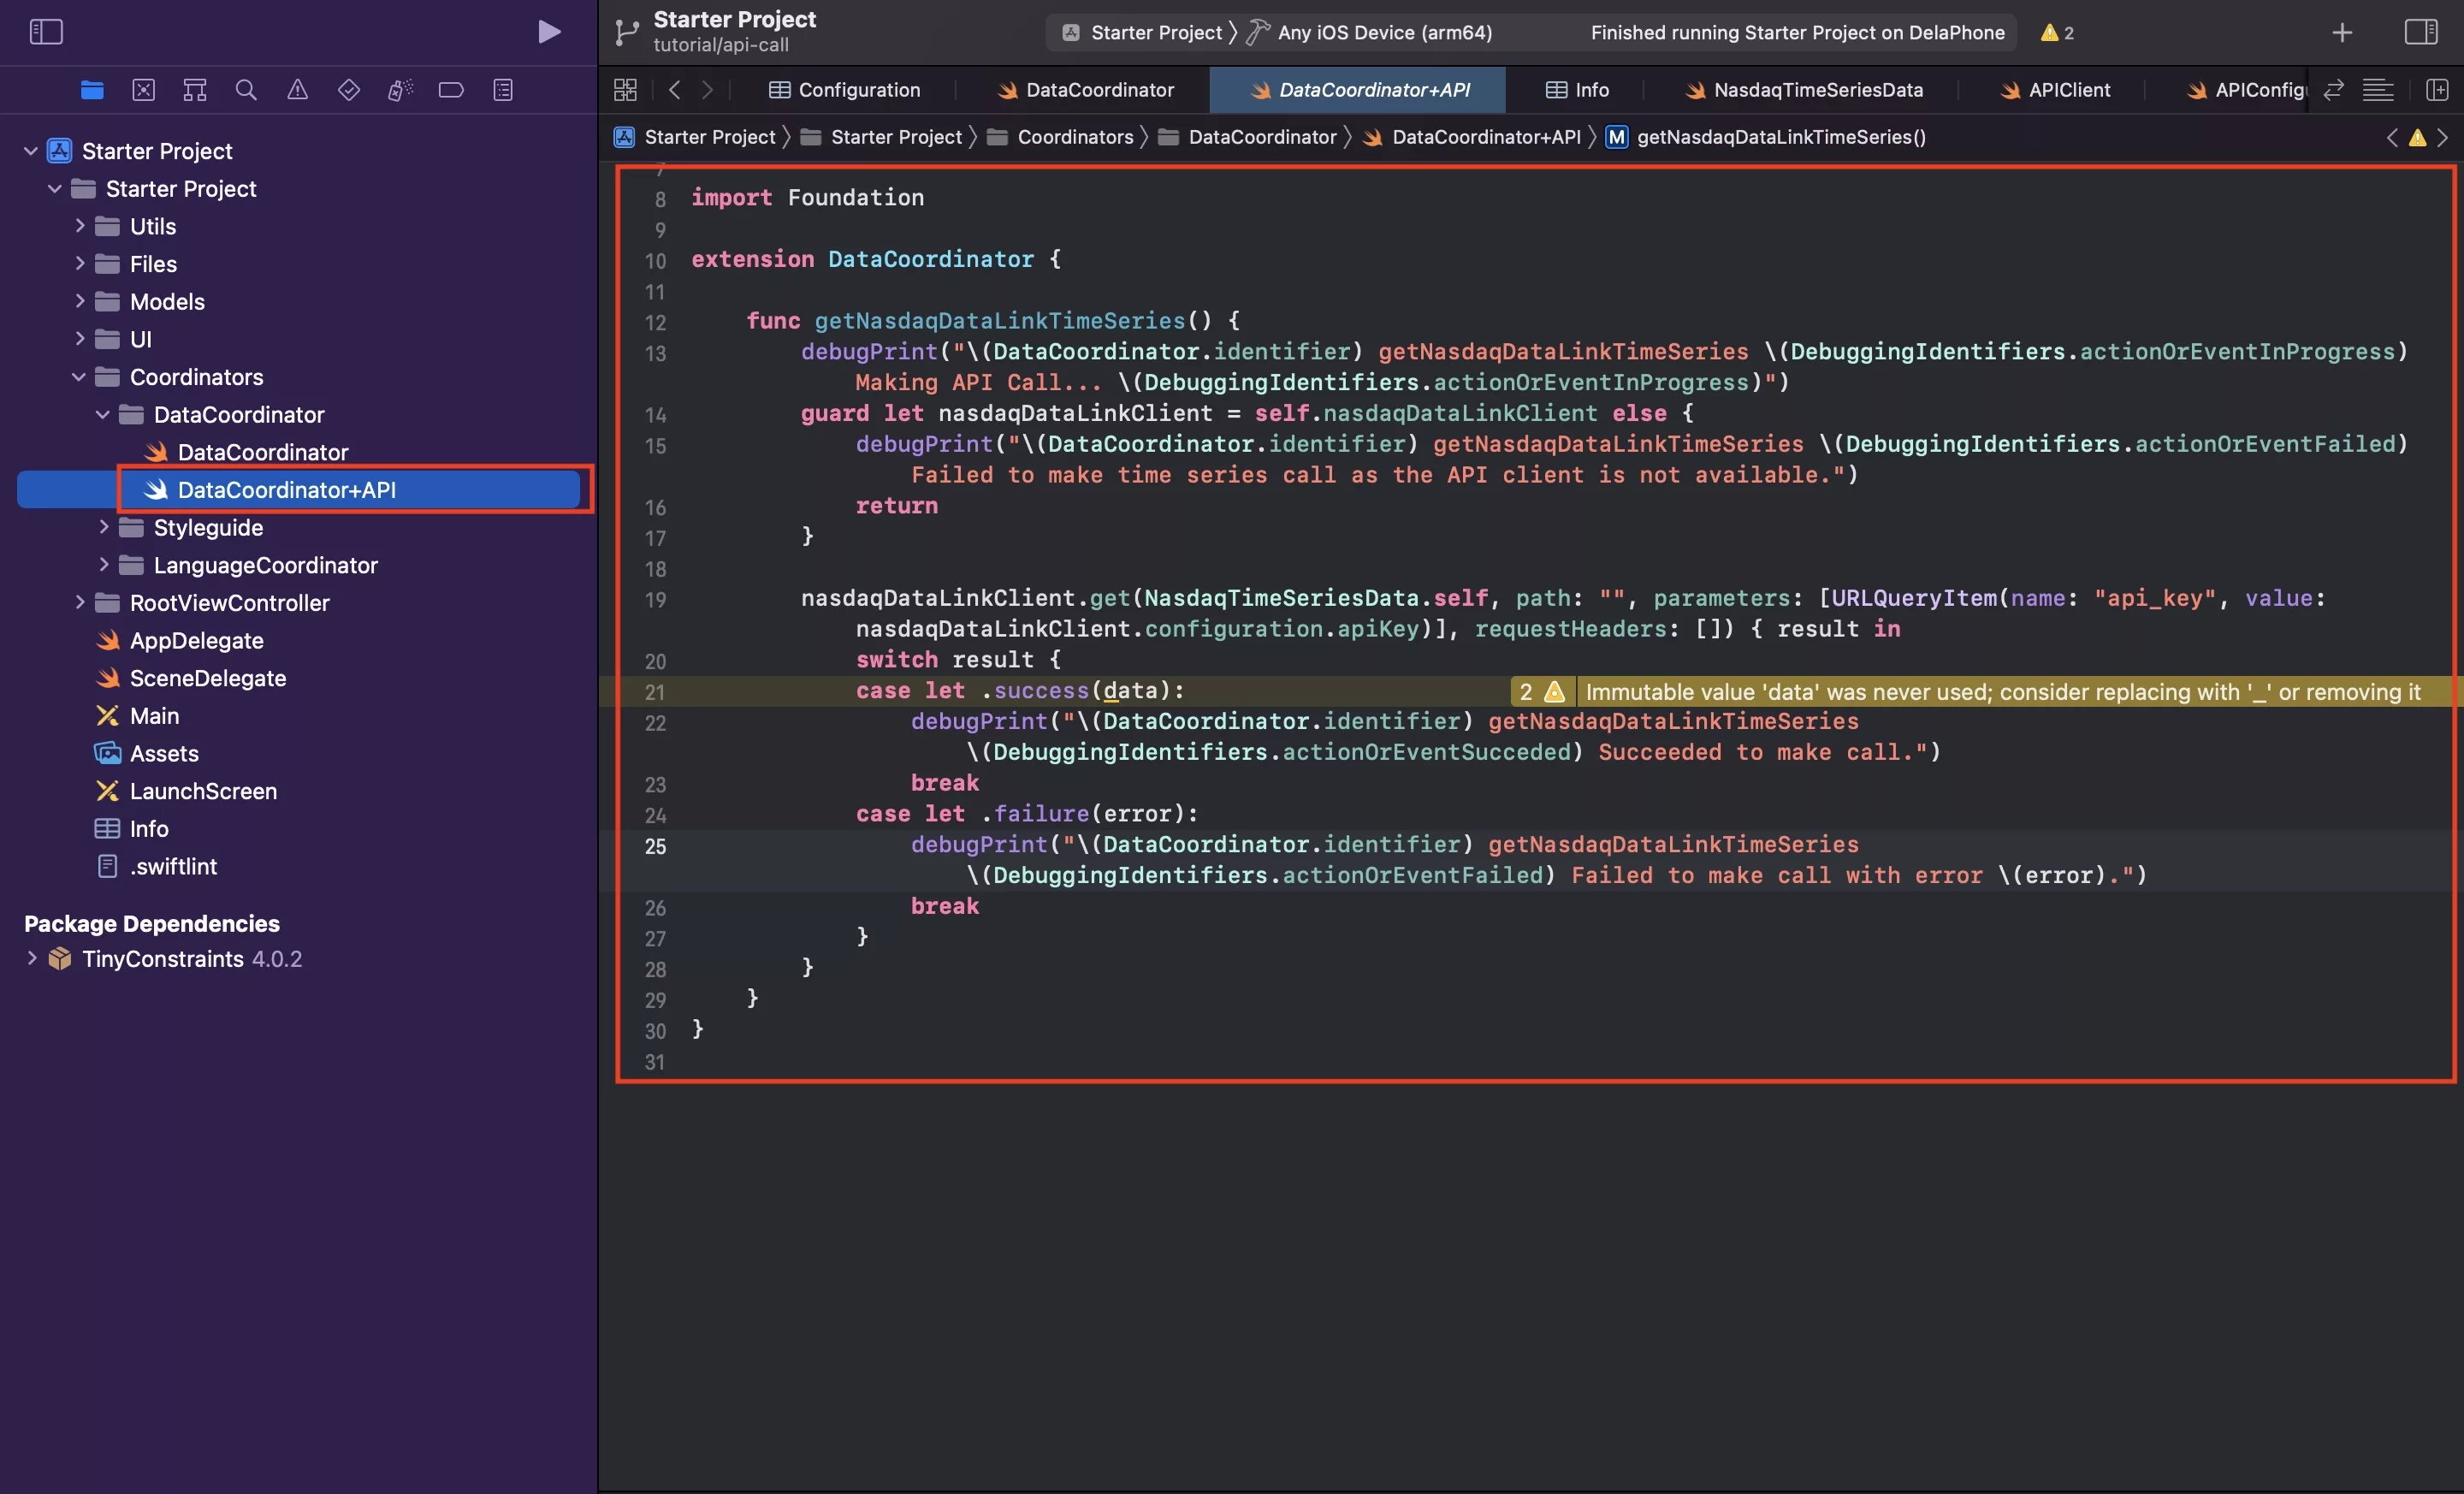
In the DataCoordinator folder, create a new file called DataCoordinator+API.swift and paste in the code below.
Step Six: Verify
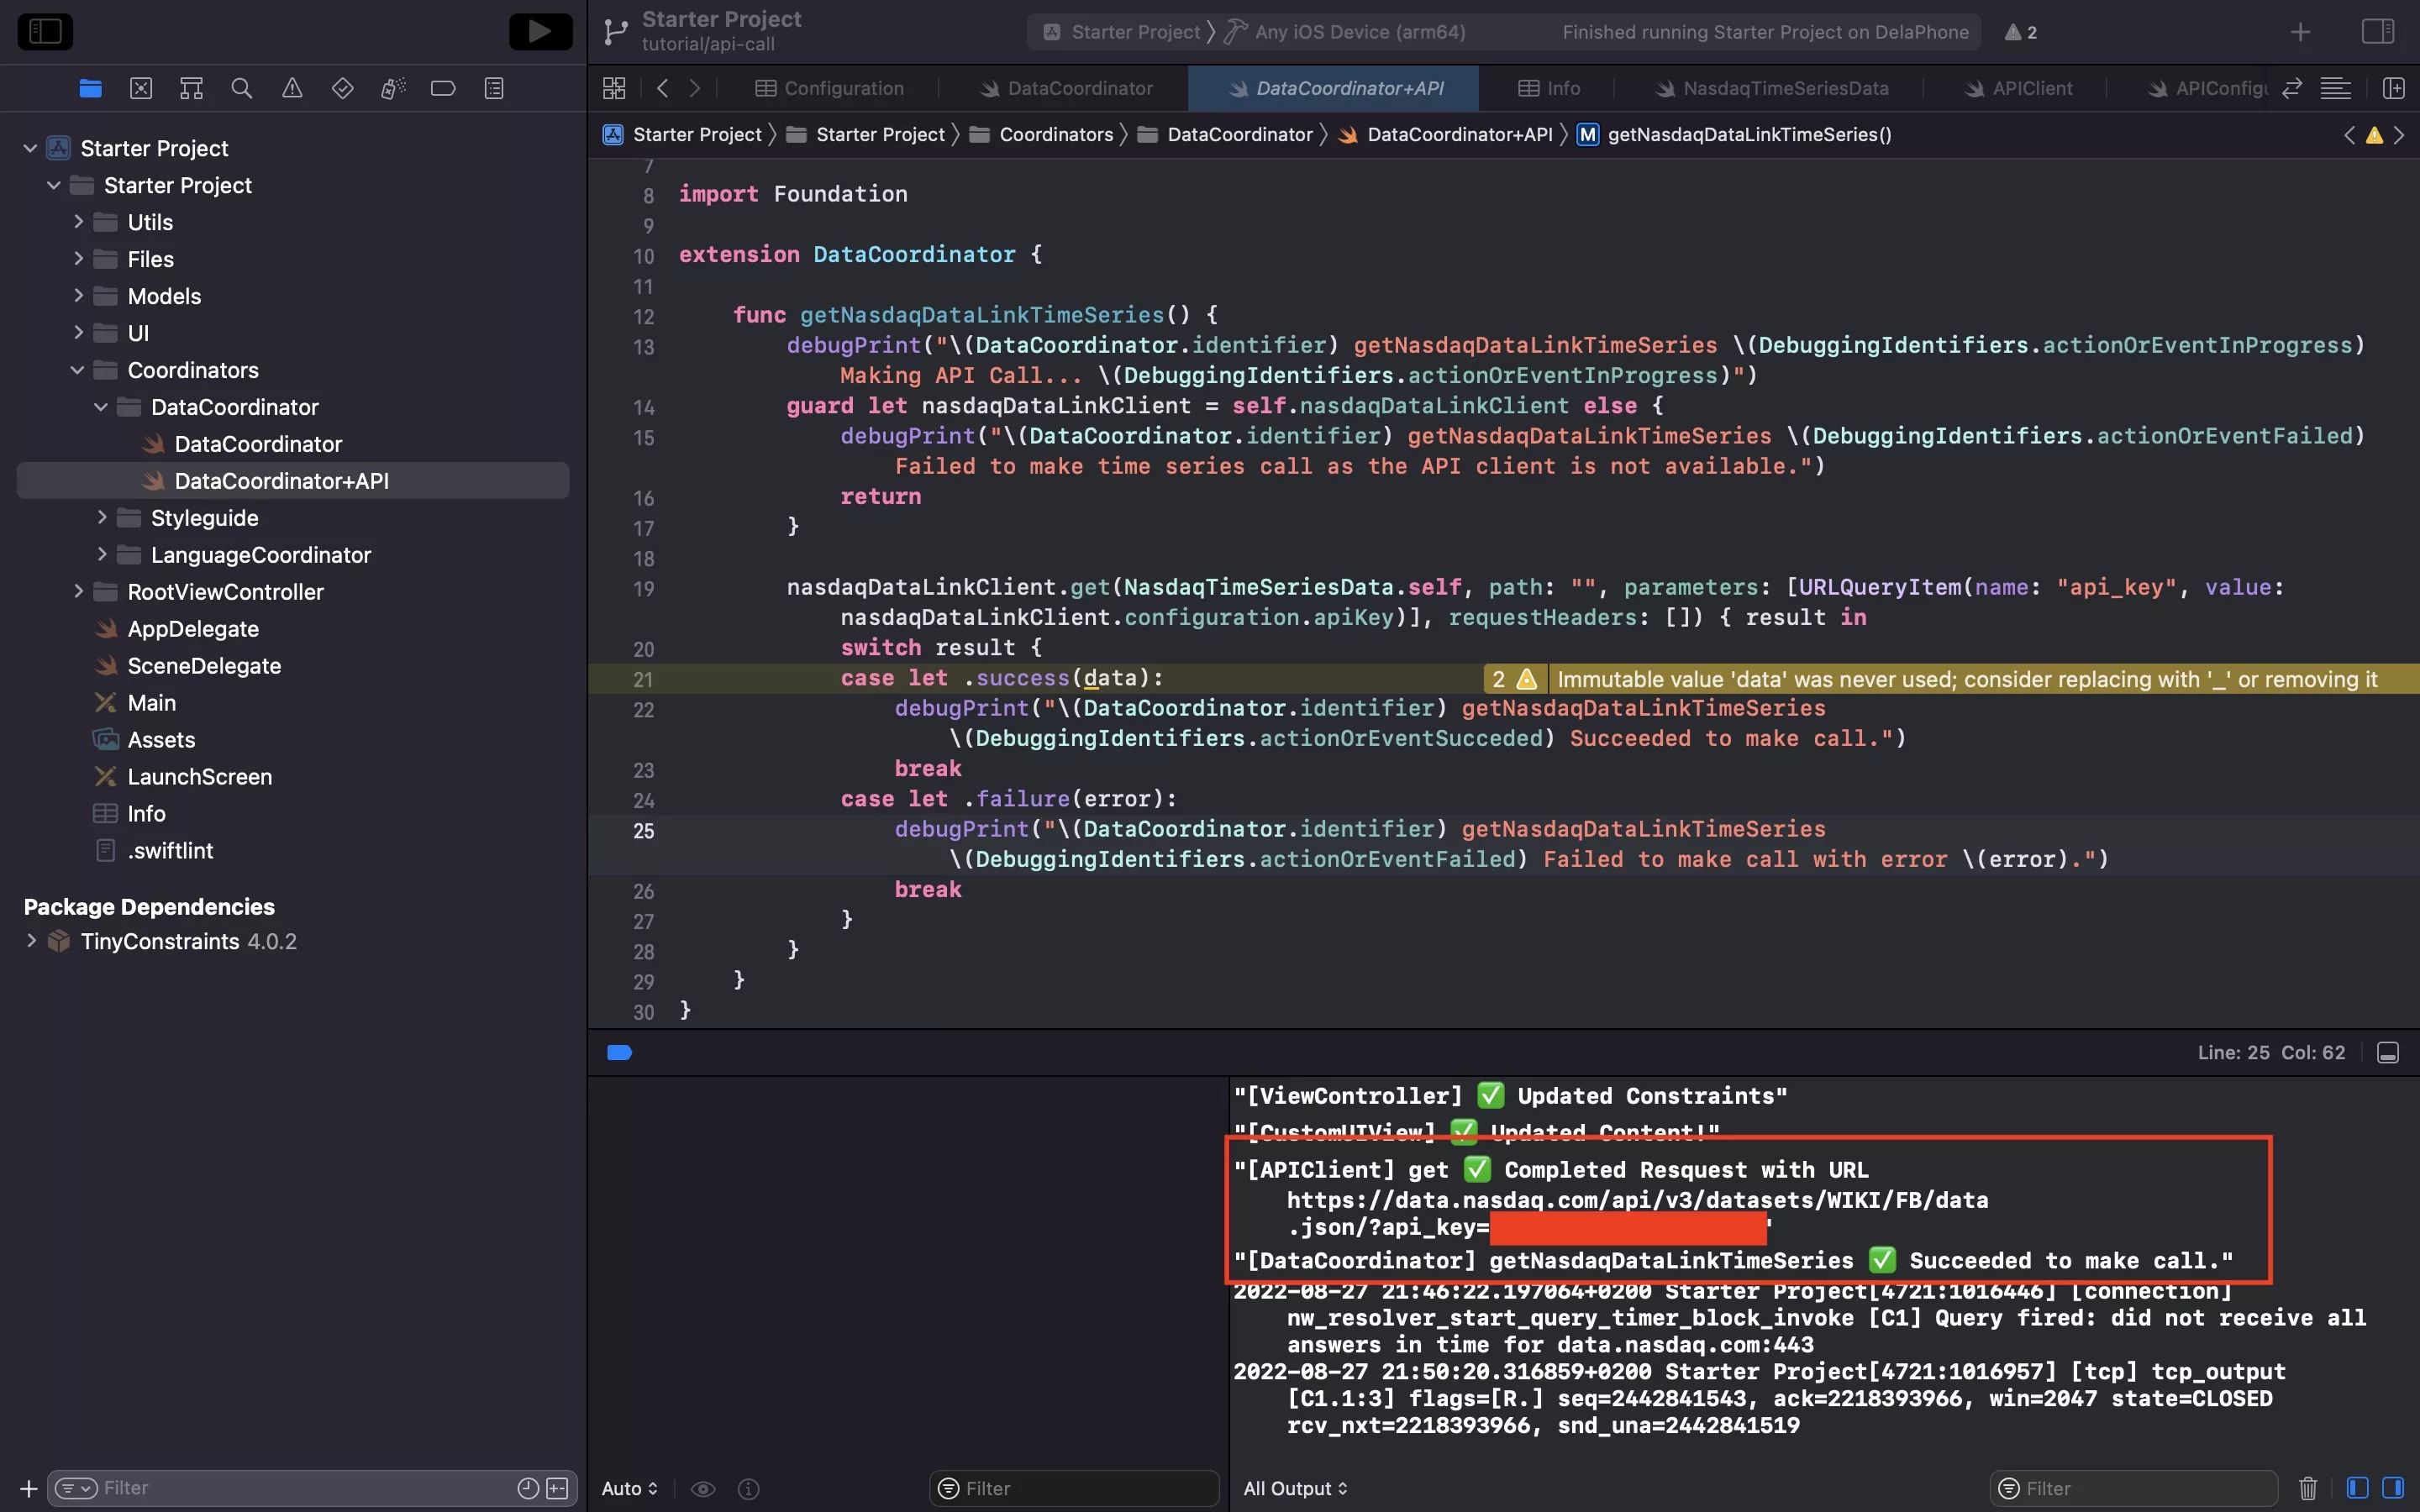
Run your app and verify that the call is successfully.
Please note that we called the API from DataCoordinator.swift within the initialization function, after the API Client was generated & that we did not print the data as it cannot be printed in the console as it is too large.
Any Questions
We are actively looking for feedback on how to improve this resource. Please send us a note to inquiries@delasign.com with any thoughts or feedback you may have.