How to change StoreKit Storefront in Xcode
A step by step guide on changing the StoreKit Storefront to a different locale to test In-App Purchases or Subscriptions in XCode.

A step by step guide on changing the StoreKit Storefront to a different locale to test In-App Purchases or Subscriptions in XCode.
The guide was made using our Free iOS StoreKit 2 Open Source project which is recommended for developers or business folk wishing to learn about how In-App Purchases or Subscriptions work and the code behind them.
In order for you to be able to change StoreKit Storefront and for it to work locally, you must have a StoreKit Configuration File setup and have StoreKit testing enabled.
To learn how to do this consult the guides below.
Step One: Select the StoreKit Configuration File
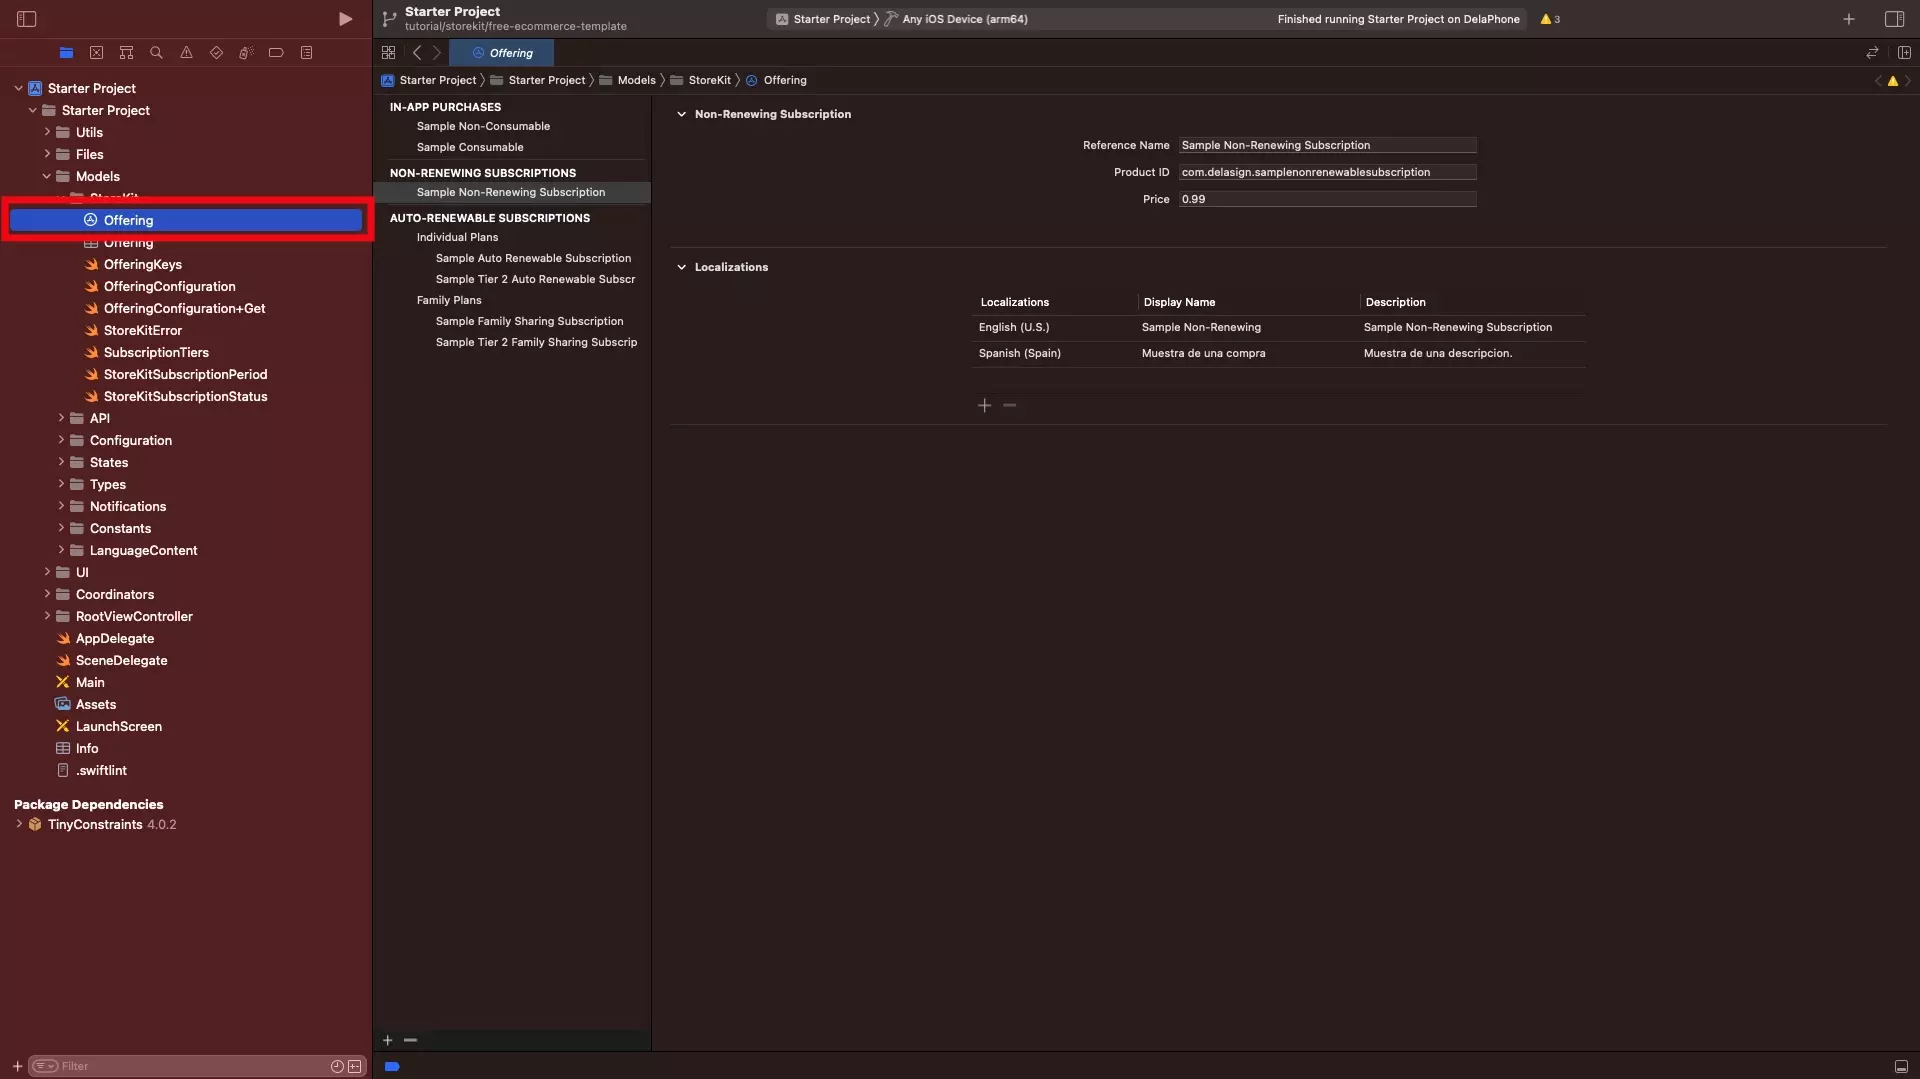
In XCode, select the StoreKit Configuration File.
Step Two: Change StoreKit Storefront
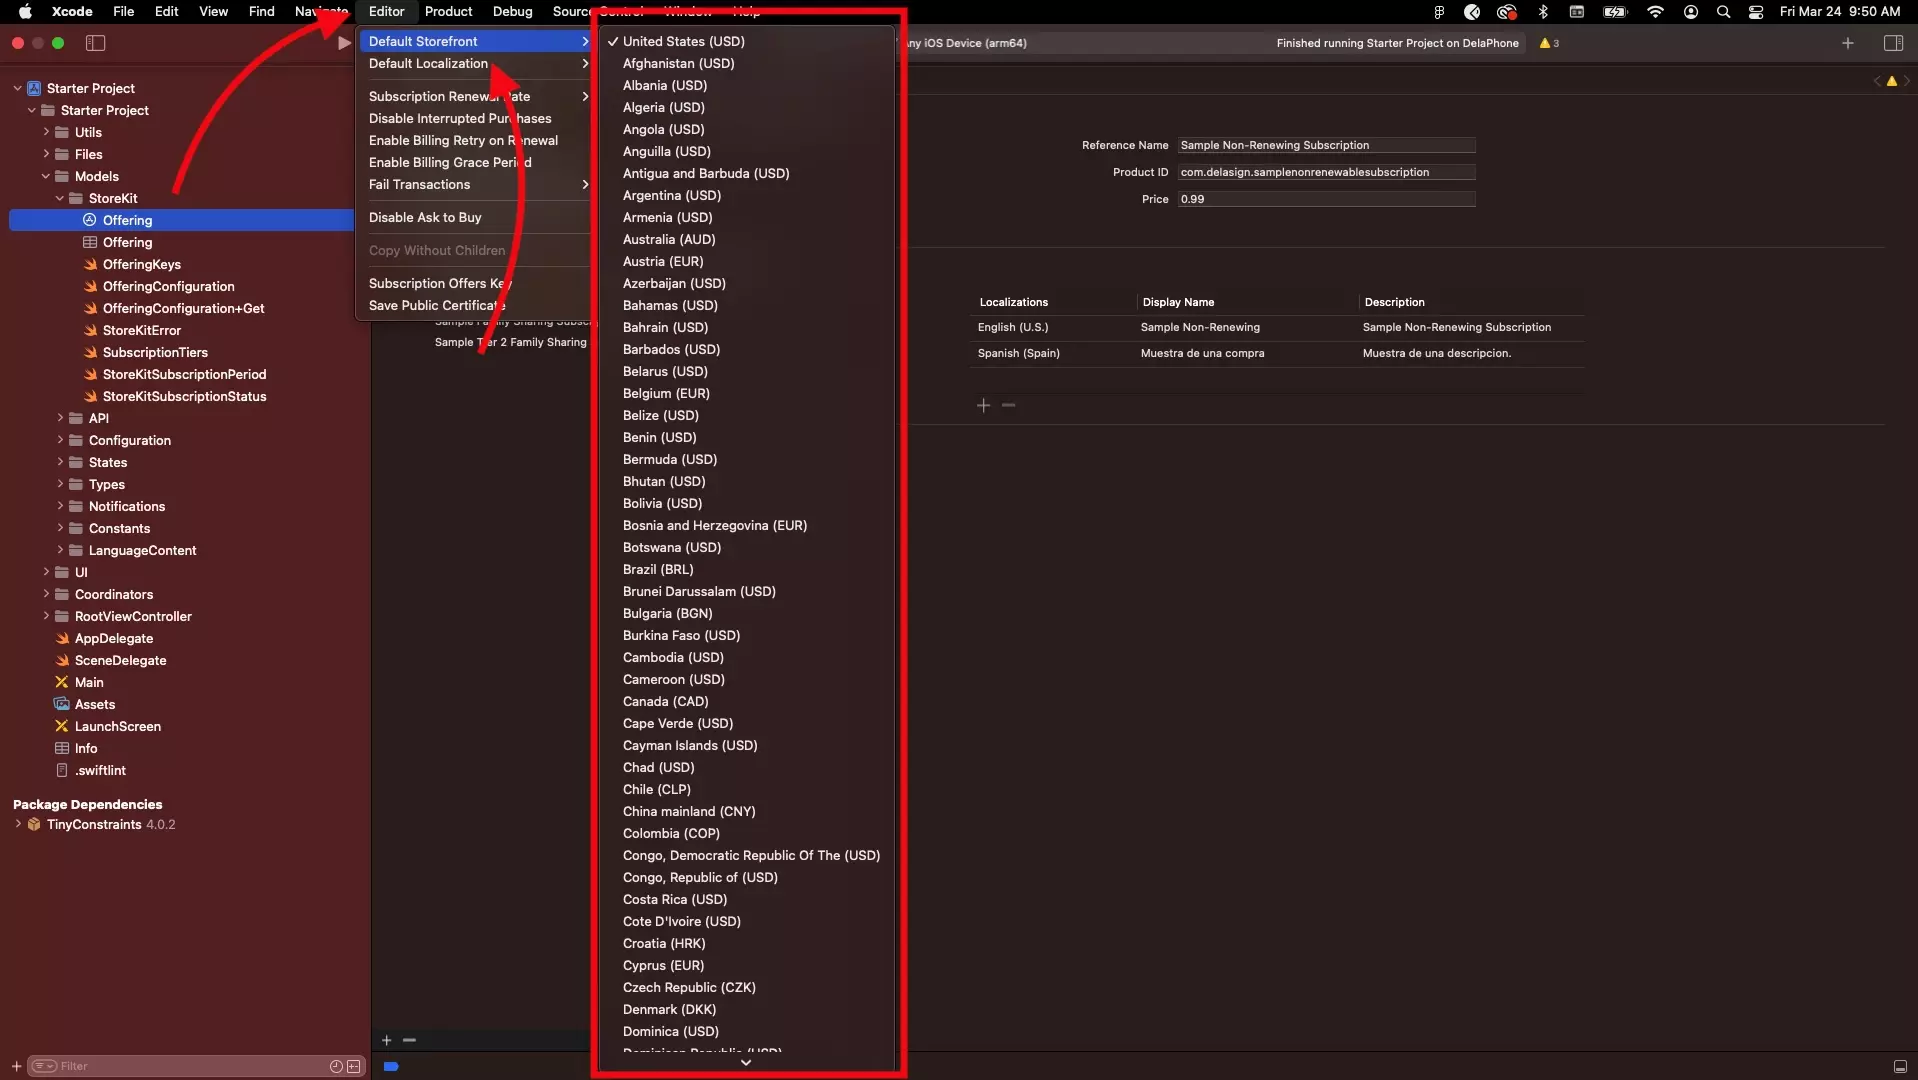
In the menu bar at the top, press Editor > Default Storefront and select the desired Storefront.
Step Three: Clean & Run
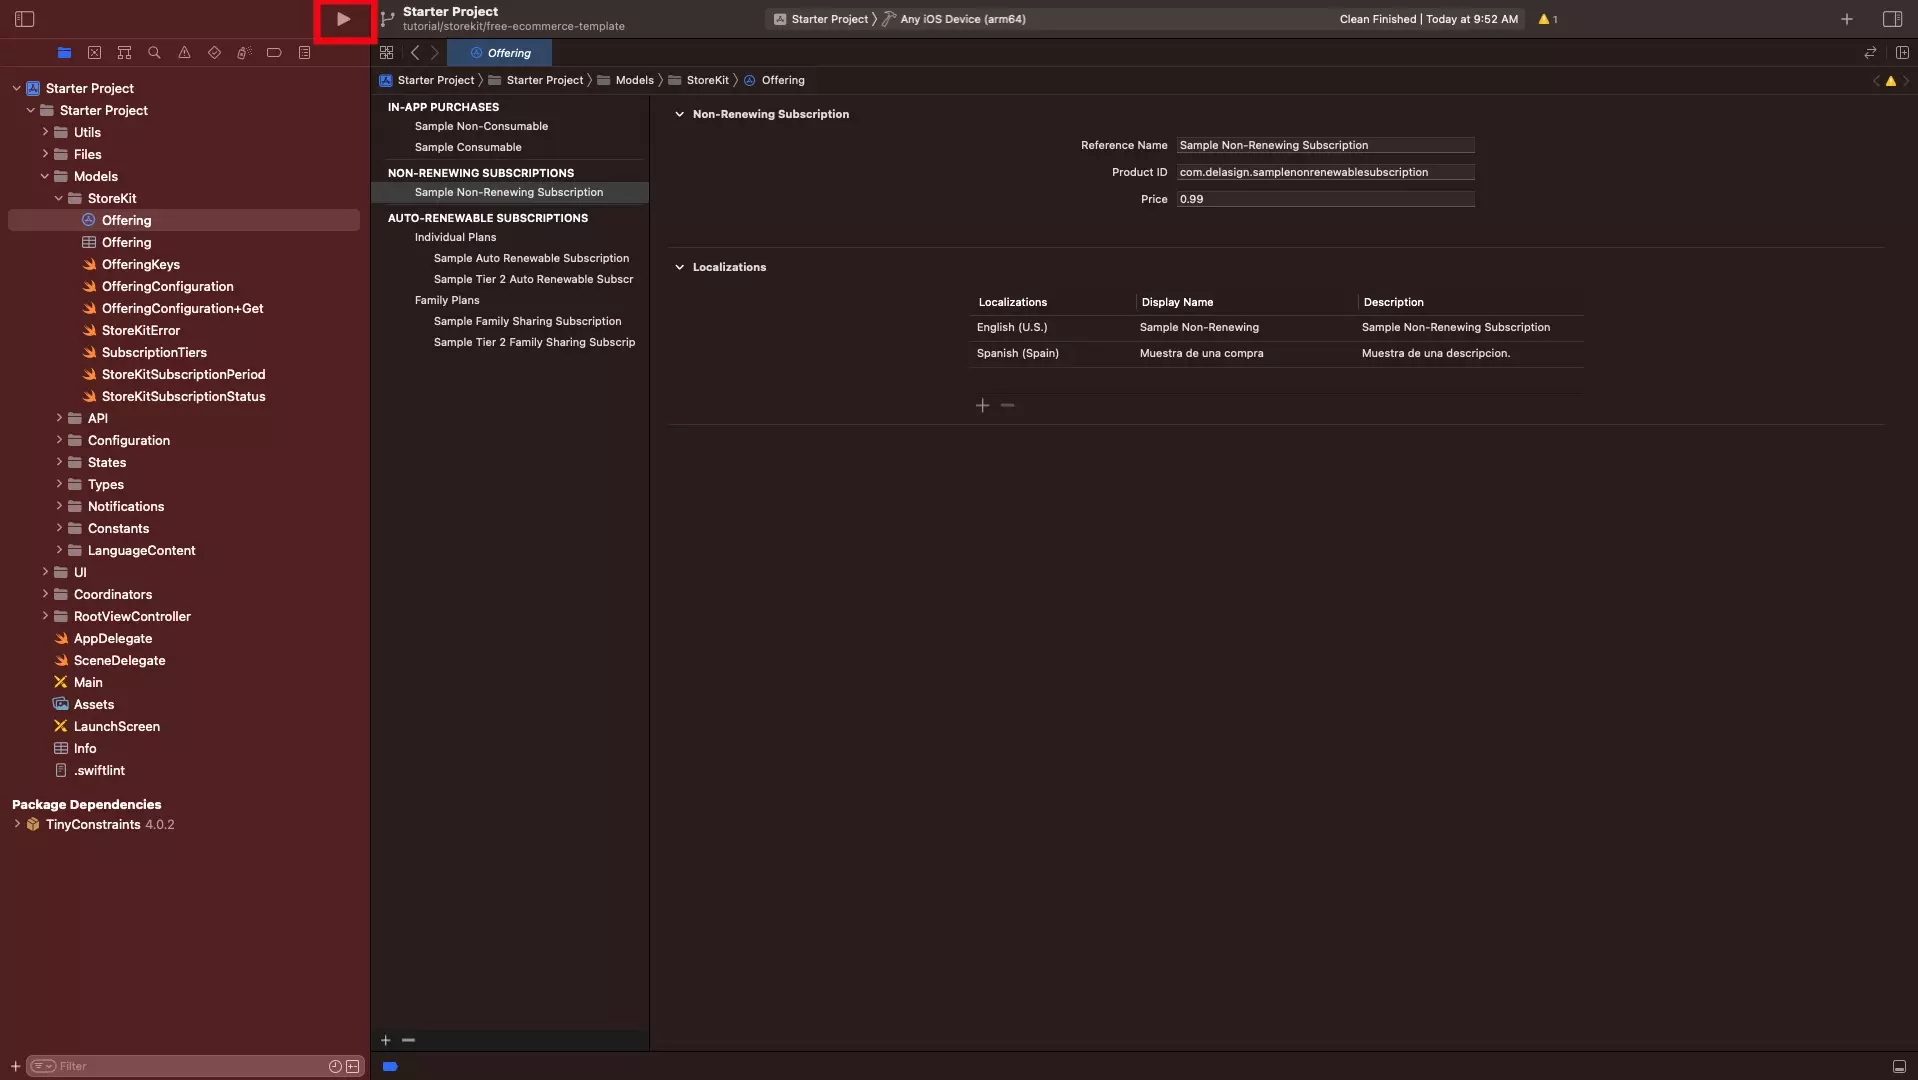
To guarantee that the change in Storefront takes place, clean the XCode project by pressing Command + Shift + K.
Then run the project by pressing Command + R or the play button in XCode.
Looking to learn more about developing apps with StoreKit 2?
Read our comprehensive development guide linked below to learn about all the secrets behind developing In-App Purchases and Subscriptions with StoreKit 2.