How to create a React, Typescript & ThreeJS GLSL Vite Project
A step by step guide on creating a GLSL powered React, Typescript & 3JS ViteJS project.

A step by step guide on creating a GLSL powered React, Typescript & 3JS ViteJS project.
SubscribeDownload Starter ProjectReact, ThreeJS & GLSL ResourcesStep One: Create Vite React & Typescript Project
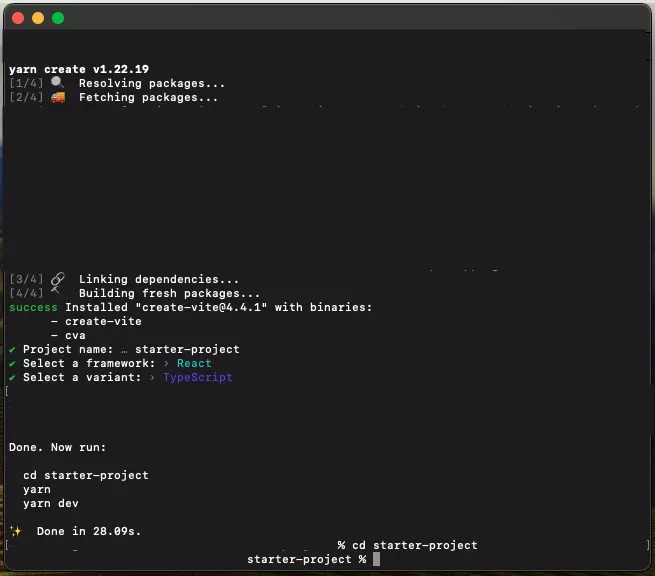
Open Terminal and create a project in the chosen directory using the line:
yarn create viteGive your project a name, select the React framework with the Typescript variant.
Once its generated, set the current directory to that of the project.
cd starter-projectStep Two: Add Dependencies

Run the following line in terminal
yarn add three; yarn add @types/three; yarn add vite-plugin-glsl; yarn add styled-components; yarn add @types/nodeStep Three: Start the project
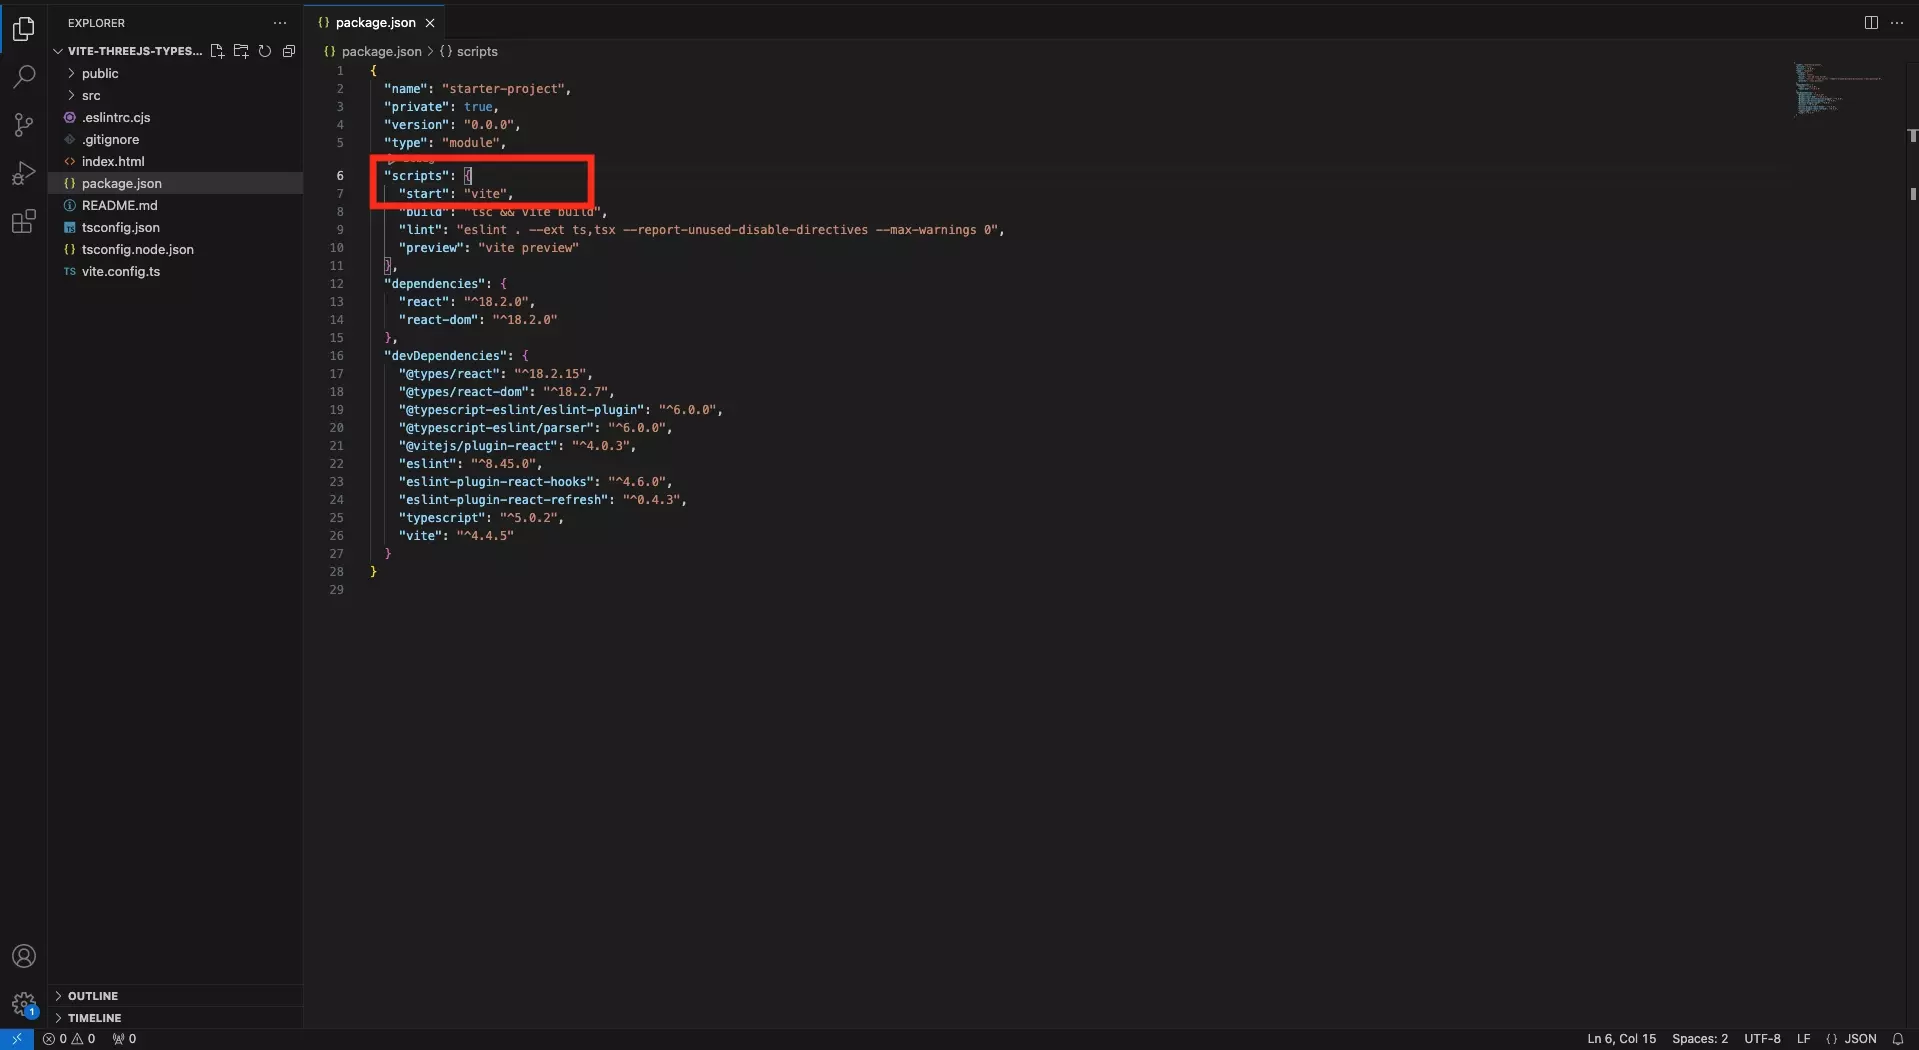
In the Package.json, update the "dev" script to "start."
Then, in Terminal, run the line below:
yarn startStep Four: Create the first ThreeJS scene

Follow the tutorial below to create a ThreeJS scene that exhibits a plane that uses a shader.
Step Five: Update the Shader to GLSL
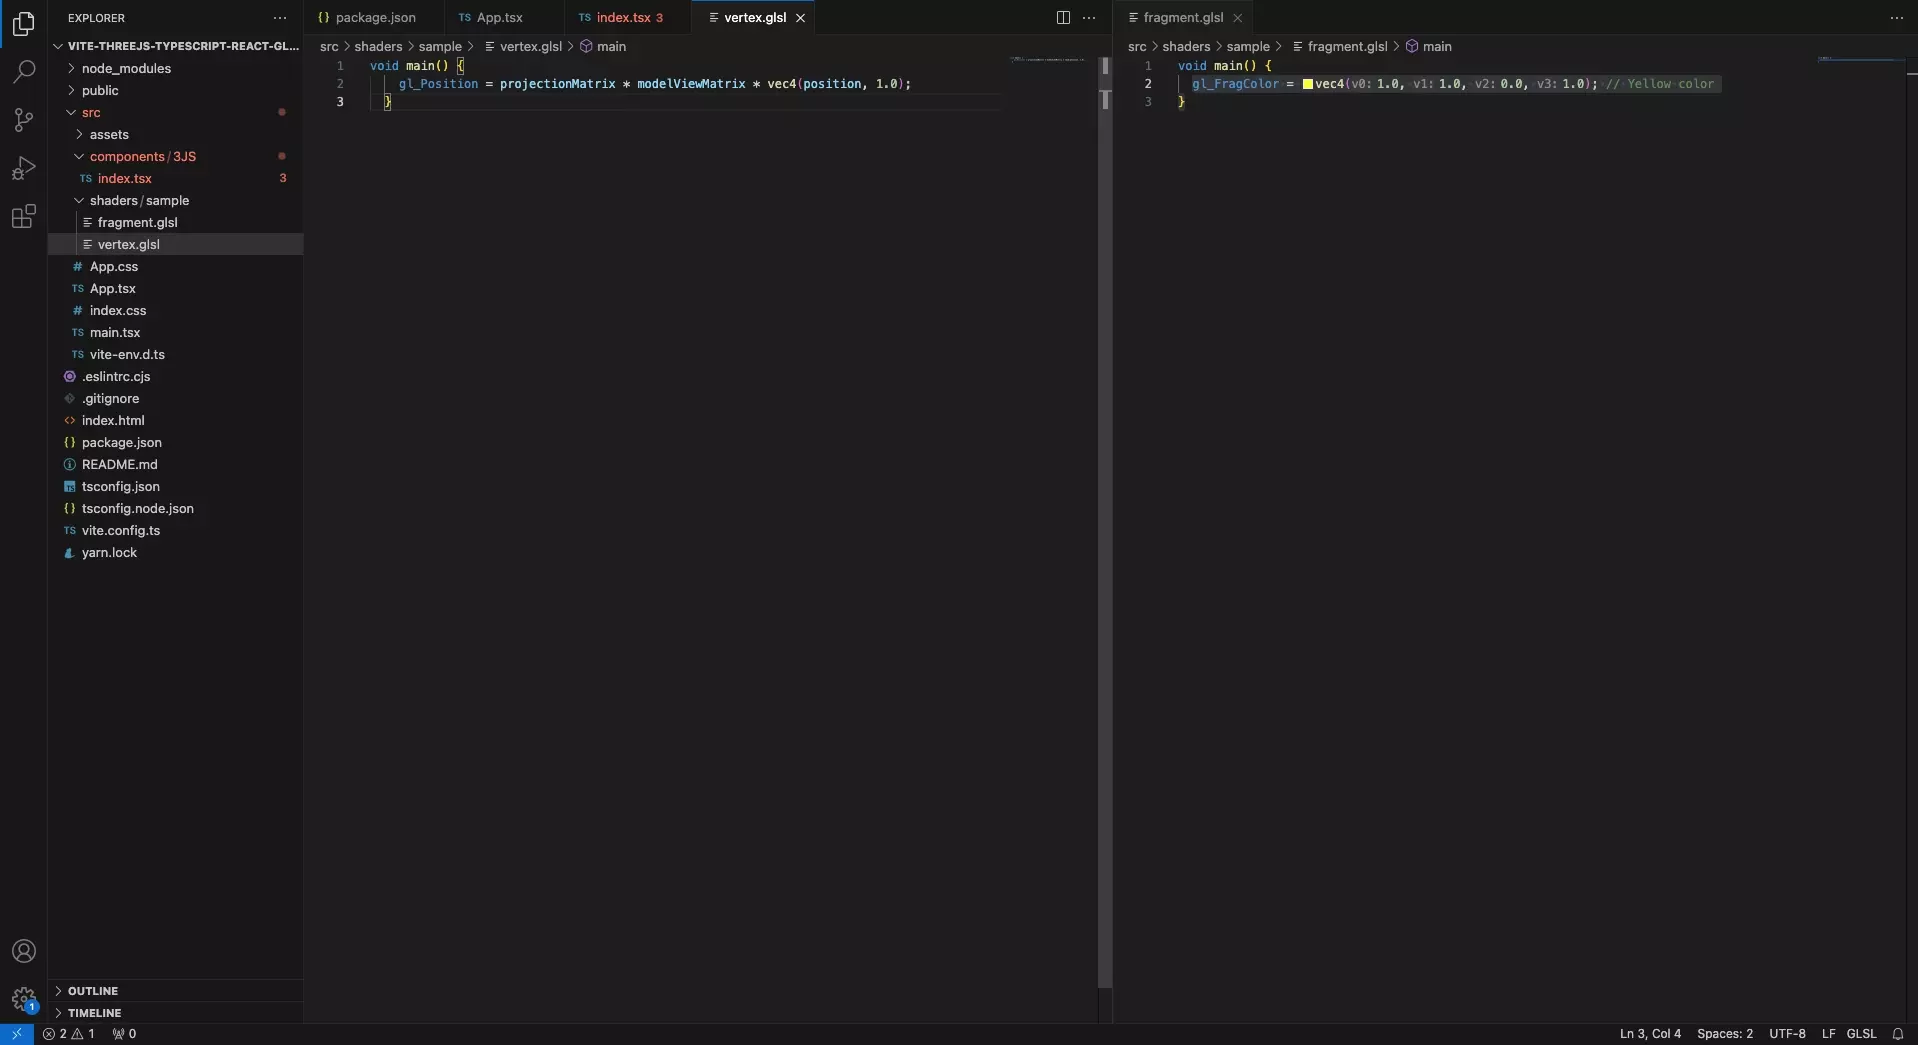
Convert the vertex and fragment shader to GLSL.
Step Six: Update the Imports
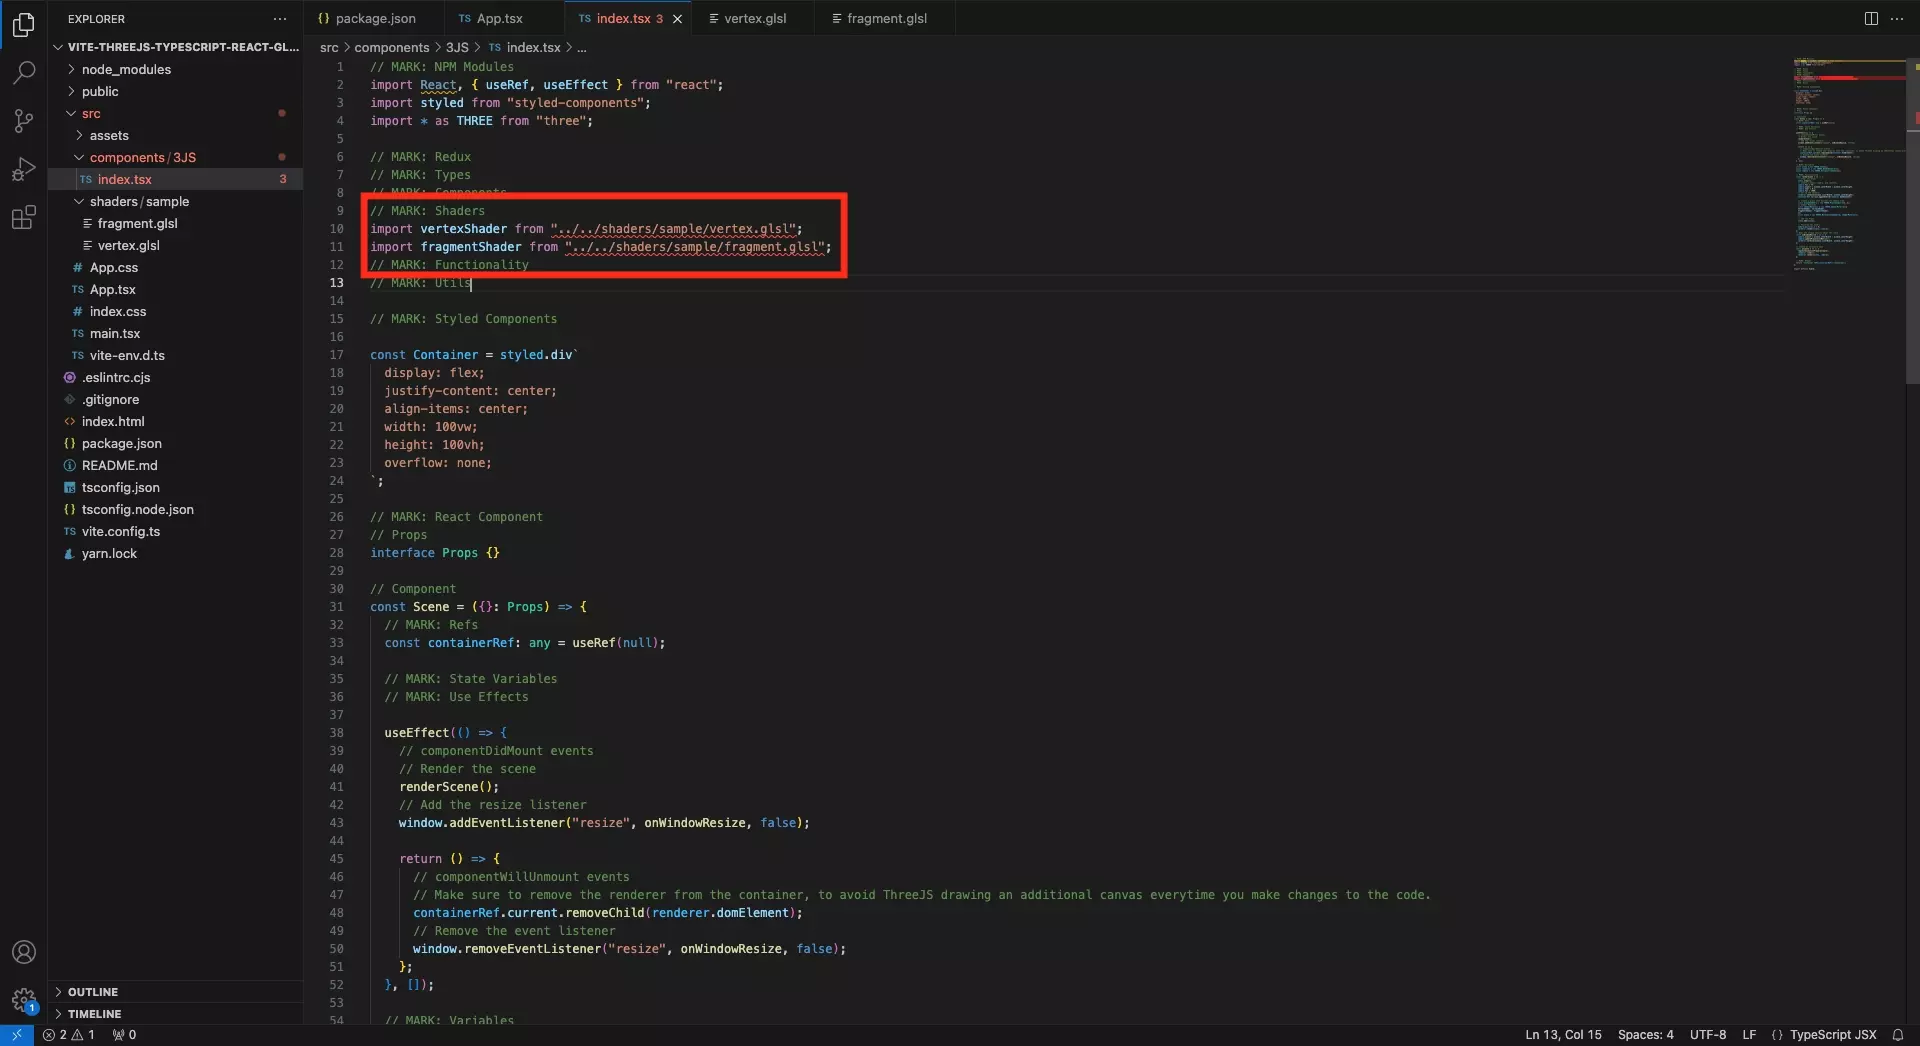
In the Scene, update the imports to .glsl.
Step Seven: Update the Vite Config
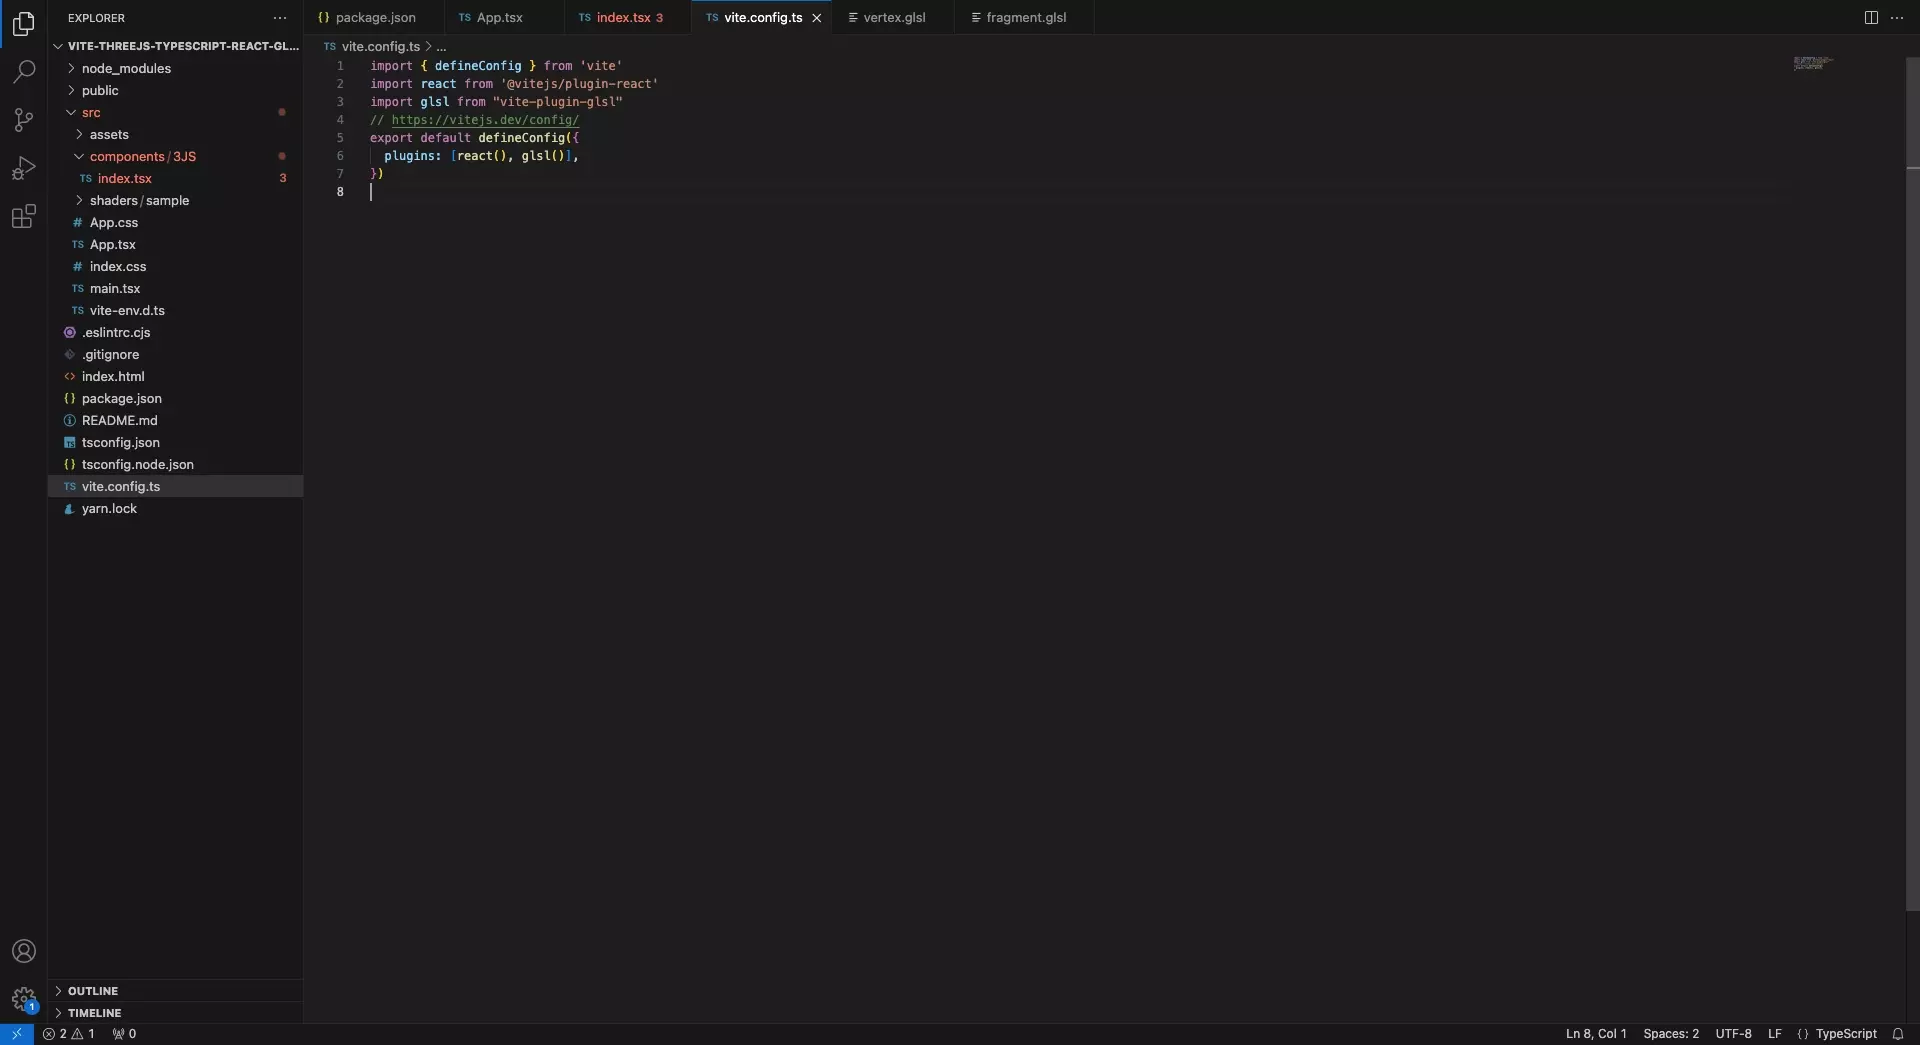
Update the vite.config.js file to make use of the vite-plugin-glsl.
Step Eight: Add the GLSL declaration
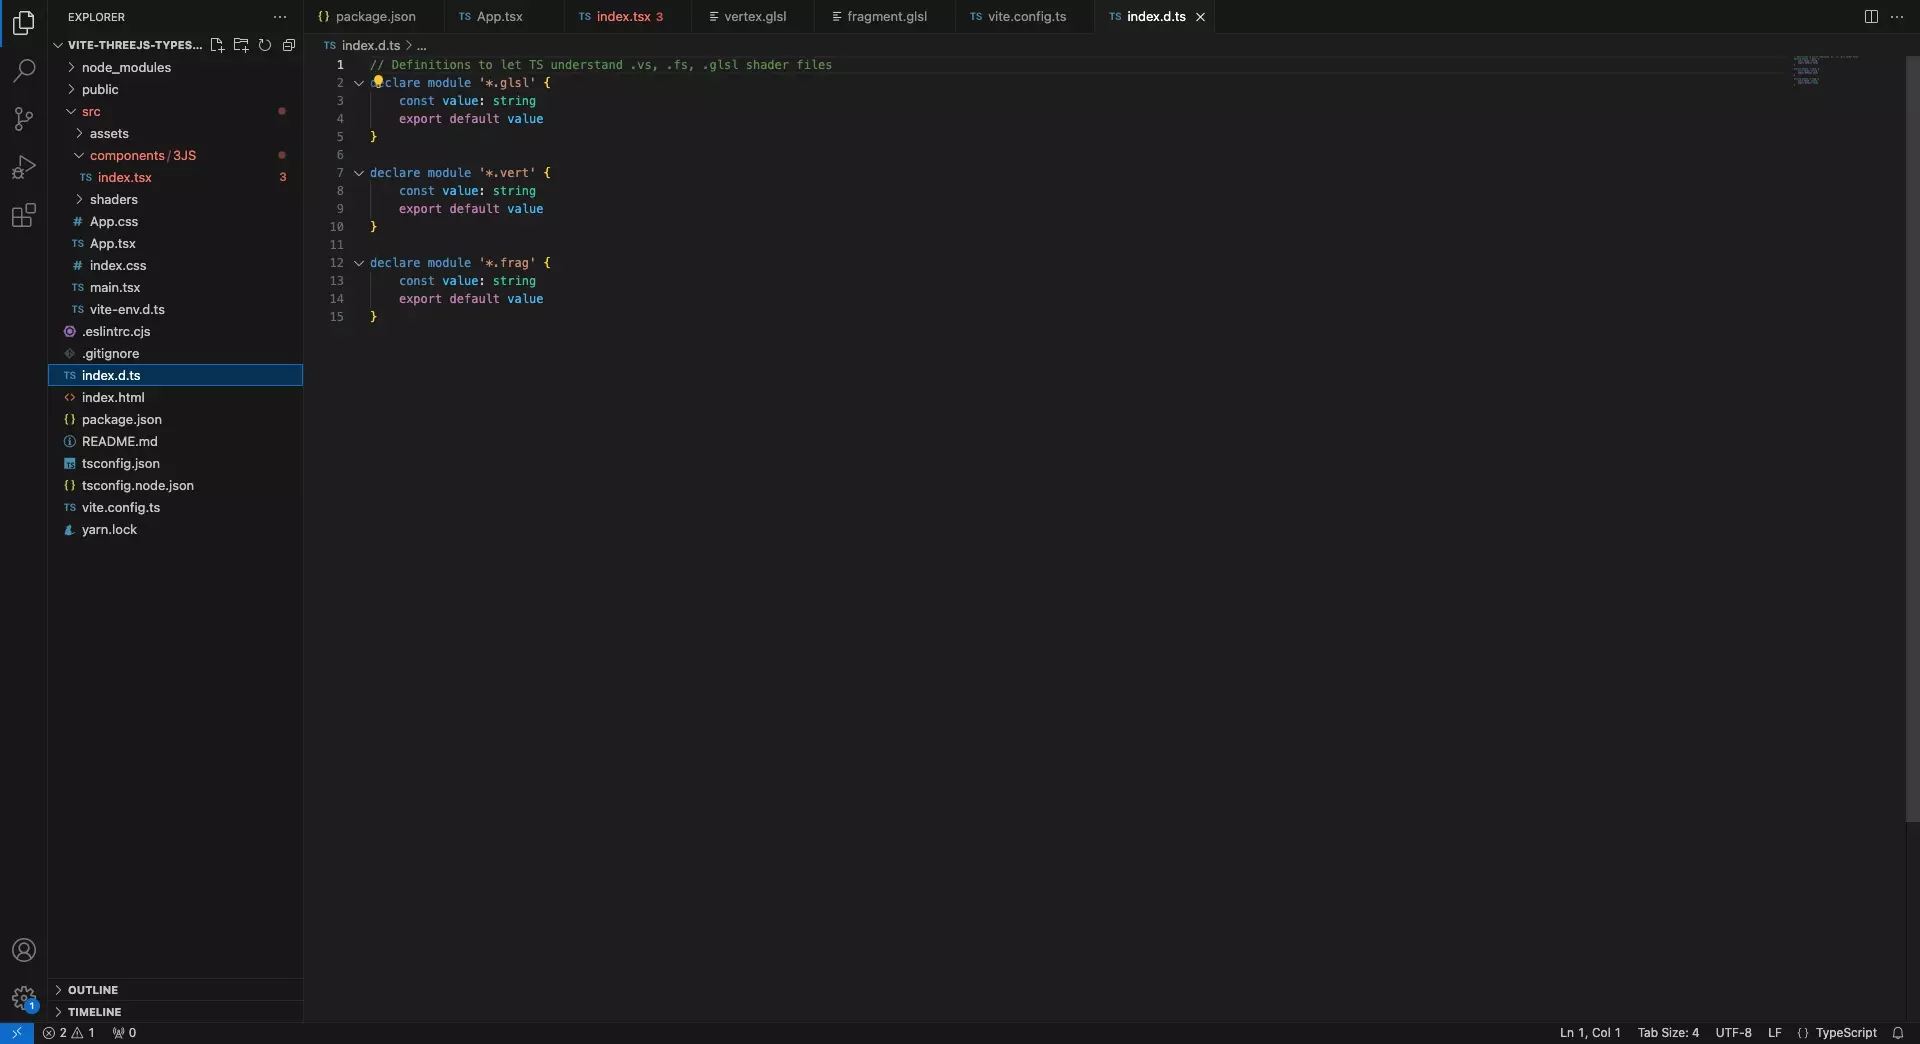
At the root of the project, create a index.d.ts file and add the declarations for the GLSL files.
Step Nine: Update the TSConfig
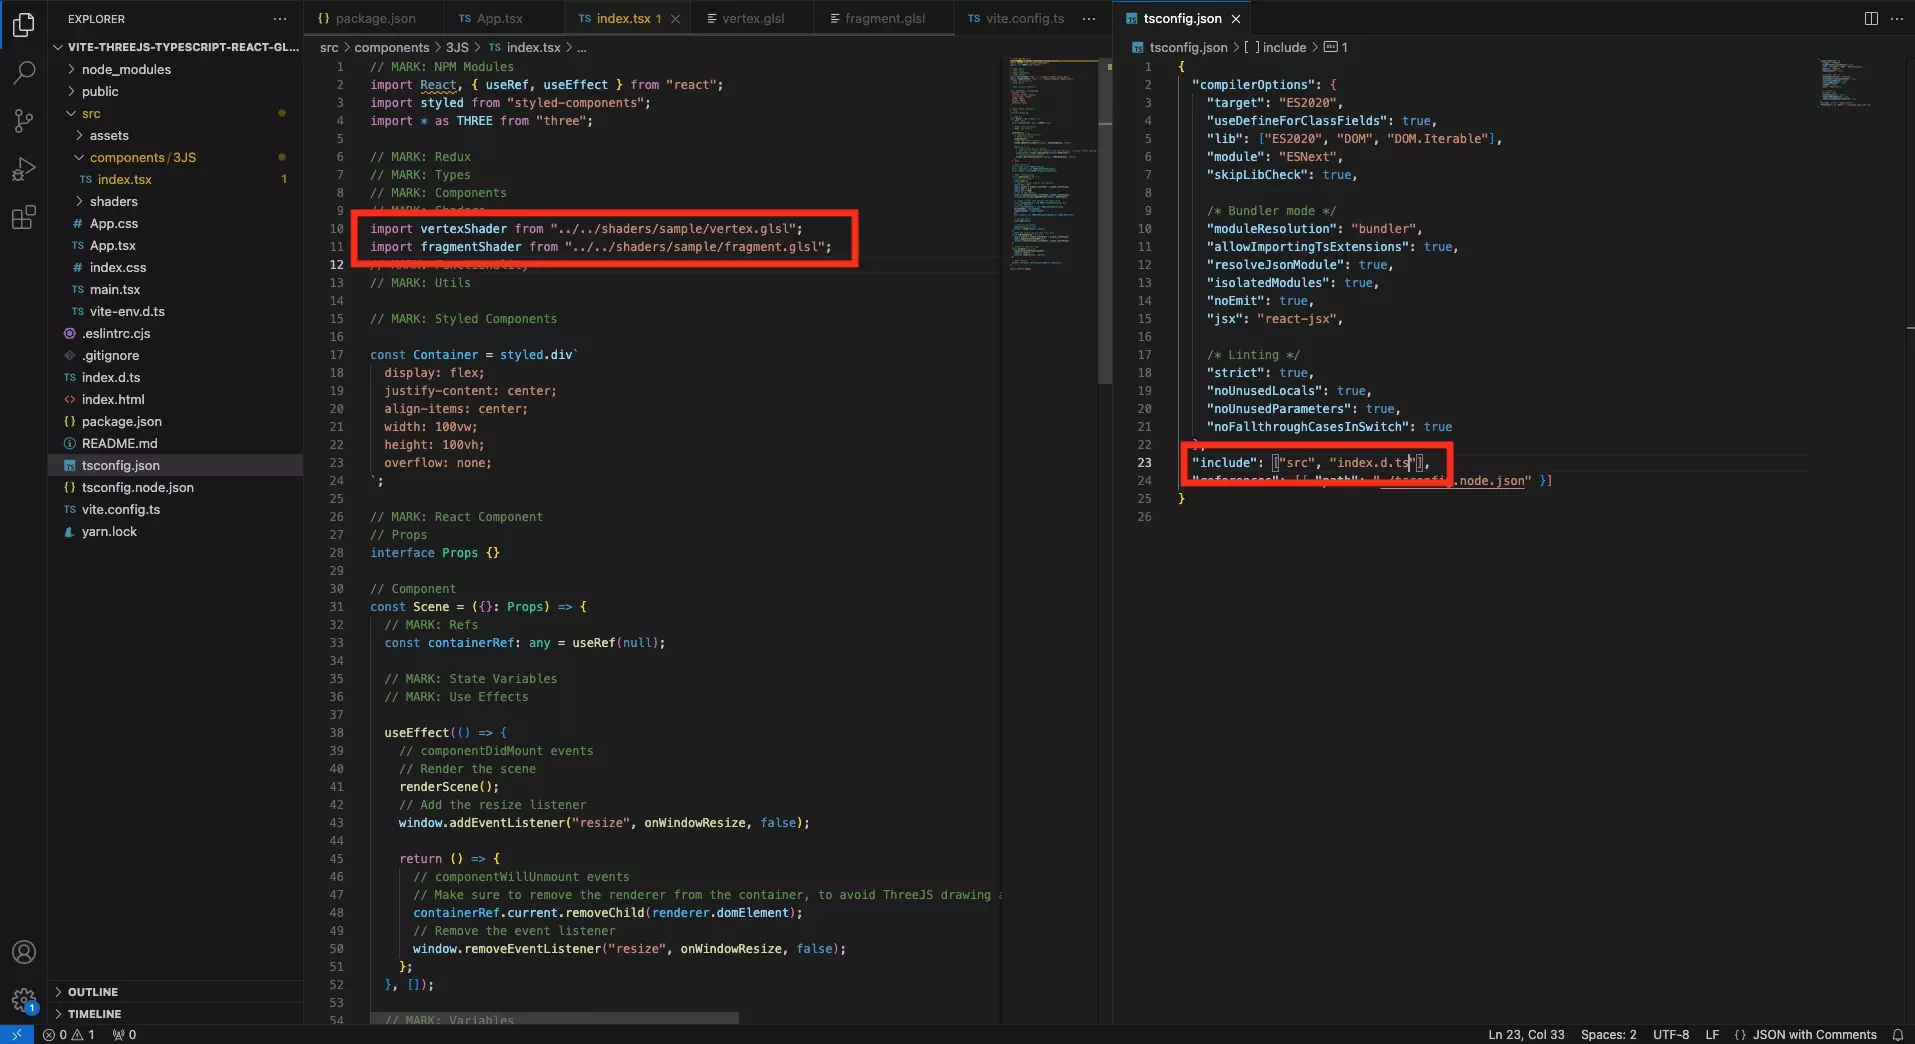
Update the TSConfig to include the index.d.ts file. This should resolve the error in the Scene imports.
Step Ten: Test
Confirm that the scene renders as expected.
Looking to learn more about ReactJS and ThreeJS ?