How to use alias paths in Typescript & ViteJS

To use typescript path aliases in Typescript & ViteJS, setup your paths in the TSConfig and match them in the vite.config.js.

Oscar de la Hera Gomez
Written by Oscar de la Hera Gomez
First published on 11/16/2023 at 14:24
Last Updated on 11/16/2023 at 16:08
<p>Three flowers that represent React, ThreeJS and ViteJS side by side beneath them sits the text "Alias Paths."</p>

To use typescript path aliases in Typescript & ViteJS, setup your paths in the TSConfig and match them in the vite.config.js.

SubscribeReact, ThreeJS & GLSL Resources

The solution that we carried out below can be found on the main branch of our Open Source React, Typescript & ViteJS Starter Project.

git clone git@github.com:delasign/reactjs-3js-vitejs-starter-project.git
View Repository

Step One: Setup the Project

<p>A screenshot of Chrome showing that the plane is now using the shader that we offer in this tutorial.</p>

Follow the tutorial below to learn how to setup a Typescript & ViteJS project that works with a GLSL shader.

How to create a React, Typescript & ThreeJS GLSL Vite Project

Step Two: Add Dependencies

<p>A screenshot of Terminal showing you how to add the Path dependency.</p>

In Terminal, with the current directory set to that of the project, add the path dependency using the line below:

yarn add path

Step Two: Add the Paths to the TSConfig

<p>A screenshot of the TSConfig showing you how we added the paths.</p>

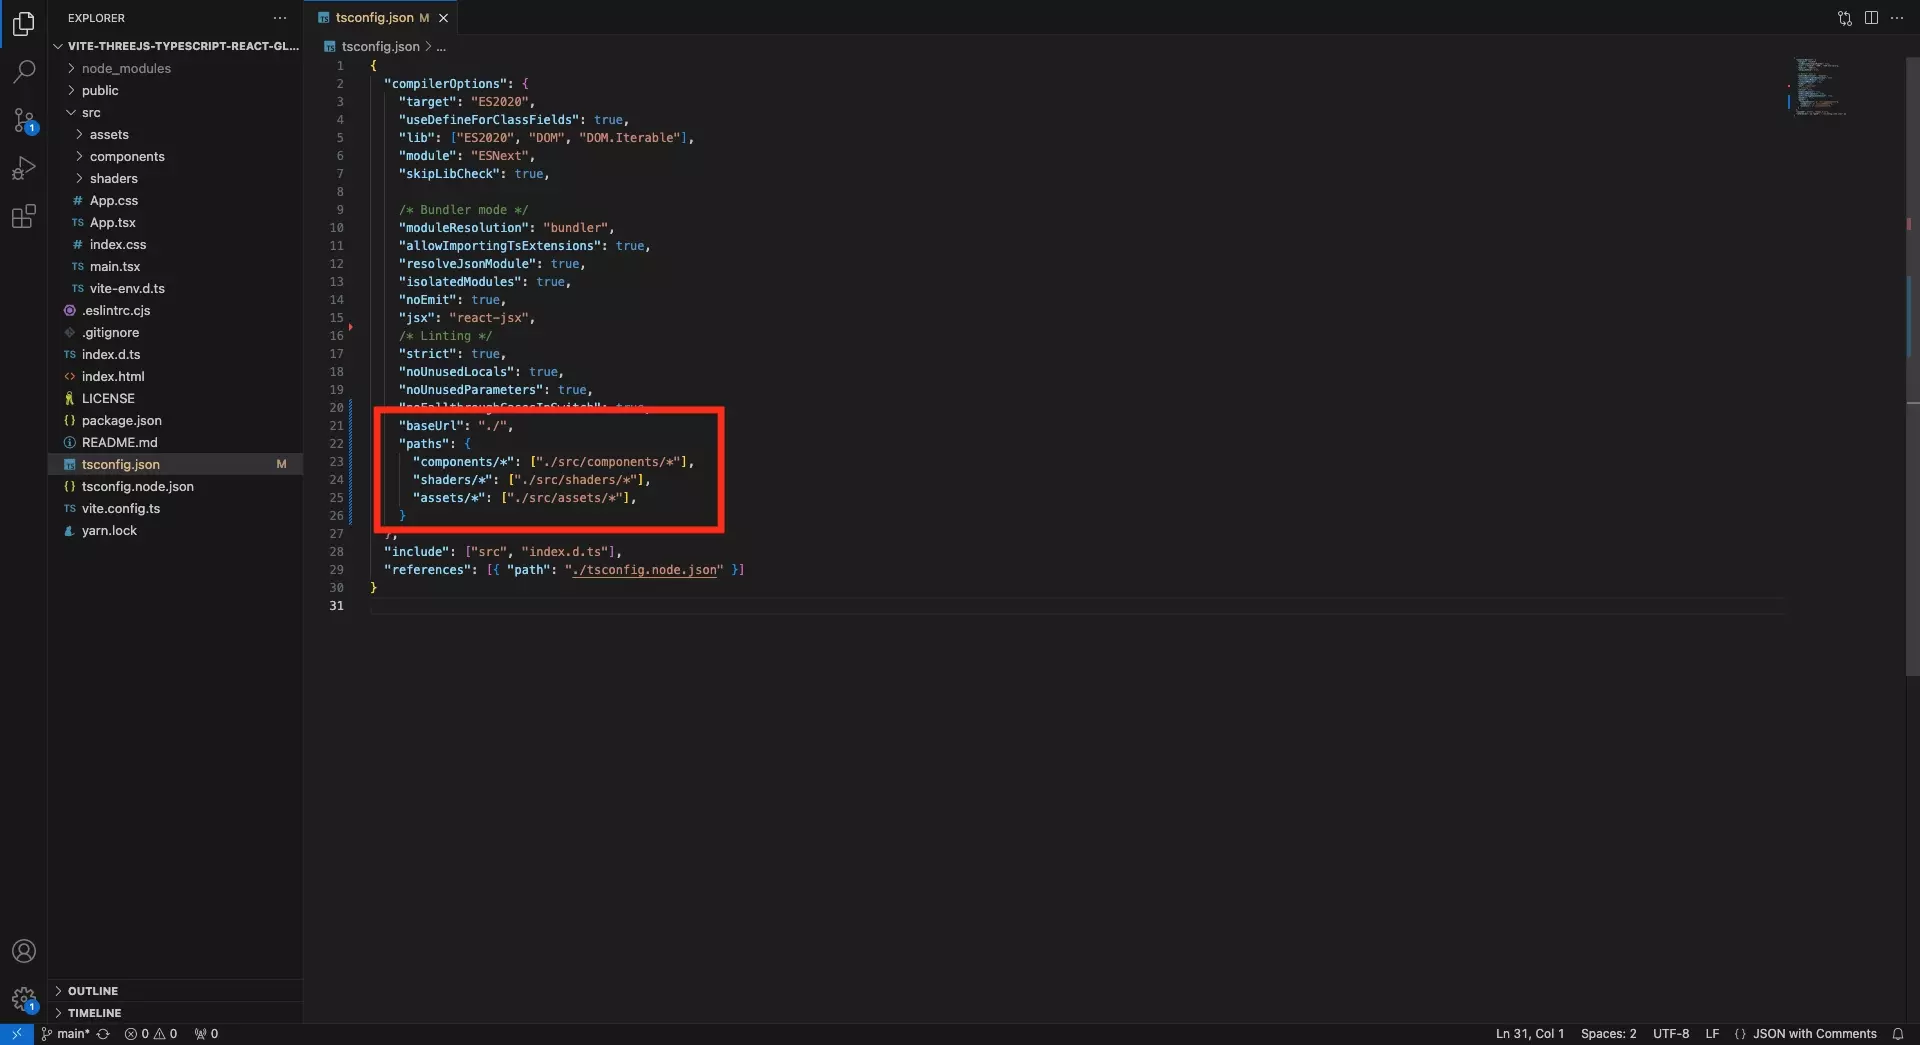
In the tsconfig.json file, add the relevant paths.

Step Three: Add the Paths to the Vite Config

<p>A screenshot showing the TSConfig and Vite Config side by side, highlighted are how the paths match and the syntax that you have to use in each file.</p>

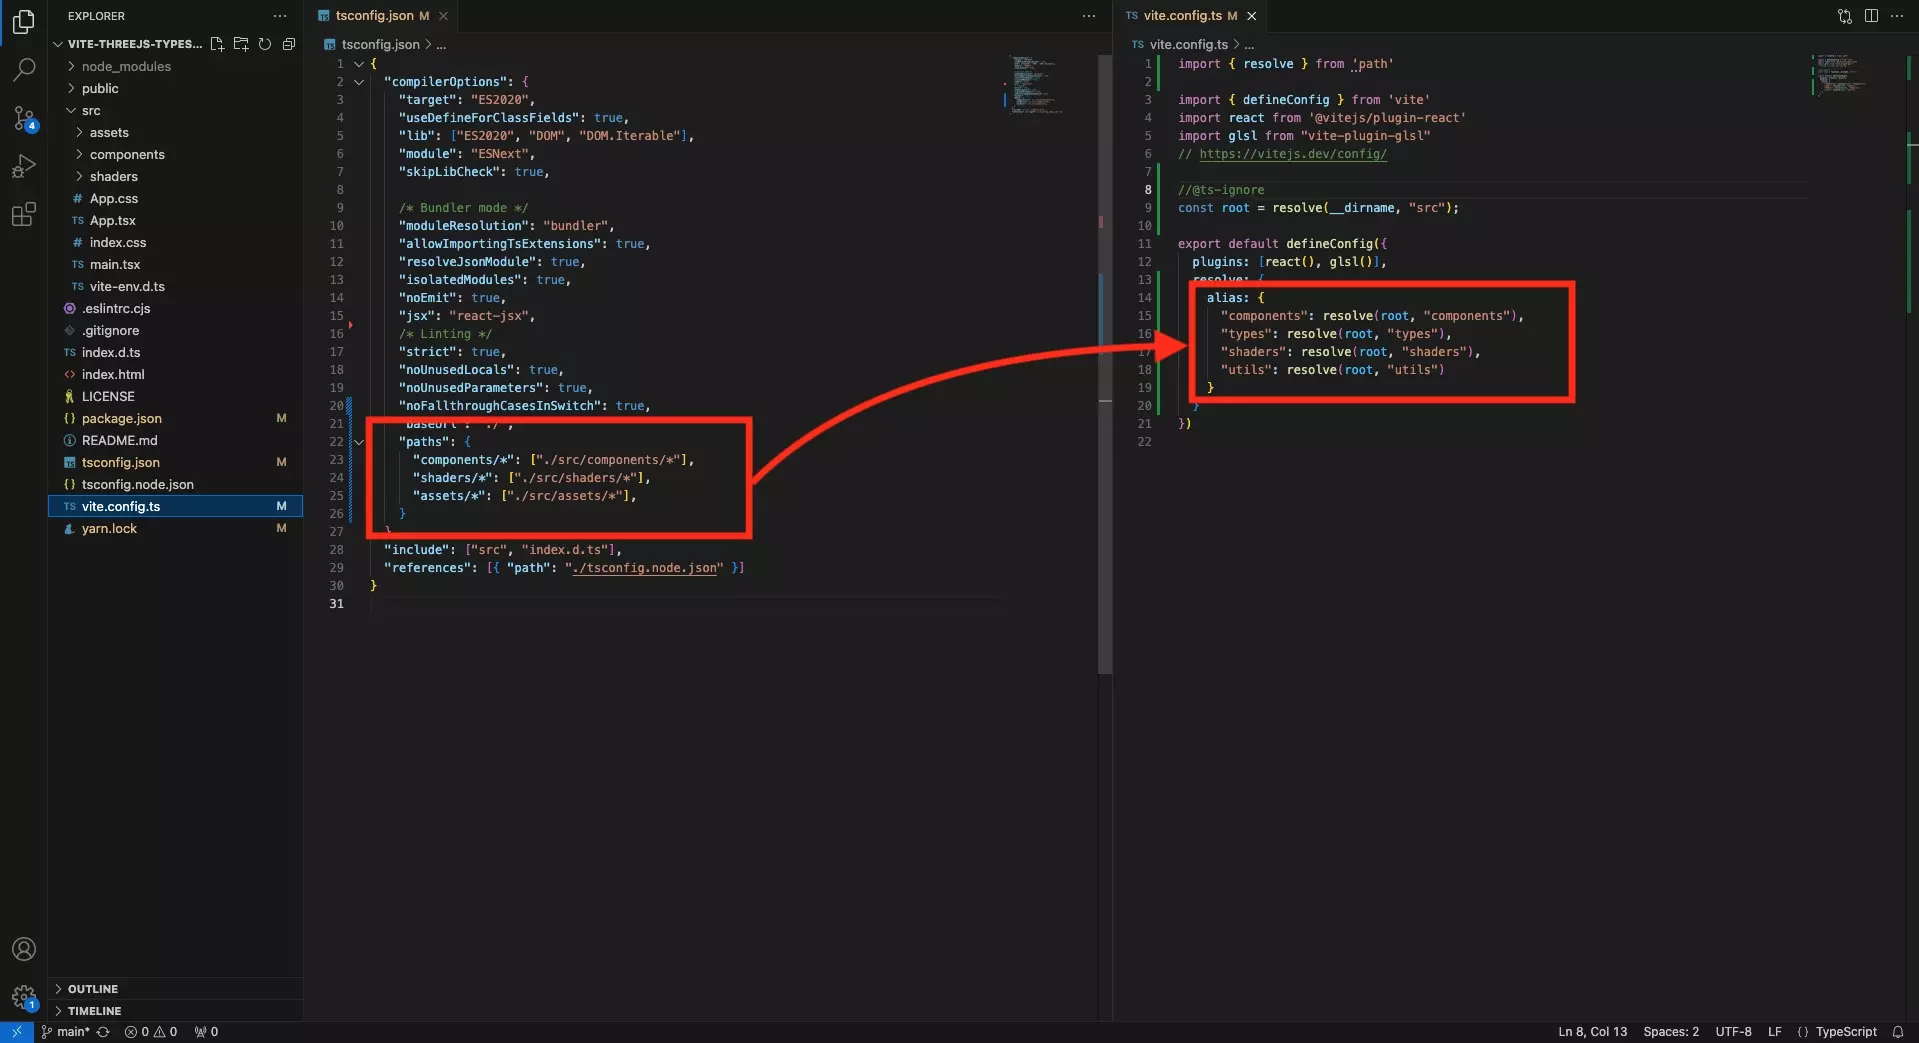
In the vite.config.ts file, add the relevant paths using the alias parameter within the resolve attribute of the defaultConfig.

Step Four: Update Paths

<p>A screenshot of VSCode showing you how we updated the Paths of imports within a TSX file and how they now work.</p>

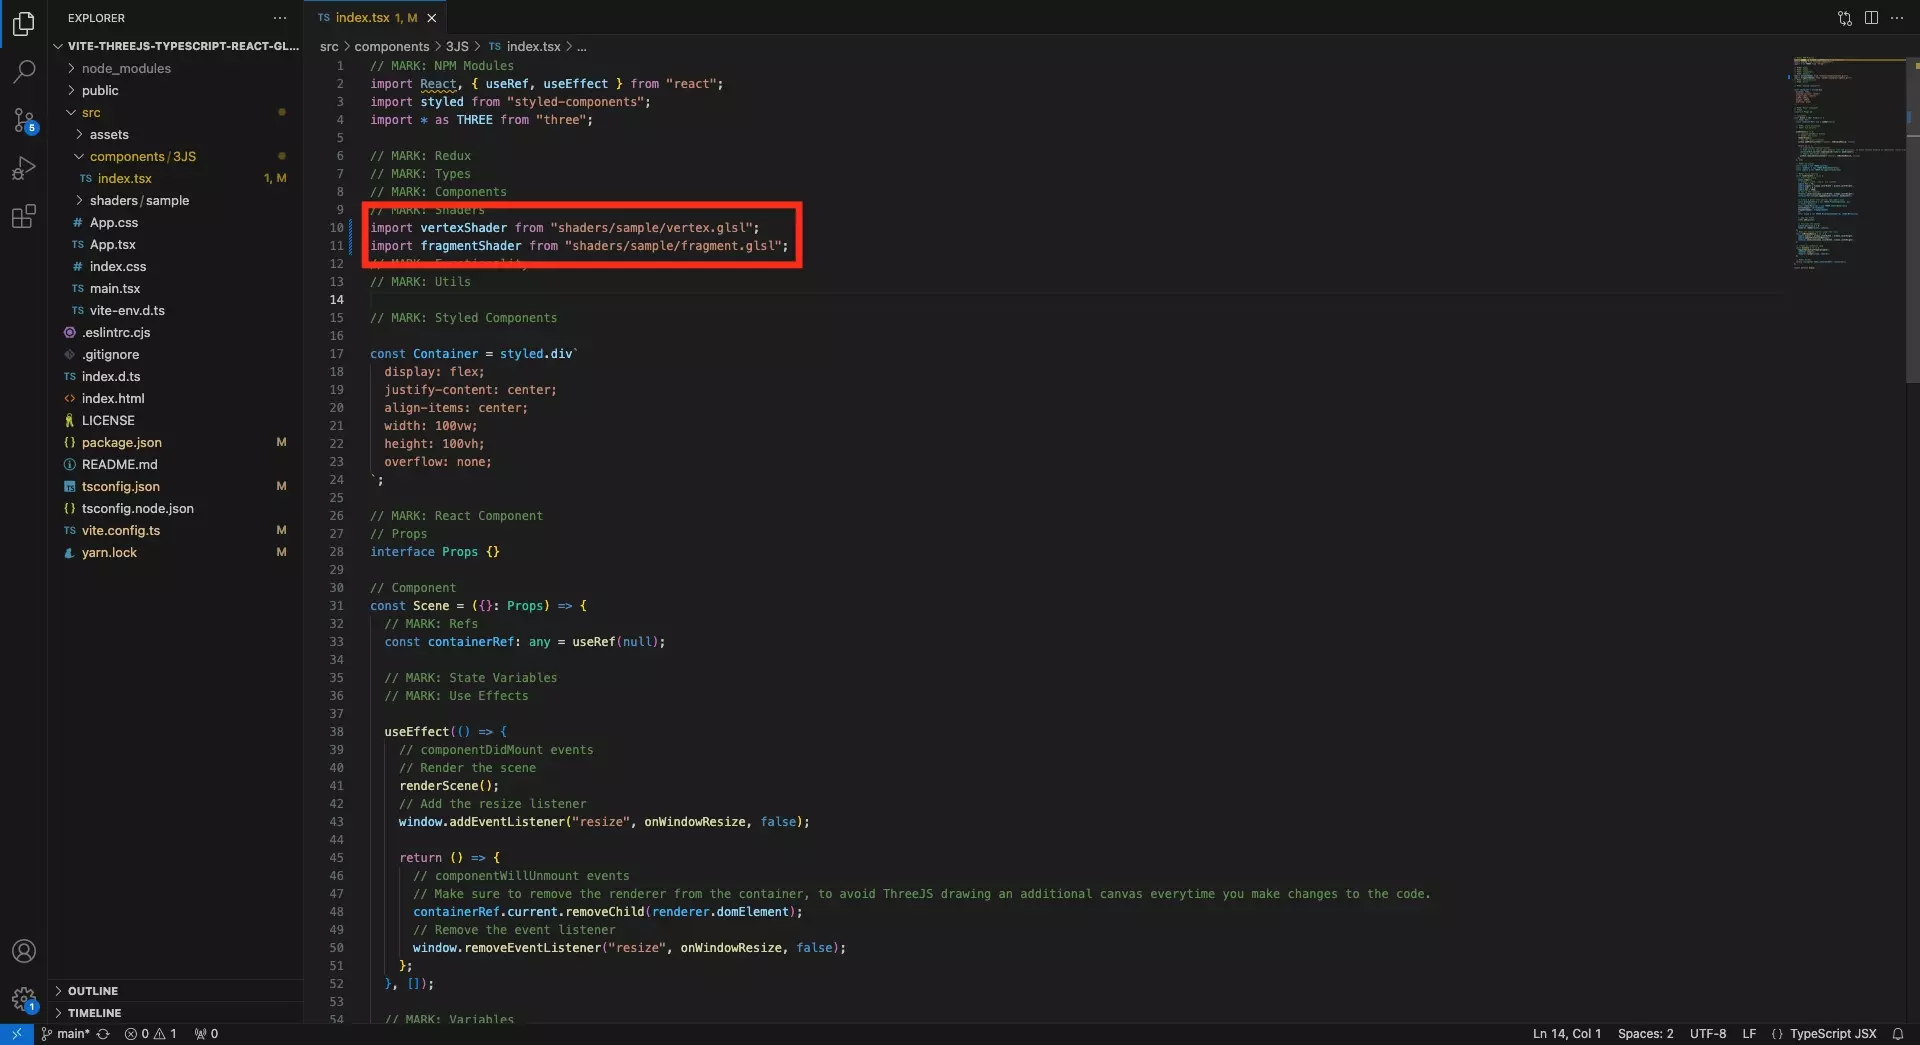
The project can now use these paths. Update them wherever necessary.

Step Five: Test

<p>A screenshot of Chrome showing that the plane is now using the shader that we offer in this tutorial.</p>

Run the project and make sure everything works as expected.

Looking to learn more about ReactJS and ThreeJS ?

Search our blog to find educational content on learning how to use ReactJS and ThreeJS.

Search our BlogReact, ThreeJS & GLSL Resources

Any Questions?

We are actively looking for feedback on how to improve this resource. Please send us a note to inquiries@delasign.com with any thoughts or feedback you may have.
SubscribeContact UsVisit our BlogView our ServicesView our Work

Partner with us

We would love to get to know you and see how we can help your organization with its goals and needs.
Let's Talk

Stay Informed

Get occasional updates about our company, research, and product launches.
Subscribe