How to add reCAPTCHA protection to a GatsbyJS or ReactJS project
A step by step guide on adding reCAPTCHA v2 to a GatsbyJS or ReactJS app.
A step by step guide on adding reCAPTCHA v2 to a GatsbyJS or ReactJS app.
SubscribePlease note that this tutorial only covers how to use reCAPTCHA v2 on the front-end without backend validation. If you are seeking to authenticate the reCAPTCHA v2 token that is produced, follow the tutorial below.
Step One: Setup the reCaptcha Site
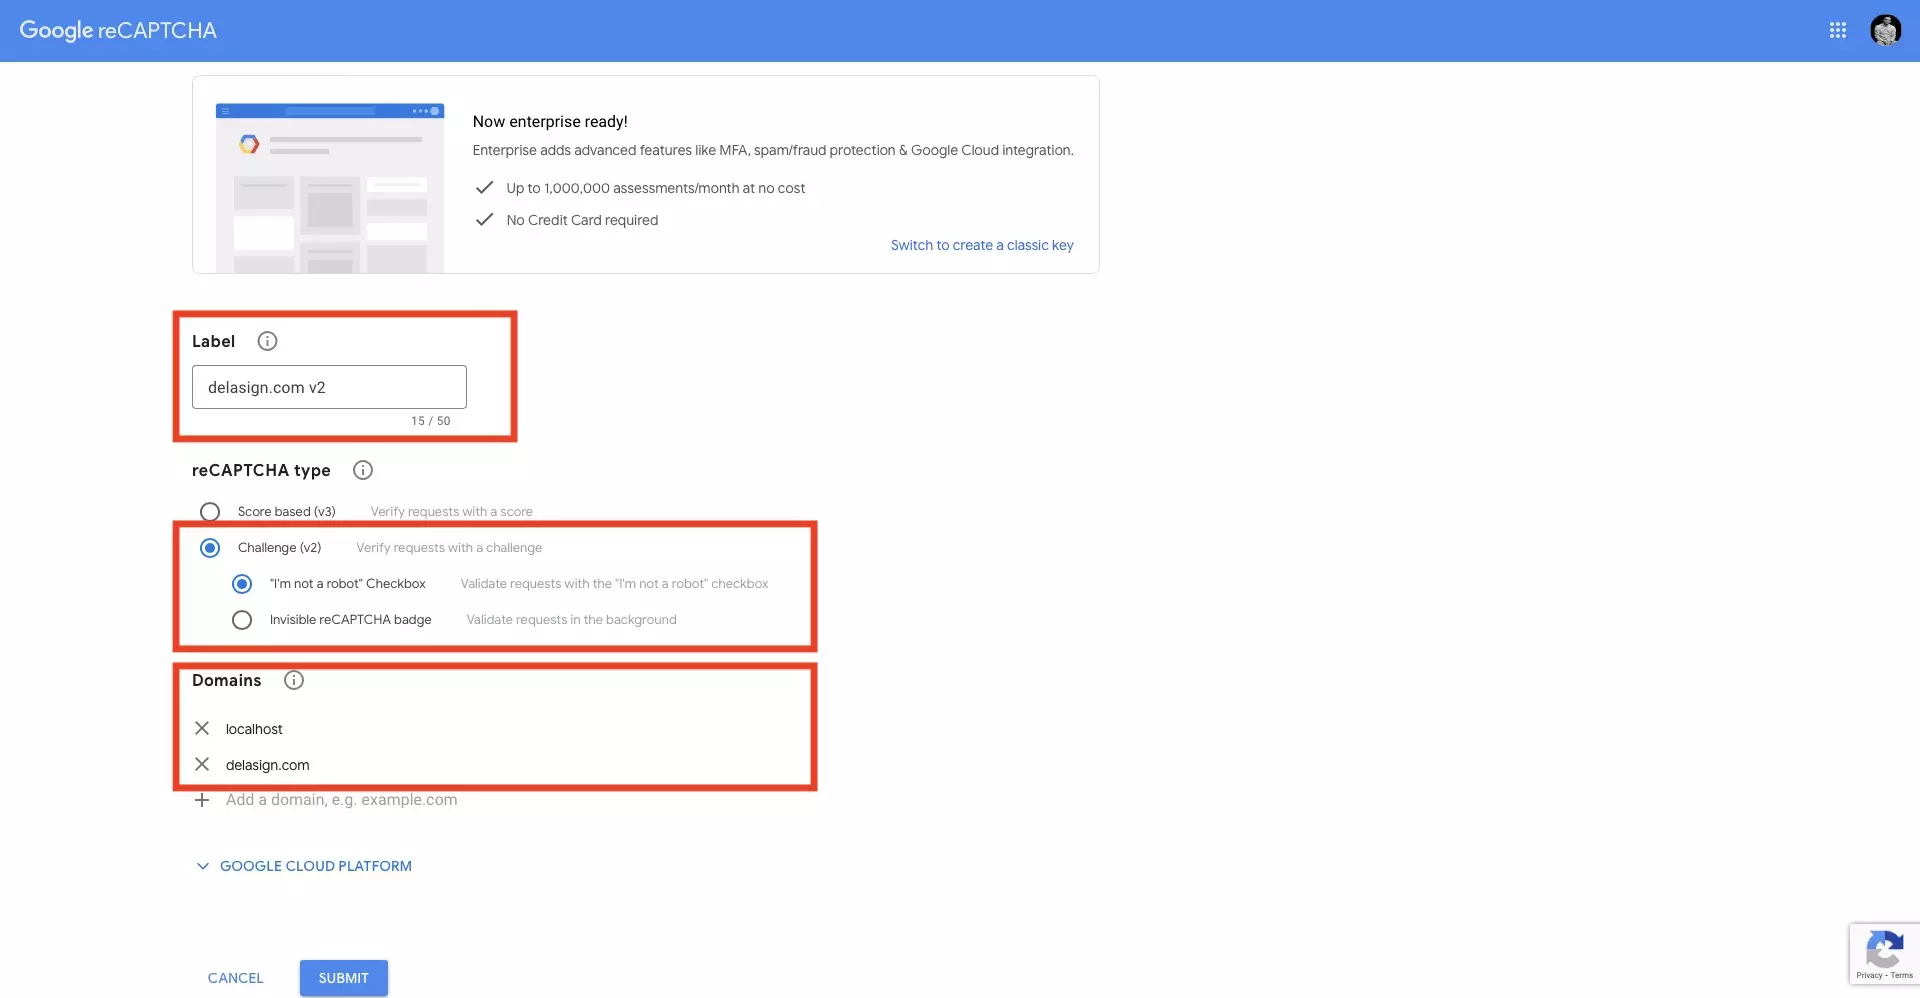
Navigate to Google's reCAPTCHA website and setup your website.
Make sure that you add localhost, any development or staging environment domains as well as the public domain.
Once you're done, press Submit and you will be taken to a page similar to the one below.
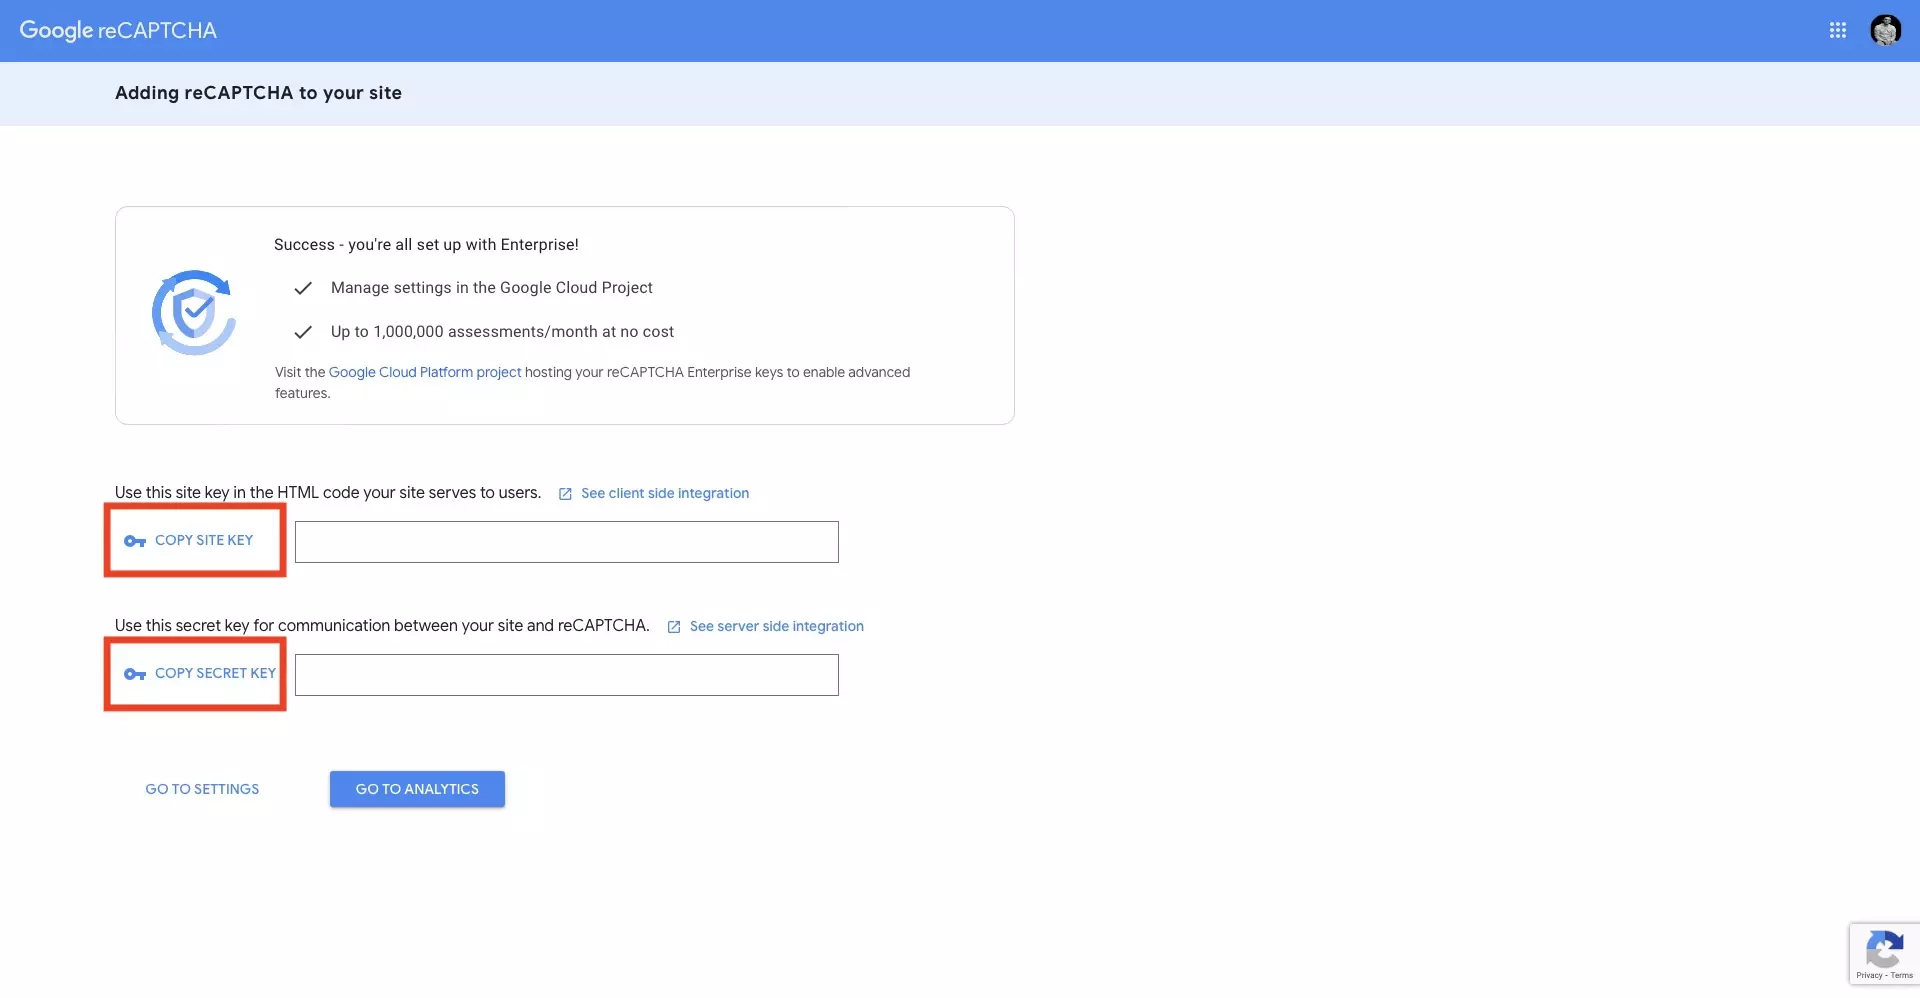
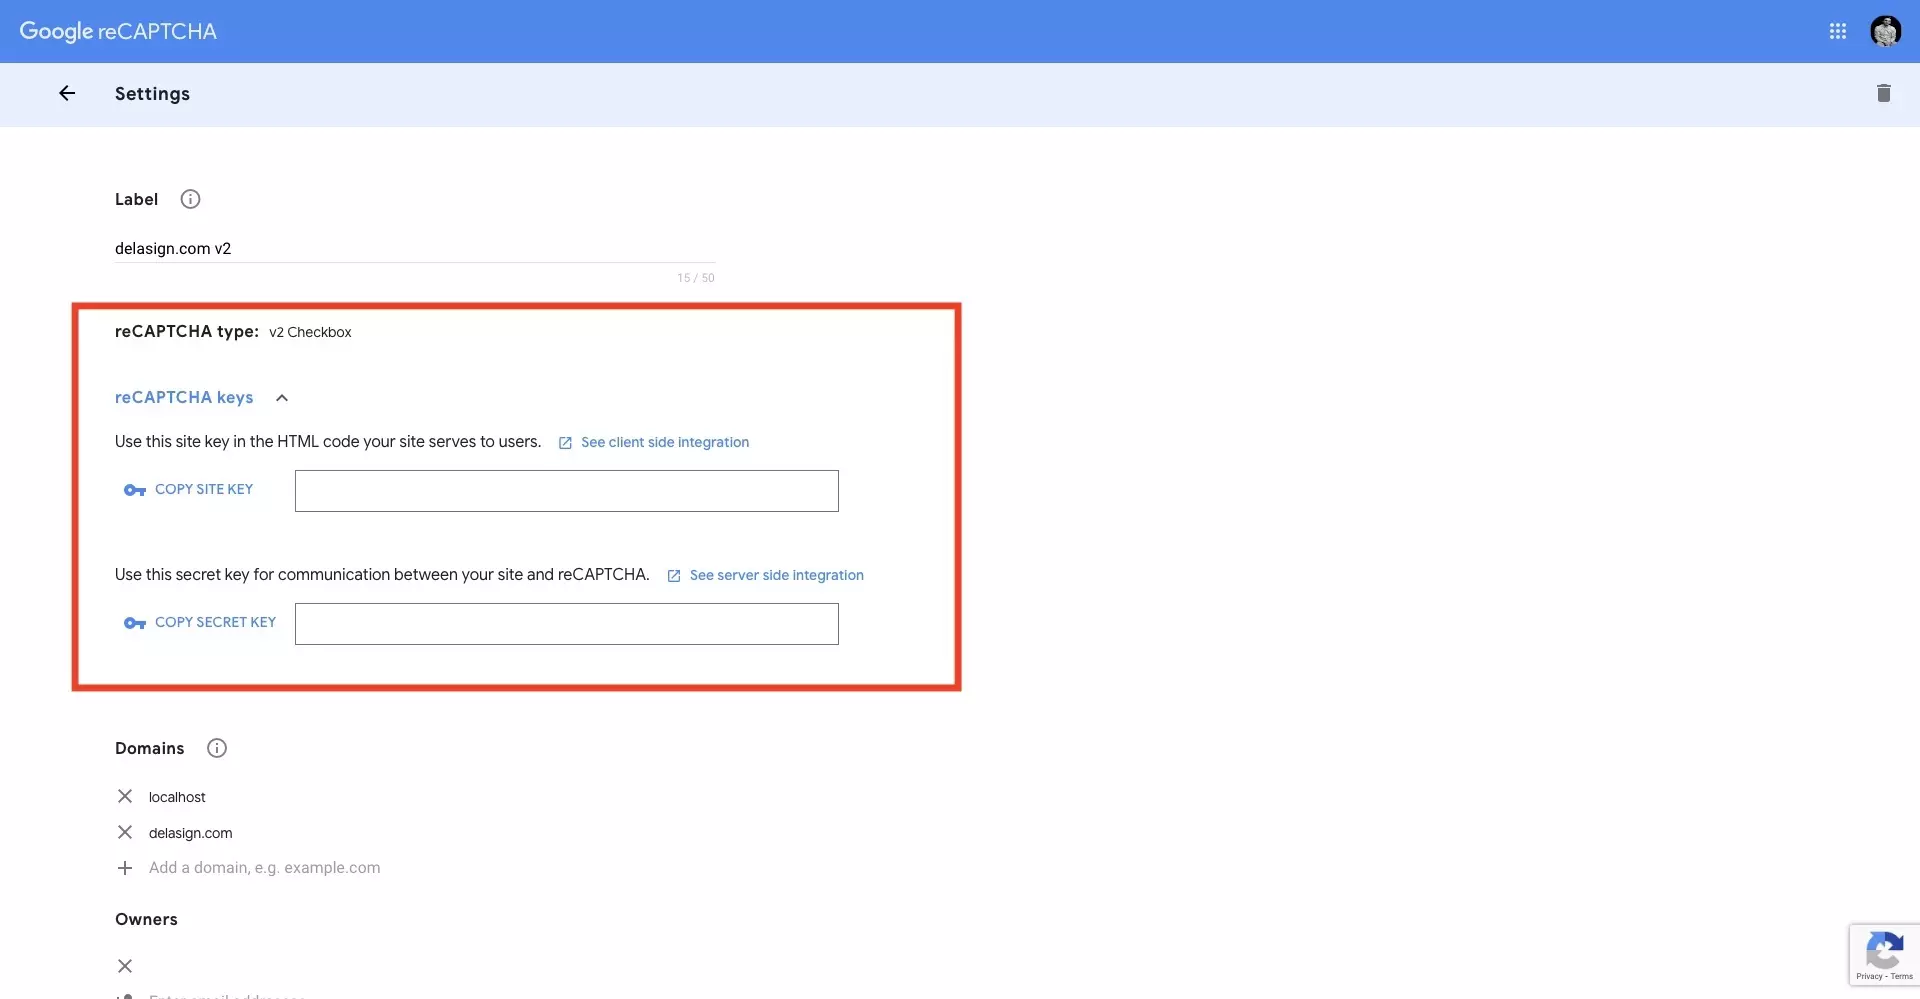
Copy the SITE KEY and SECRET KEY.
If by any chance you already created the reCAPTCHA site, the SITE KEY and SECRET KEY can be found by pressing the gear (settings) icon under the Google reCAPTCHA website.
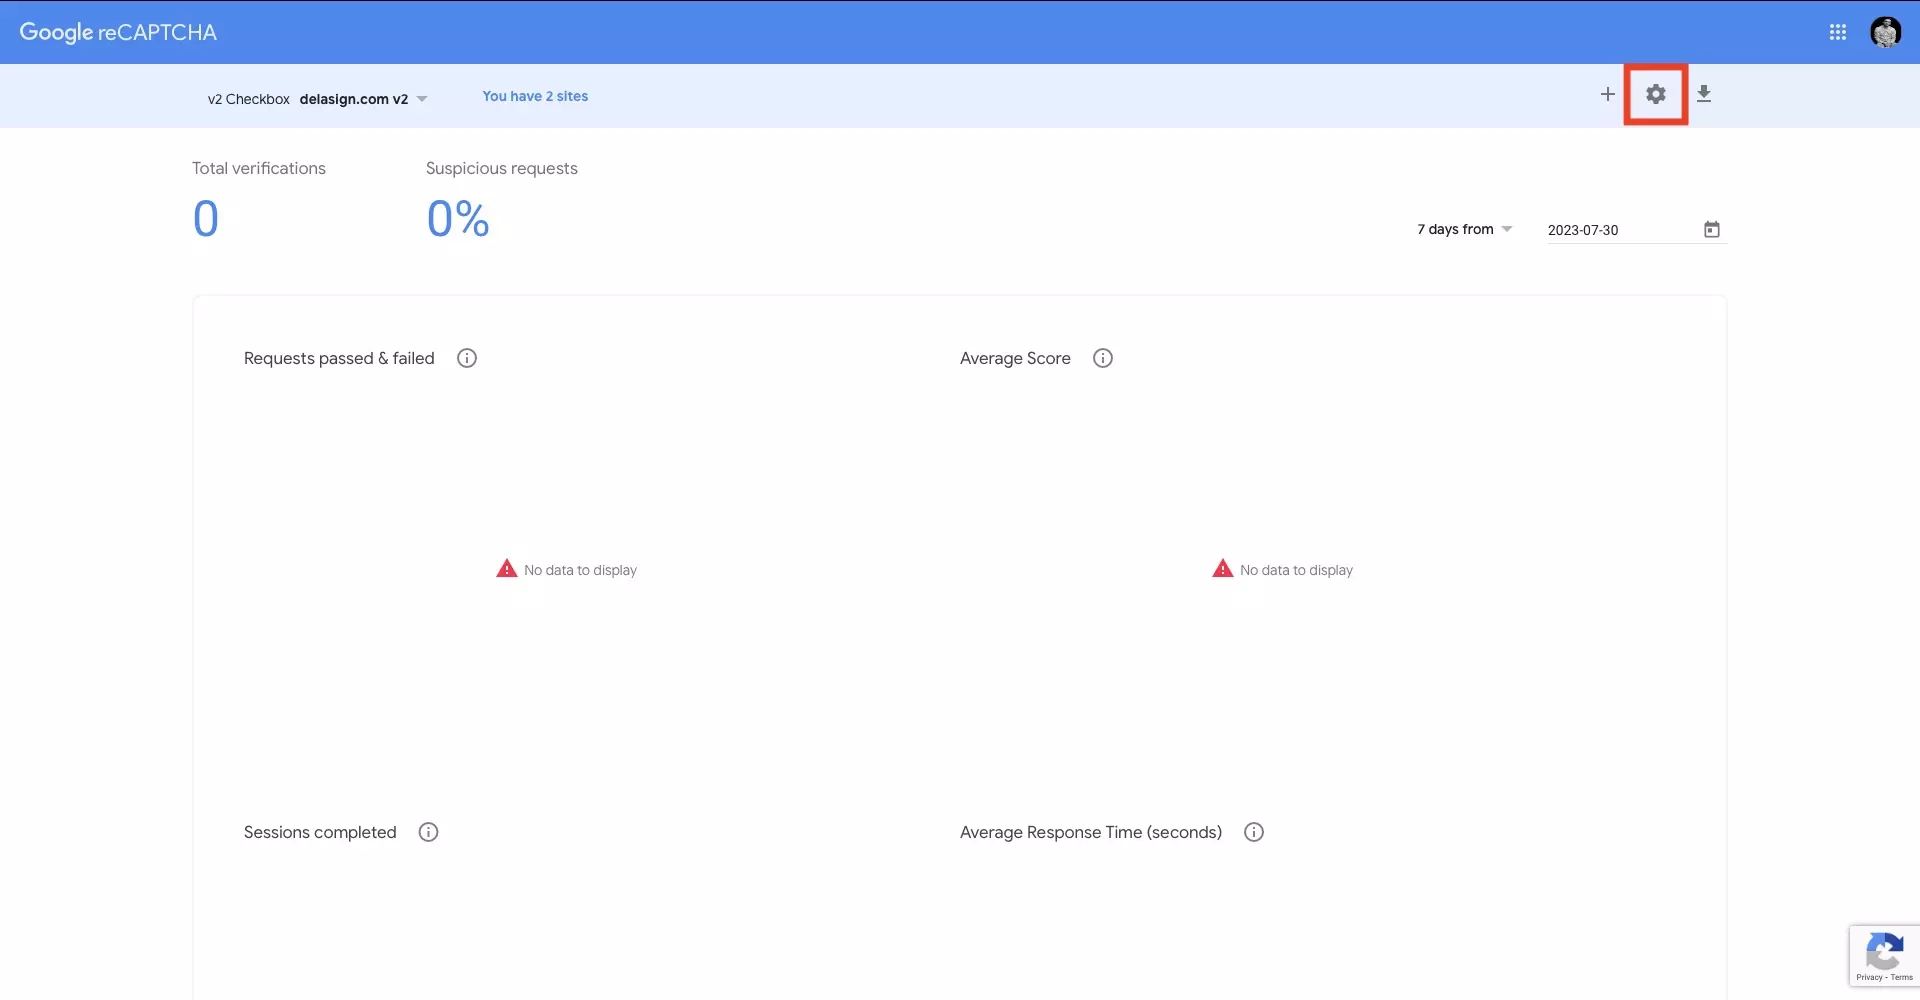
In the page that appears, open the reCAPTCHA keys section, to find the SITE KEY and SECRET KEY.
Step Two: Add the Site Key as an Environment Variable
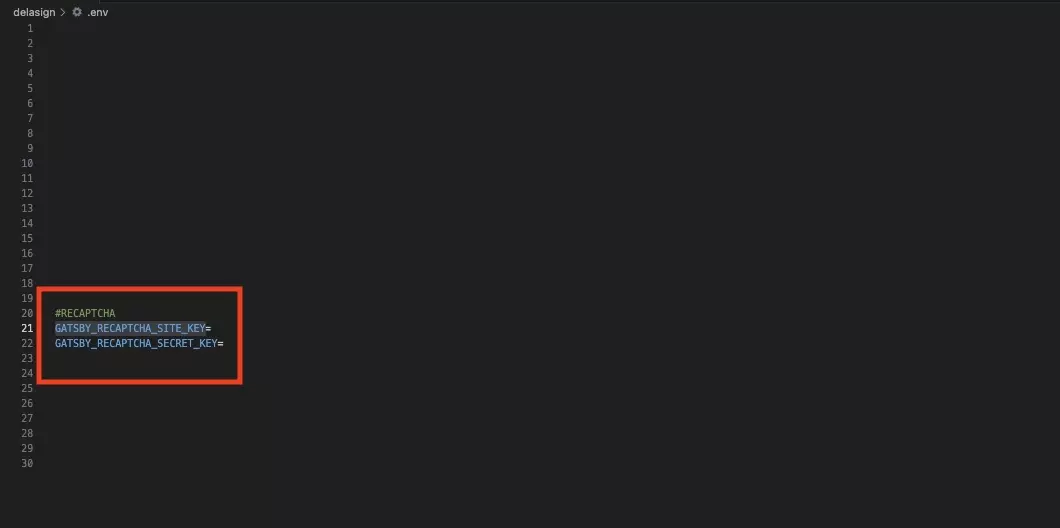
In your GatsbyJS or ReactJS project, add environment variables for the SITE KEY.
Please note that the reCAPTCHA v2 SECRET KEY is required to verify the token. This should be done in the backend.
Step Three: Add the Dependencies
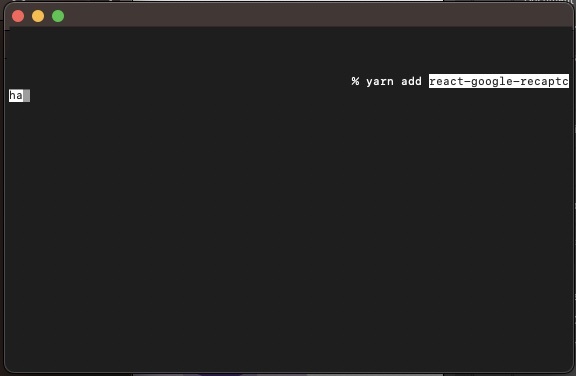
Open Terminal and with the current directory set to that of your project and run the following line of code:
yarn add react-google-recaptchaIf you're using Typescript, make sure to add the relevant types:
@types/react-google-recaptchaIf you're using the GatsbyJS, you will need to add the following plugin:
yarn add gatsby-plugin-recaptchaStep Four: Add Plugin Configuration (GatsbyJS Only)
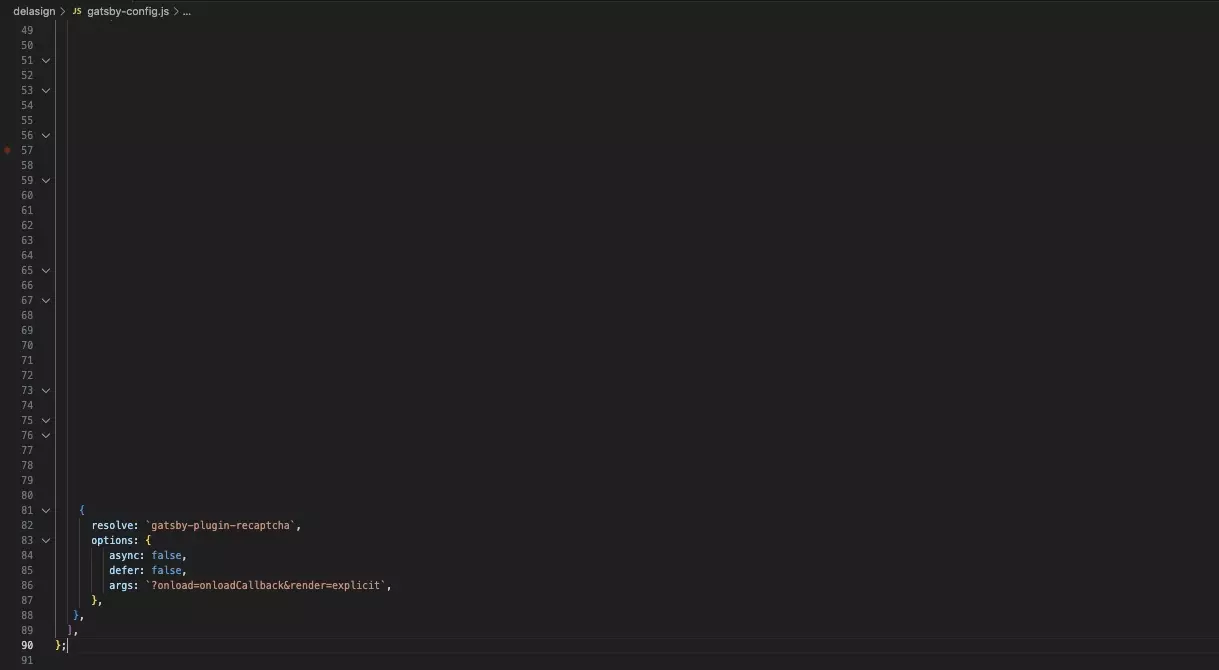
Please note this step only applies to GatsbyJS.
In the gatsby-config.js file, add the configuration for the gatsby-plugin-recaptcha using code similar to that below.
Step Five: Add reCAPTCHA protection
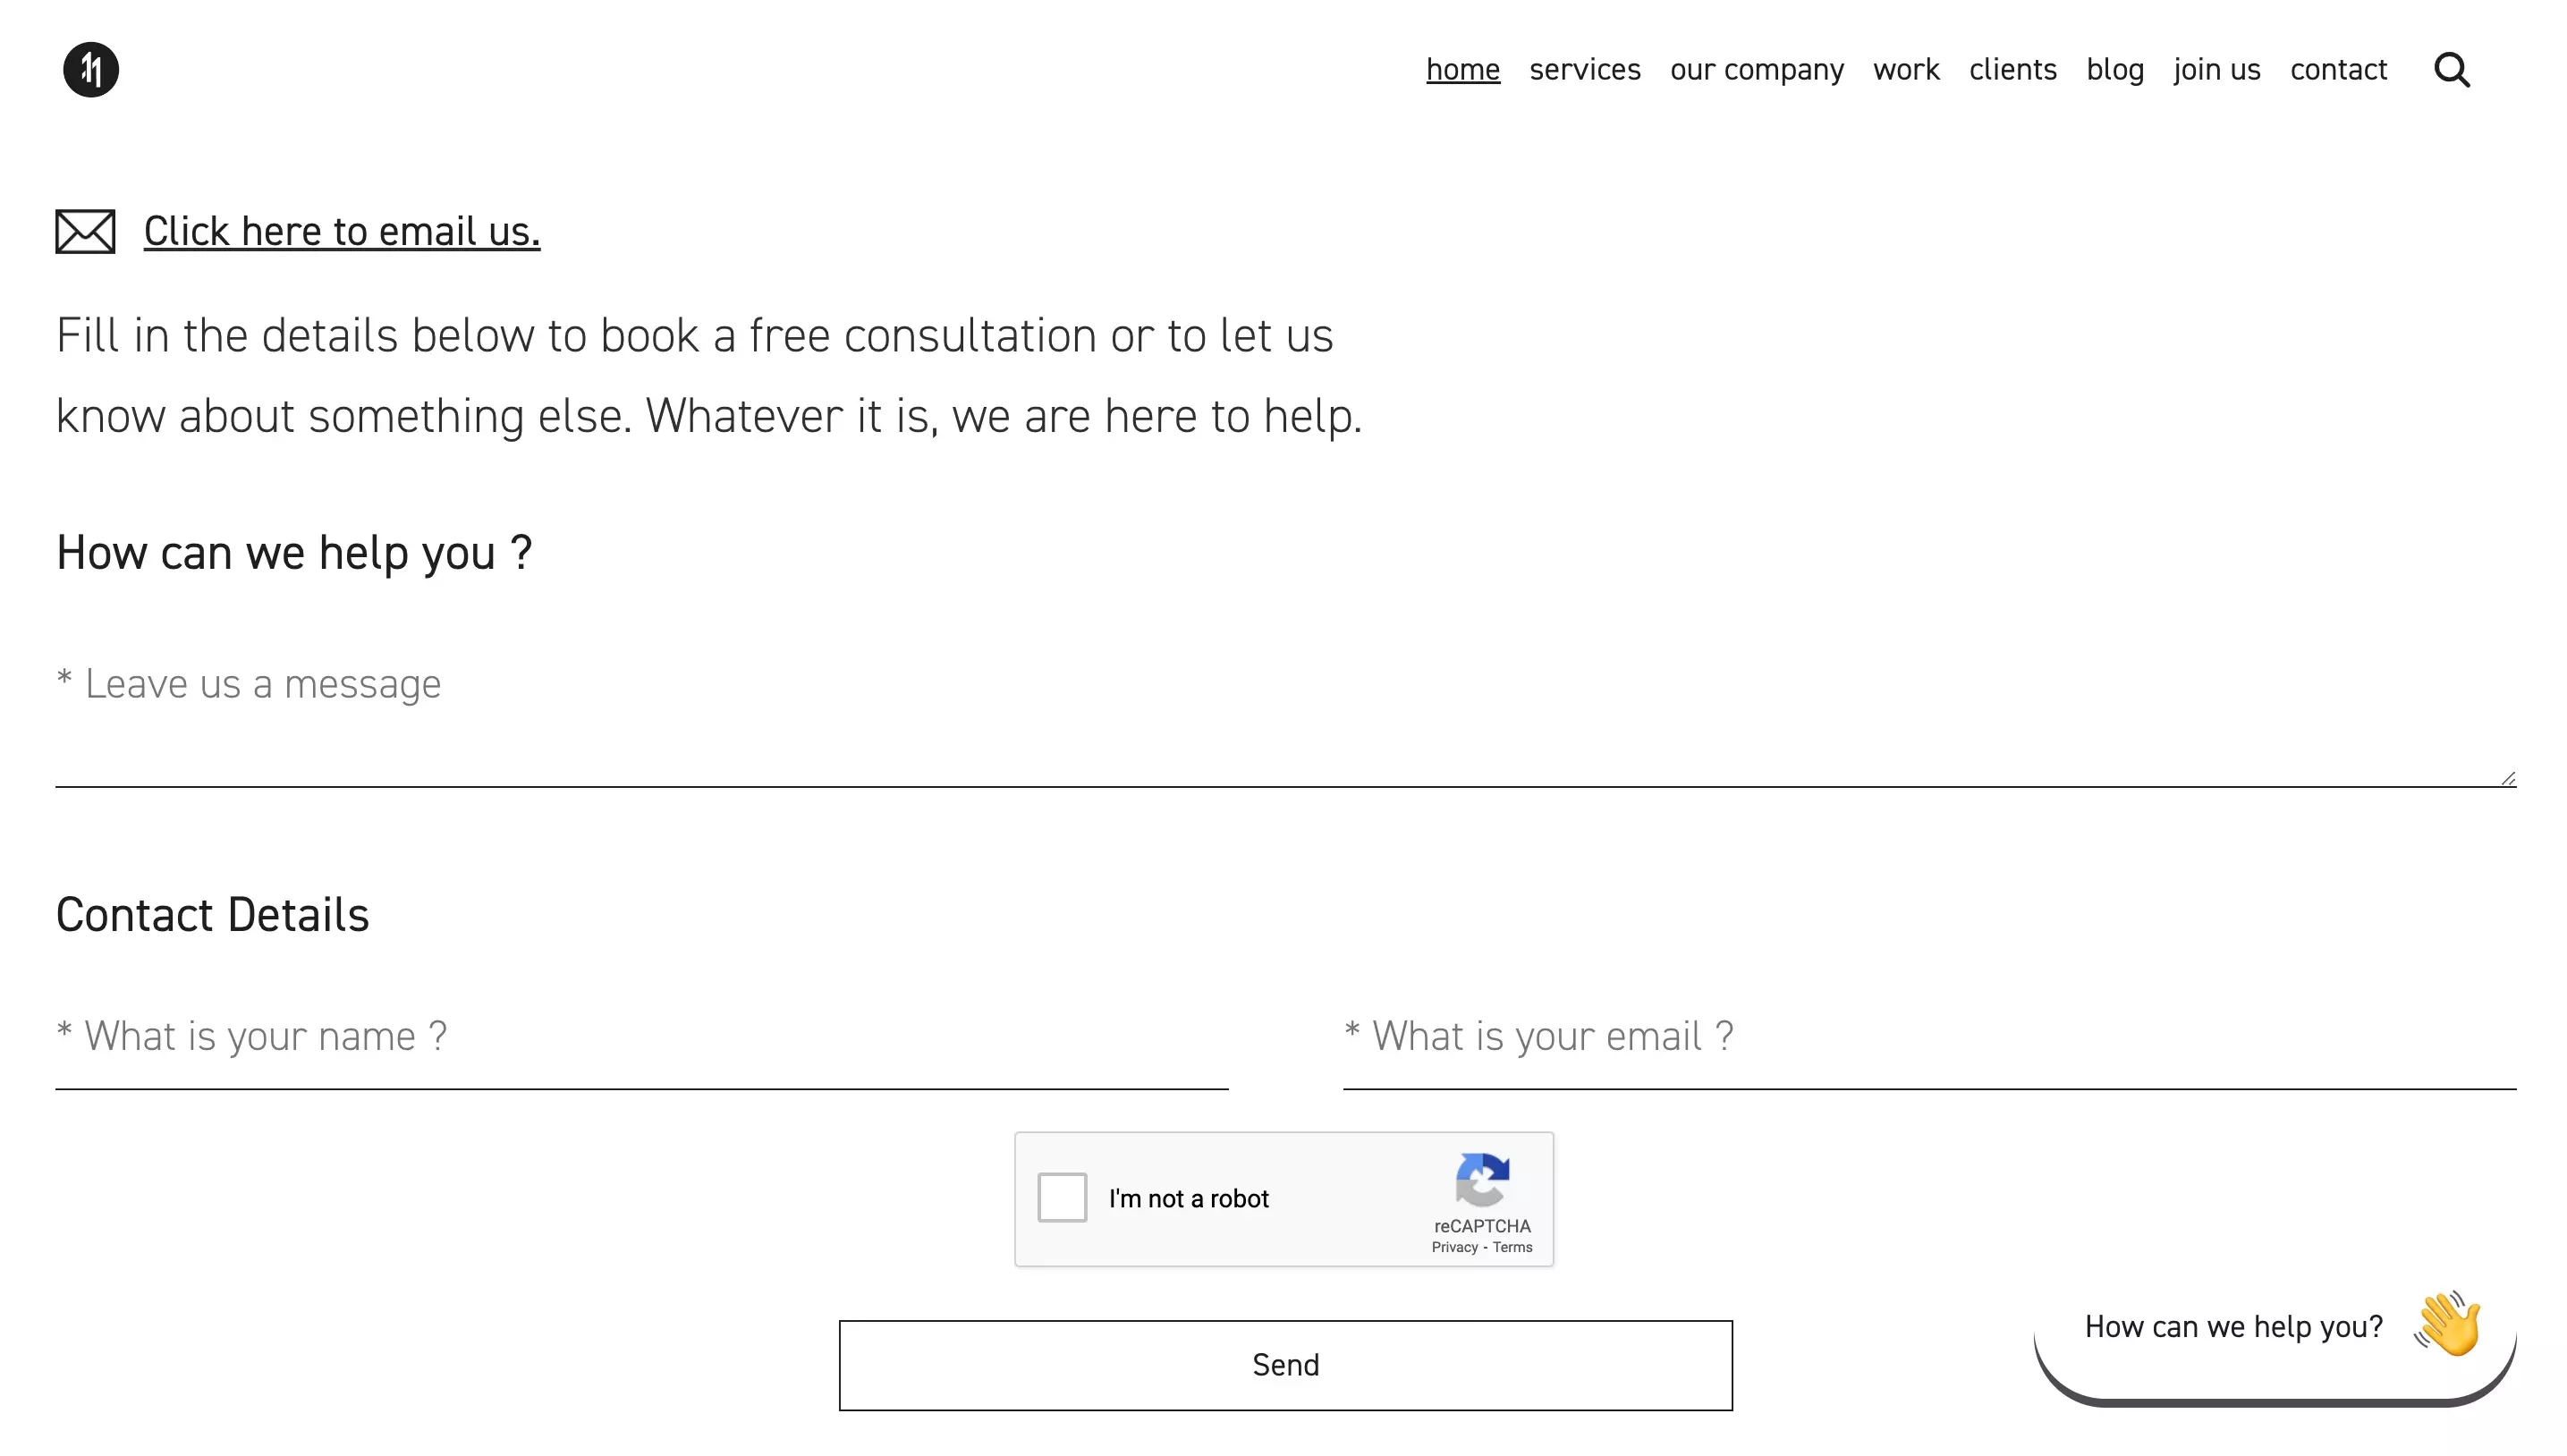
To add reCAPTCHA protection, import and apply the module using the code below.
Step Six: Verification
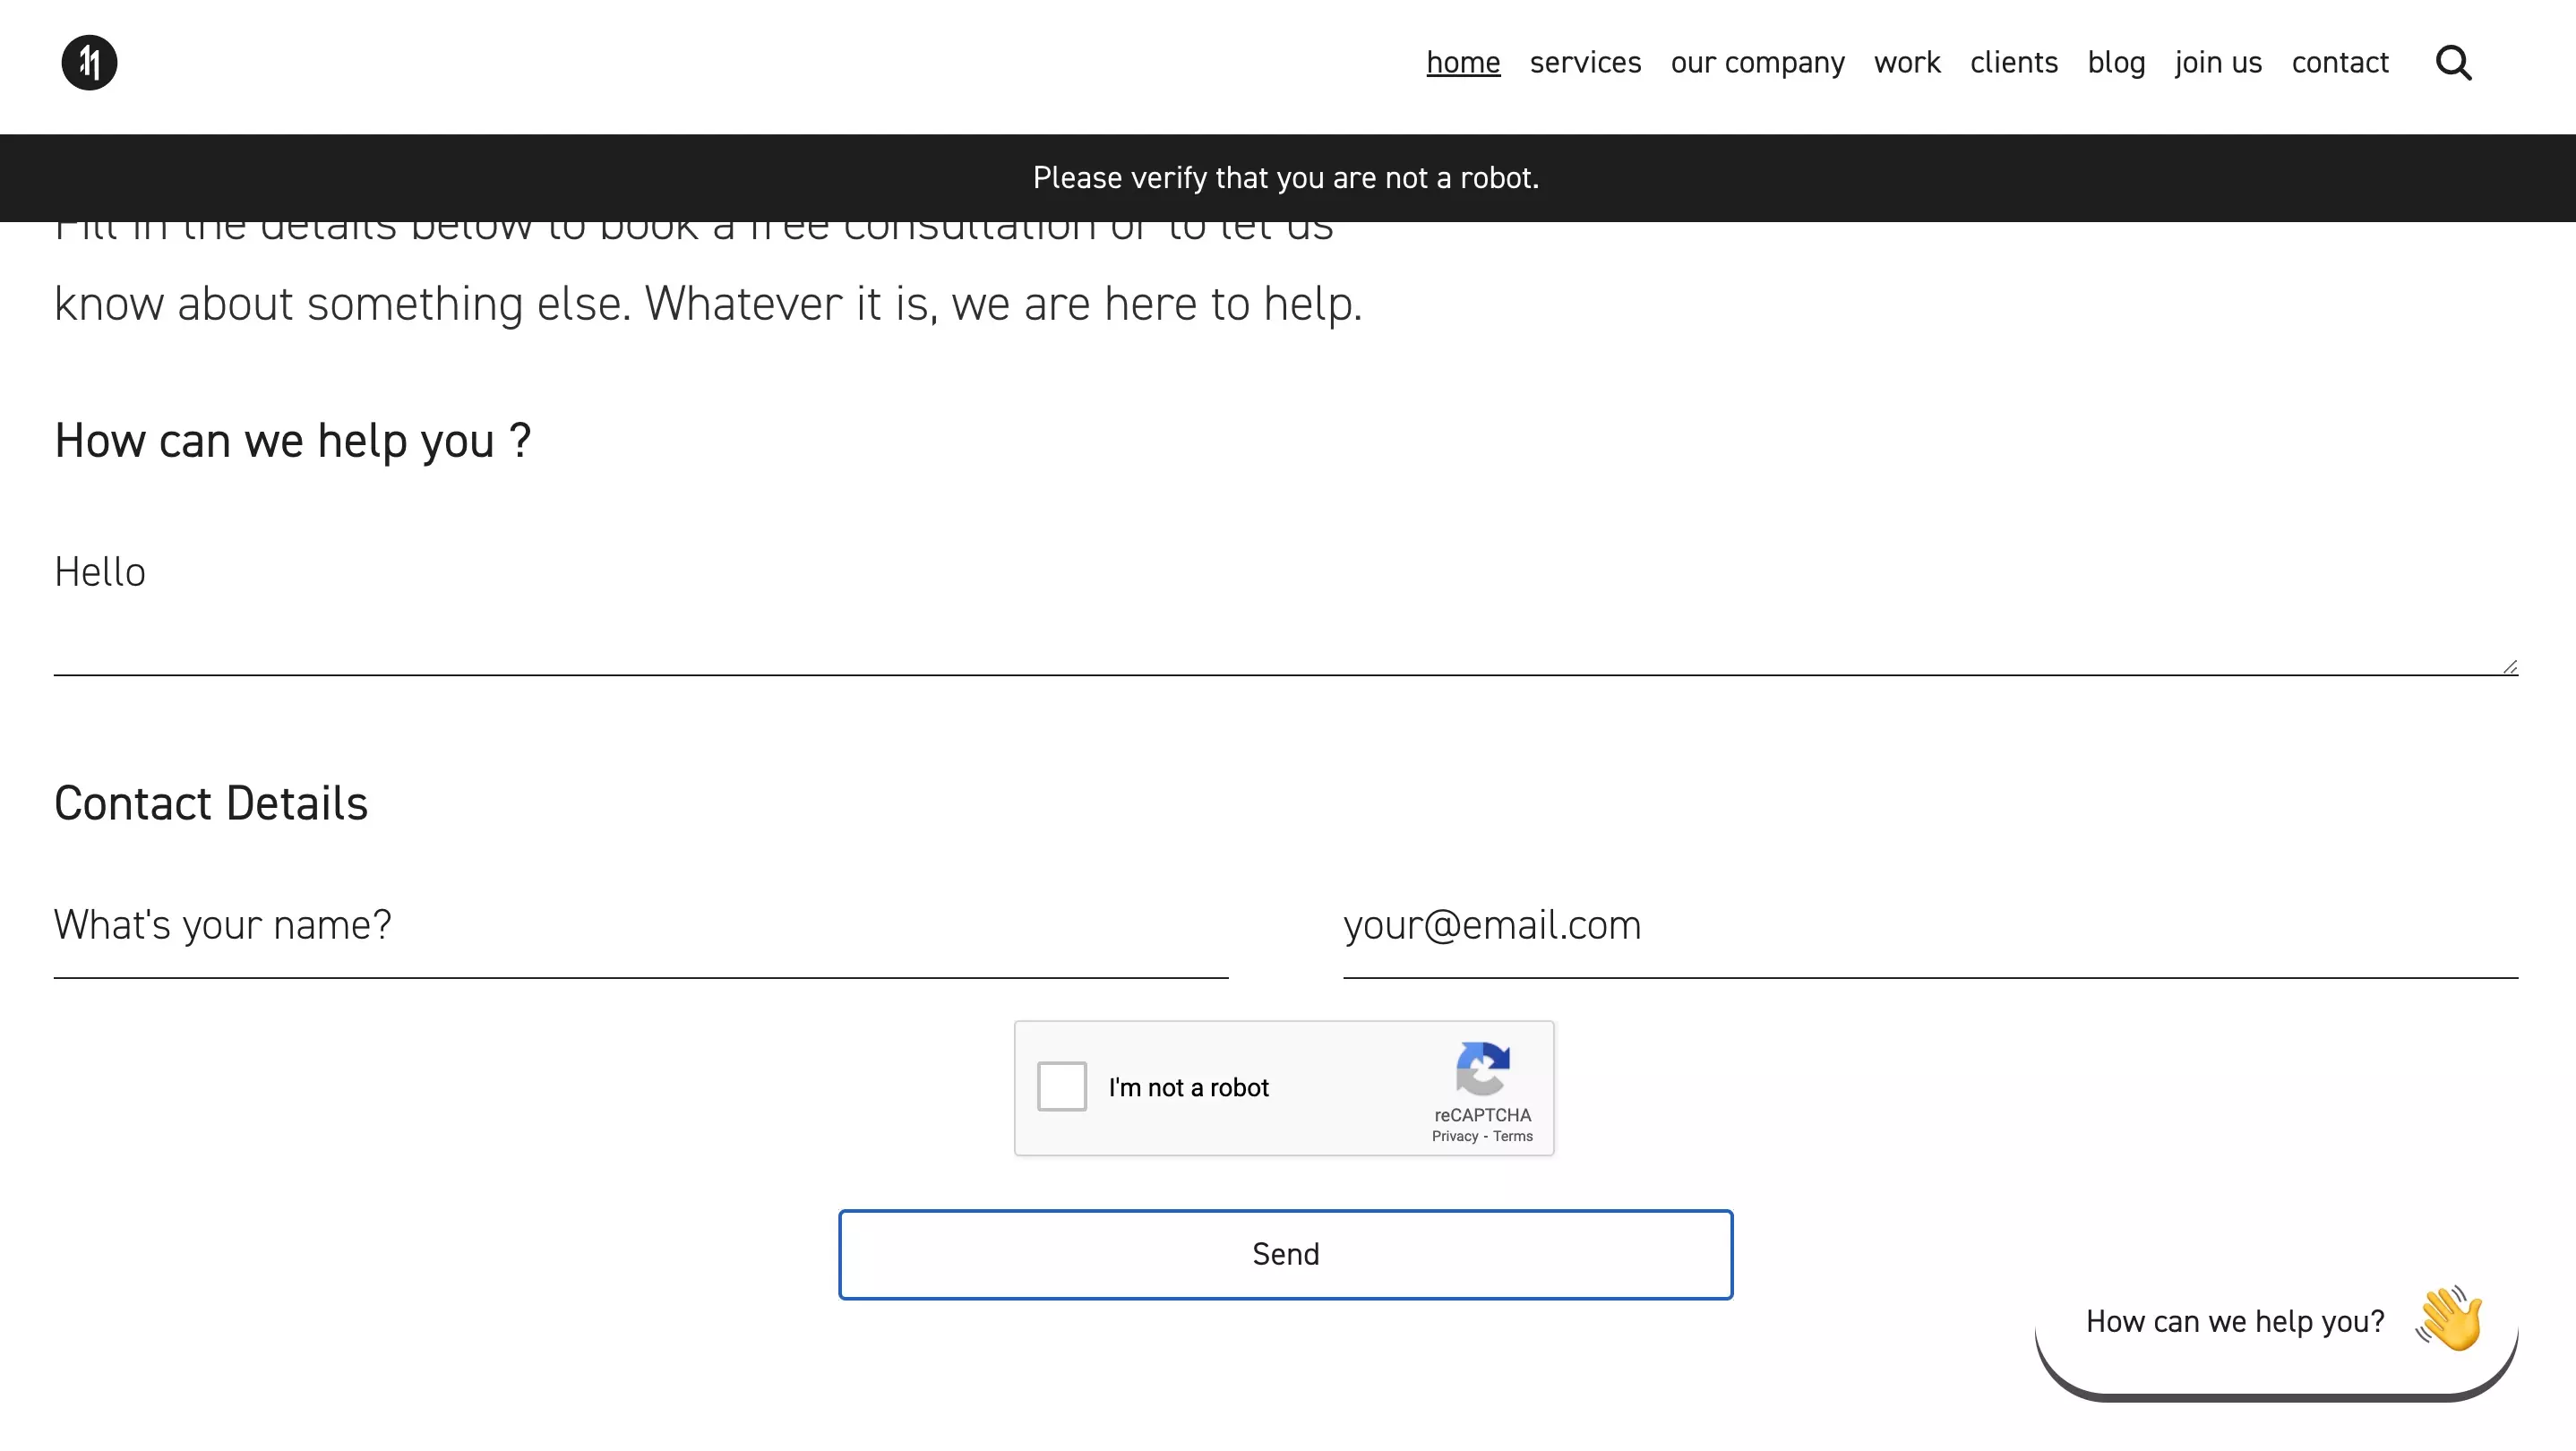
To know if a reCAPTCHA test passed or not, you must check the Token is empty.
To gather the Token, get current value of the reference created in Step Five.
- If it's empty (reCaptchaElement.current.getValue() != ""), then it has not yet been completed.
- If it is not empty, the user successfully demonstrated that it is not a robot.
Please note that in order to guarantee that the token was produced by a human, you must authenticate it with Google using your Secret Key.
Next Steps: Authenticate the reCAPTCHA Token
To learn how to authenticate a reCAPTCHA token, follow the tutorial below.
Please note that you can authenticate the token on the front-end but, for security purposes, it is strongly recommended that you authenticate the reCAPTCHA token on the backend.
Frequently Asked Questions (FAQ)
How do I reset the reCAPTCHA for subsequent checks ?
To reset the reCAPTCHA, reset the current value of the ref using the following code:
reCaptchaElement.current.reset()How do I make the reCaptcha show the selection challenge (i.e. select all squares with traffic lights) ?
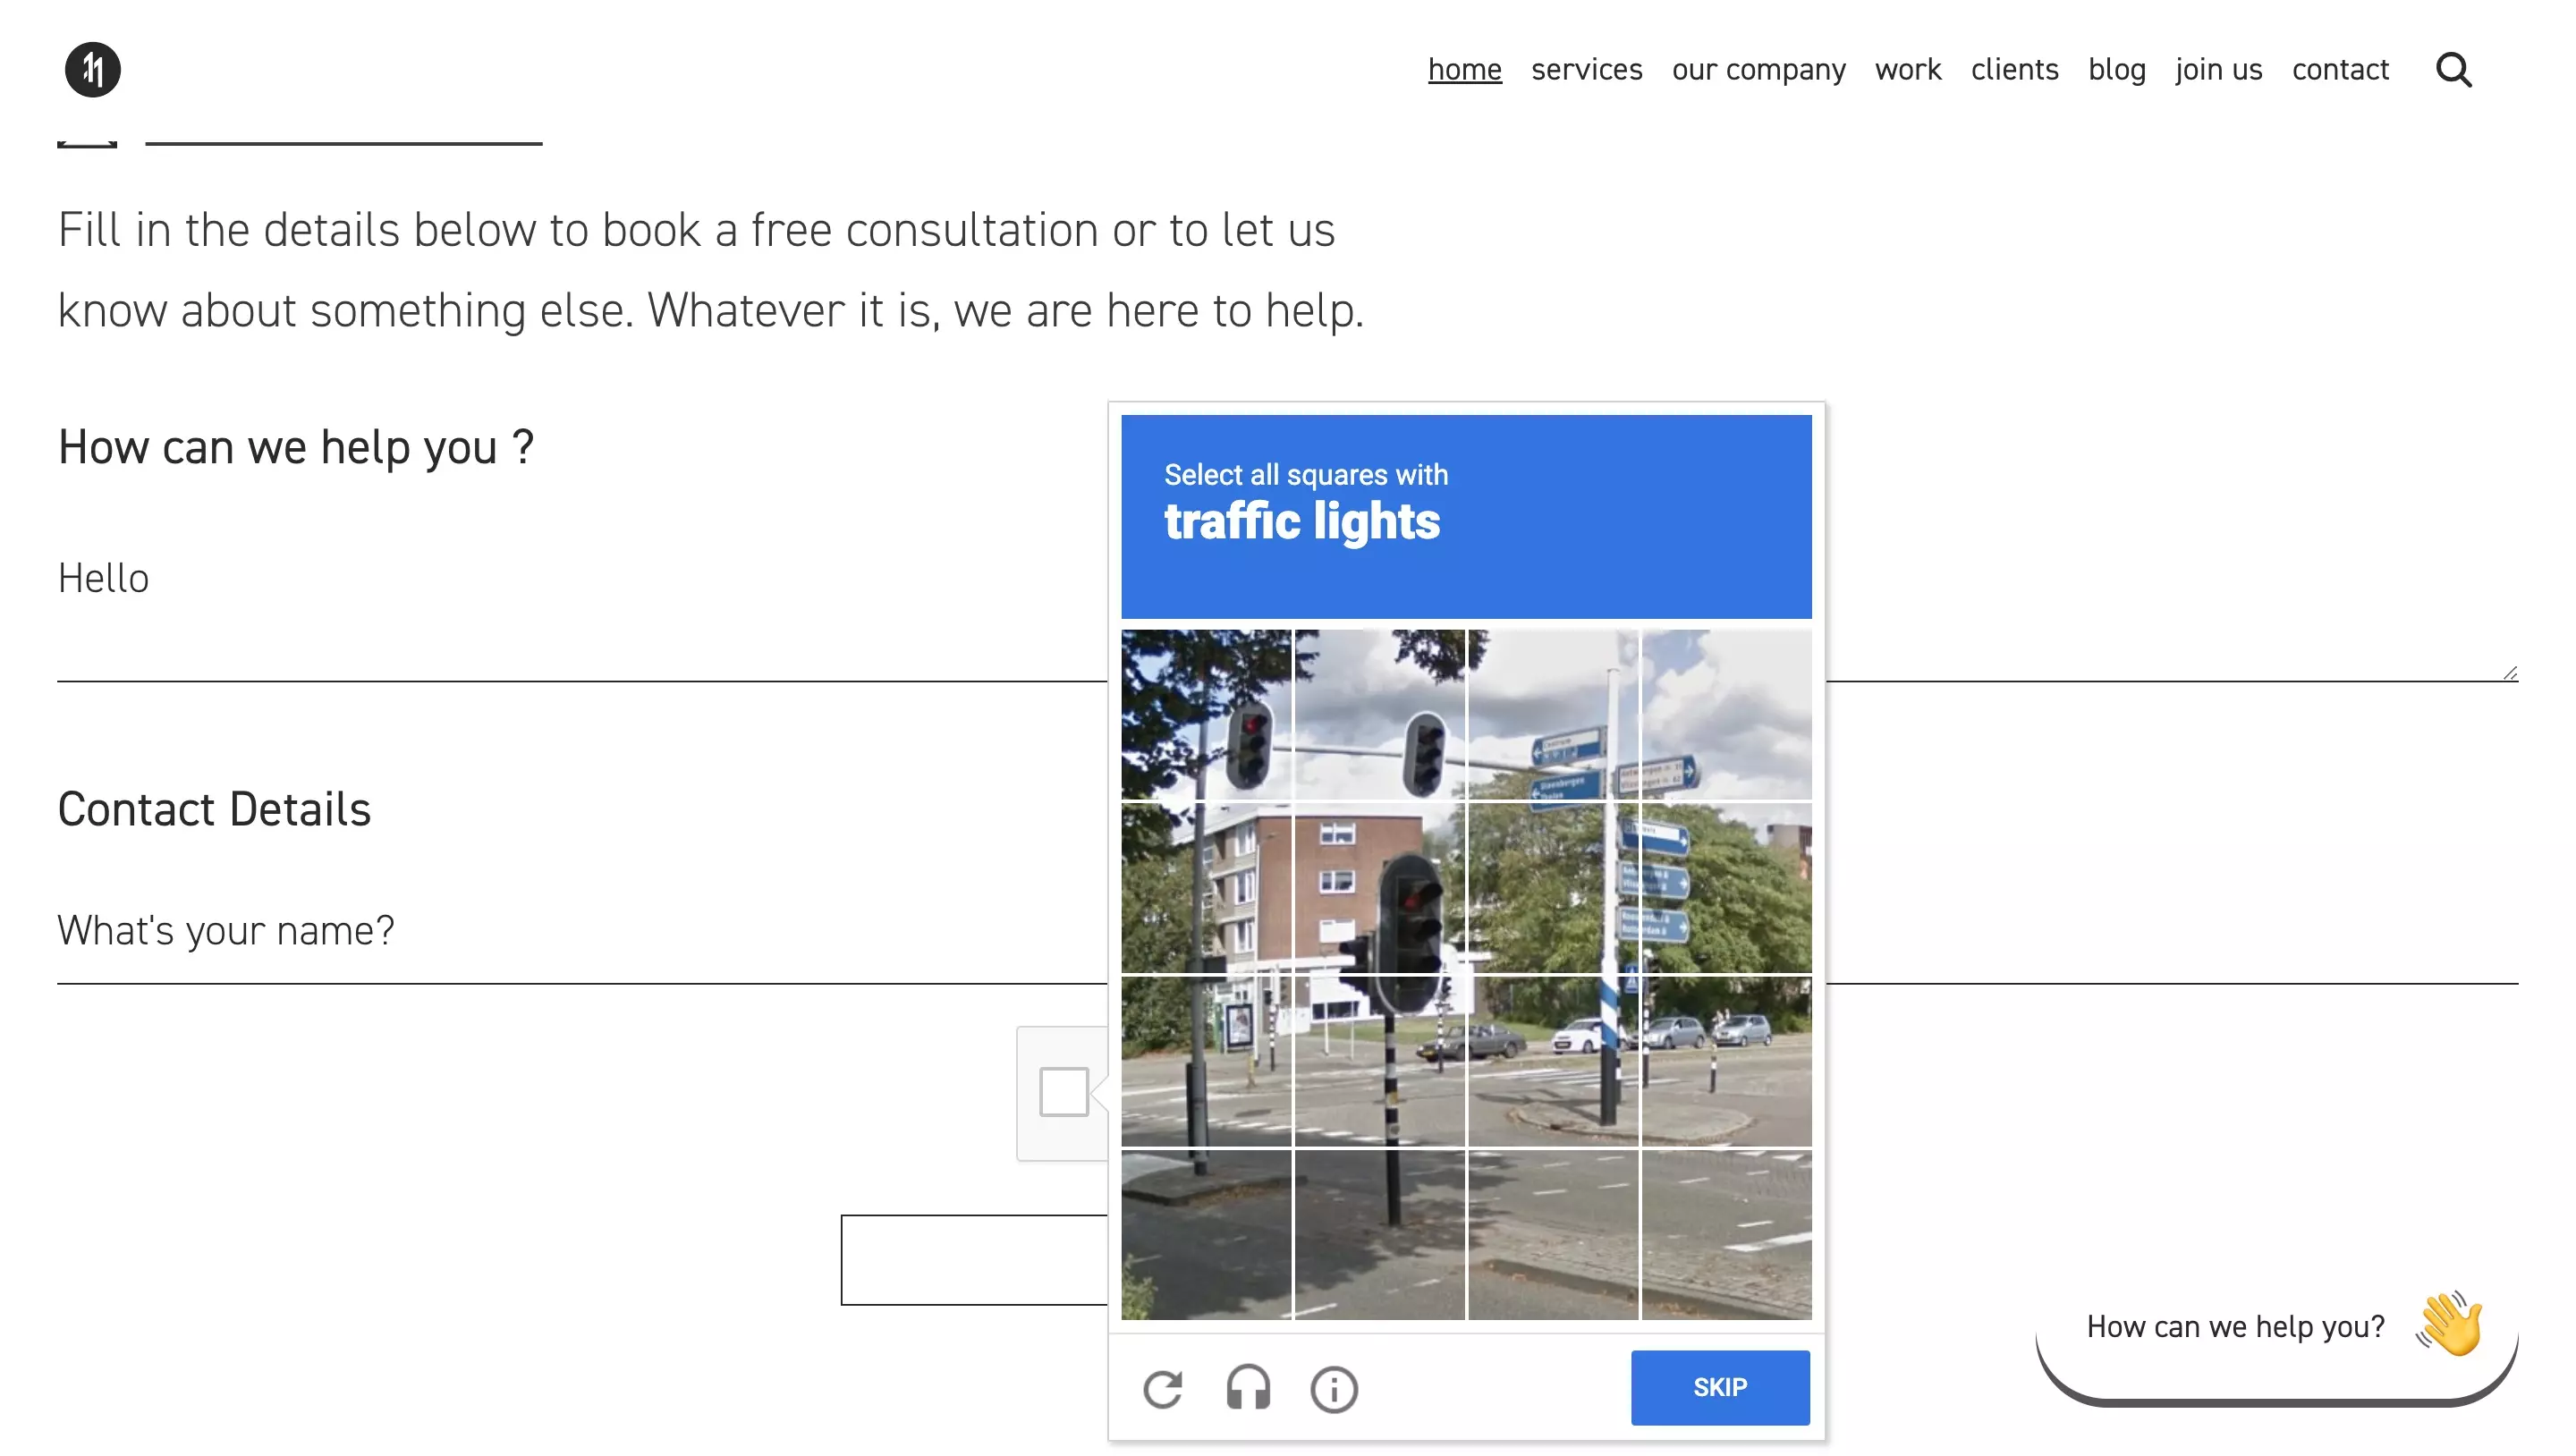
To show the most secure version of the reCAPTCHA v2 checkbox, navigate to the settings page for your site and under Security Preference slide the slider to Most Secure.
Make sure you press save so that the update registers.
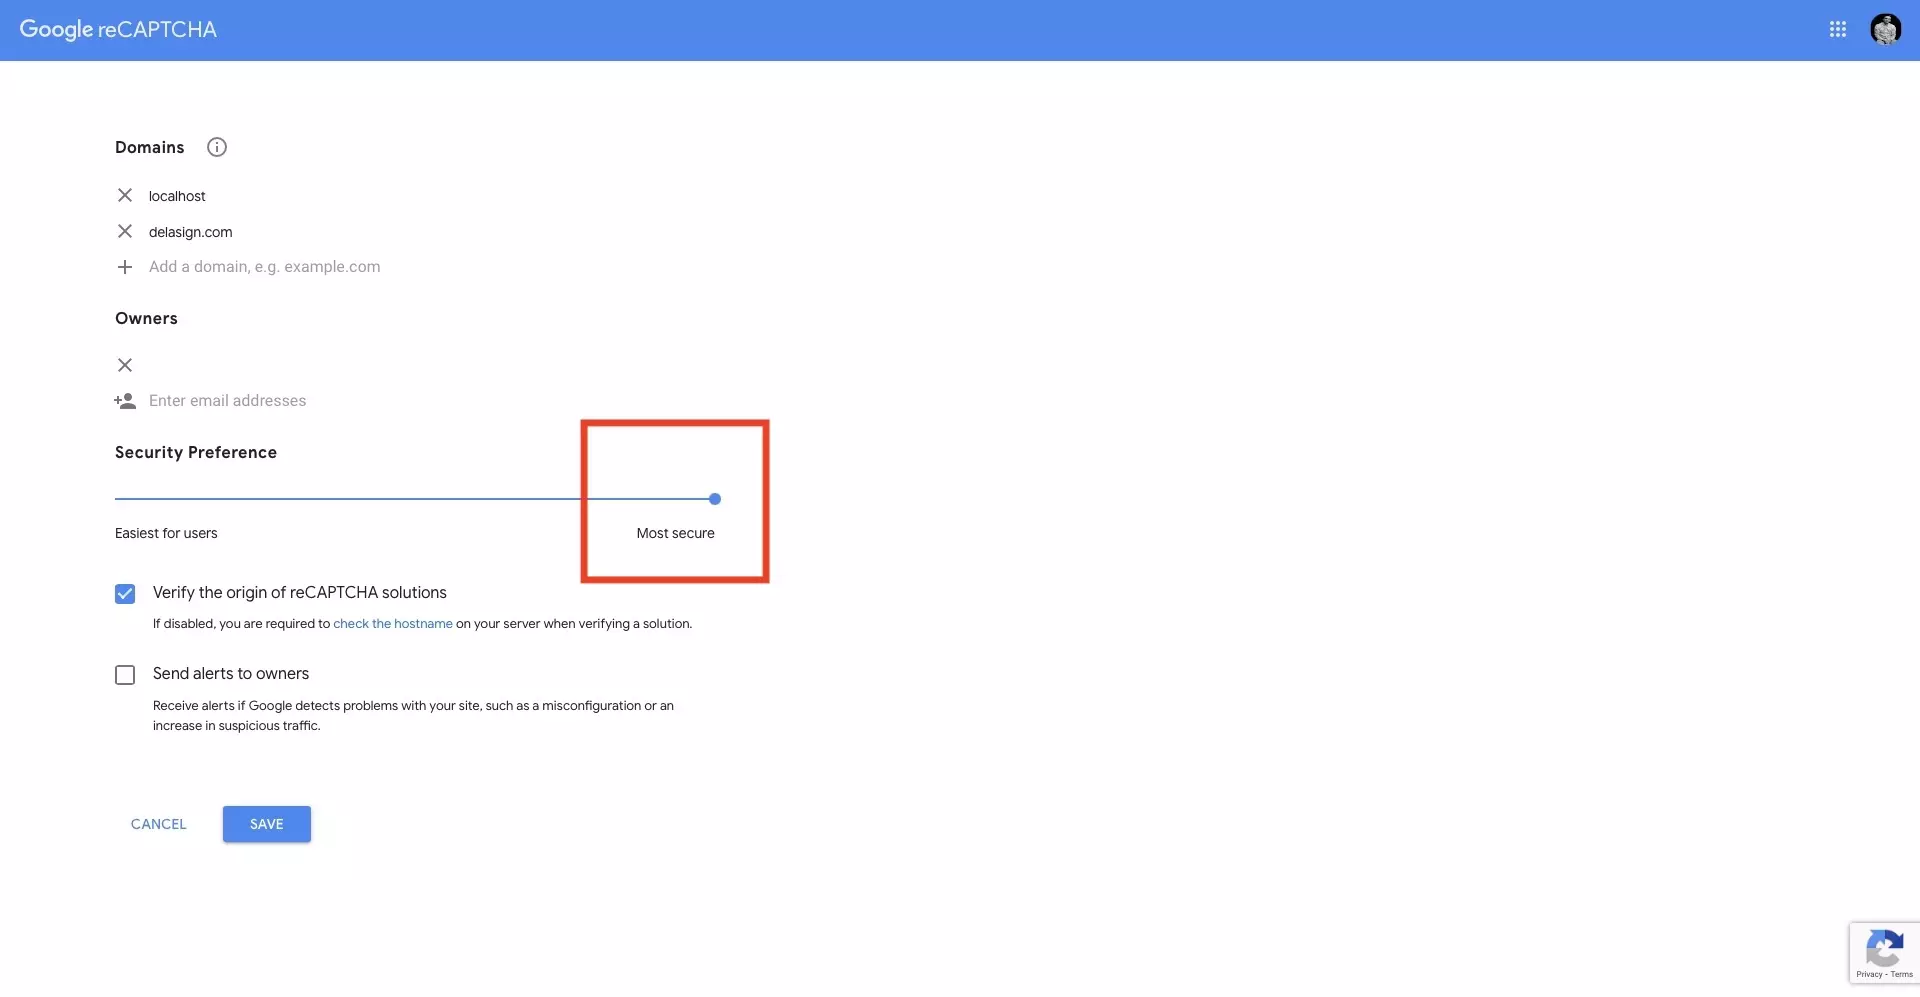
How do I get alerts if Google detects reCAPTCHA problems with my site ?
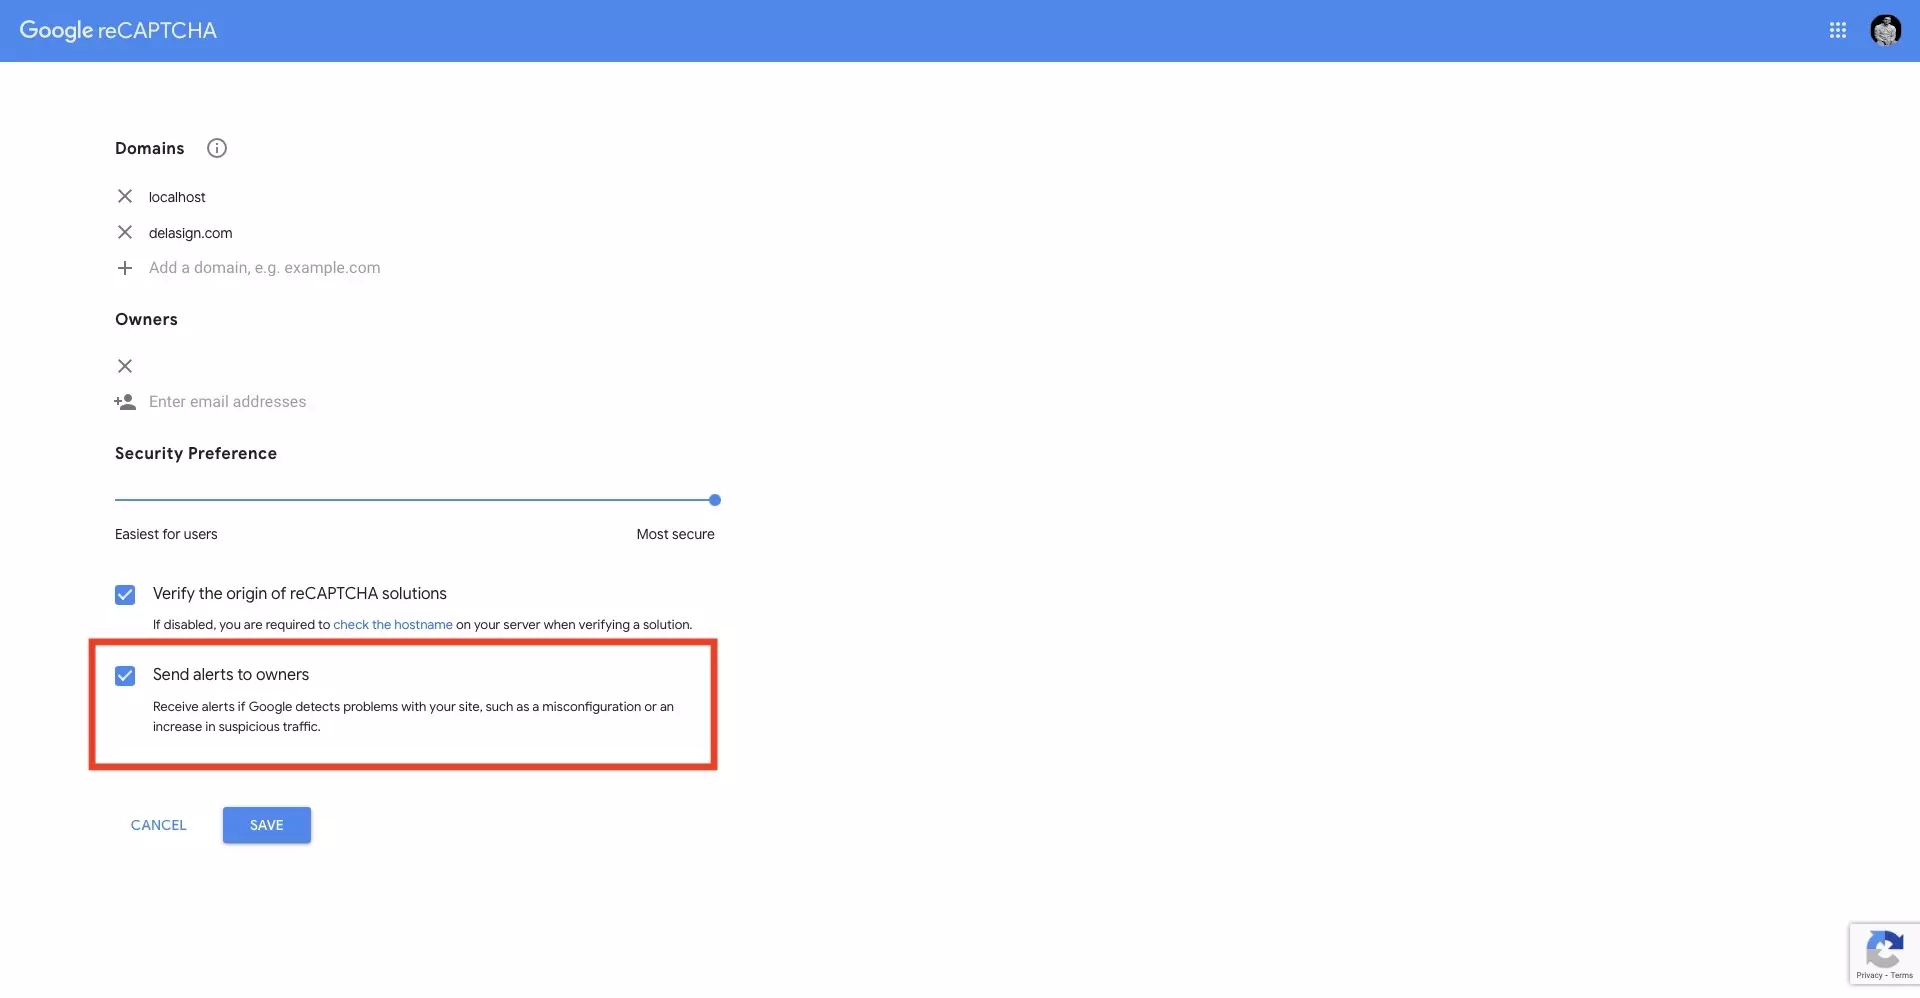
To get alerted about misconfigurations or an increase in suspicious traffic, navigate to your sites settings and check Send alerts to owners.
Make sure you press save so that the update registers.
Do I need to authenticate a reCAPTCHA token?
You do not need to verify (authenticate) the token to get the basic functionality out of reCAPTCHA.
However, it is strongly recommended to verify the token to have an extra layer of authentication, guaranteeing that it is not a robot.
How do I authenticate that a reCAPTCHA token was produced by a human?
To authenticate that a reCAPTCHA token was produced by a human, you must create a backend service that calls an Google API with the SECRET KEY and TOKEN.