How to write a spot light shader in GLSL
A step by step guide for coding a spot light shader in Typescript, ReactJS, ThreeJS, ViteJS and GLSL.

A step by step guide for coding a spot light shader in Typescript, ReactJS, ThreeJS, ViteJS and GLSL.
SubscribeA guide for creating lights in GLSL shadersReact, ThreeJS & GLSL ResourcesThe solution that we carried out below can be found on the tutorial/three-js/light-shaders branch of our Open Source React, Typescript & ViteJS Starter Project.
To clone this project, paste the code found below in Terminal.
git clone git@github.com:delasign/reactjs-3js-vitejs-starter-project.gitThe tutorial was made possible thanks to the work of OGLDev which provided the code for spot lights at the tutorial linked below.
Step One: Create a Point Light

A spot light is a point light with a direction and a cutoff.
Follow the tutorial below to learn how to setup a Typescript & ViteJS project that works with a Point Light GLSL shader whose R, G, B color values can be adapted using dat.gui.
Step Two: Create the Typescript Type
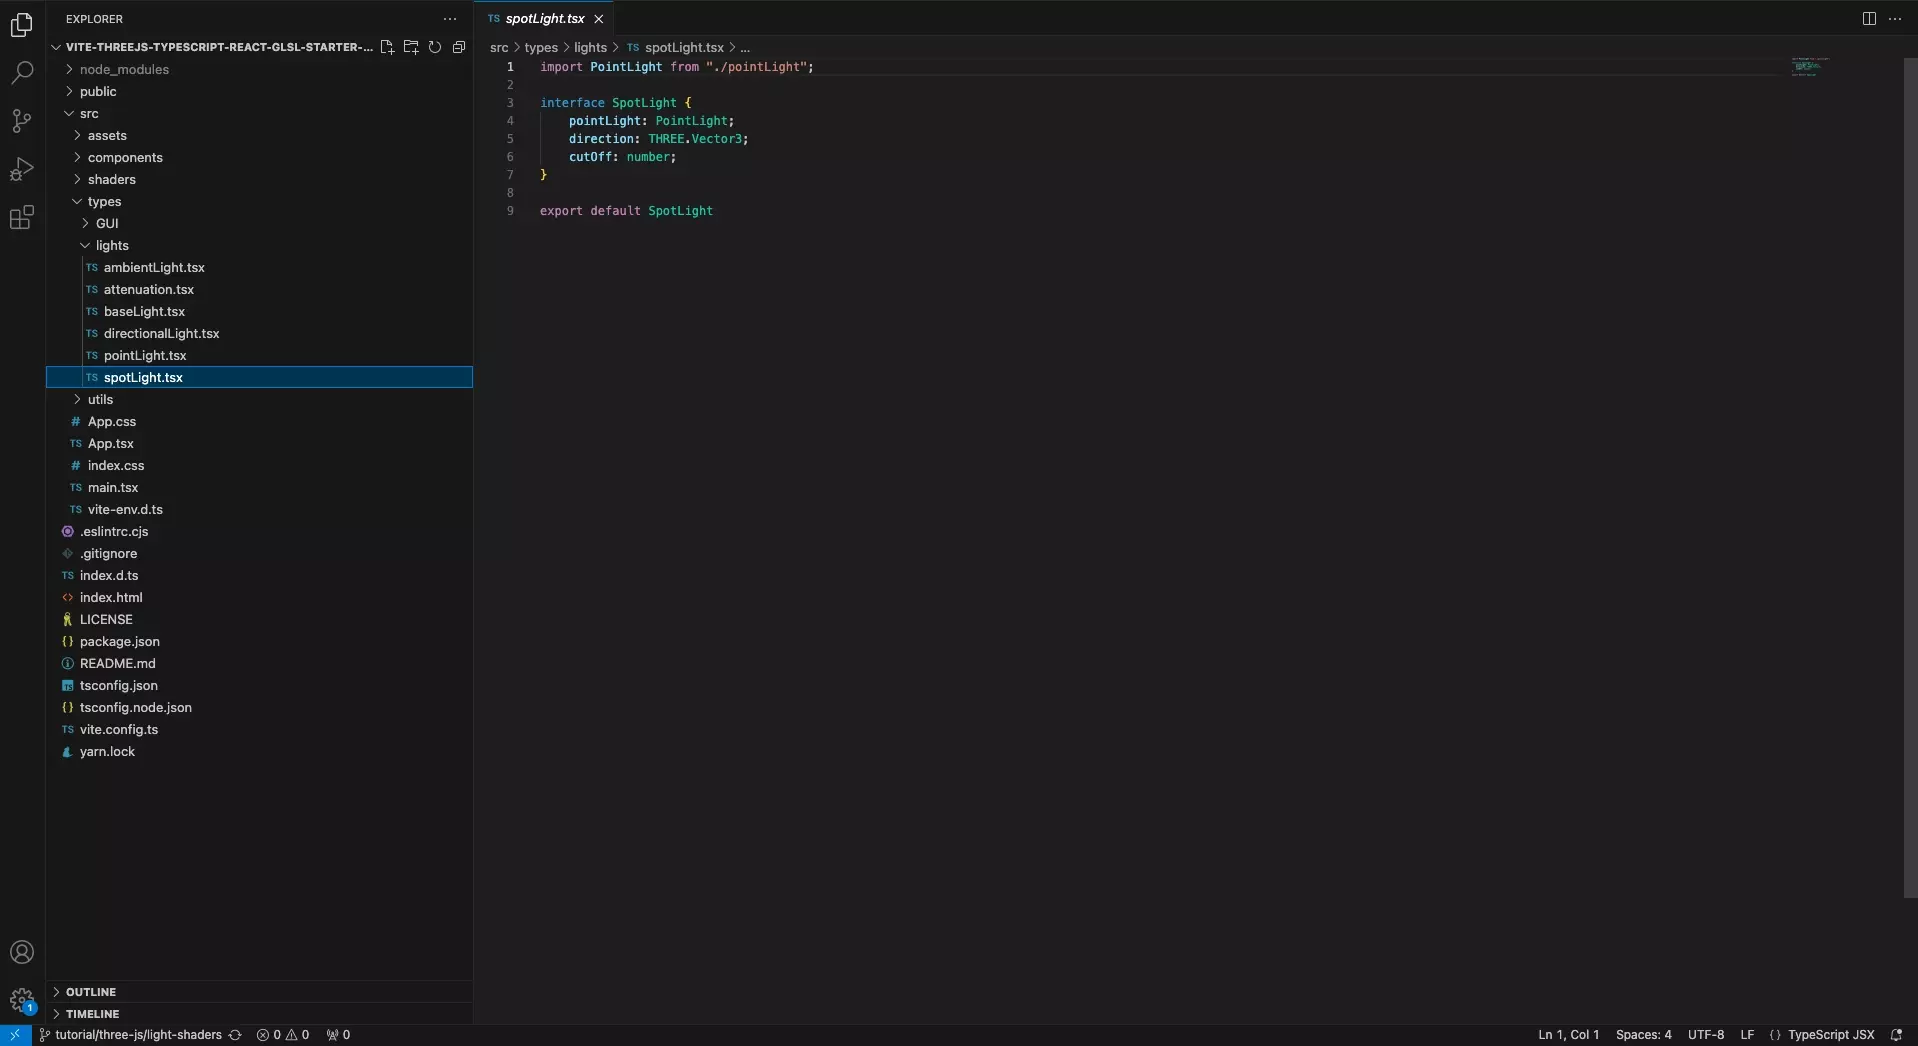
Create a file in your project called SpotLight.tsx and paste in the code found below.
We recommend that you place this under a types folder.
Step Three: Create the GLSL Struct
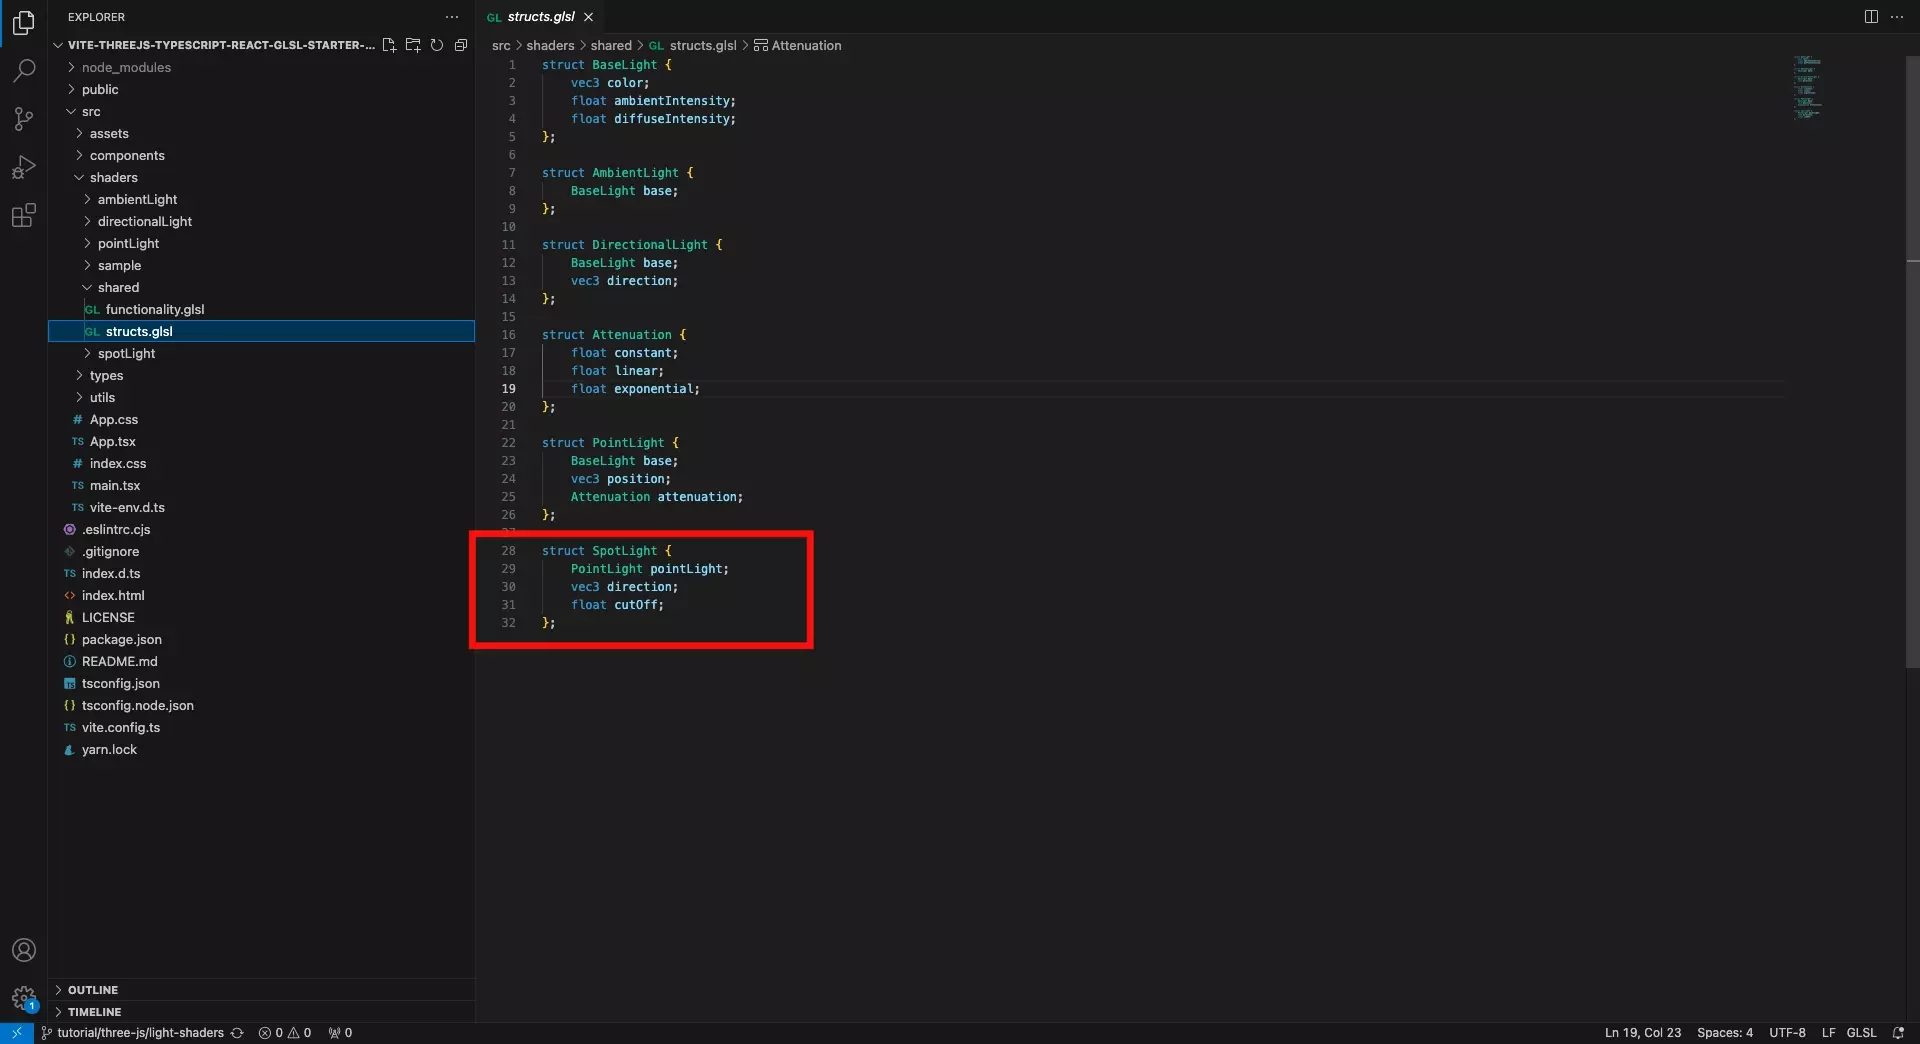
In the structs.glsl file, add the Spotlight struct using the code below.
Step Four: Create the GLSL Spot Light Functionality
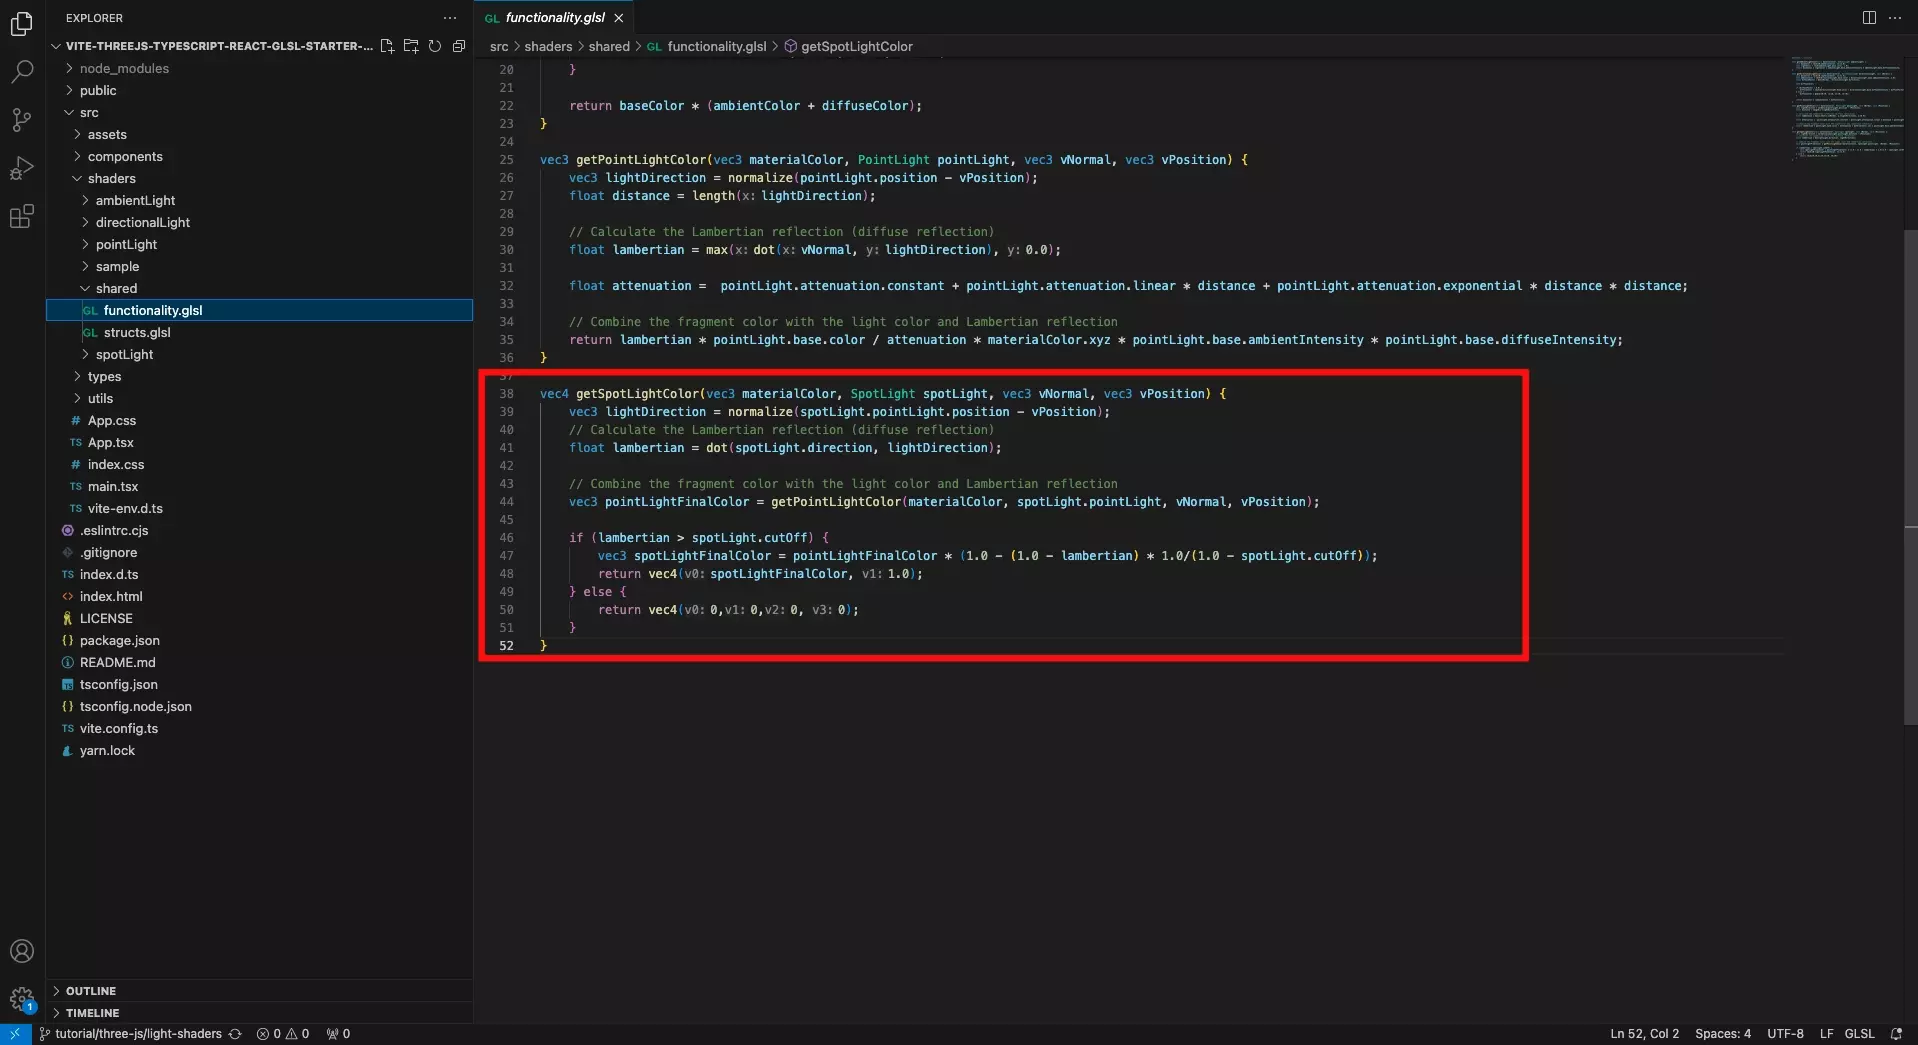
In the functionality.glsl file, add the Spot Light functionality using the code below.
Step Five: Create the GLSL Spot Light Shader
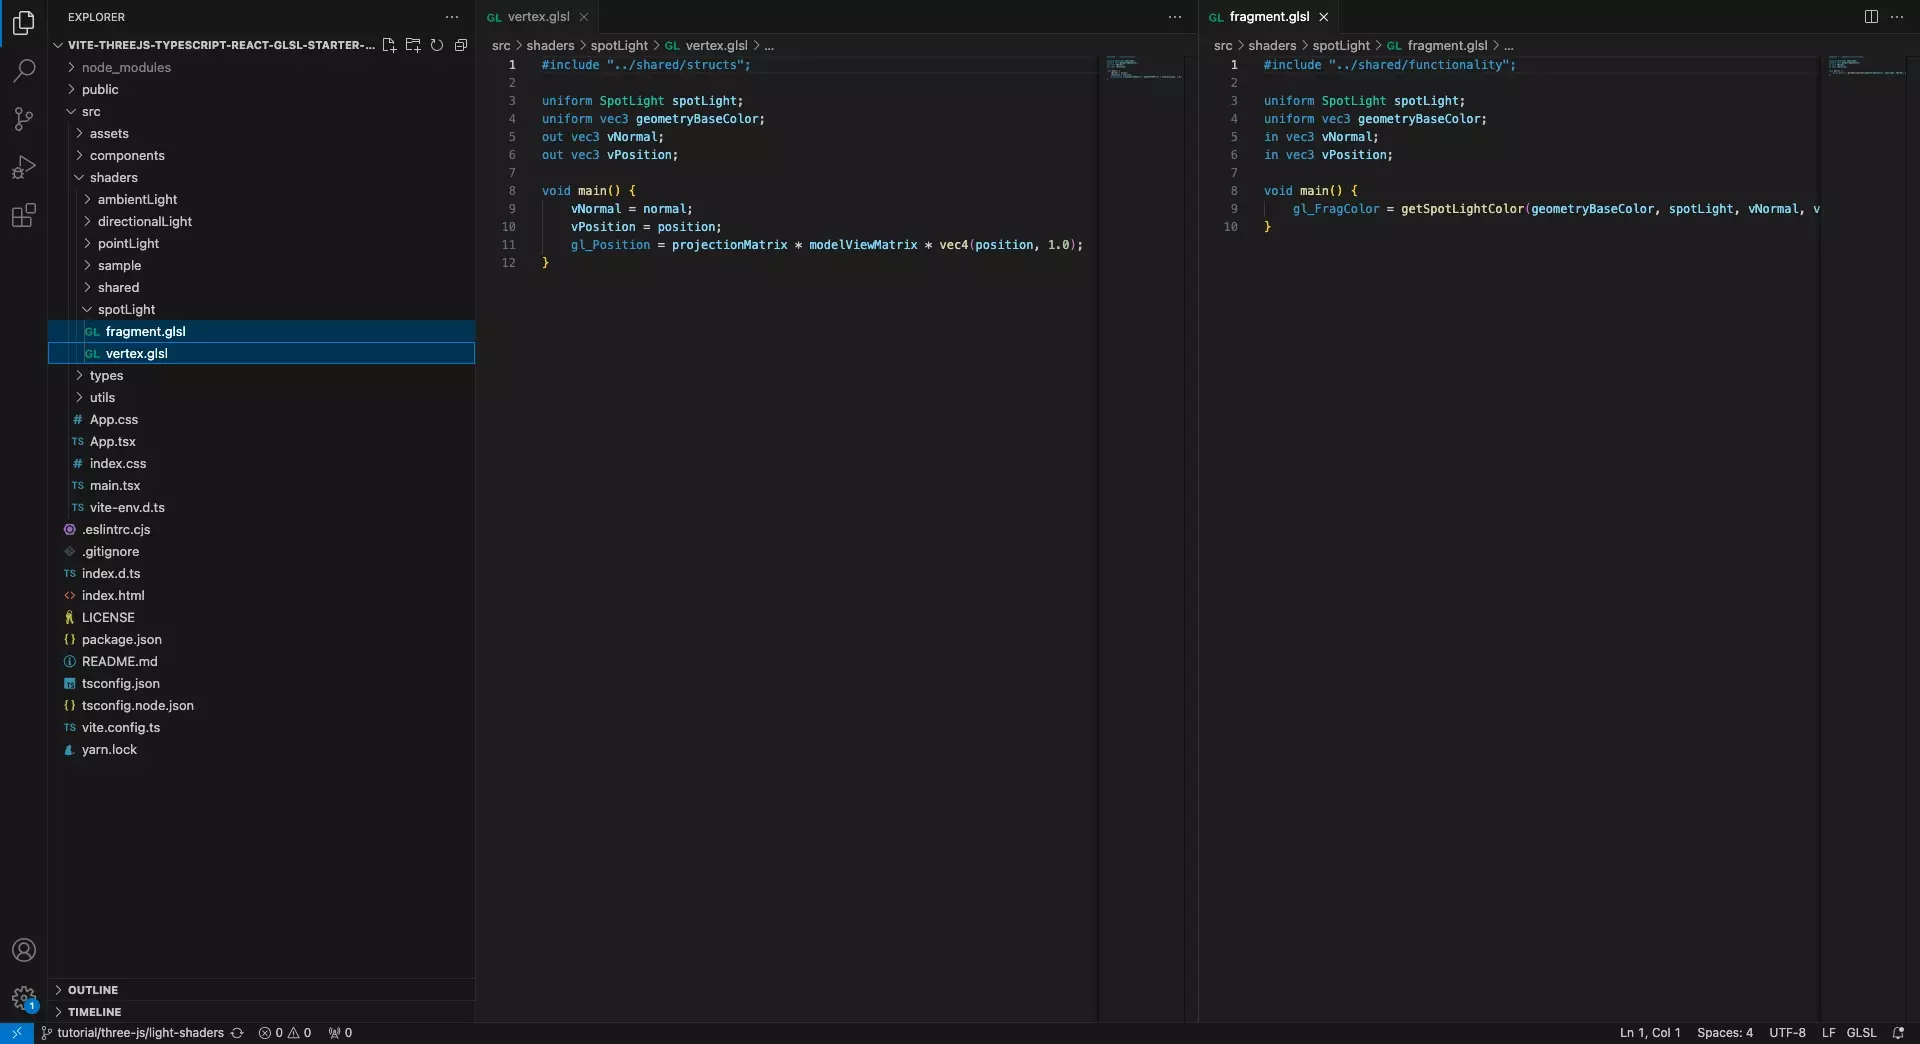
Create a vertex.glsl and fragment.glsl file for your shader.
We recommend that you place these files under a spotLight within a shaders folder.
Vertex Shader
Fragment Shader
Step Six: Update the Scene
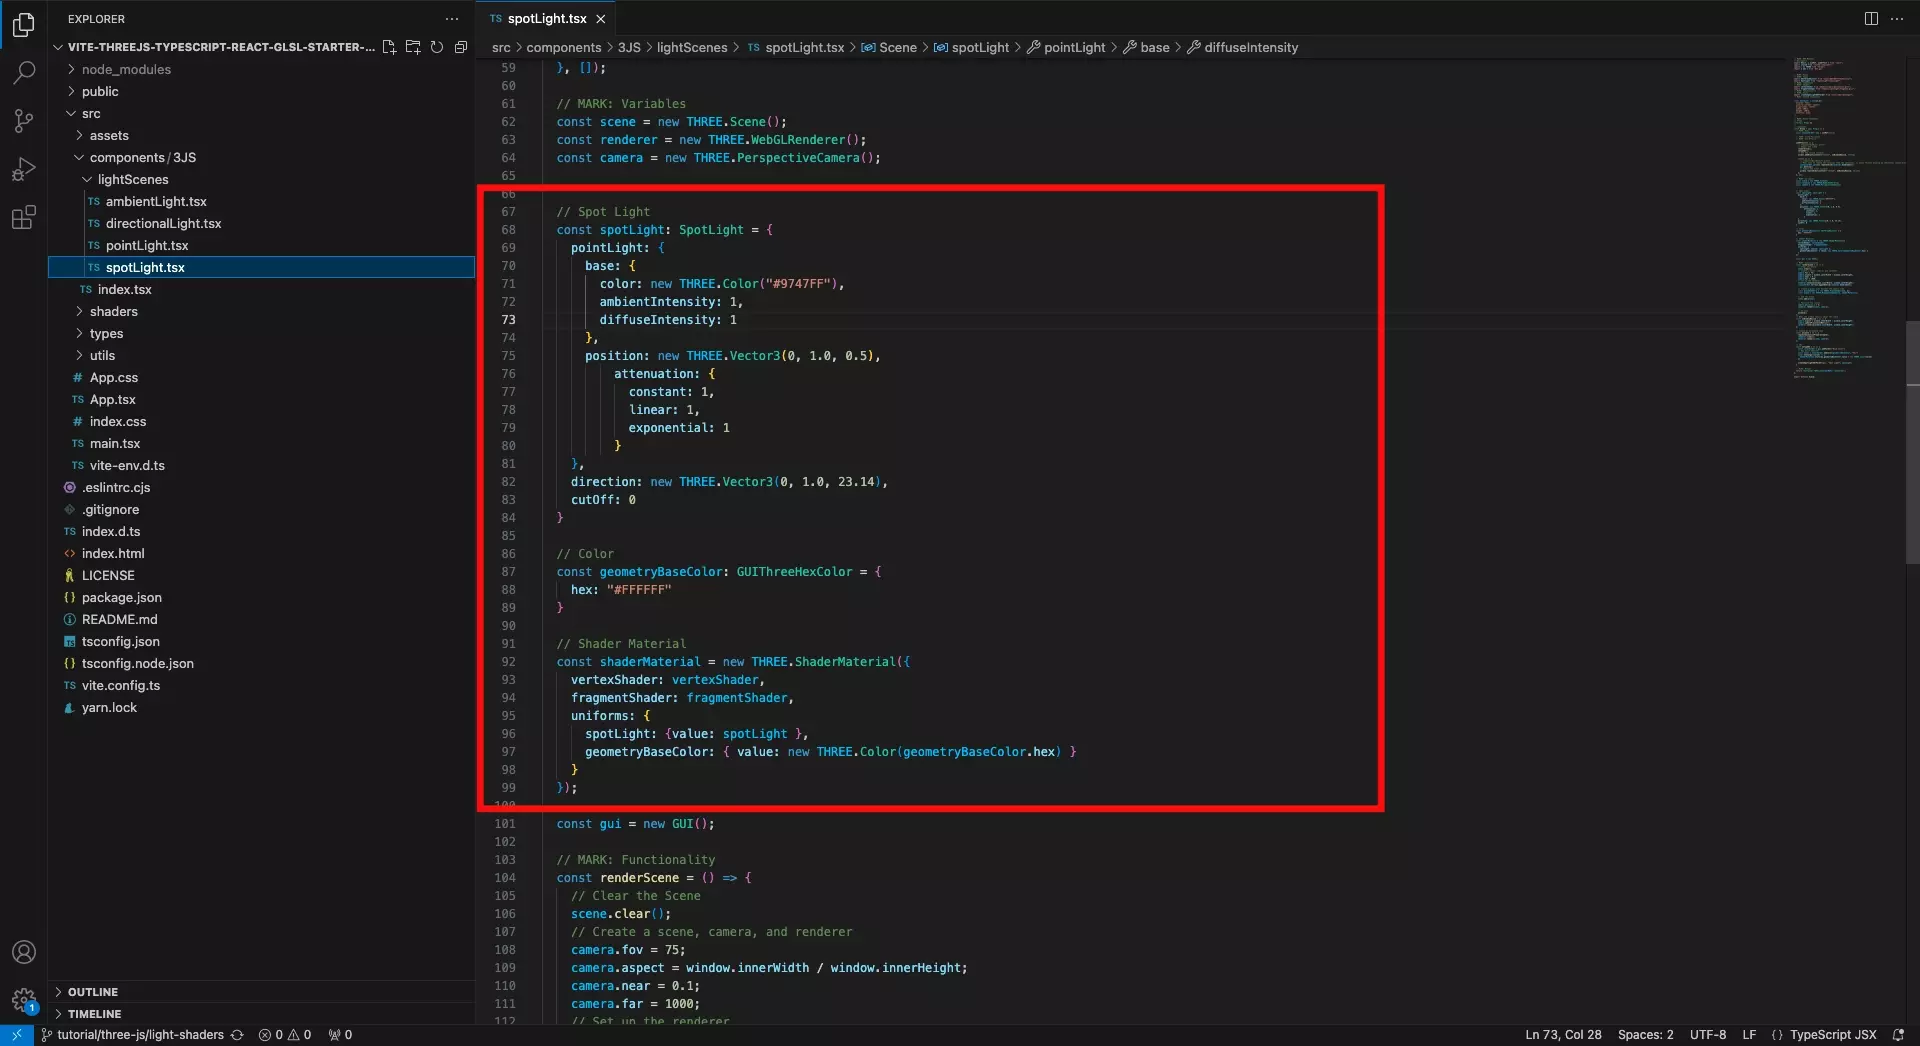
Update the scene to make use of the vertex and fragment shader that you created in Step Four.
Make sure that the shader material includes the spotLight and geometryBaseColor required for the shader created in Step Four.
Step Seven: Test
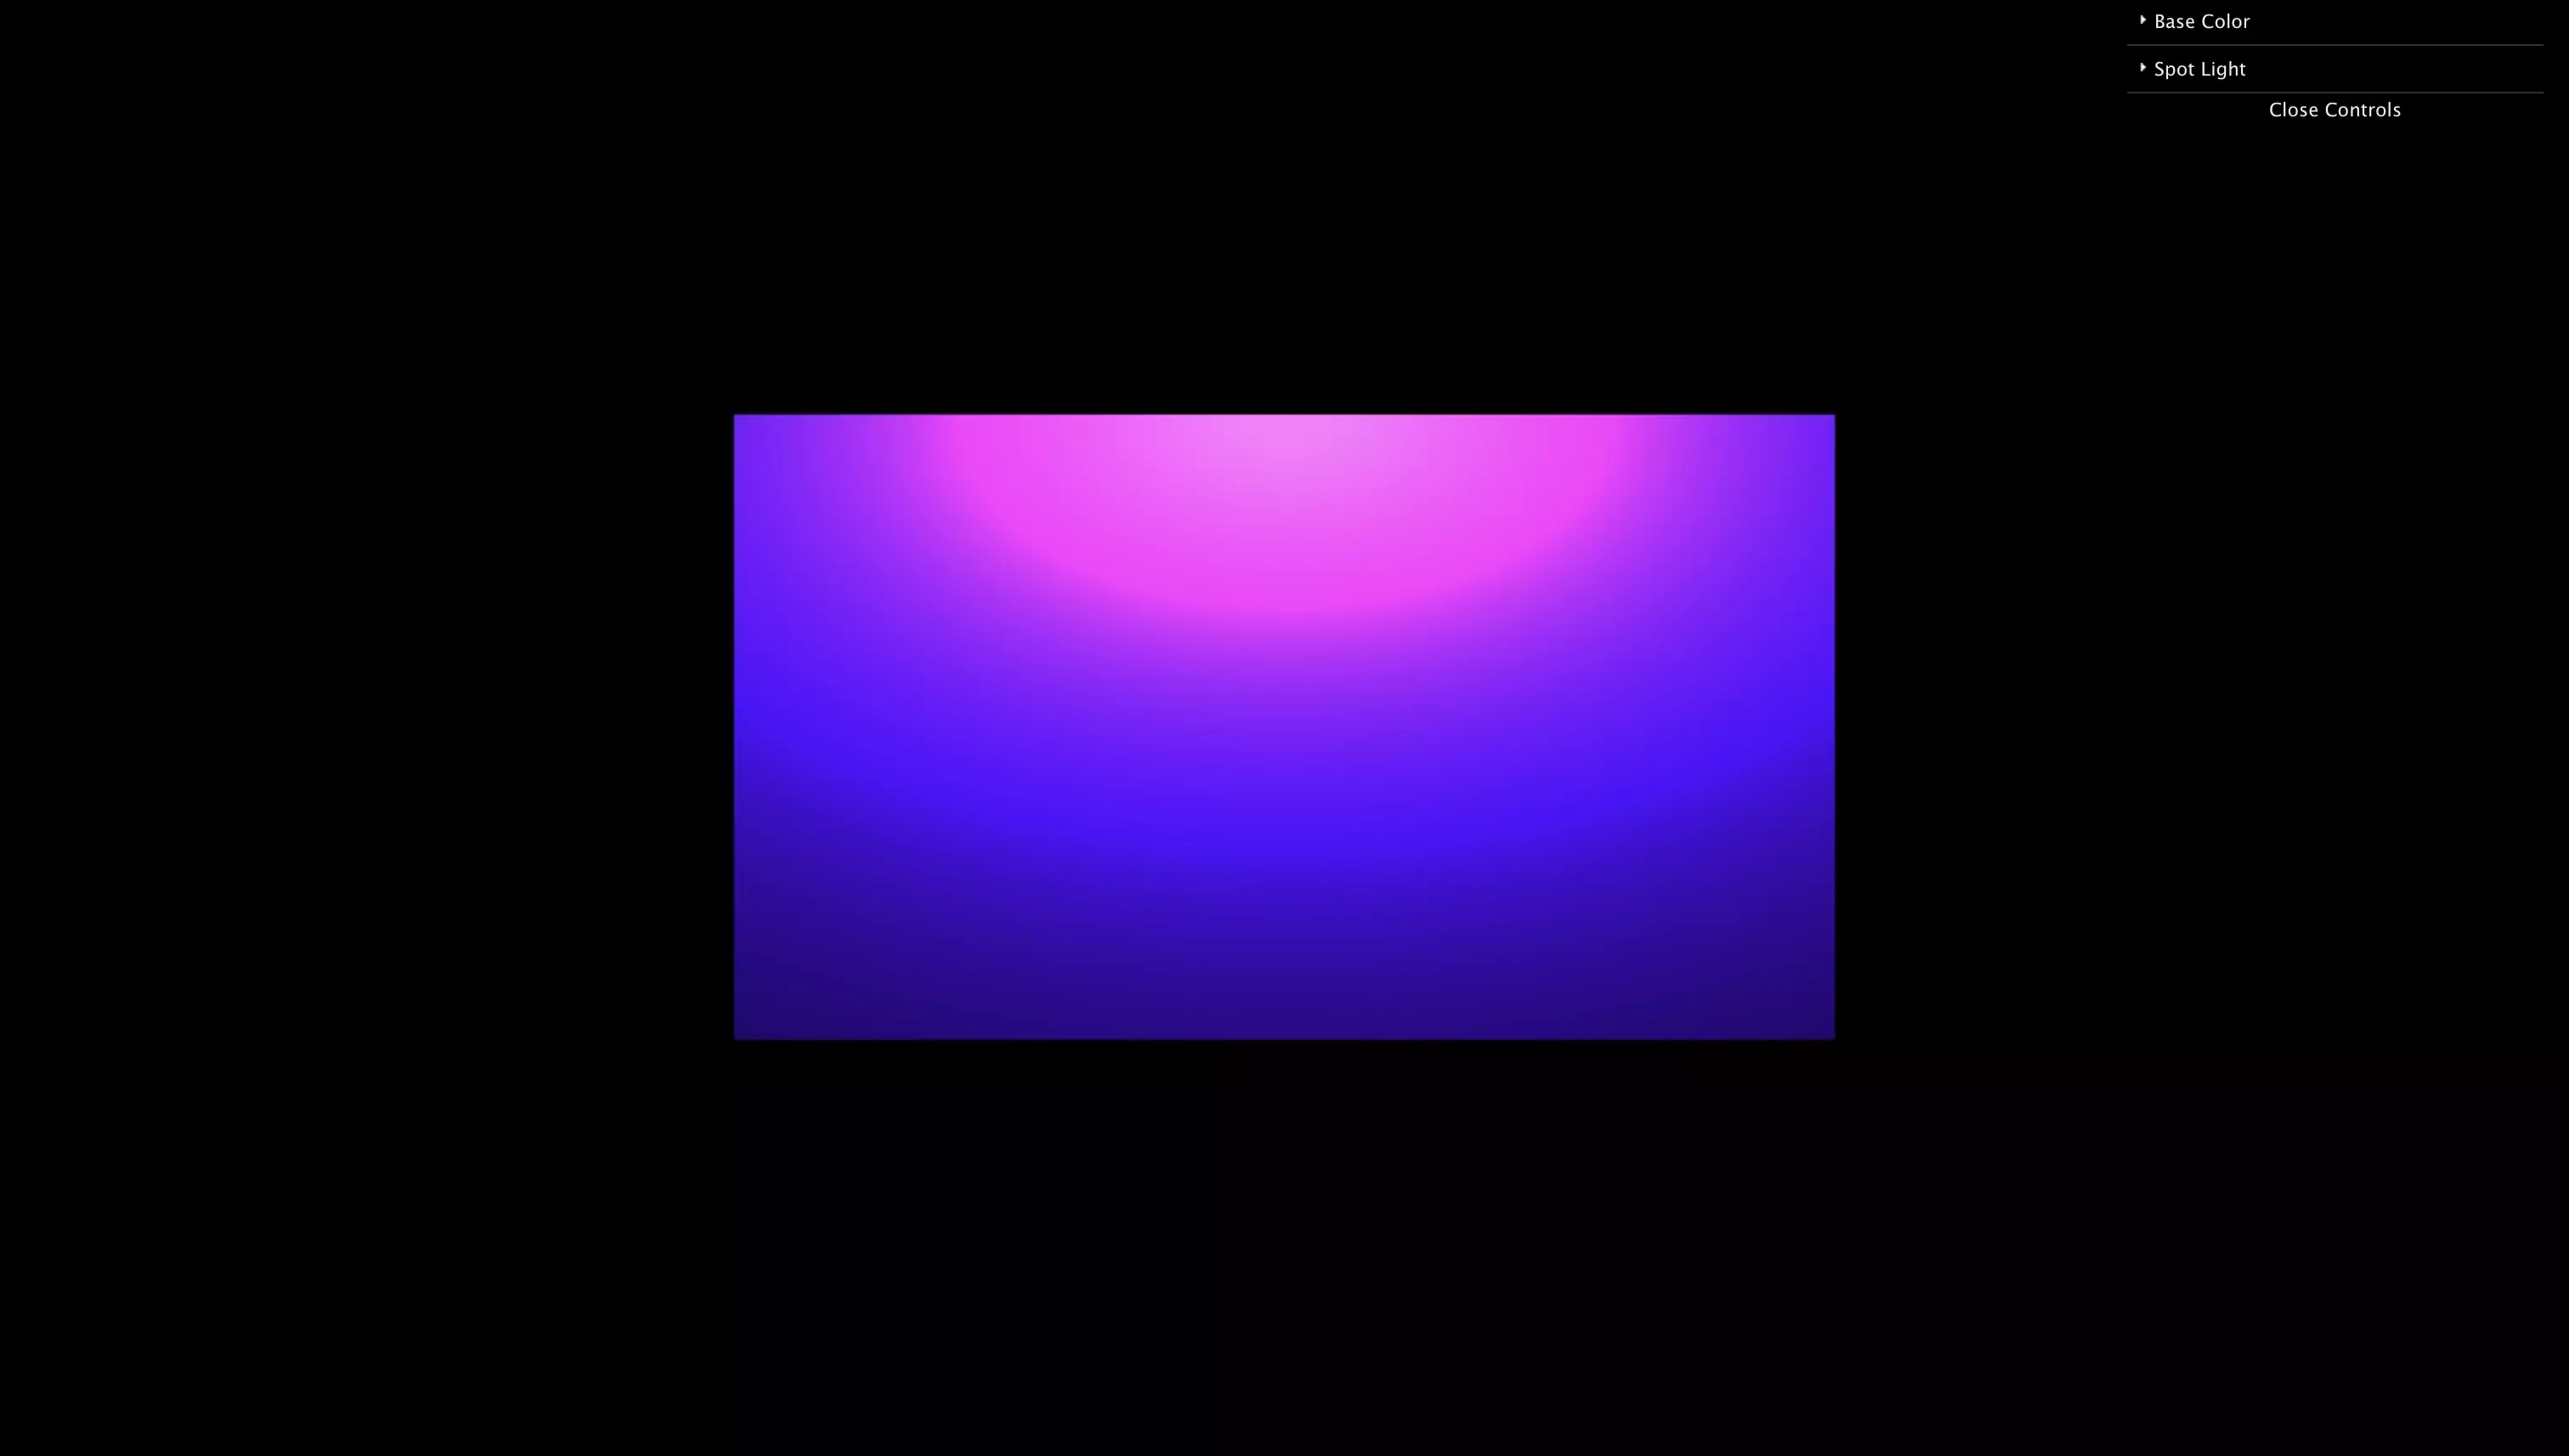
Run the code and make sure that everything works as expected.
If you wish to include dat.gui sliders like we have, consult the tutorials below.
Looking to learn more about ReactJS and ThreeJS ?
Search our blog to find educational content on learning how to use ReactJS and ThreeJS.