How to add a label to a JIRA ticket
Select a ticket within a JIRA project and in the modal that appears, add a label through the details menu on the right side.

Select a ticket within a JIRA project and in the modal that appears, add a label through the details menu on the right side.
Step One: Open up a JIRA project

Login to JIRA and open up the project which you wish to add labels to.
Step Two: Create or select a ticket
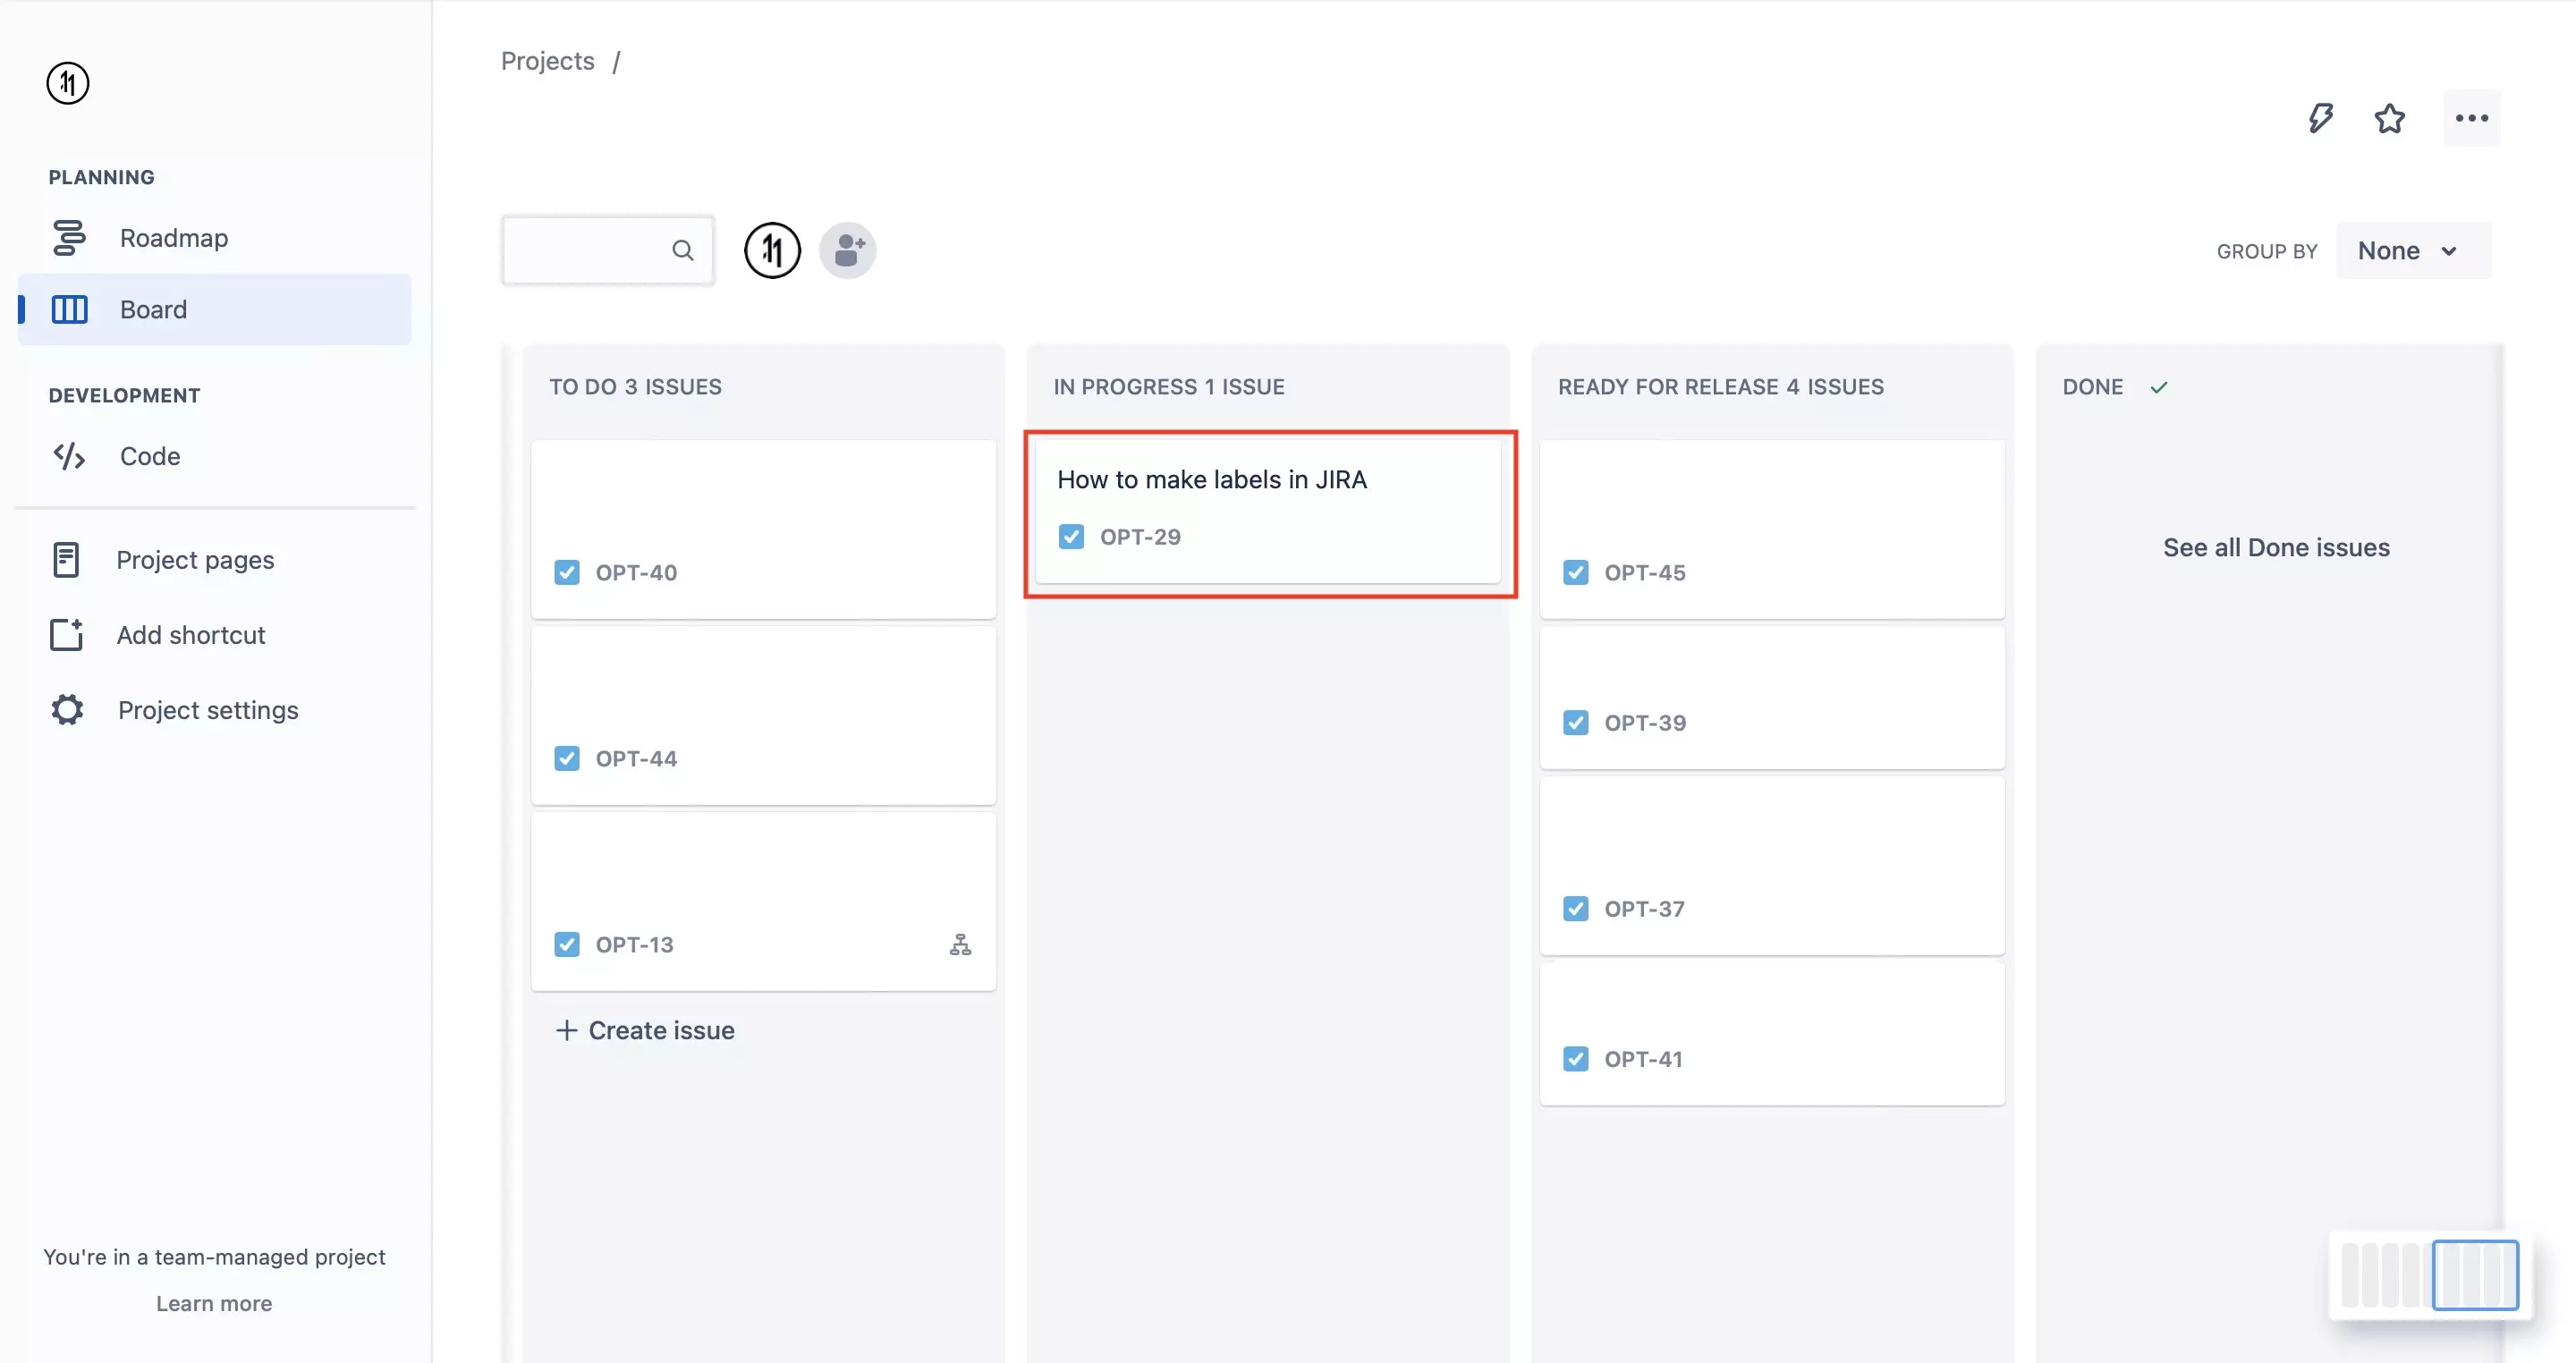
In the project, either create a new ticket or select an existing one.
Step Three: Add a label
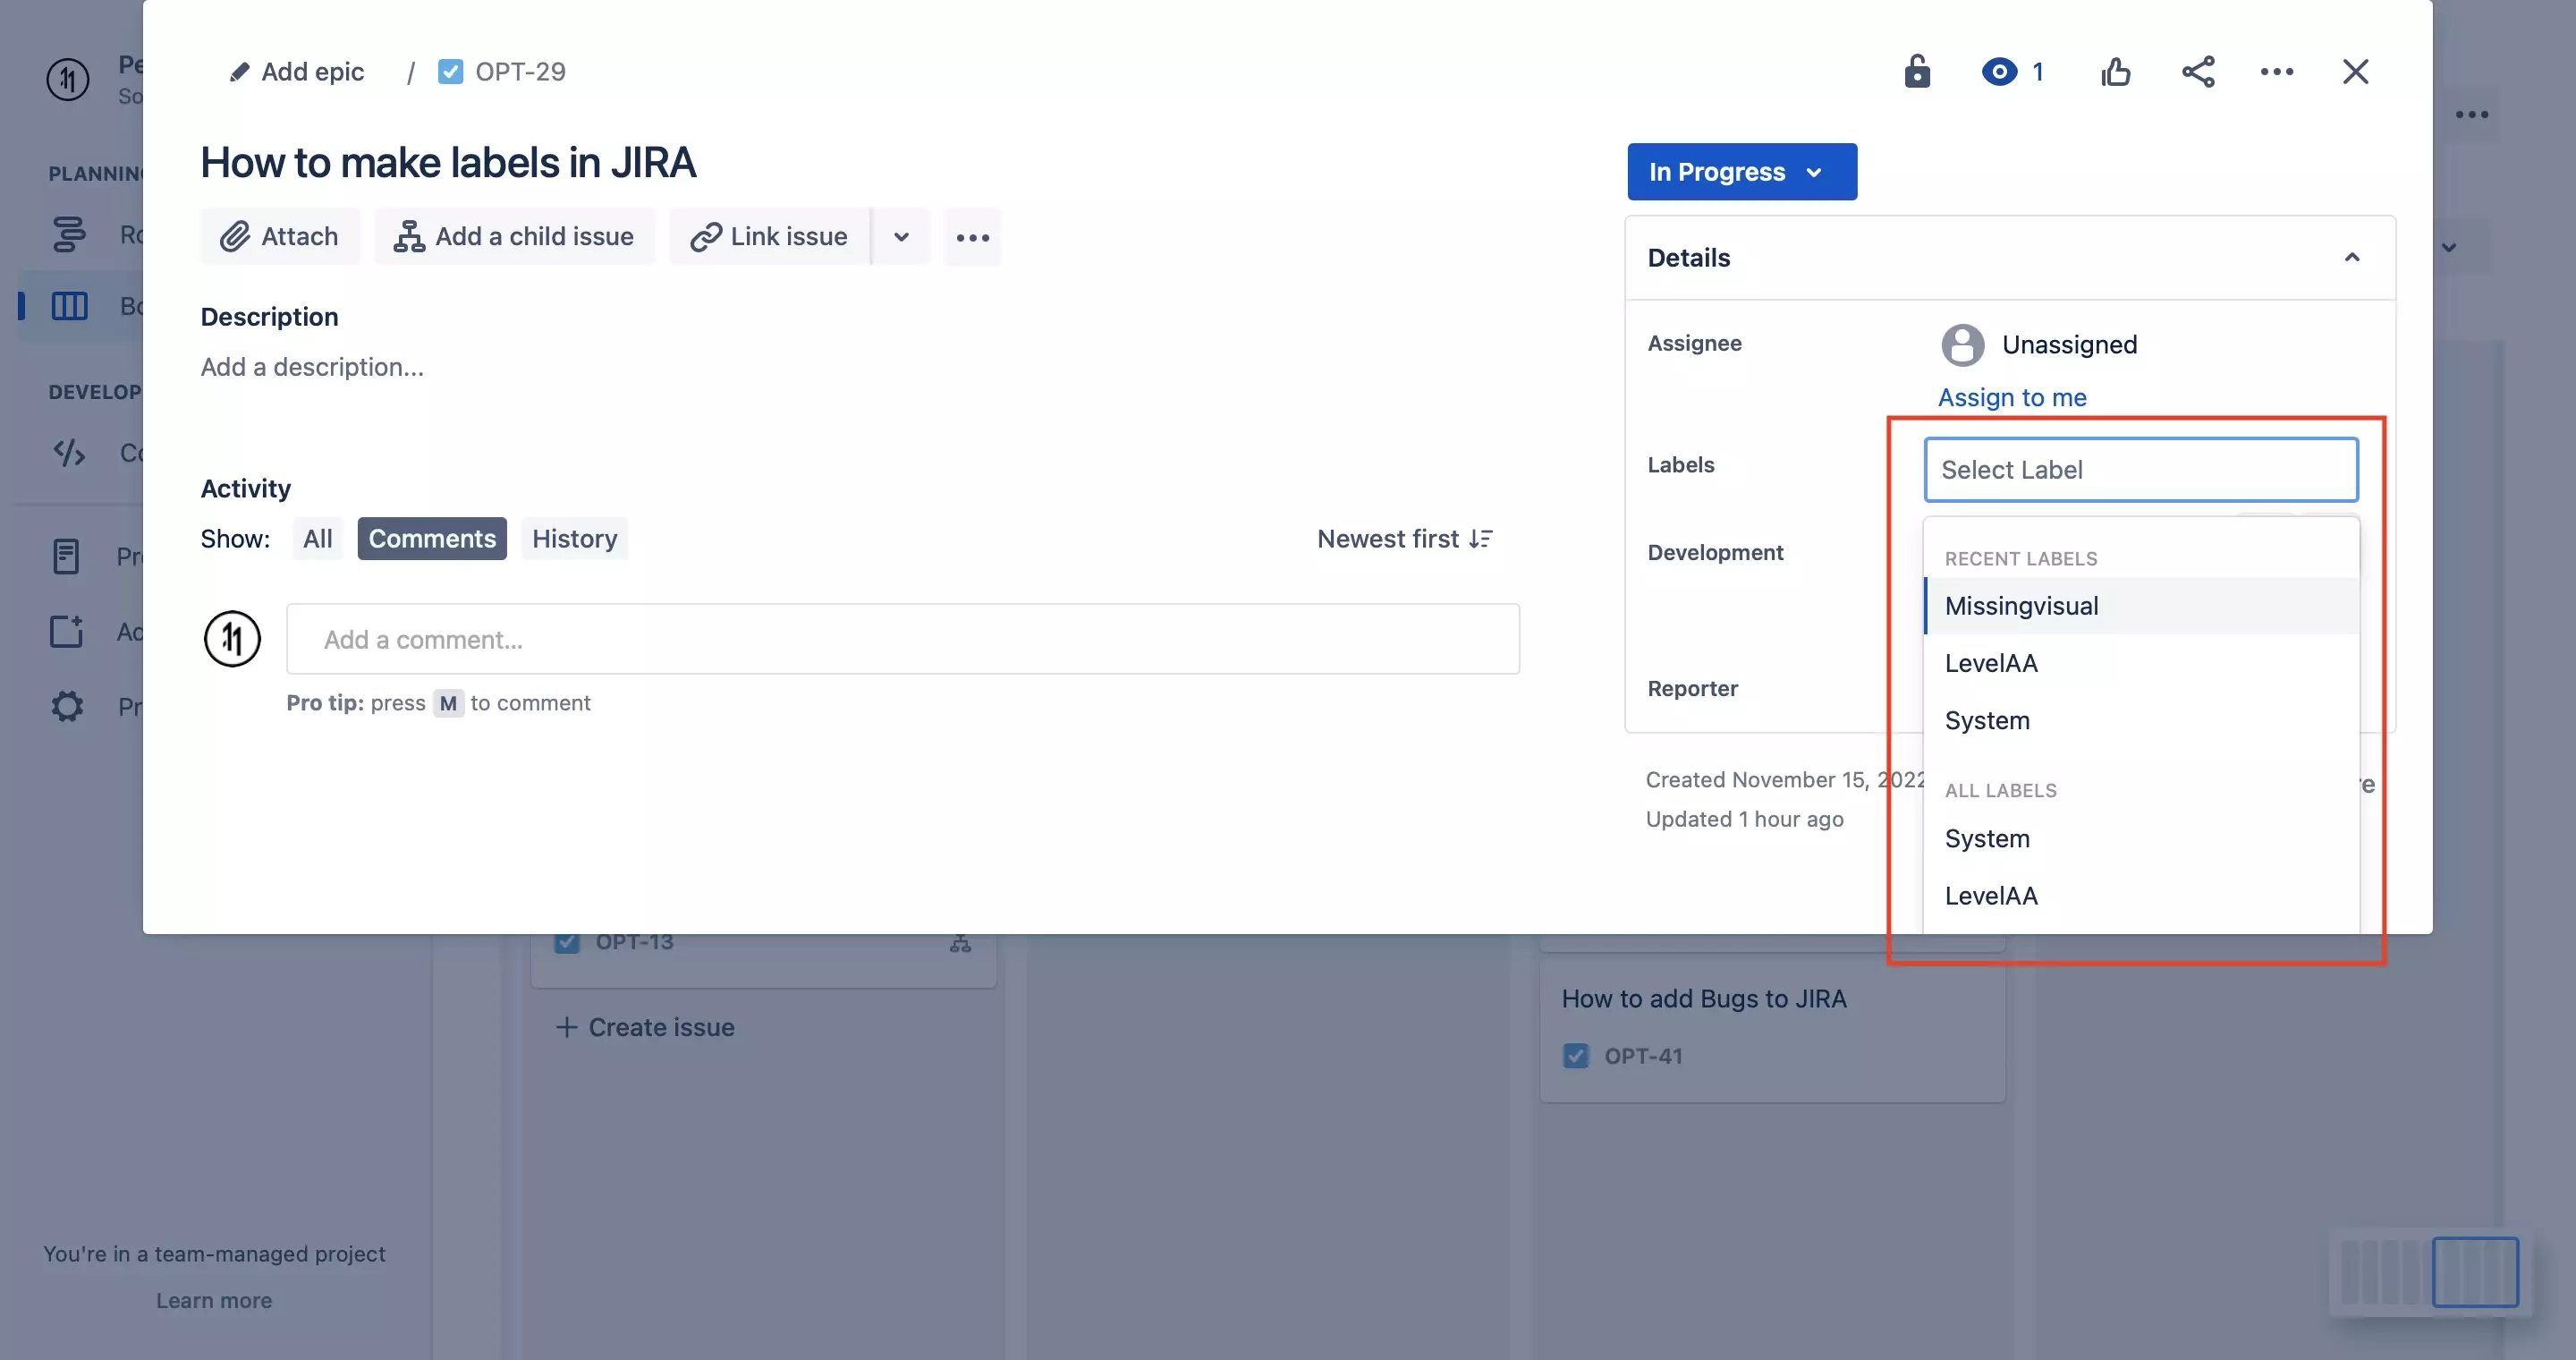
Under the label section of the Details menu on the right side, add your label by typing it in the text field or by selecting a previously created label from the menu that appears.
Any Questions?
We are actively looking for feedback on how to improve this resource. Please send us a note to inquiries@delasign.com with any thoughts or feedback you may have.