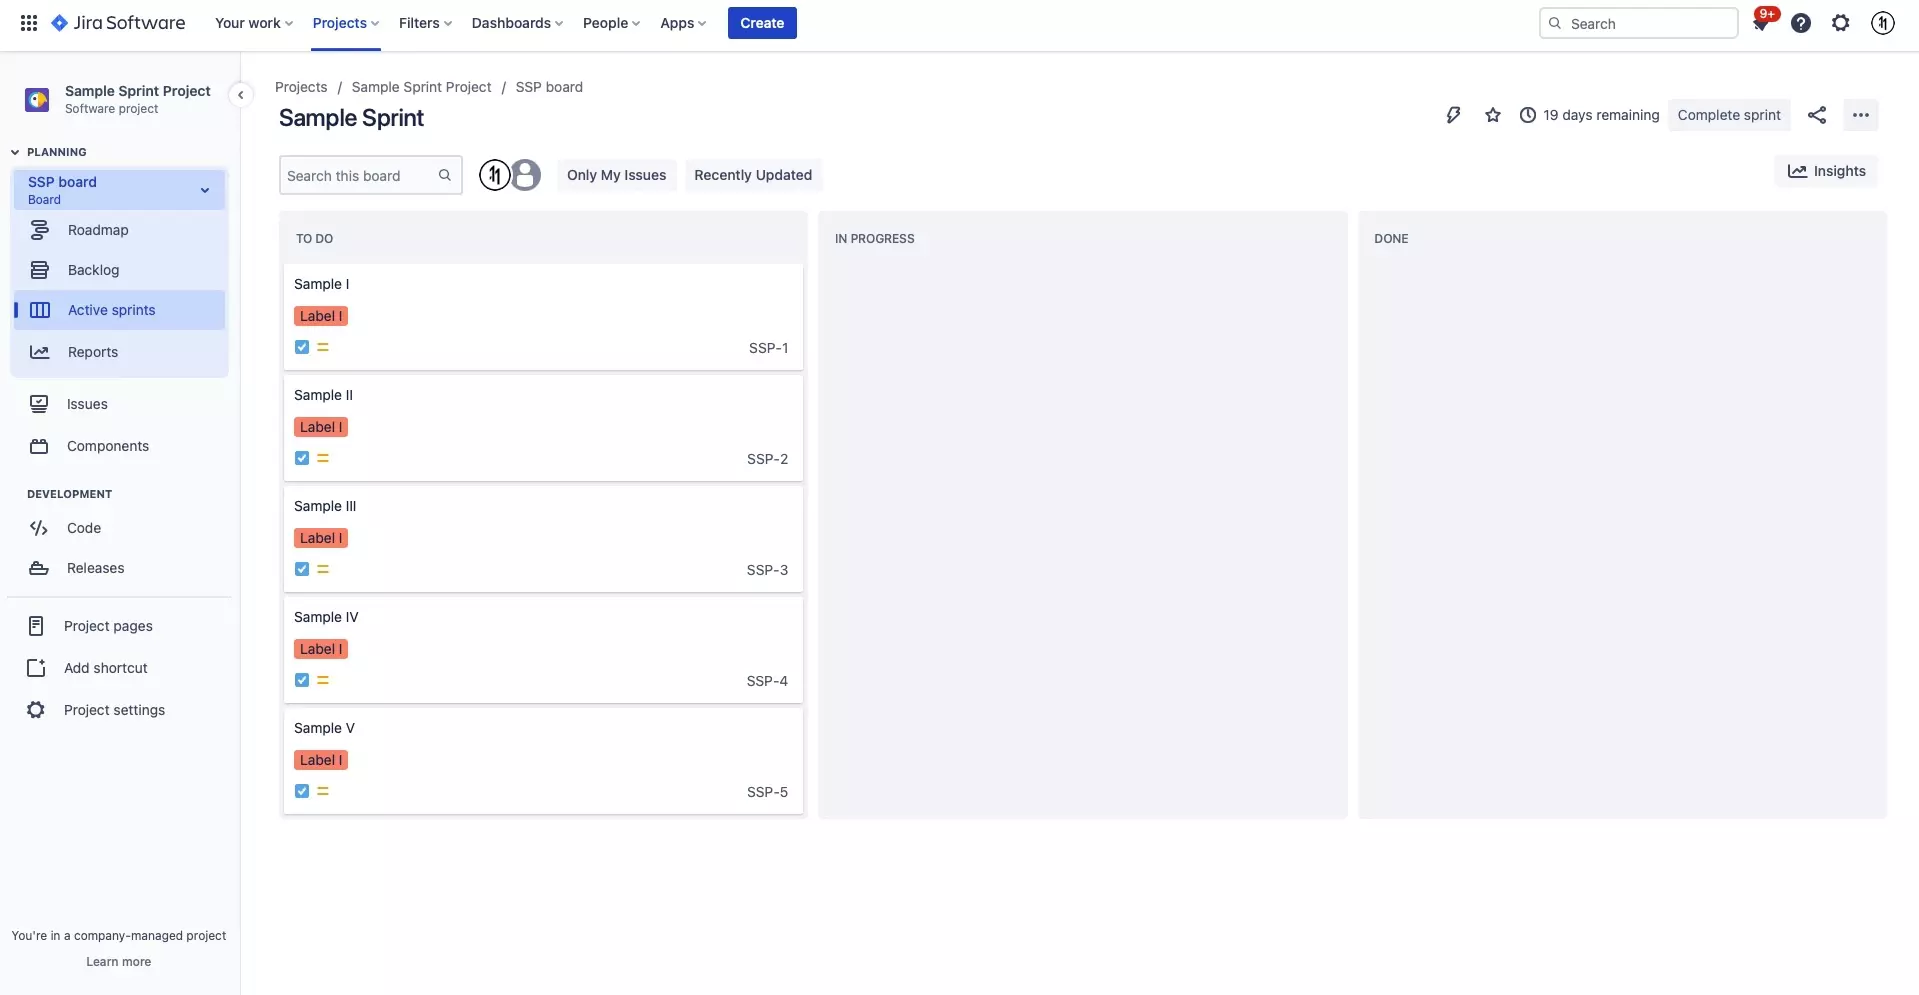
How to bulk change issues in JIRA
A step by step walkthrough on editing multiple tickets (issues) in JIRA.

A step by step walkthrough on editing multiple tickets (issues) in JIRA.
SubscribeSearch our blog for more JIRA tutorialsStep One: Select Advanced Issue Search
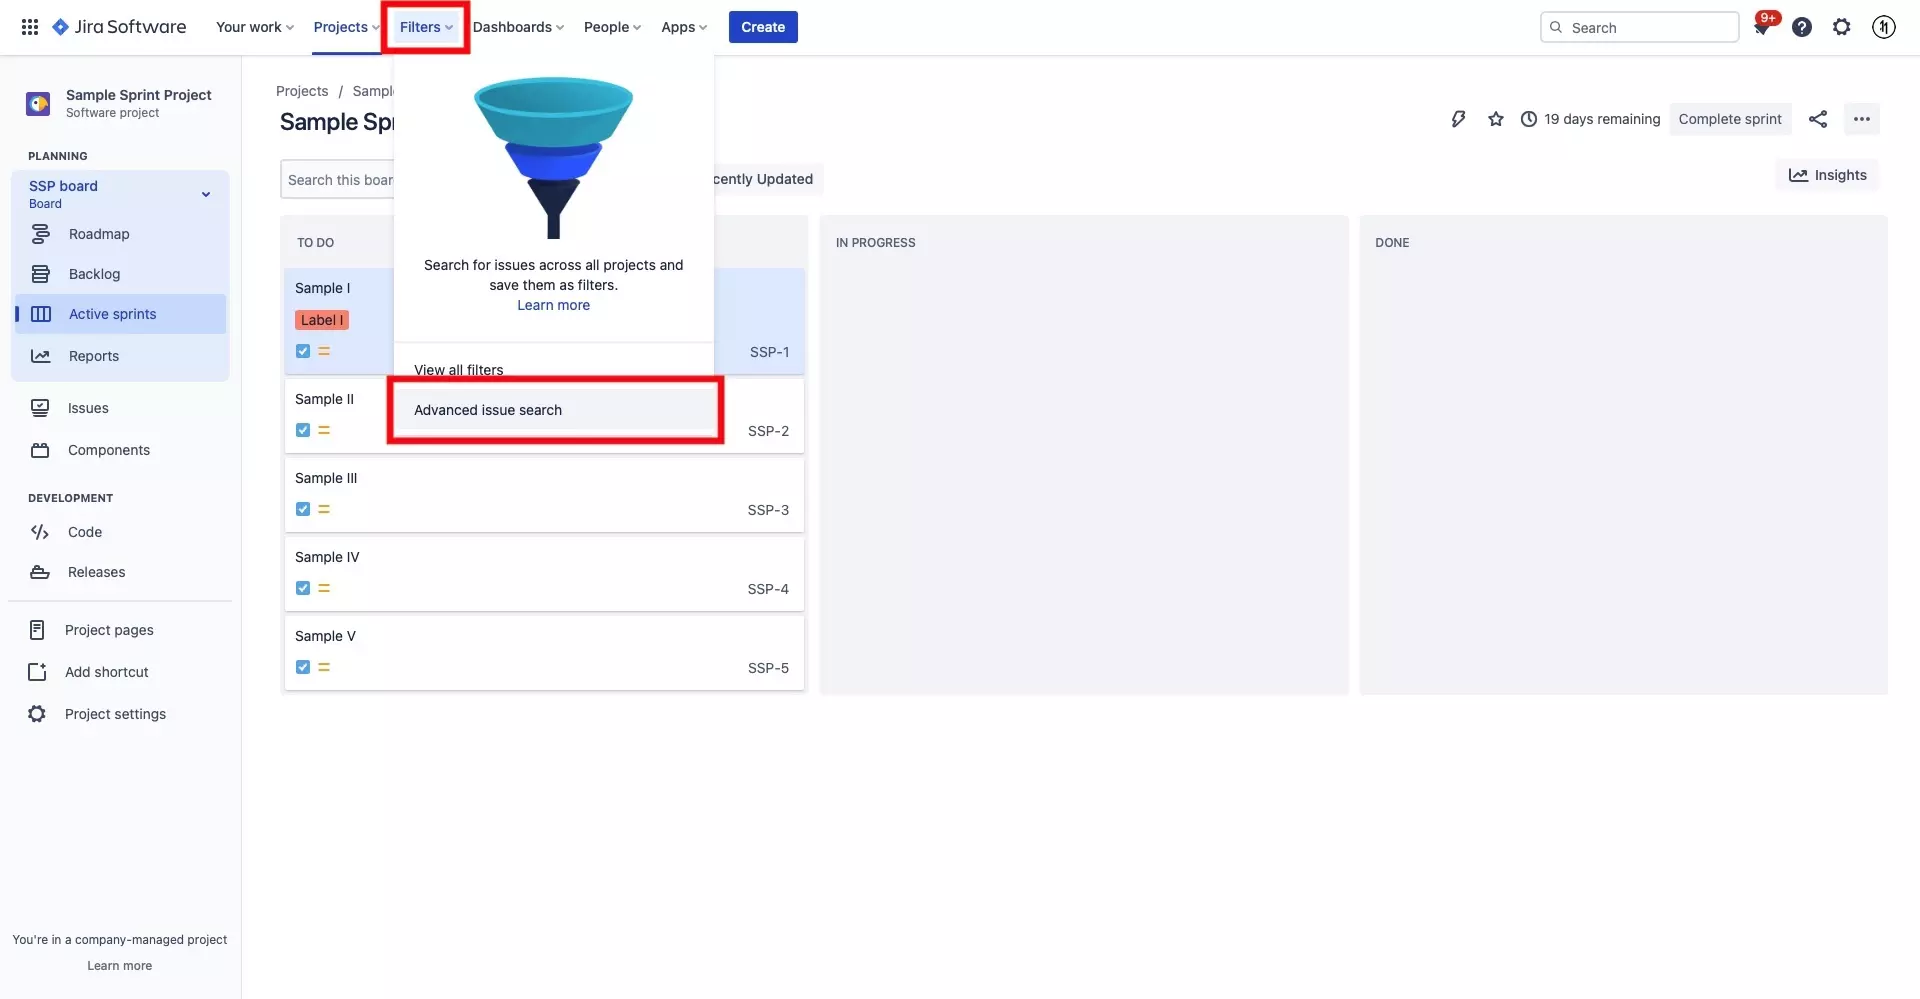
Select Filters from the navigation bar.
In the modal that appears, select Advanced issue search.
Step Two: Filter Projects
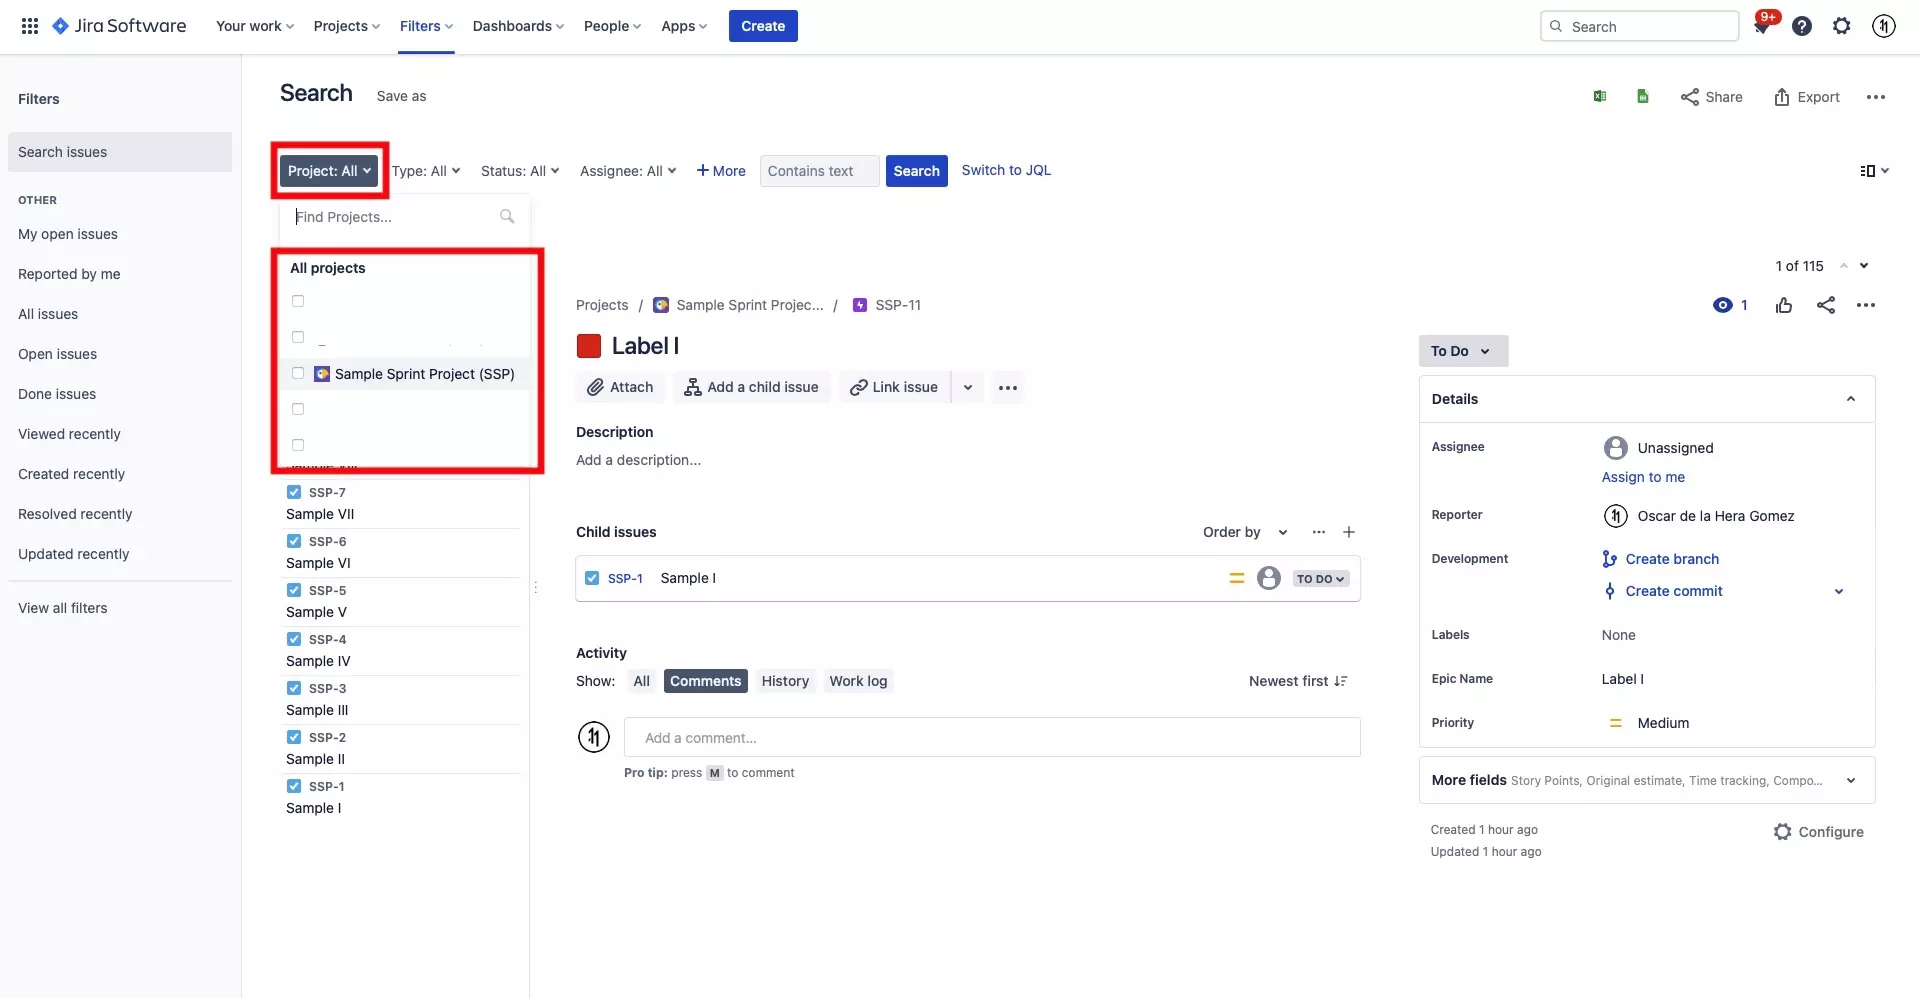
Select the project or projects that you wish to bulk edit tickets (issues) for.
Step Three: Select Bulk Change all Issue(s)
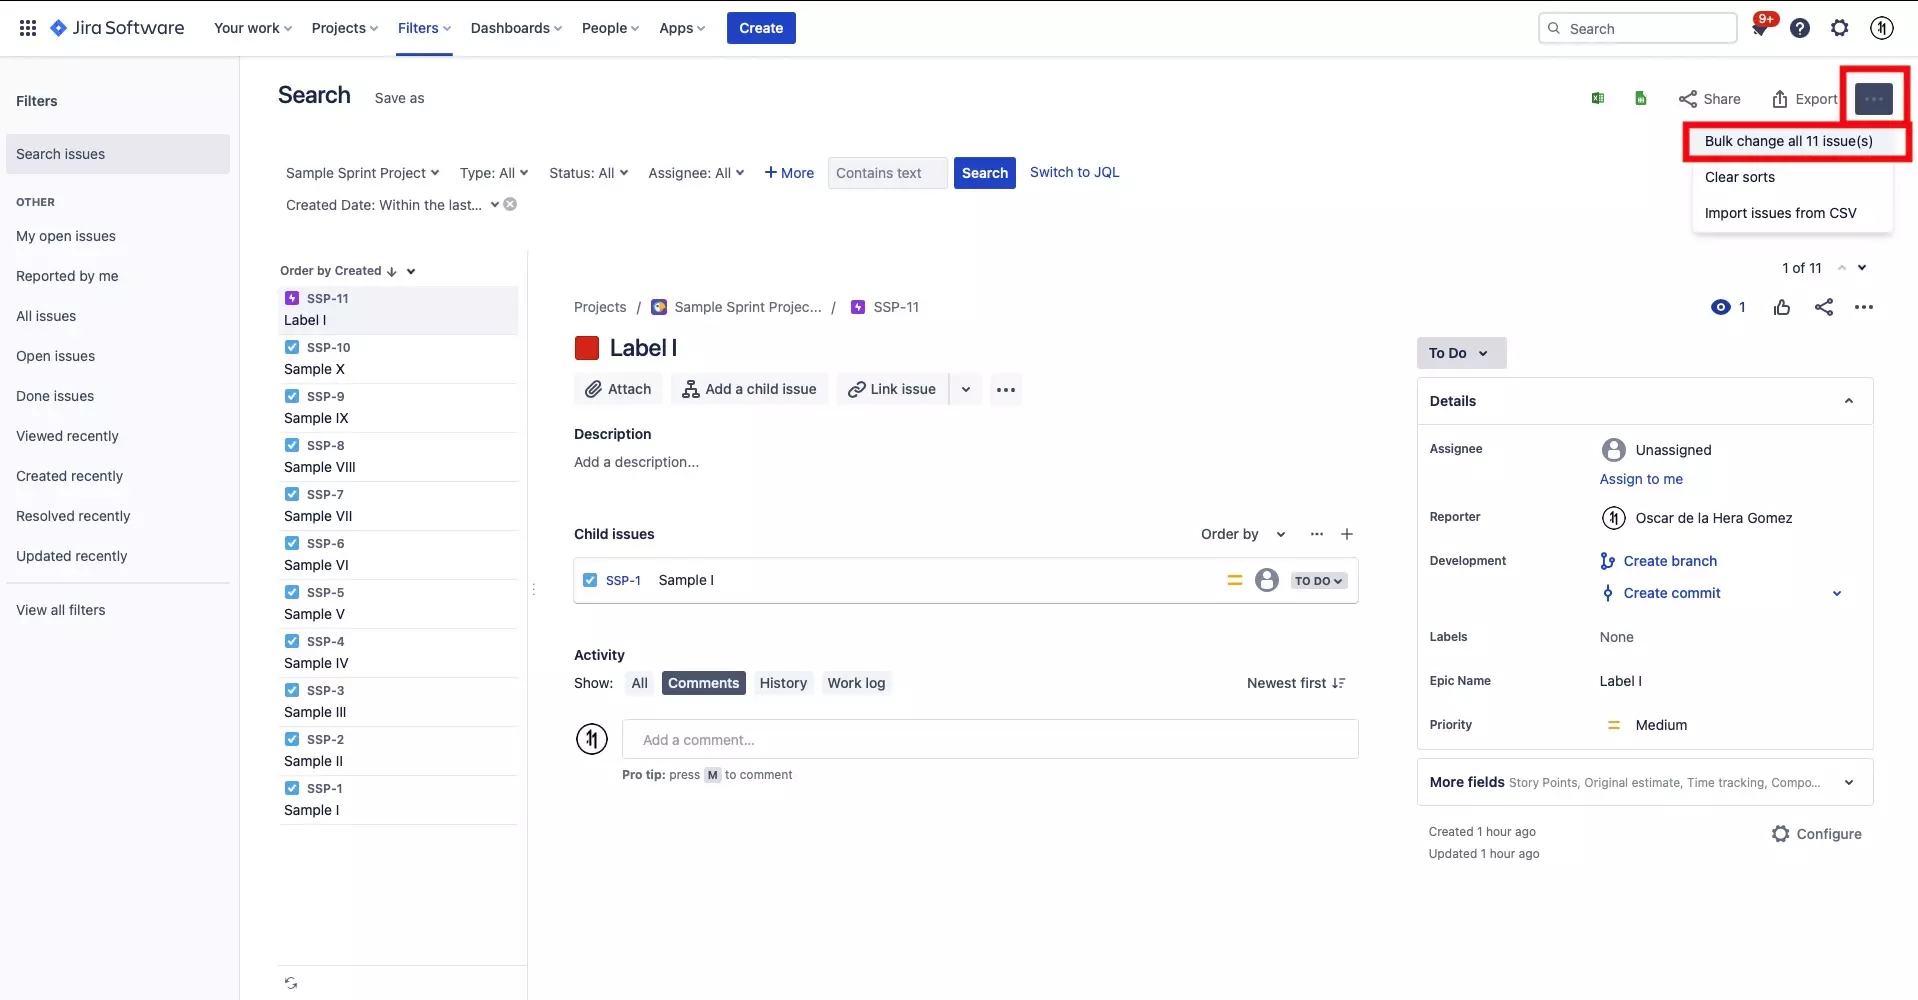
Press the ⚈ ⚈ ⚈ button on the top right.
A modal will appear, select Bulk change all # issue(s), where # is the number of issues available to your project.
Step Four: Choose issues
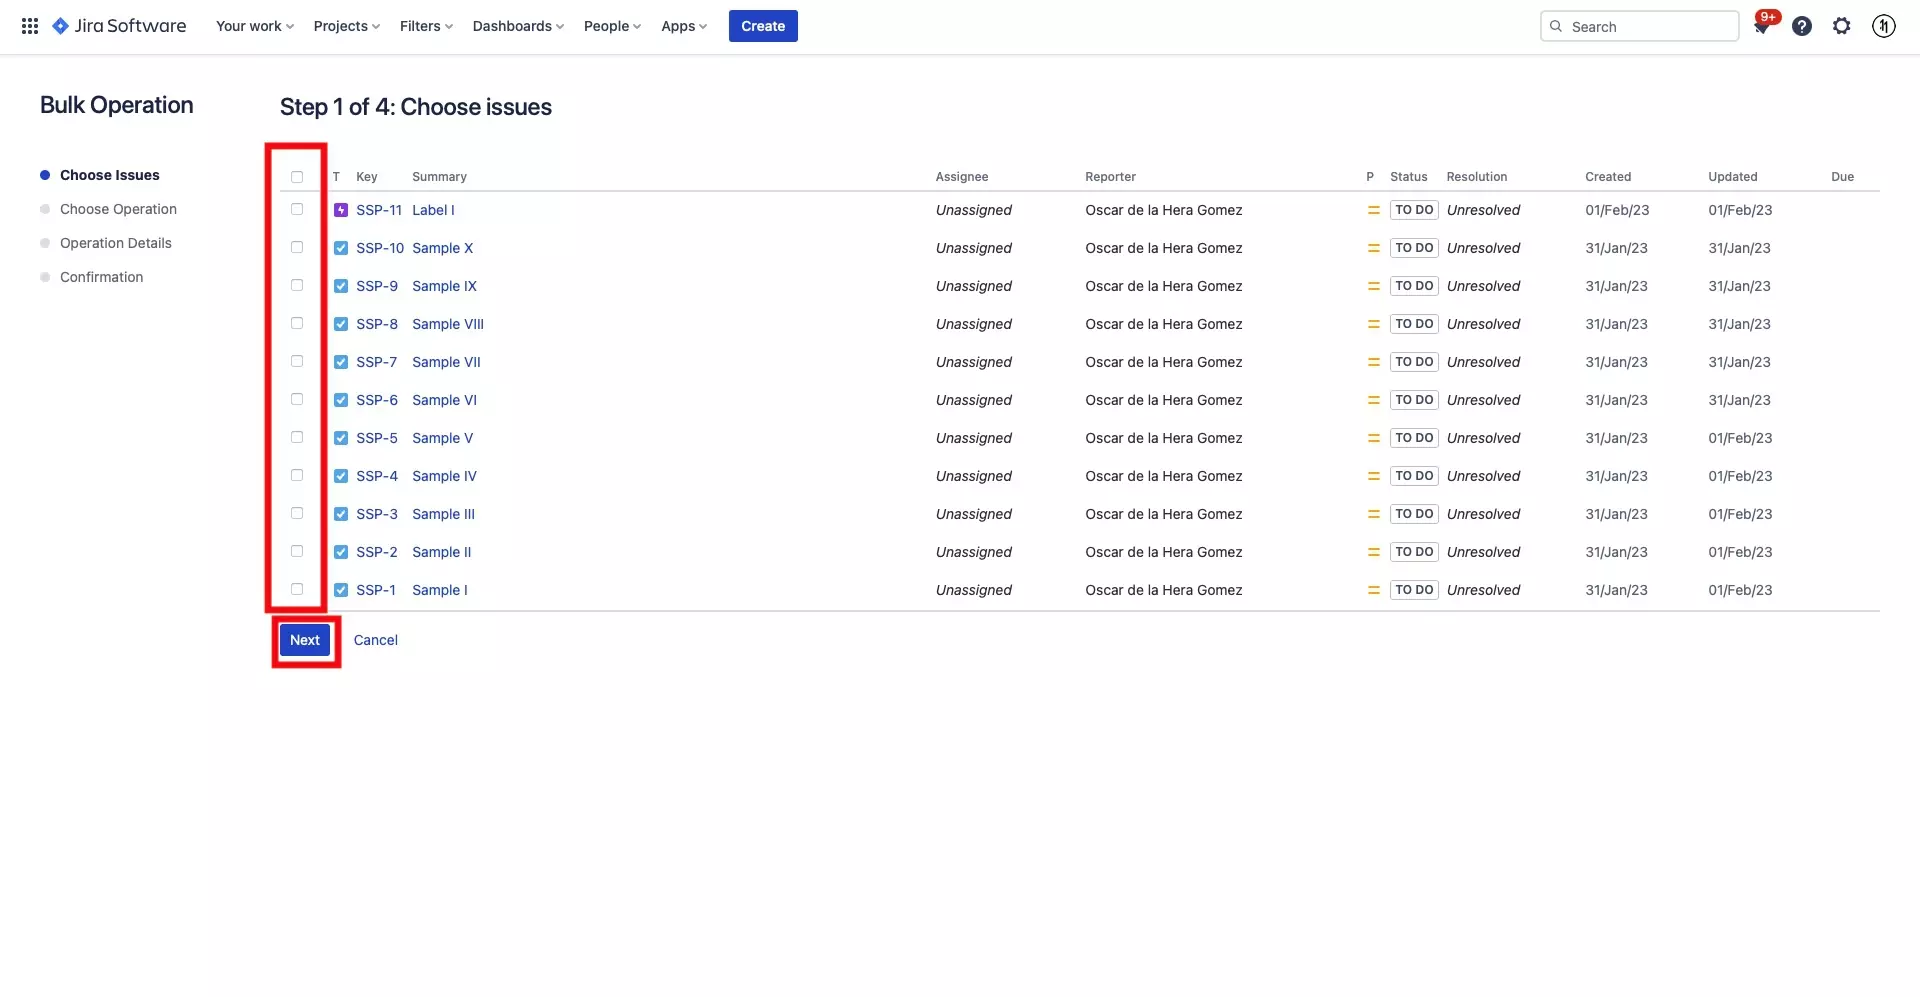
Select the issues you wish to bulk edit by pressing the checkmark field to the left of the issue key.
Once you have selected the issues, press Next.
Step Five: Choose Operation
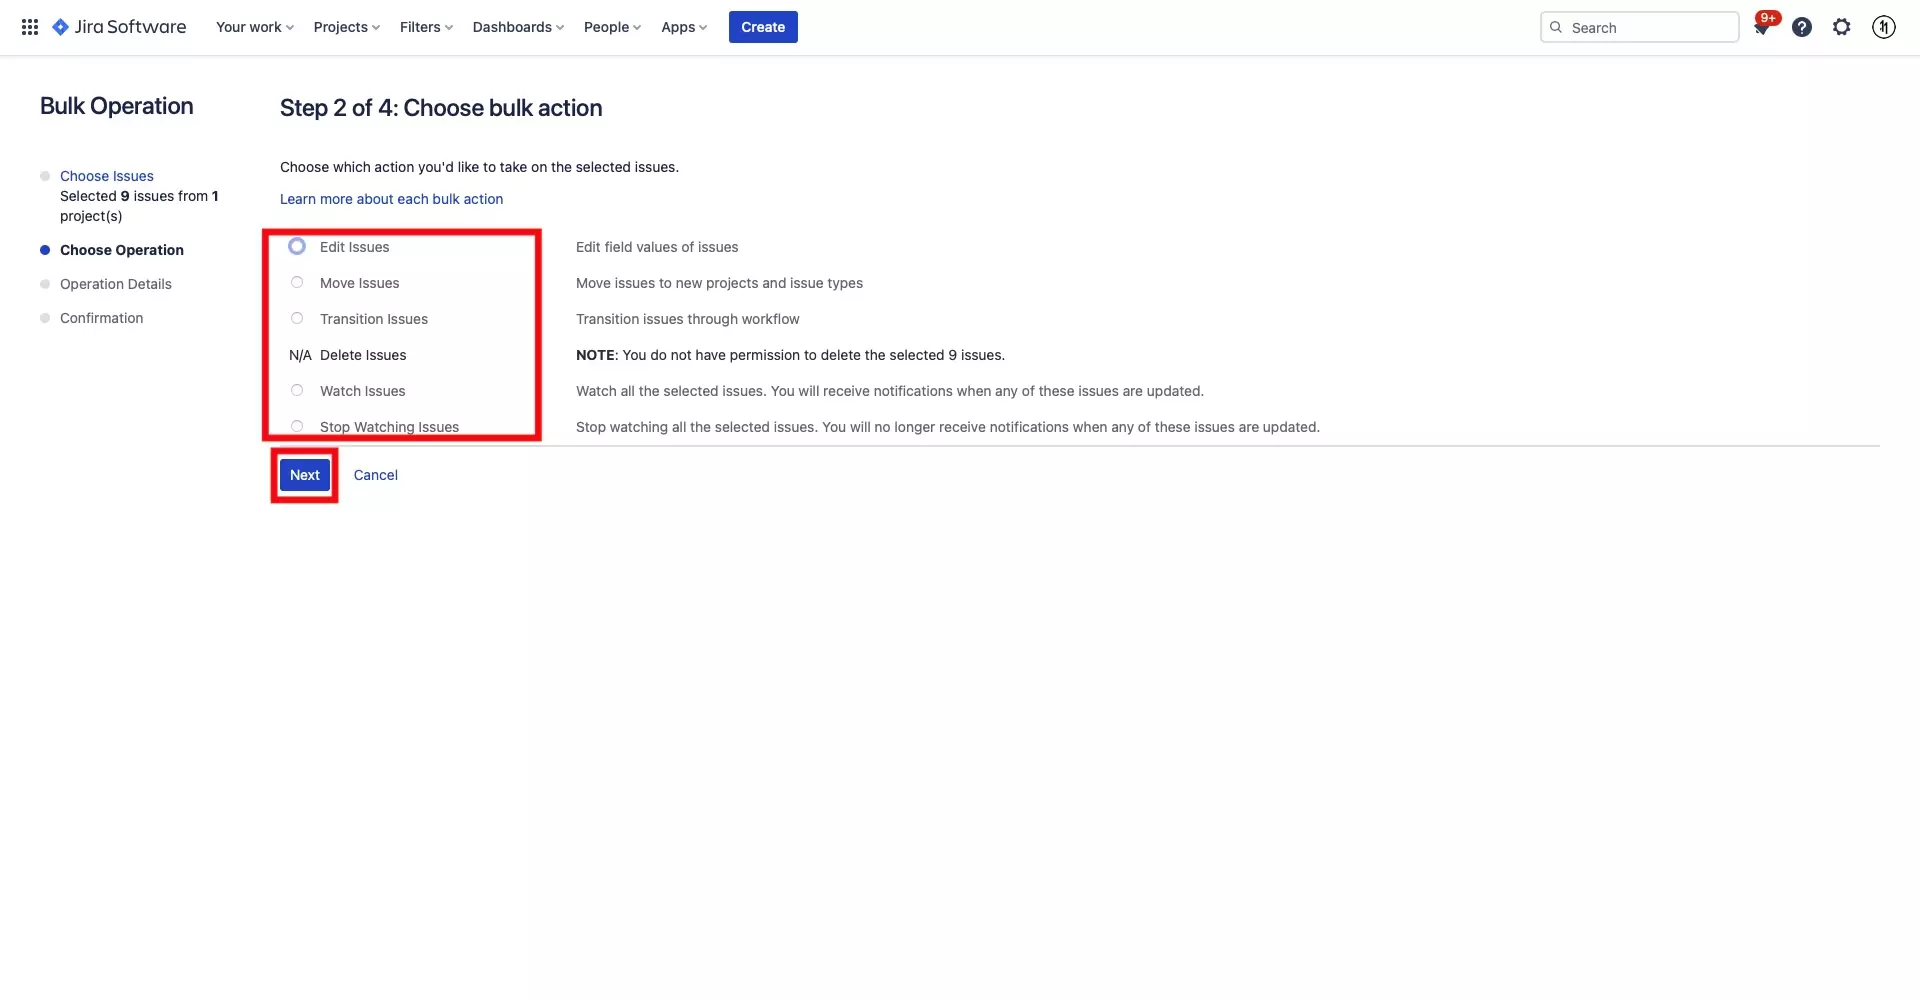
Select the operation that you wish to apply to your tickets. The available options are:
- Edit issues
- Move issues
- Transition issues
- Delete issues (requires permissions)
- Watch issues
- Stop watching issues
Step Six: Operation Details
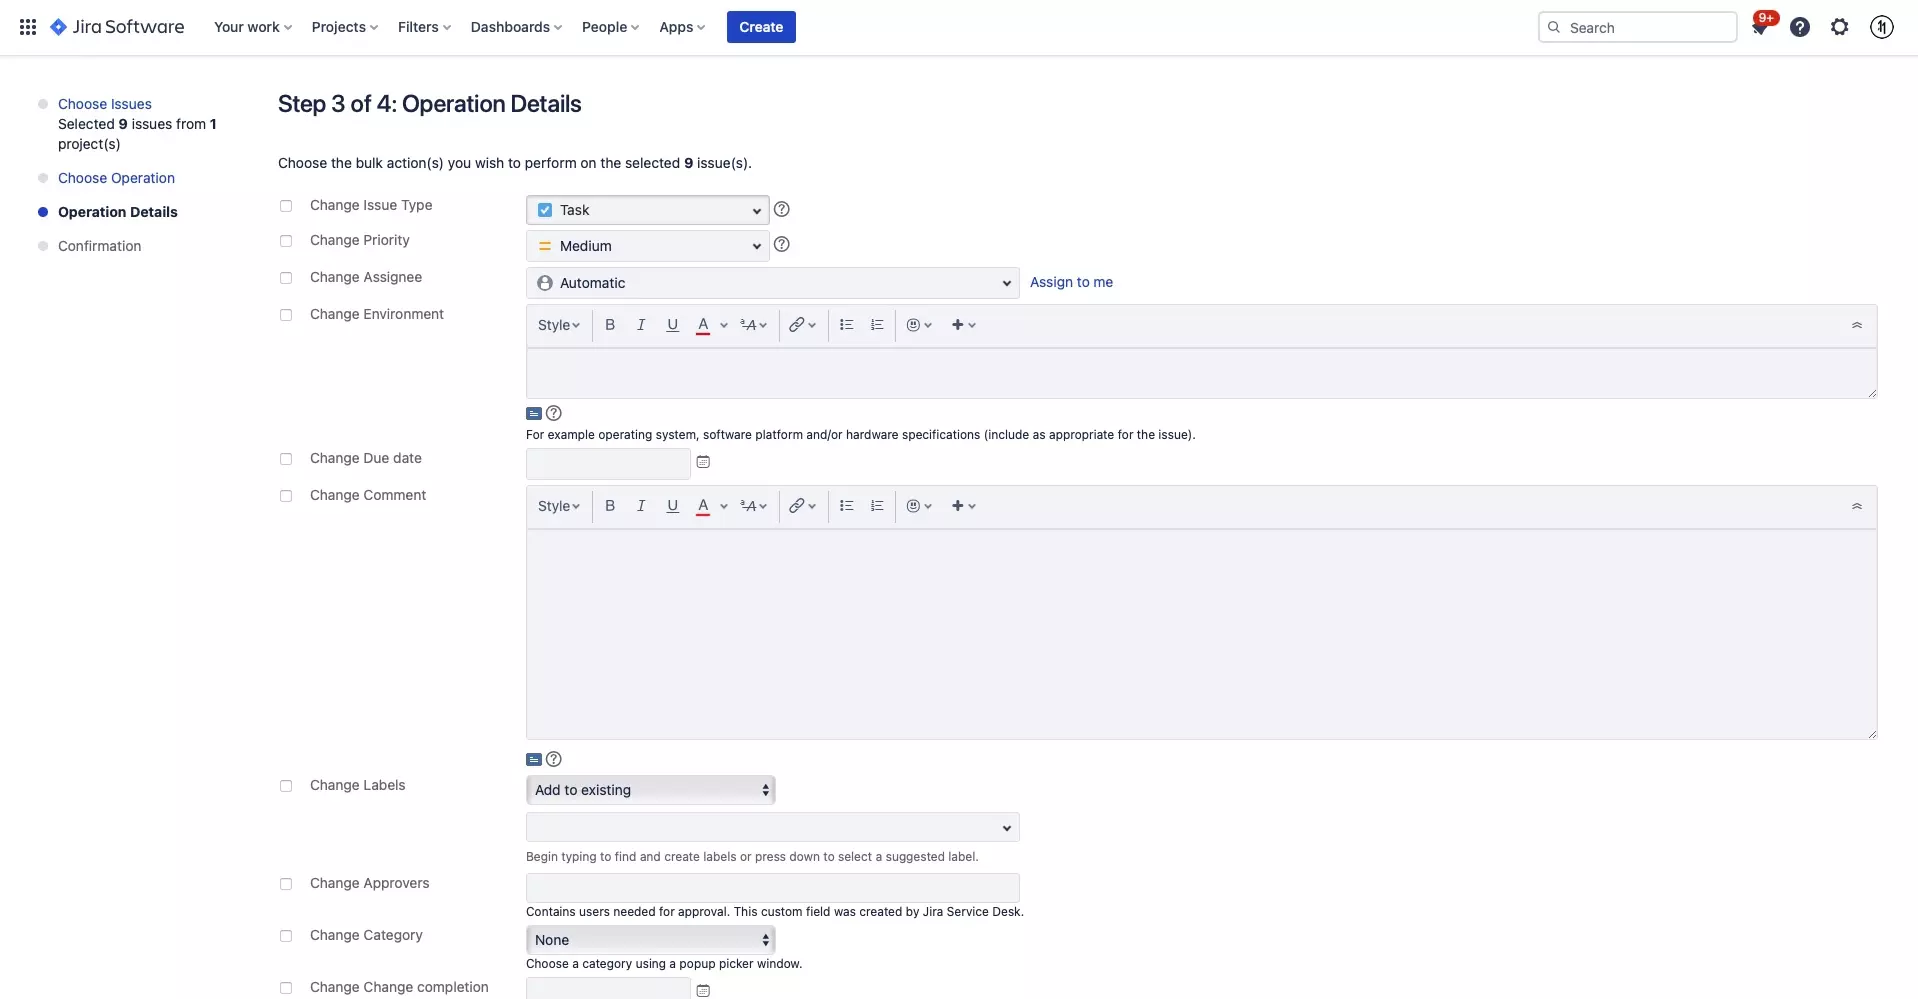
The following example is for editing issues. Set the details that you wish to bulk change to the tickets you selected in Step Four.
Step Seven: Press Next
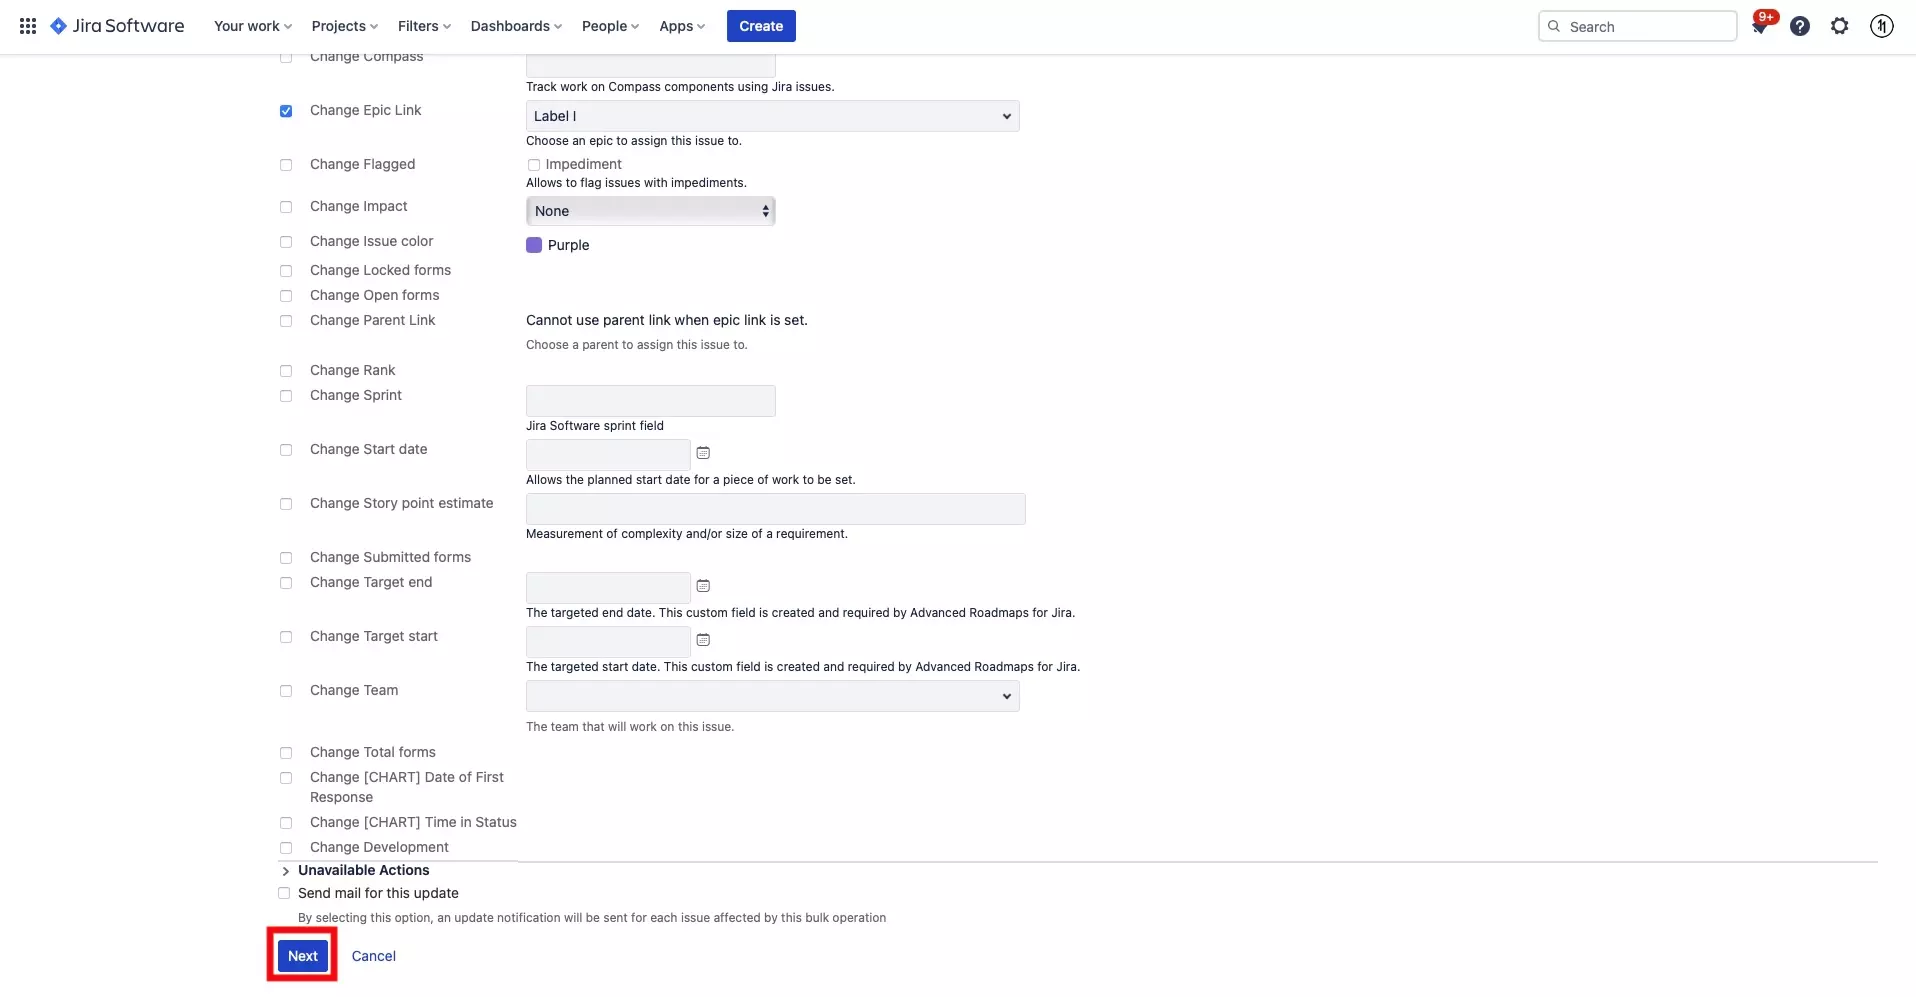
Once you have made all the changes you wish to apply, scroll to the bottom of the page and press Next.
Step Eight: Confirm
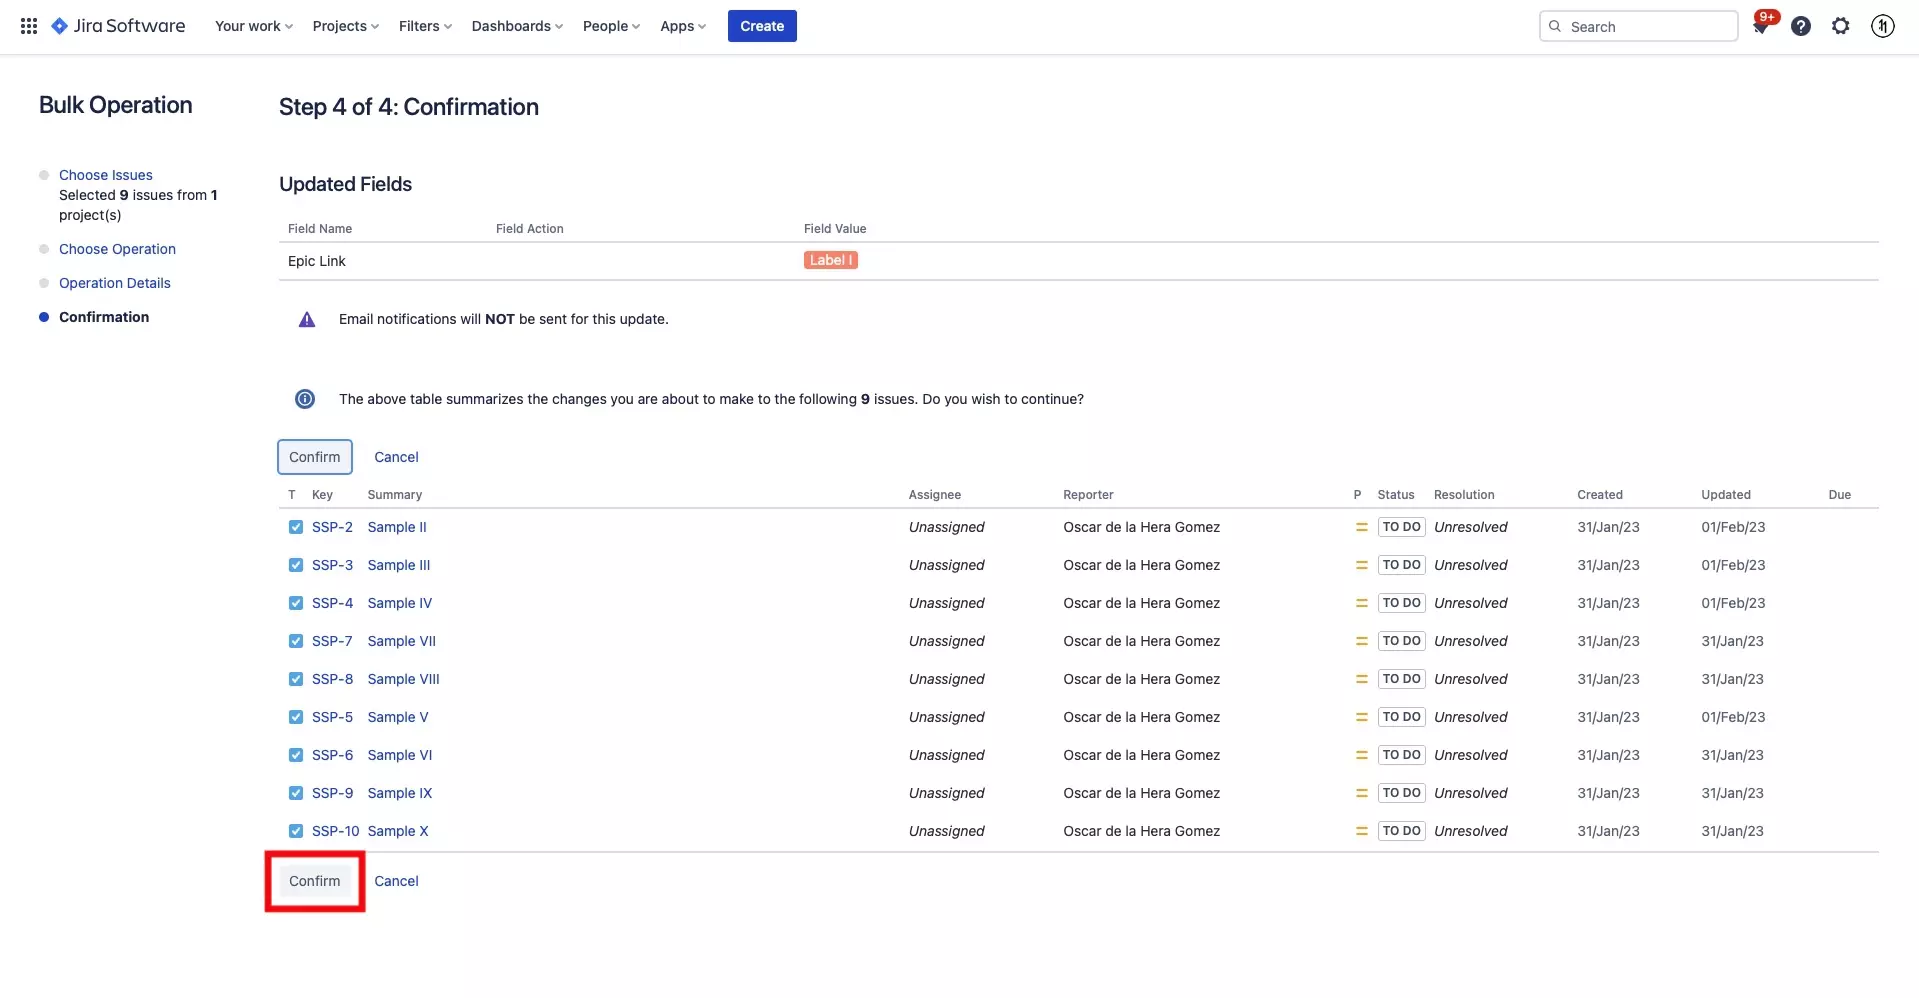
The confirmation page will show you all the changes that you apply and to which fields.
If everything looks correct, press Confirm on the bottom left.
Step Nine: Acknowledge
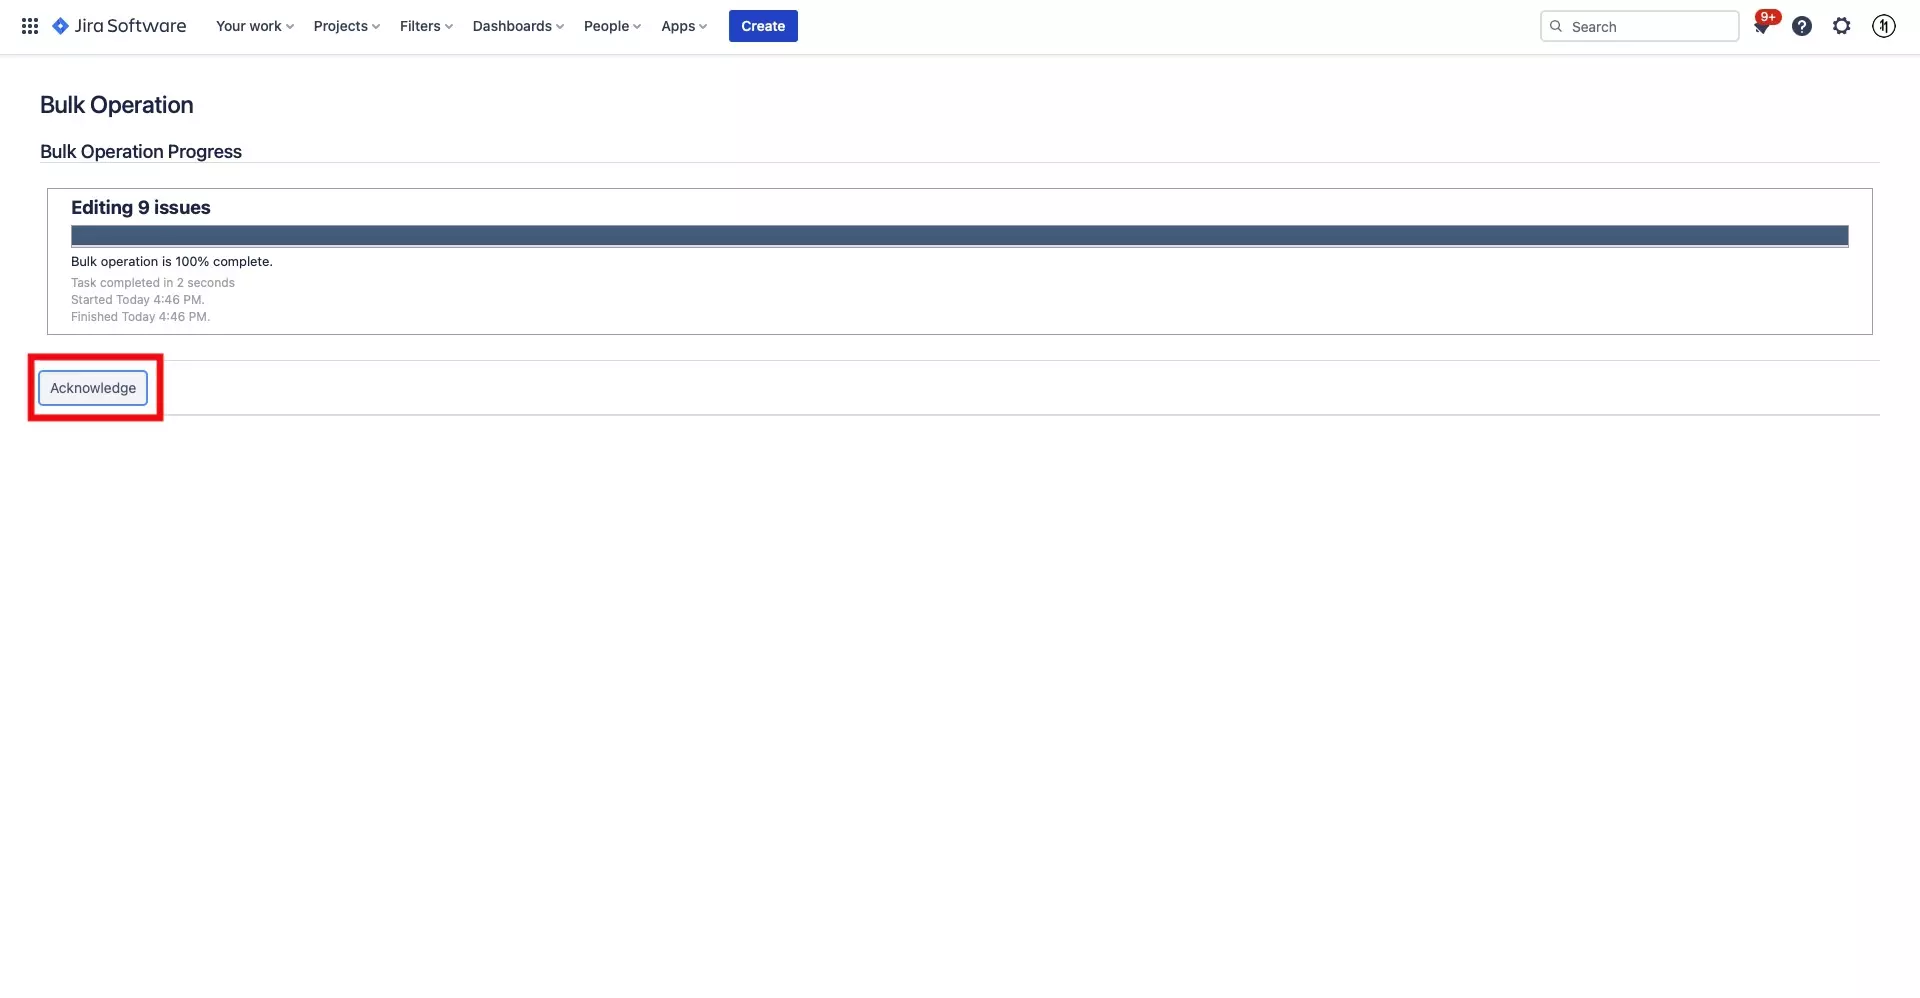
The system will them process all the bulk edits. Once complete, you will have to press Acknowledge.
If you navigate to your board, you will see that all the changes have taken place.
