How to setup Swift Testing in a Swift or SwiftUI project in Xcode
A step by step guide for adding Unit Tests and UITests to a Swift or SwiftUI project.
A step by step guide for adding Unit Tests and UITests to a Swift or SwiftUI project.
SubscribeThe following tutorial can be found in the main branch of our Open Source Swift and SwiftUI projects linked below.
Step One: Add a New Target
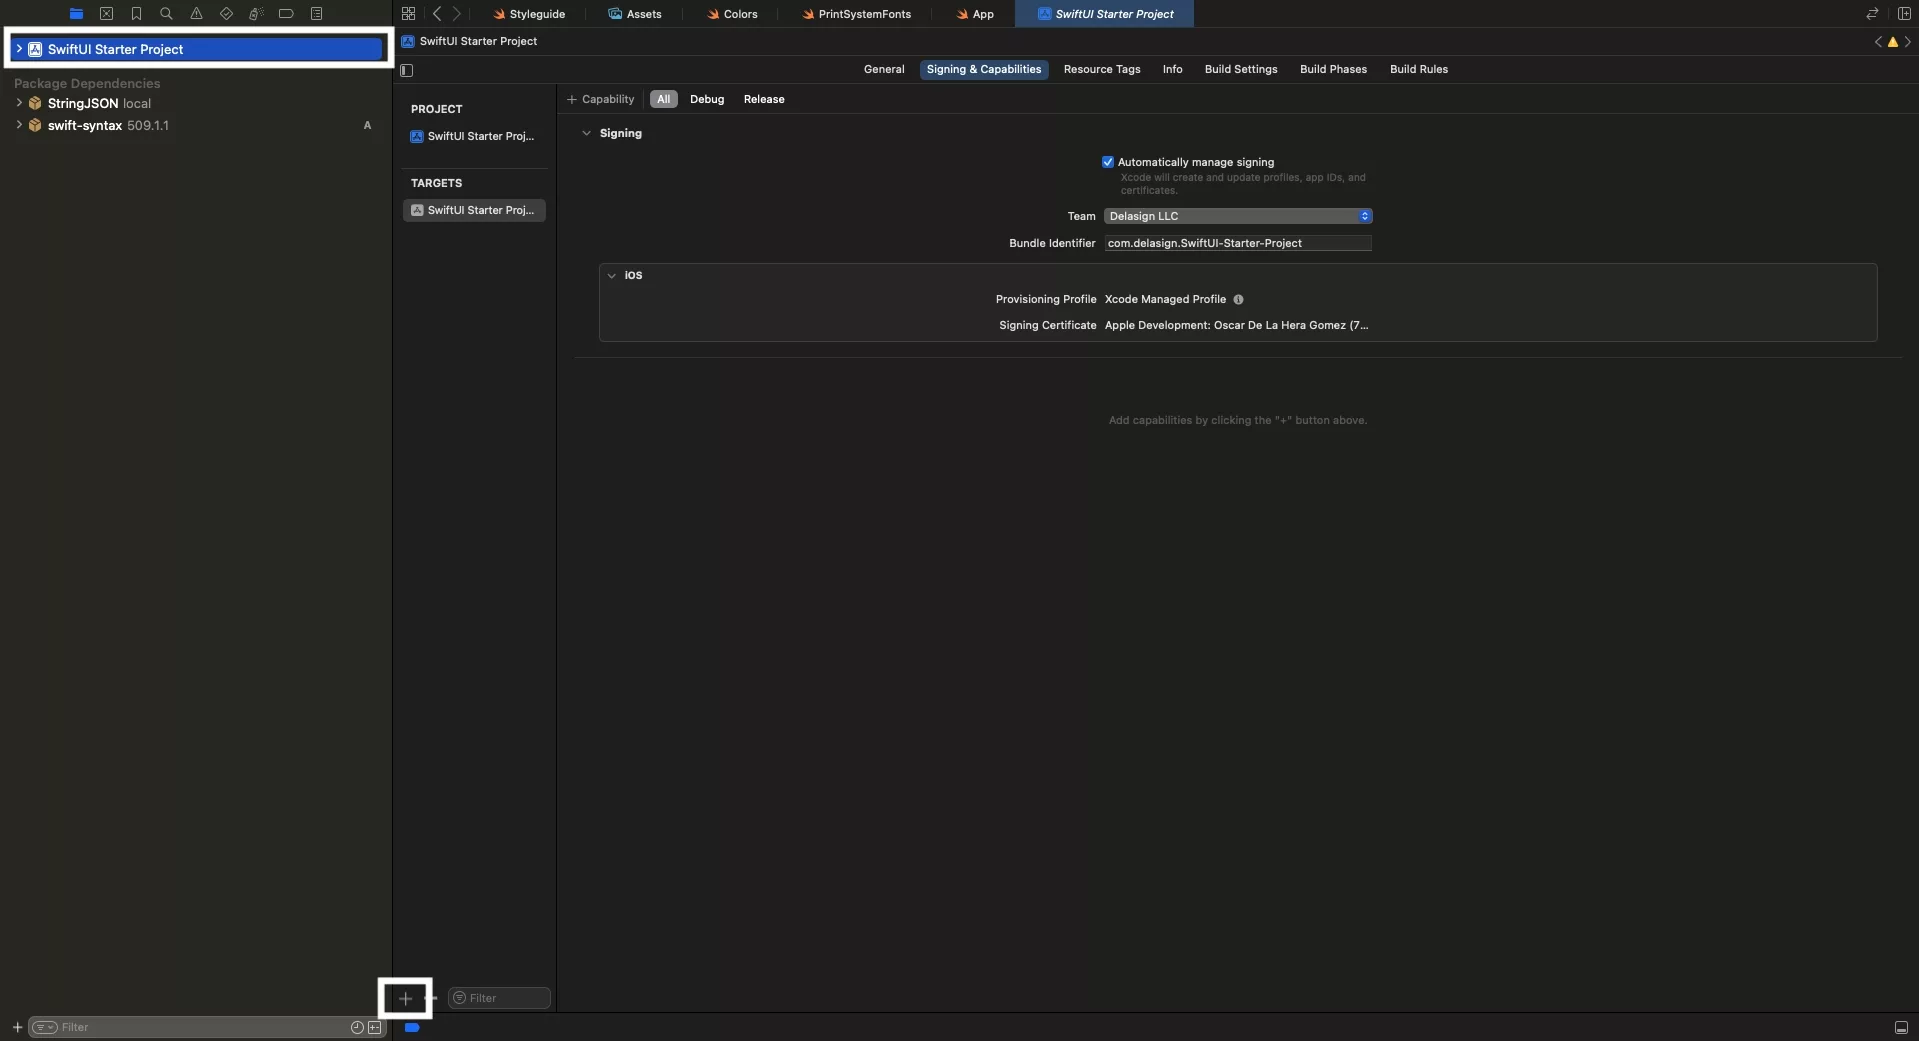
Add a new target through project settings screen or through File > New > Target...
Step Two: Select a Test Bundle
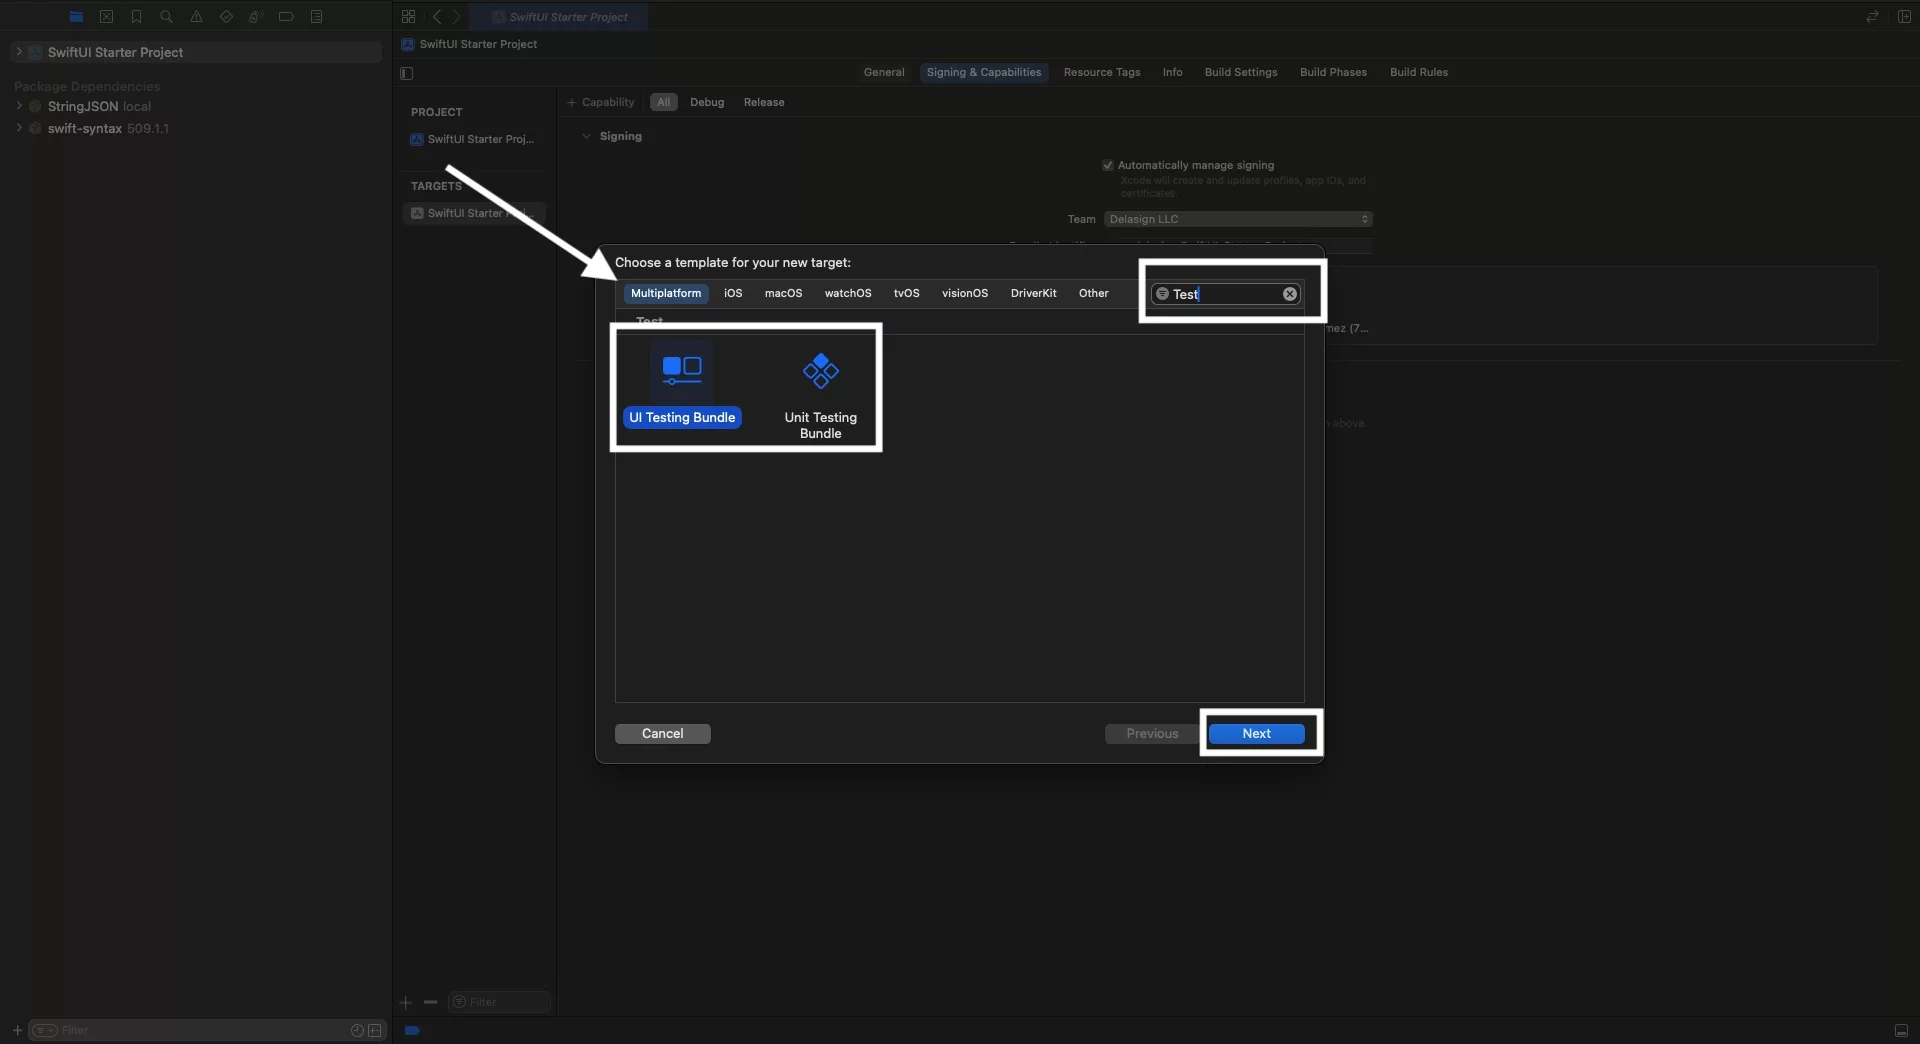
In the modal that appears, select Multiplatform and search for test.
Select UI Testing Bundle or Unit Testing Bundle.
Click the Next button on the bottom left.
Step Three: Name & Finish
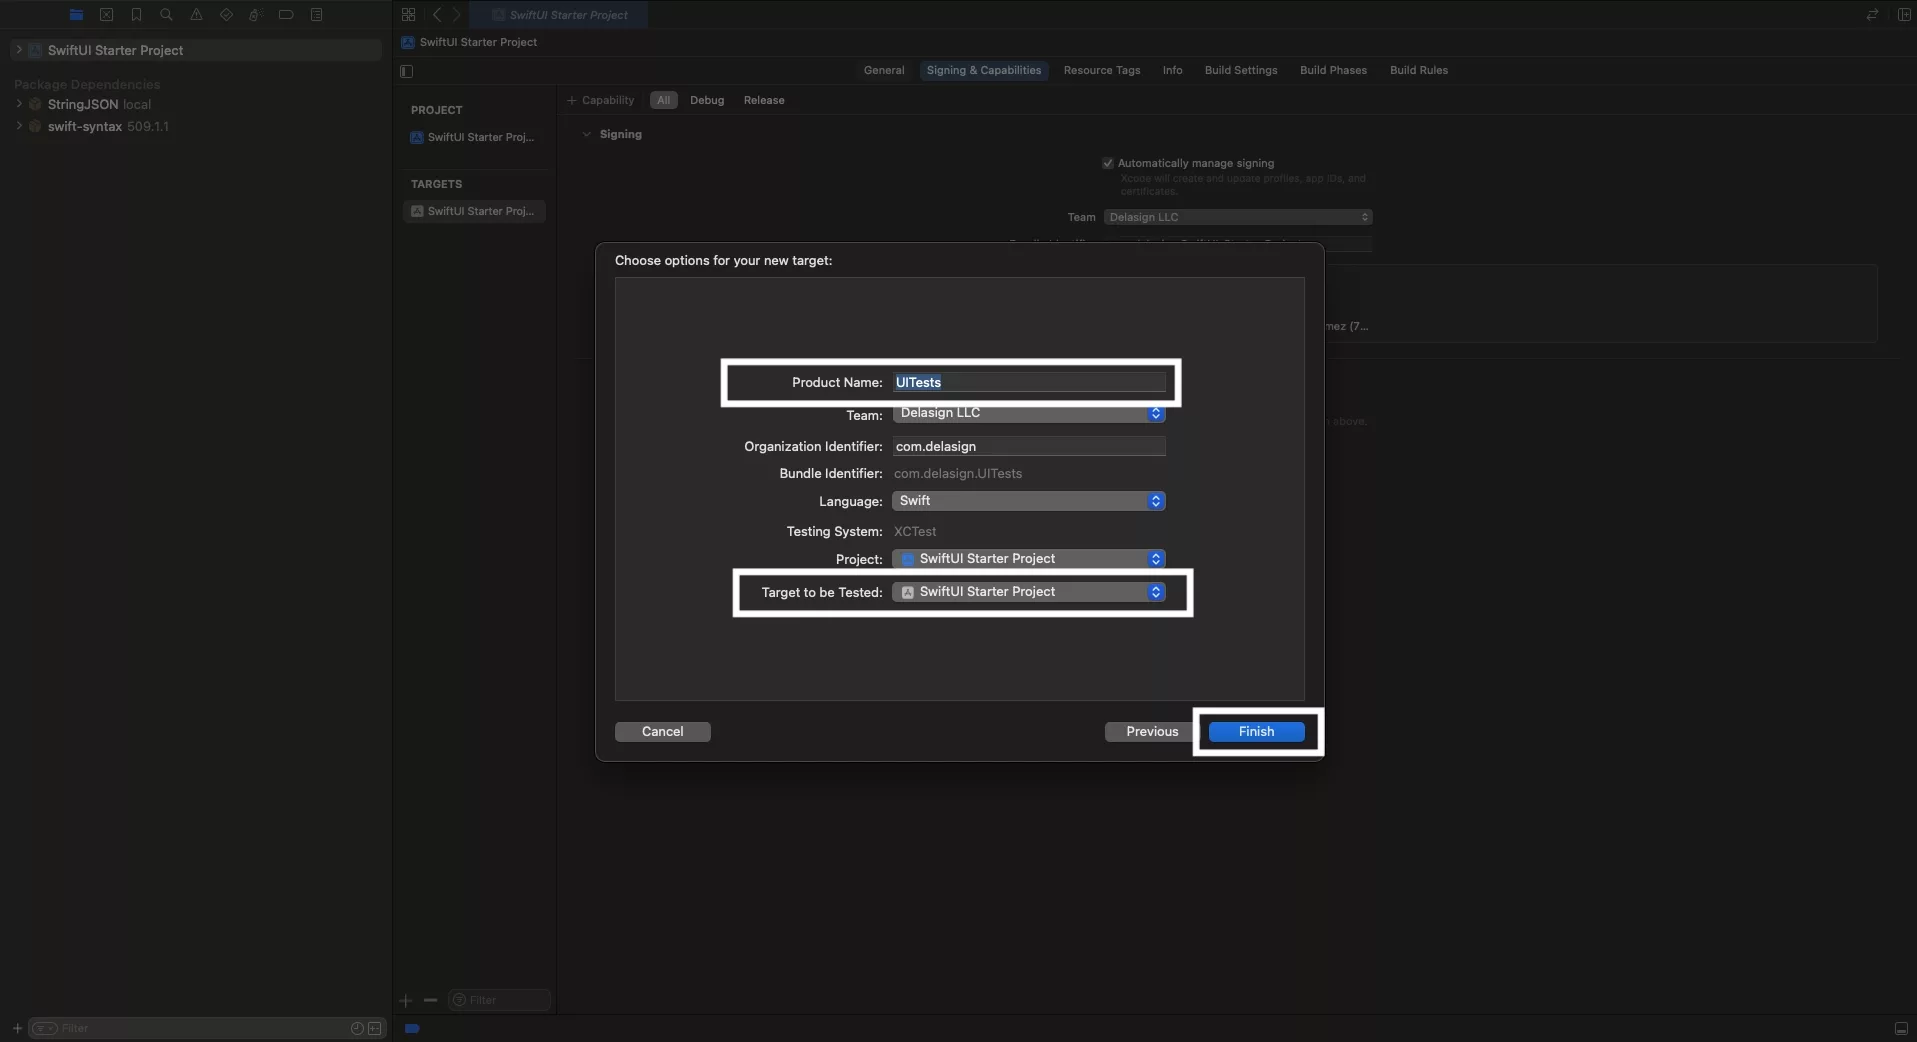
Name the Target. We recommend UITests or Tests depending on whether they are UITests or Unit Tests.
Please note that the modal should show the app target selected. If you have a scenario like the image below, which may arise if you selected the MacOS tab, please go back and select "Multiplatform" from the target tab to ensure that you can add the target.
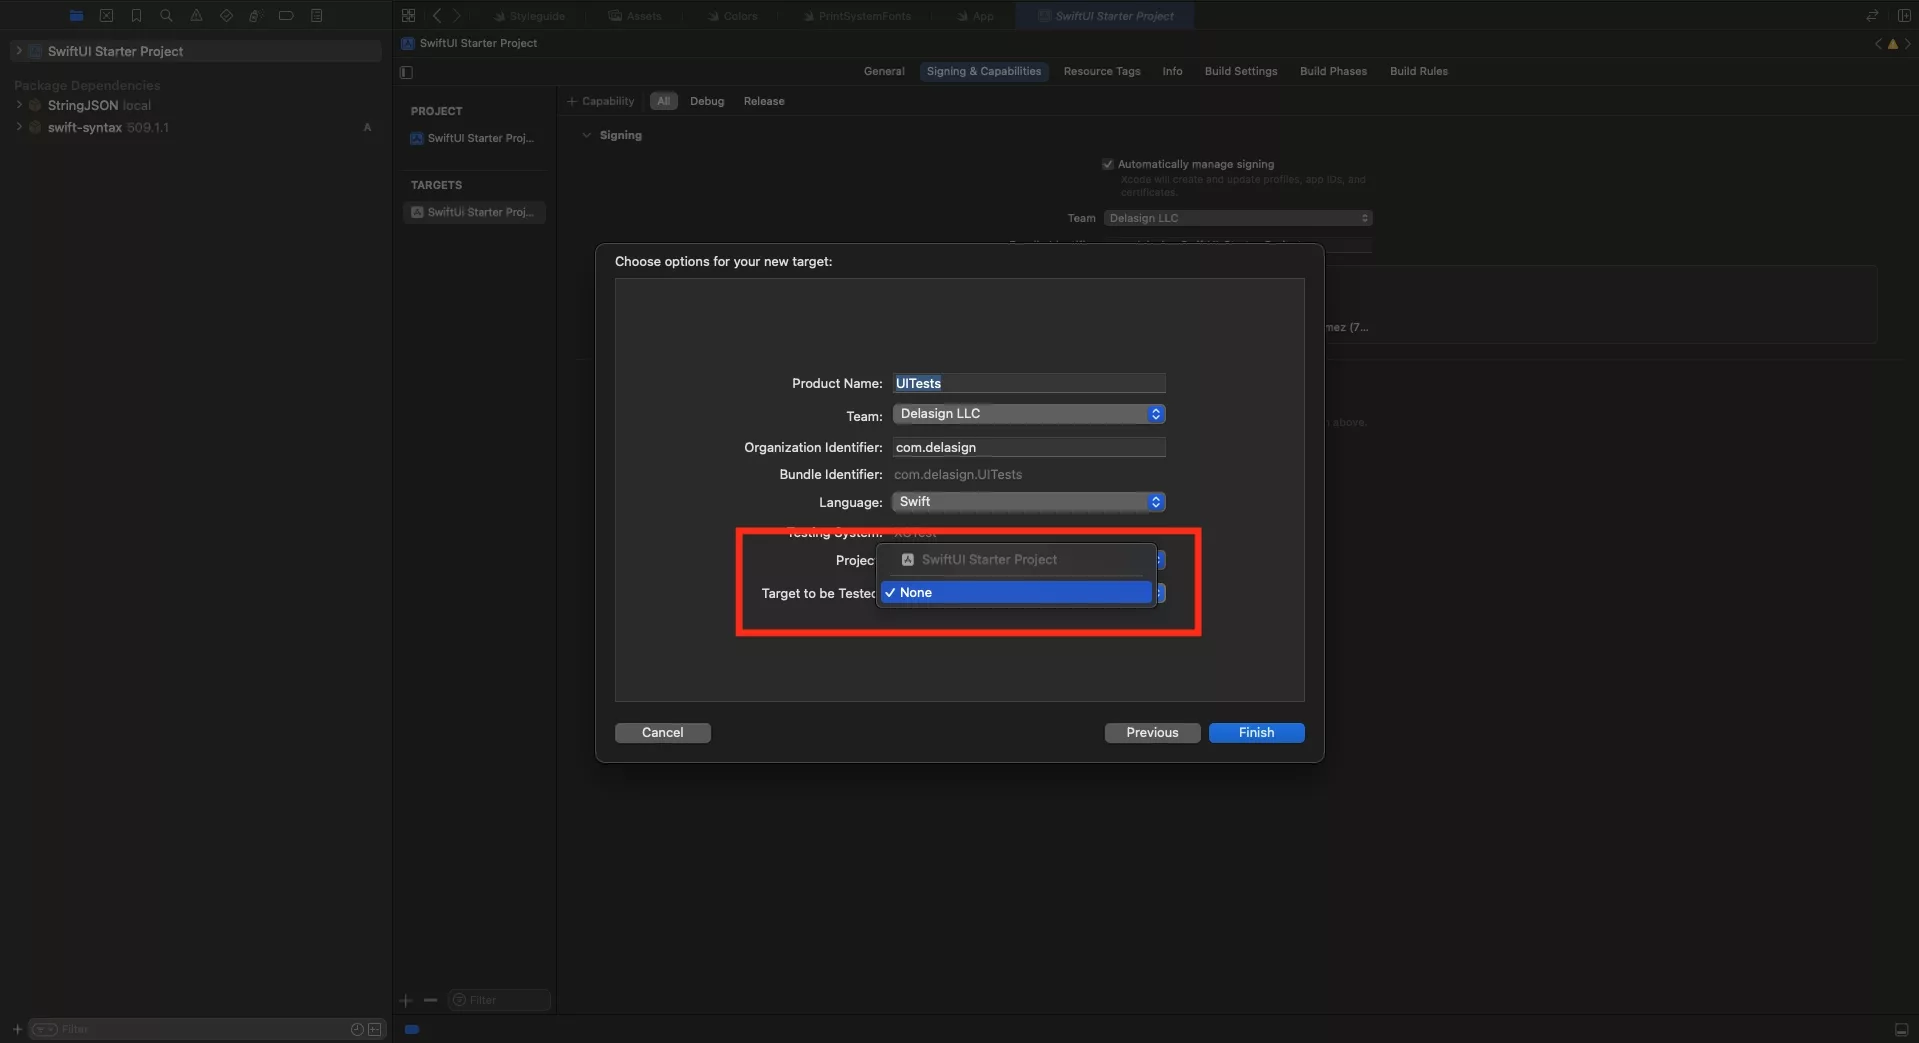
Step Four: Import the Project
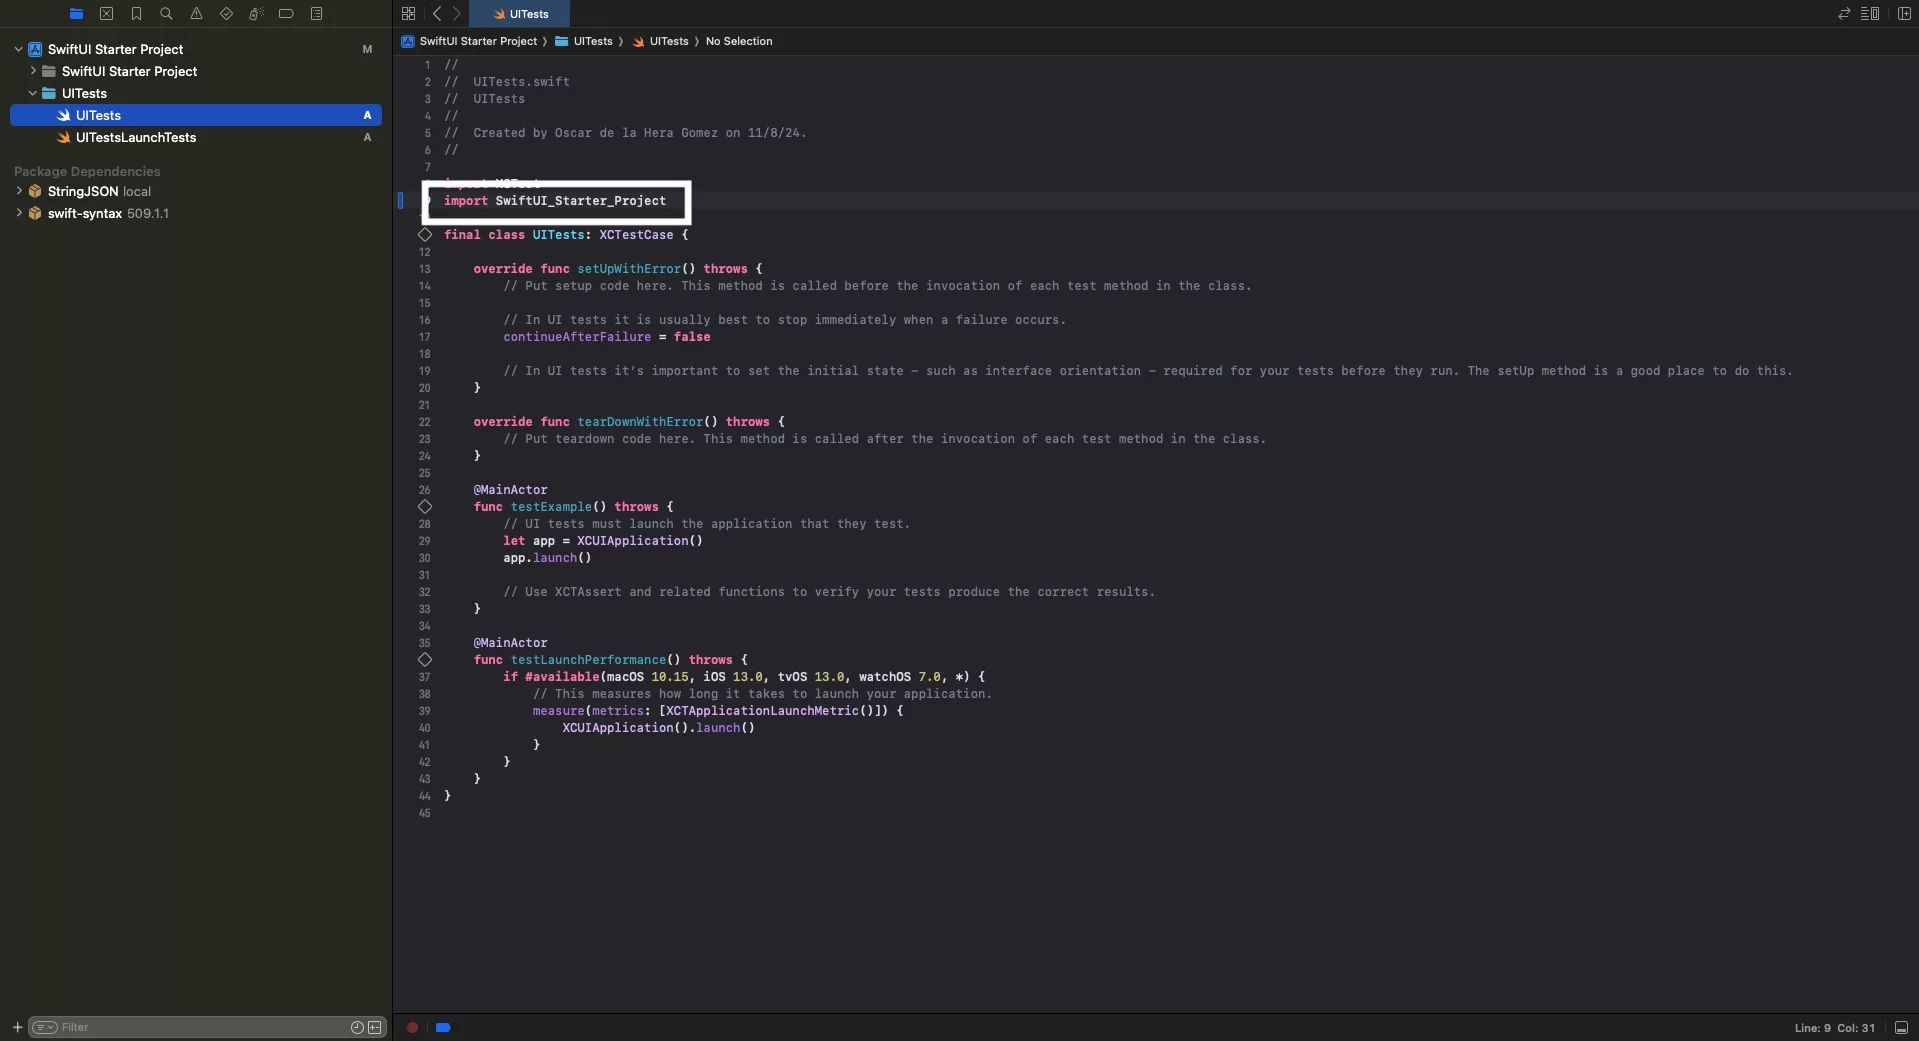
Select the relevant test swift file and at the top import your project (i.e. import SwiftUI_Starter_Project).
This import statement must match your app target name in order to be able to use elements (i.e. LanguageCoordinator) from within the target.
Step Five: Repeat if Necessary
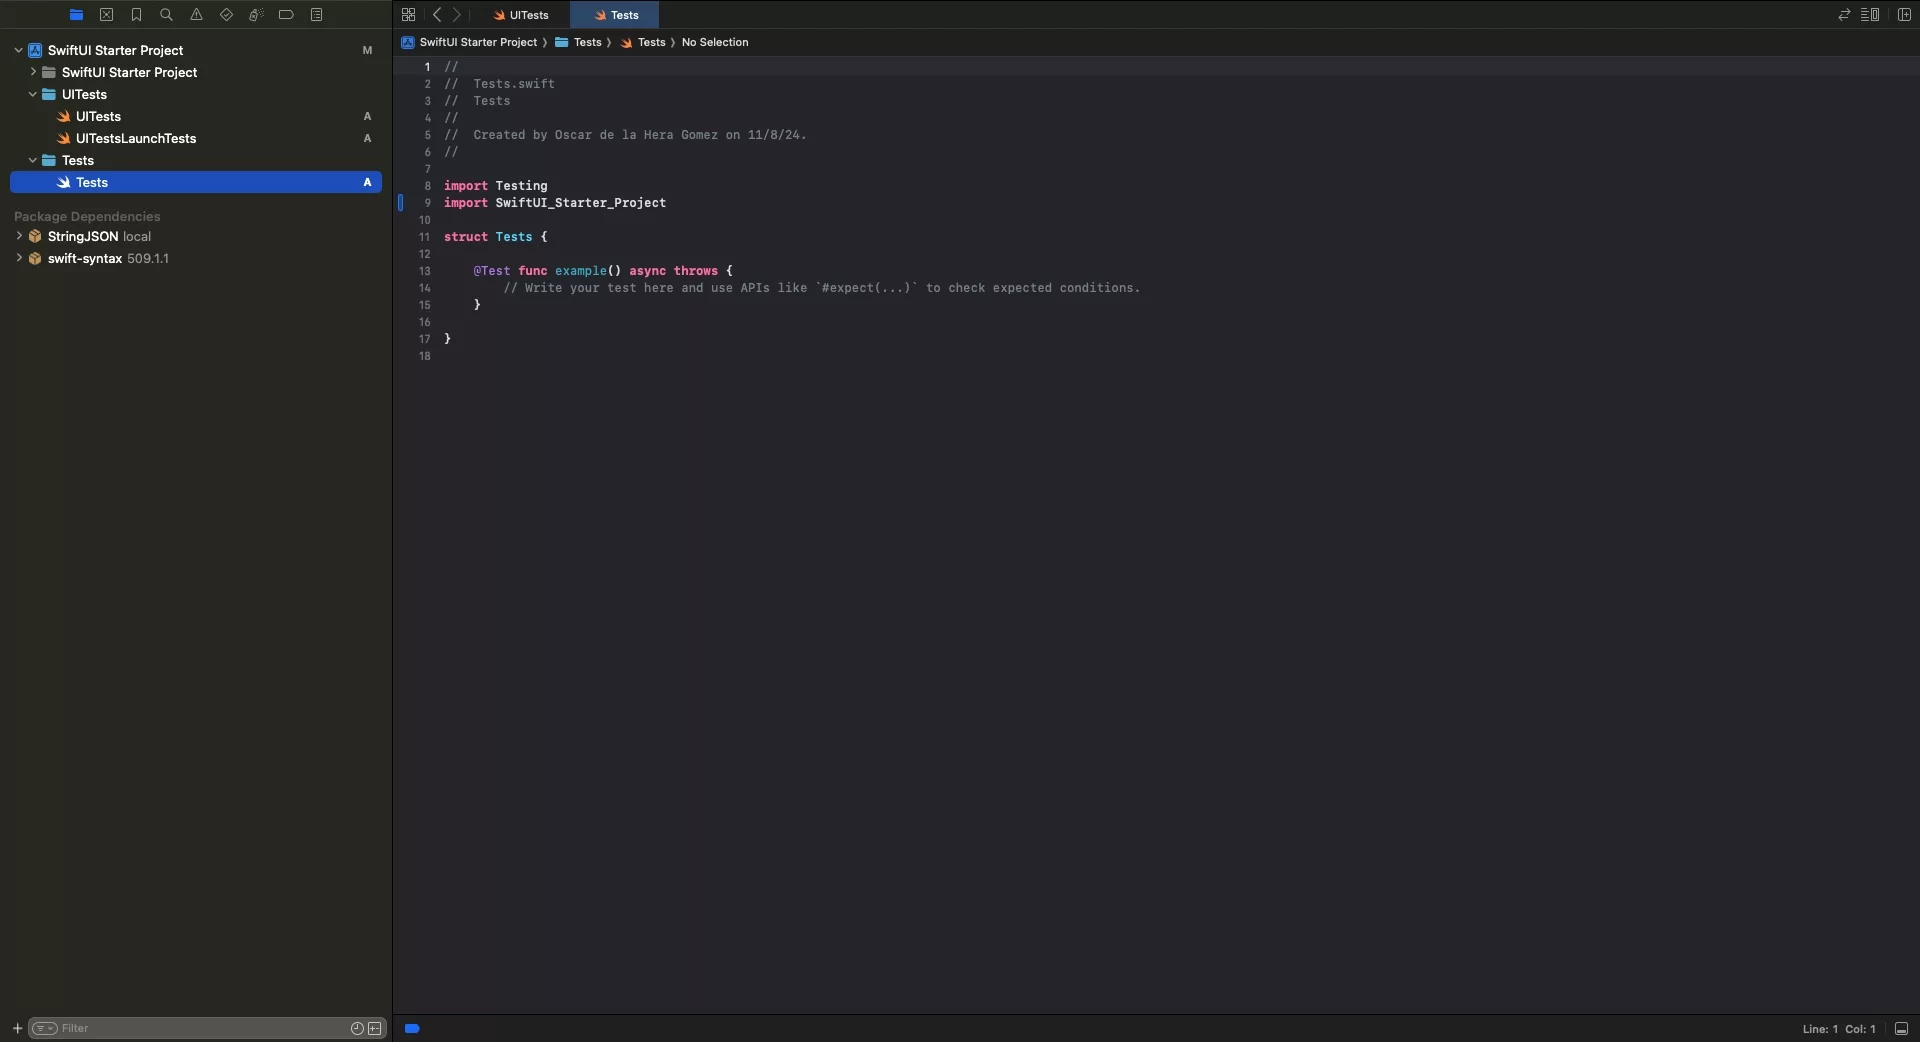
Repeat steps one to four, to add more testing targets (i.e. Unit Testing or UI Testing).
Looking to learn more about SwiftUI, Swift, Swift Testing, Design and Technology?
Search our blog to learn more about Swift, SwiftUI, Swift Testing, design and technology.