How to How to create a temporary file in a MacOS application
Set the User Selected File entitlement to "Read Only" and call the function below.

Set the User Selected File entitlement to "Read Only" and call the function below.
SubscribeDownload Open Source ProjectThe following tutorial shows code from our upcoming app Object Capture Pro. If you wish to be updated on the progress and release of this app, please subscribe using the link below.
Step One: Set Permissions
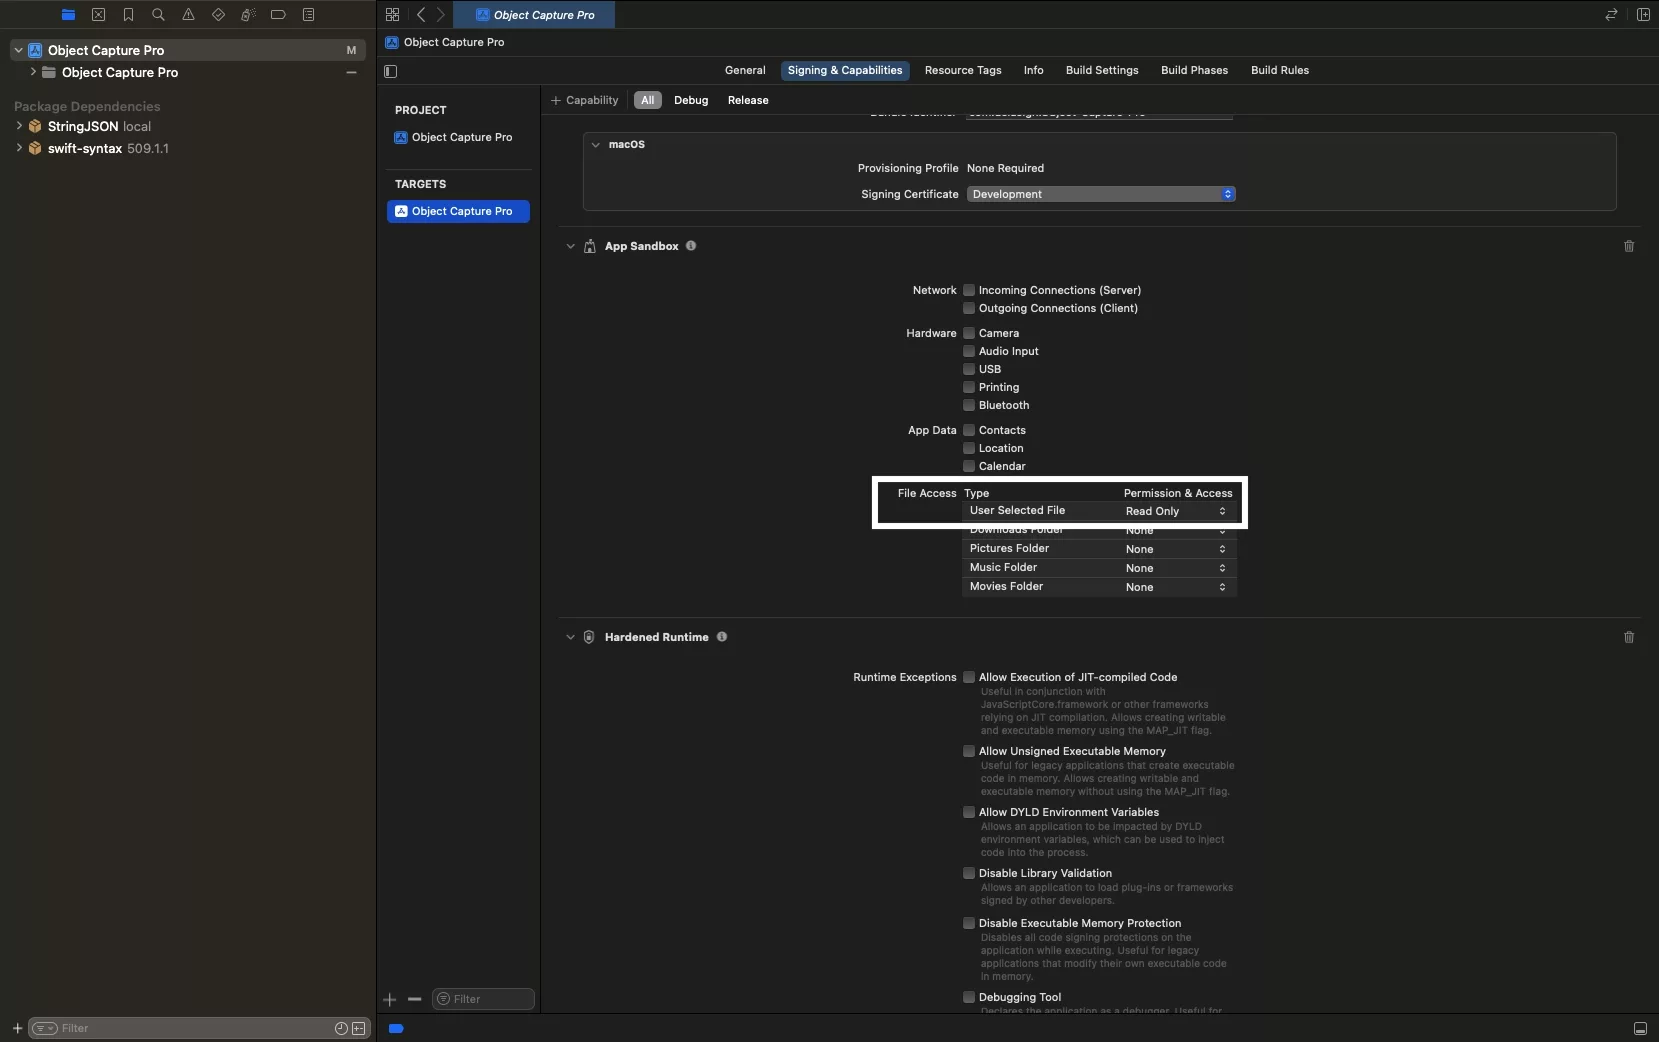
Within the sandbox of the app target, set the "User Selected File" File Access permission to Read Only.
Step Two: Code

Add the code below the app and call it to create a file.
Please note that the specific example above shows how to create an empty USDZ whose title matches the id of an object capture pro model.
Looking to learn more about SwiftUI, Swift, Design and Technology?
Search our blog to learn more about Swift, SwiftUI, design and technology.