How to create a launch screen in XCode
A step by step guide on creating splash screens with multiple images for iOS, MacOS, TVOS or WatchOS apps using XCode.
A step by step guide on creating splash screens with multiple images for iOS, MacOS, TVOS or WatchOS apps using XCode.
SubscribeDownload open source projectBefore continuing we strongly recommend reading our best practices guide on creating launch (splash) screens.
Step One: Set the Storyboard
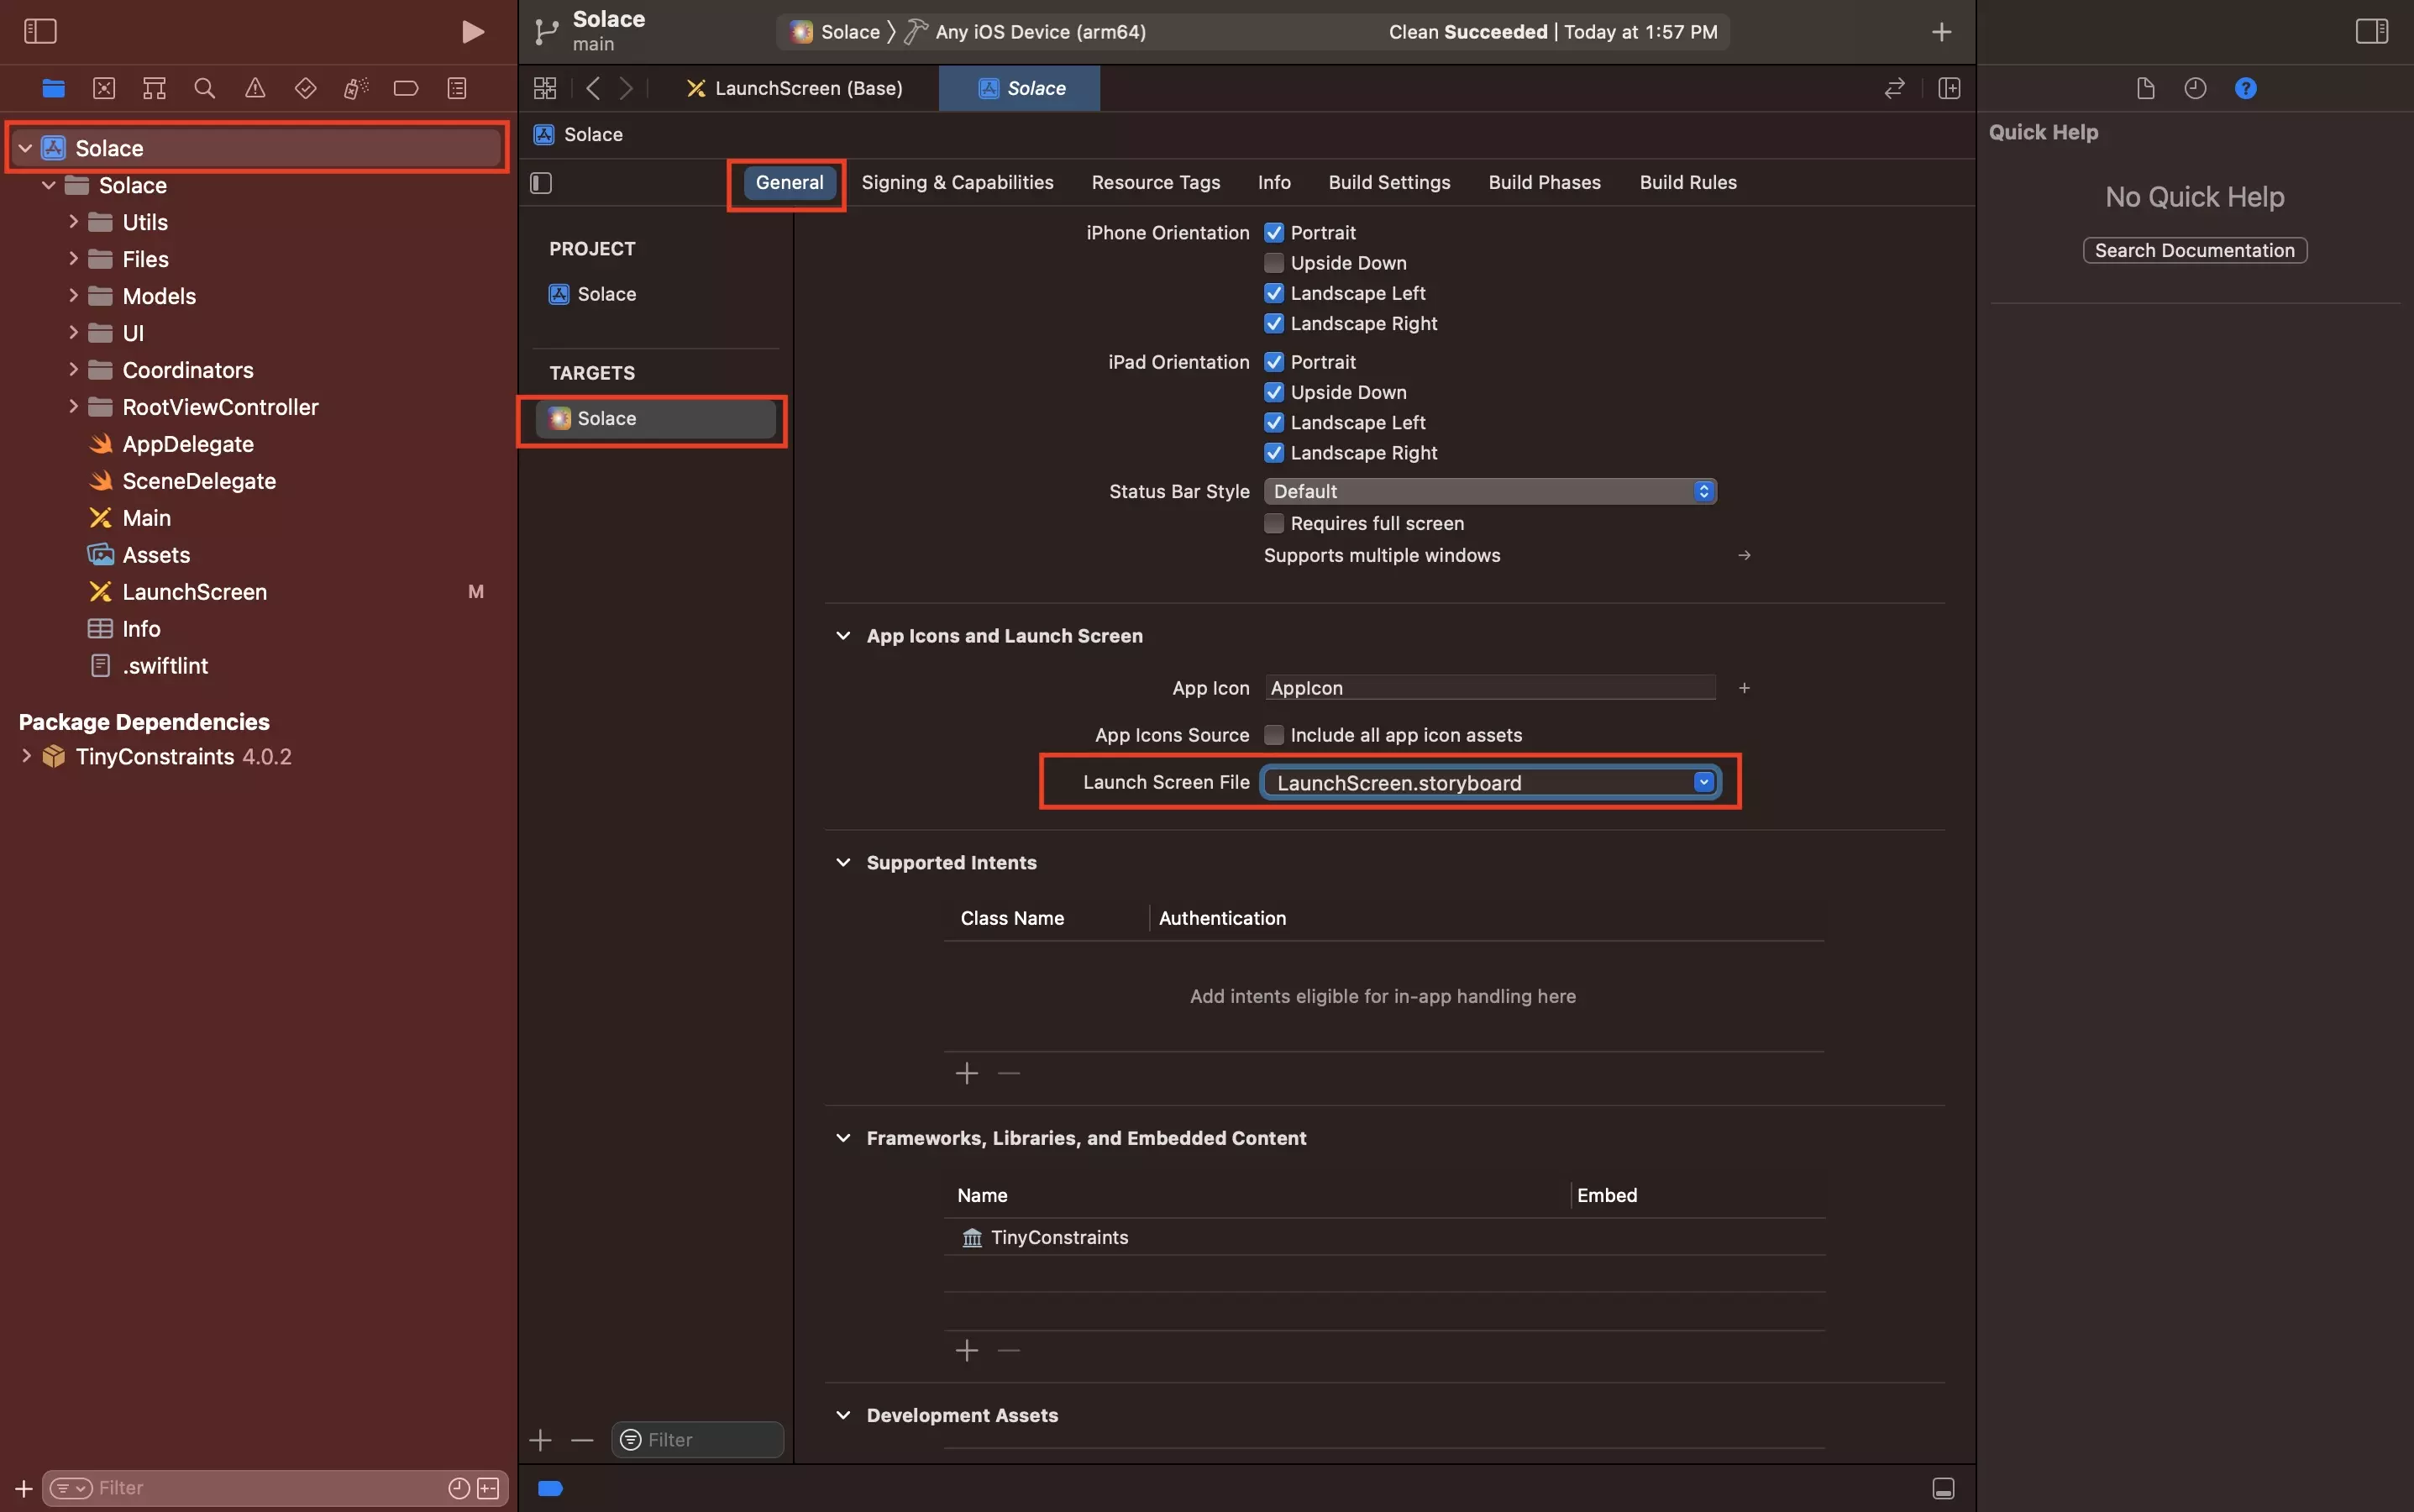
In the Project Settings, select the app target and make sure that the Launch Screen File has been set to LaunchScreen.storyboard or the relevant storyboard file.
Step Two: Add the Images
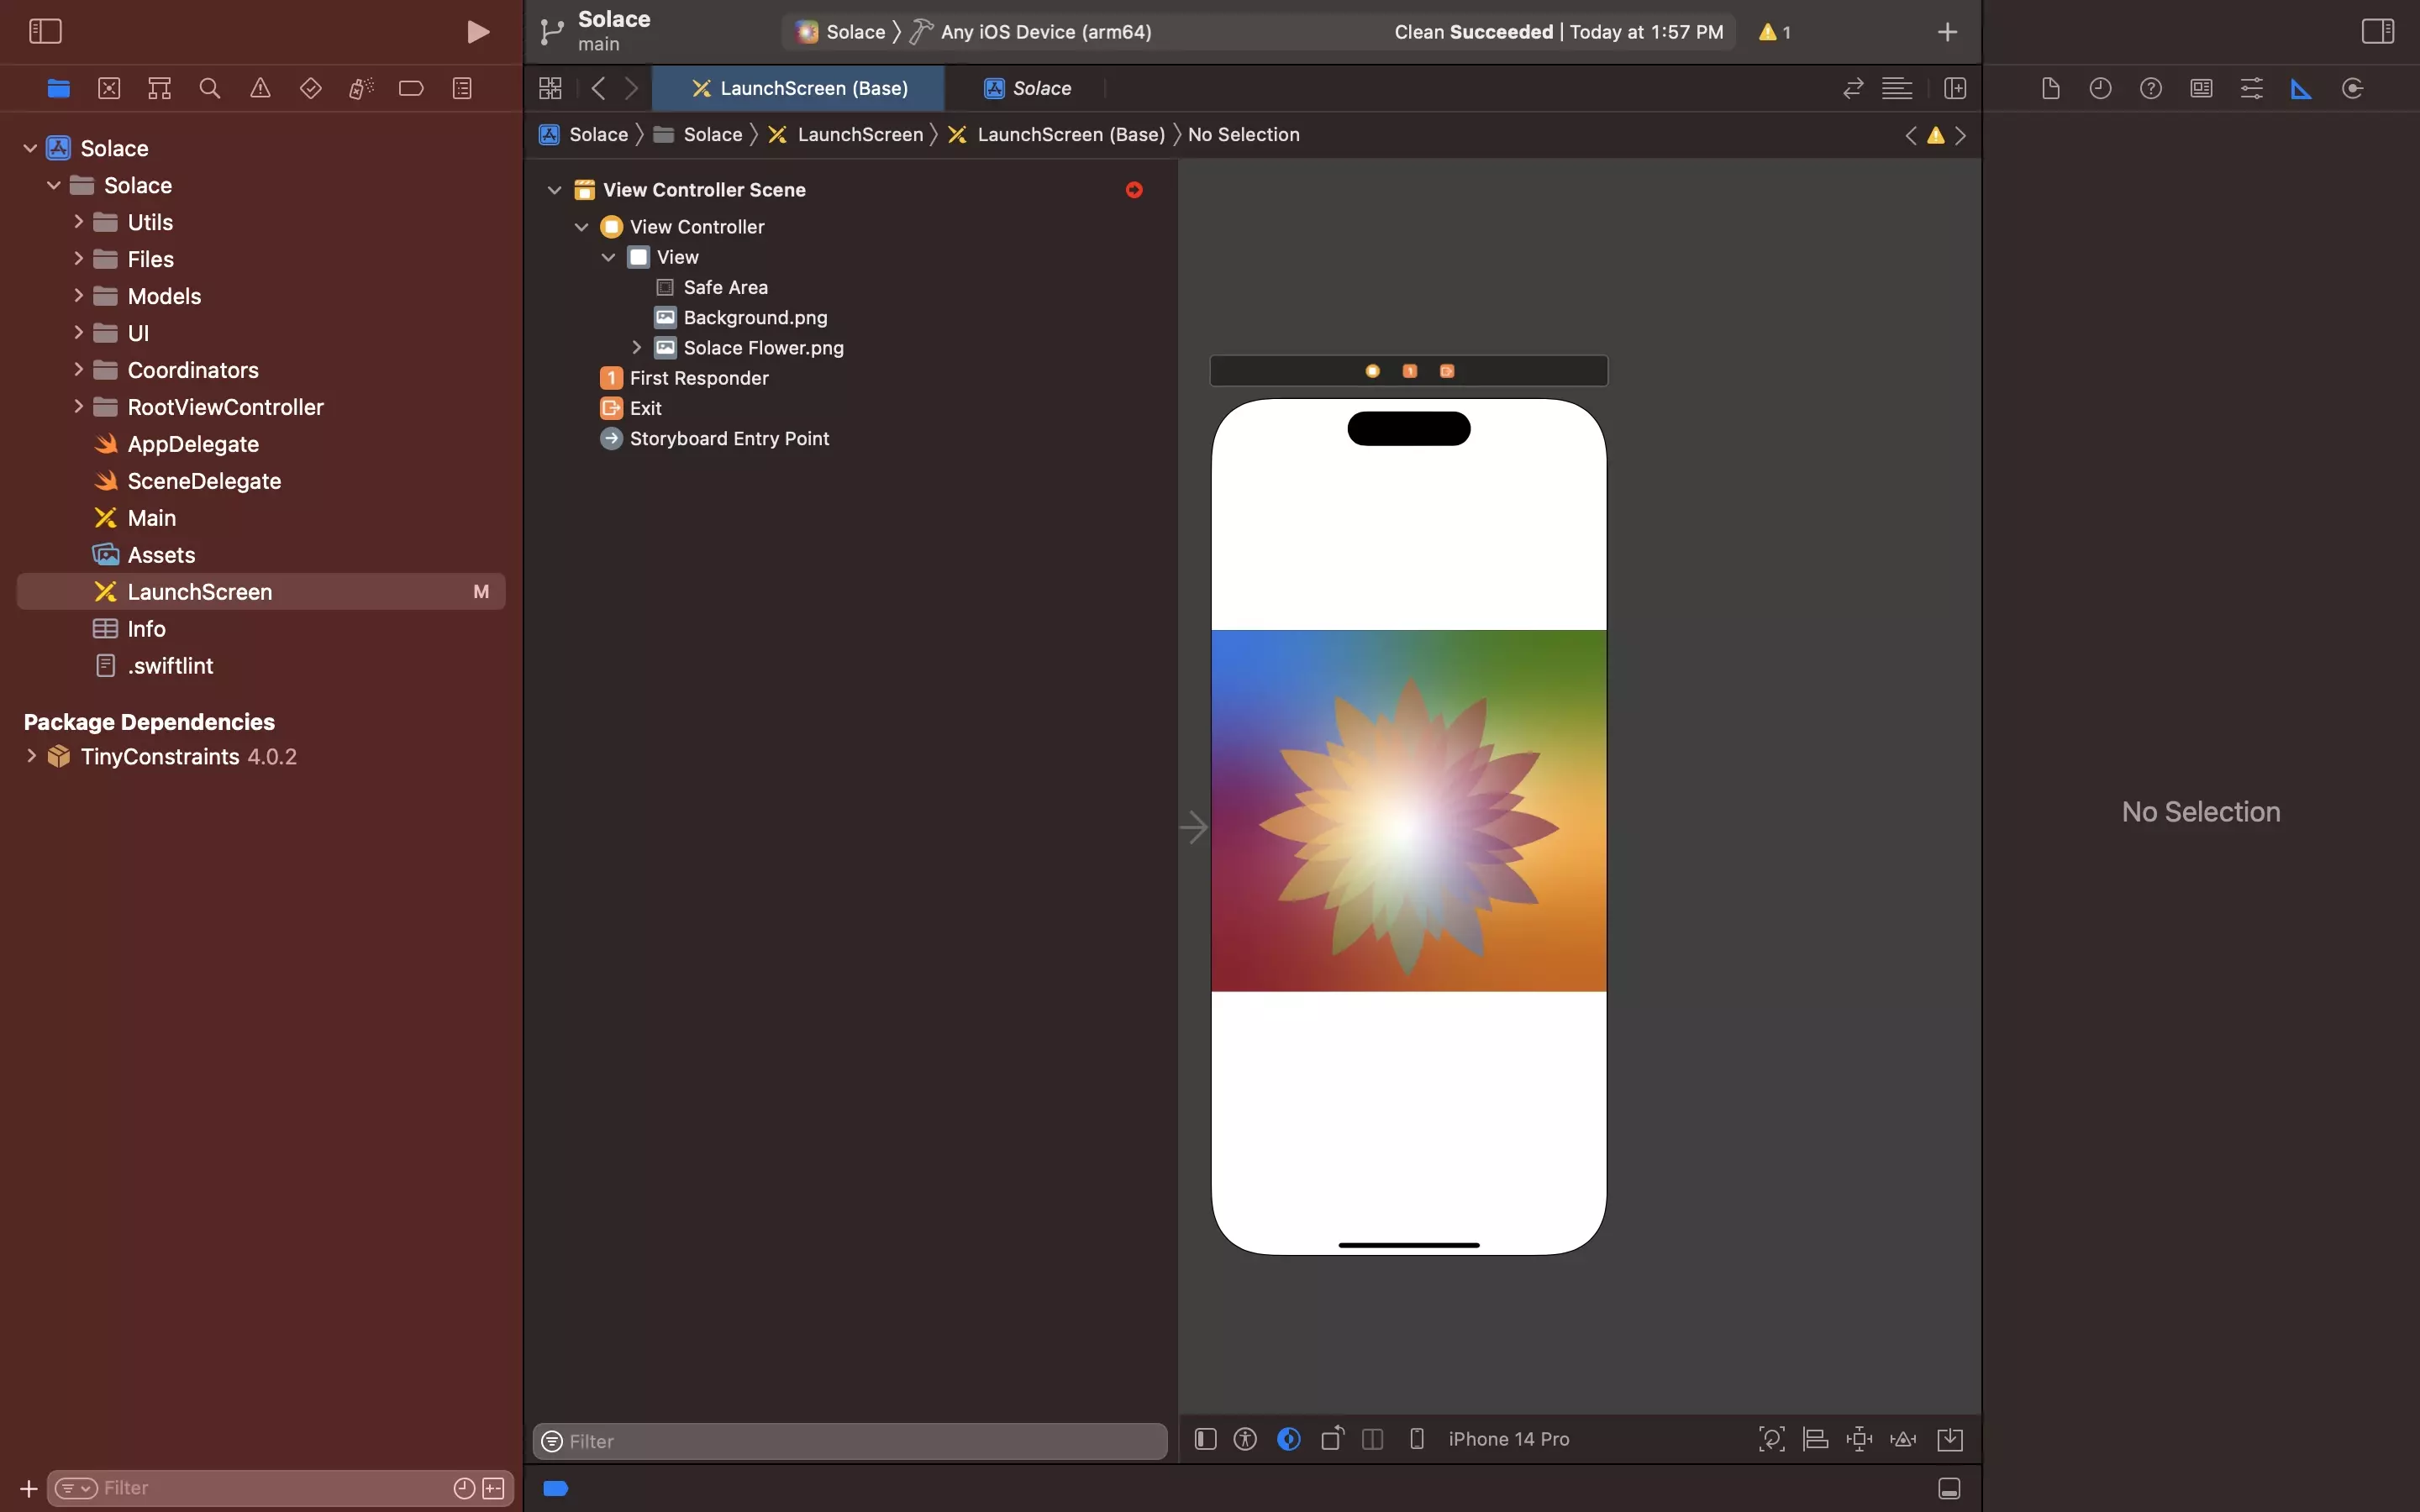
Follow the tutorials below to learn how to add image view components with images to the launch screen storyboard.
Make sure that you add the images as local files instead of xcassets. This will aid previewing updates without having to restart the device.
Step Three: Constrain the Images
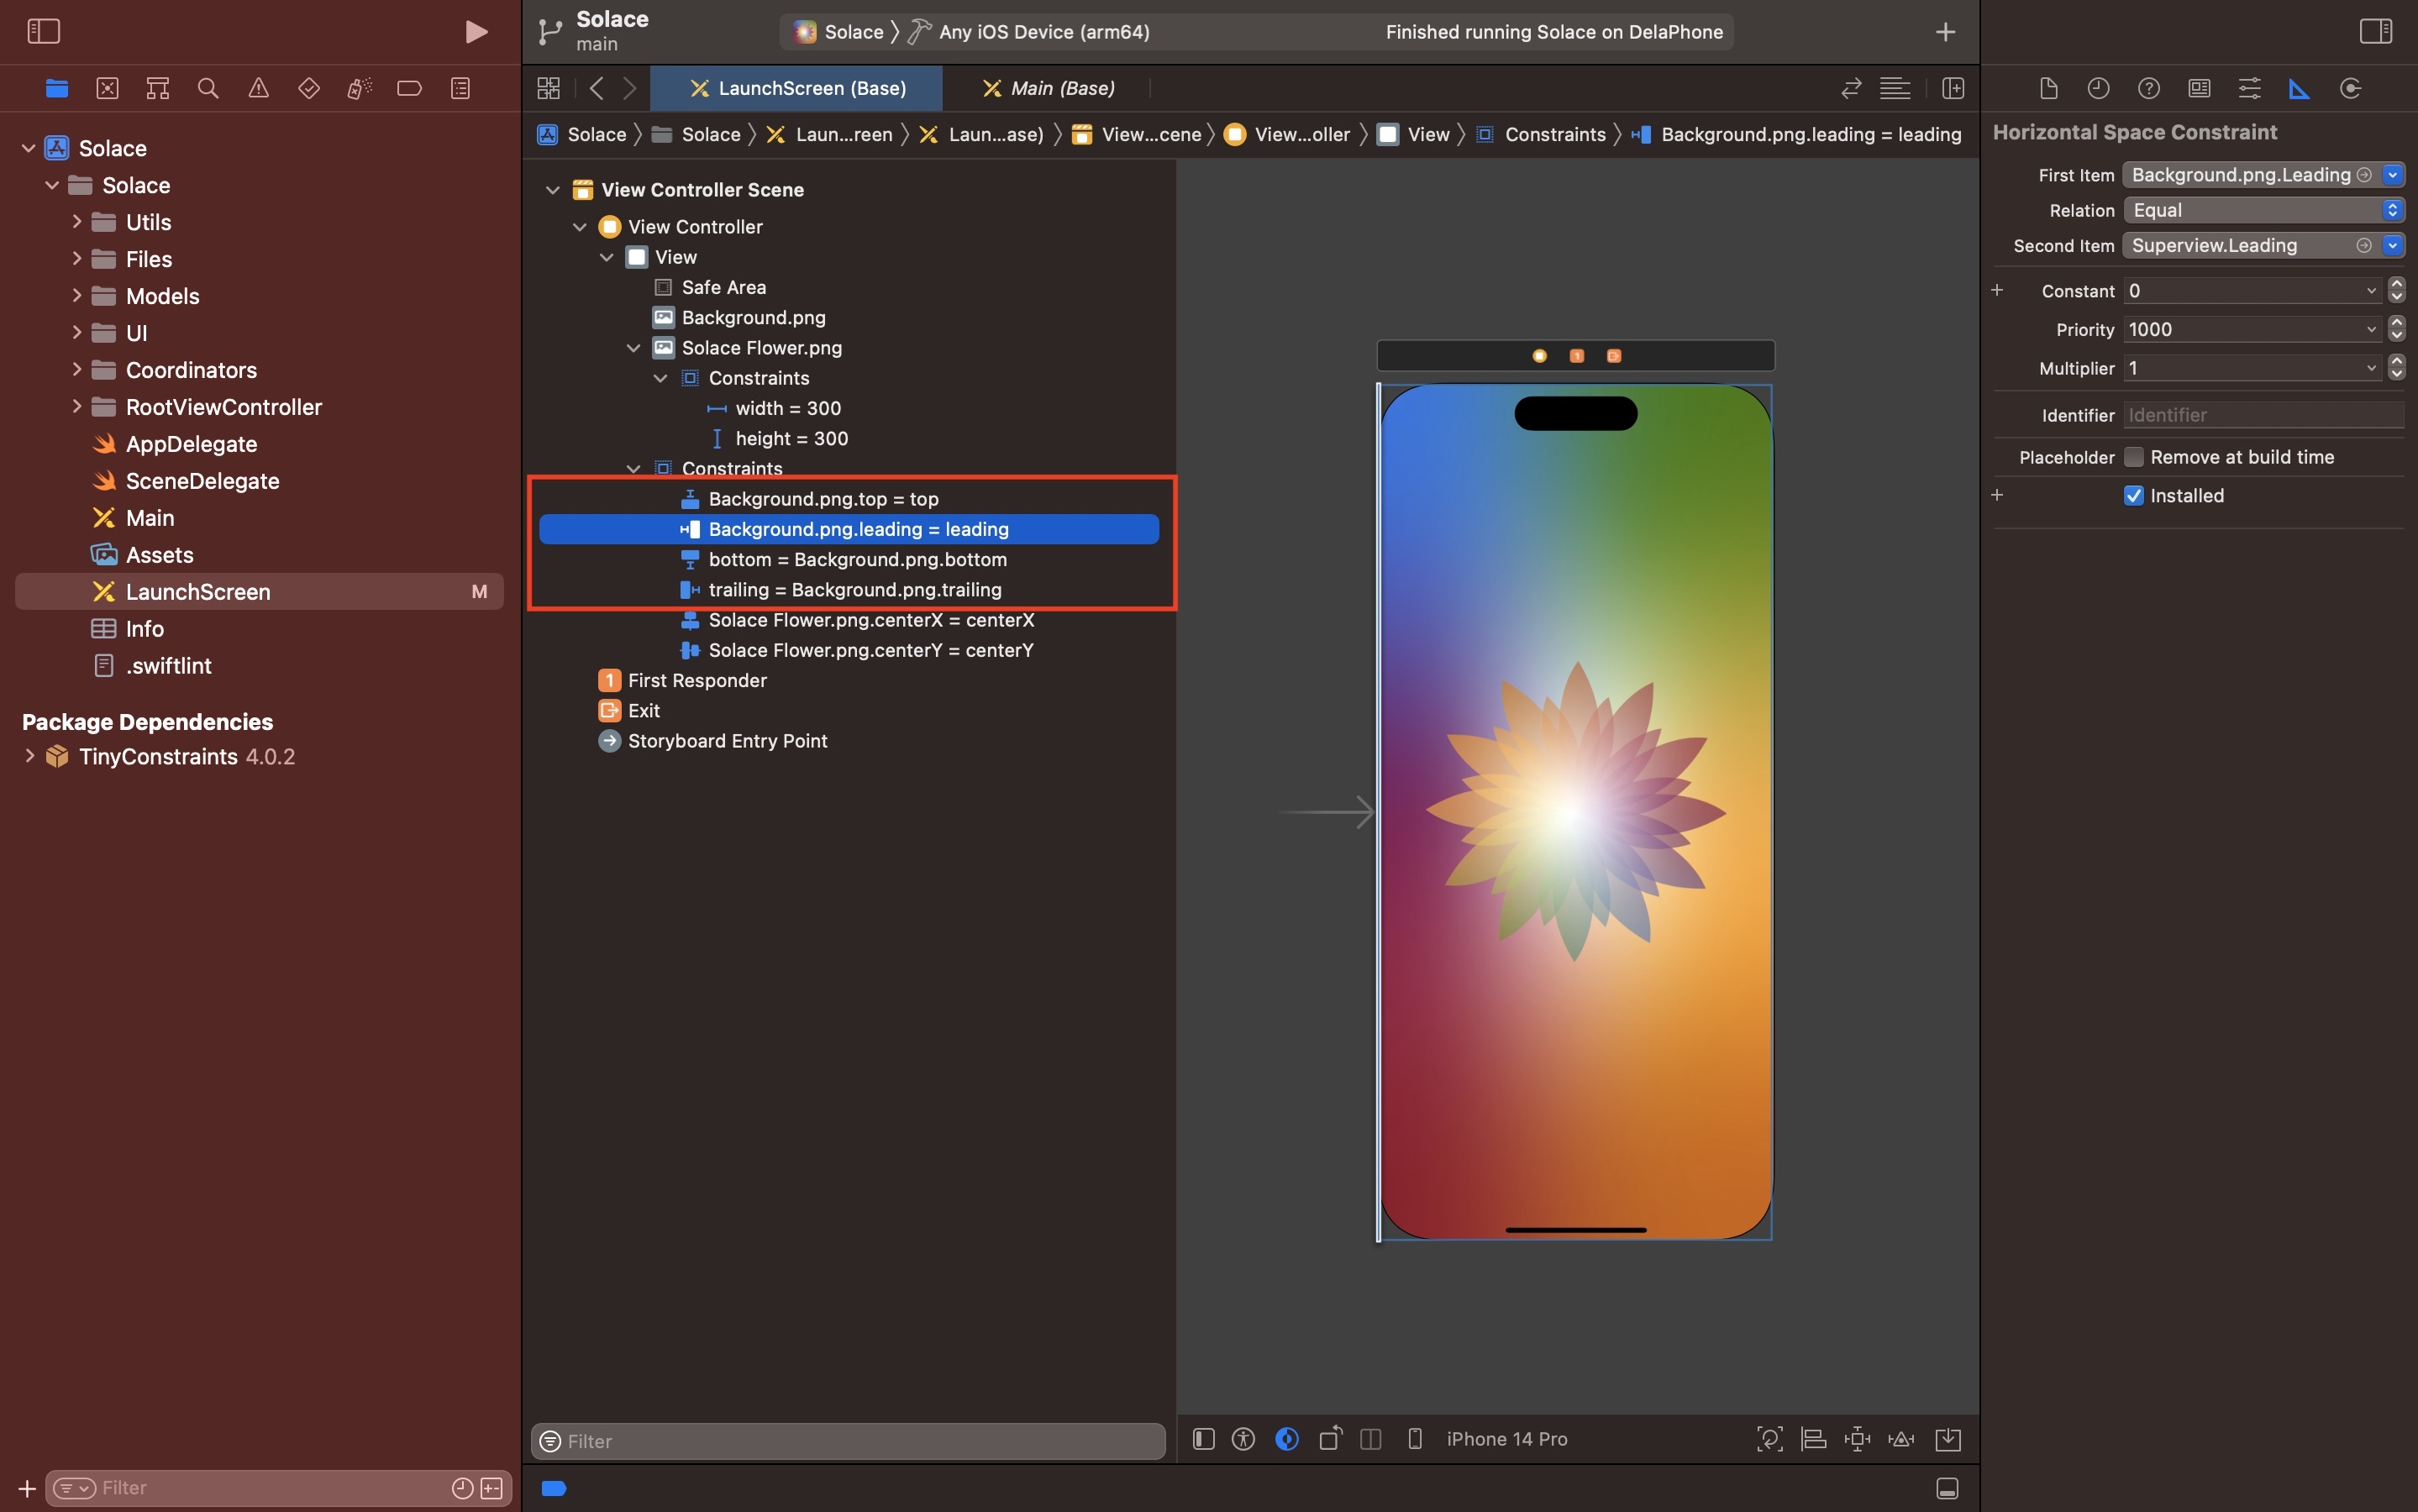
Follow the tutorials below to learn how to constrain the image views. Make sure that you constrain the background image view to the edges of the view, and not the safe area.
Step Four: Run
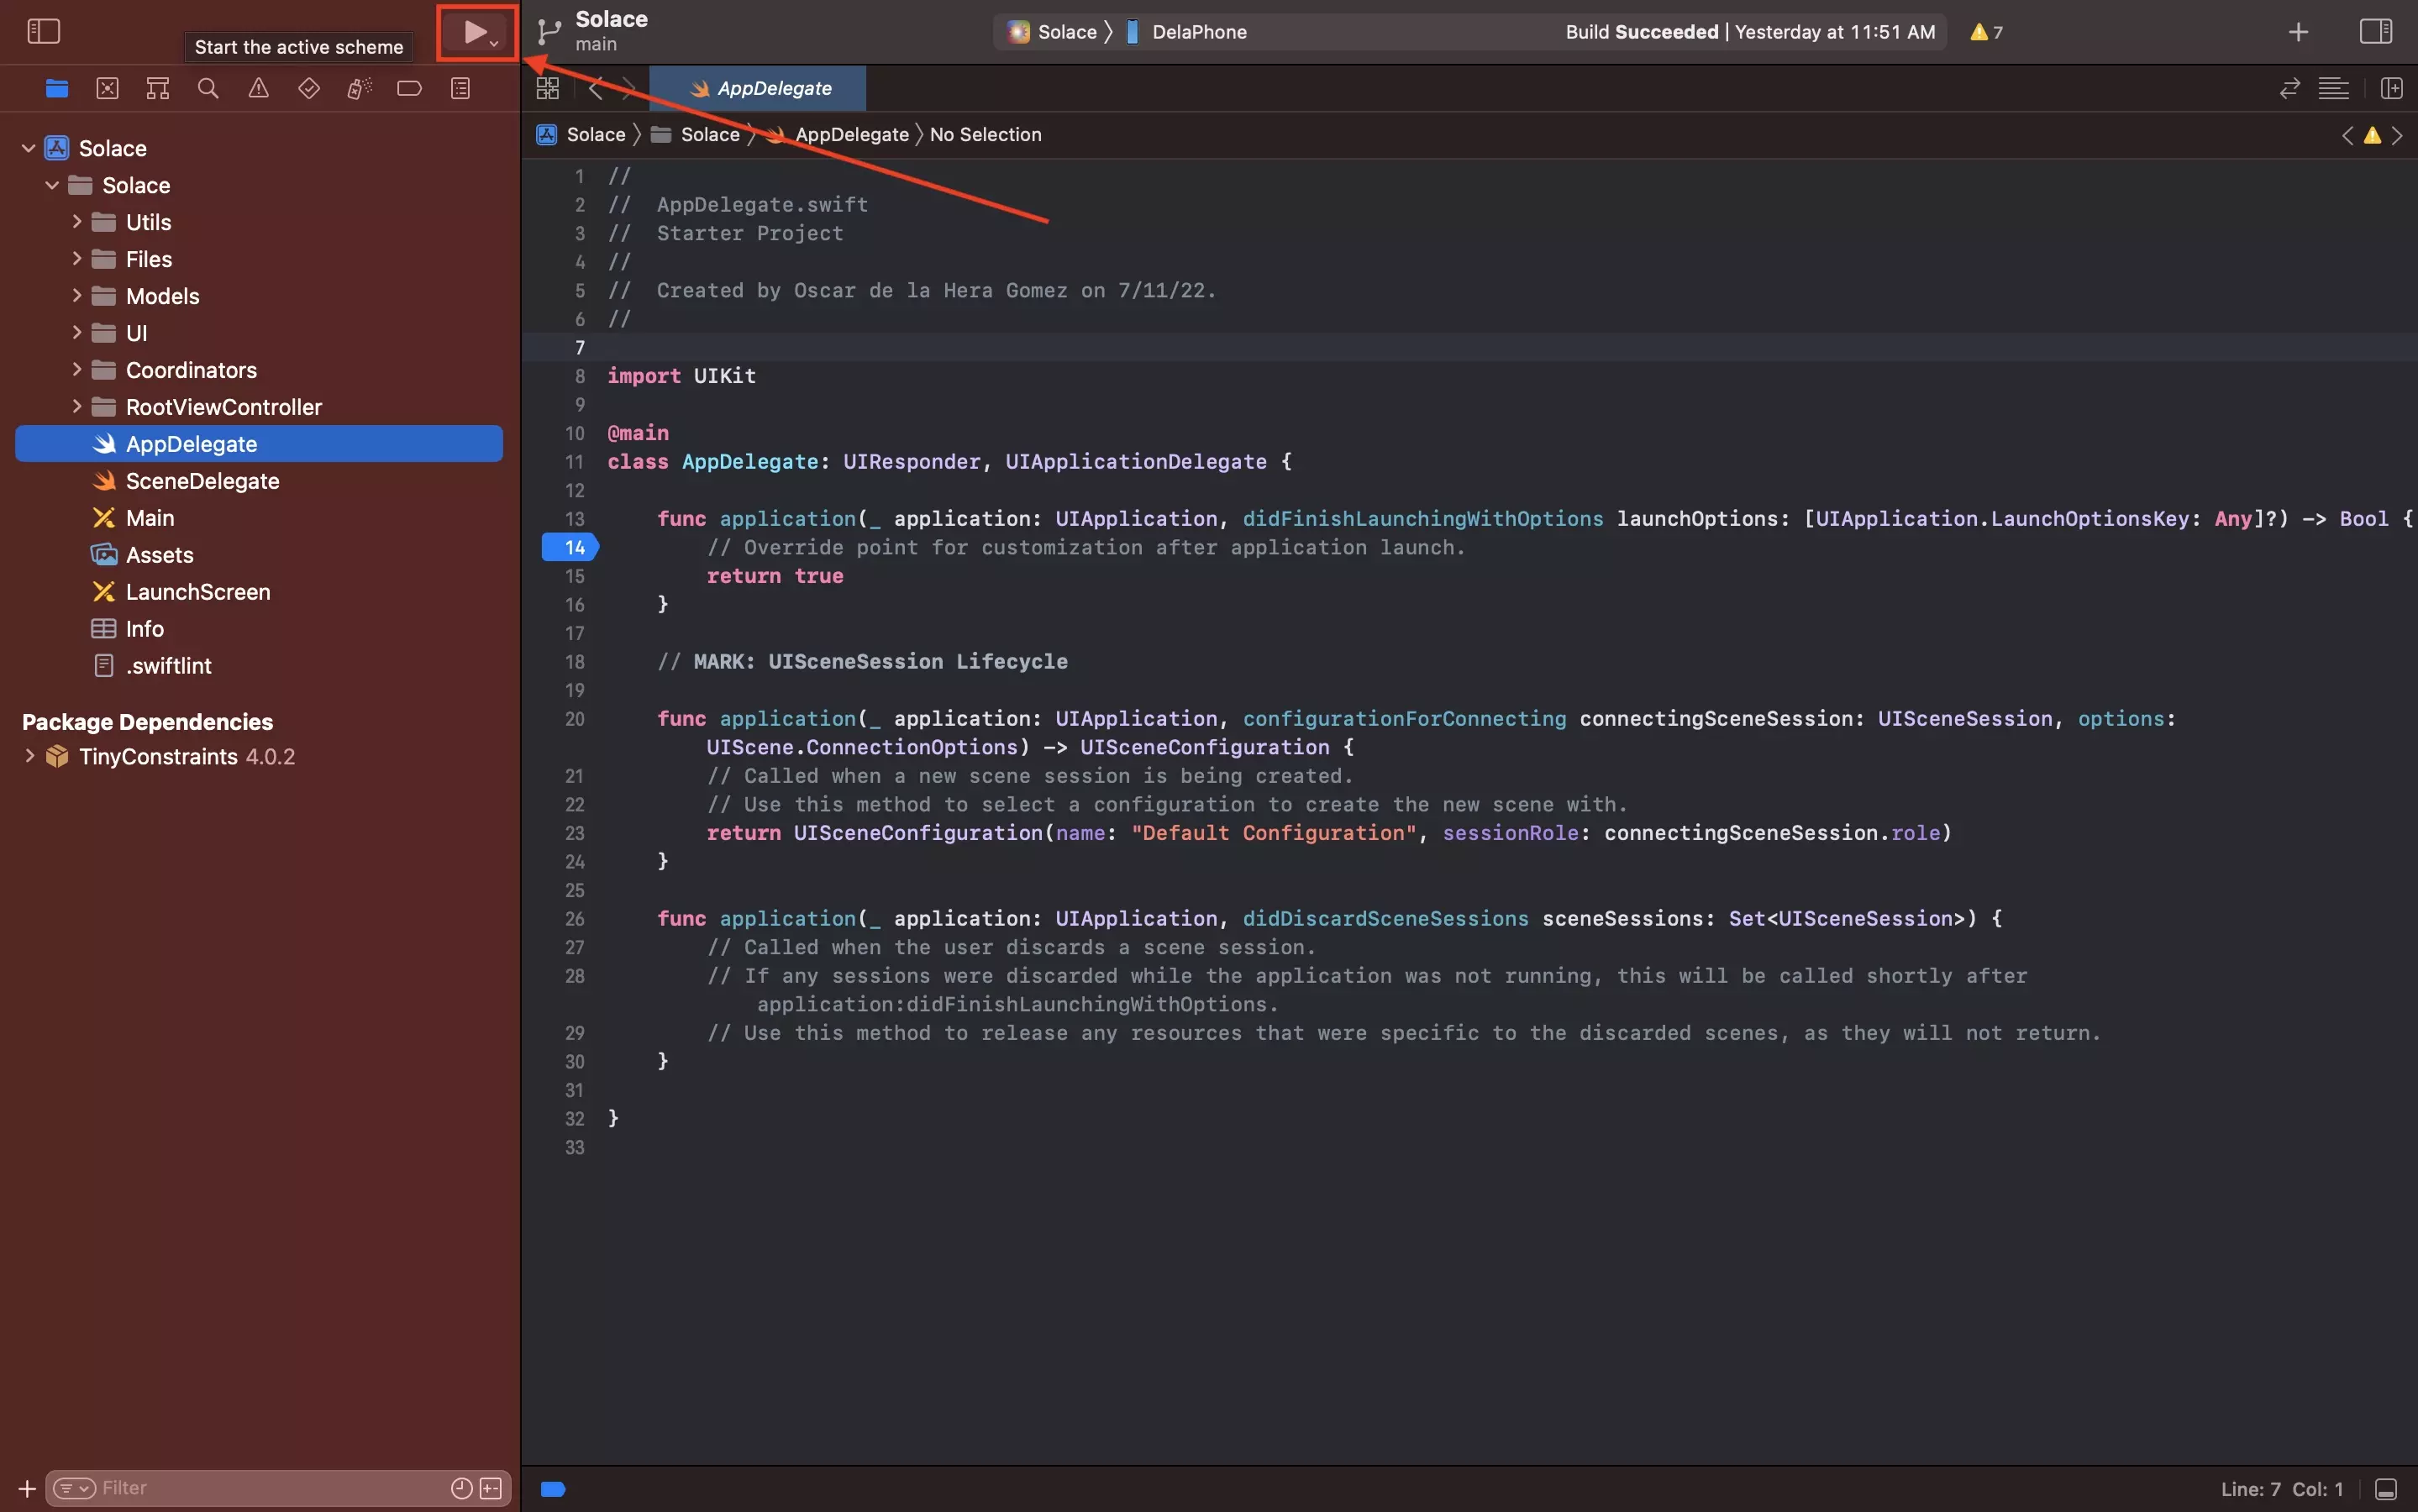
Run the app on the device.
We recommend setting a breakpoint in the AppDelegate of the app so that the app stops at the launch screen, allowing you to confirm that the changes went through.
Frequently Asked Questions (FAQ)
I updated the Launch Screen but it's not showing on my device, what do I do ?
Delete the app and restart your device. Then in XCode, clean the project and reinstall the app.
My launch screen is black on my device, even though XCode shows something else
It sounds like your images are too big. Try:
- Reducing the image file sizes to less than 0.5MB for each image.
- If you are not already, use local files instead of xcassets.
- Delete the app and restart your device. Then in XCode, clean the project and reinstall the app.