How to add the LanguageCoordinator to Swift Testing
Add the targets to the files, modify the initializer and generator. Then initialize the LanguageCoordinator with a isTestingEnvironment flag in the tests.
Add the targets to the files, modify the initializer and generator. Then initialize the LanguageCoordinator with a isTestingEnvironment flag in the tests.
SubscribeThe following tutorial can be found in the main branch of our Open Source Swift and SwiftUI projects linked below.
Step One: Add the Language Coordinator
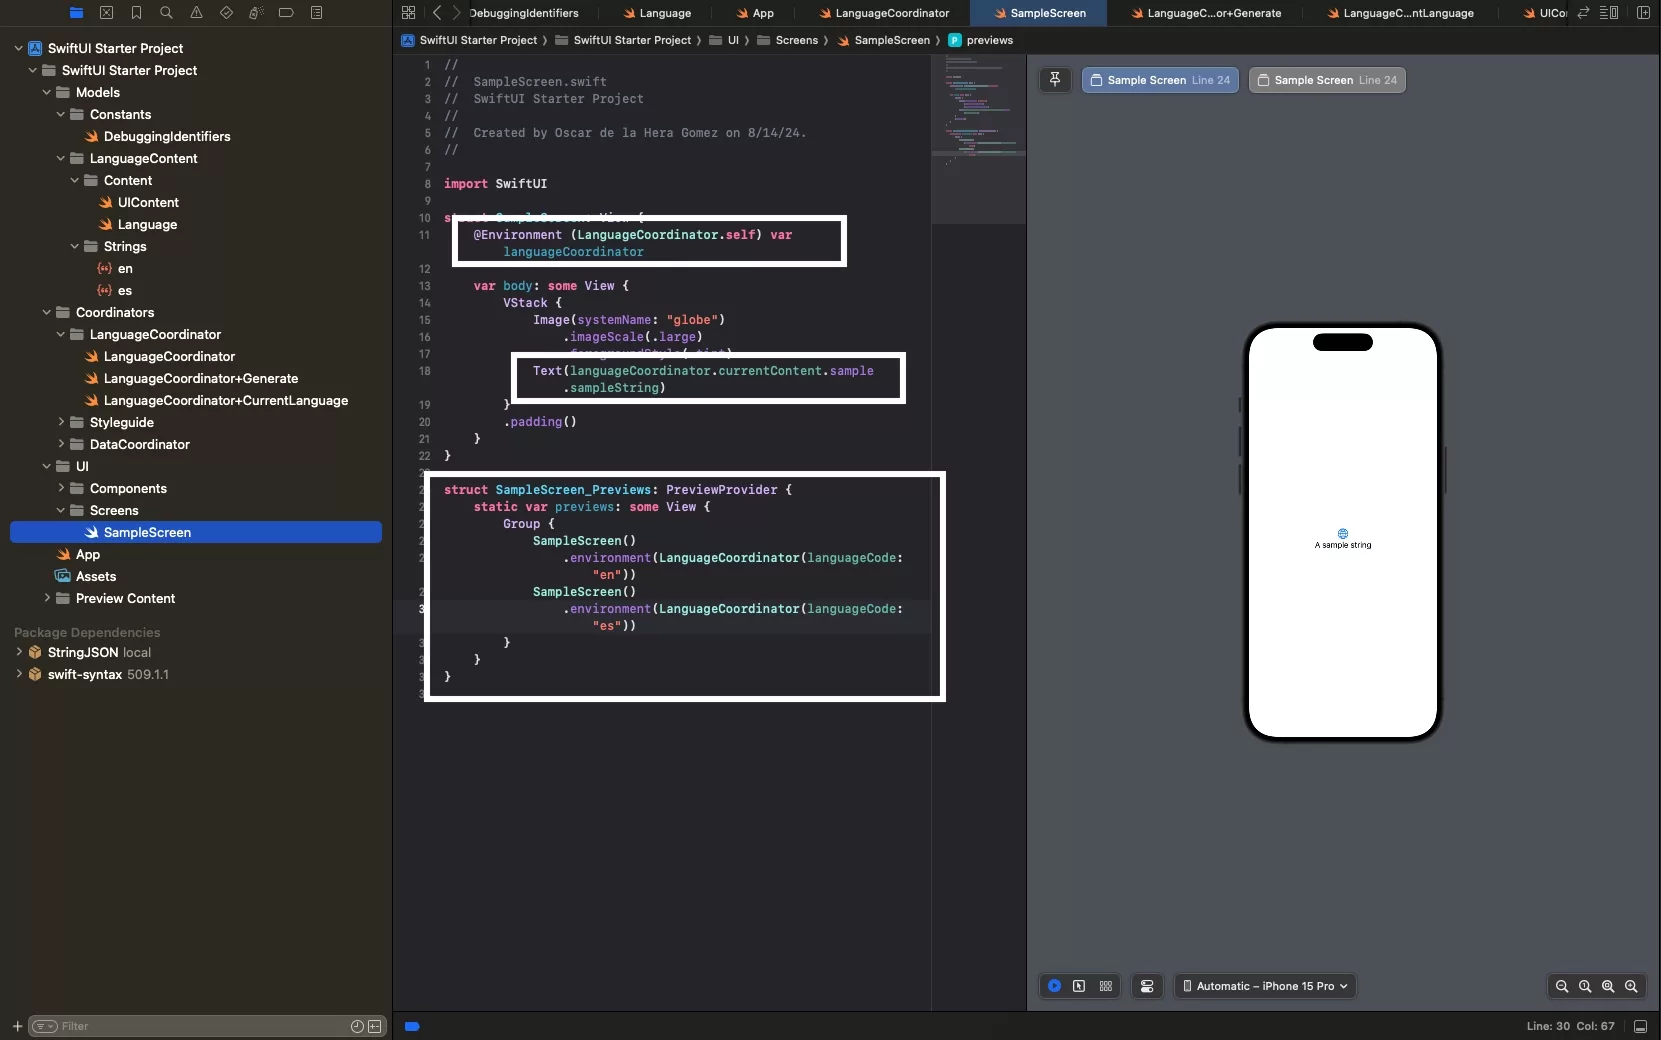
If you haven't already, add the Language Coordinator and relevant files to the project by following one of the two tutorials below.
Step Two: Add the Testing Targets to All Files
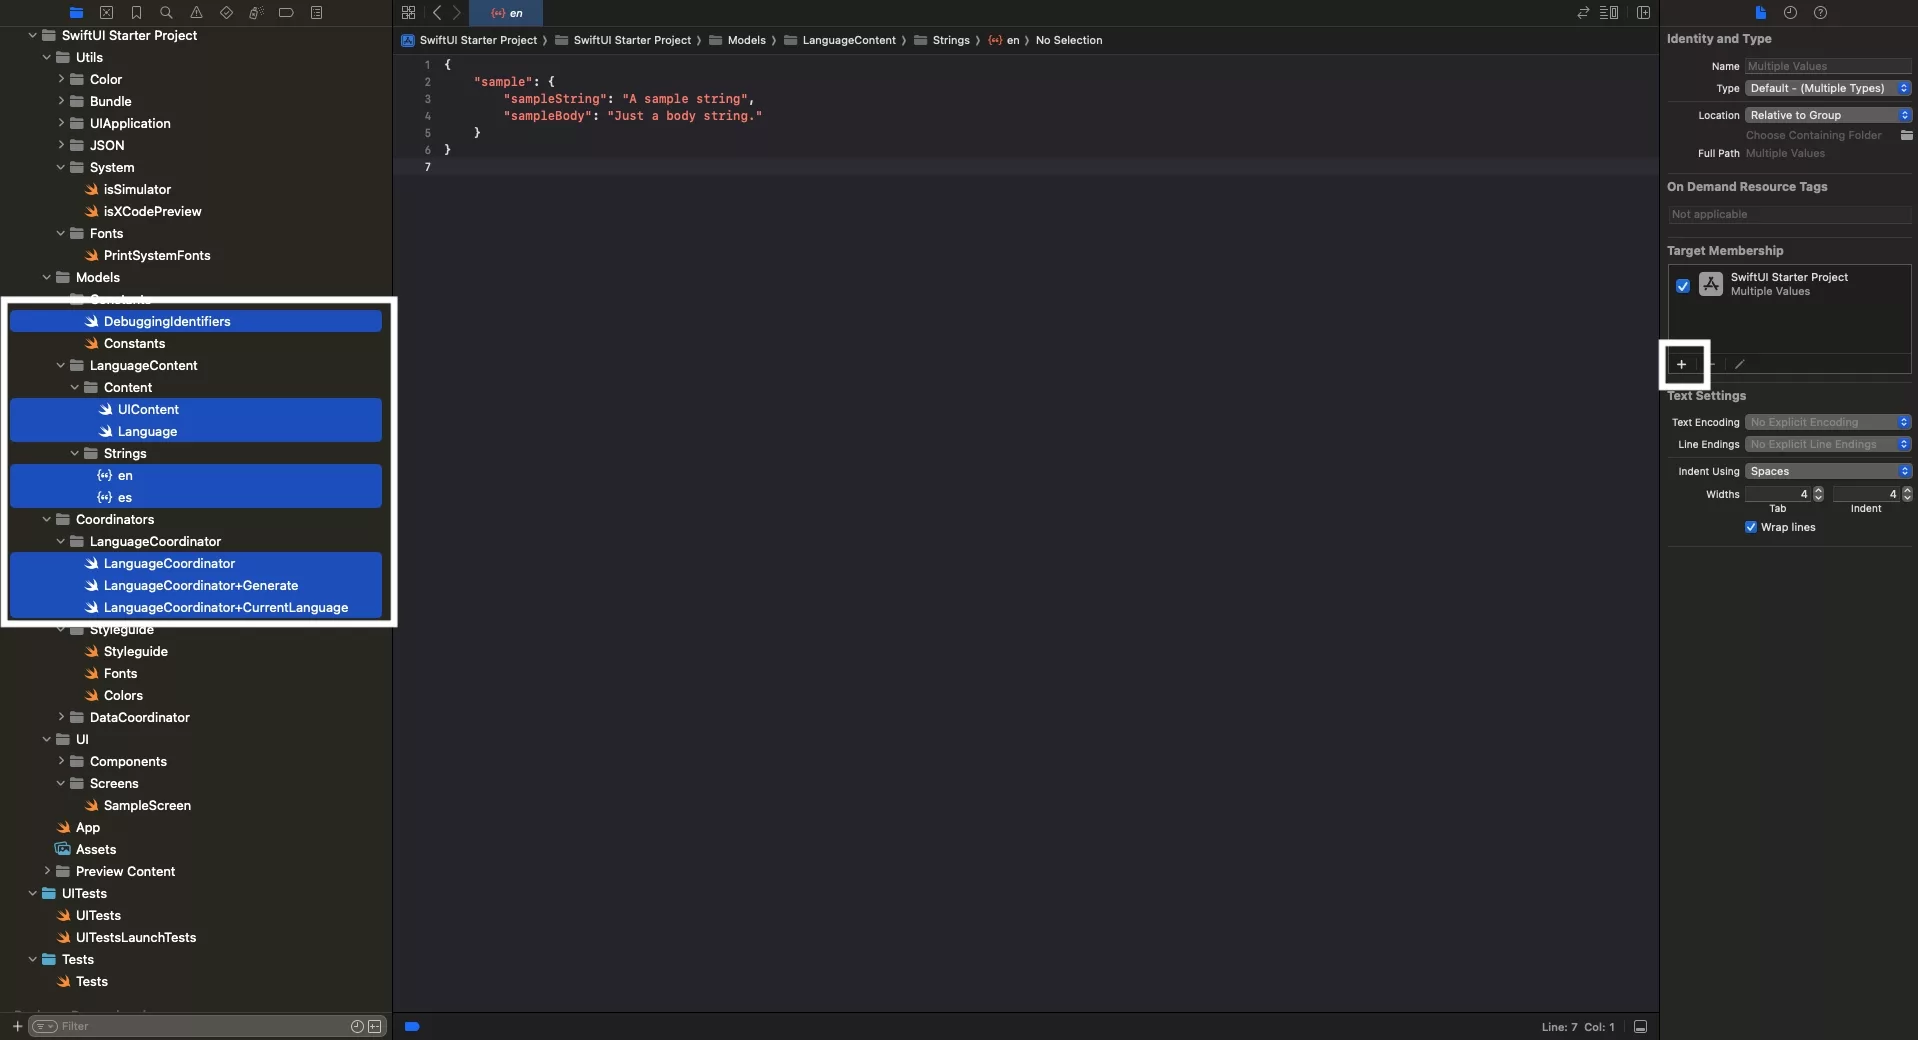
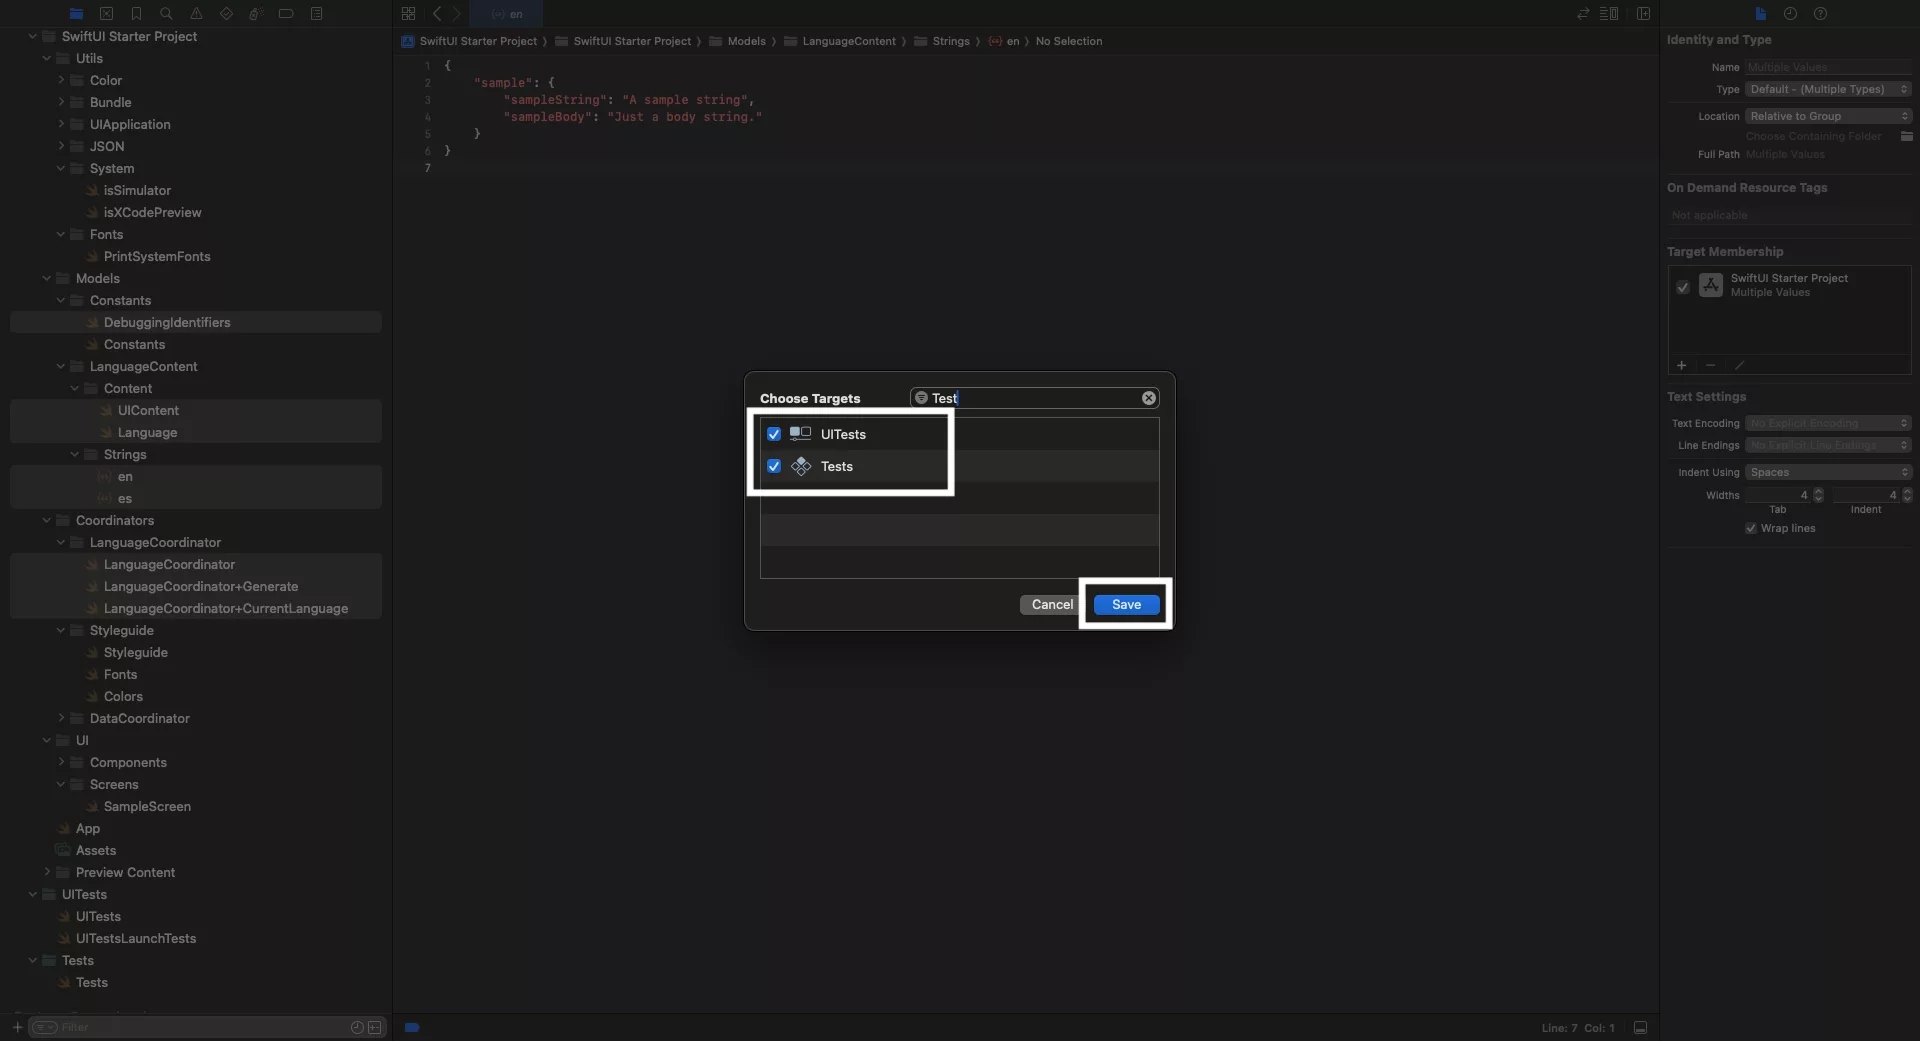
Select all the LanguageCoordinator, UIContent, Language and String files and add the testing targets to them.
Please note that we have also added targets for our debugging identifiers.
Make sure you add all relevant testing targets.
Step Four: Update the Initializer
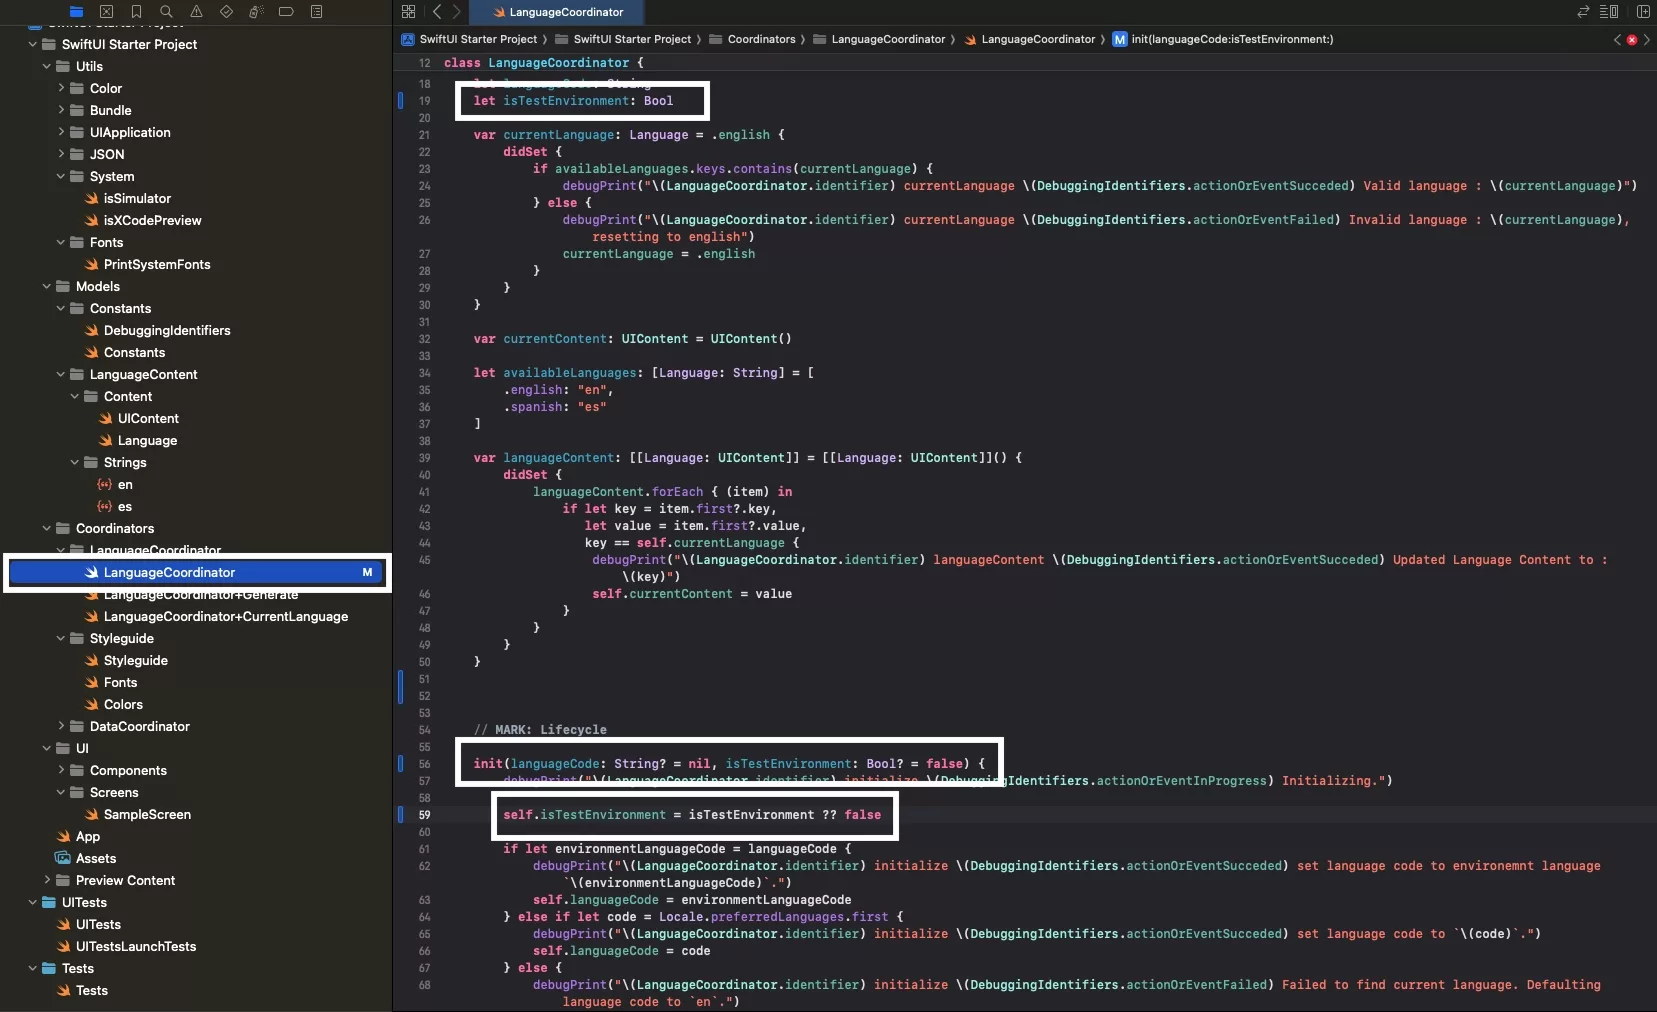
Add an isTestEnvironment boolean constant, and within the initializer set it as an optional parameter that defaults to false.
Please note that we did not use a launch argument as the app must launch with the standard bundle path, whilst the test requires a different path.
If you use a launch argument, both will use the different path, which will cause the App to not find the files - resulting in empty strings.
Step Five: Update the Generator
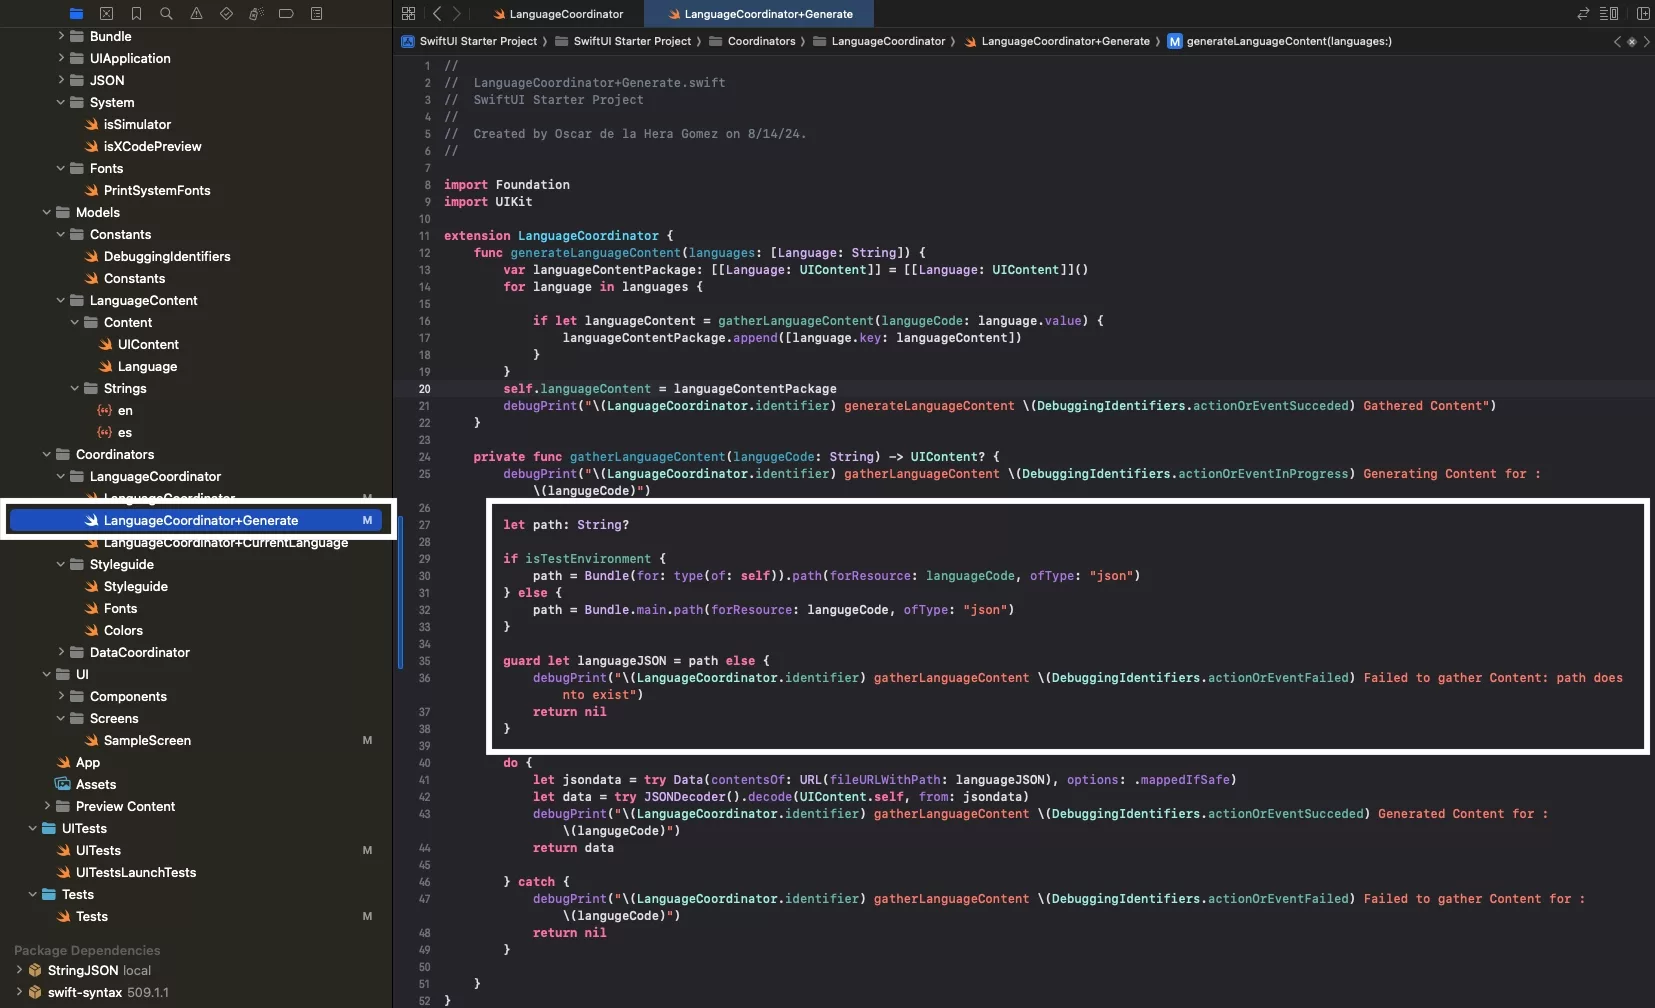
Update the LanguageCoordinator+Generate.swift file to use a different path if it uses the testing environment.
Step Six: Initialize the LanguageCoordinator
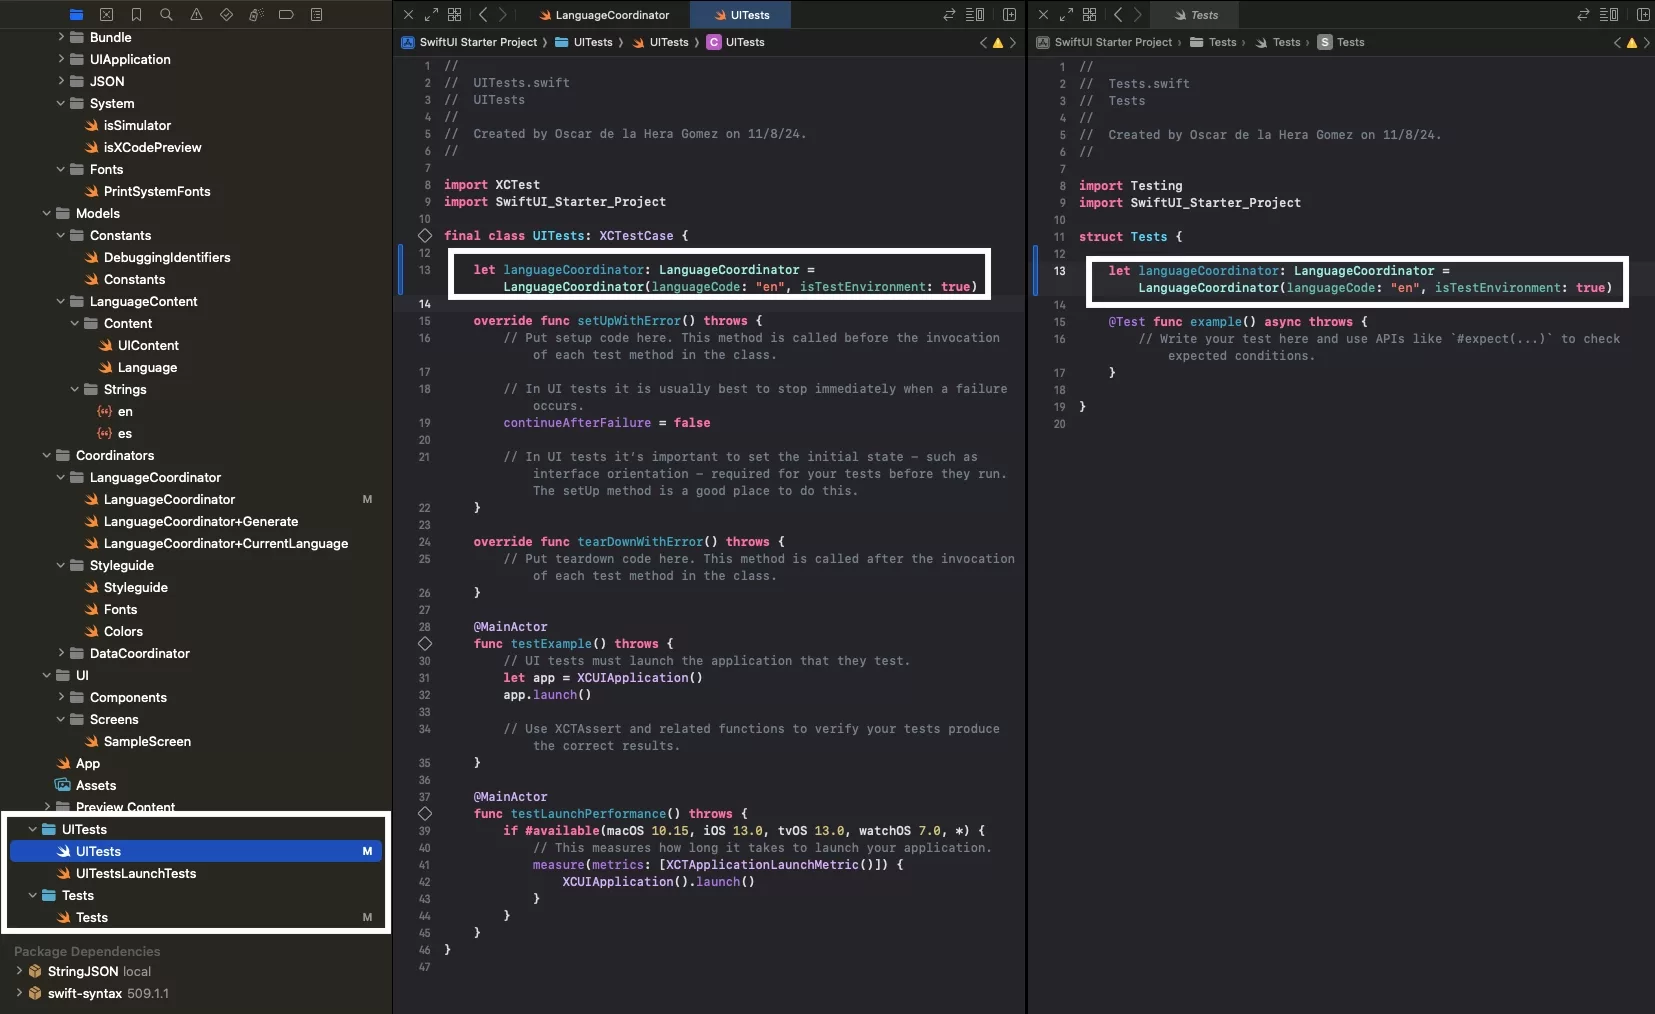
In the UI Testing or Unit Testing swift file, initialize the LanguageCoordinator and in the initializer set the isTestEnvironment variable to true.
Step Seven: Test
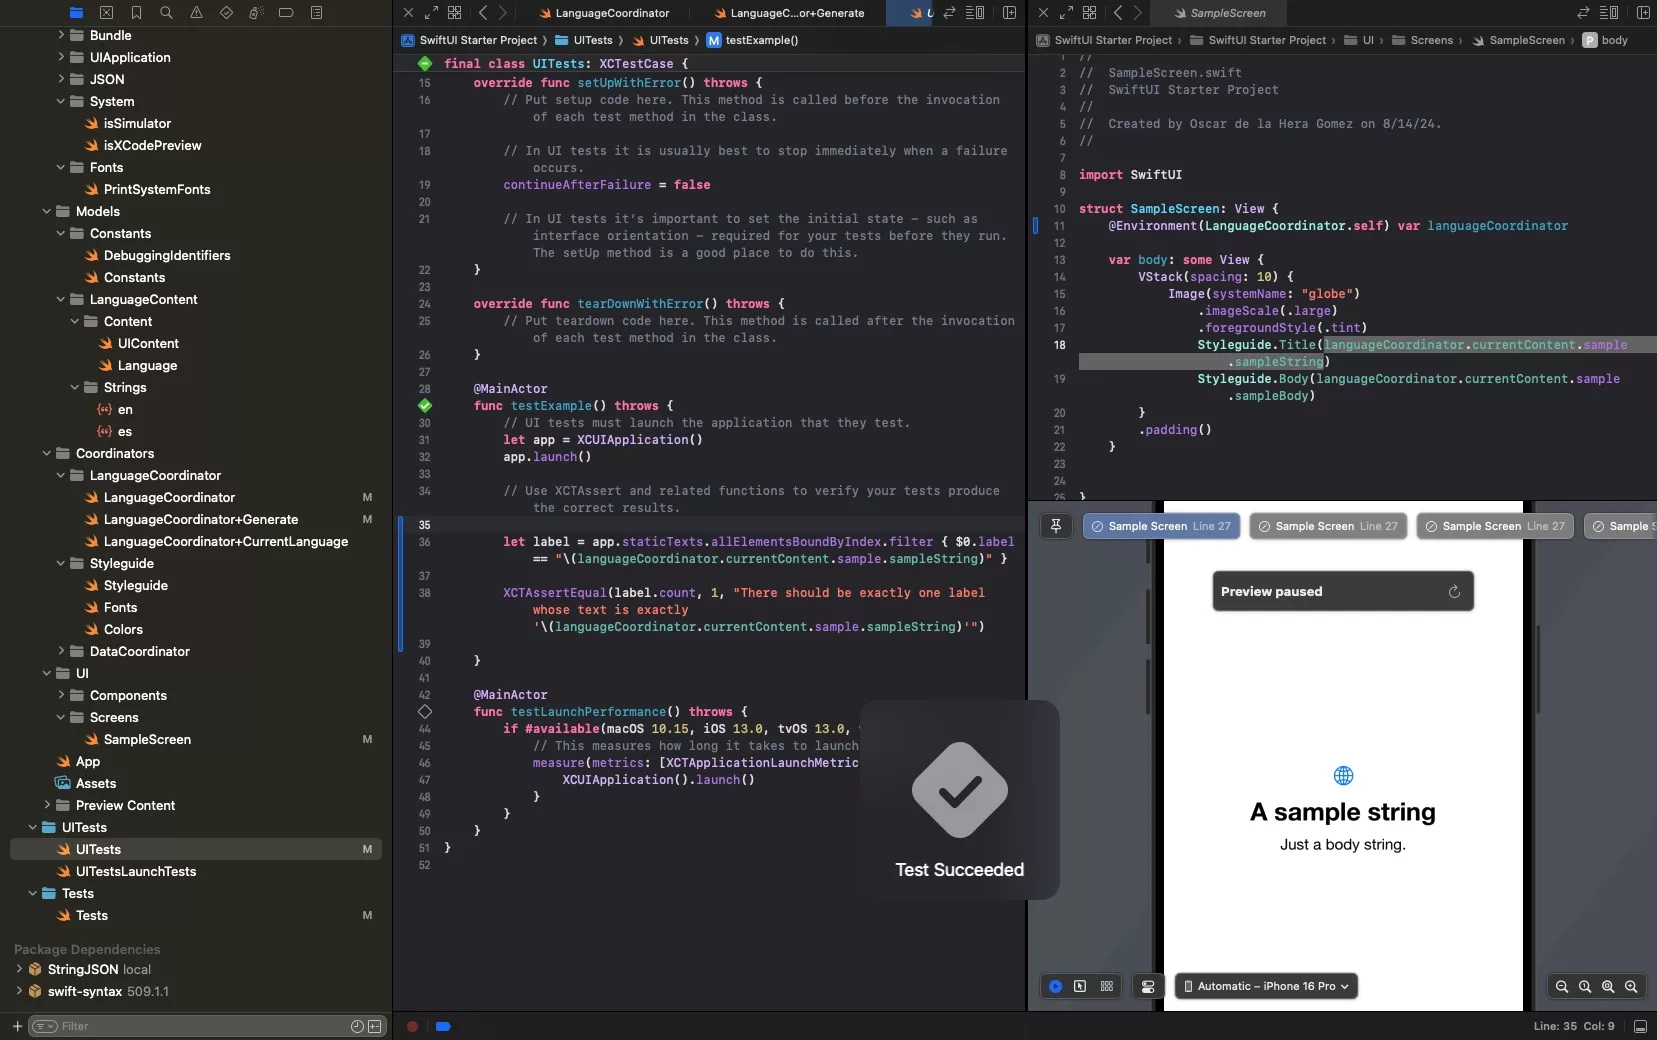
Write a test that verifies that the LanguageCoordinator text is working within the UI Test or Unit Test.
Run it and verify it works.
Looking to learn more about SwiftUI, Swift, Swift Testing, Design and Technology?
Search our blog to learn more about Swift, SwiftUI, Swift Testing, design and technology.