How to add, edit or remove environment variables in Vercel
A guide to adding, removing or editing env variables in Vercel.
A guide to adding, removing or editing env variables in Vercel.
SubscribeDownload Open Source ProjectEnvironment variables hosted on Vercel are used in the same way as those defined in a .env file.
To learn more about how to use them, consult the link below.
Step One: Access the Project
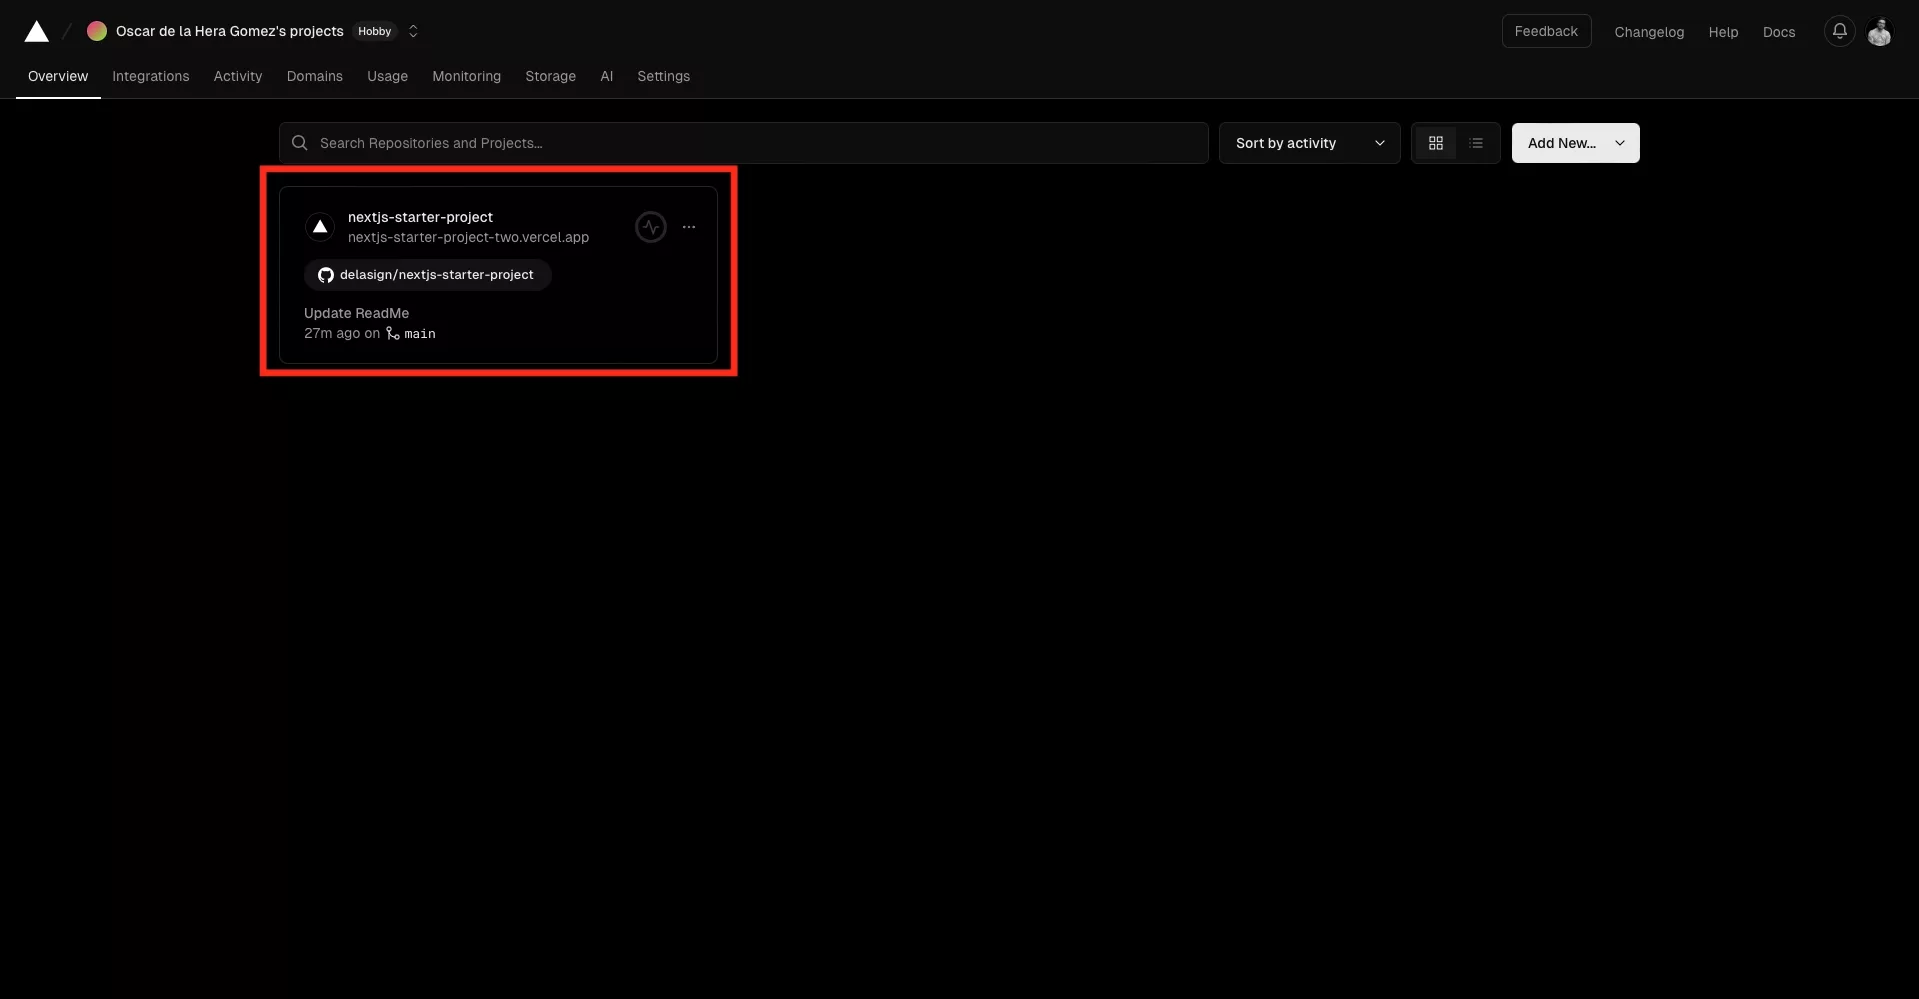
Login to Vercel and click on the tile for the project where you wish to add, edit or remove environment variables.
To learn how to create a Vercel account or deploy a project, consult the link below.
Step Two: Settings
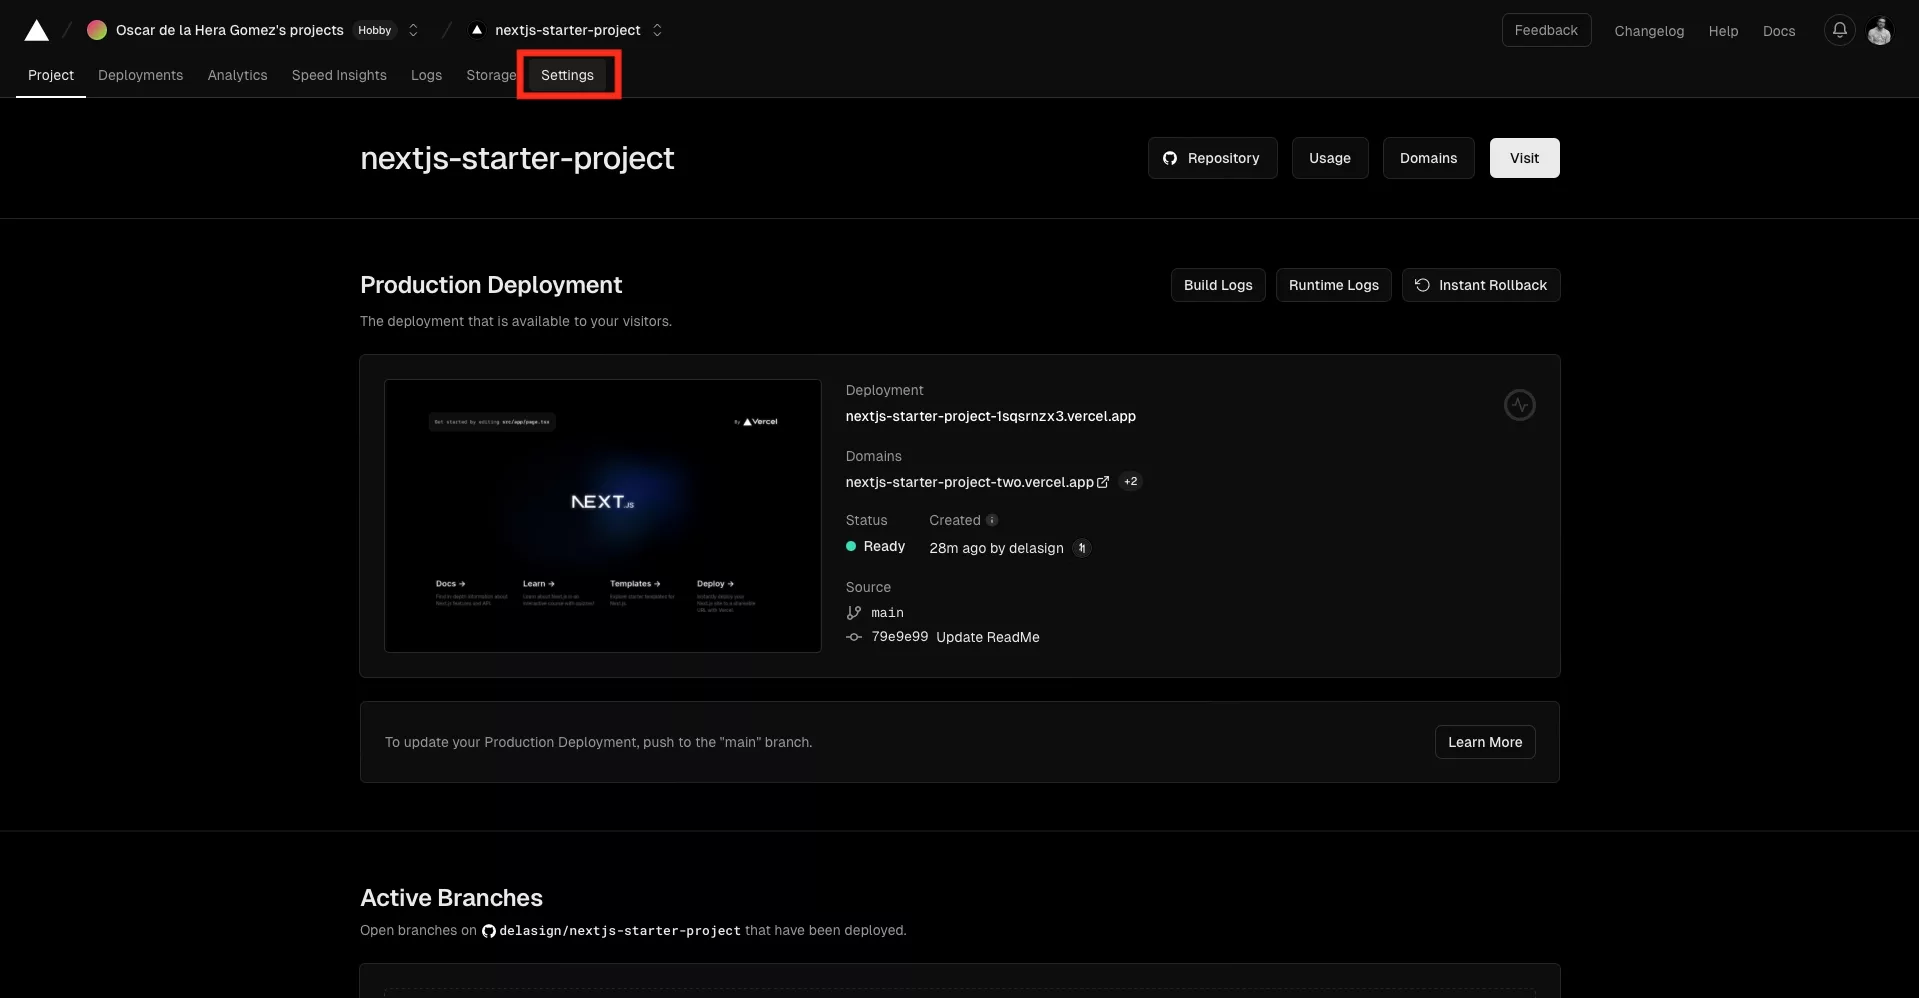
In the project page, click the Settings tab.
Step Three: Environment Variables
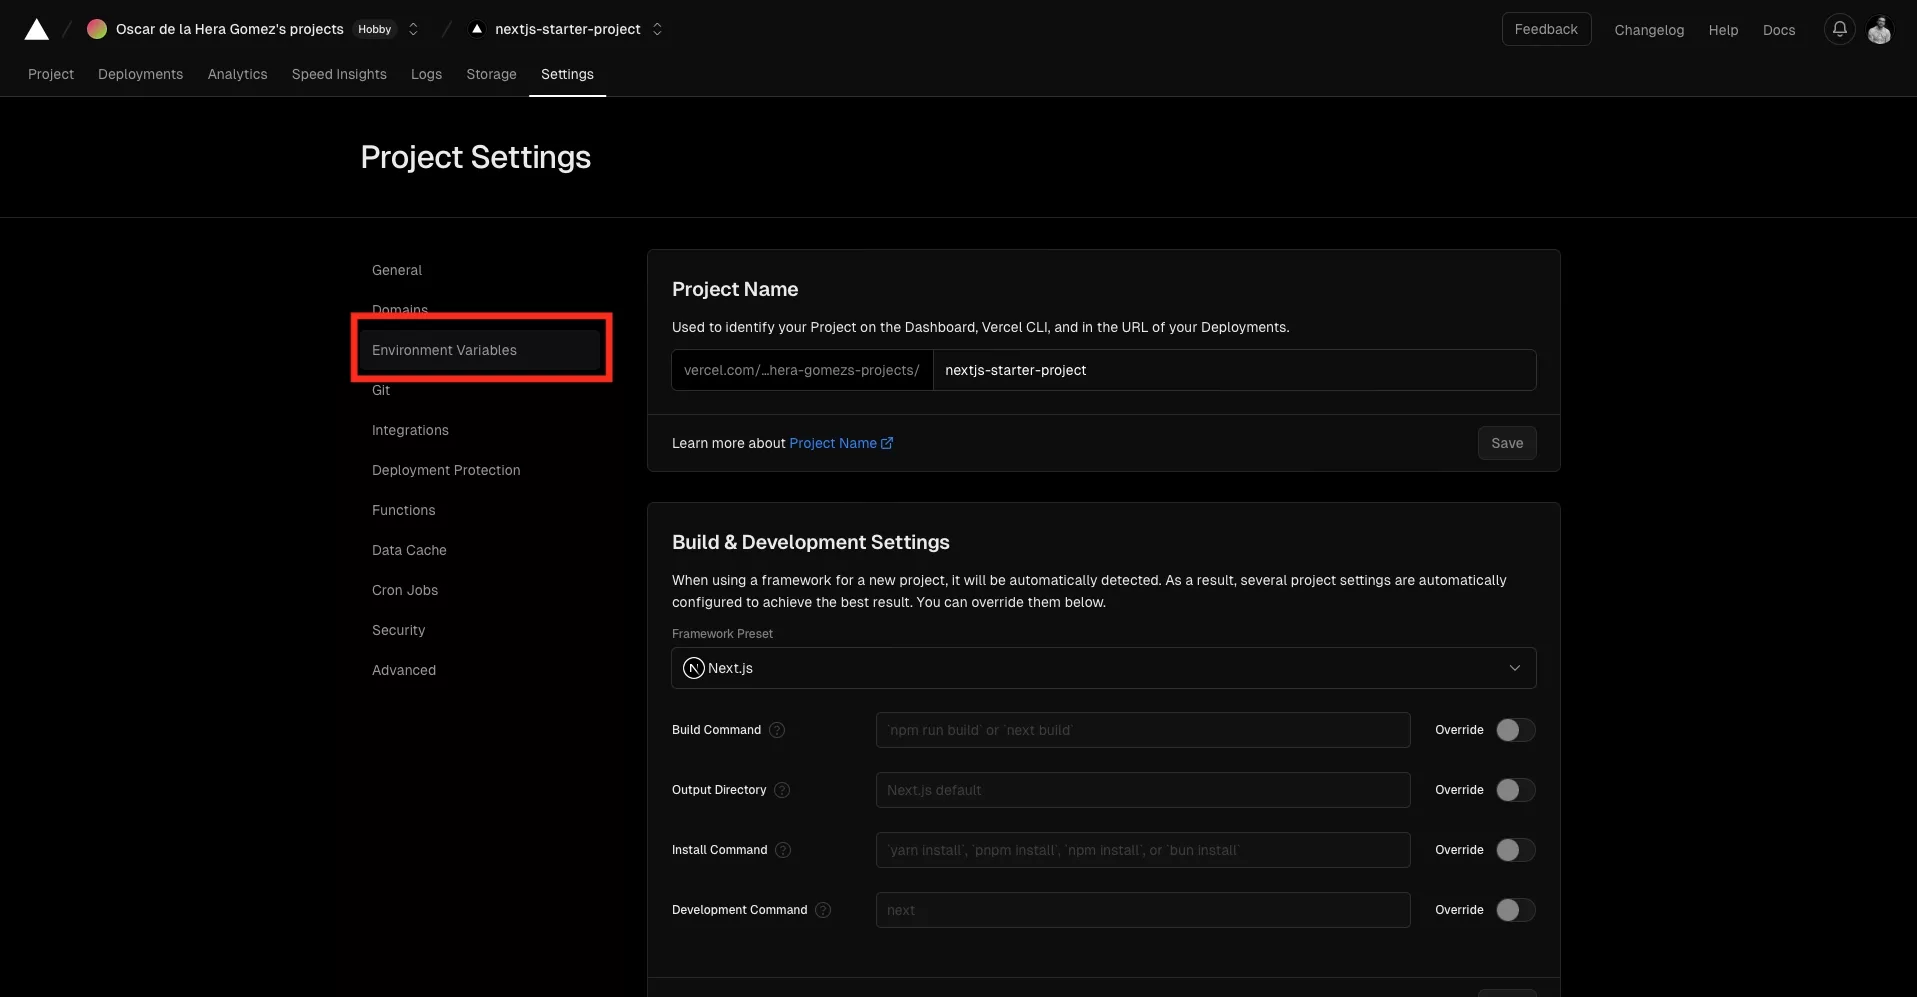
In the project settings, select the Environment Variables tab on the left menu sidebar.
Step Four: Add
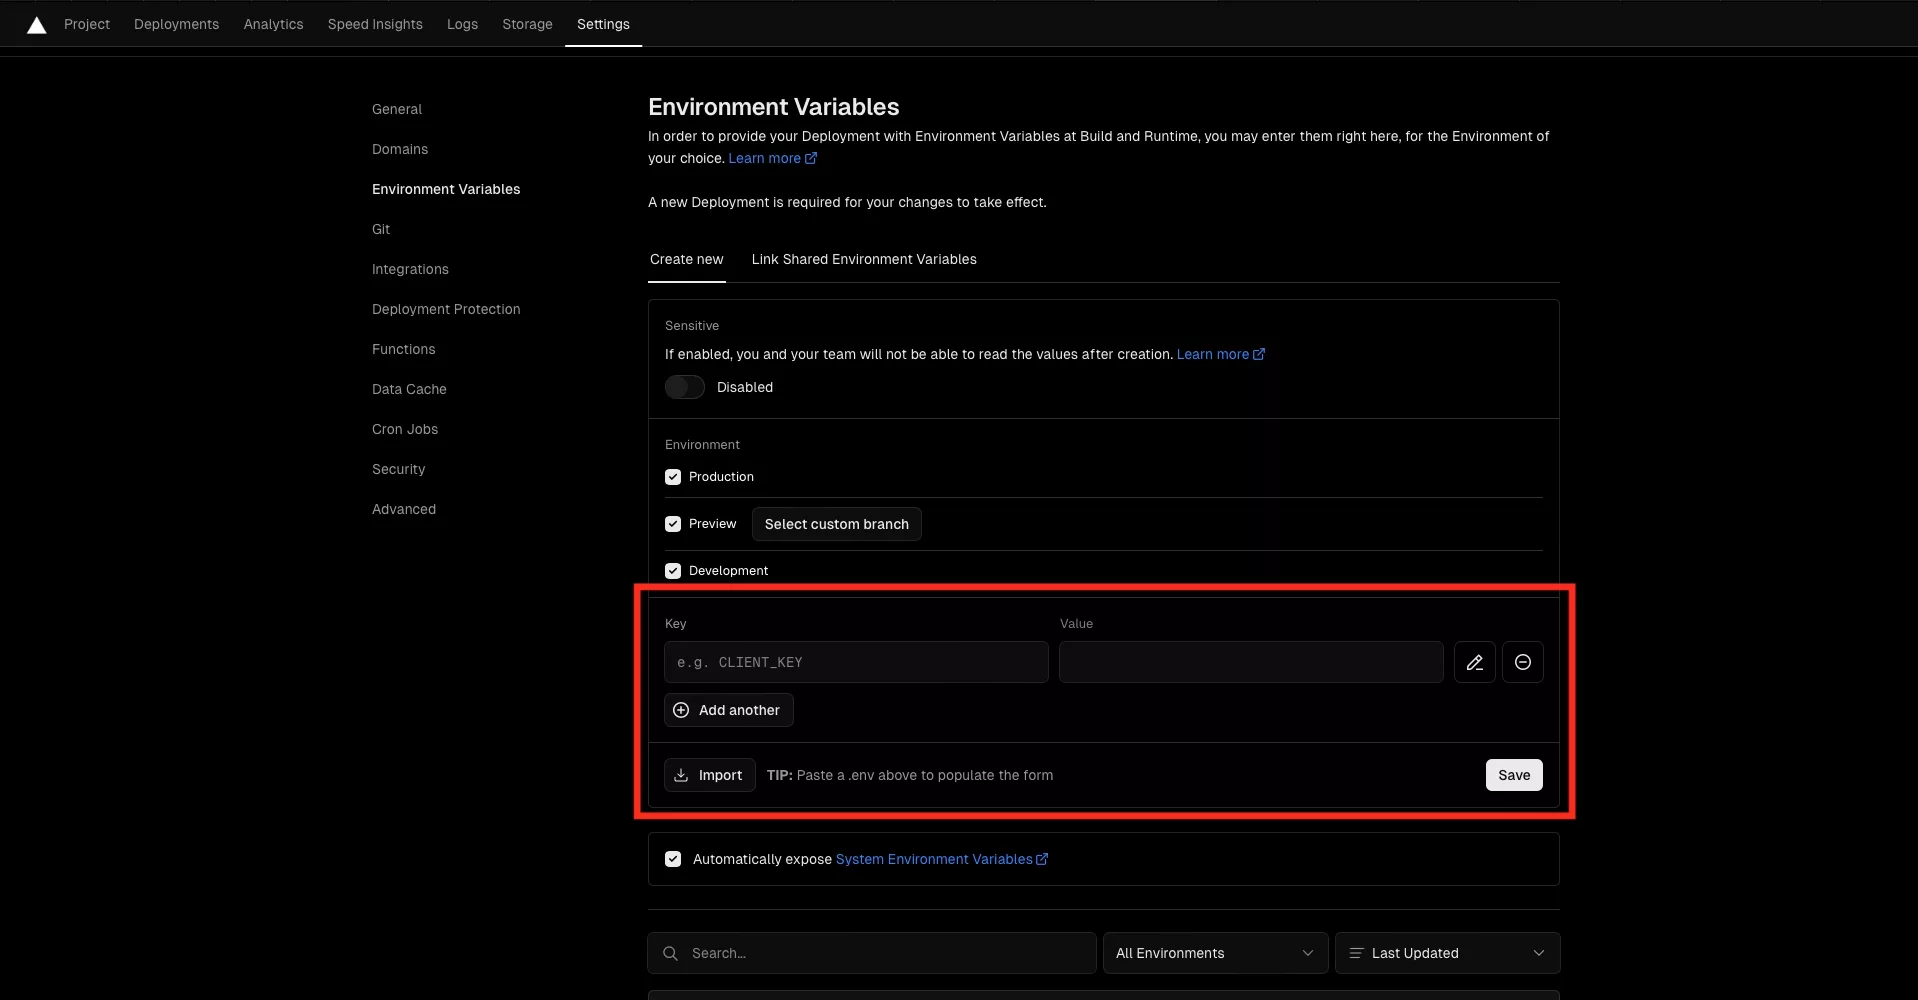
Enter the key and value.
In the event that you want to add another, click add another.
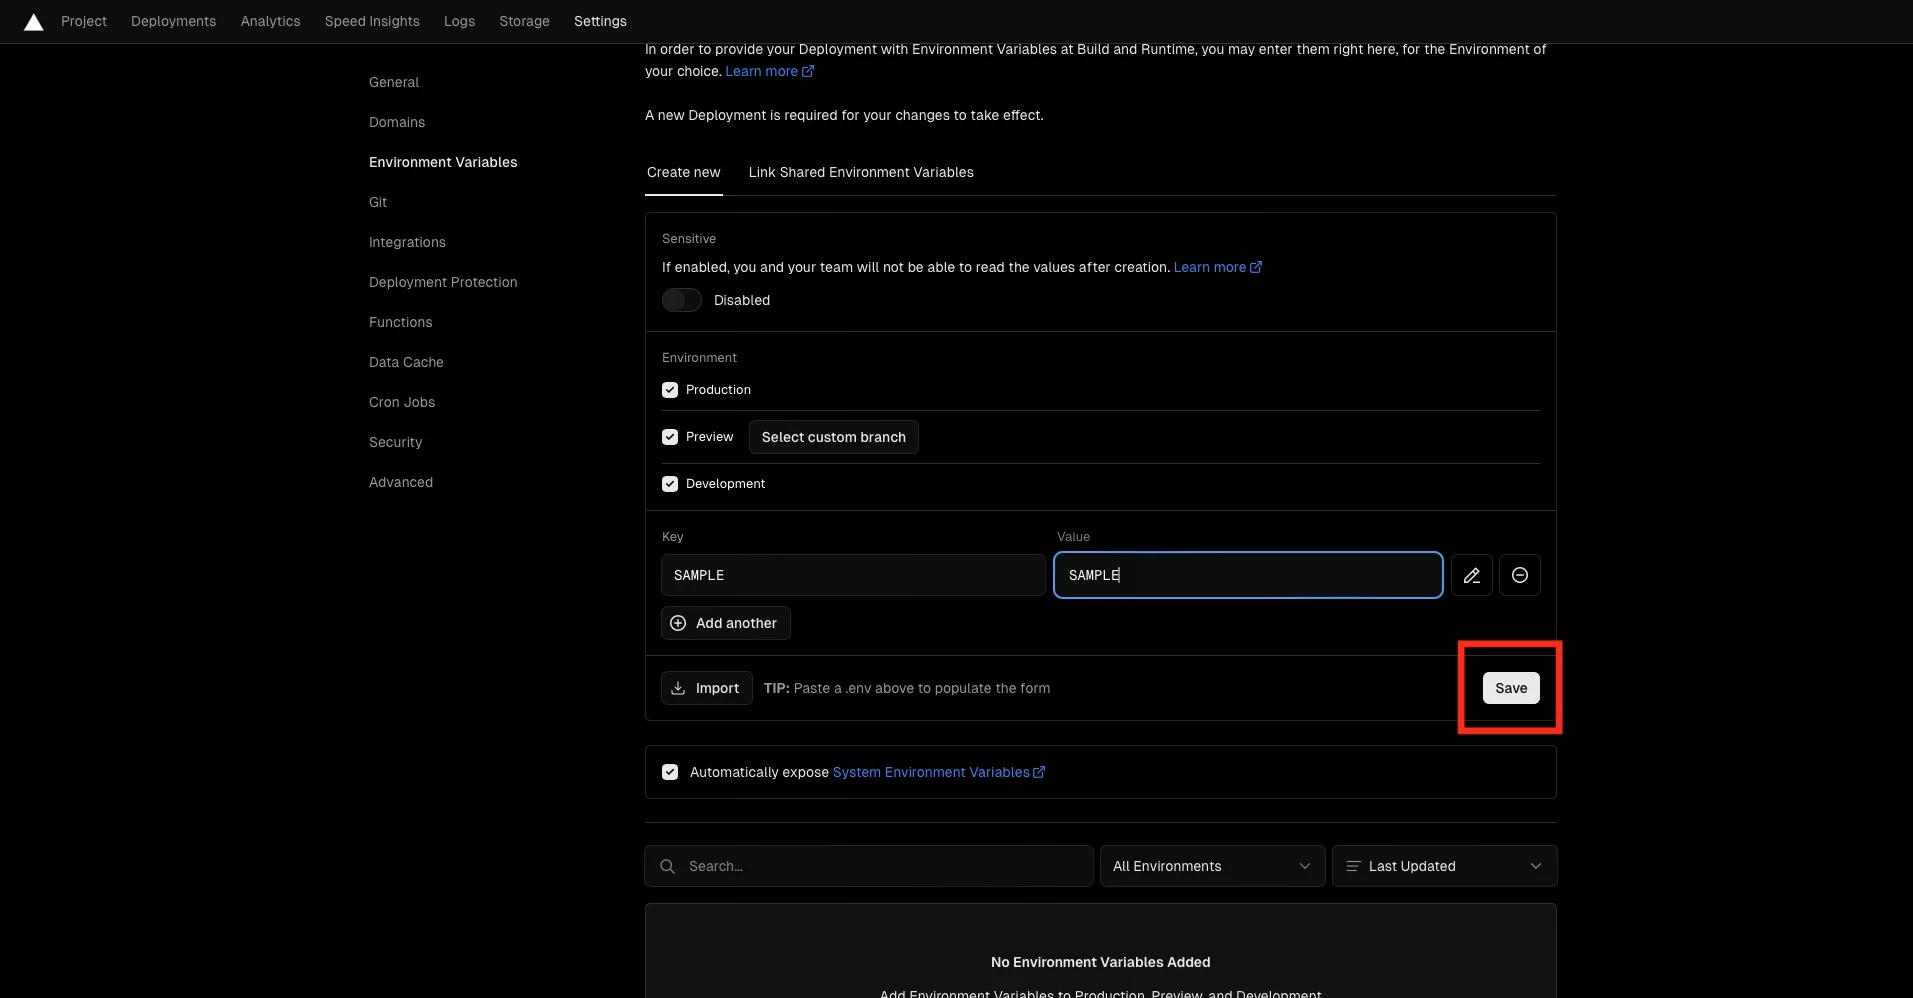
Once you are done, click save.
Step Five: Edit or Remove
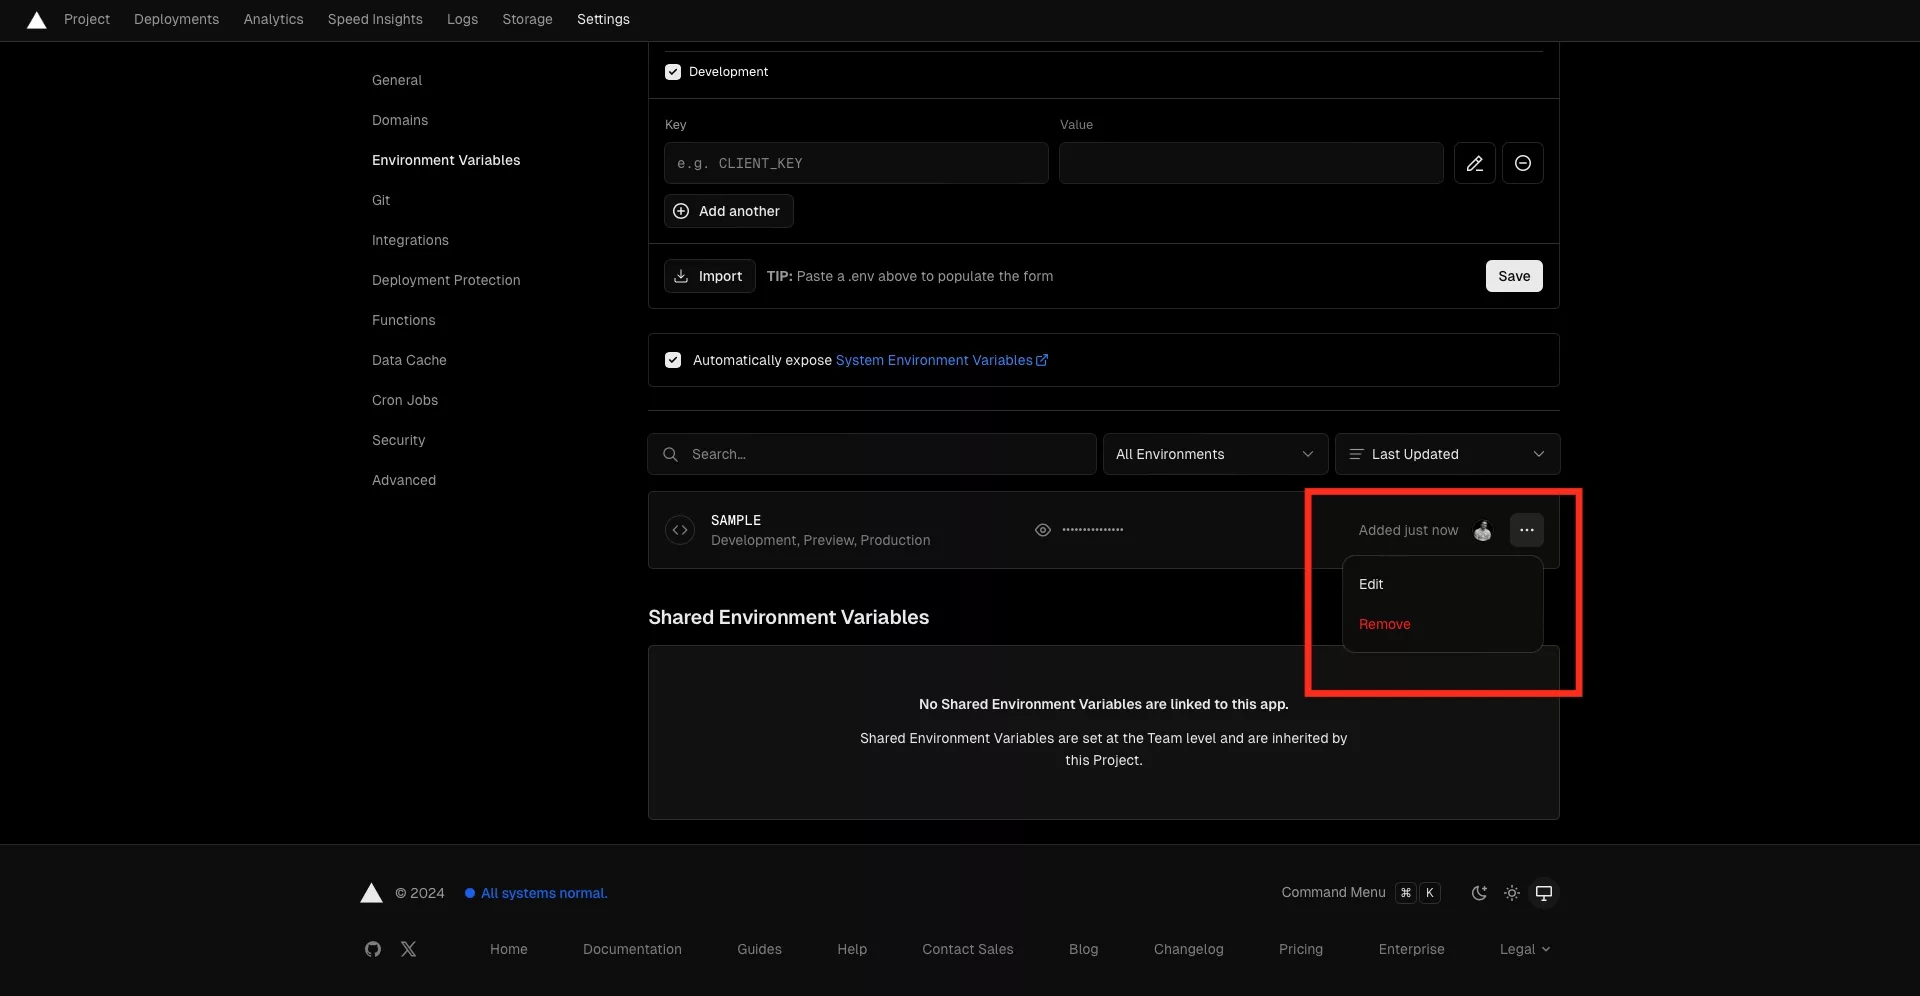
Scroll down to find previously declared environment variables.
Next to the environment variable that you wish to edit or remove, click the three dots and in the pop up that appears, select edit or remove.
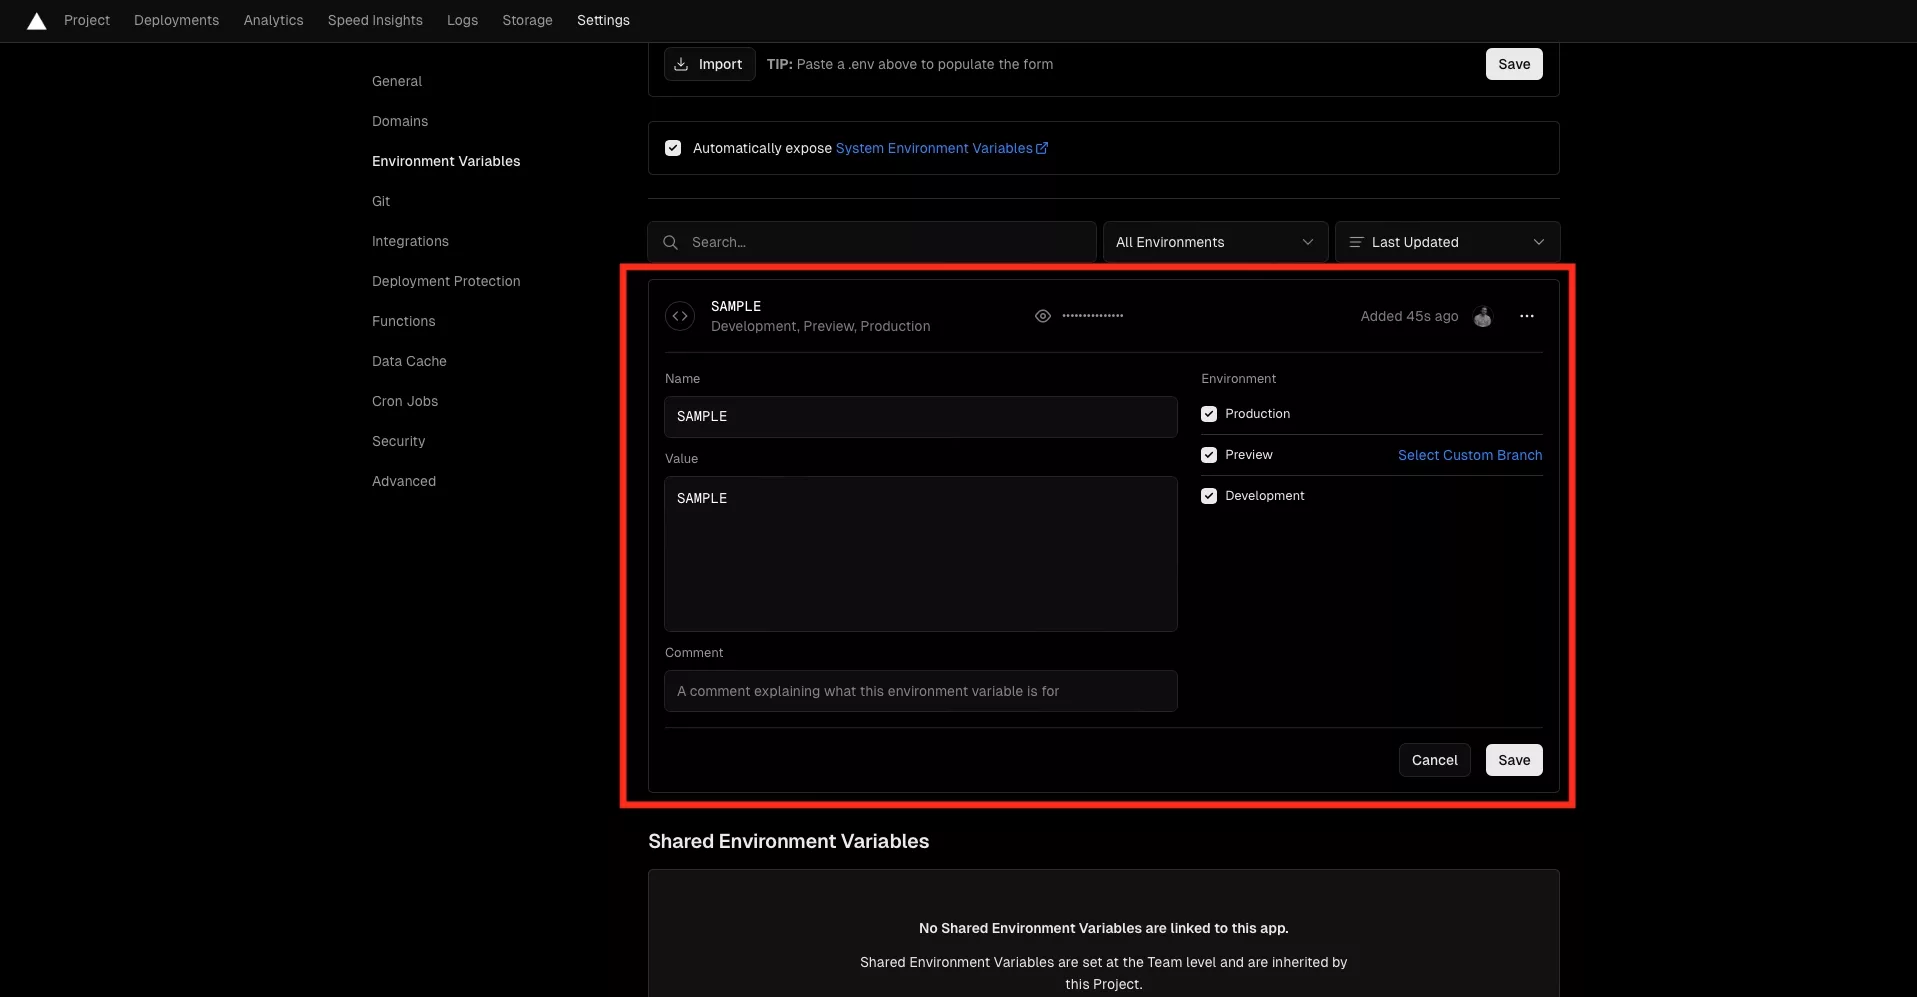
In the event that you chose edit, make the required changes and click Save.
In the event you chose edit but do not want to make changes, click cancel.
Please note that you must redeploy the project for the changes to take effect
Follow the guide below to learn how to manually redeploy a Vercel project.
Looking to learn more about NextJS, ReactJS or web development?
Search our blog to find educational content on NextJS, ReactJS and web development.