How to block commits and pushes to a branch in Github

Oscar de la Hera Gomez
A flower that represents Github with the text "Deny Pushes to Github" beneath it.

A step by step guide on creating branch protection rules that deny commits and pushes to specific branches in Github.

If you are looking to block commits to a local branch, we recommend that you follow the tutorial below.

Step One: Access the Branch Protection Rules

A screenshot of Github showing the branch protection rules page. This can be accessed by selecting the "branches" menu option within the repository settings page.

On Github, access the projects settings and select Branches from the left menu side bar.

Step Two: Add New Rule

A screenshot of Github highlighting the "Add Branch Protection Rule" button in the branches settings page of a Github repository.

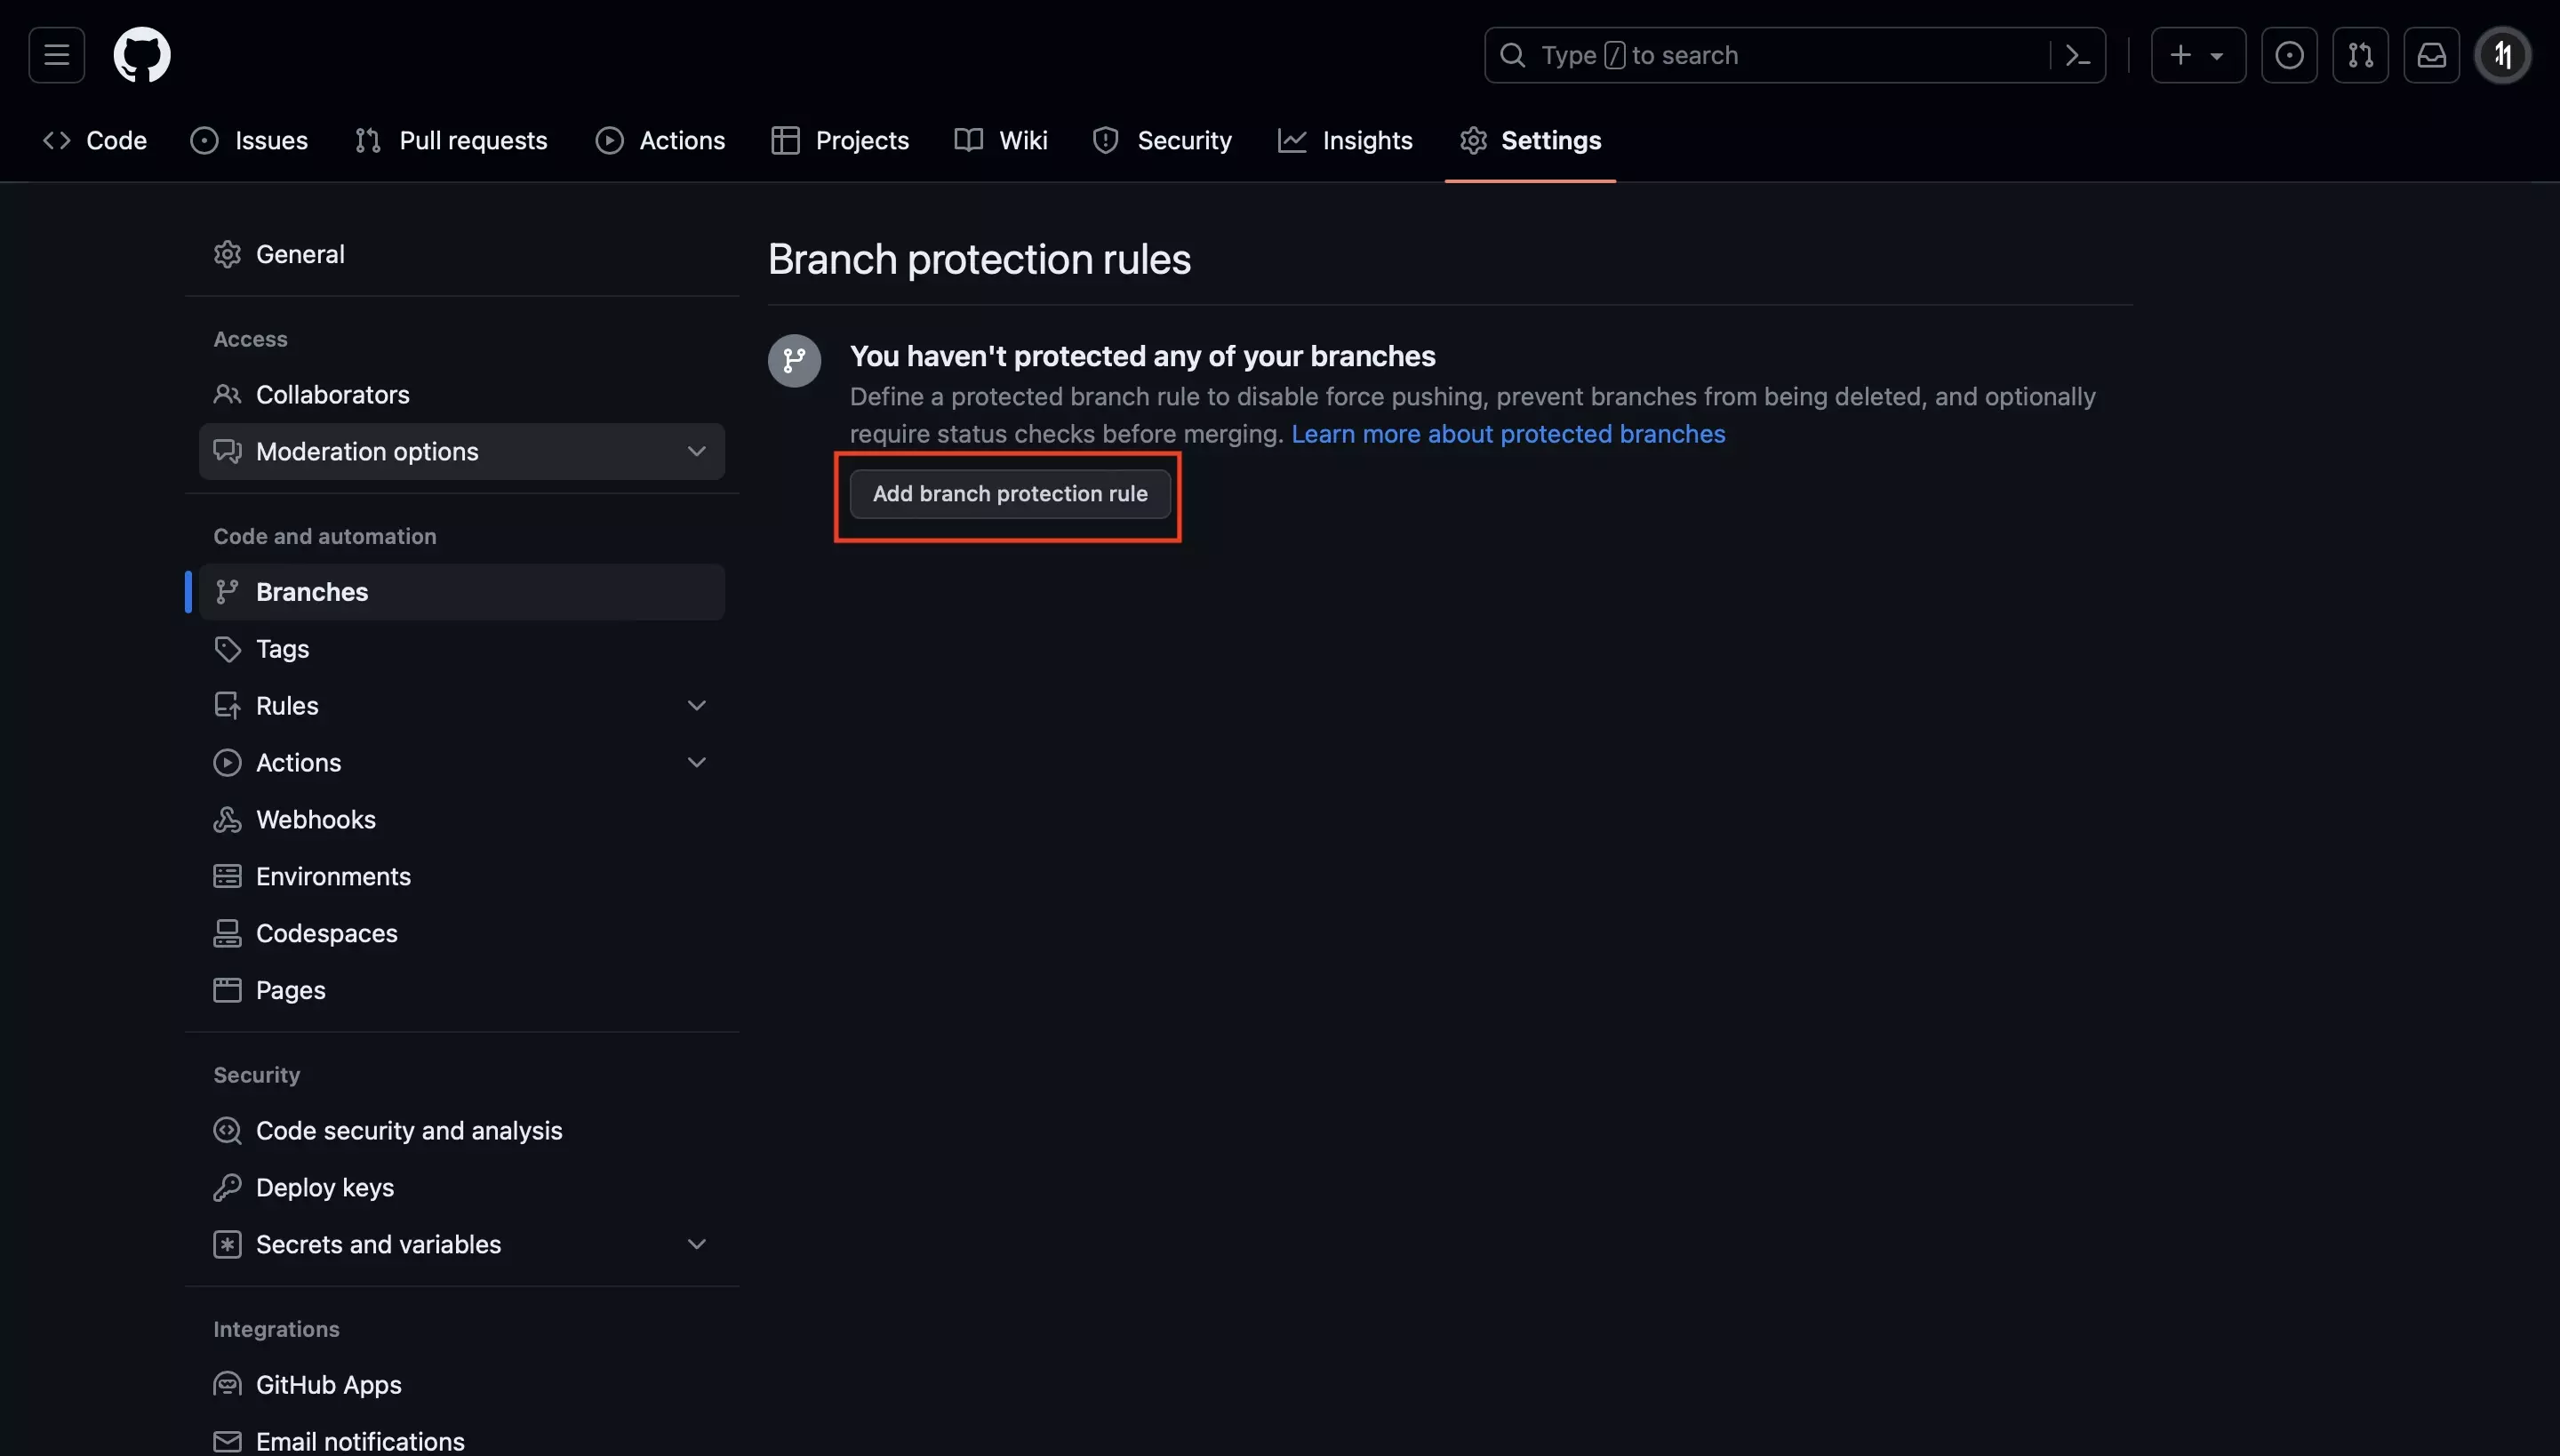
Click the Add Branch Protection Rule button.

Step Three: Apply the Branch Name


<p>A screenshot of Github showing the page that allows you to create branch protection rules. We have highlighted the branch pattern name input, enter the name of the branch here.</p>
<p></p>

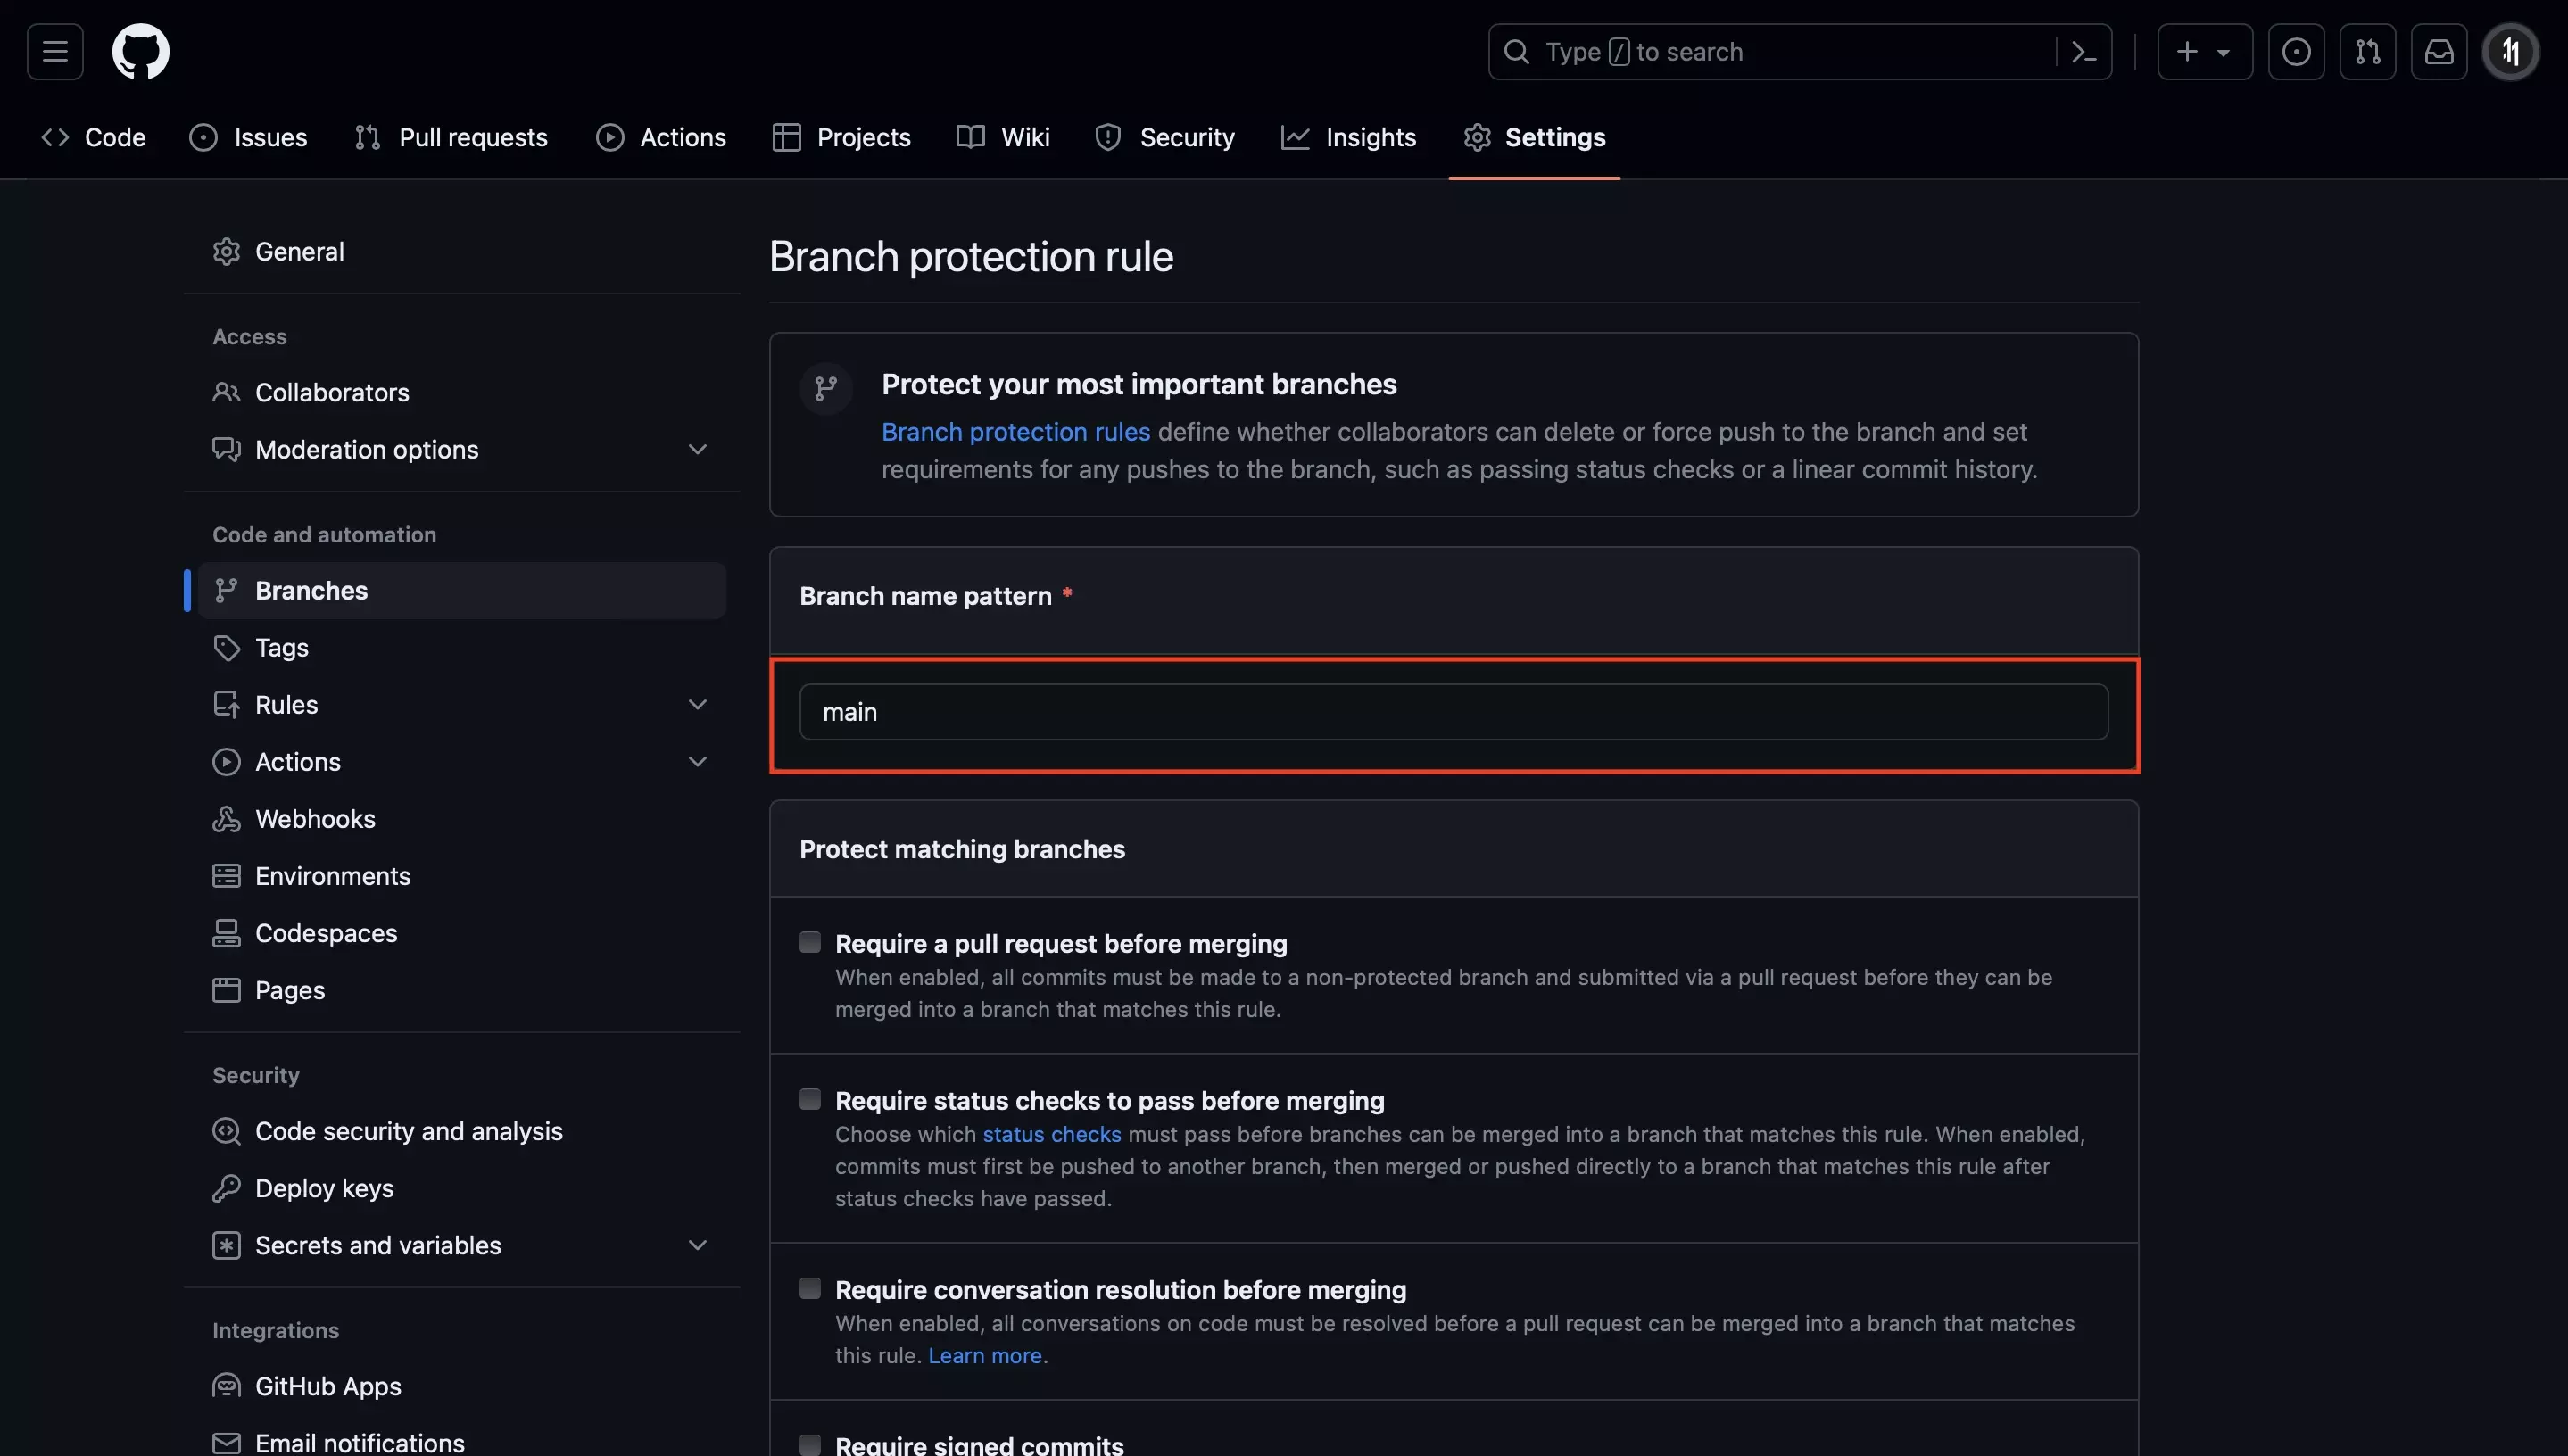
Under Branch Name Pattern, add the name of the branch (i.e. main, uat, dev).

Step Four: Set Rules

A screenshot of Github showing the page that allows you to create branch protection rules. We have highlighted two options which must be checked off: “Require a pull request before merging” and “Require Signed Commits.”

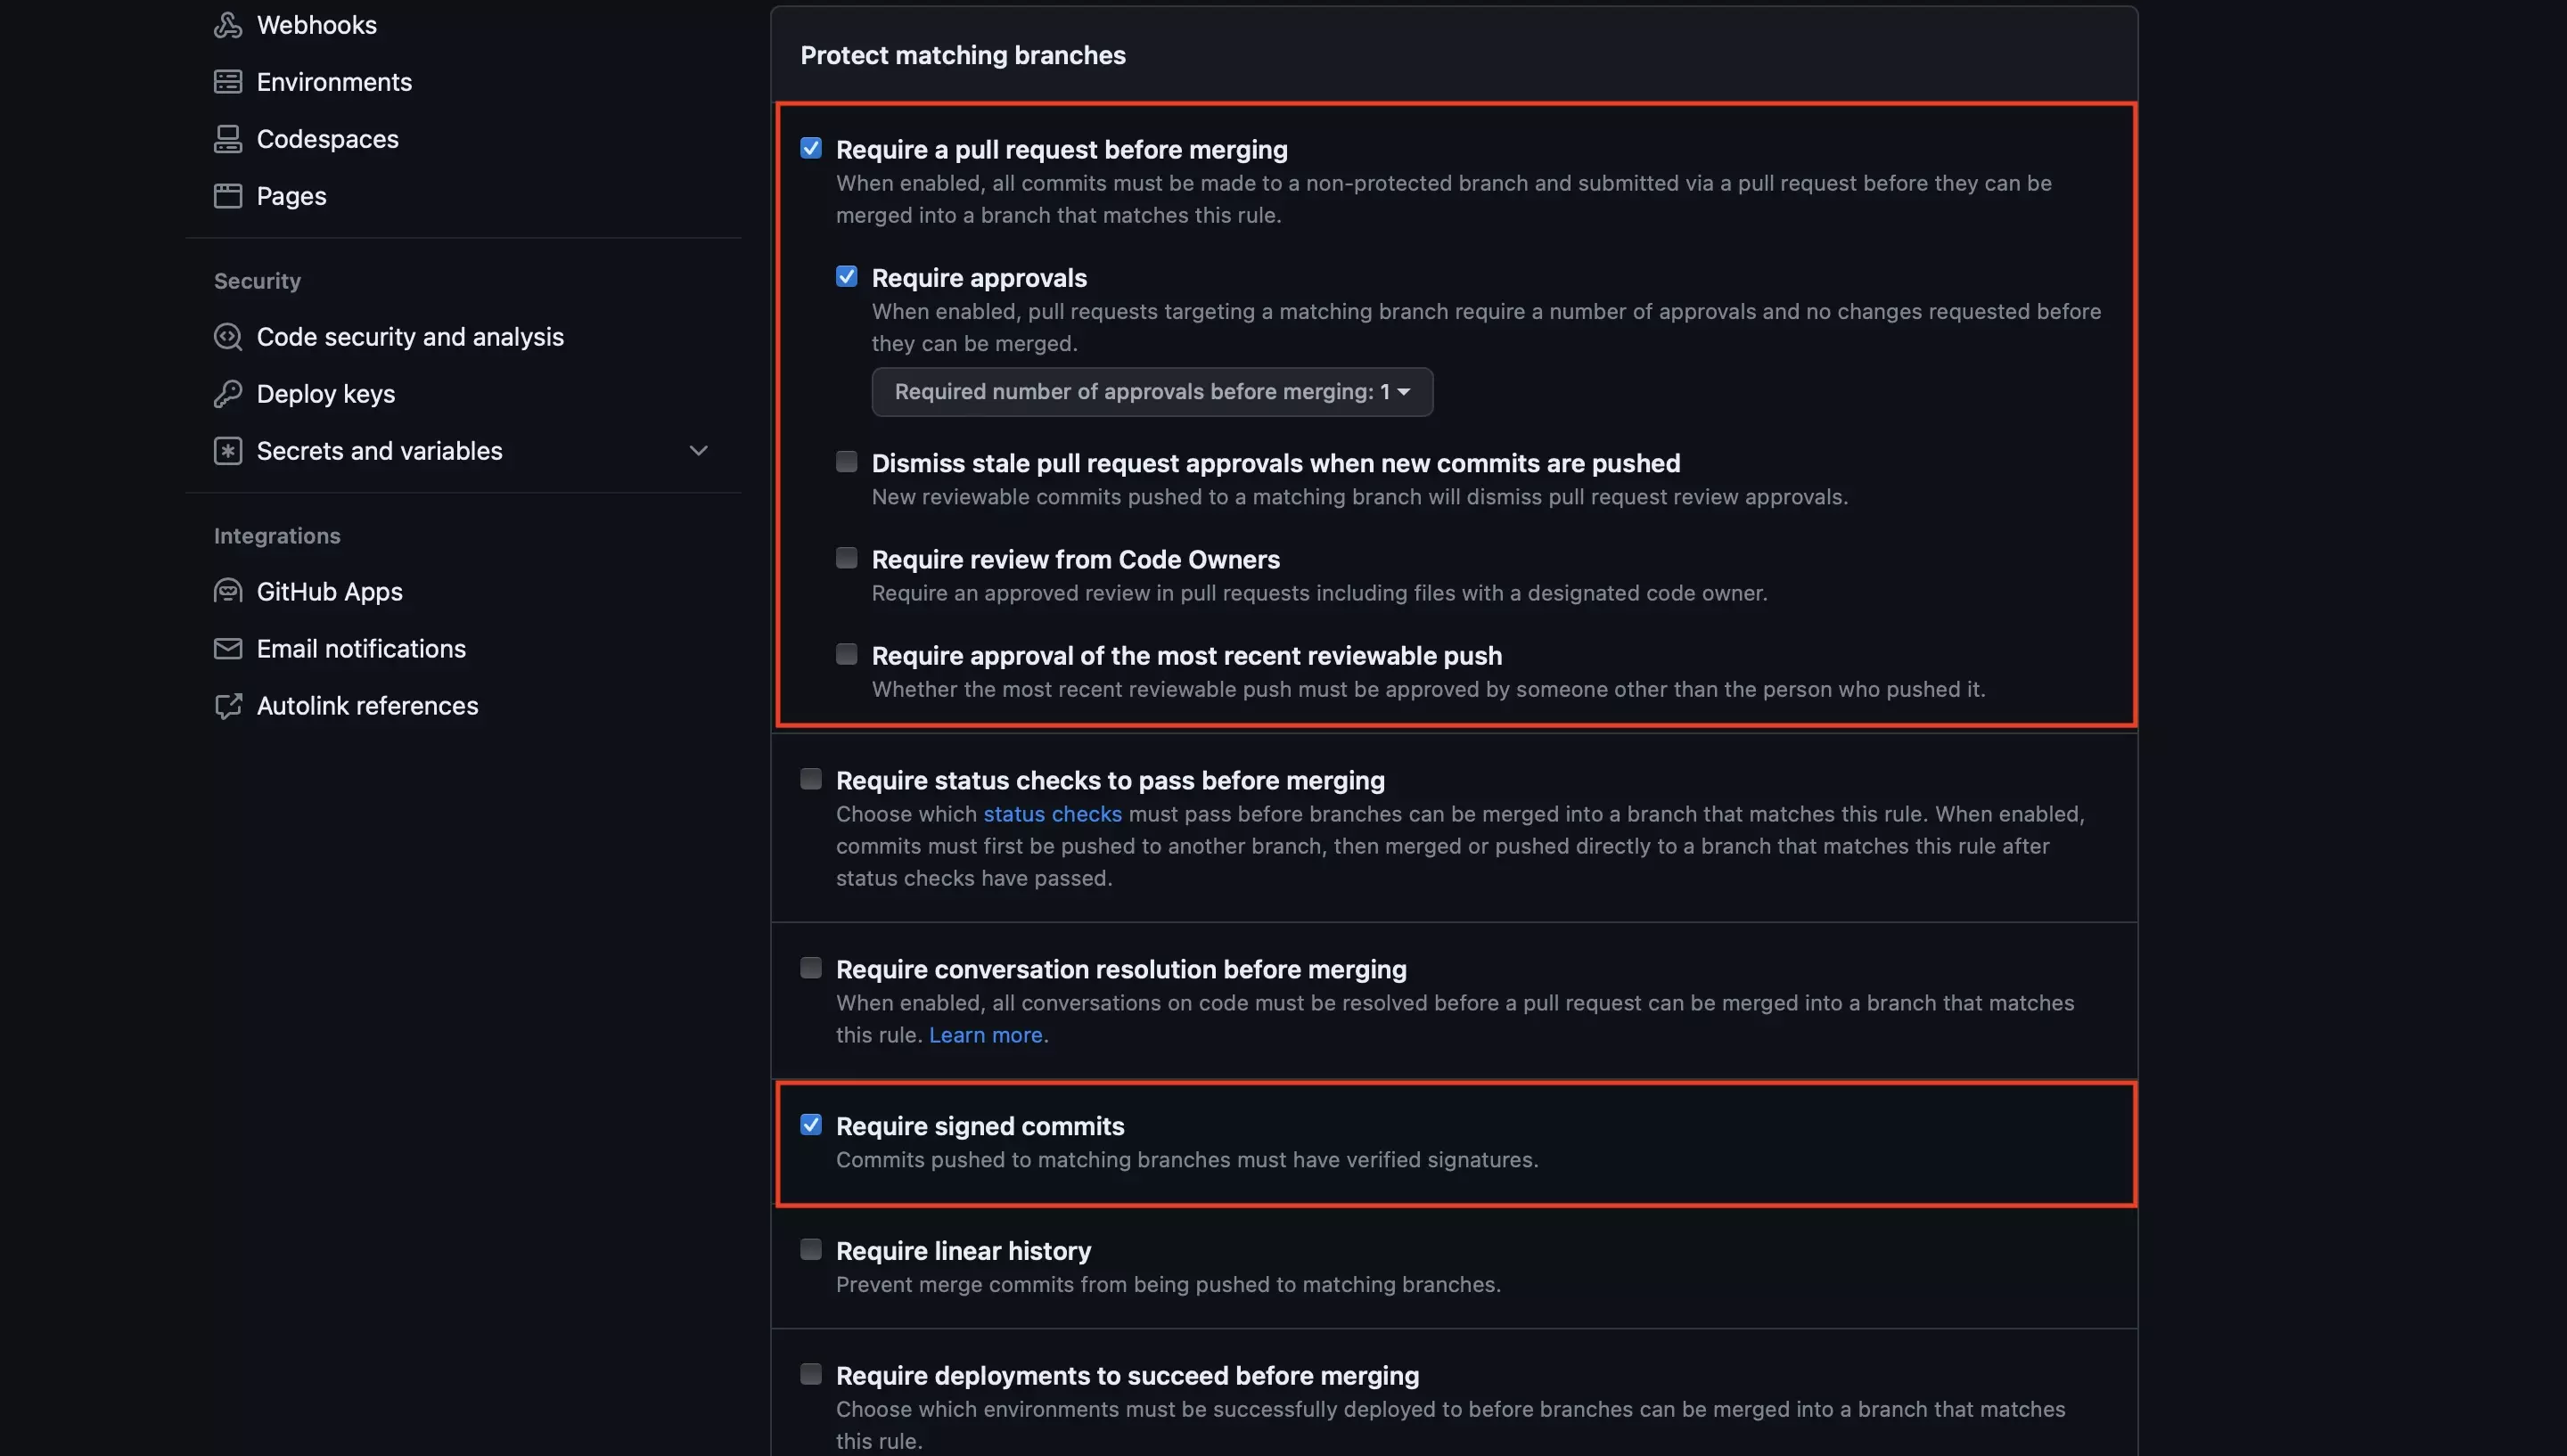
Check off Require a pull request before merging and Require signed commits.

Step Five: No Bypasses

A screenshot of Github showing the page that allows you to create branch protection rules.  We have highlighted the “Do not allow bypassing the above settings” option - click this checkbox to make sure no one can break the rules, not even administrators. If you do not click this checkbox, administrators will be able to break the rules.

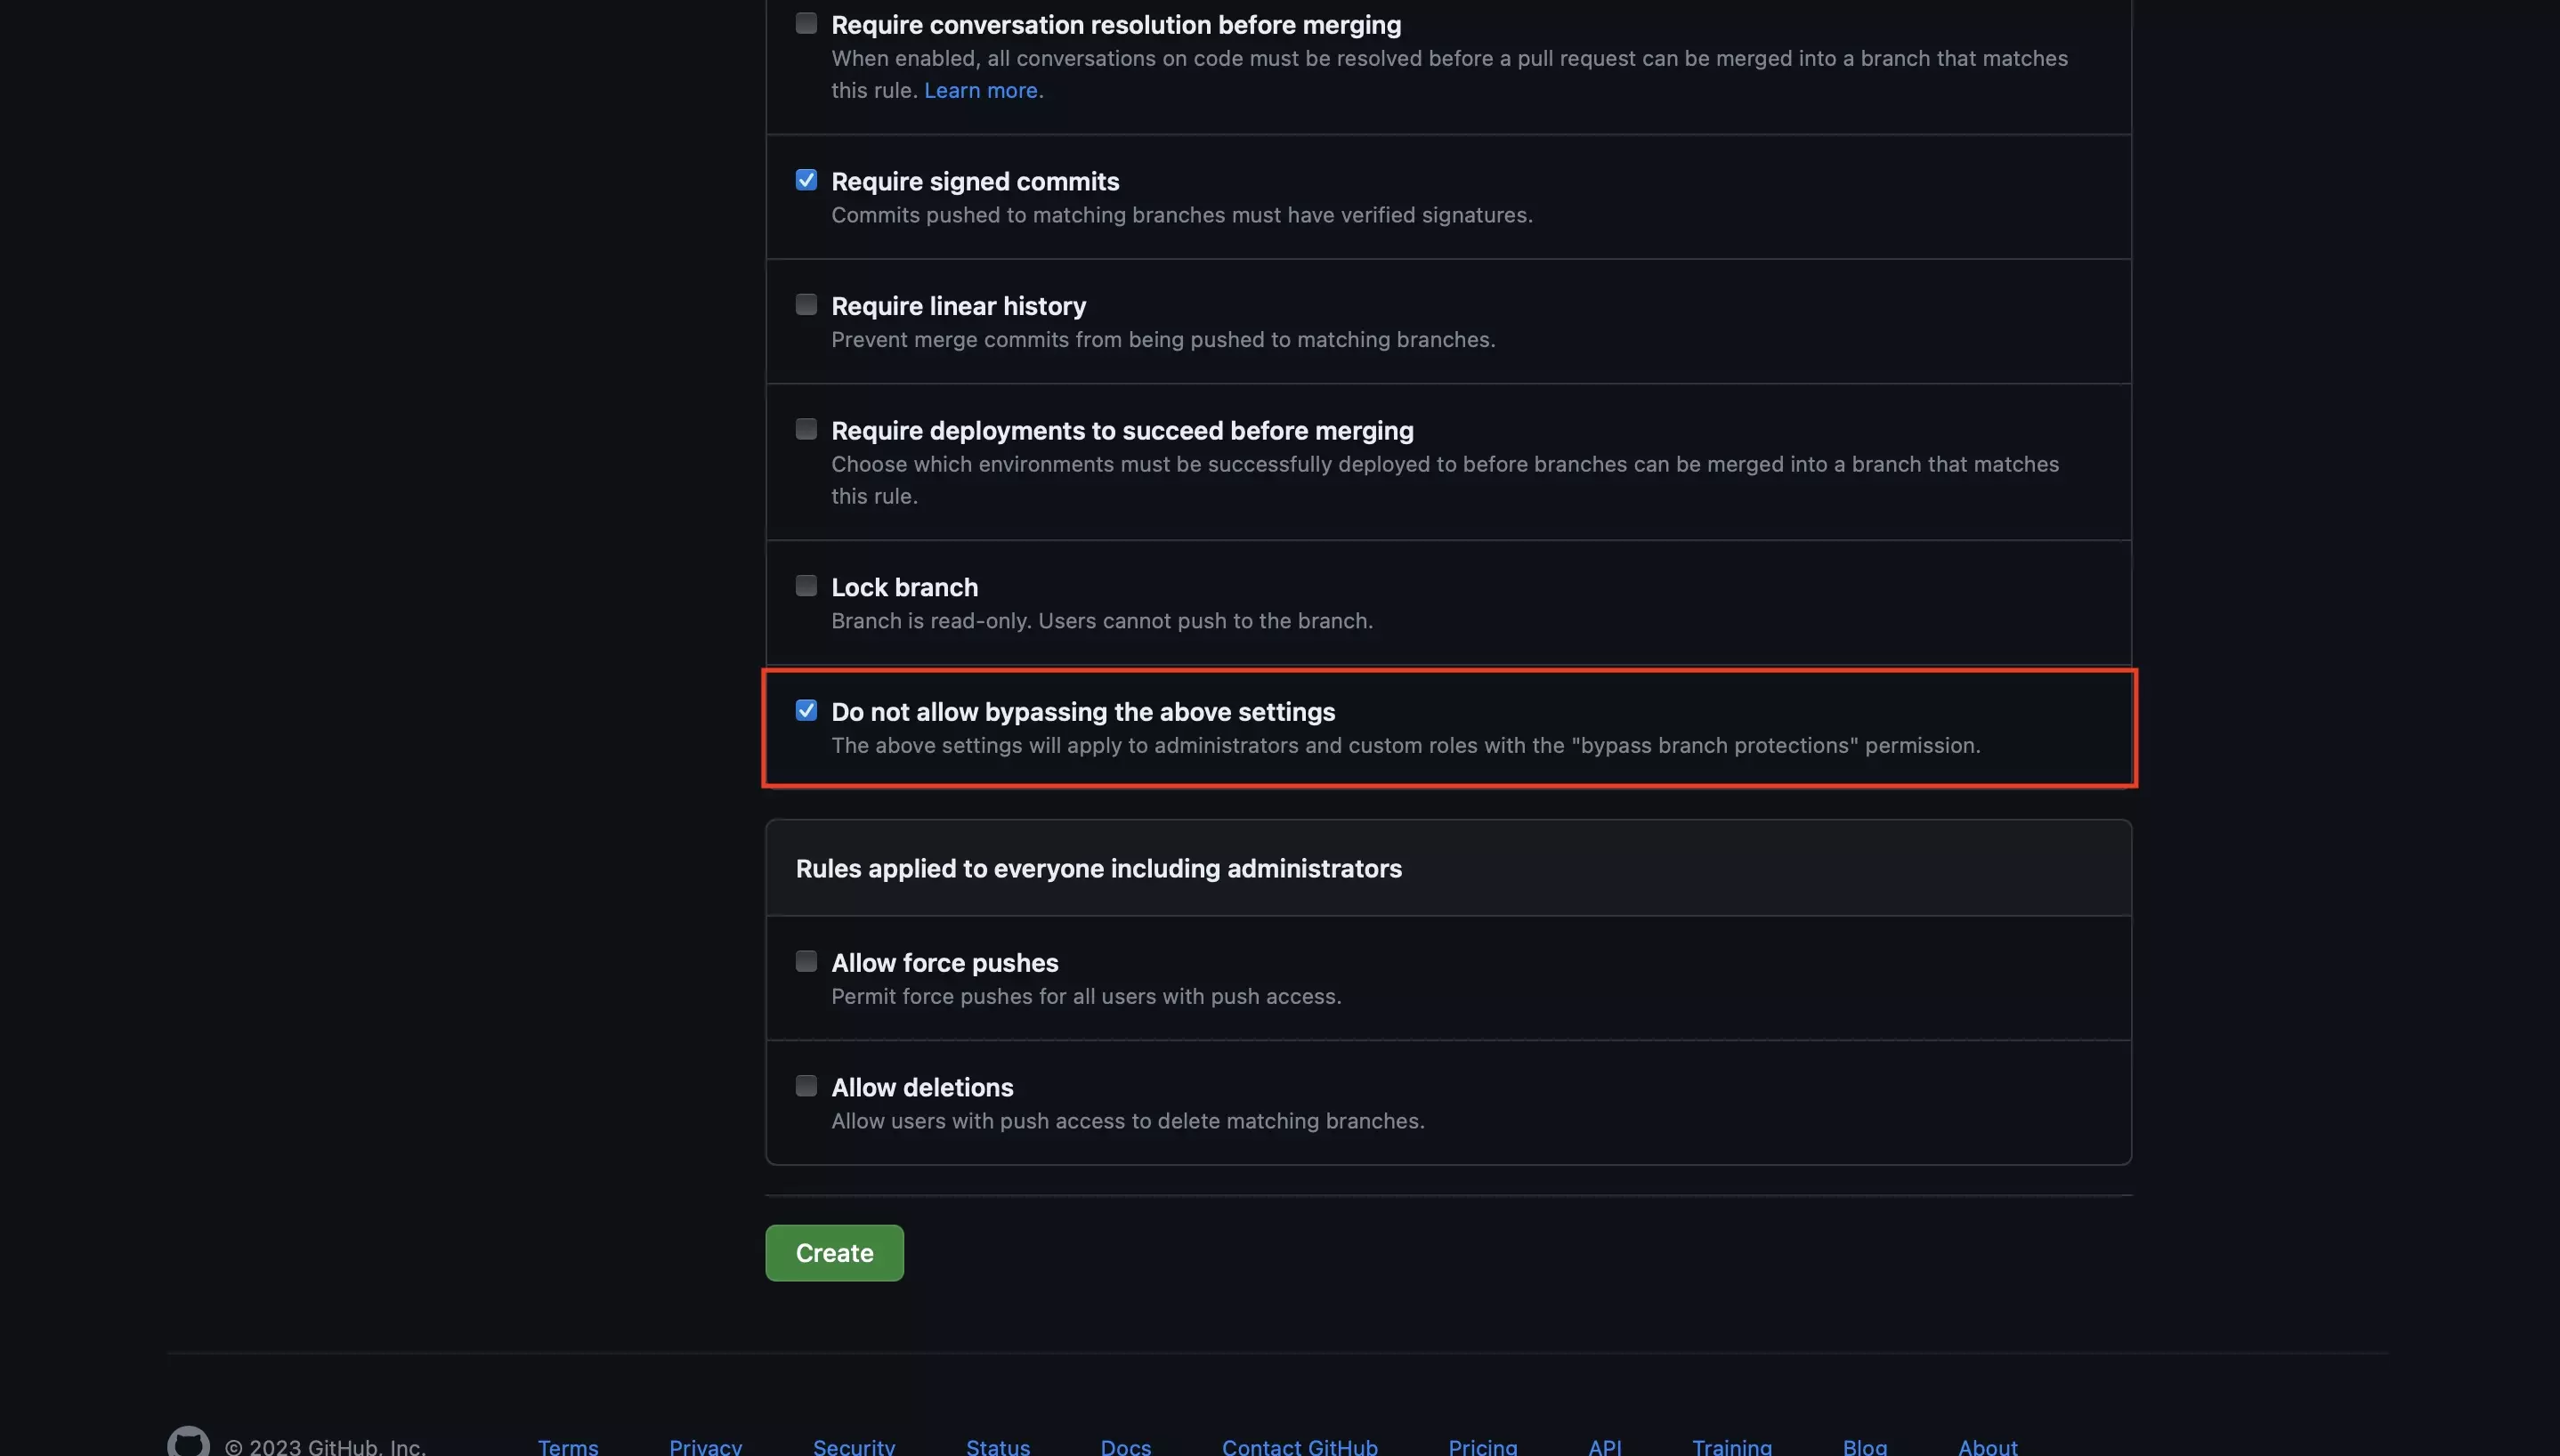
Check off Do not allow bypassing the above settings to make sure that no one, even administrators, can break these rules.

If you do not click this checkbox, administrators will be able to break the rules.

Step Six: Create Branch Protection Rule

A screenshot of Github showing the page that allows you to create branch protection rules.  We have highlighted the Create button at the bottom of the page, click this button when everything looks good.

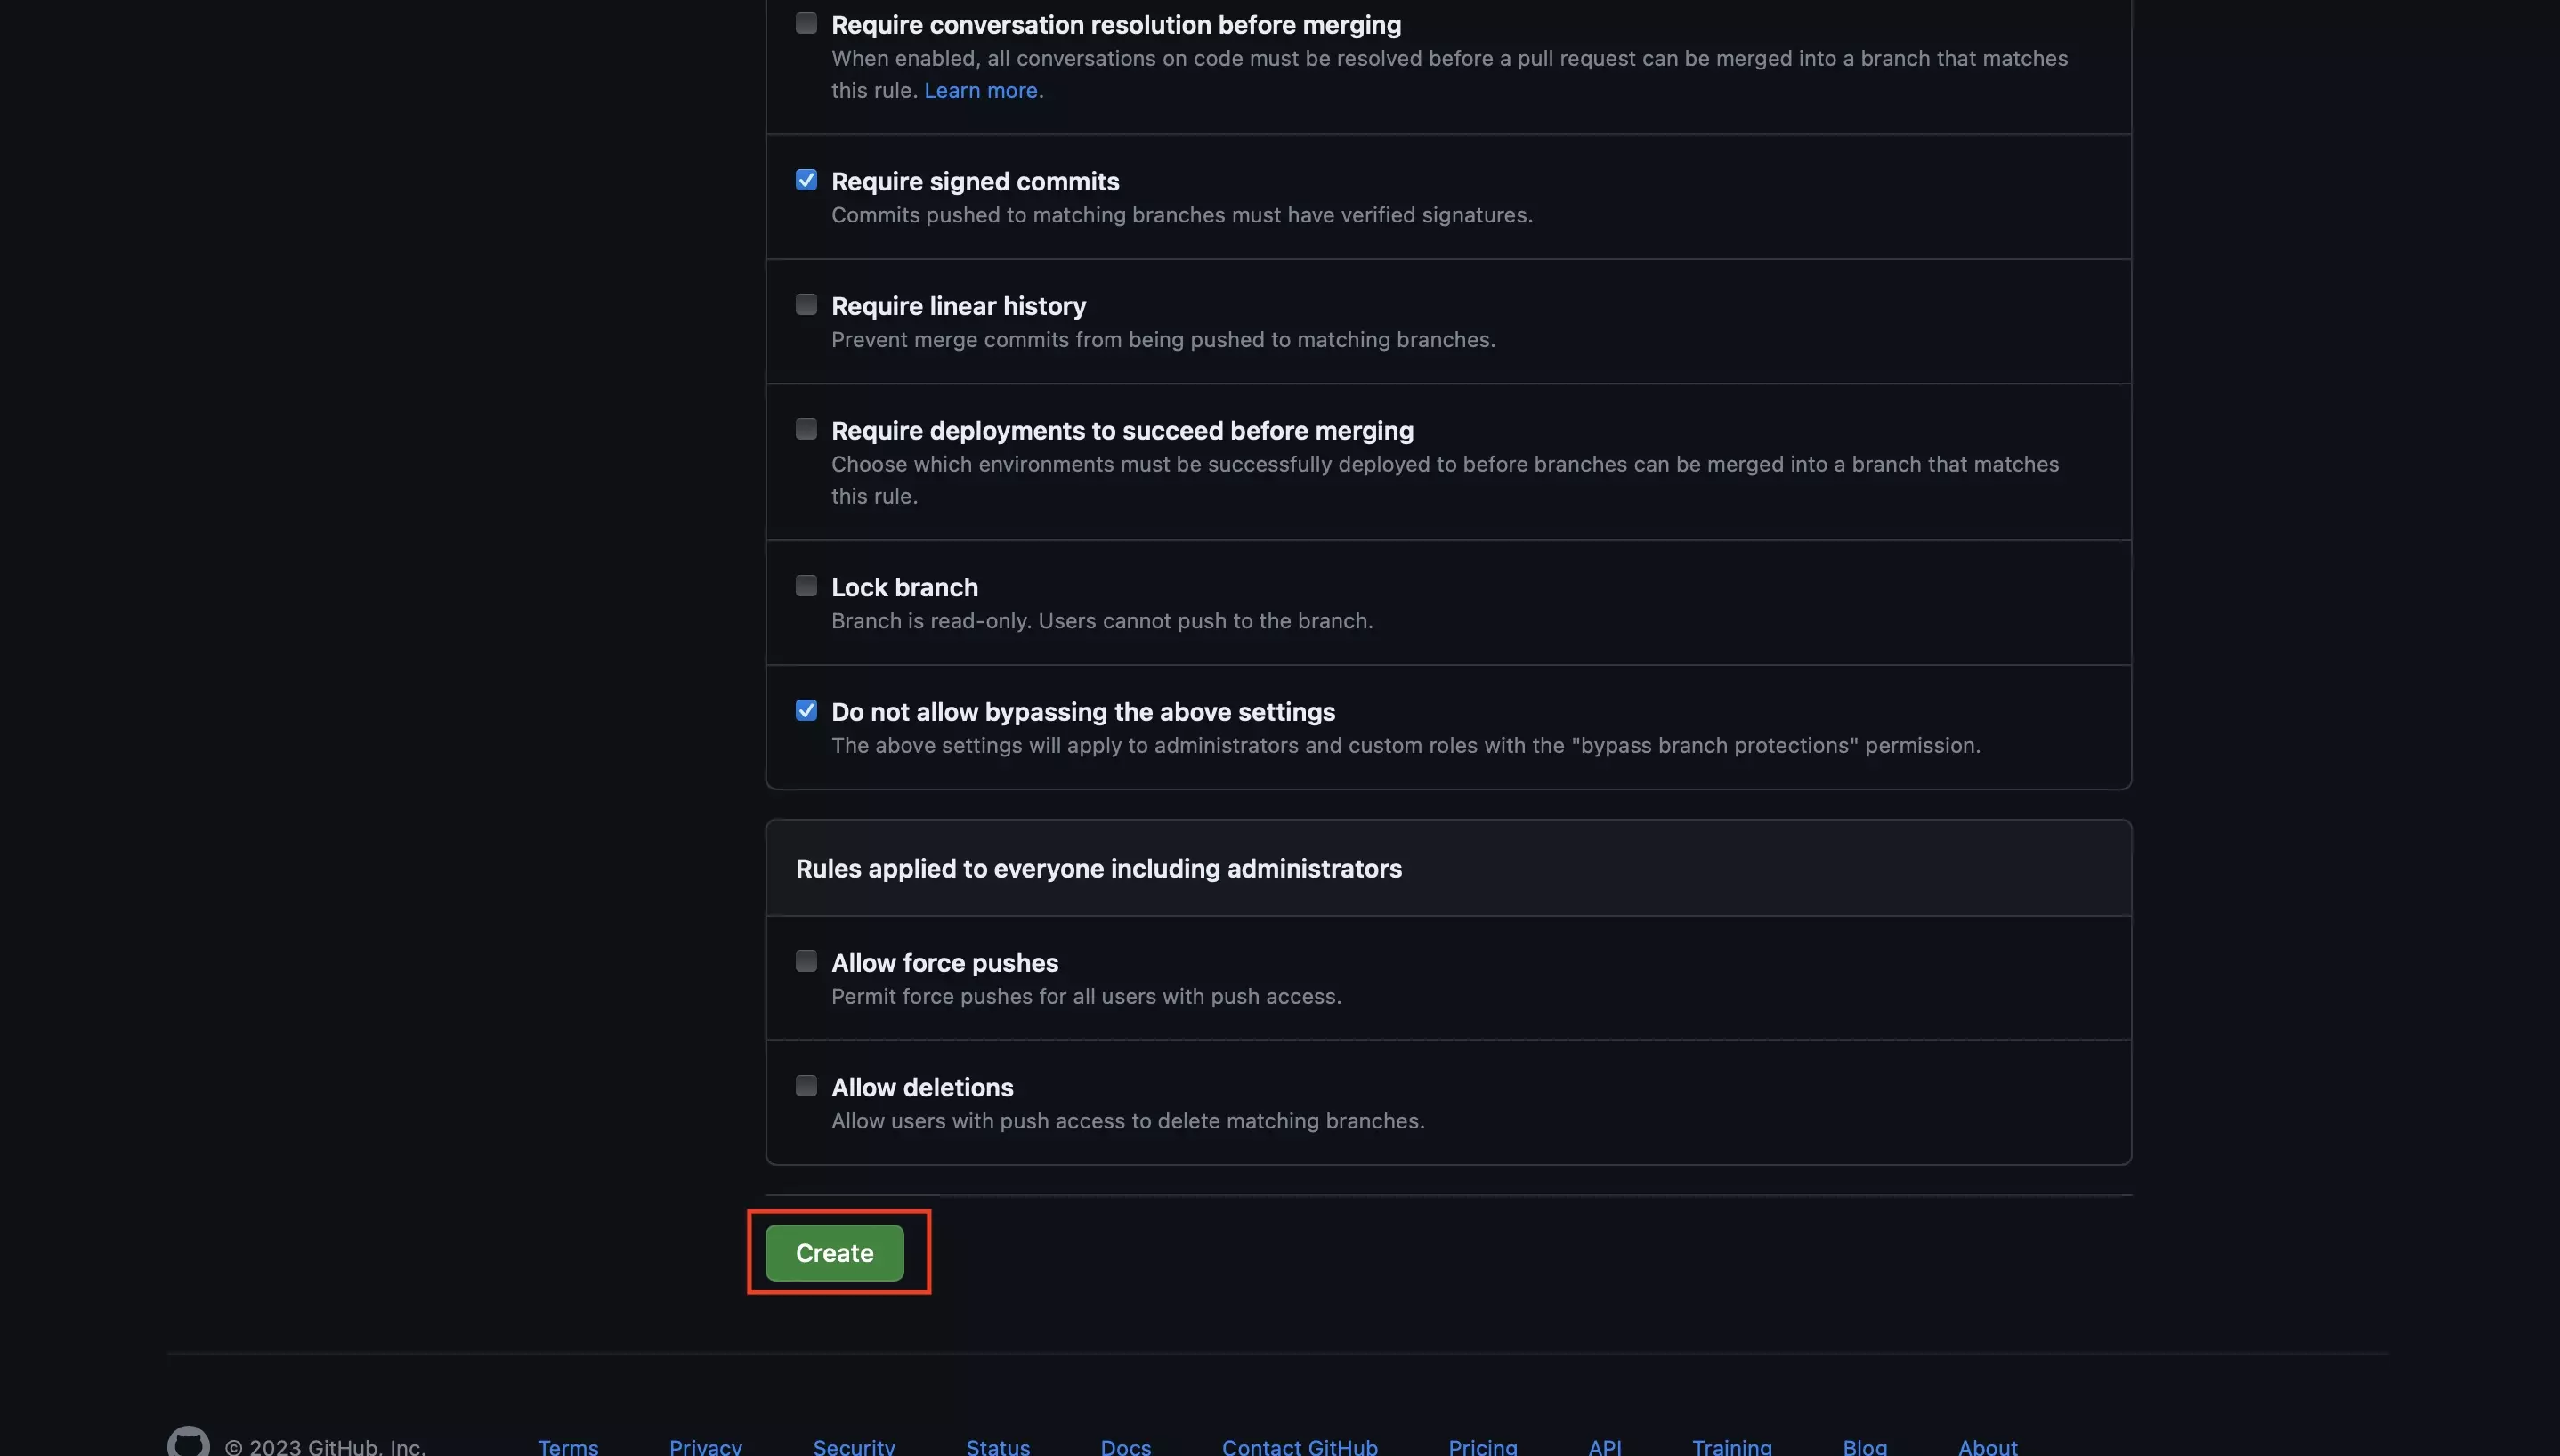
Click the Create button.

Step Seven: Confirm

A screenshot of the Github page that appears asking you to enter your password. You must successfully complete this step to finalize the creation of the Branch Protection Rule.

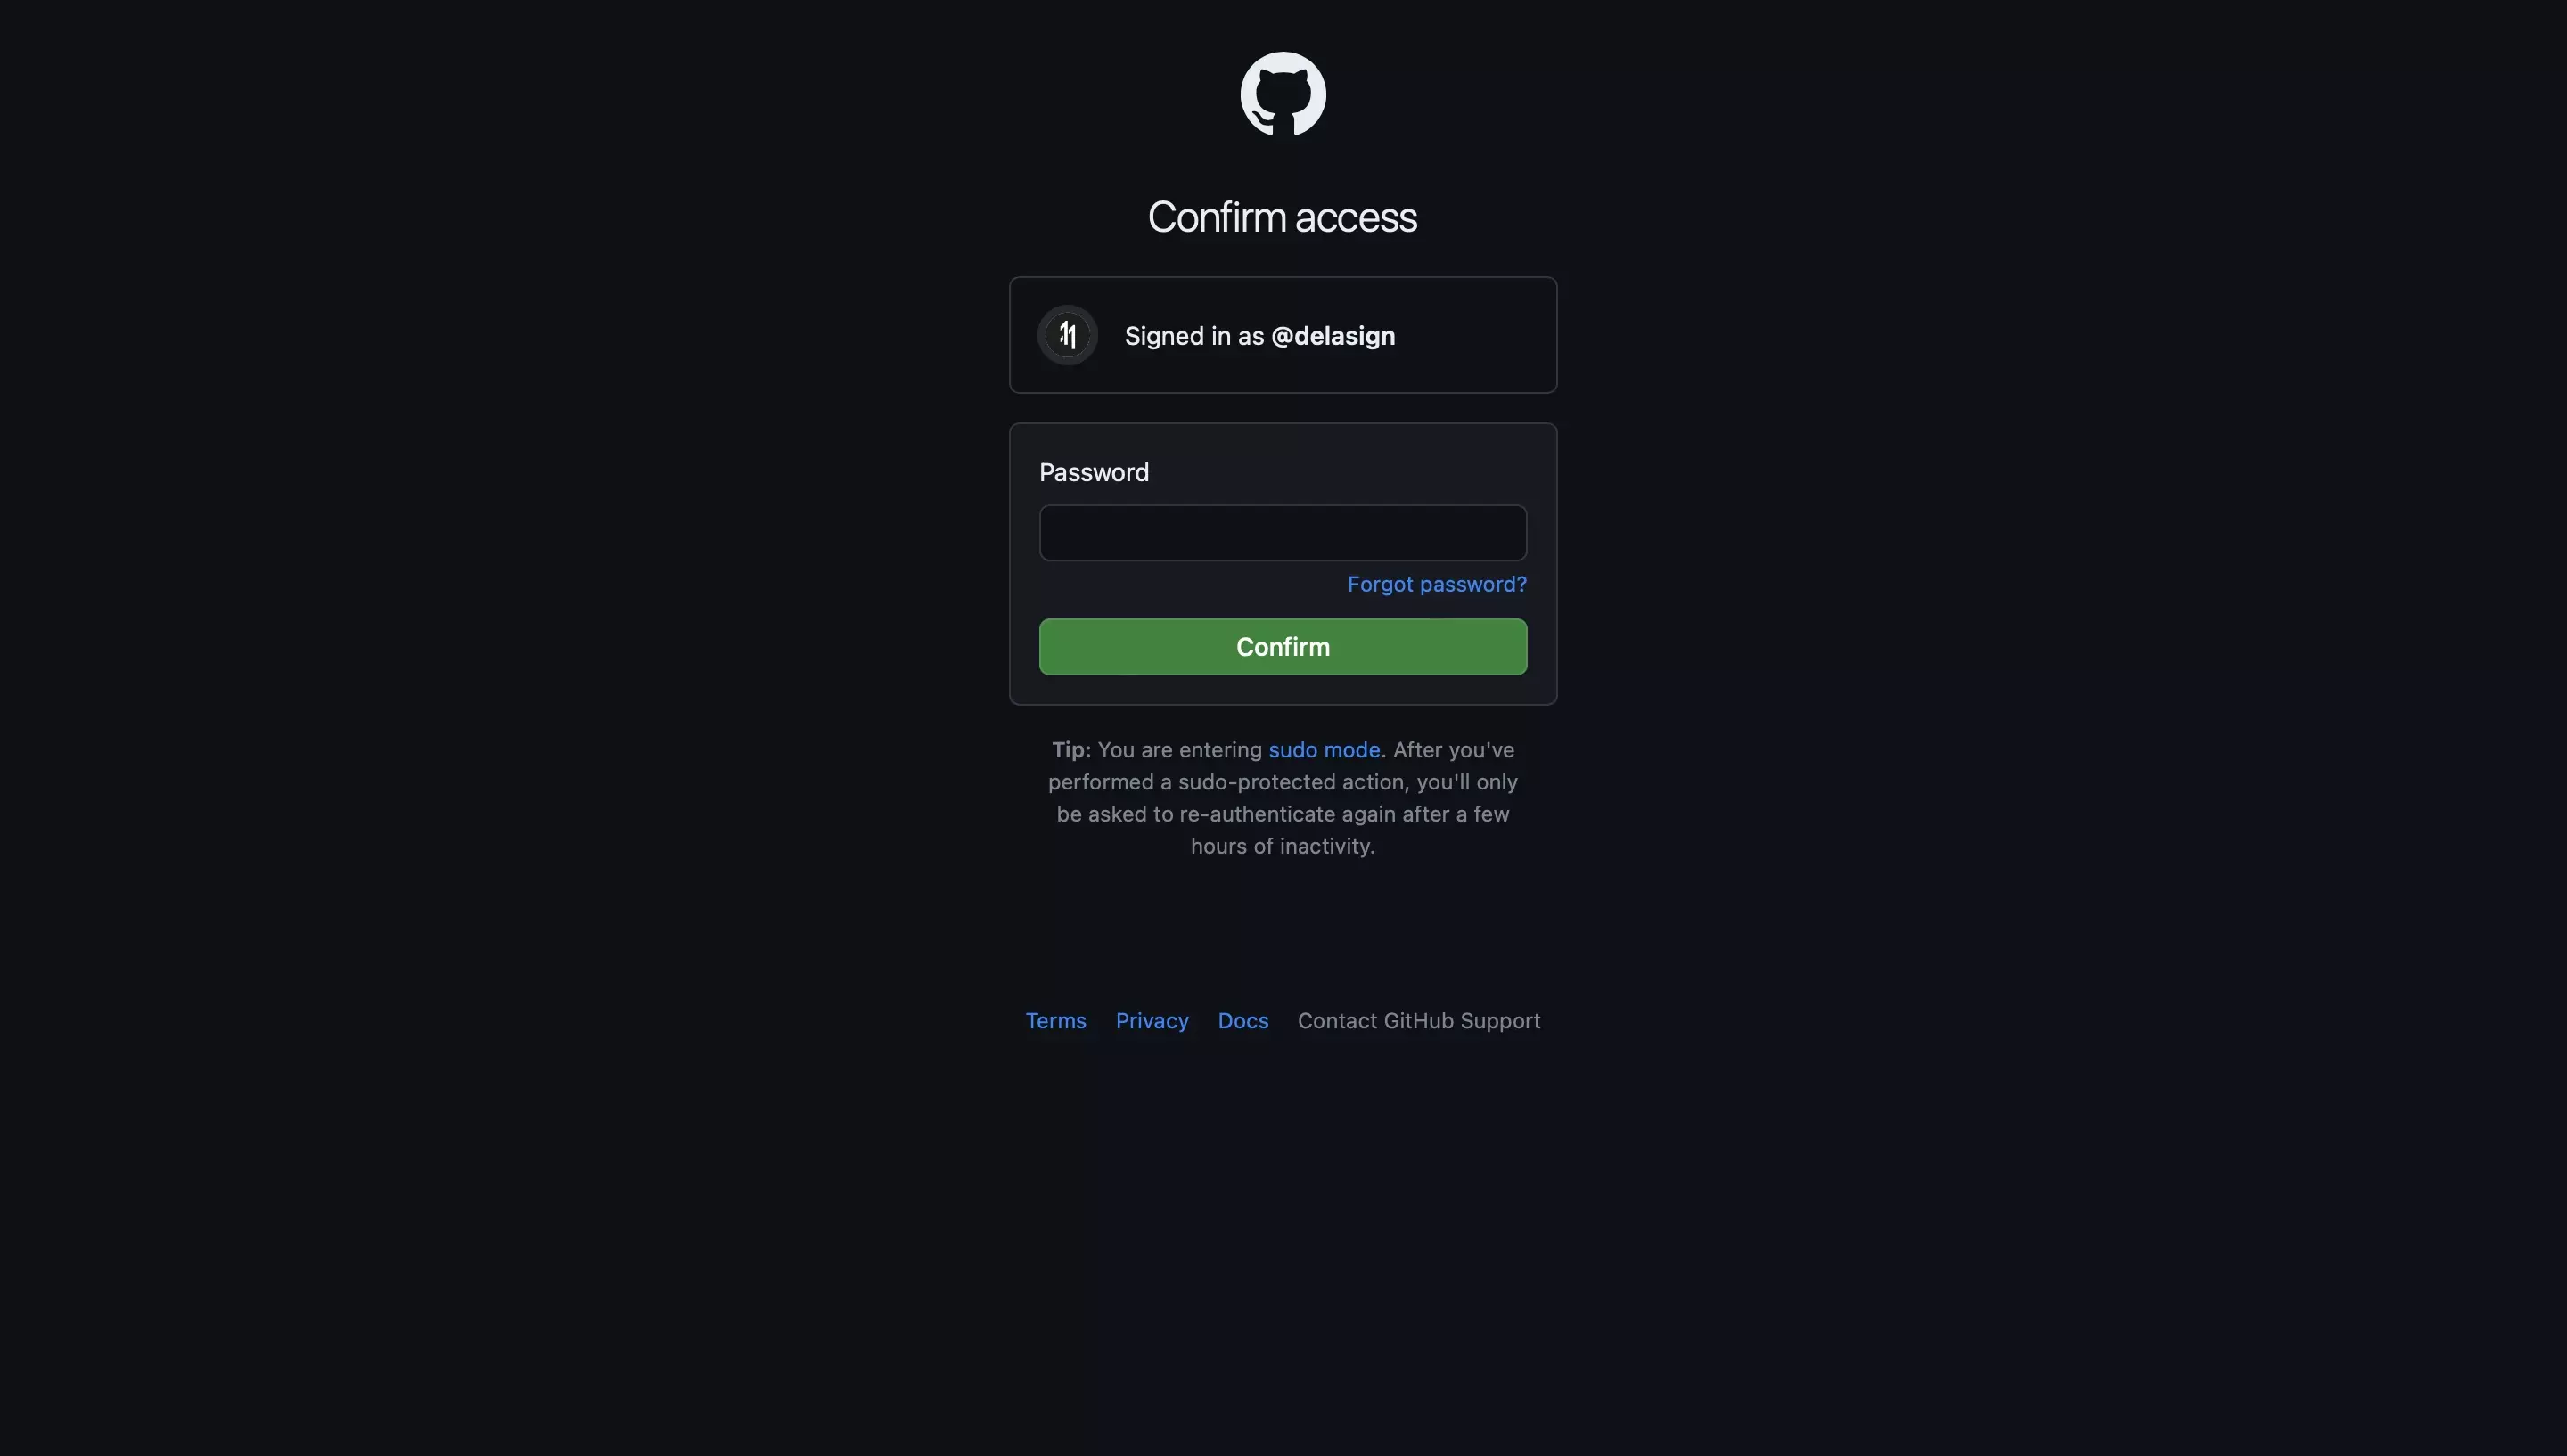
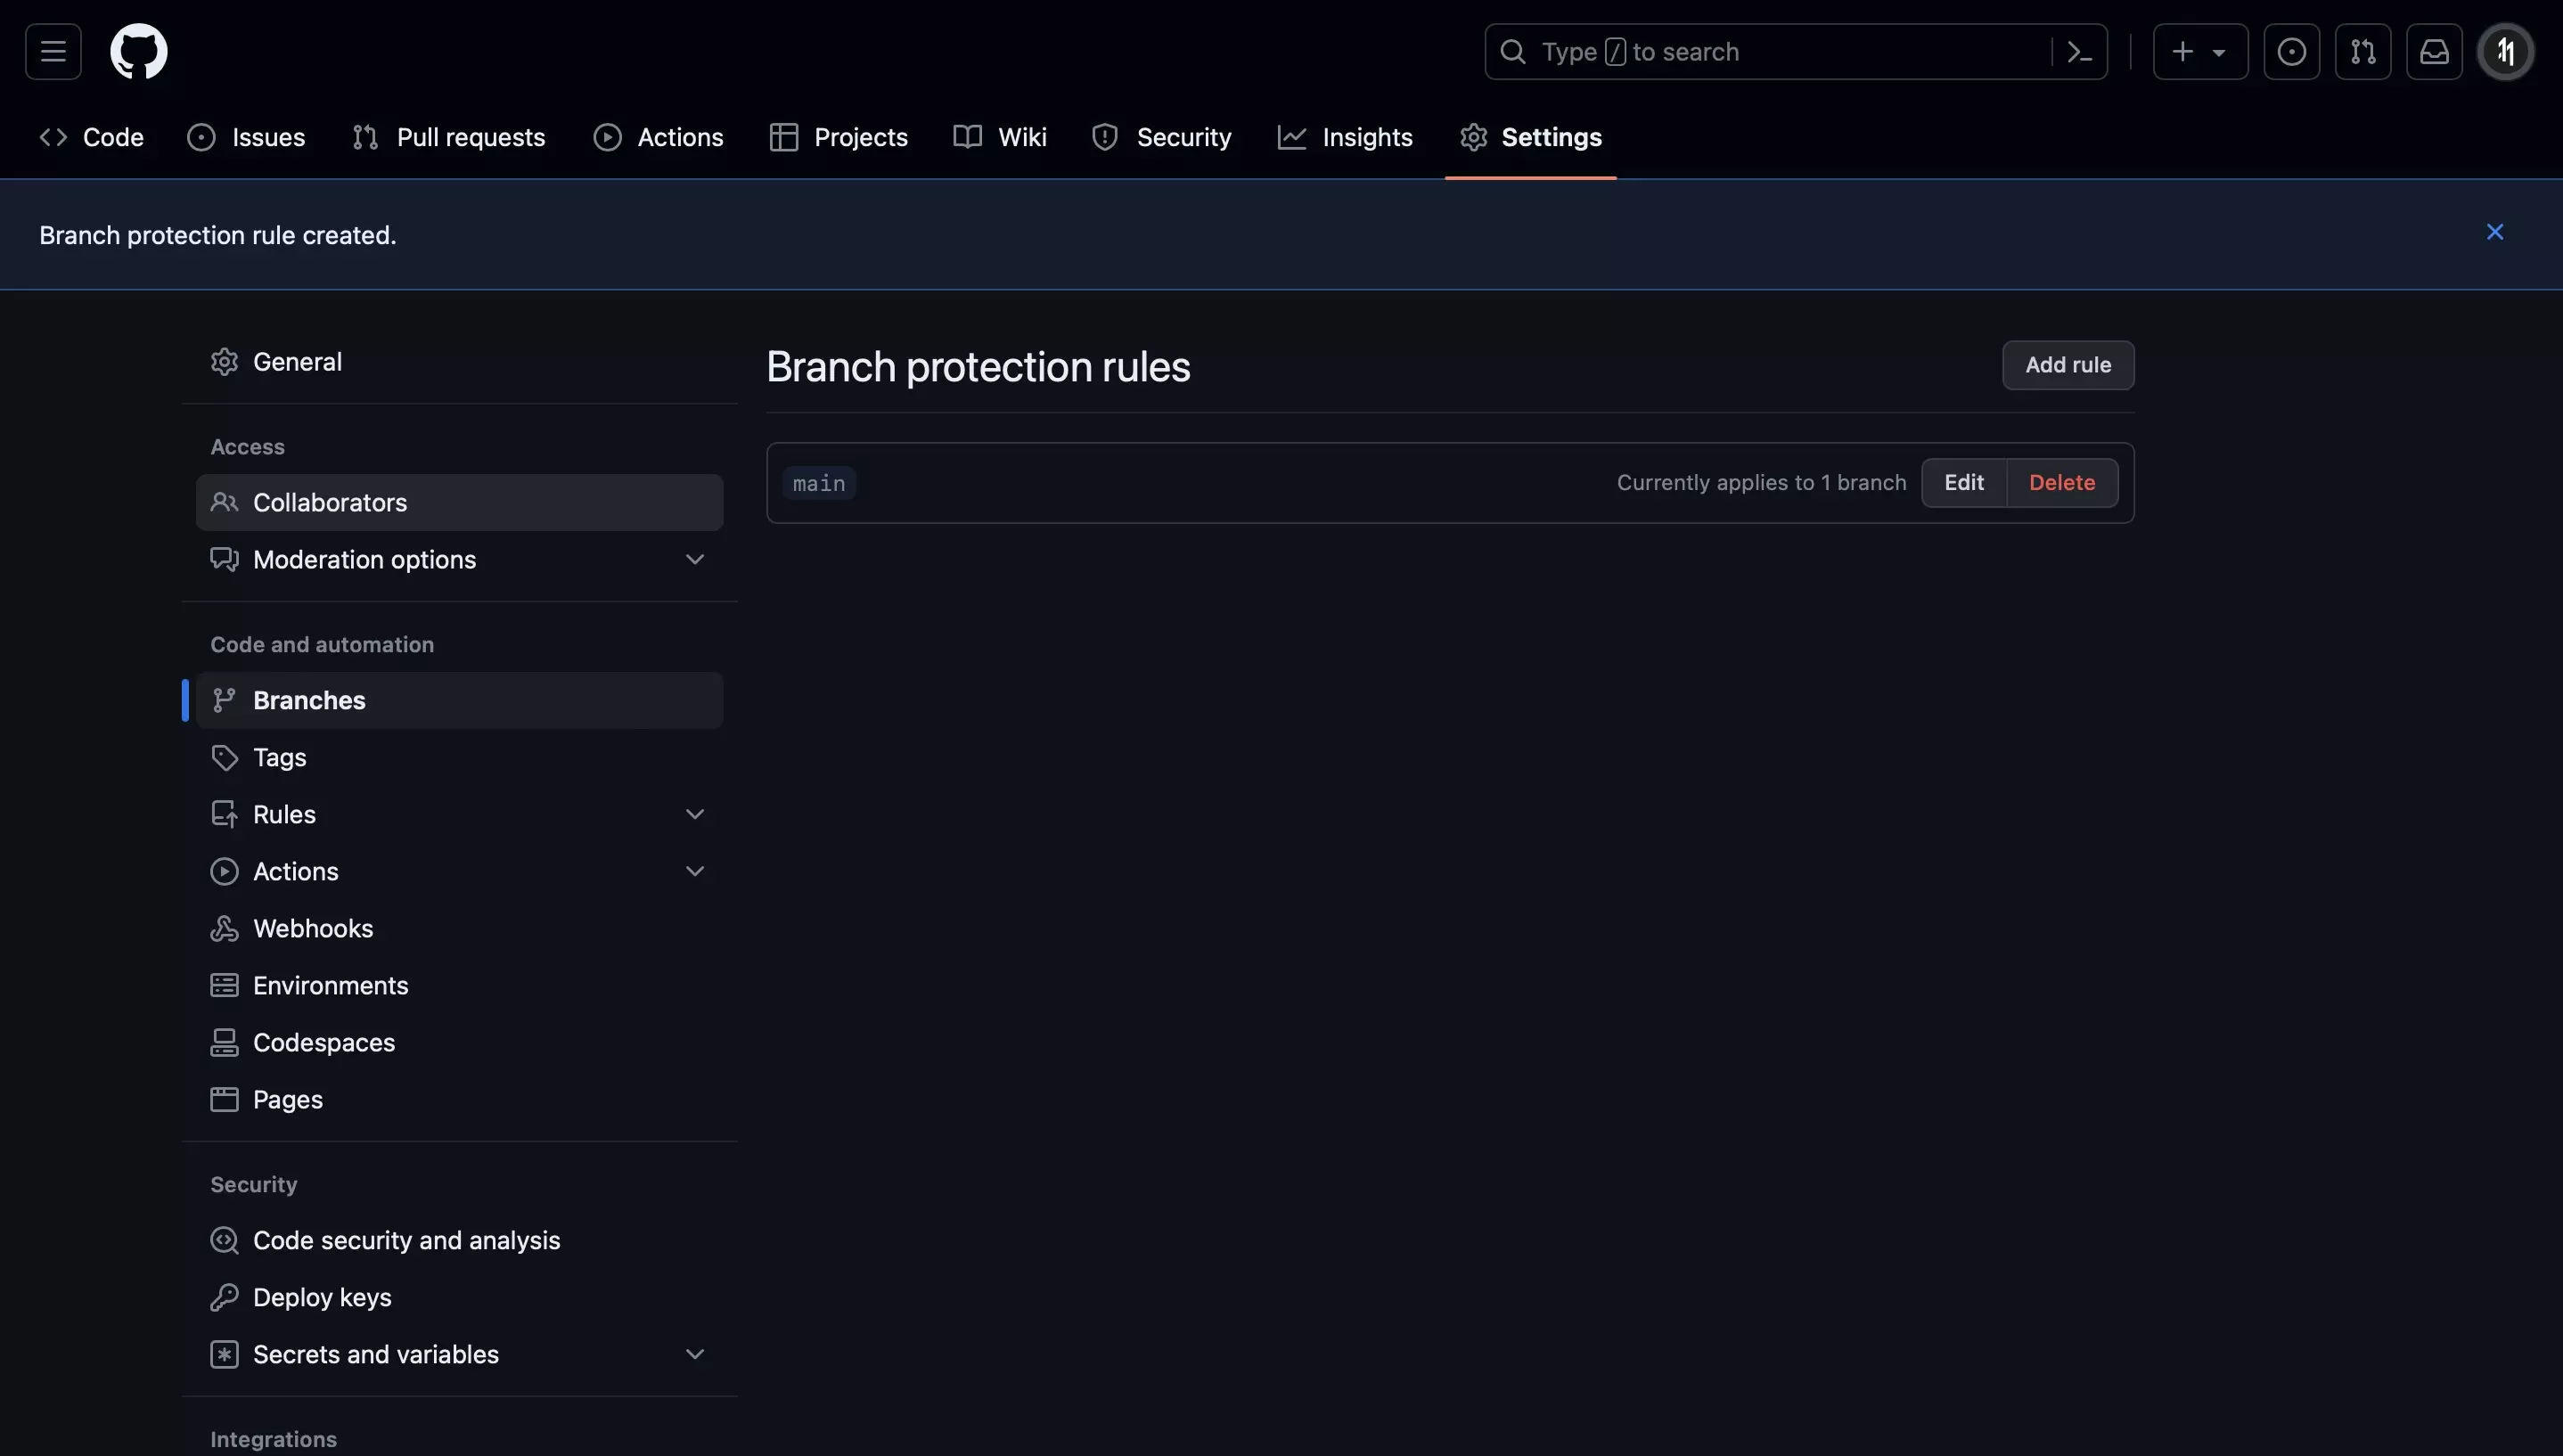
Enter your password and click the Confirm button.

This will complete the process, leading to a screen similar to the one below.

A screenshot of Github that shows a banner confirming that the Branch Protection Rule was created.

Step Eight: Test

A screenshot of Sourcetree showing that you can no longer commit to the main branch. The main branch is the branch that we chose to assign the rule to.

In Terminal or on an application like Sourcetree, attempt to push a commit from the branch and confirm that it is denied.

Looking to prevent commits to a local branch ?

To prevent commits to specific local branches, you must use a pre commit githook script.

Read the article linked below to learn about the code that you must use.

Any Questions?

We are actively looking for feedback on how to improve this resource. Please send us a note to inquiries@delasign.com with any thoughts or feedback you may have.
delasign logo

Book a Free Consultation.

An icon of an email.

Click here to email us.

Fill in the details below to book a free consultation or to let us know about something else. Whatever it is, we are here to help.

How can we help you ?

Contact Details