How to Style Text in Figma

Oscar de la Hera Gomez
A flower that represents Figma with the text “Style Text” beneath it.

A step by step guide on customizing the appearance of text in Figma including how to change the font (typeface), color, alignment, decoration, case, vertical trim and more.

Step One: Select the Text

A screenshot of Figma that shows you a frame with text on it. The text is selected.

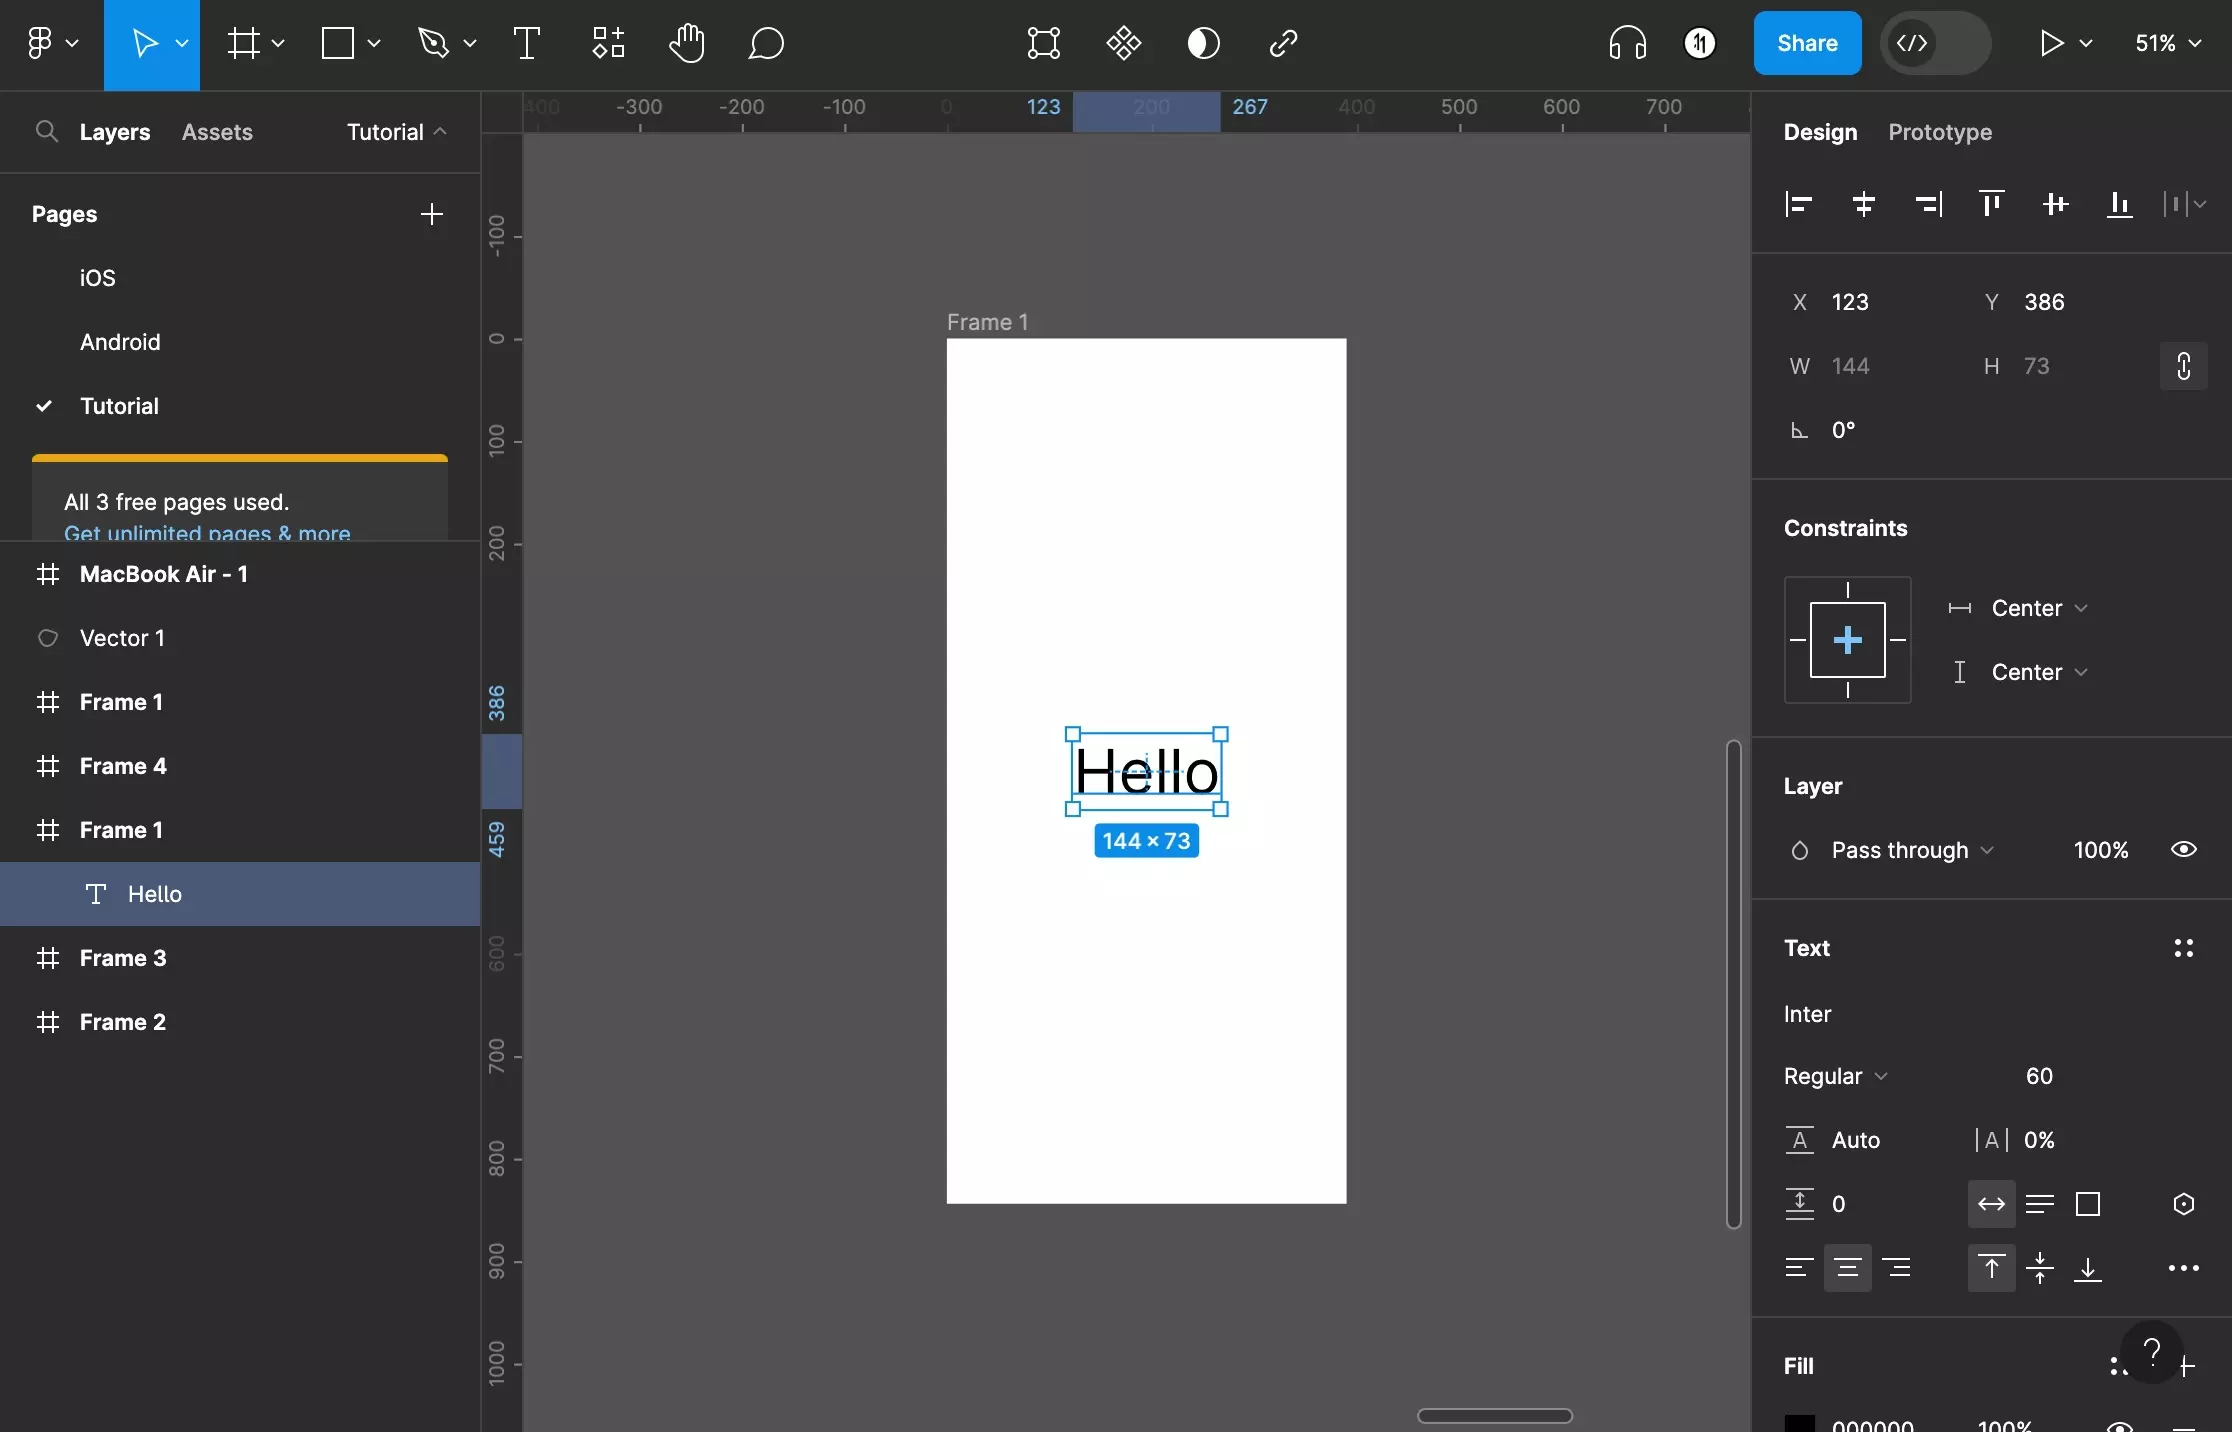
In Figma, select the text you'd like to style.

Step Two: Change the Typeface

A screenshot of Figma that shows you a frame with text on it. We have highlighted the “Inter” typeface - which is the input found right below the “Text” section. If you click this input it will open up a dropdown to the left of the input which will allow you to change the font family (typeface) of the text.

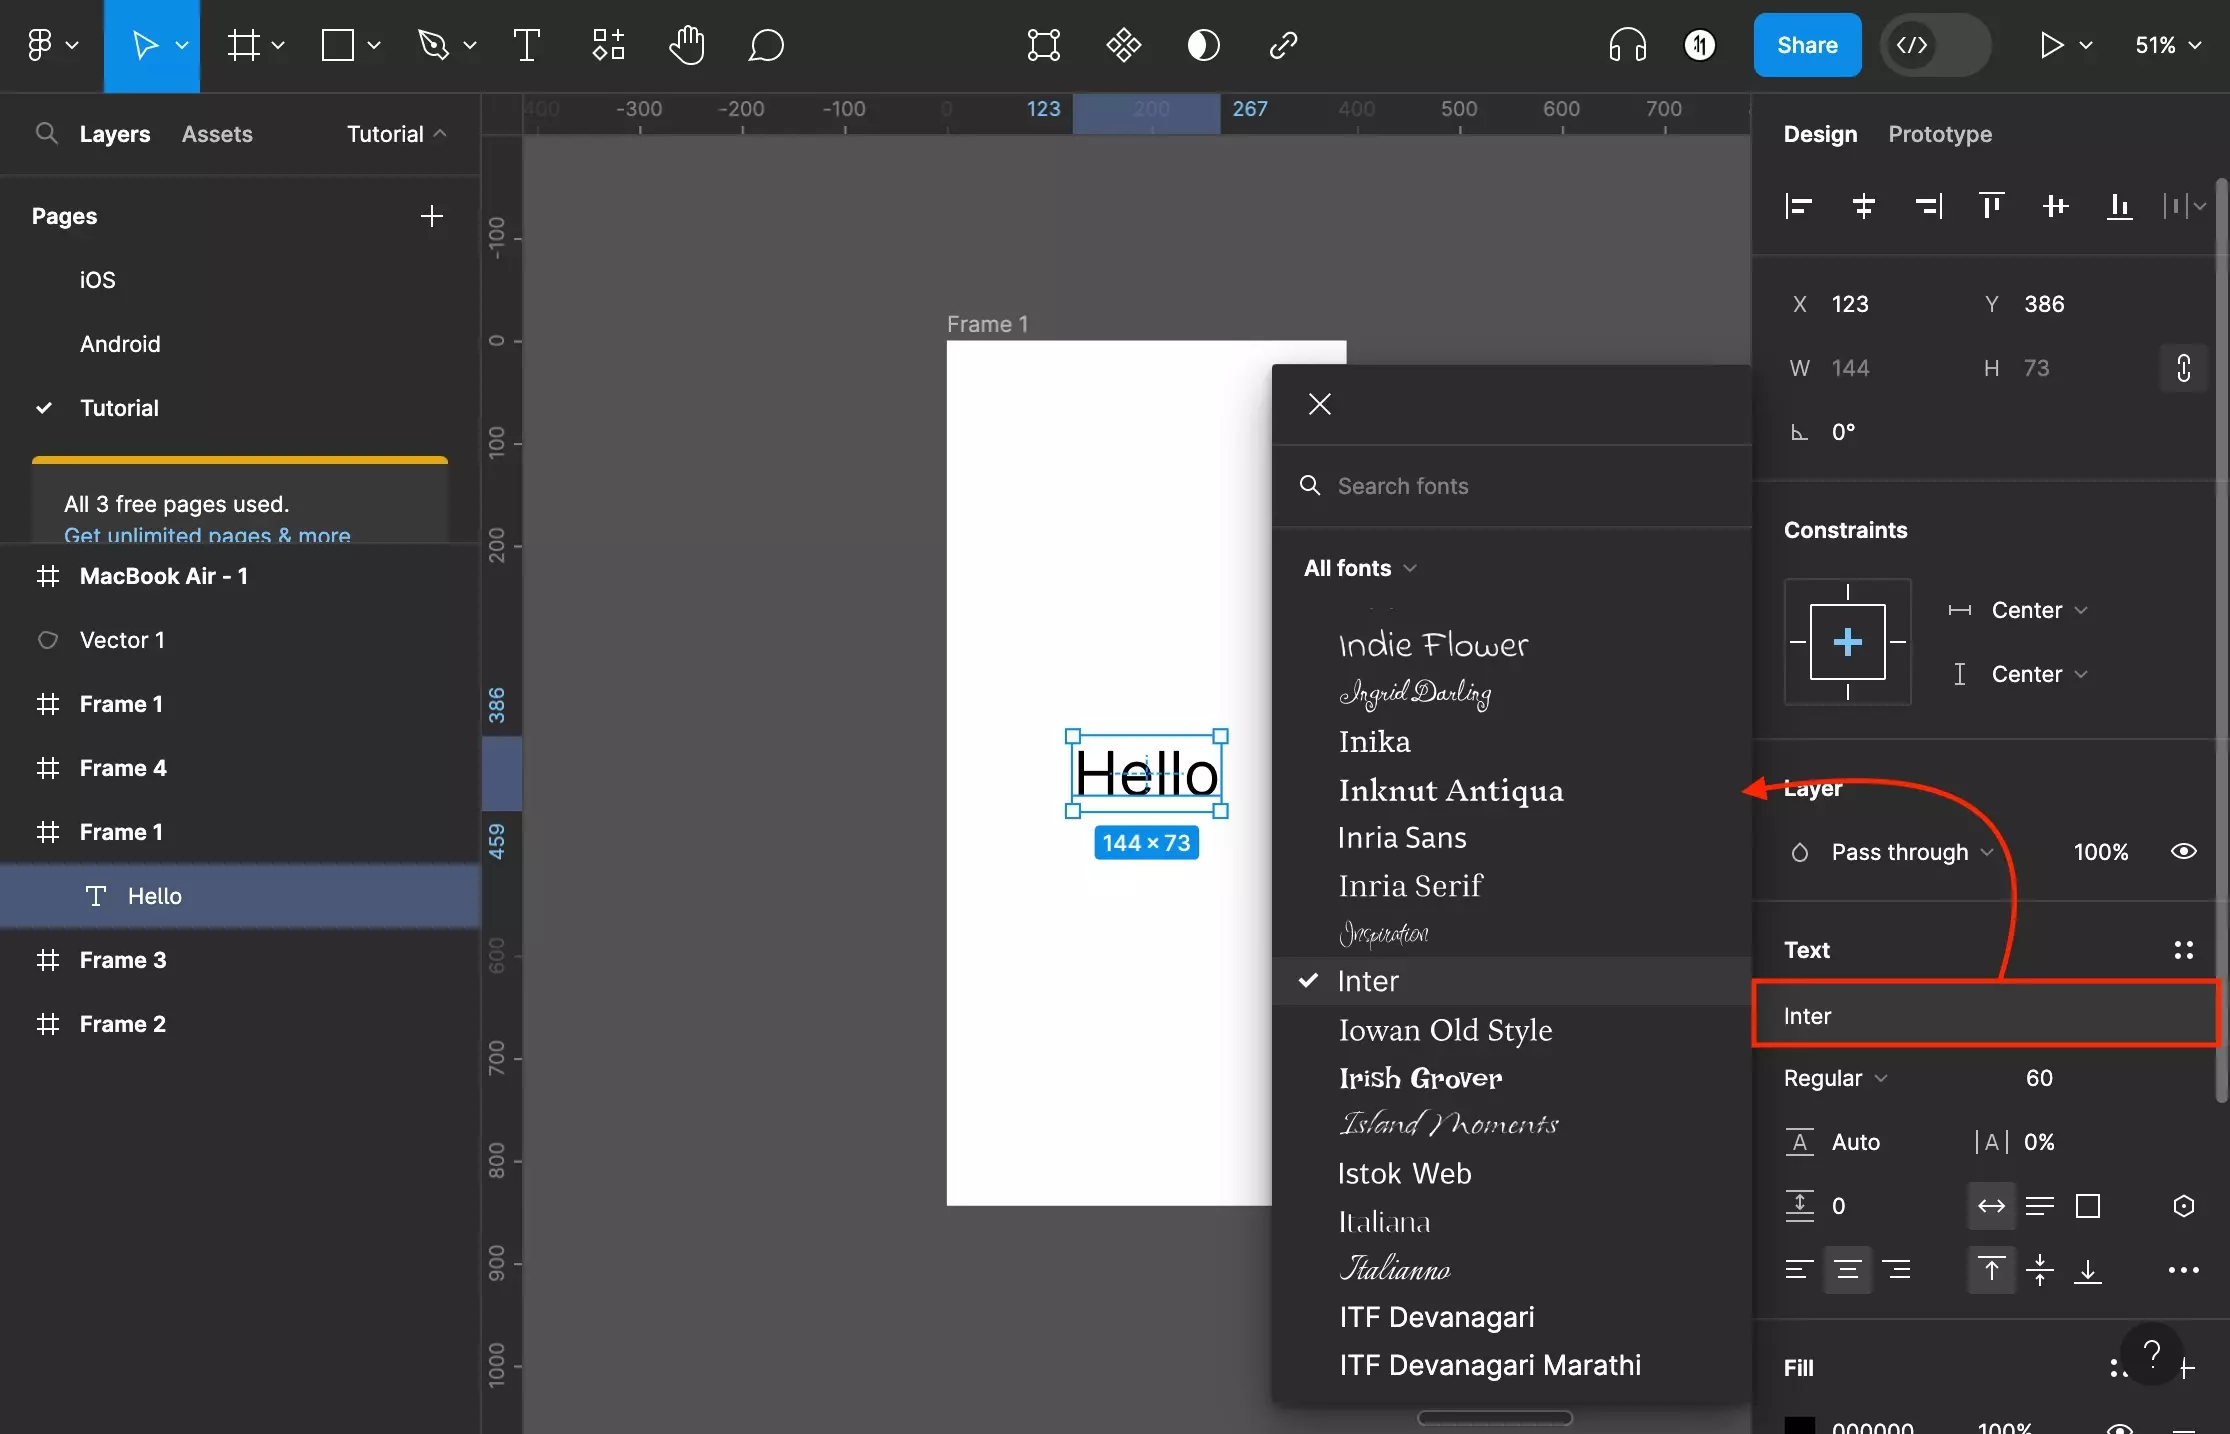
Click the Typeface (Font Family) to open up a dropdown that allows you to filter through all the font families.

Select the typeface that you wish to use from the dropdown.


<p>A screenshot of Figma that shows you a frame with text on it. The typeface dropdown is open and on it, we have highlighted the “All Fonts” label that has a caret next to it. Press this to open a second dropdown that allows you to filter fonts.<br /></p>
<p></p>

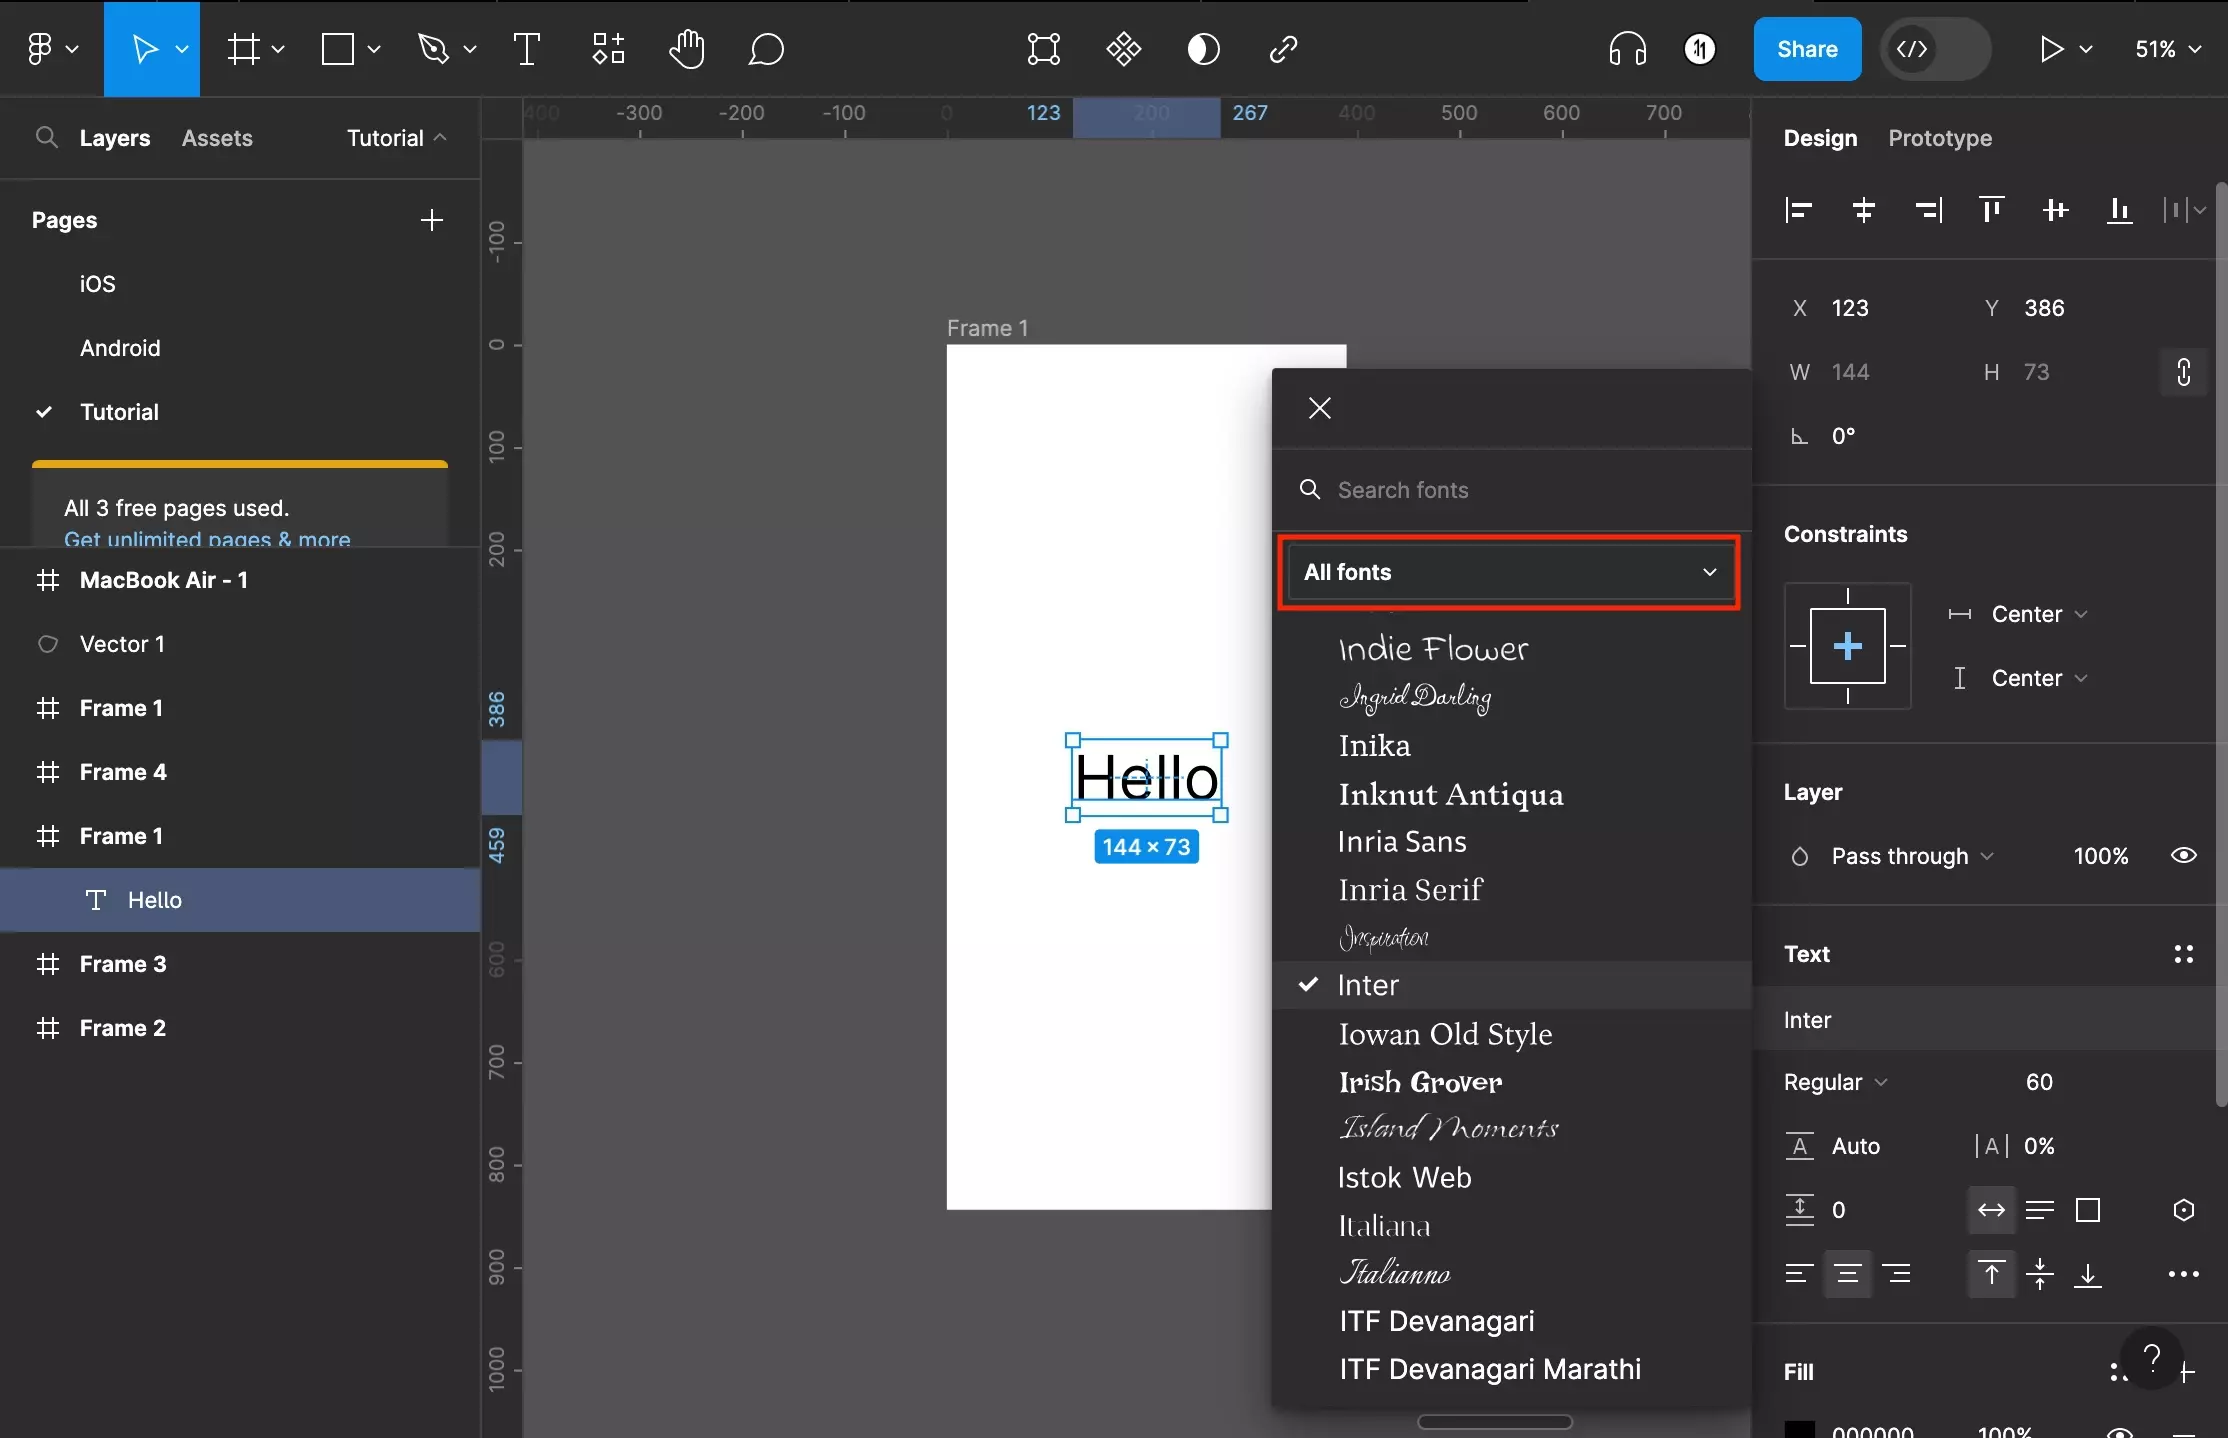
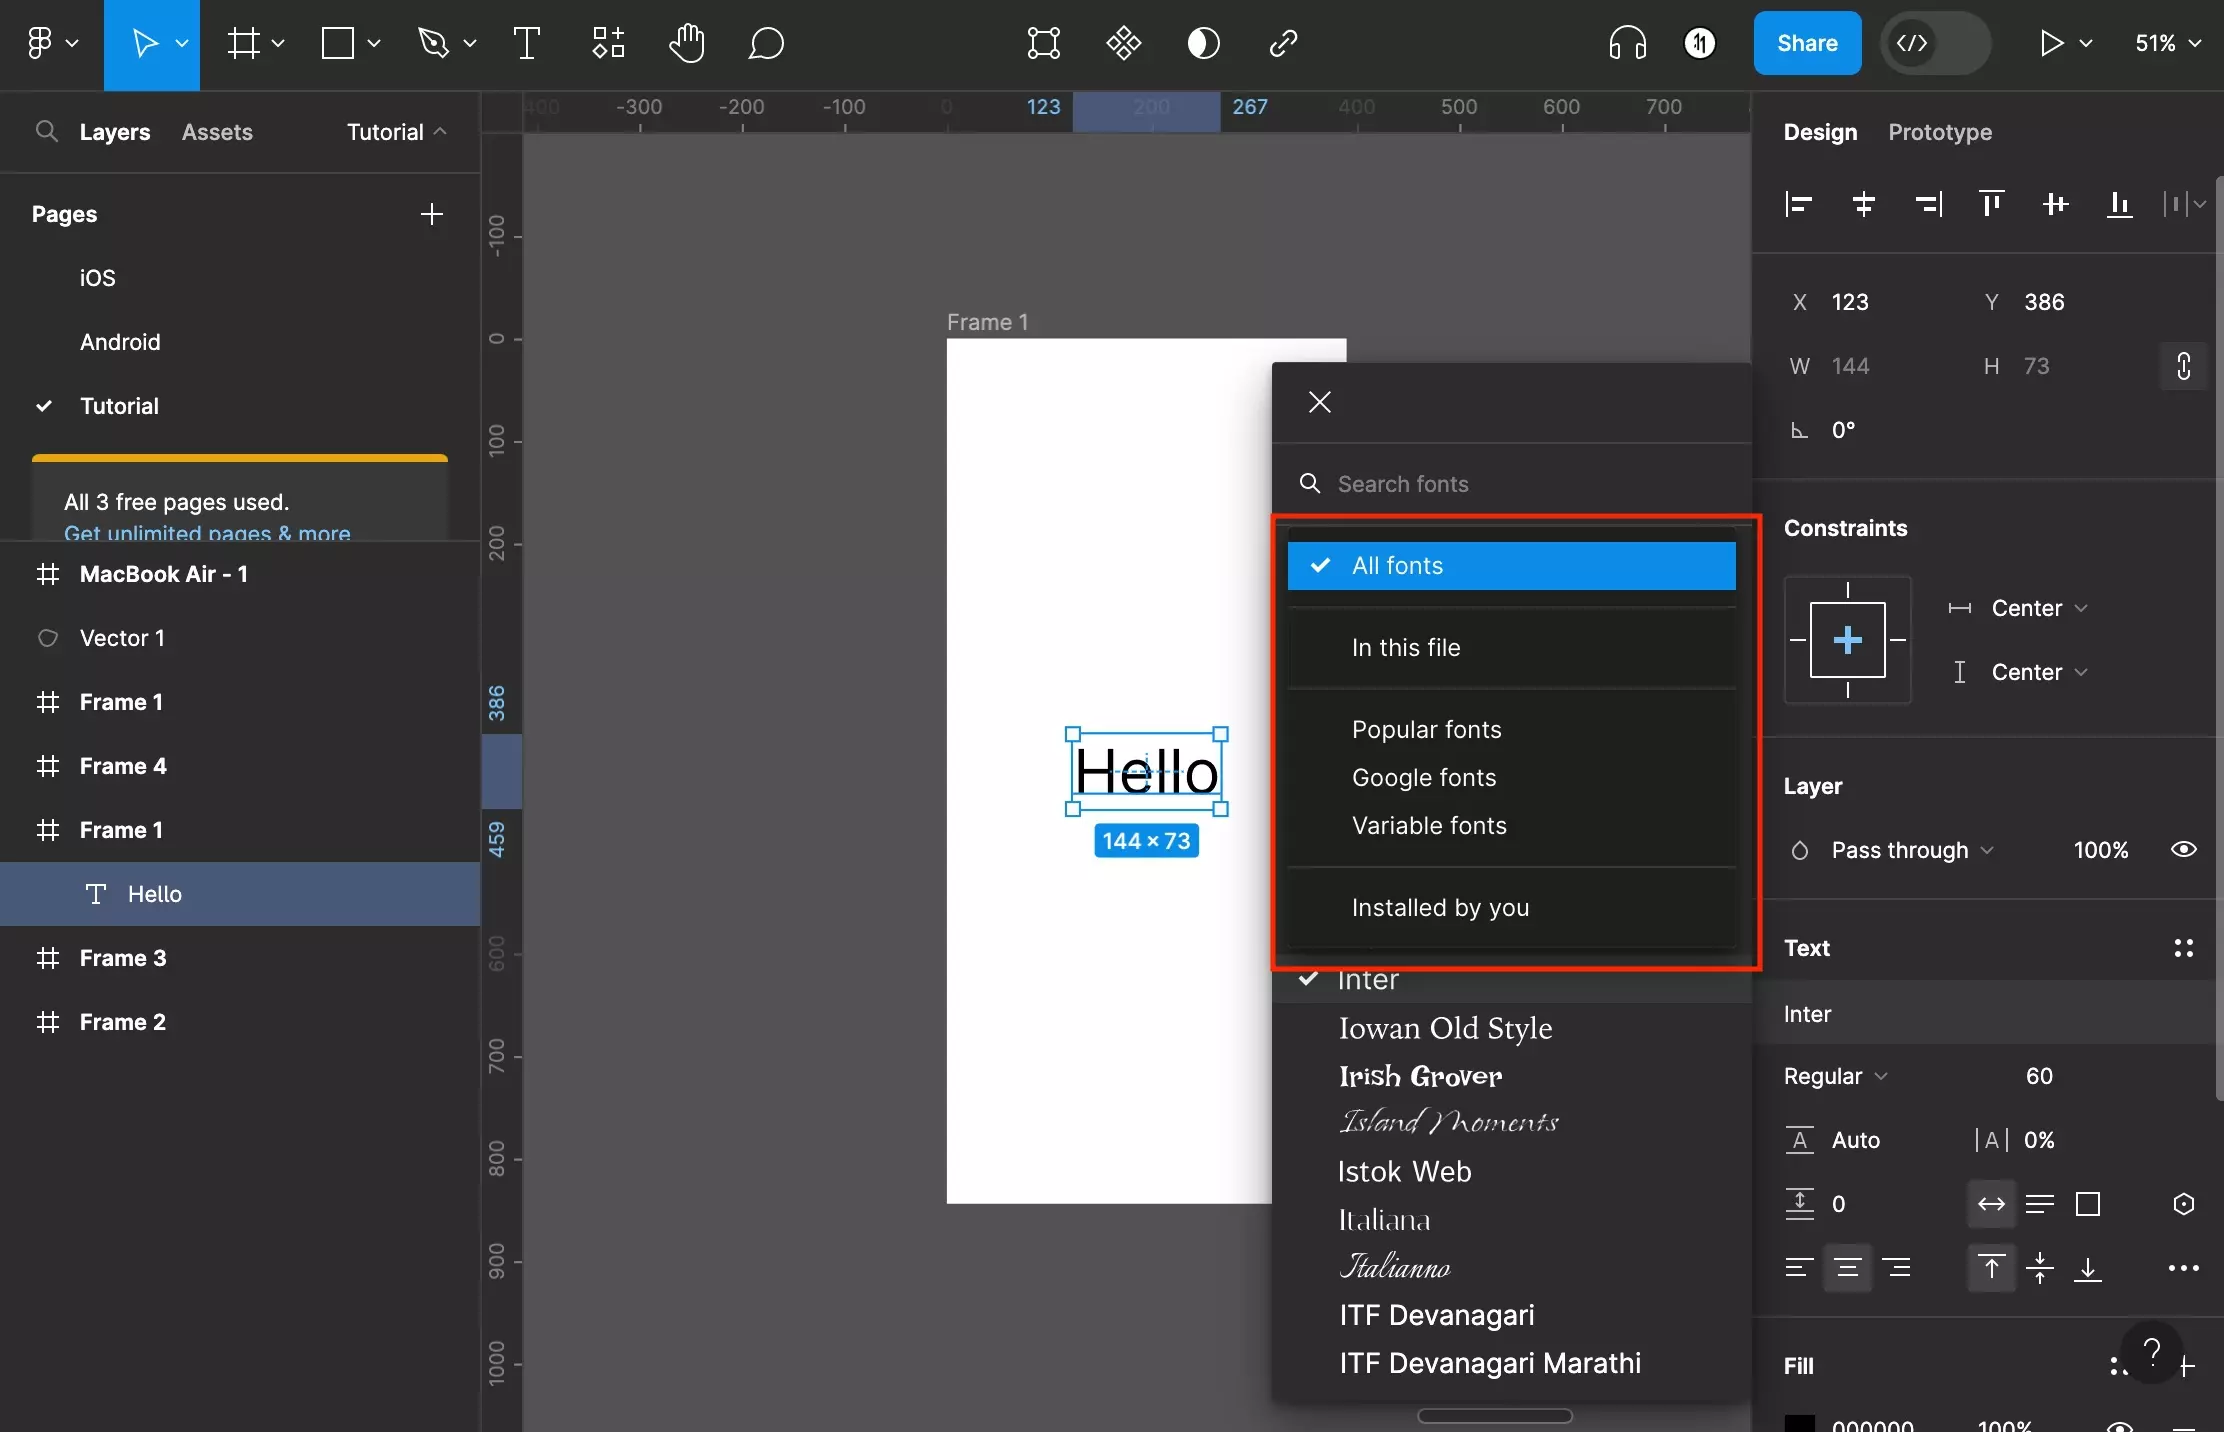
If you wish to filter the fonts that are shown in the dropdown, click the caret next to All Fonts.

This will open a separate dropdown that allows you to filter the fonts shown to the following categories:

  • All fonts (default)
  • In this file
  • Popular Fonts
  • Google Fonts
  • Variable Fonts
  • Installed by You
A screenshot of Figma that shows you a frame with text on it. The filter fonts dropdown is open. The options on the dropdown are All Fonts, In this File, Popular Fonts, Google Fonts, Variable Fonts and Installed by You.

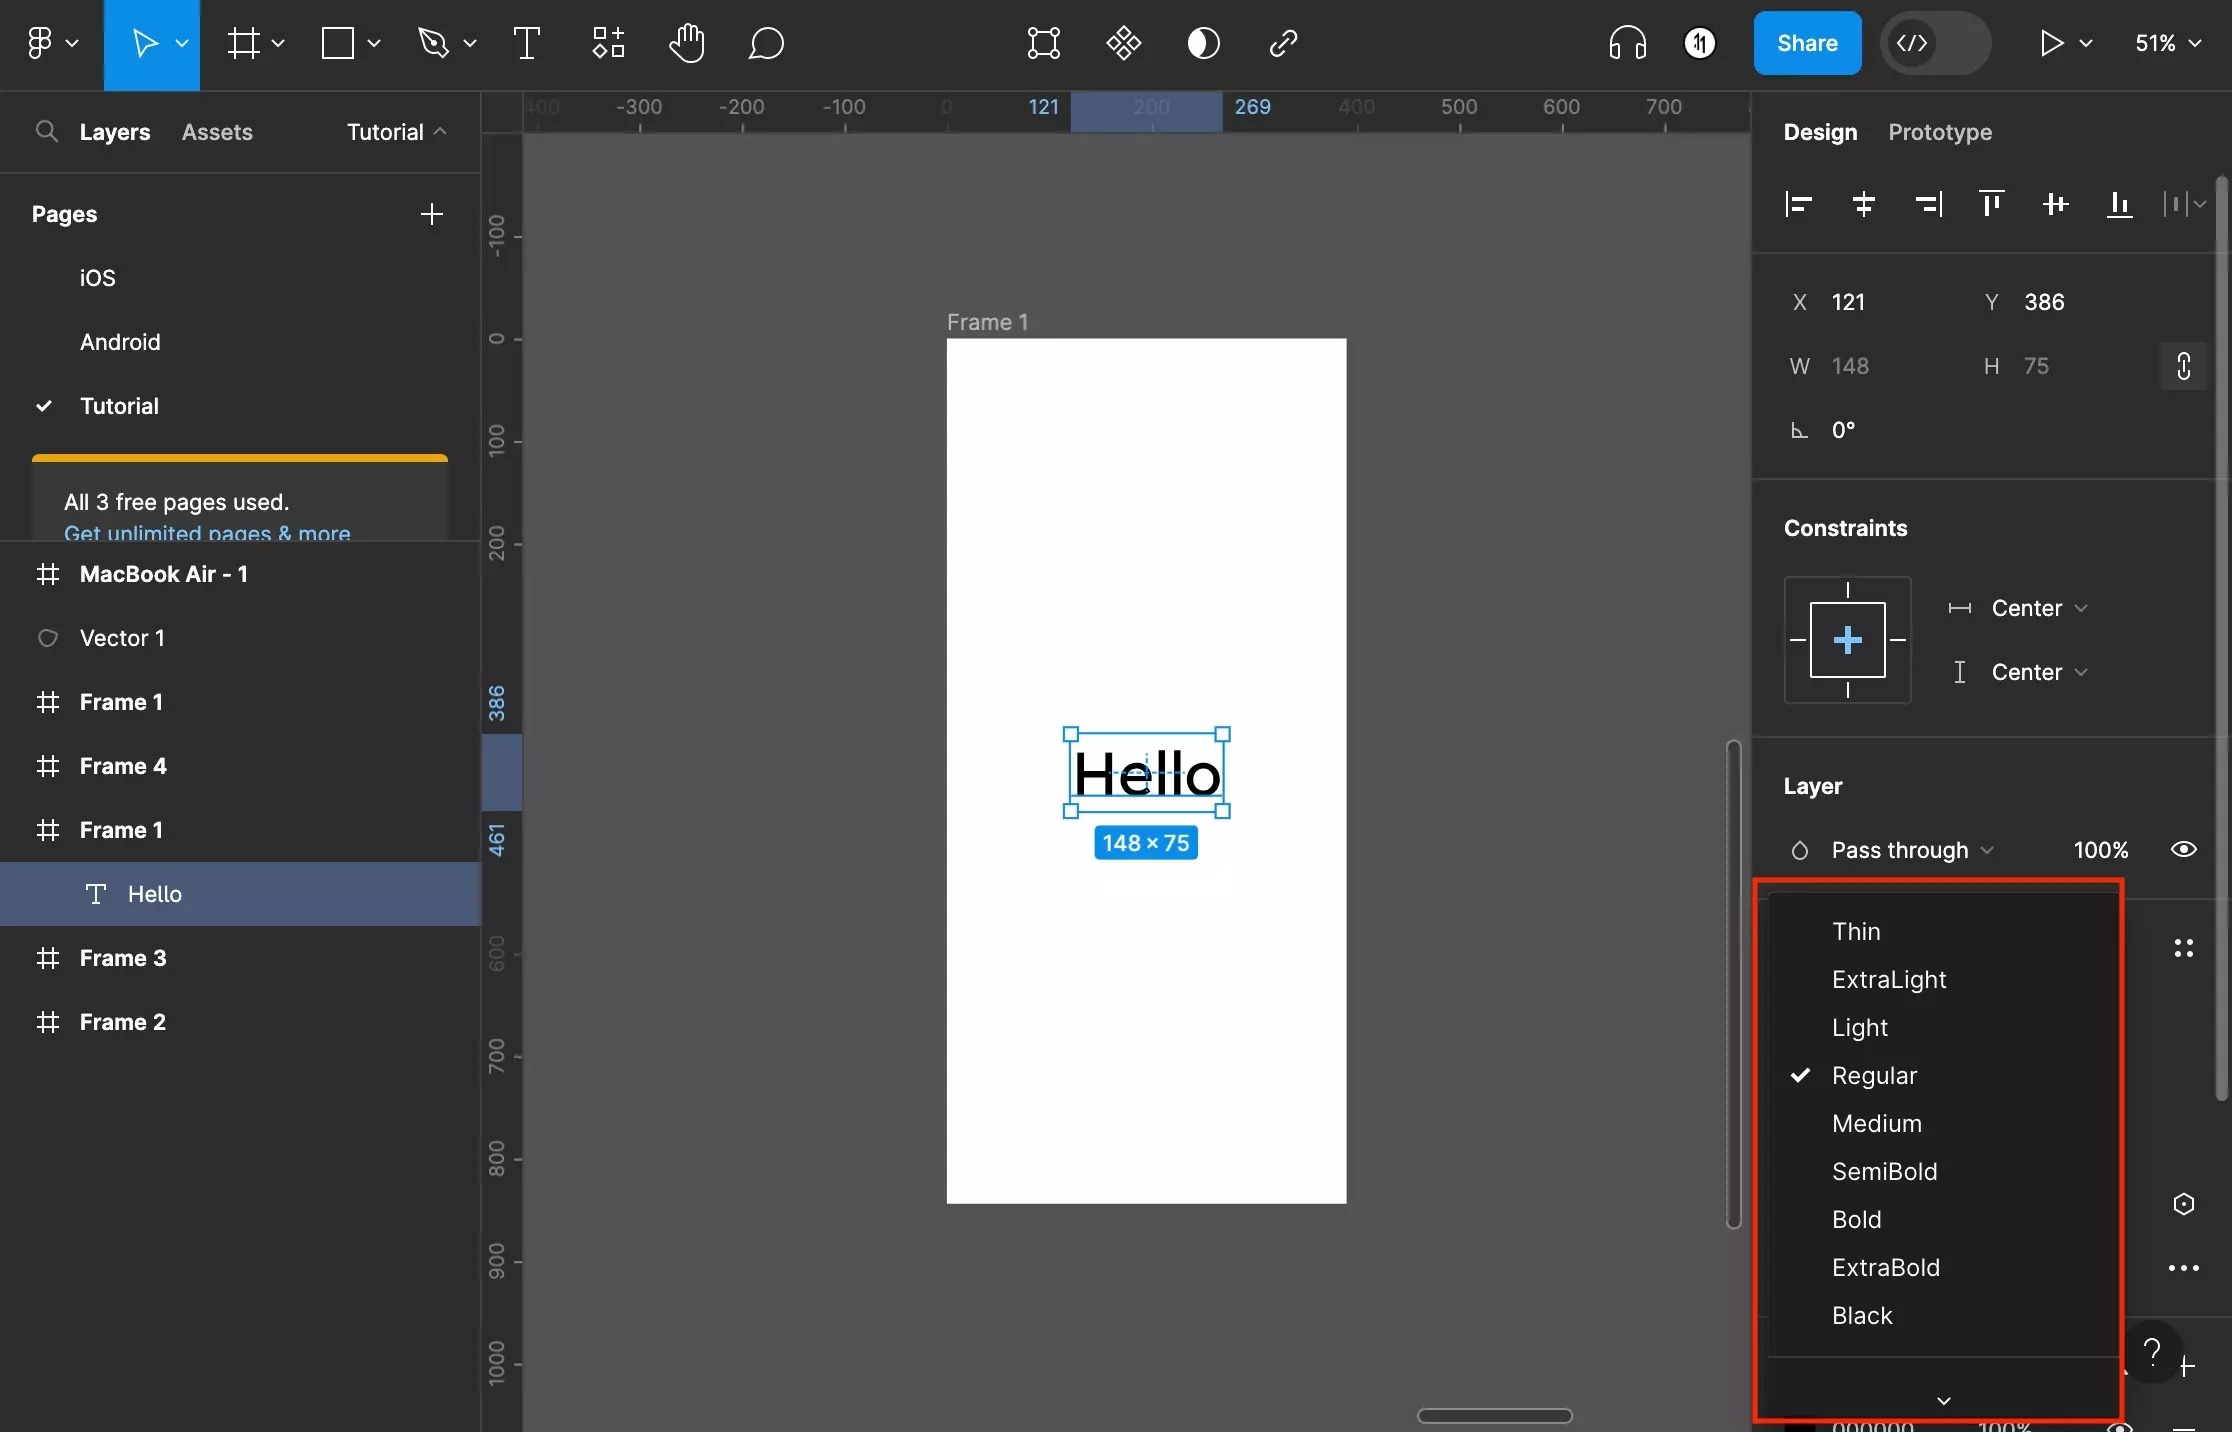
Step Three: Change the Font

A screenshot of Figma that shows you a frame with text on it. Under the typeface, we have highlighted the font input. If you click the input you will open a dropdown that allows you to change the font of the selected typeface. Please note that it will only be available if the Typeface has more than one font.

If more than one font is available for your typeface, a font name will appear below the chosen typeface.

Click the caret to open a dropdown that displays the font options for the typeface.

Select a font option to update the font.

A screenshot of Figma that shows you a frame with text on it.  The font dropdown is open and we have highlighted the font options that are available for the Lemon typeface.

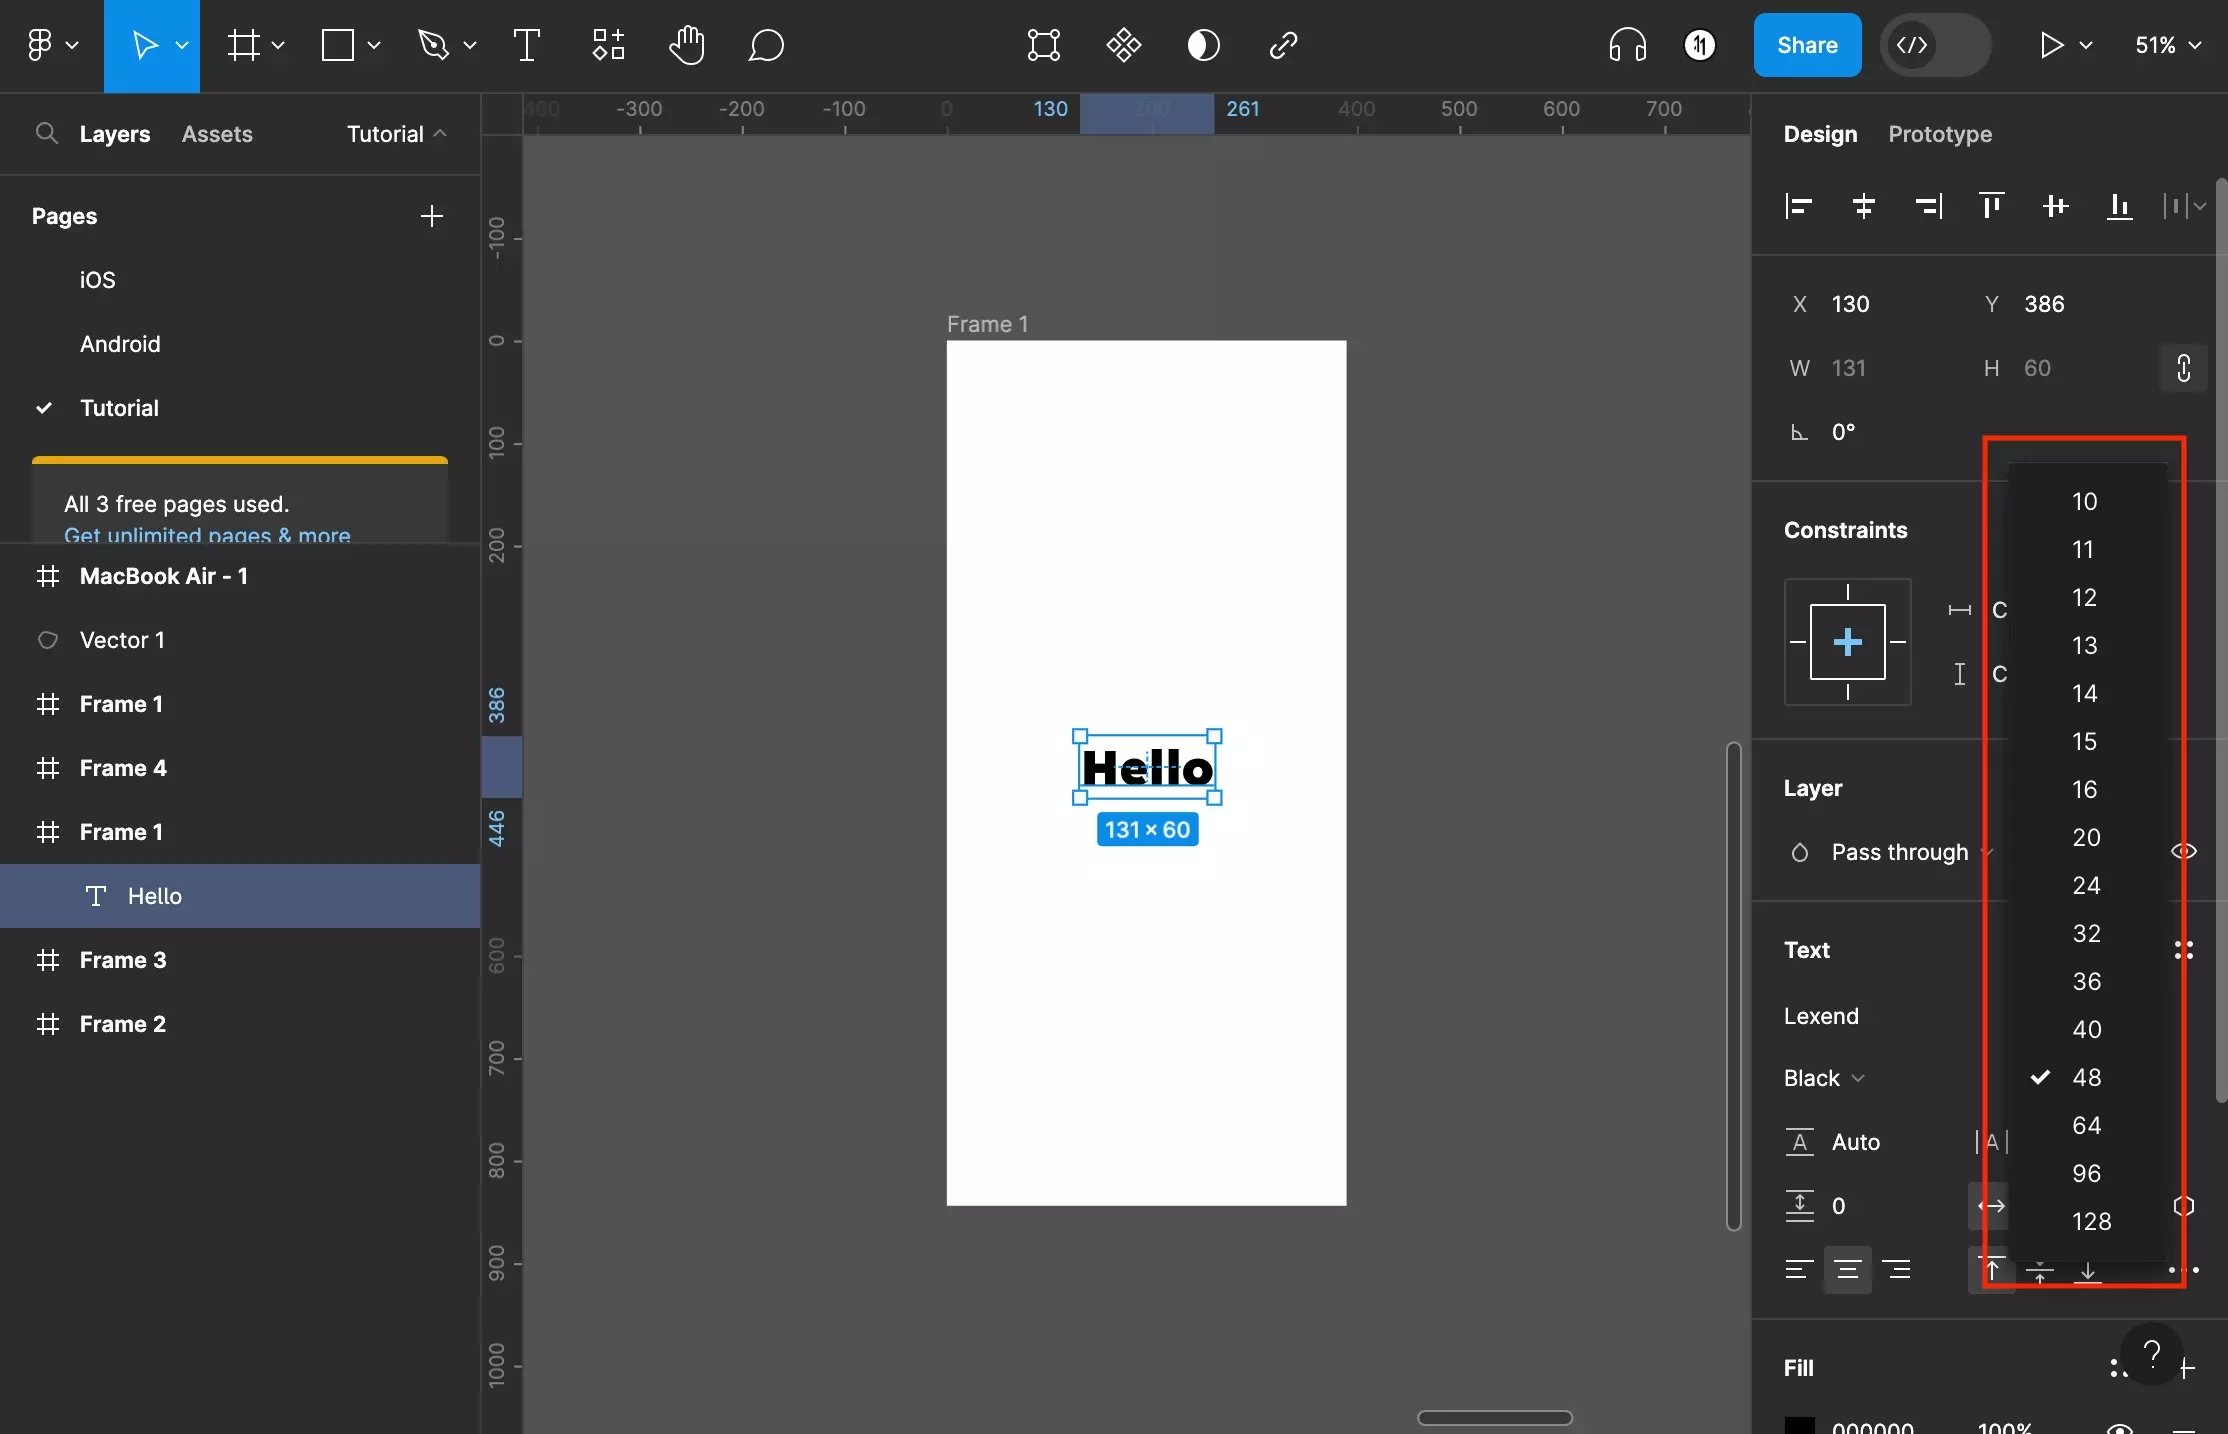
Step Four: Change the Font Size

A screenshot of Figma that shows you a frame with text on it.  We have highlighted the font size input that appears to the right of the font input. Click and enter a number in this input to change the dropdown. Alternatively, press the caret to open a dropdown with standard font size options.

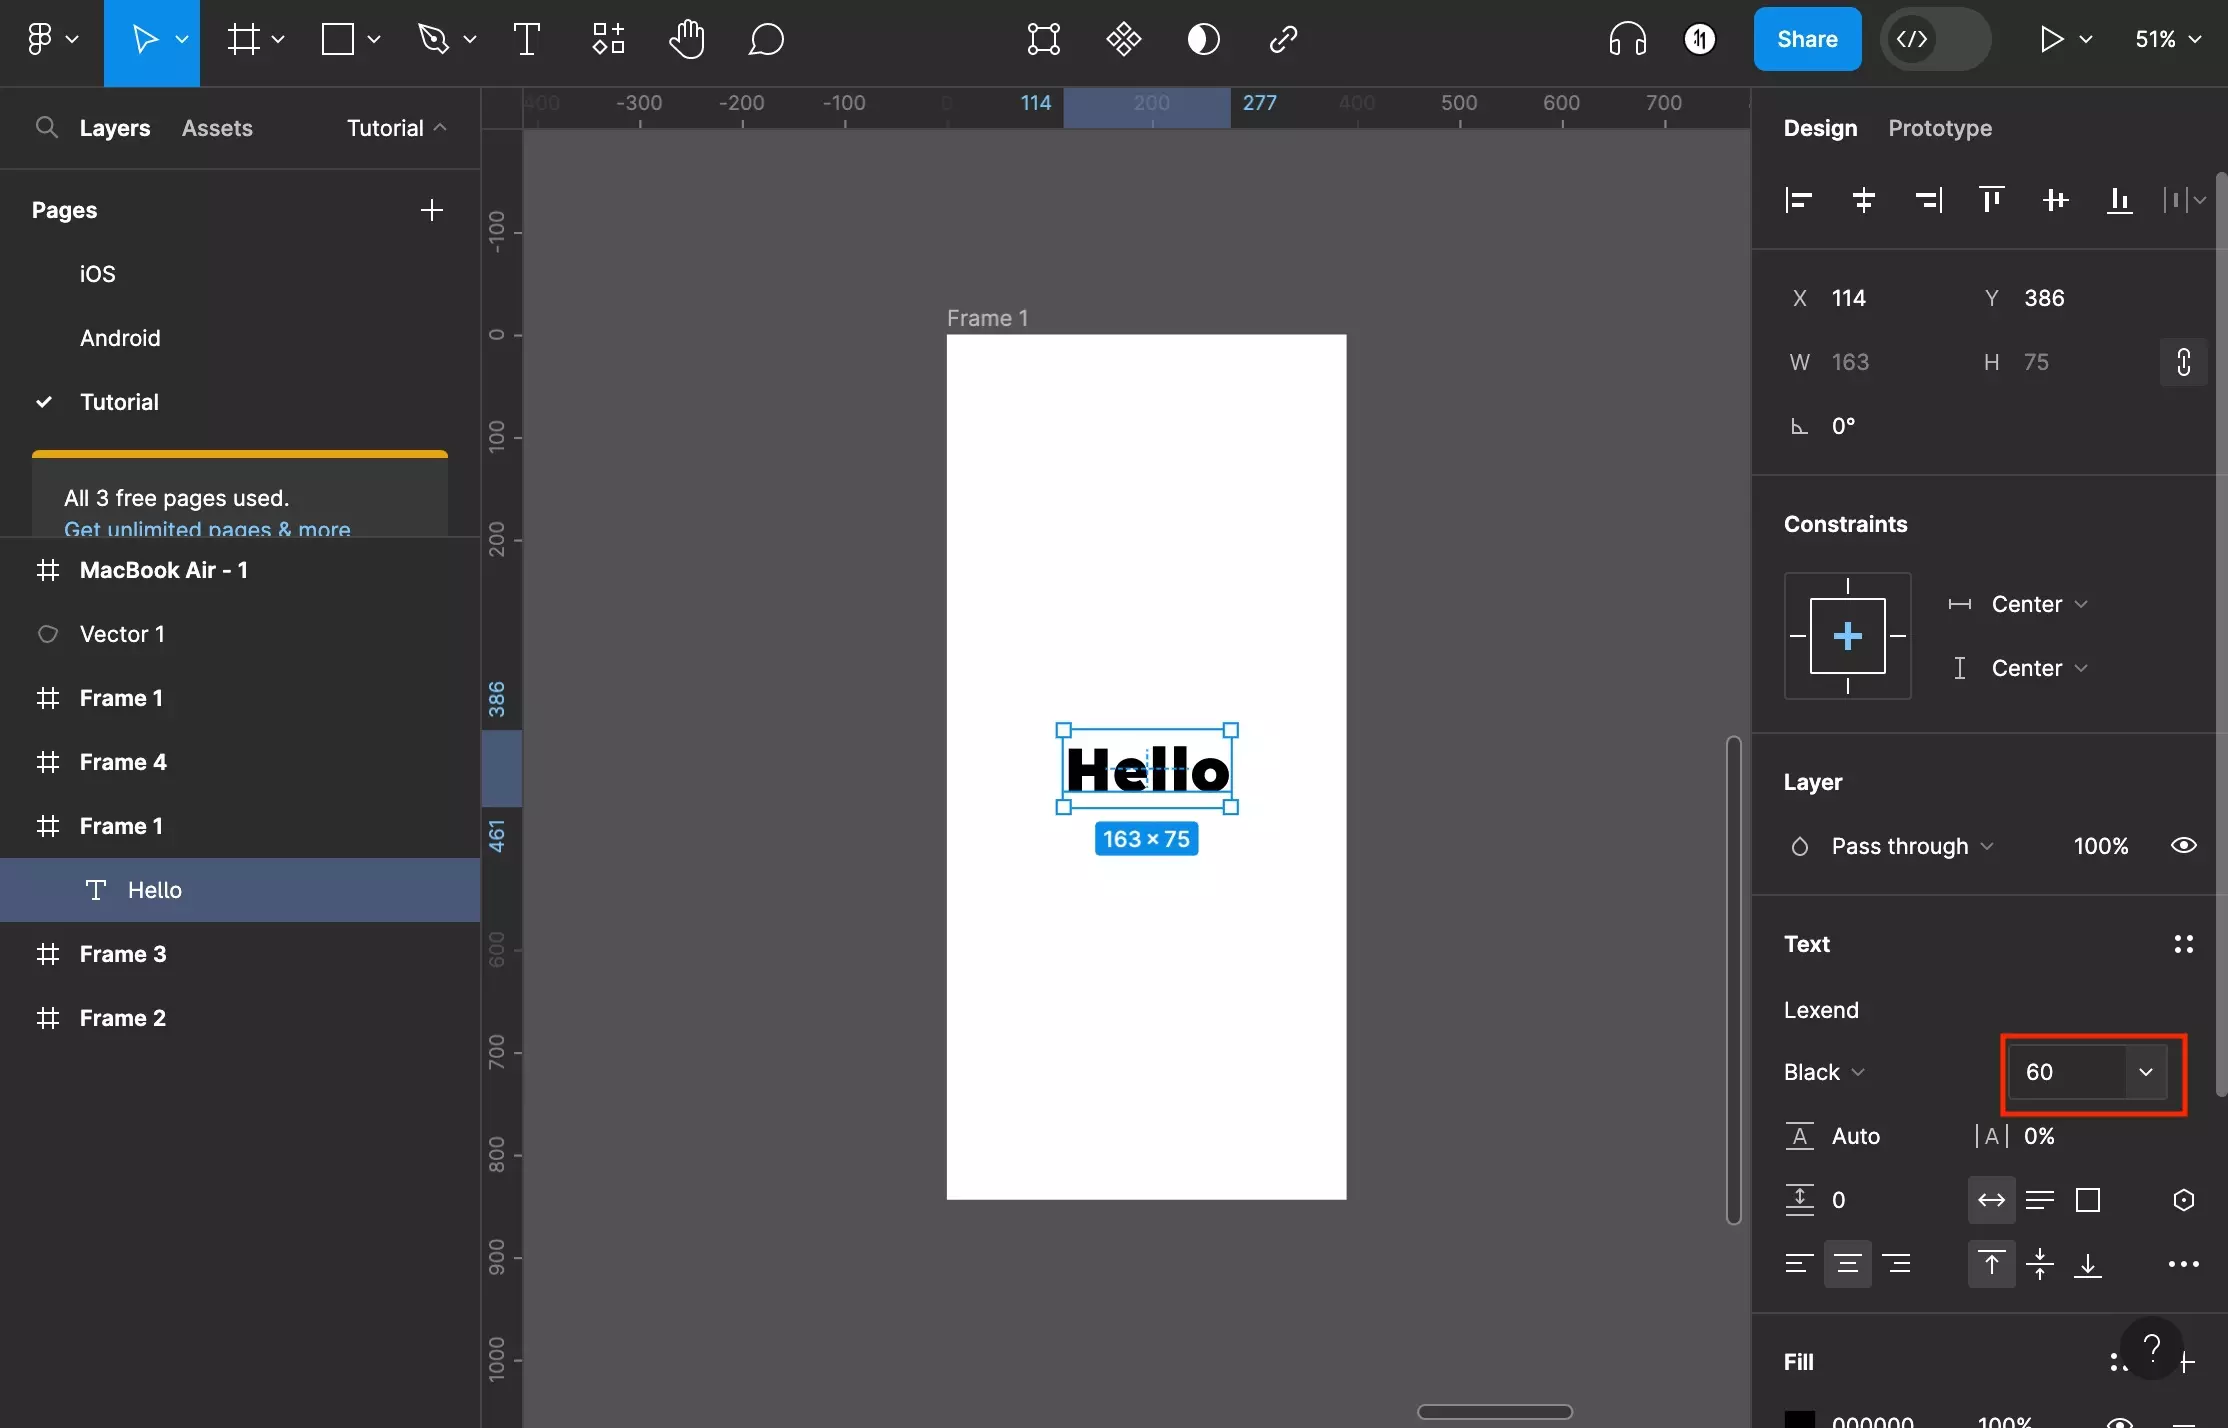
To change the font size, change the number in the input to the right of the Font selector.

If you wish to choose from standard font sizes, click the caret next to the number to open a dropdown from which you can select a standard size.

A screenshot of Figma that shows you a frame with text on it.  The standard font size dropdown is open and demonstrates the values that are available.

Step Five: Apply Basic Settings

A screenshot of Figma that shows you a frame with text on it.  We have highlighted the area below the Typeface and font size. In this area you can customize the text’s Line Height, Letter Spacing, Paragraph Spacing, Text Alignment or Text Positioning.

To apply basic type settings such as Line Height, Letter Spacing, Paragraph Spacing, Text Alignment or Text Positioning use the inputs and buttons found below the typeface and font size.

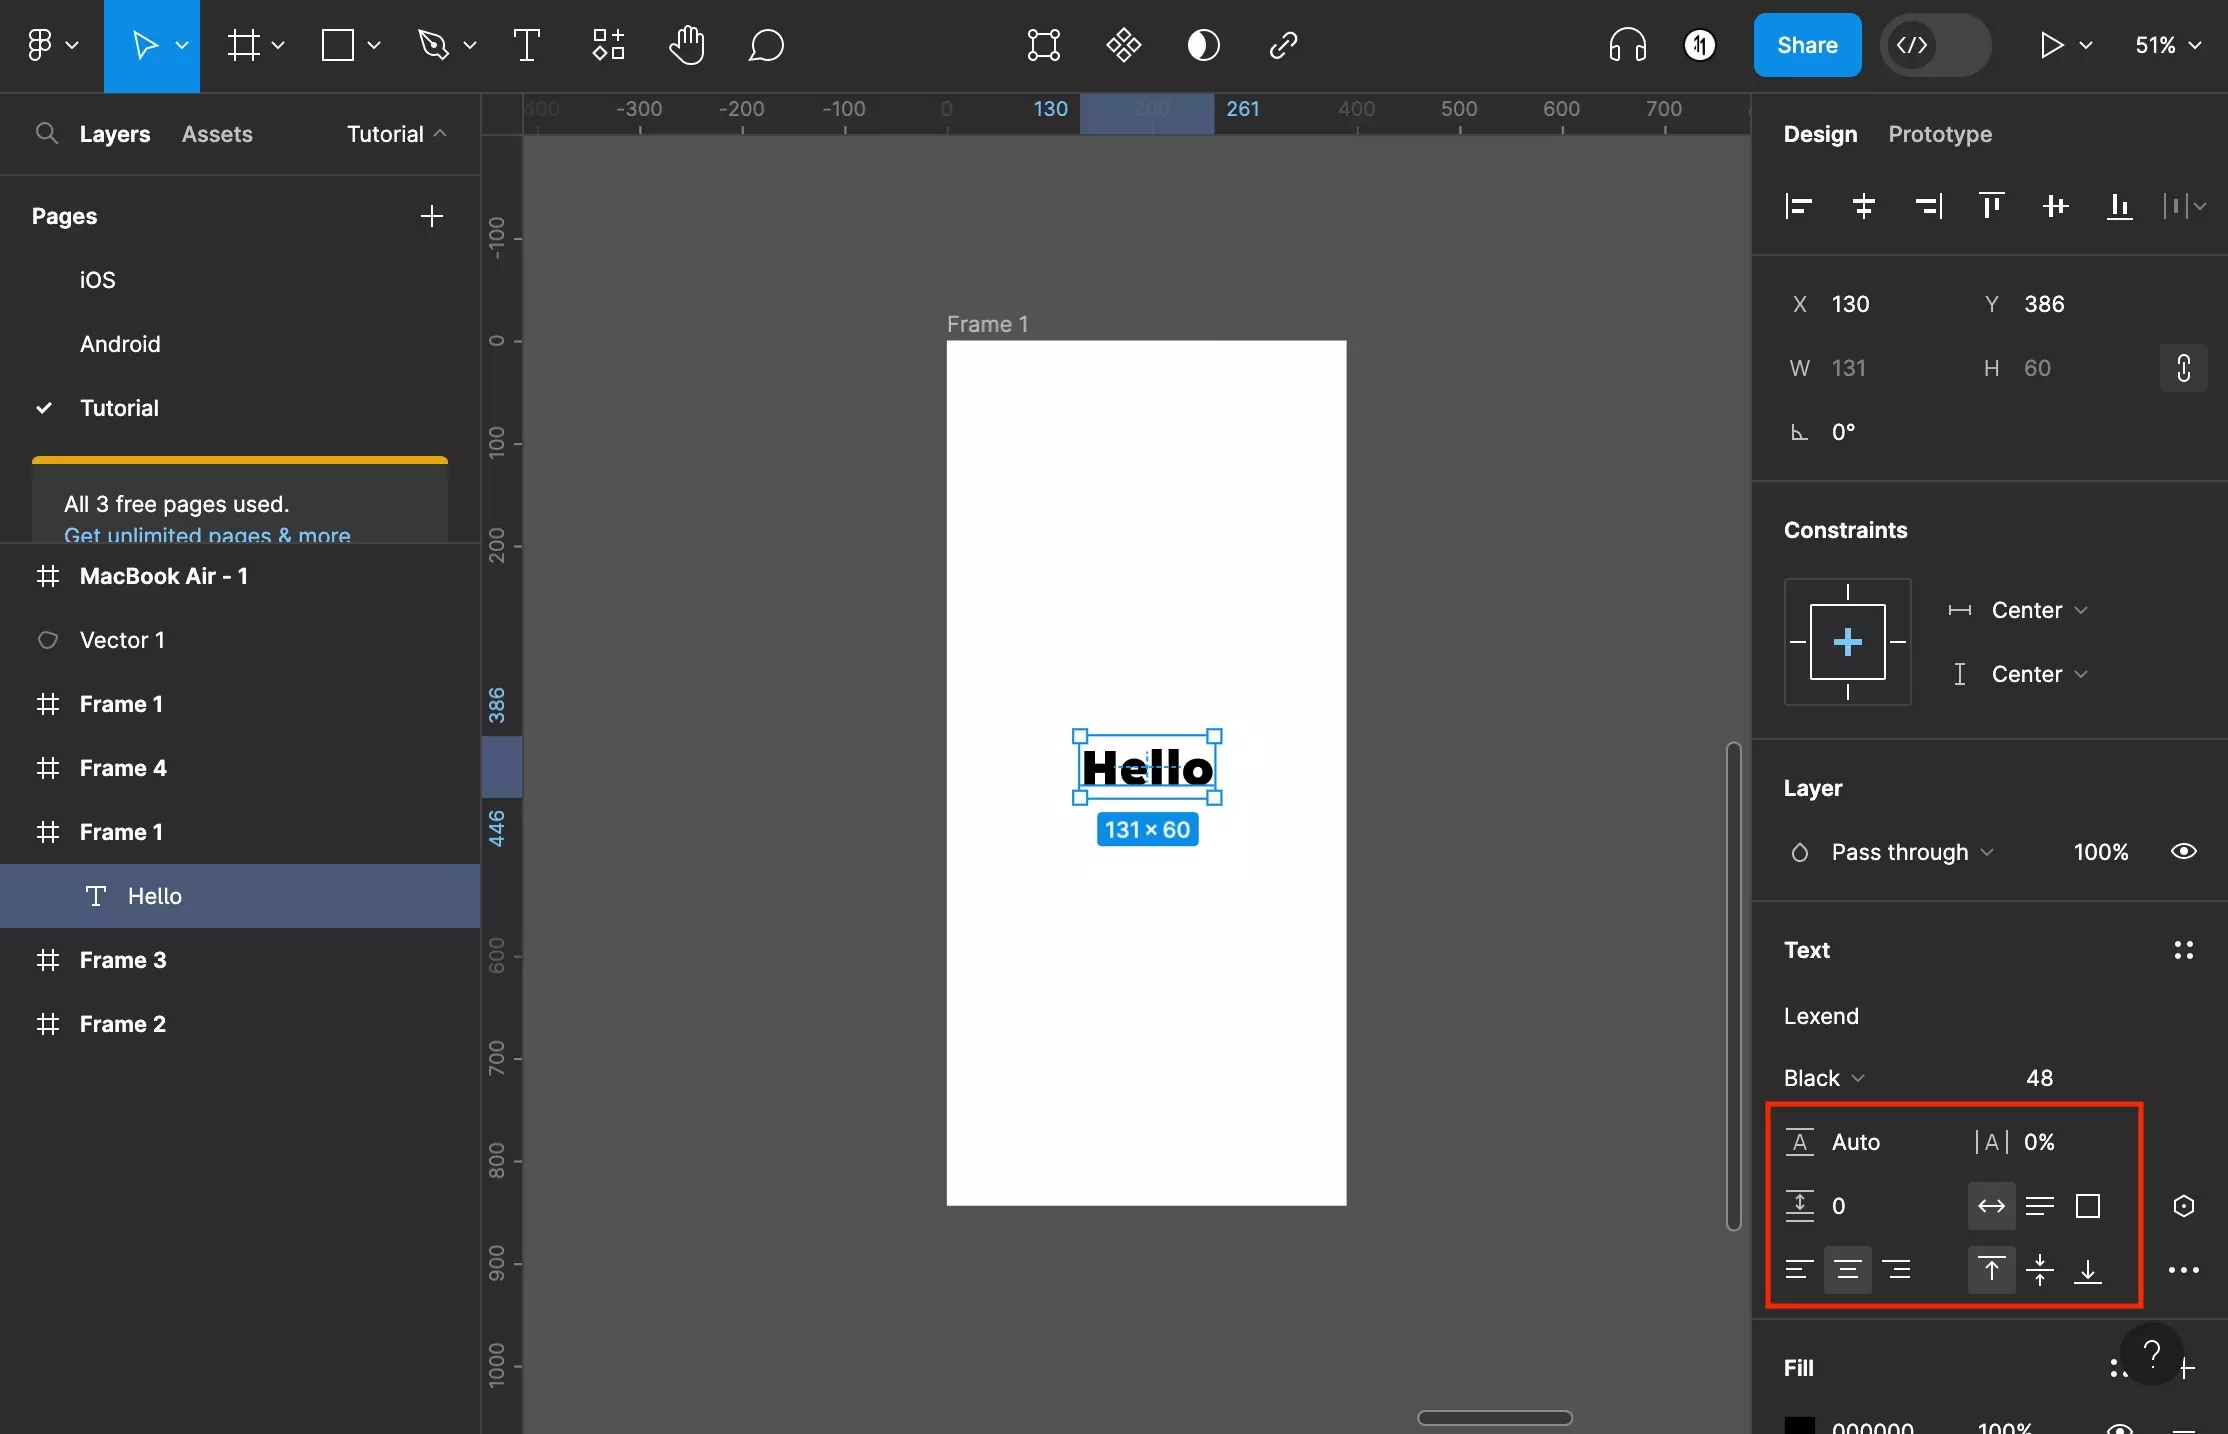
Step Six: Advanced Type Settings

A screenshot of Figma that shows you a frame with text on it.  We have highlighted the three dots that appear at the bottom right of the text section. If you click these three drops it will open the Type Settings window that allows you apply advanced settings to the text through three tabs: Basic, Details and Variable. The Basic tab is on display. Here you can change How text resizes (Auto Width, Auto Height or Fixed Size), Modify the text alignment, Set the text decoration (None, Underline or Strikethrough), Set the case (As typed, Uppercased, Lowercased, Title Case and Small Caps), Set the vertical trim (Standard or Cap Height to Baseline), Set the List Style (No List, Bulleted List, Numbered List), Set the Paragraph Spacing and Truncate the Text (No Truncation, Truncate Text).

To open the advanced type settings press the three dots at the bottom right of the Text section.

This will open up a Type Settings window set to the Basics tab.

In the Basics tab you will be able to:

  • How text resizes (Auto Width, Auto Height or Fixed Size).
  • Modify the text alignment.
  • Set the text decoration (None, Underline or Strikethrough).
  • Set the case (As typed, Uppercased, Lowercased, Title Case and Small Caps).
  • Set the vertical trim (Standard or Cap Height to Baseline).
  • Set the List Style (No List, Bulleted List, Numbered List).
  • Set the Paragraph Spacing.
  • Truncate the Text (No Truncation, Truncate Text).

<p>A screenshot of Figma that shows you a frame with text on it.  The Advanced Type Settings window is open with the Details tab selected. Here you can Set the indentation (Hanging Punctuation, Hanging Lists, Paragraph Indent), Set the letter case (As typed, Uppercased, Lowercased, Title Case and Small Caps), Allow or disallow case sensitive forms, Set the number position (Subscript, Normal, Superscript), Allow or disallow numbers to behave as fractions, Allow or disallow slashed zeros, Allow or disallow letterforms that include ligatures, rare ligatures or ordinals, Allow or disallow stylistic sets, Allow or disallow kerning pairs and Allow or disallow other features such as fraction denominators, fraction numerators or scientific inferiors.</p>
<p></p>

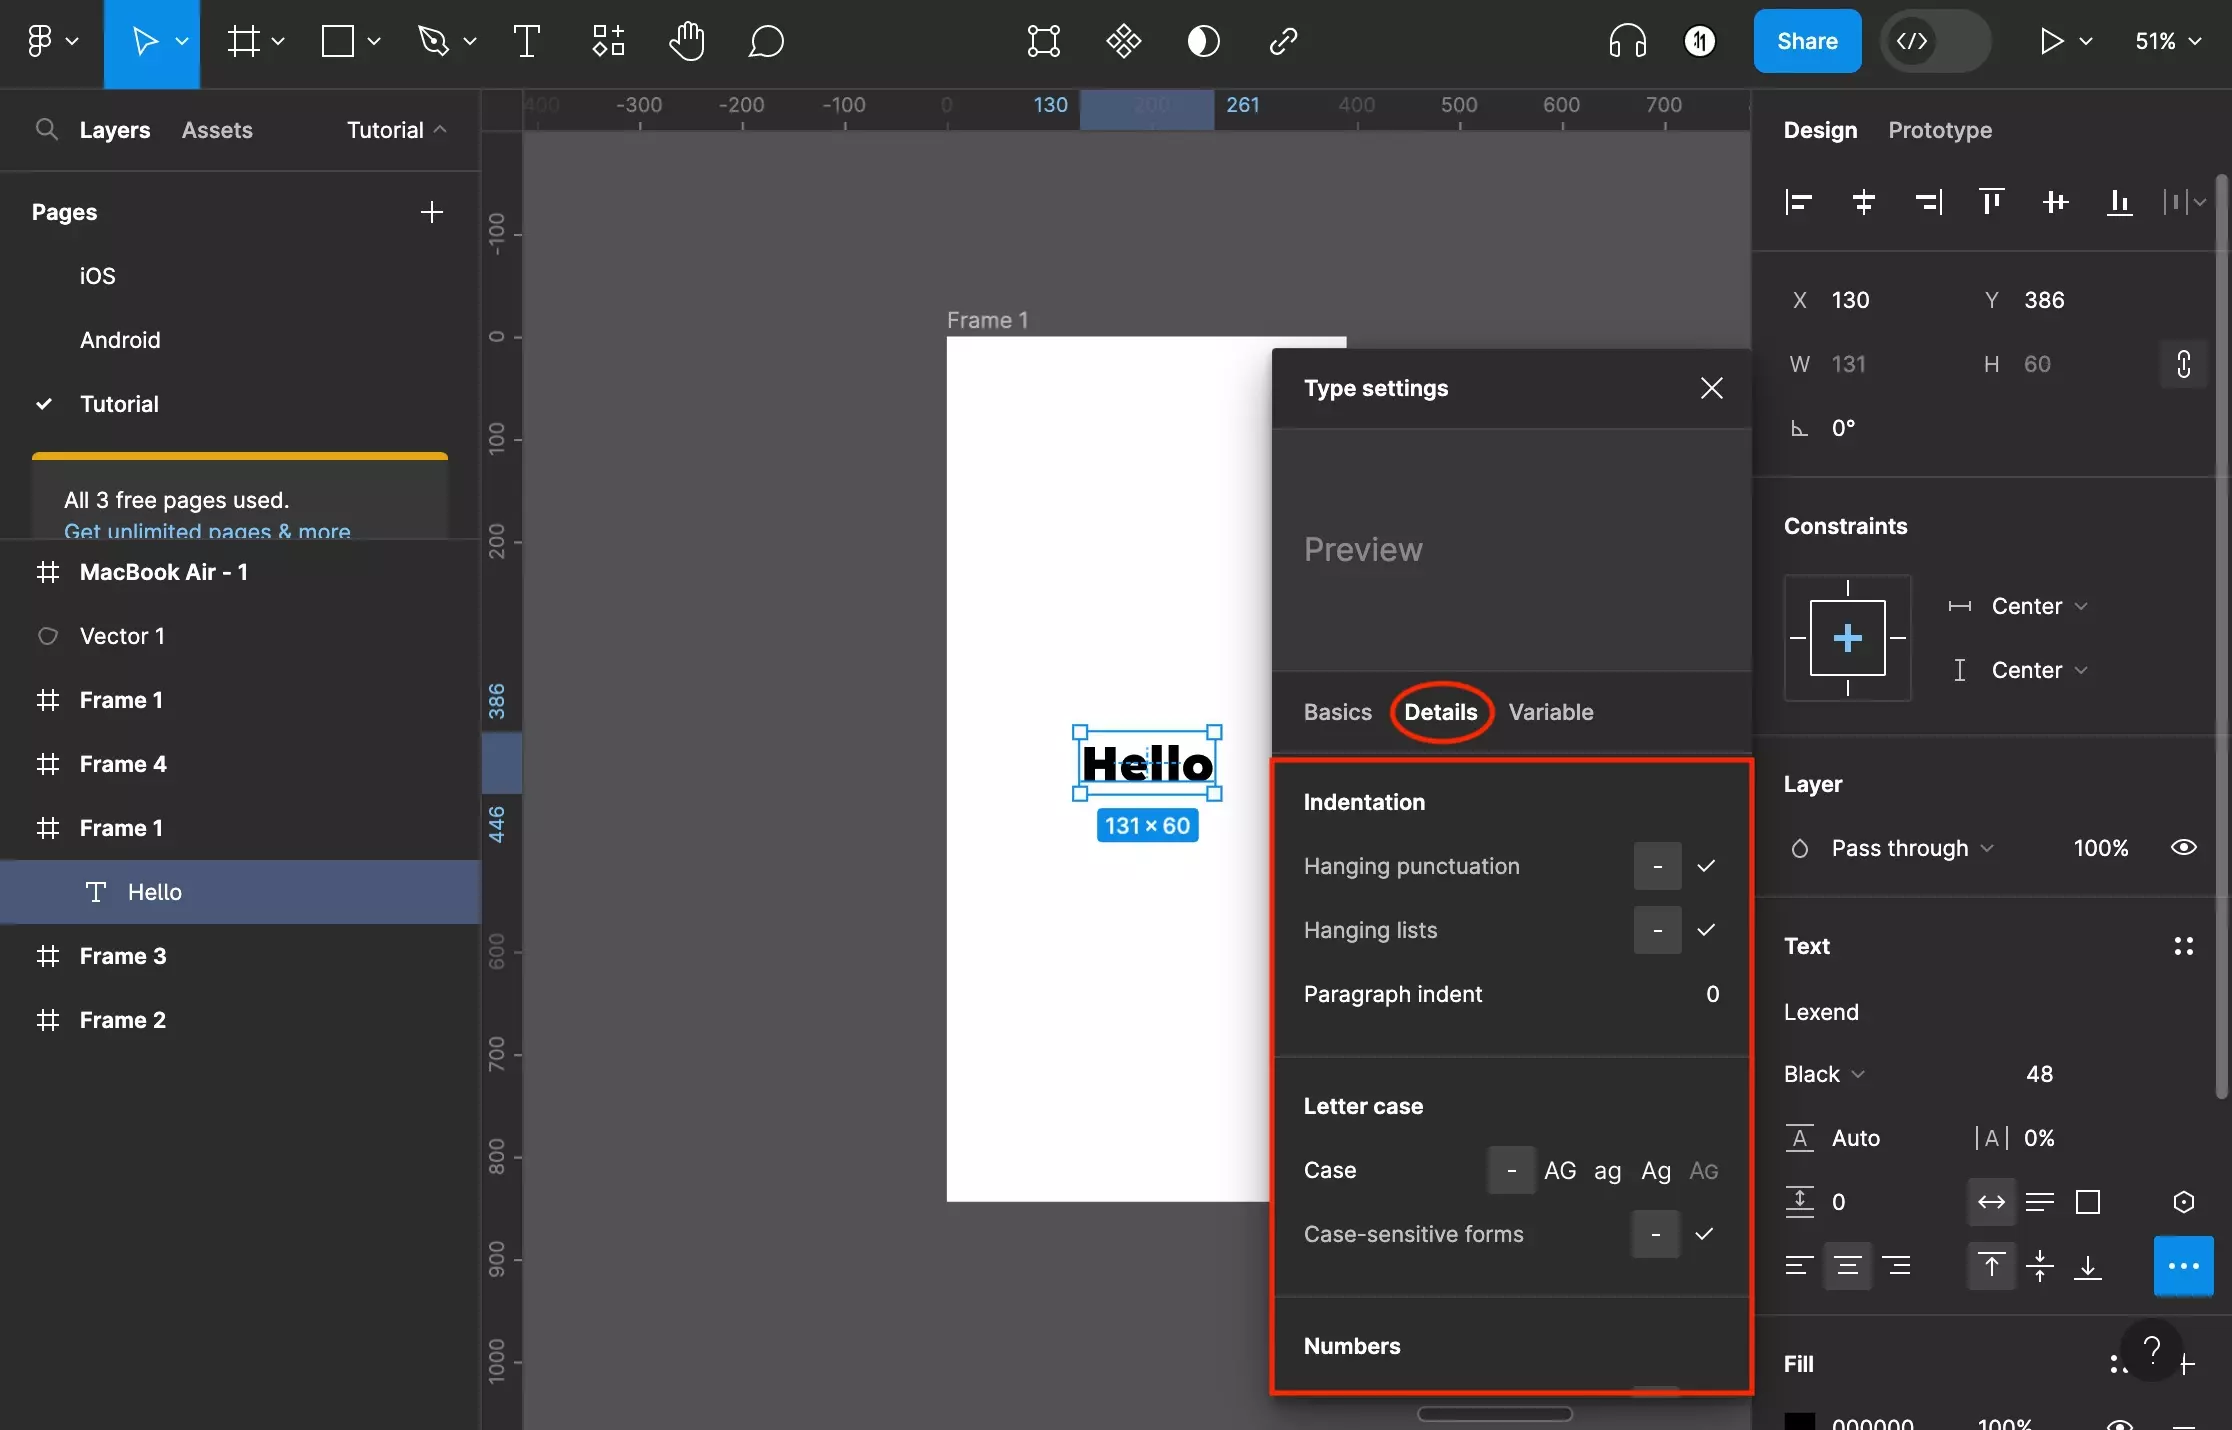
If you select the Details tab, you will be able to:

  • Set the indentation (Hanging Punctuation, Hanging Lists, Paragraph Indent).
  • Set the letter case (As typed, Uppercased, Lowercased, Title Case and Small Caps).
  • Allow or disallow case sensitive forms.
  • Set the number position (Subscript, Normal, Superscript).
  • Allow or disallow numbers to behave as fractions.
  • Allow or disallow slashed zeros.
  • Allow or disallow letterforms that include ligatures, rare ligatures or ordinals.
  • Allow or disallow stylistic sets.
  • Allow or disallow kerning pairs.
  • Allow or disallow other features such as fraction denominators, fraction numerators or scientific inferiors.
A screenshot of Figma that shows you a frame with text on it.  The Advanced Type Settings window is open with the Variable tab selected where you can adapt the font via the parameters available for the Typeface. This tab will only be available if the Typeface is a variable font.

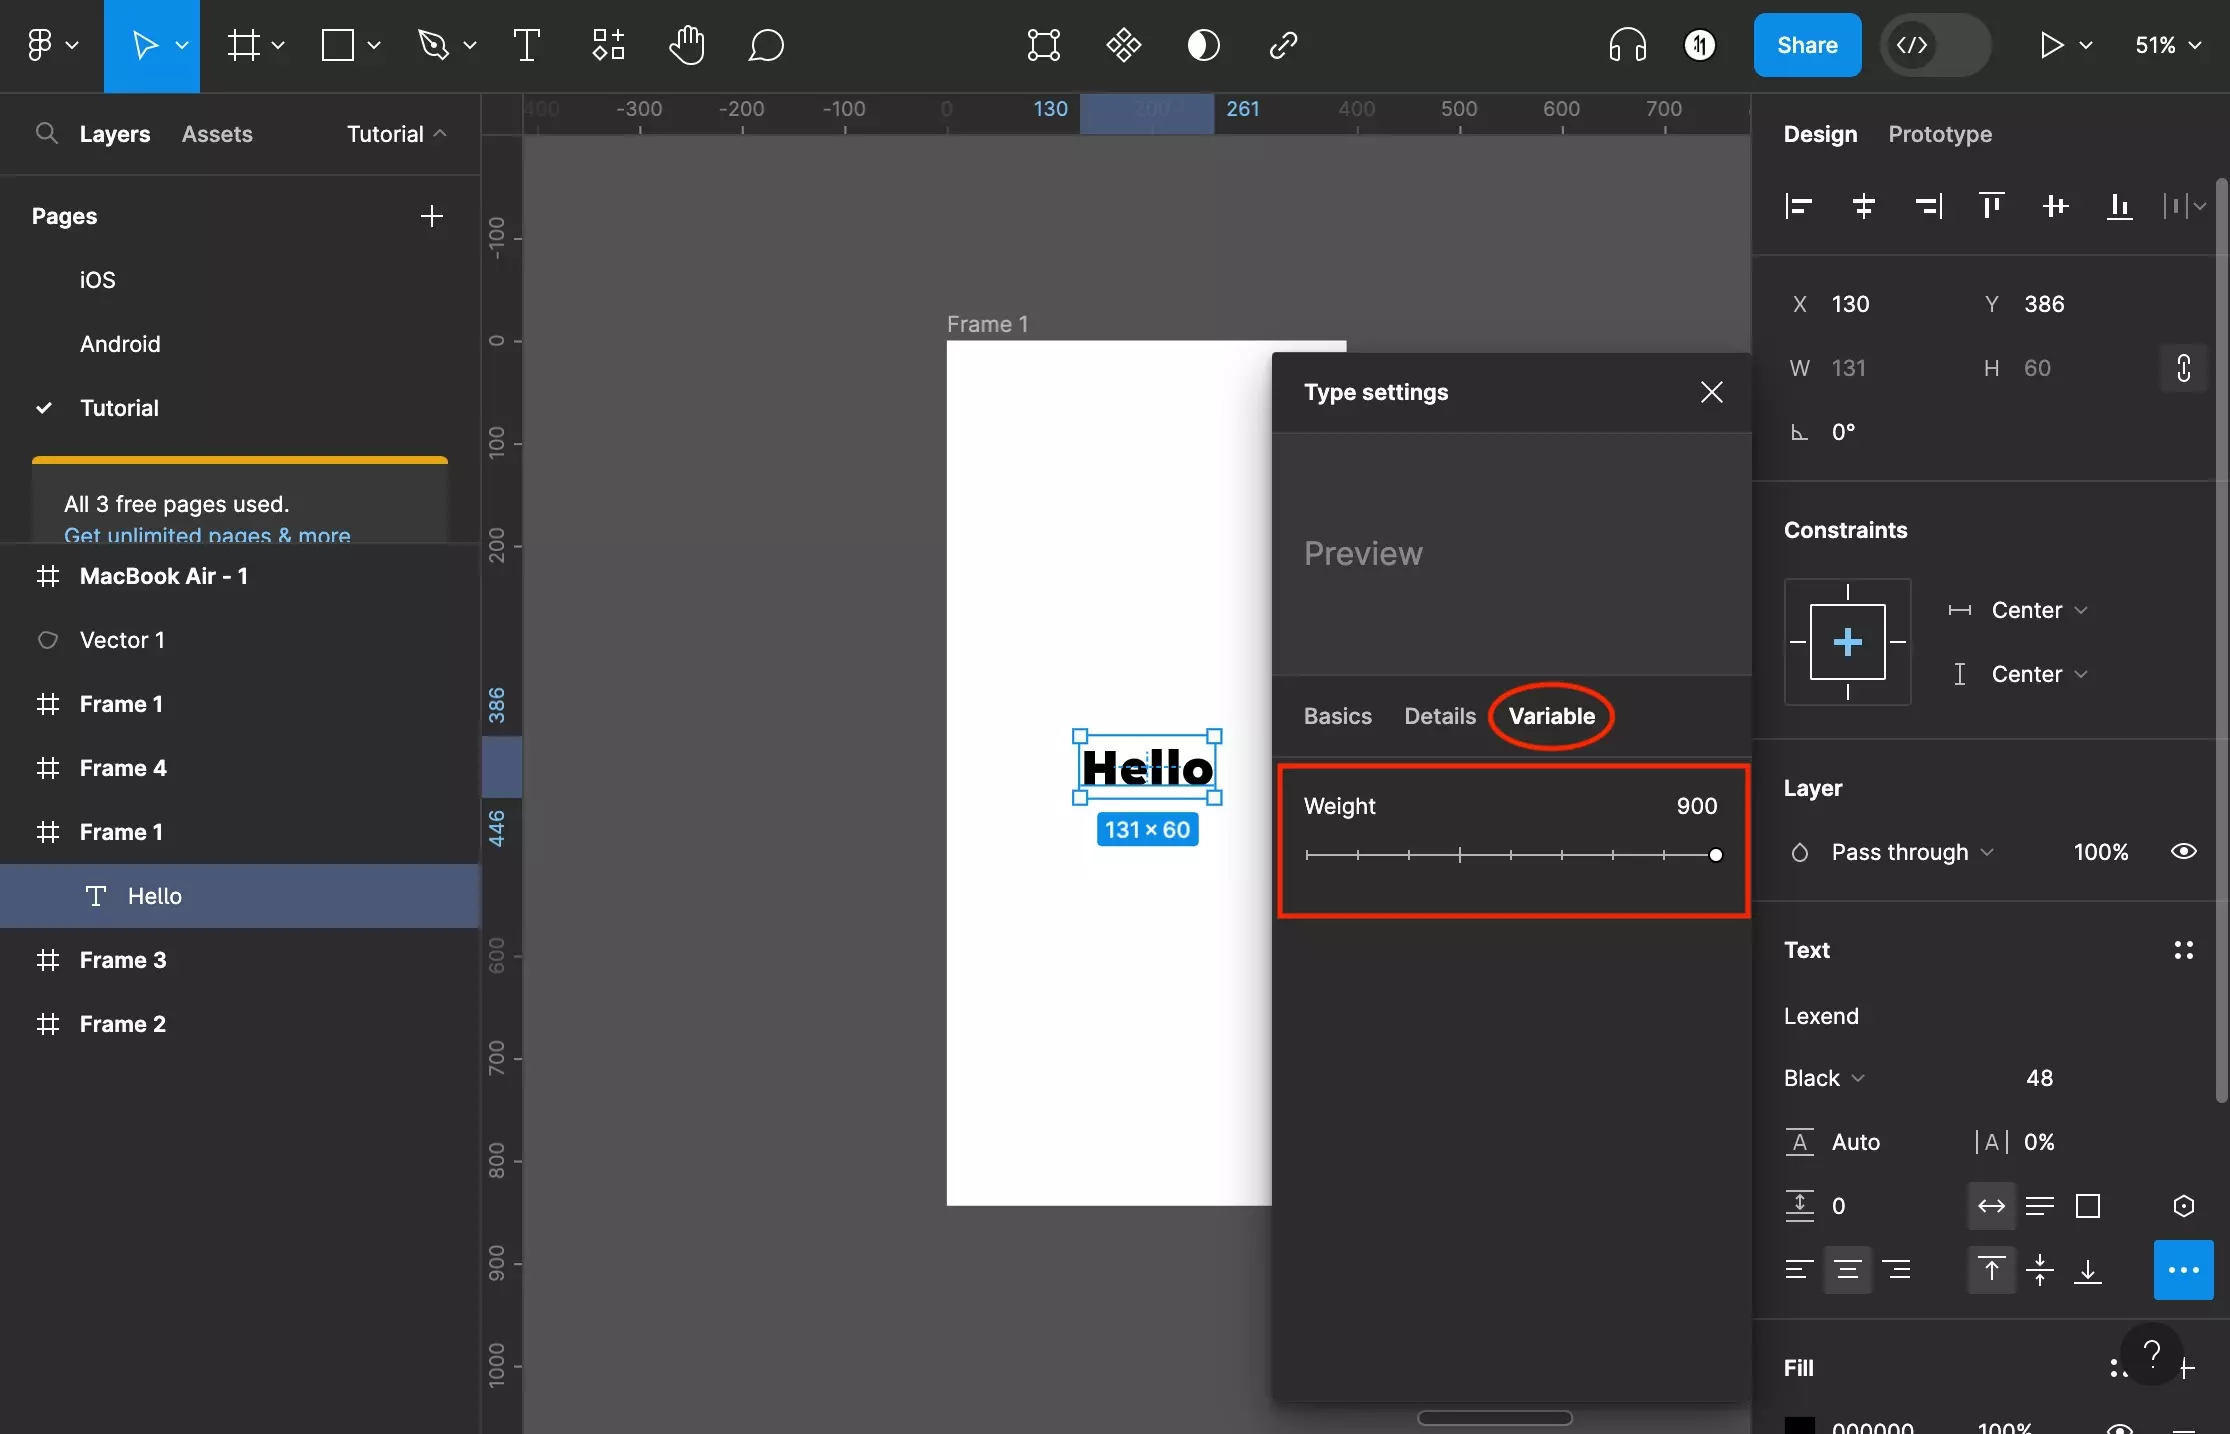
Finally, if you have chosen a variable font, you will be able to set any relevant variable font settings in the Variable tab.

Step Seven: Change the Text Color

A screenshot of Figma that shows you a frame with text on it.  The colored box in the Fill section has been highlighted. If you click this box you can open the color menu that allows you deeper customization. If you just wish to apply a hex color, enter the hex in the input to the right of the colored box.

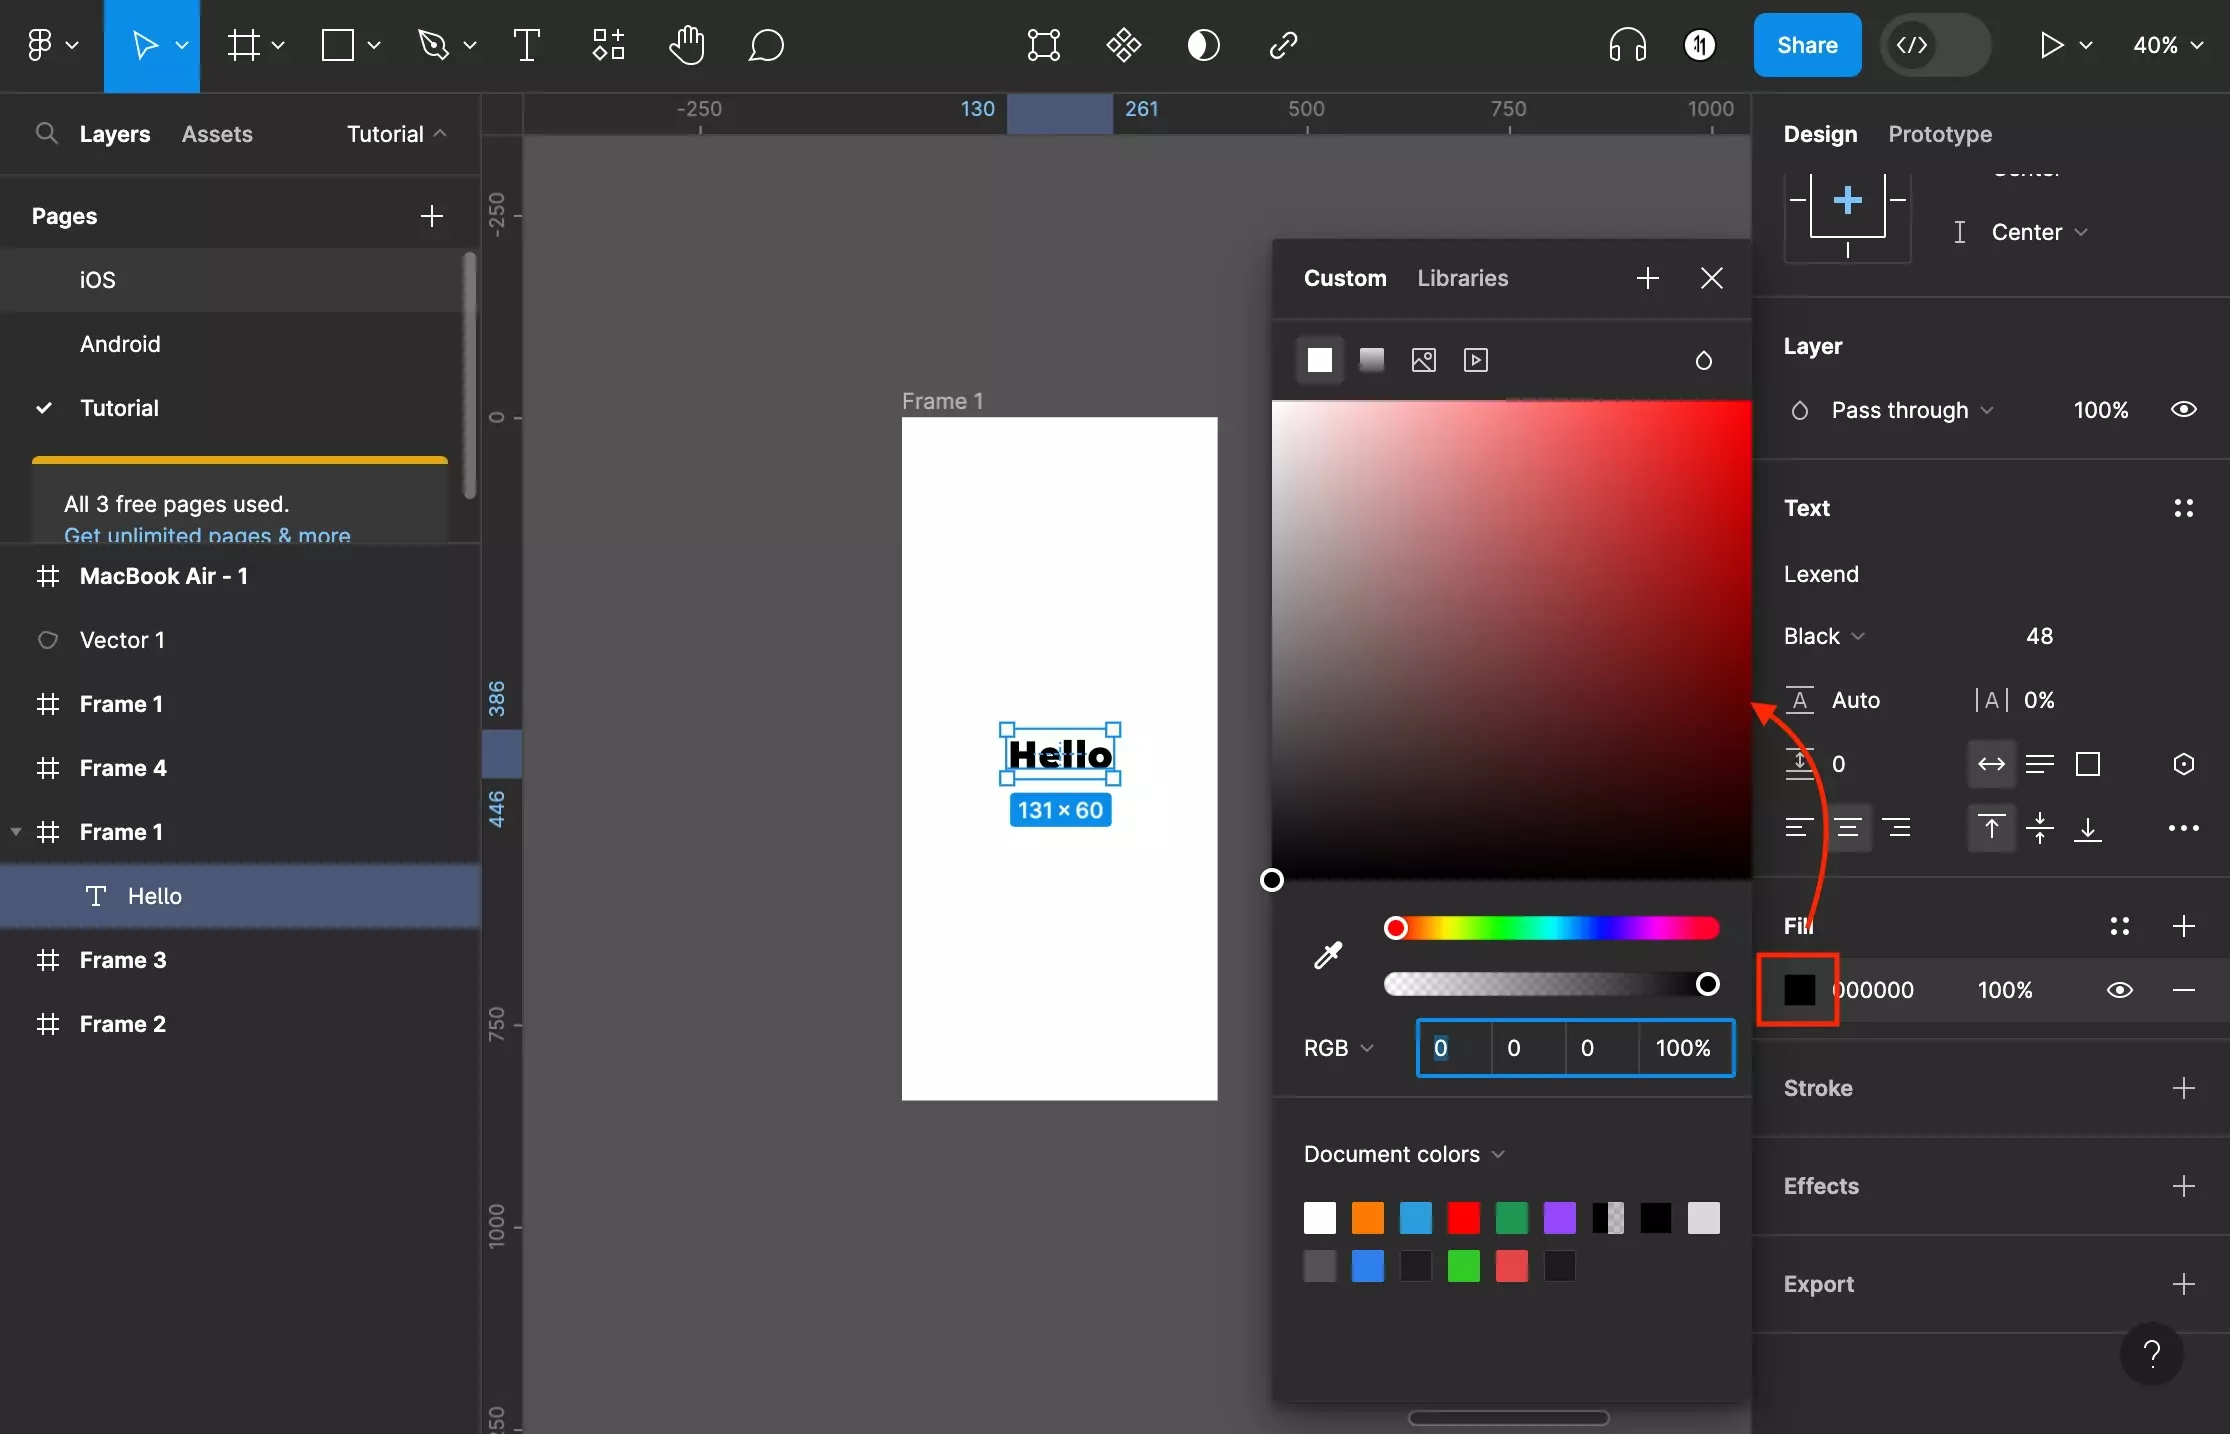
To alter the text color, change the Fill color in the section beneath Text.

Changing the text color to a solid color, gradient or image is very similar to changing a frame or shapes background, to learn more about what you can do follow the tutorials below.

Step Eight: Outline the Text

A screenshot of Figma that shows you a frame with text on it.  The colored box in the Stroke section has been highlighted. If you click this box you can open the color menu that allows you deeper customization. If you just wish to apply a hex color, enter the hex in the input to the right of the colored box.

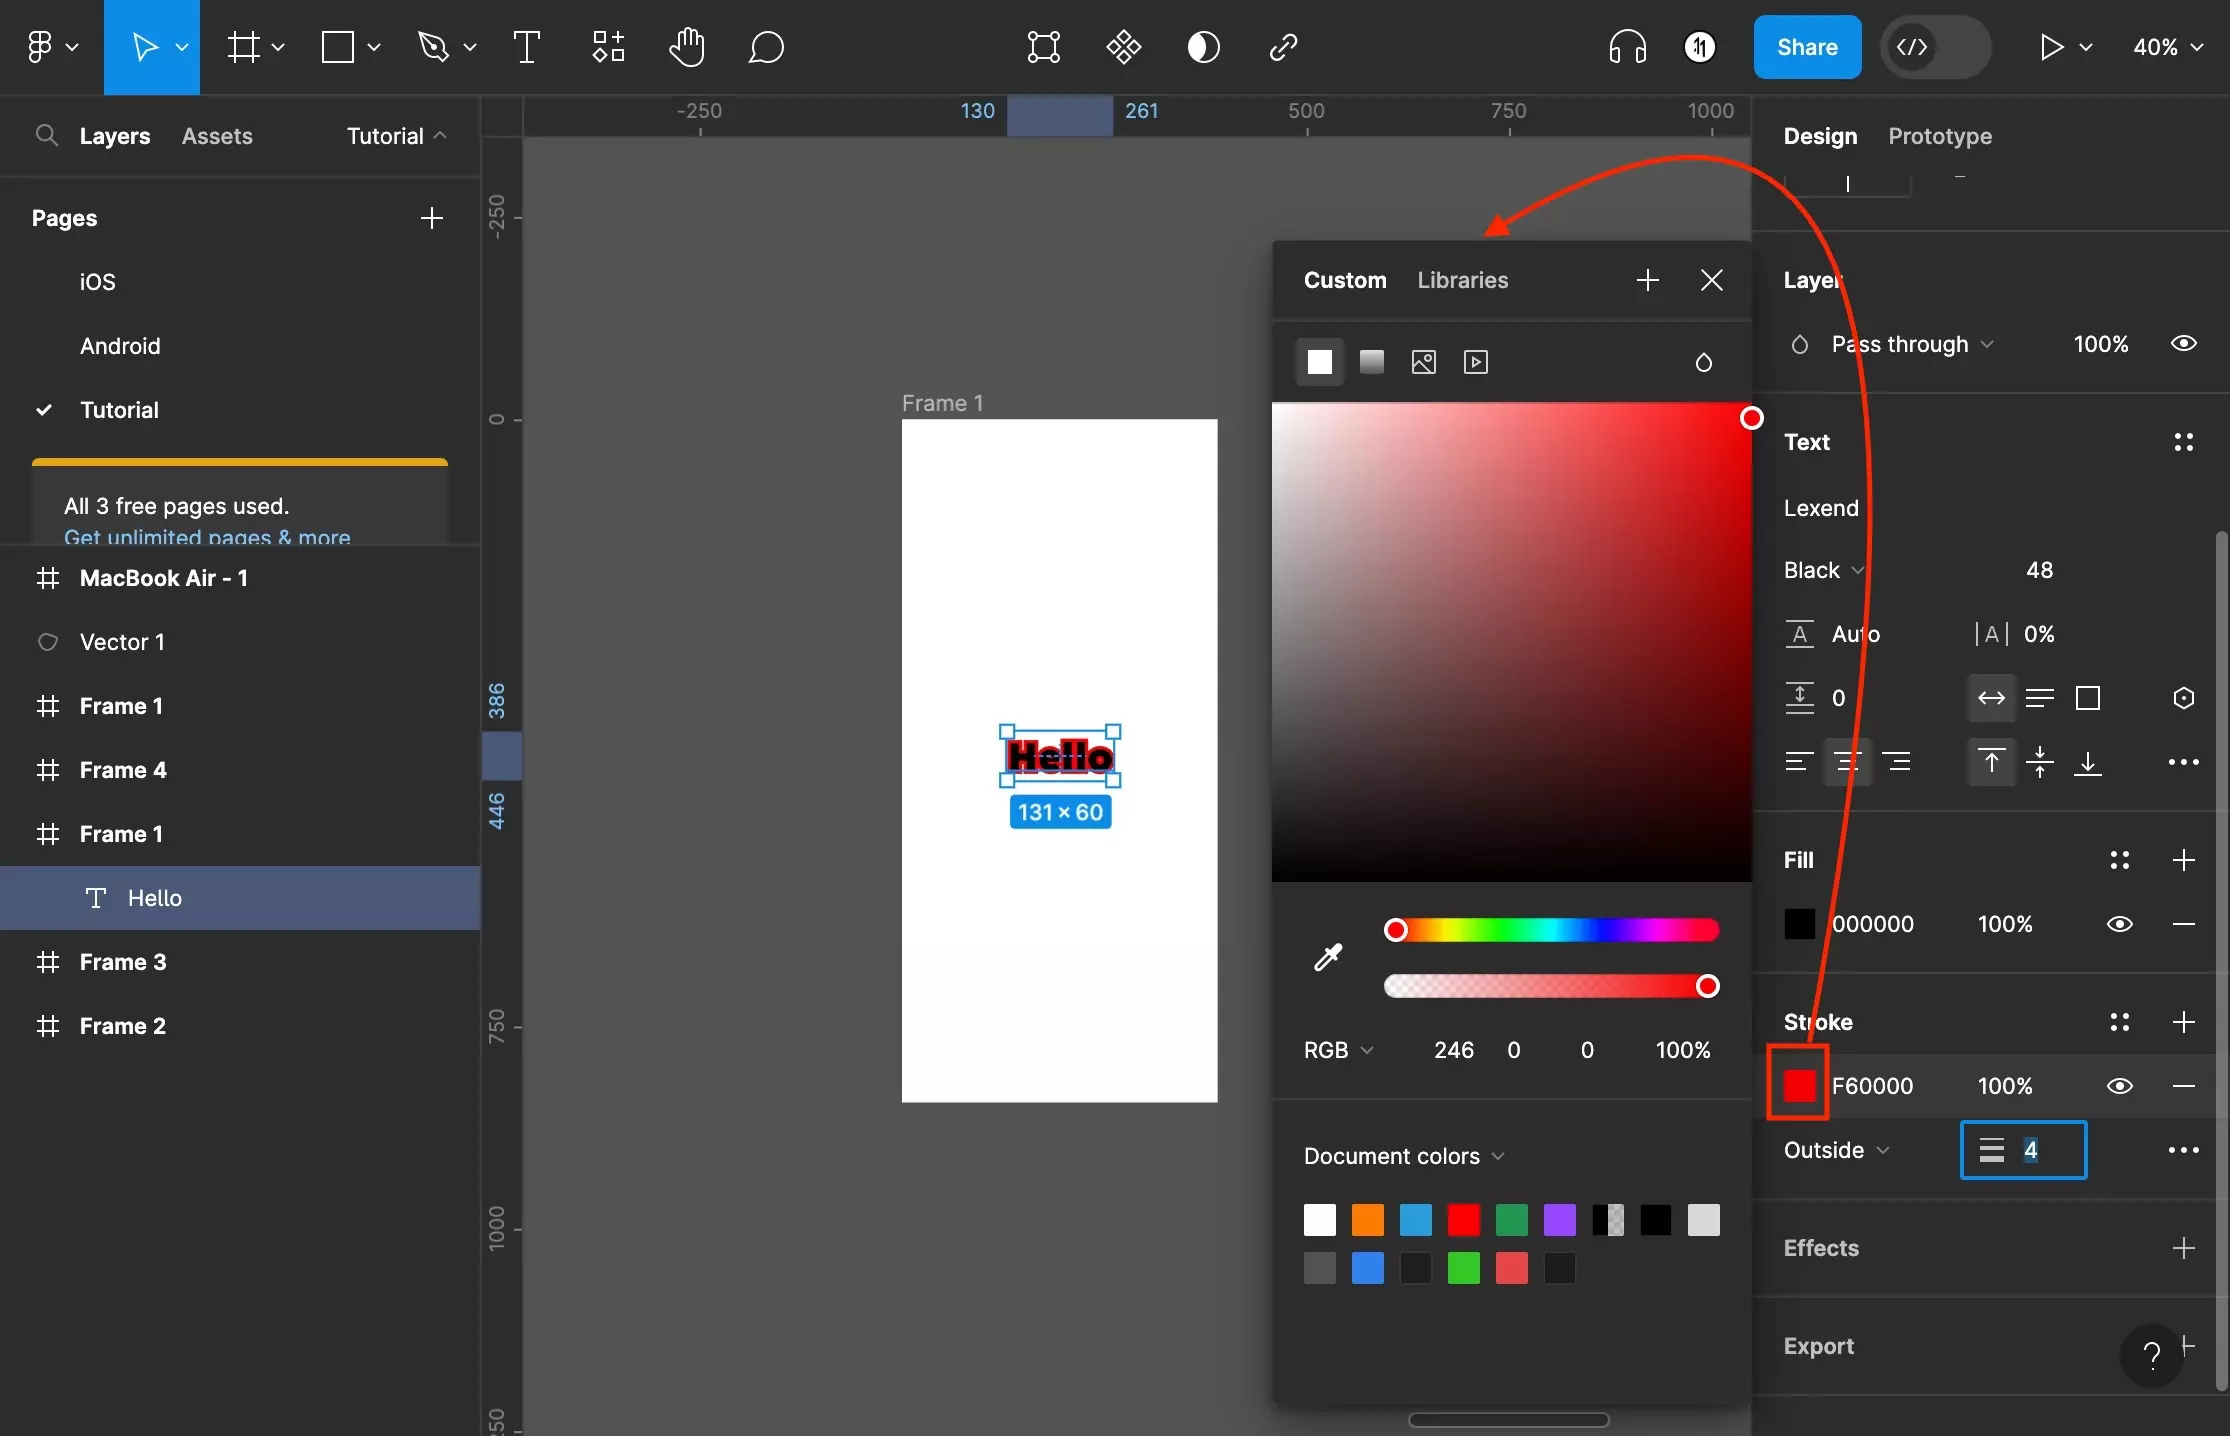
To add a an outline to the text press the + next to Stroke on the right menu side bar.

To learn more about customizing strokes follow the tutorial below.

Step Nine: Add an Effect

A screenshot of Figma that shows you a frame with text on it.  The text has a shadow which was added by pressing the + under the “Effects” section on the right menu side bar.

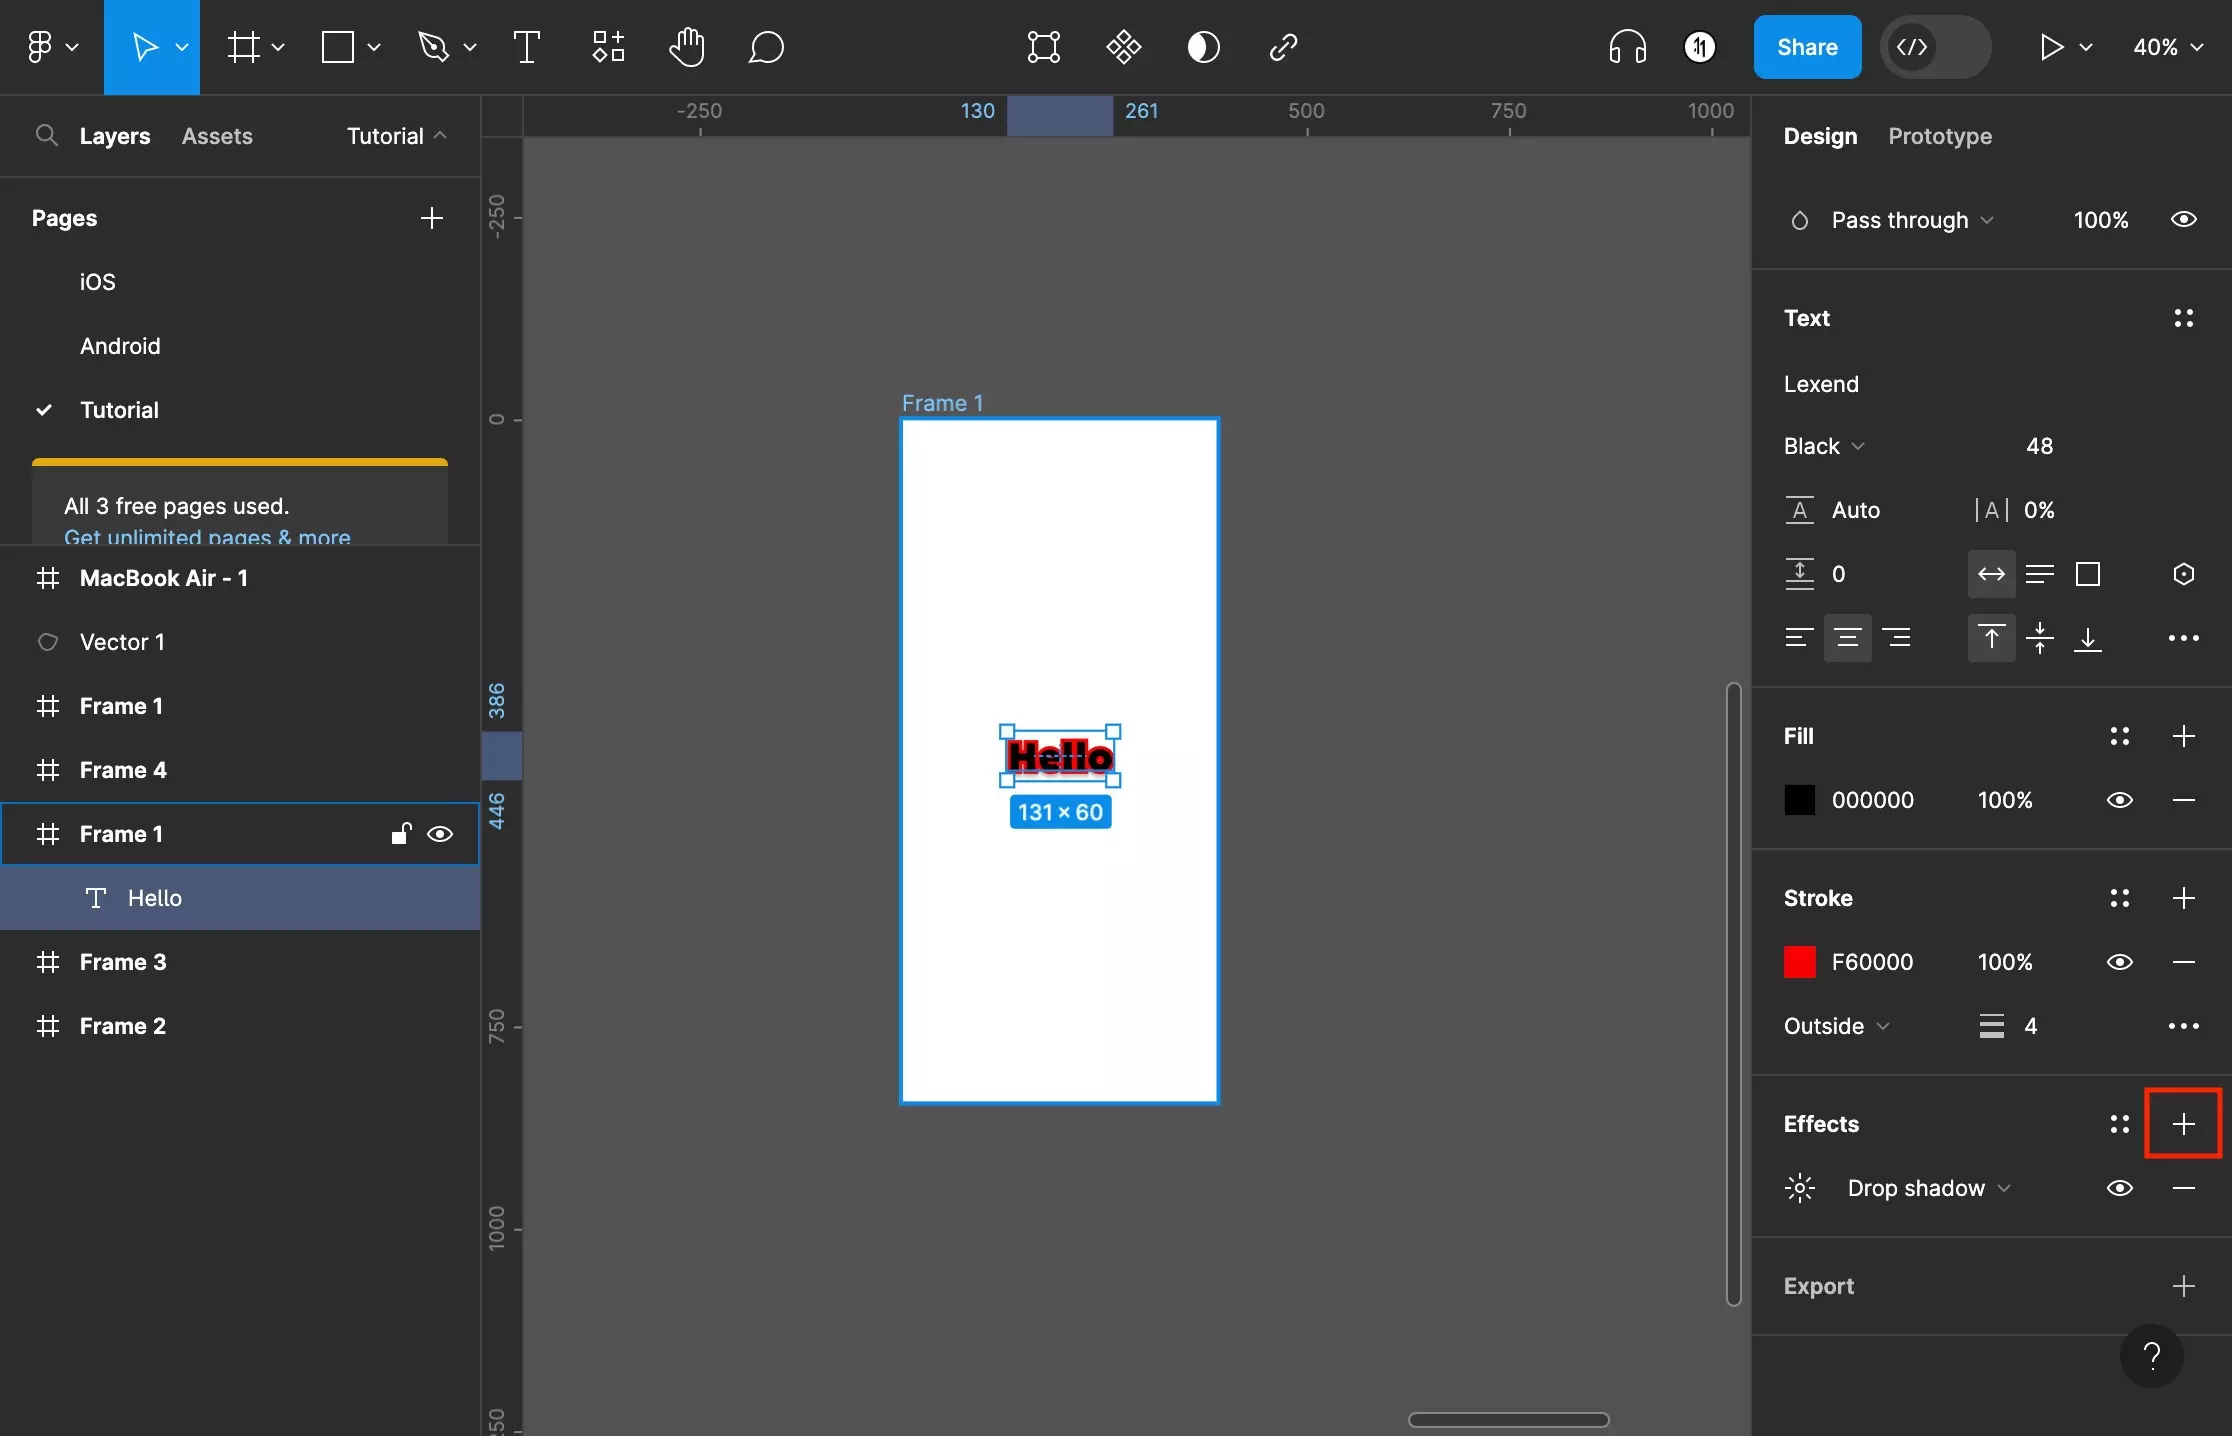
To add a stroke press the + next to Effects on the right menu side bar.

To learn more about customizing effects follow the tutorial below.

Looking to learn more about the basics behind styling frames, paths, shapes and text in Figma ?

Consult the list below to learn more about the basics behind styling text, shapes, paths and frames in Figma.

Any Questions?

We are actively looking for feedback on how to improve this resource. Please send us a note to inquiries@delasign.com with any thoughts or feedback you may have.
delasign logo

Book a Free Consultation.

An icon of an email.

Click here to email us.

Fill in the details below to book a free consultation or to let us know about something else. Whatever it is, we are here to help.

How can we help you ?

Contact Details