How to set the maximum number of lines for text in Figma
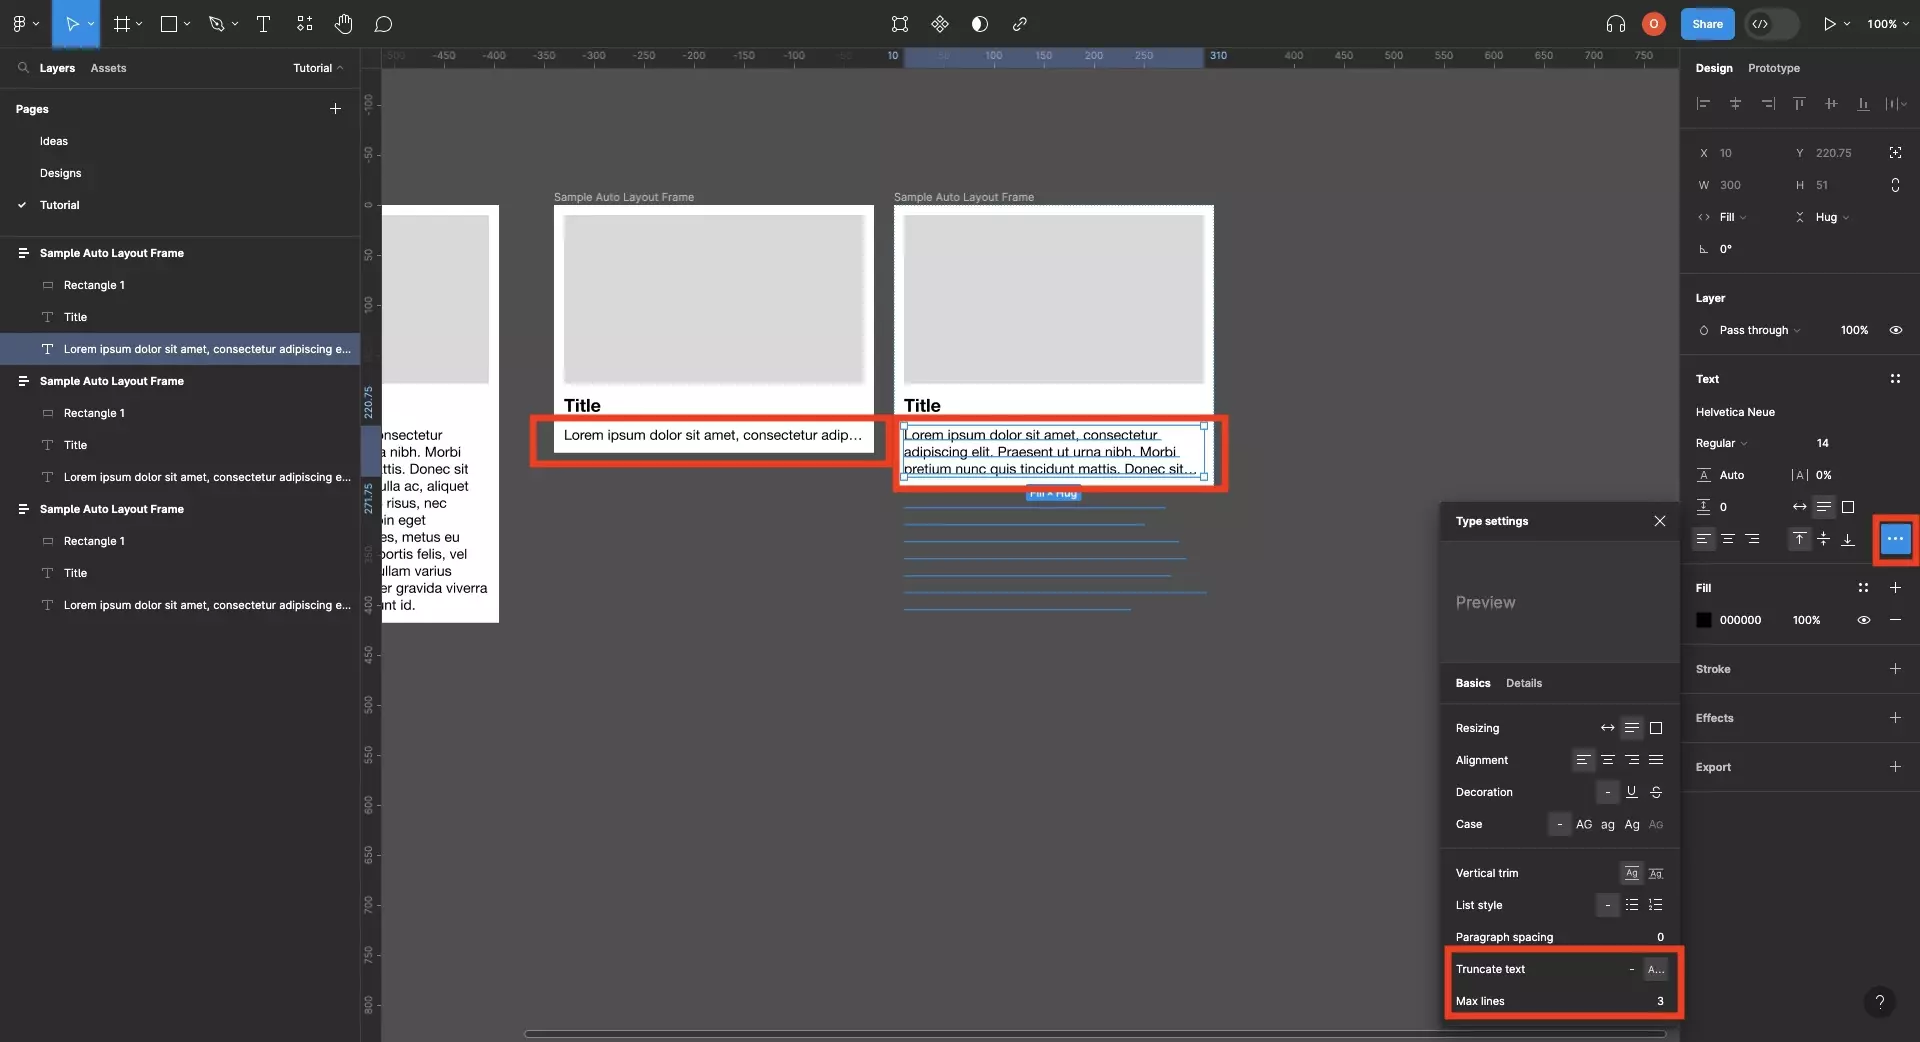
To set a line clamp, select a text element and open the type settings. Within the type settings window, change the truncate text option and max lines.
Written by Oscar de la Hera Gomez
First published on 09/24/2023 at 11:46
Last Updated on 09/24/2023 at 12:20

To set a line clamp, select a text element and open the type settings. Within the type settings window, change the truncate text option and max lines.
SubscribeHow to Style Text in FigmaPlease note that the max lines type settings menu option only appears if the truncate text is set "A...".

Looking to learn more about things you can do with Figma ?
Search our blog to find educational content on learning how to use Figma.
Any Questions?
We are actively looking for feedback on how to improve this resource. Please send us a note to inquiries@delasign.com with any thoughts or feedback you may have.
SubscribeContact UsVisit our BlogView our ServicesView our Work