How to create a Section in Figma
A step by step guide on creating a new section or converting an existing frame into a section.

A step by step guide on creating a new section or converting an existing frame into a section.
SubscribeCheck out our free mobile e-commerce Figma design fileWhat are Sections ?
"Sections let you:
- Designate areas of the canvas for collaboration or ideation
- Organize files for easier navigation
- Link to a grouping of designs
- Mark content as "Ready for development" to help with the developer handoff
Sections in Figma design are a top-level element on the canvas by default. Sections can contain all layer types, including other sections, but cannot be contained within frames or groups."
How to Create Sections
There are three ways to create a section
Option A | Create a new Section
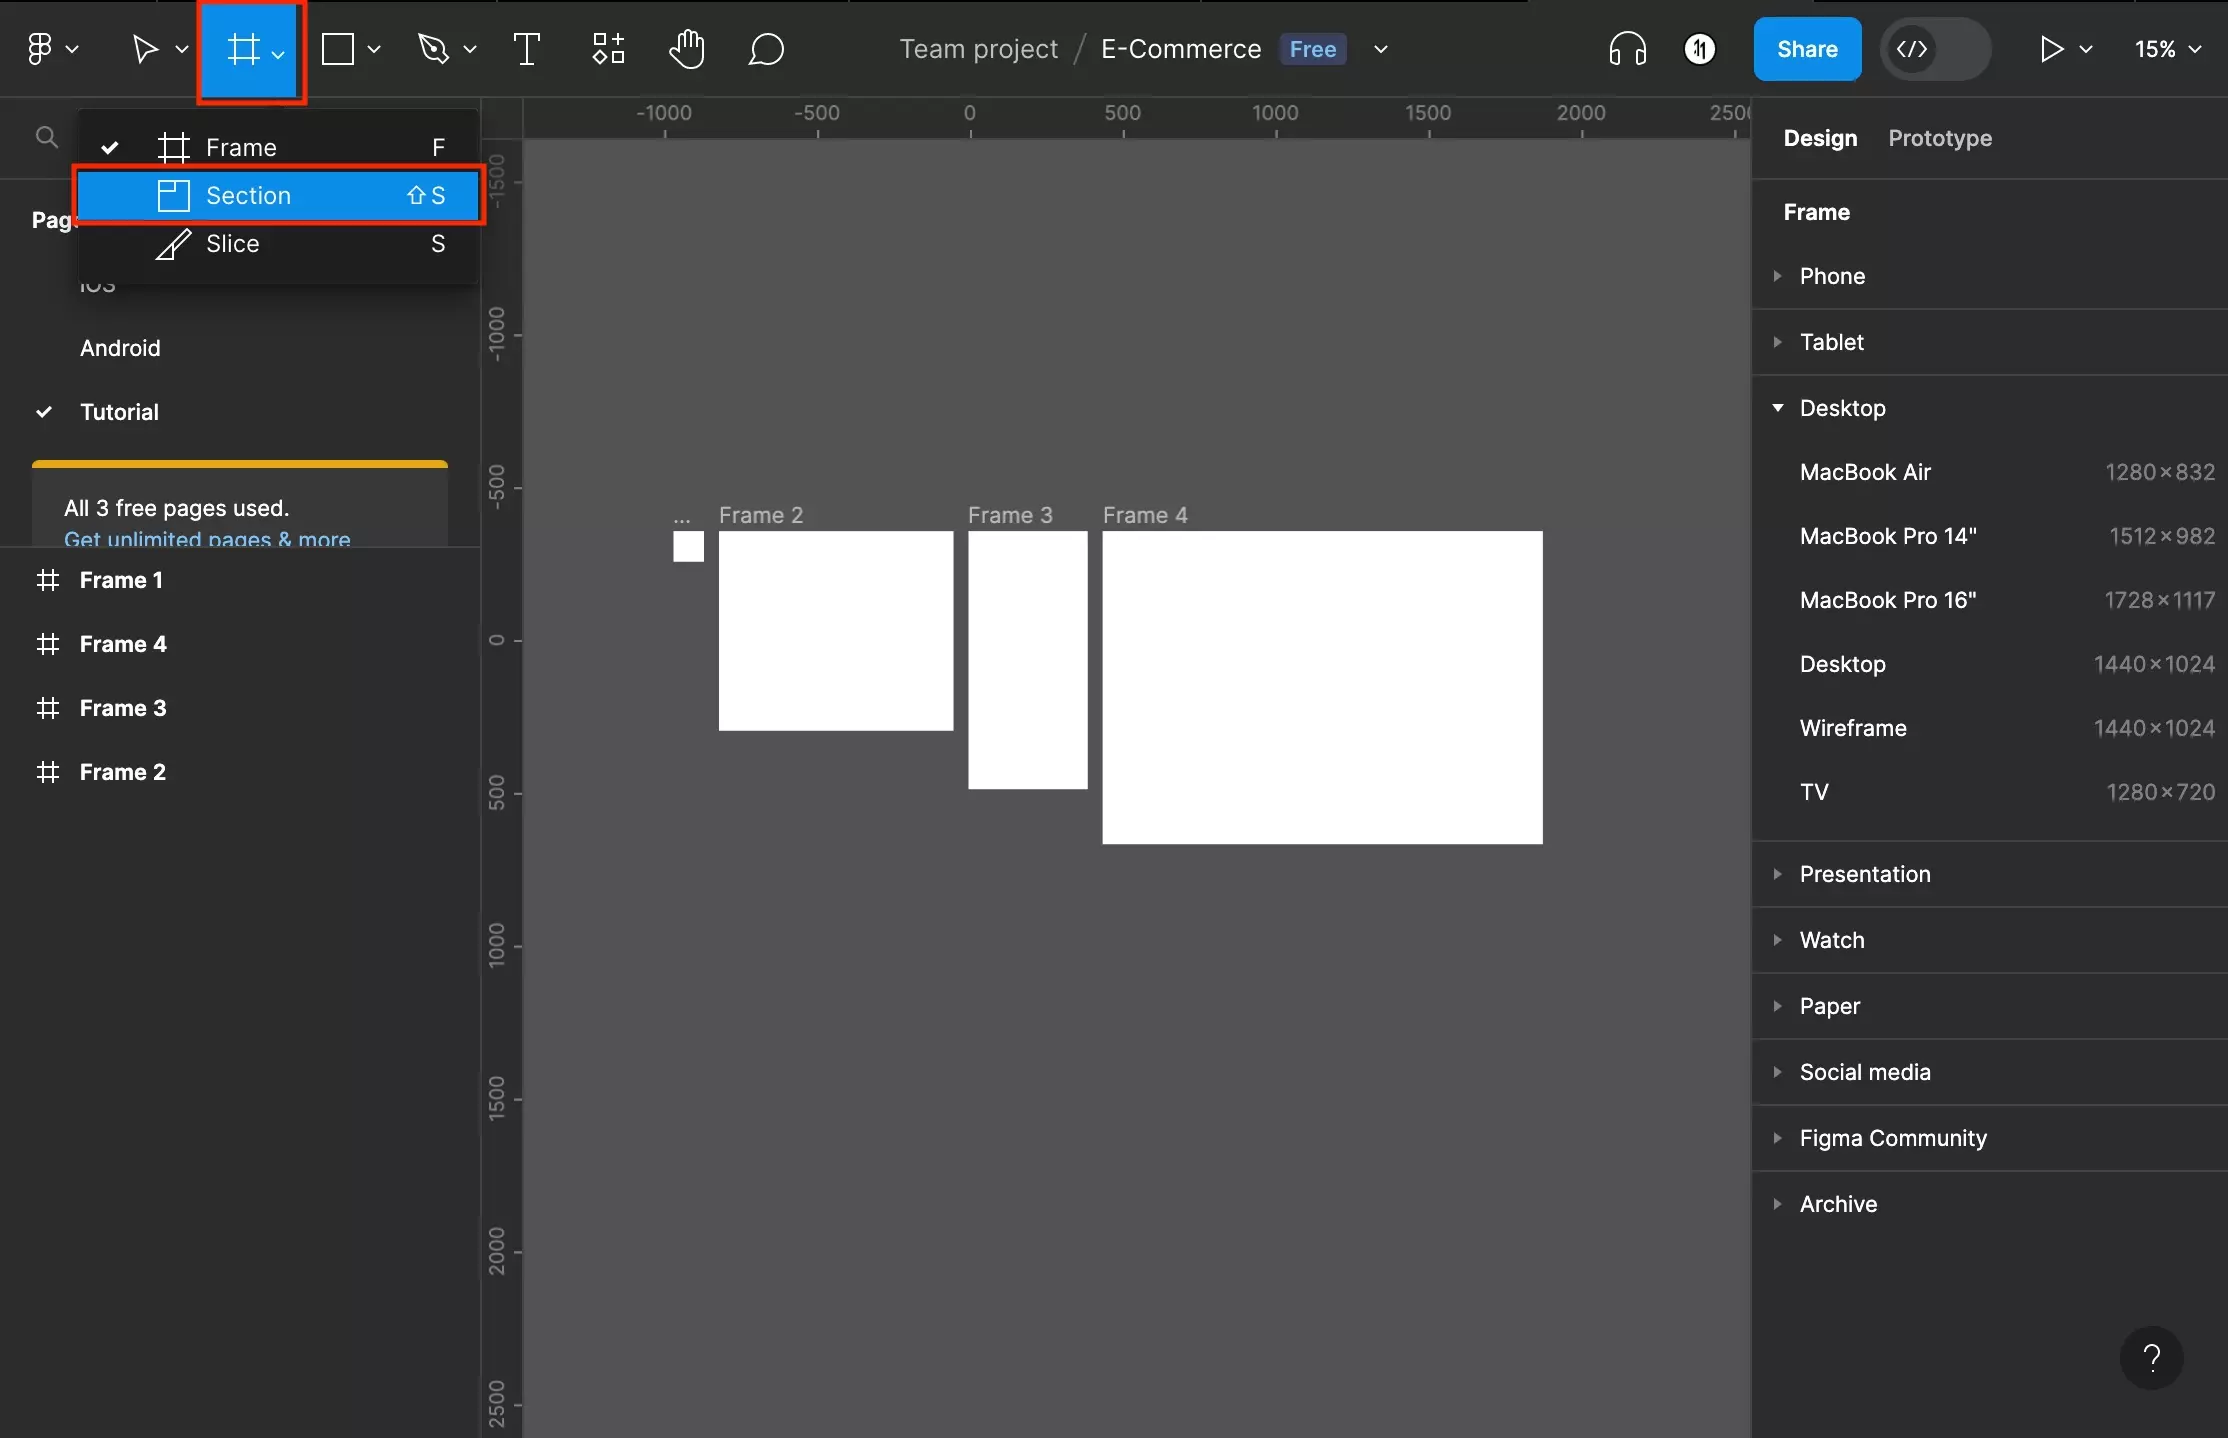
Open the Frame Tool dropdown and select Section.
This can also be accessed by clicking the Figma canvas and pressing Shift + S on your keyboard.
Once you have done this, draw your section on the Figma Canvas.
Option B | Convert a Frame
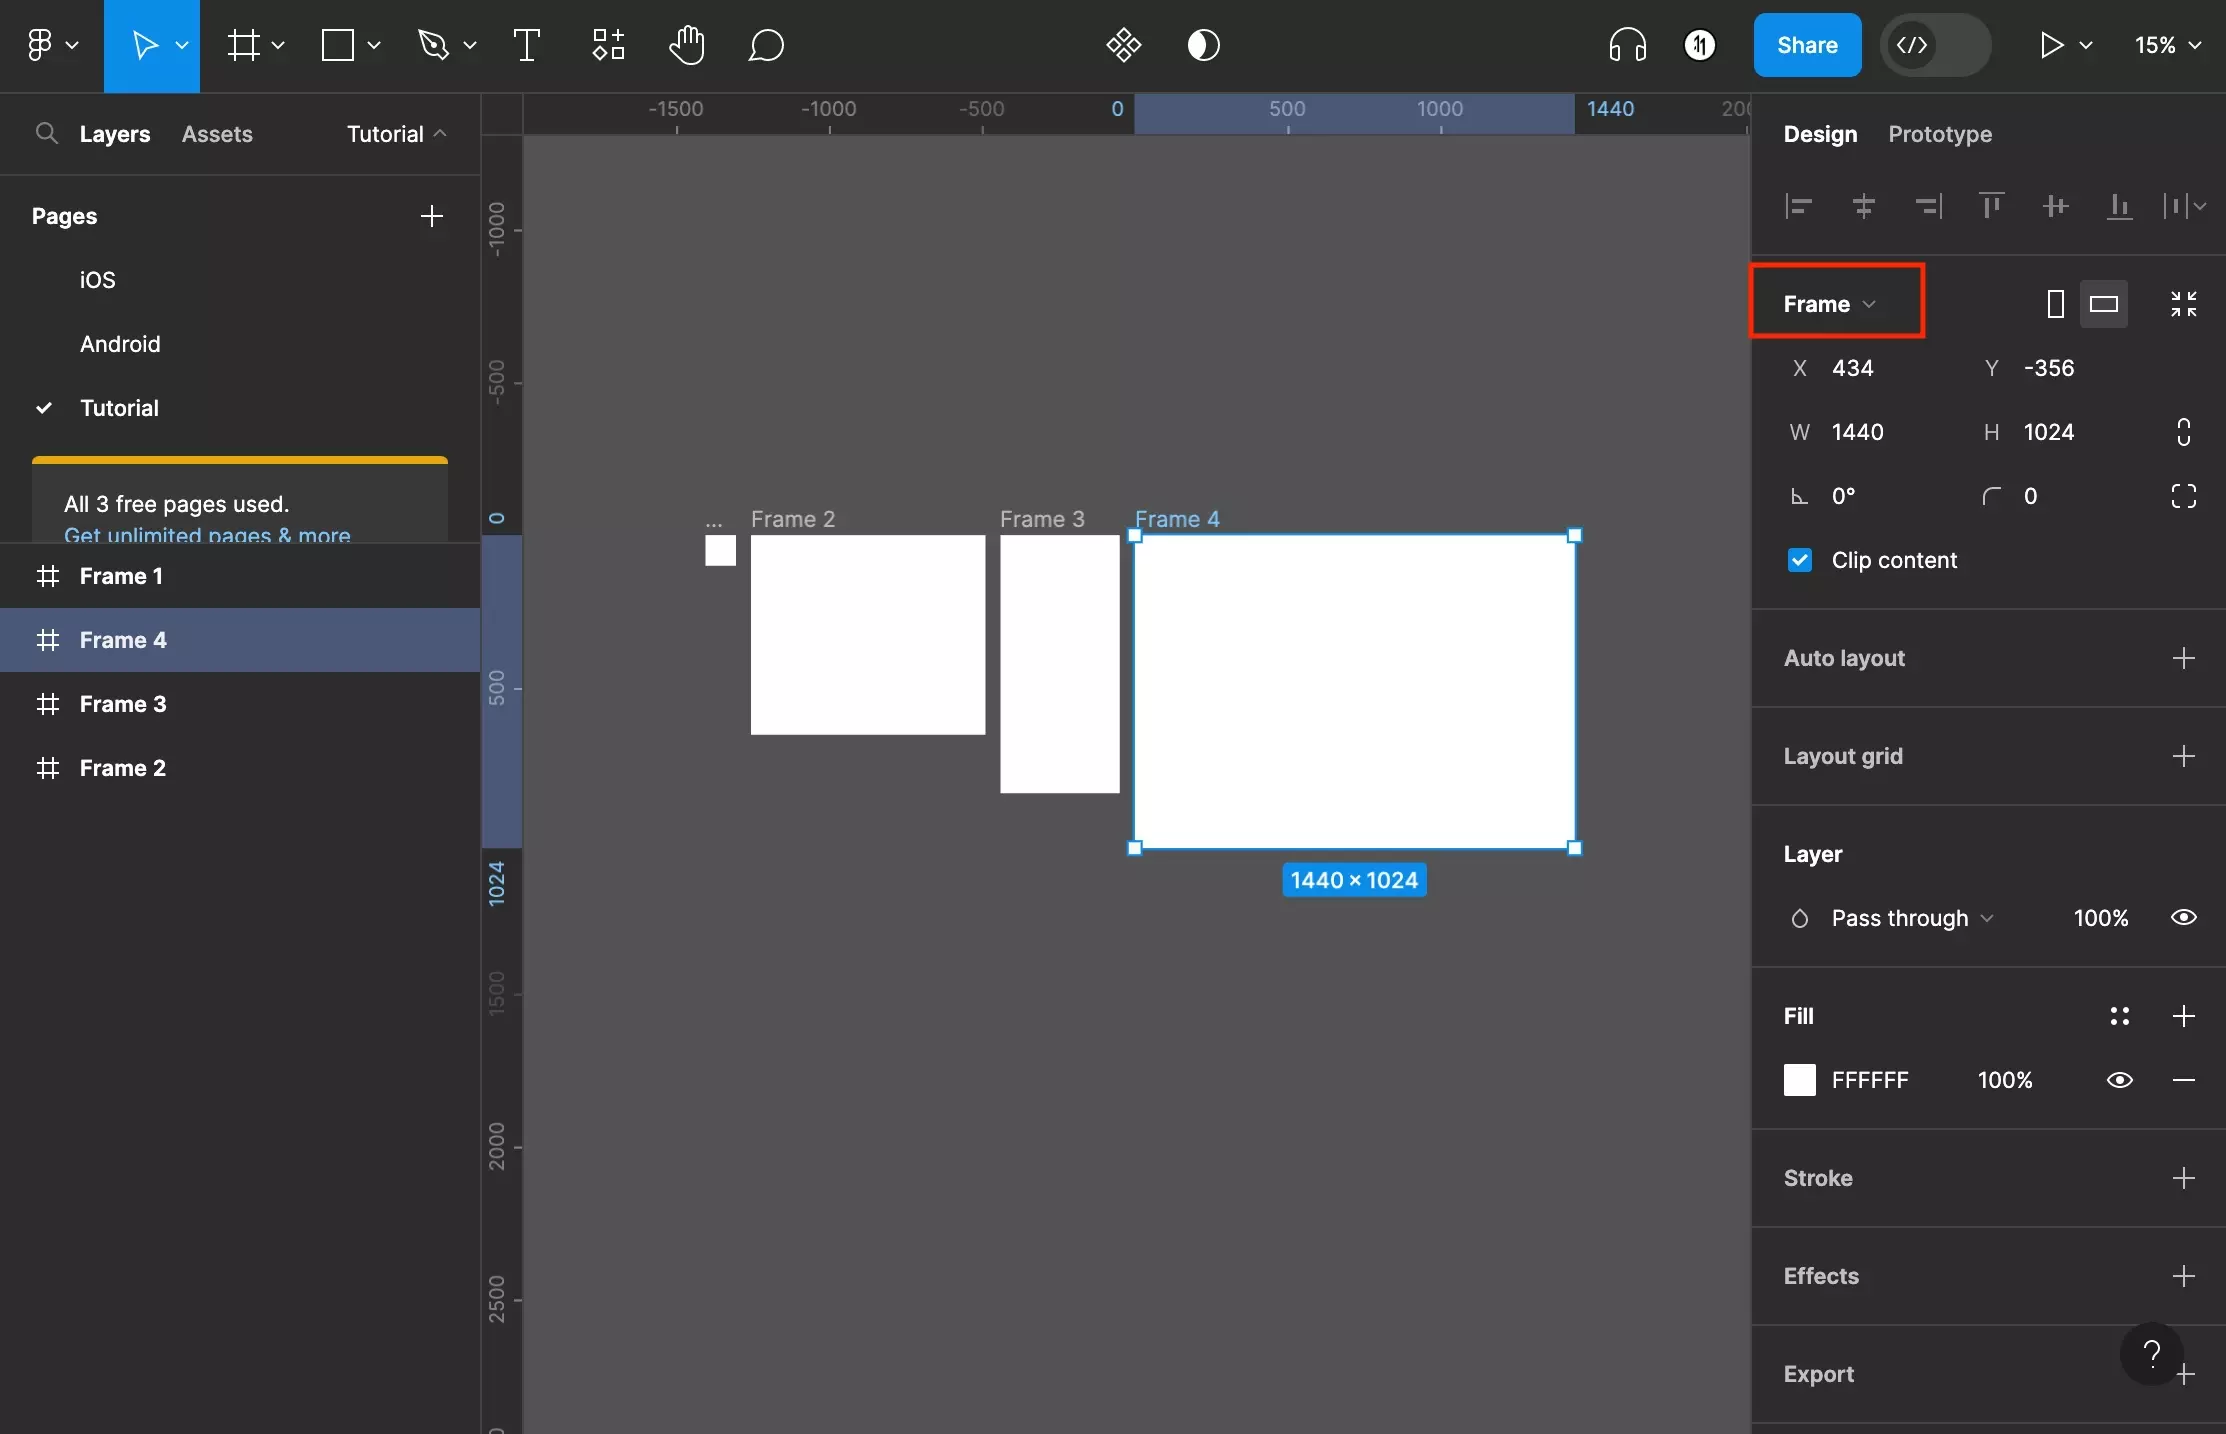
Select an existing frame and open the Frame dropdown on the right menu side bar.
In the menu that appears (shown below), select Section.

C | Wrap in new Section
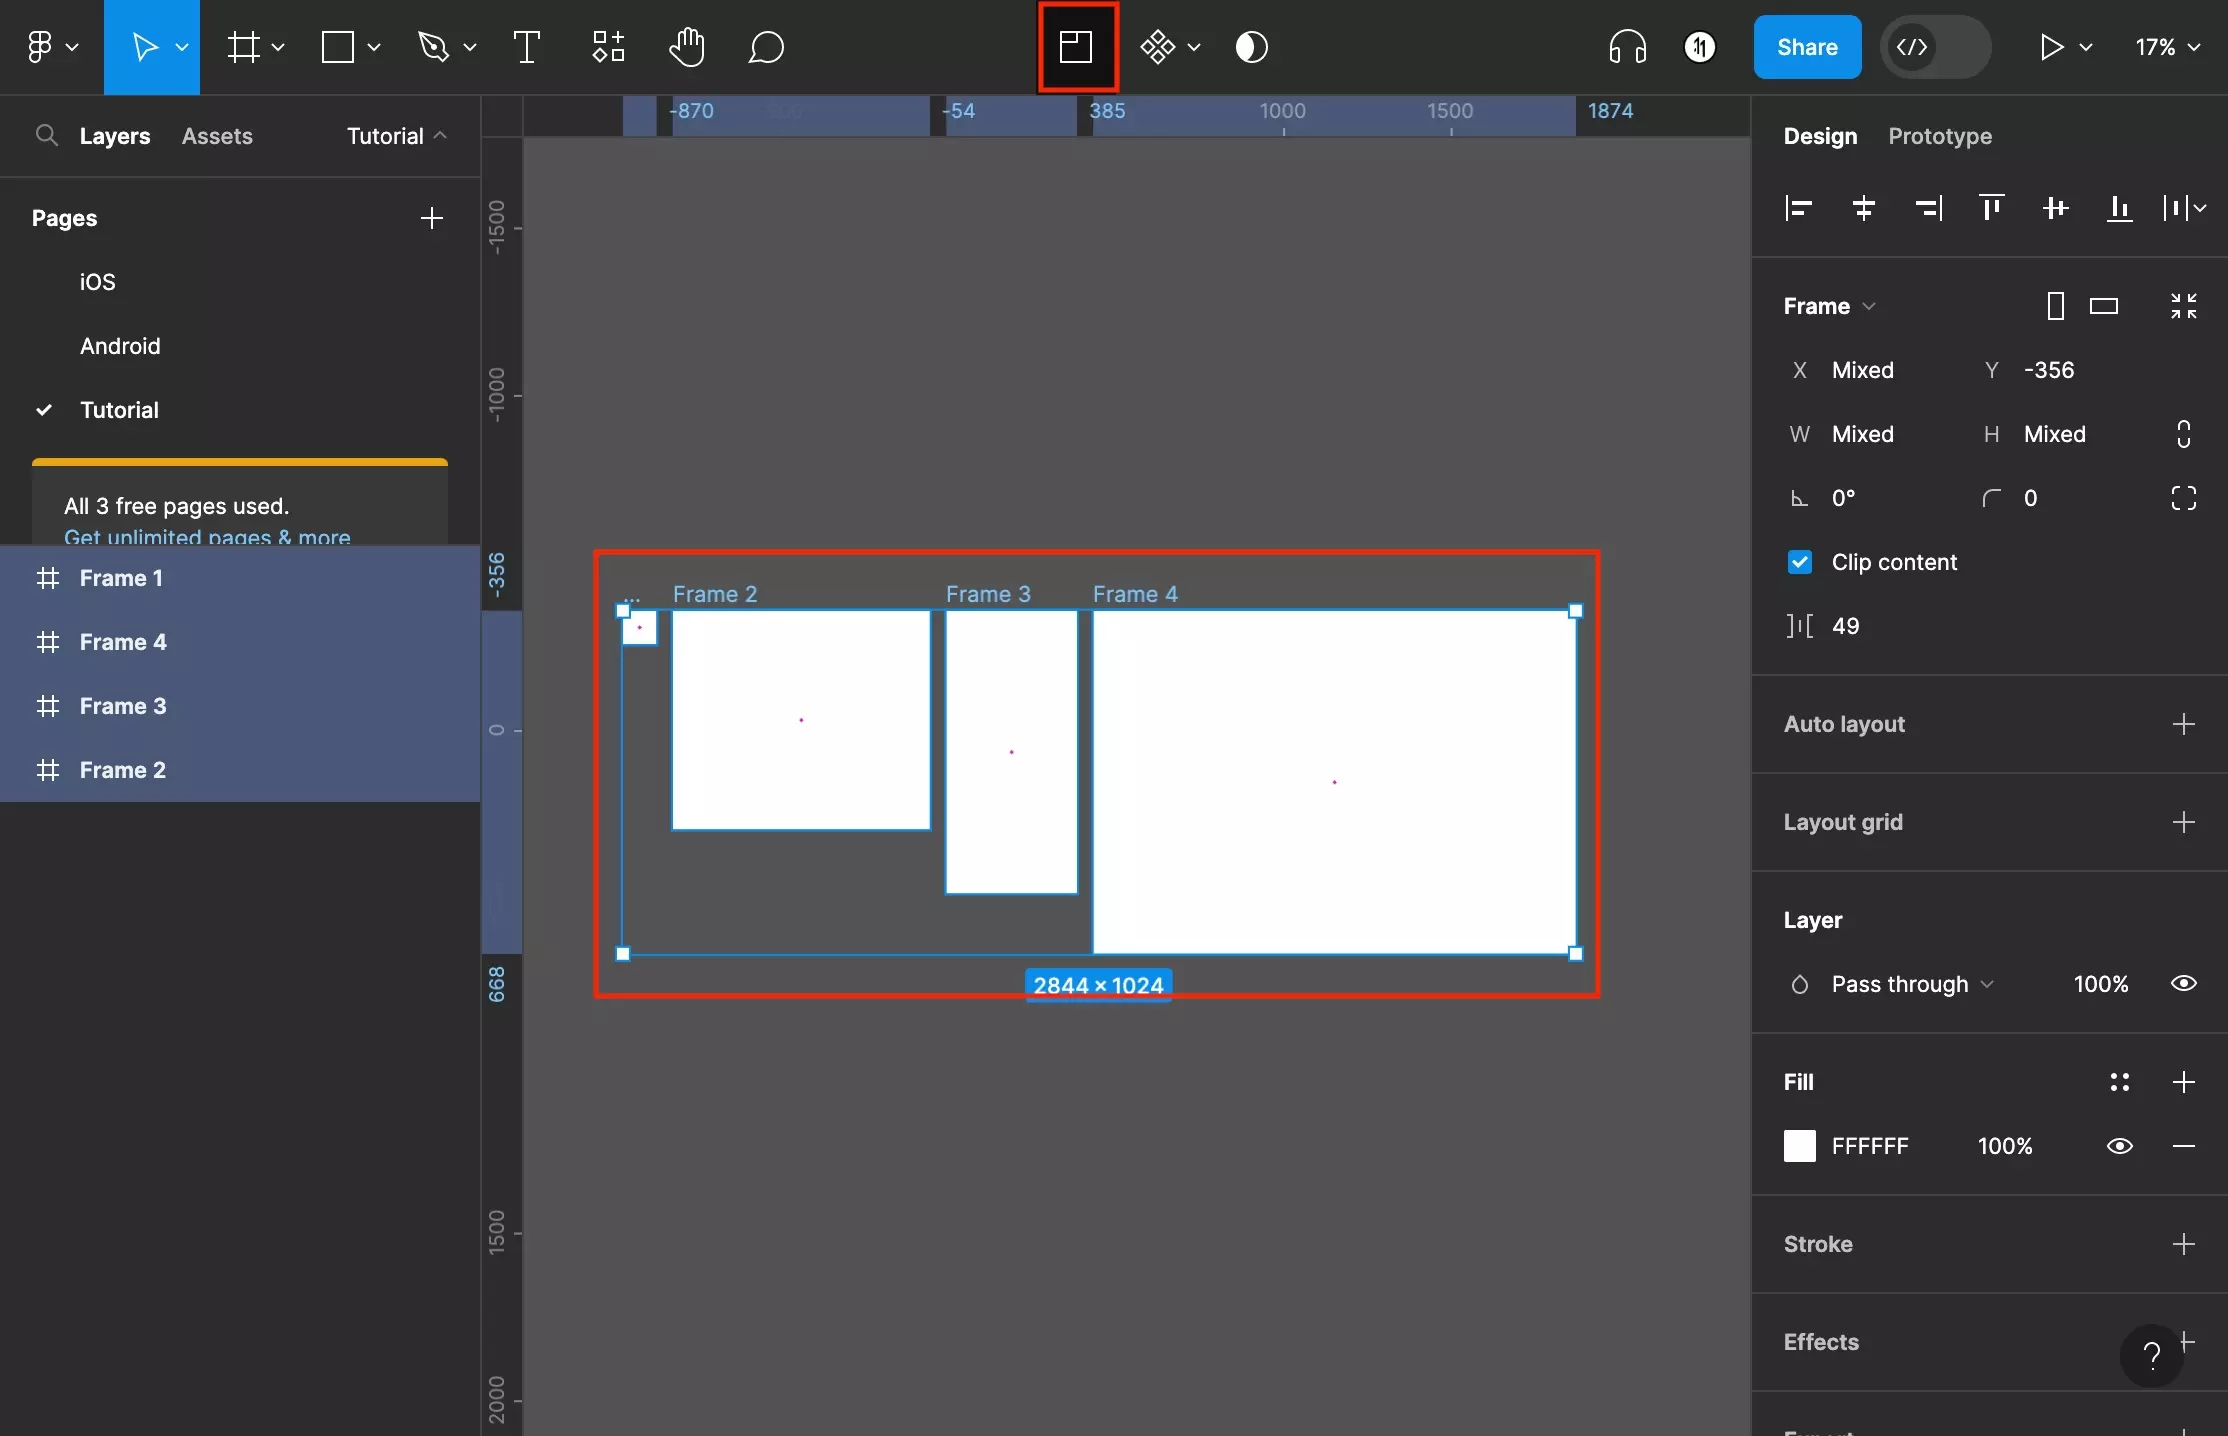
Select the frames or objects that you wish to wrap in a frame and click the Section icon on the top menu bar.
Alternatively, after selecting the chosen frames or objects, press Command + S to wrap the items in a section.