How to resize a Text Frame in Figma
A step by step guide on sizing a text frame to fit its content or to custom dimensions in Figma.

Written by Oscar de la Hera Gomez
First published on 07/13/2023 at 14:46
Last Updated on 07/14/2023 at 17:07
A step by step guide on sizing a text frame to fit its content or to custom dimensions in Figma.
SubscribeCheck out our free mobile e-commerce Figma design fileStep One: Select the Text Frame
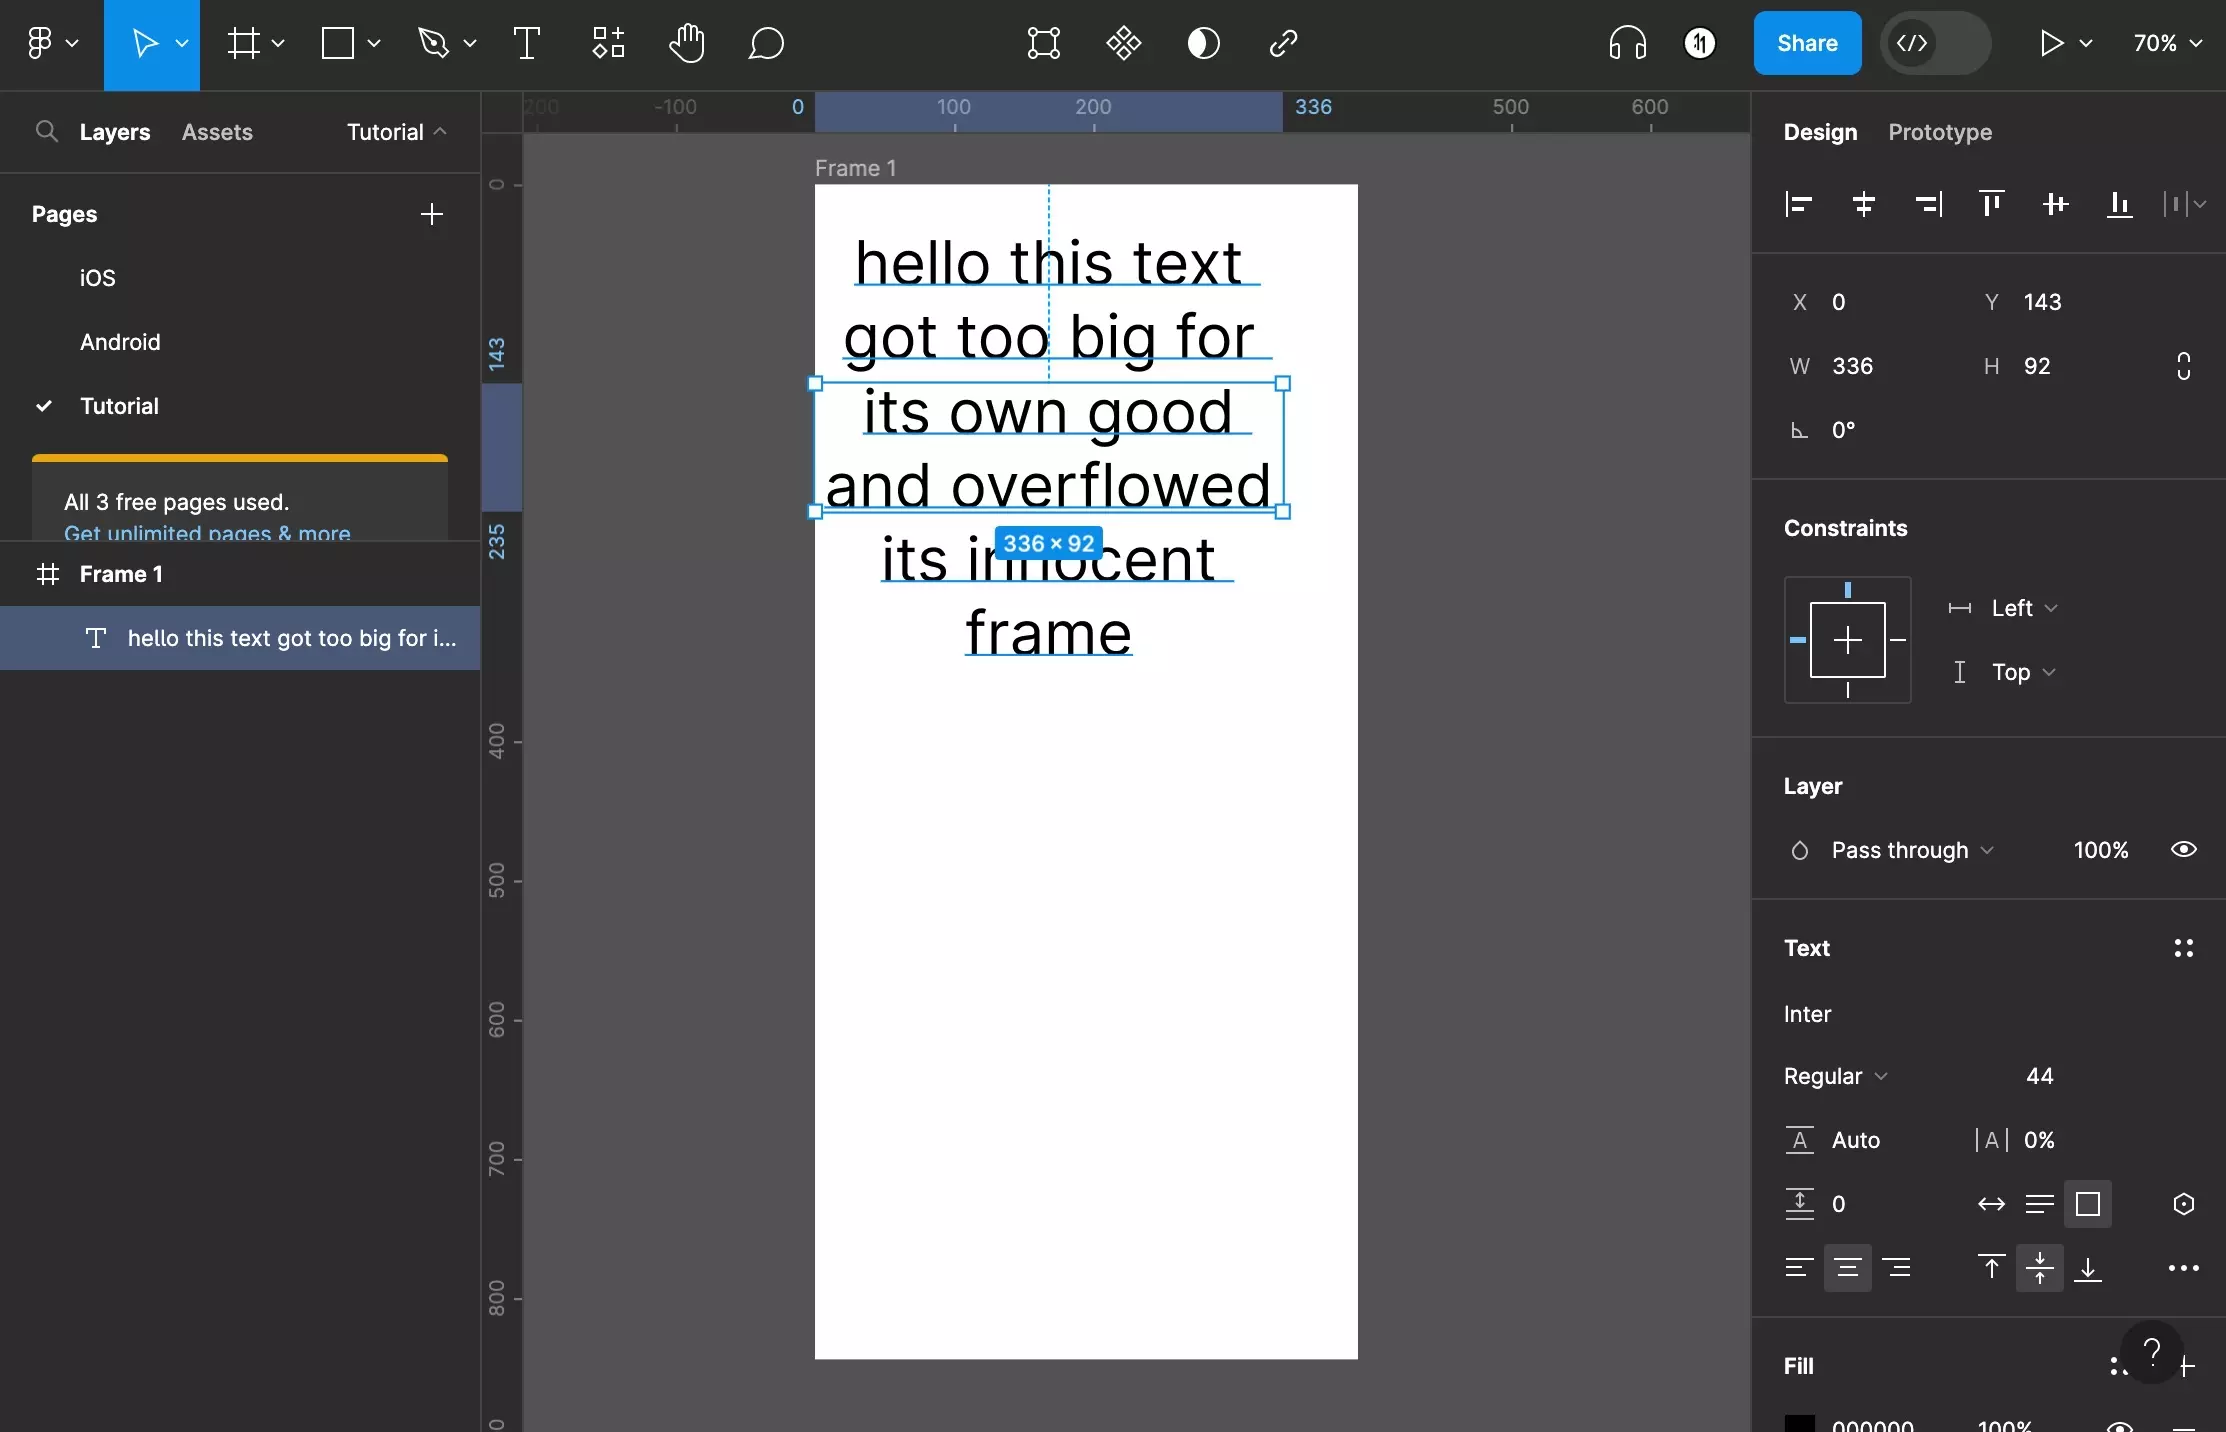
Select the text frame that you wish to resize or size to fit.
Step Two: Resize or Size to Fit
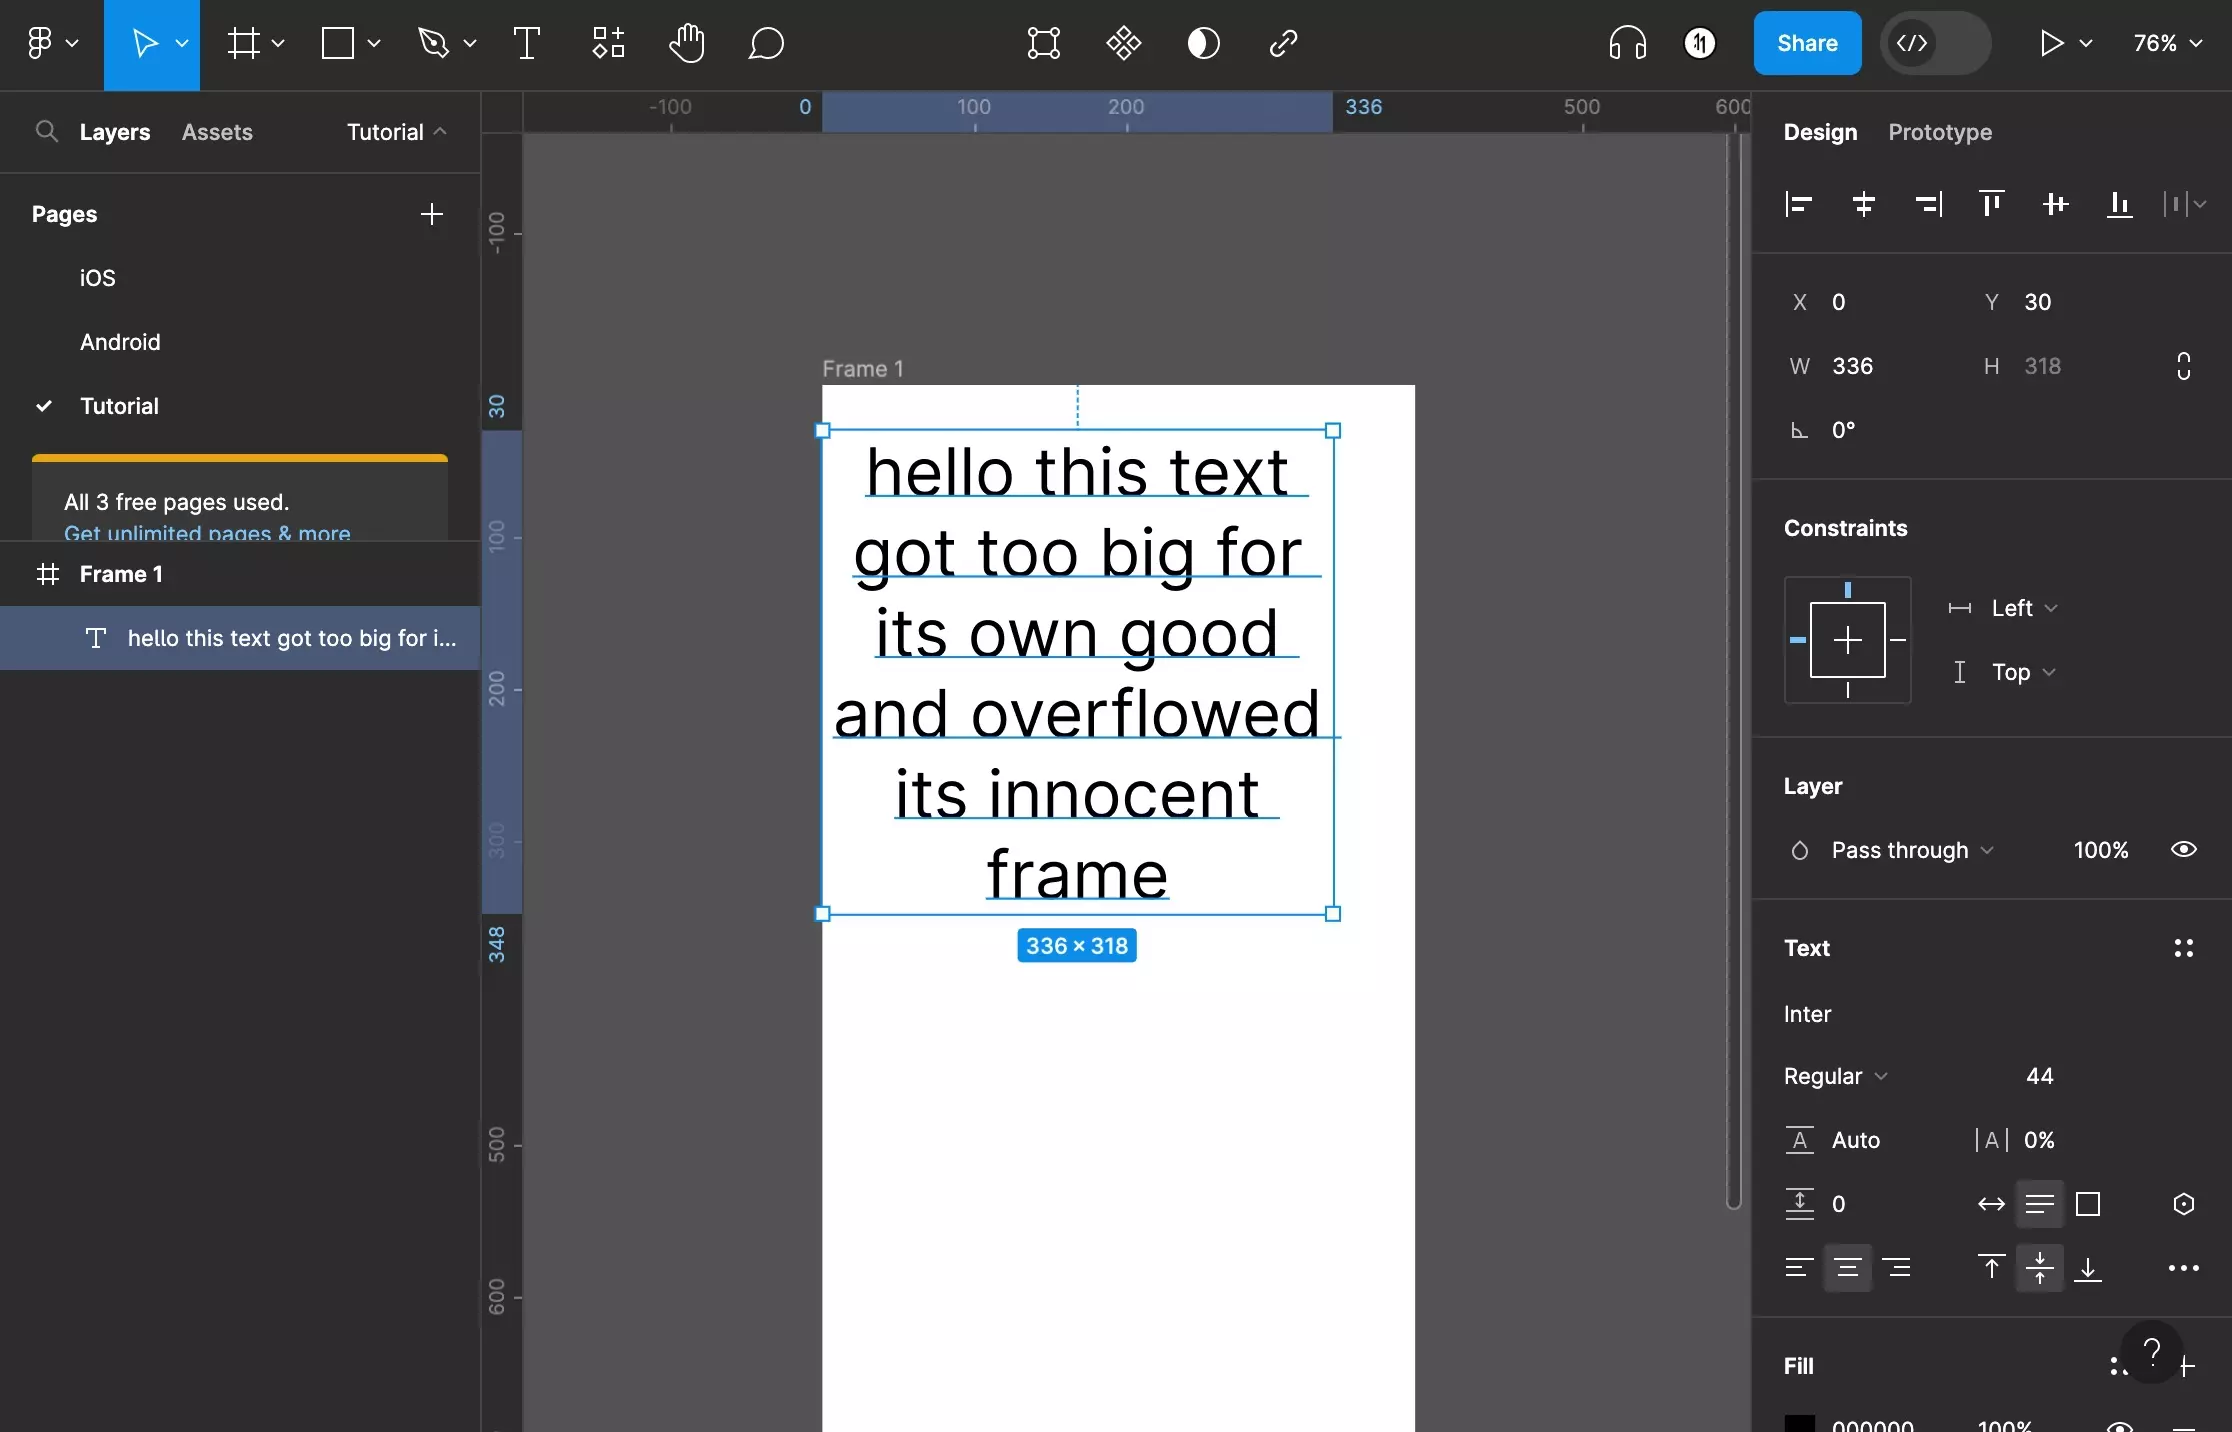
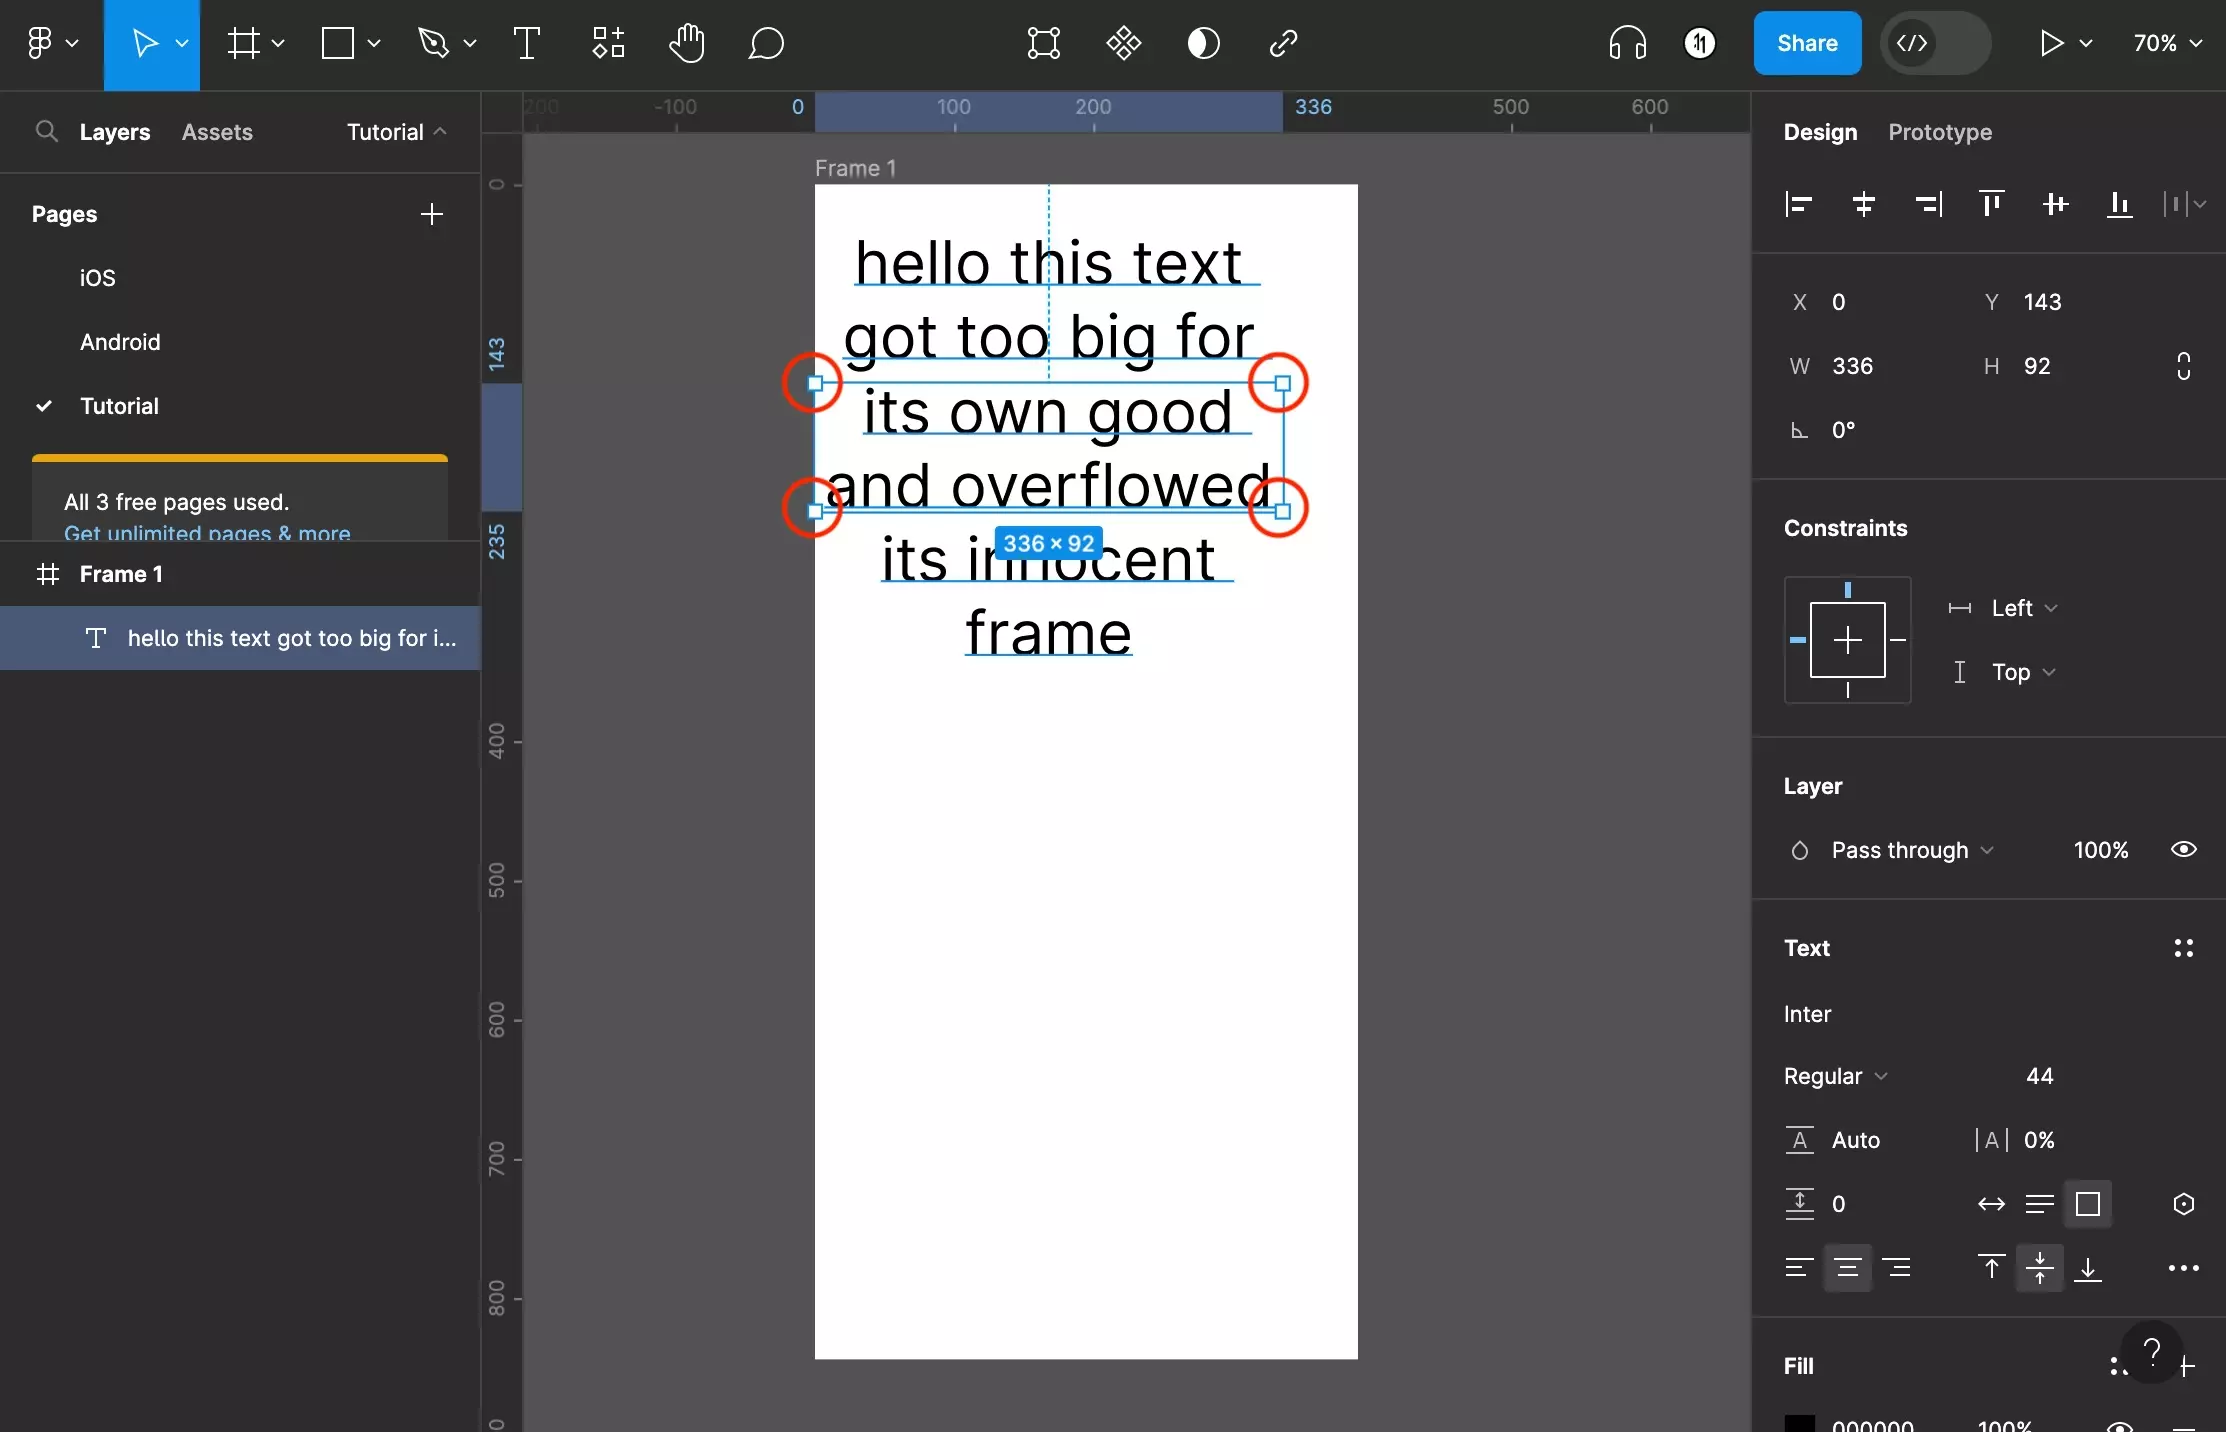
There are two ways to resize the frame:
- Adapting it manually by dragging the frames handles.
- Double clicking the top or bottom edge of the frame to make it size to fit its content.
A | Manual
Drag the handles to adapt the size manually.
B | Size to Fit
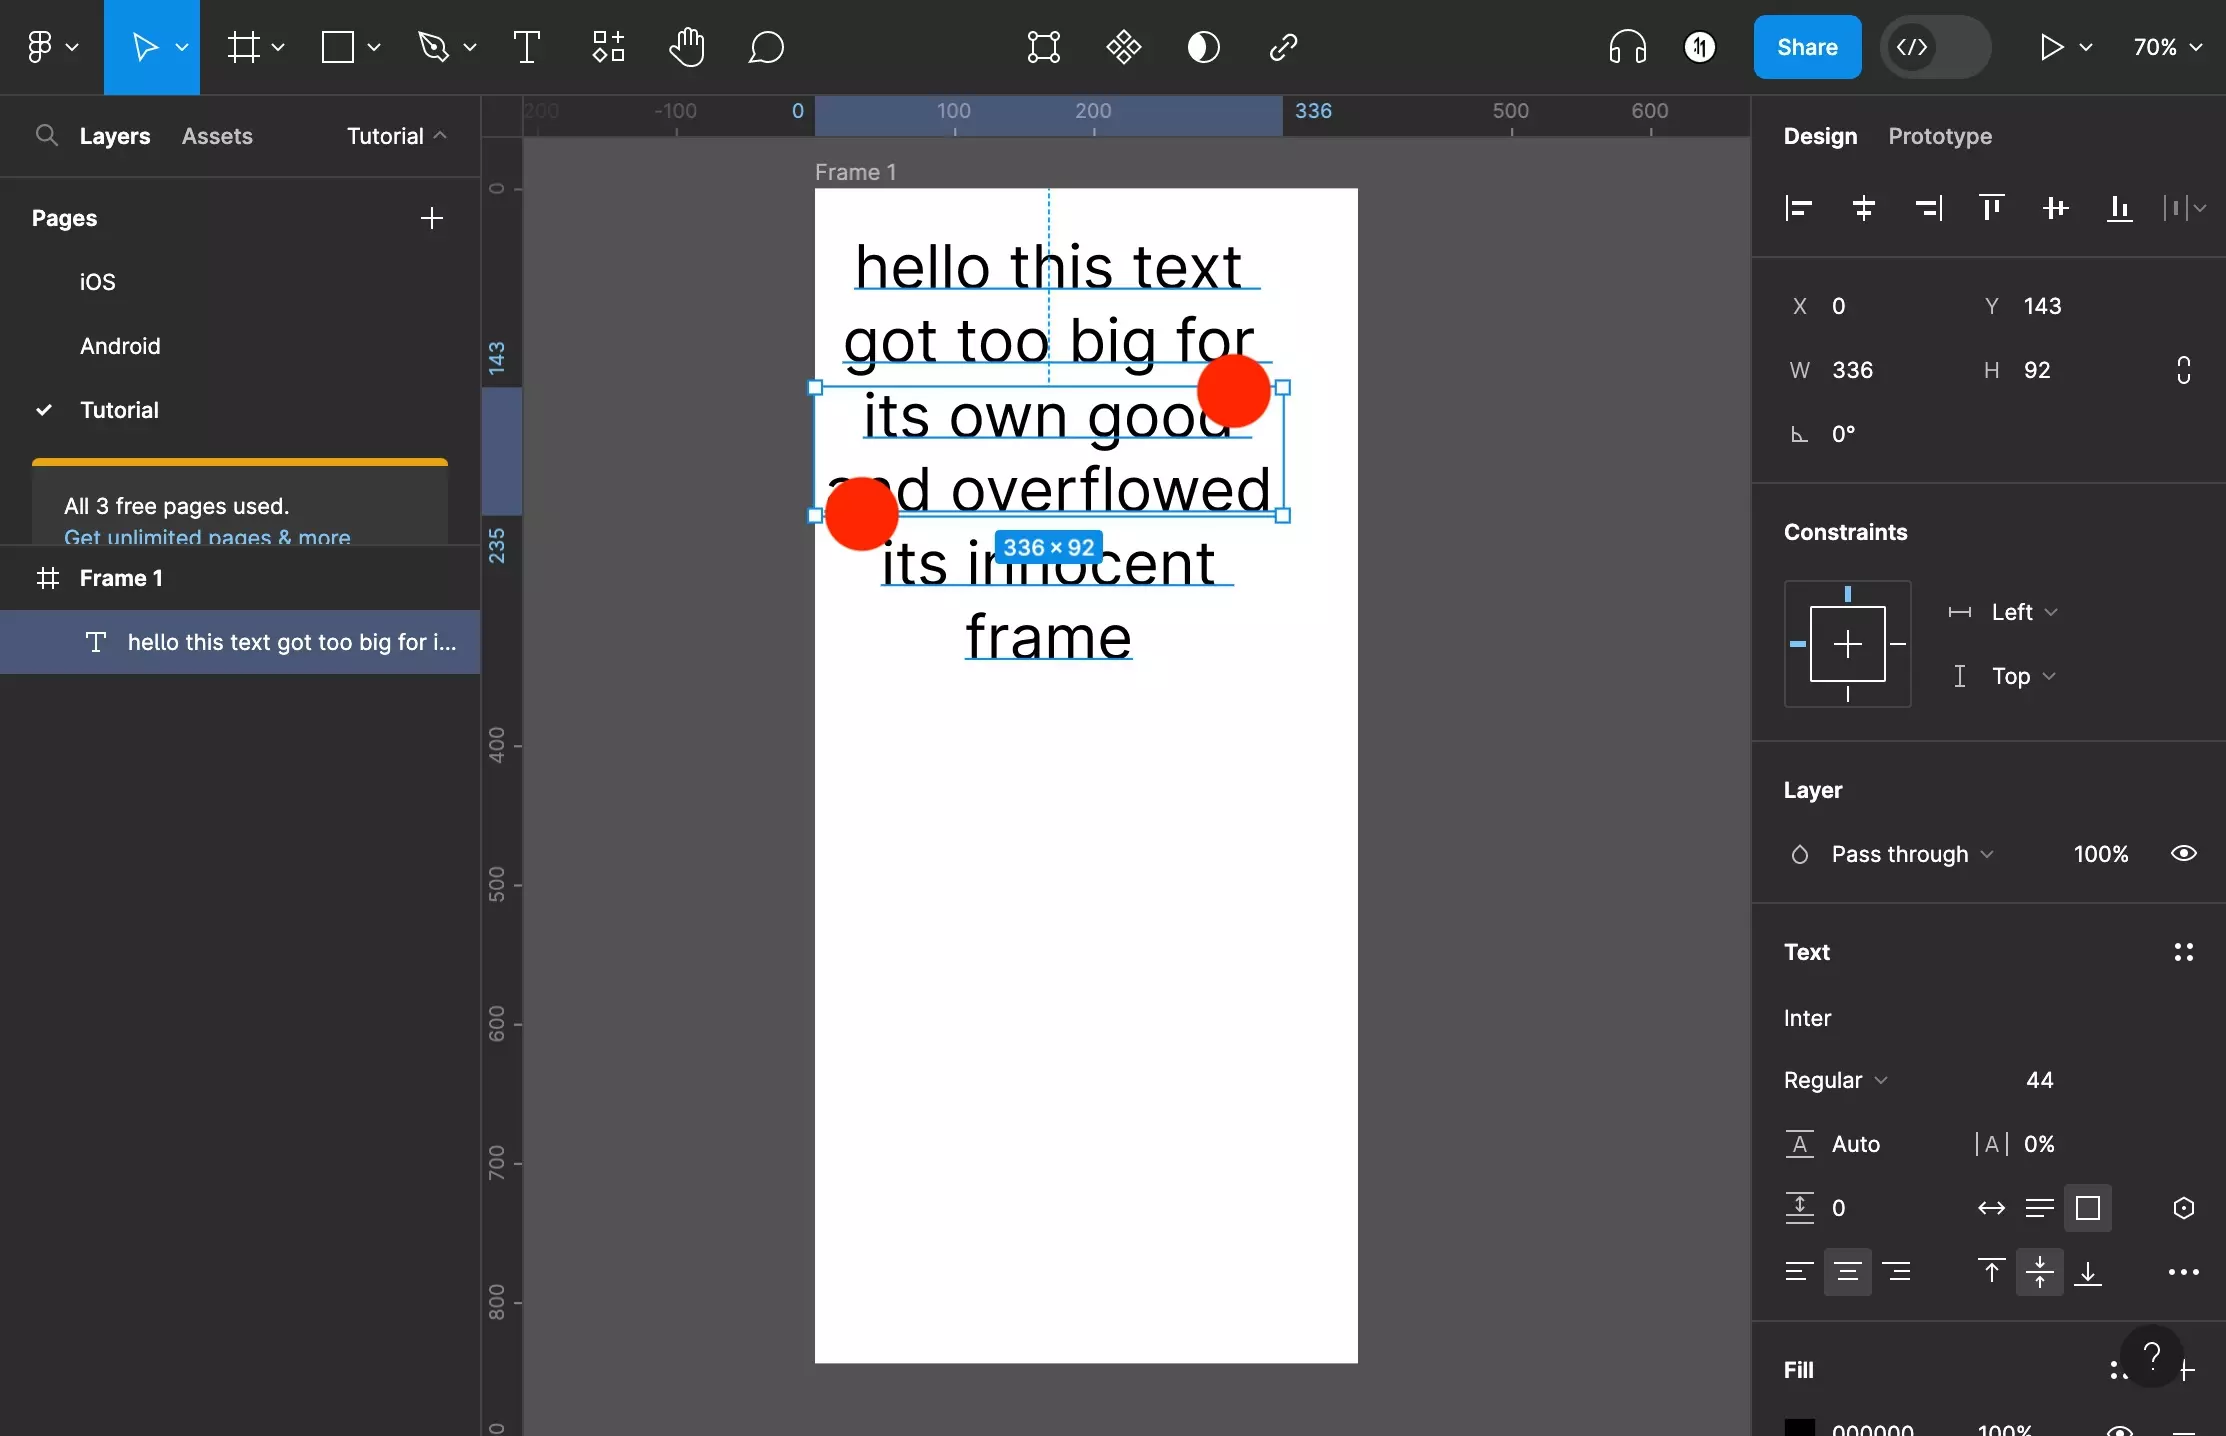
Double click the bottom or top edge to make the text frame adapt to fit its content.
Looking to learn more about the basics behind text, shapes and media in Figma ?
Consult the list below to learn more about the basics behind text, shapes and media in Figma.
Any Questions?
We are actively looking for feedback on how to improve this resource. Please send us a note to inquiries@delasign.com with any thoughts or feedback you may have.
SubscribeContact UsVisit our BlogView our ServicesView our Work