How to create and use image styles in Figma
A step by step tutorial on creating a reusable image system in Figma that allows you switch between images quickly.

A step by step tutorial on creating a reusable image system in Figma that allows you switch between images quickly.
SubscribeWhat are Styles in Figma?Image styles are a way of quickly accessing reusable images and applying them as fills to shapes in your Figma project. Applying Figma Image styles is also a quick way to mask images into shapes, although it offers less control than a custom mask, that can be used to crop images, and which grants precise control.
Step One: Add your image to Figma
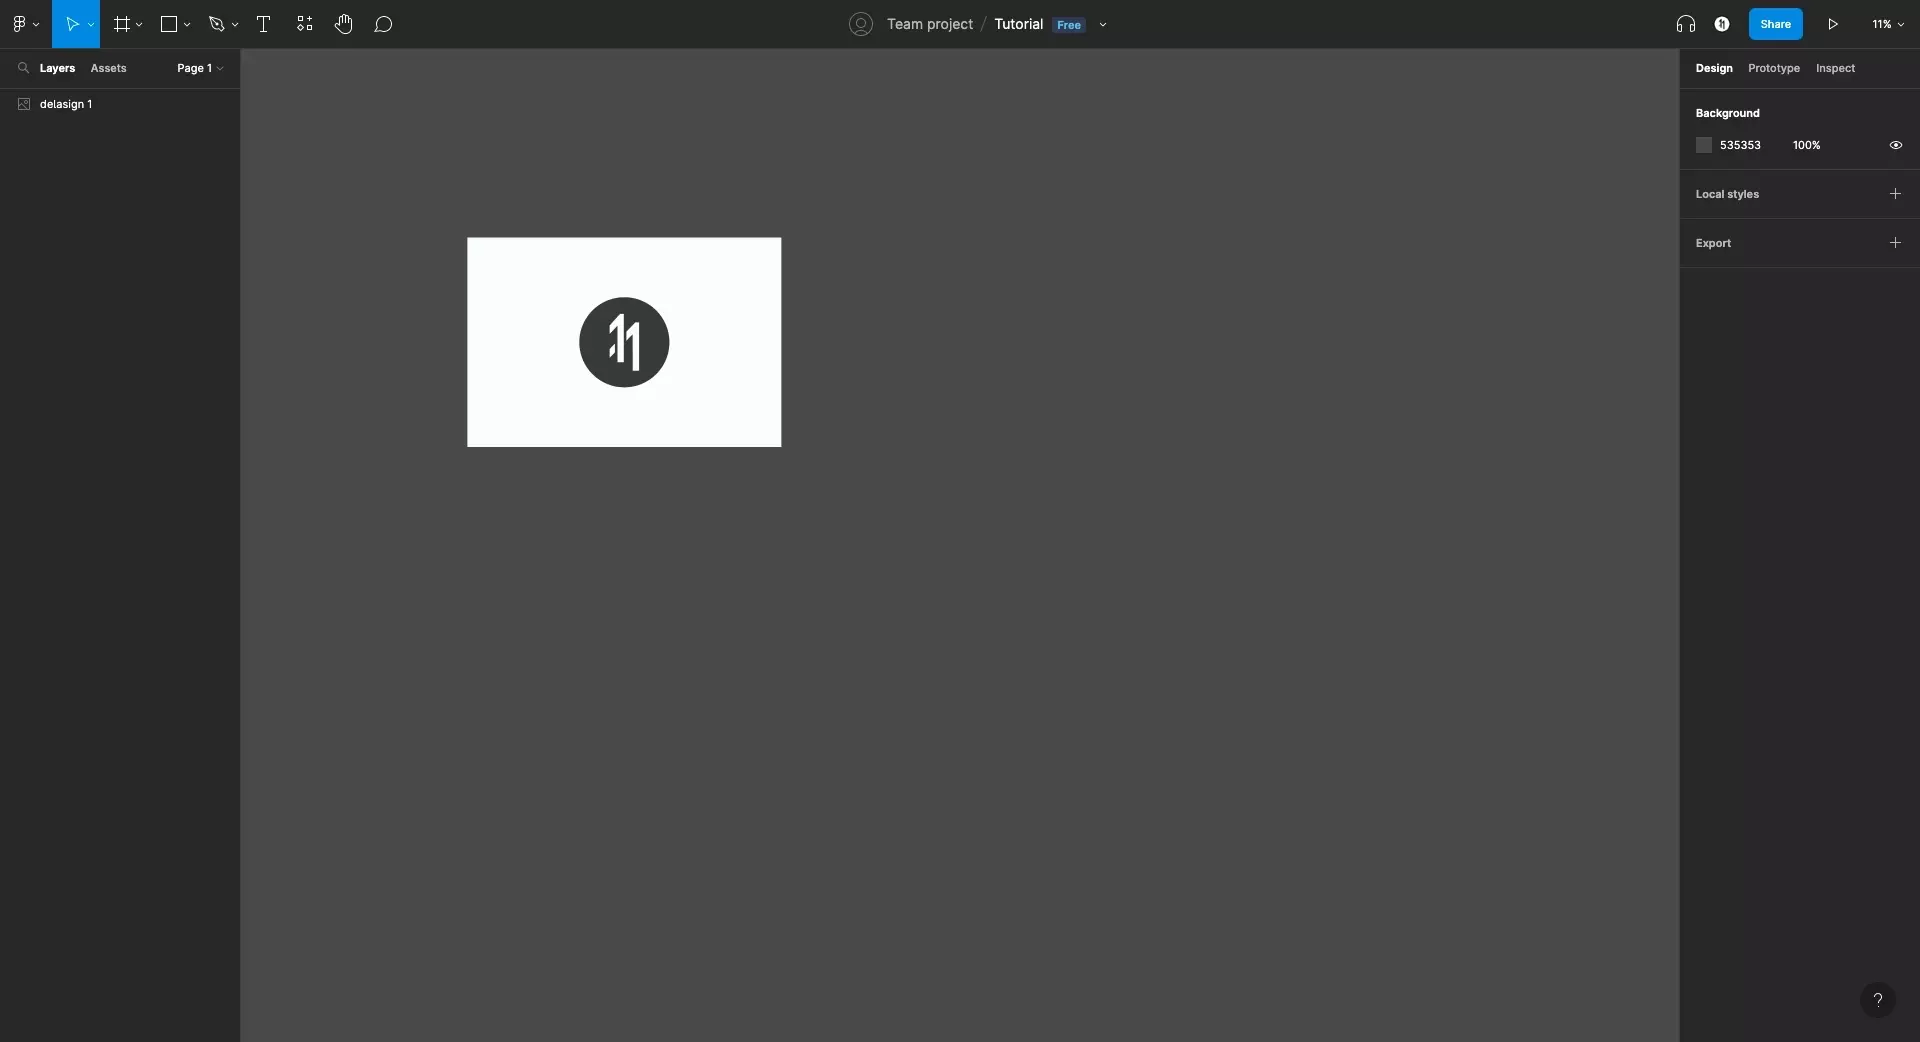
Add the image that you wish to convert into a style to your Figma project.
By converting it to a style you are making it a part of a reusable system.
Step Two: Convert the image to a style
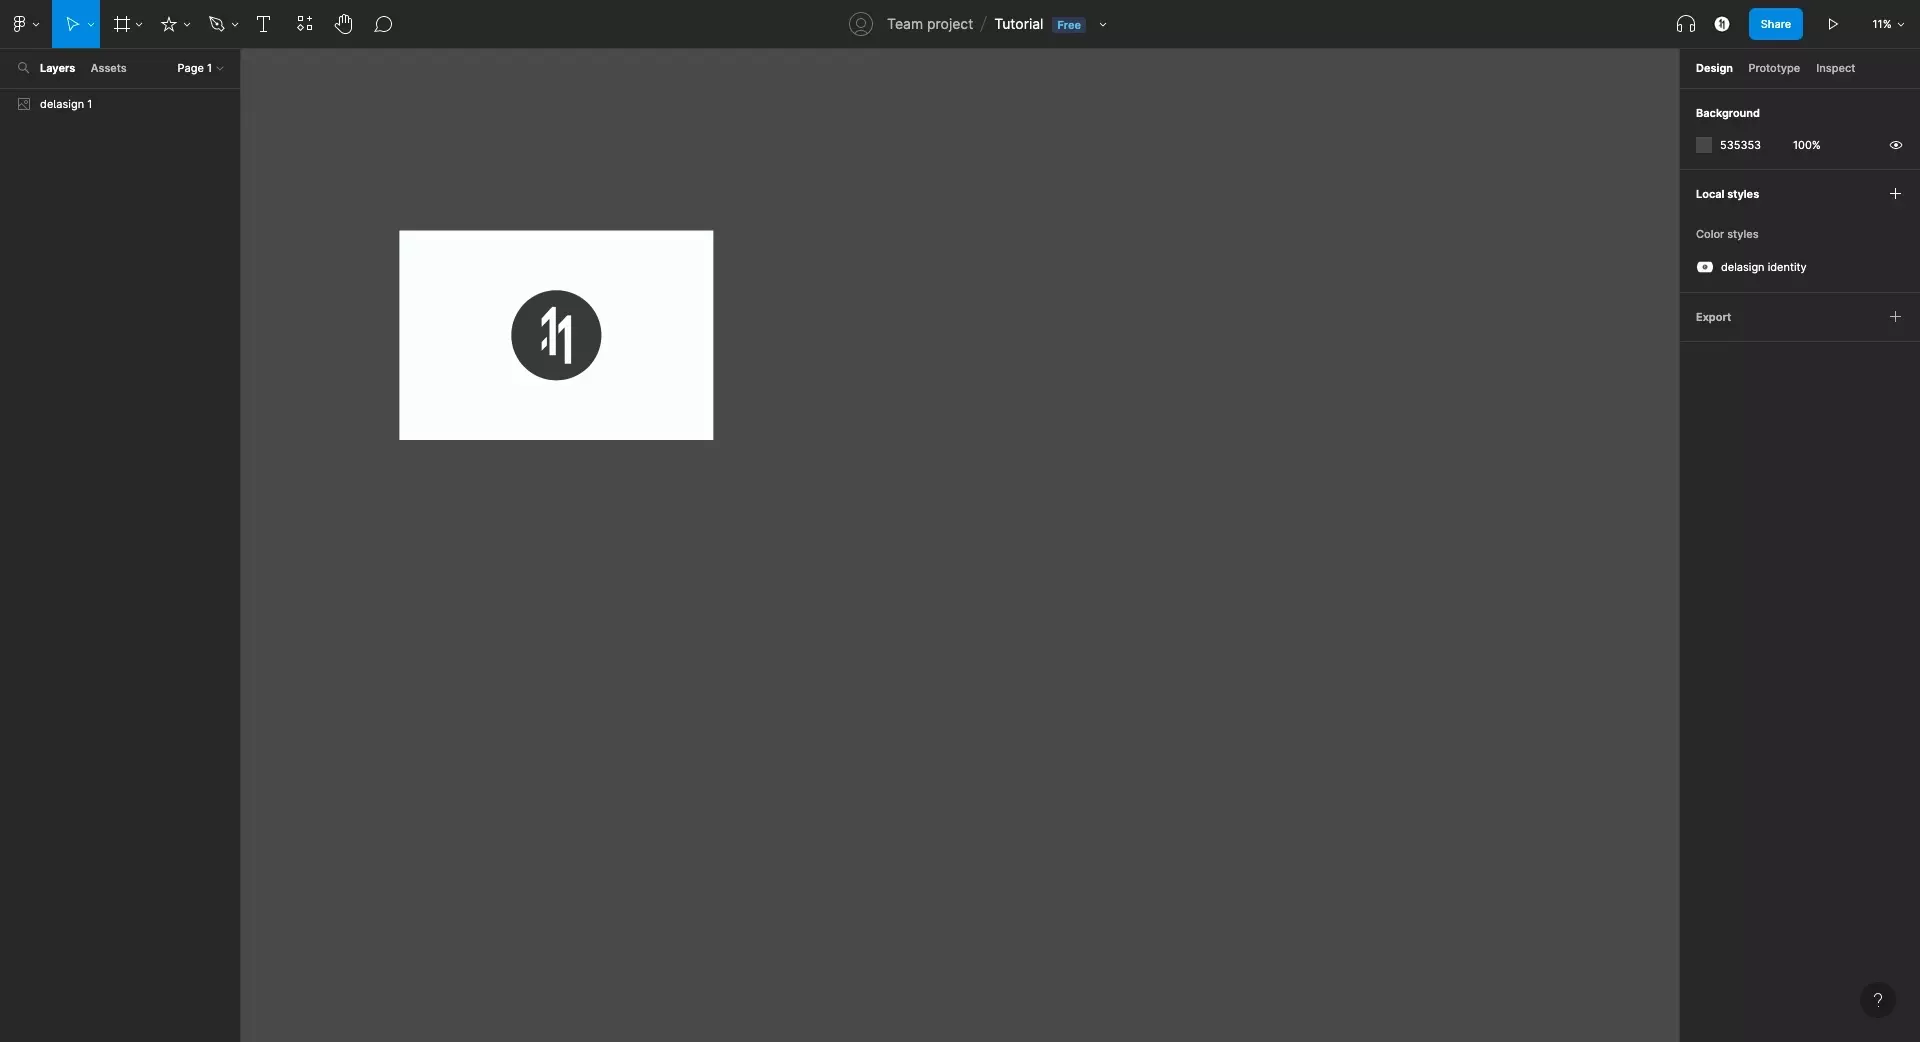
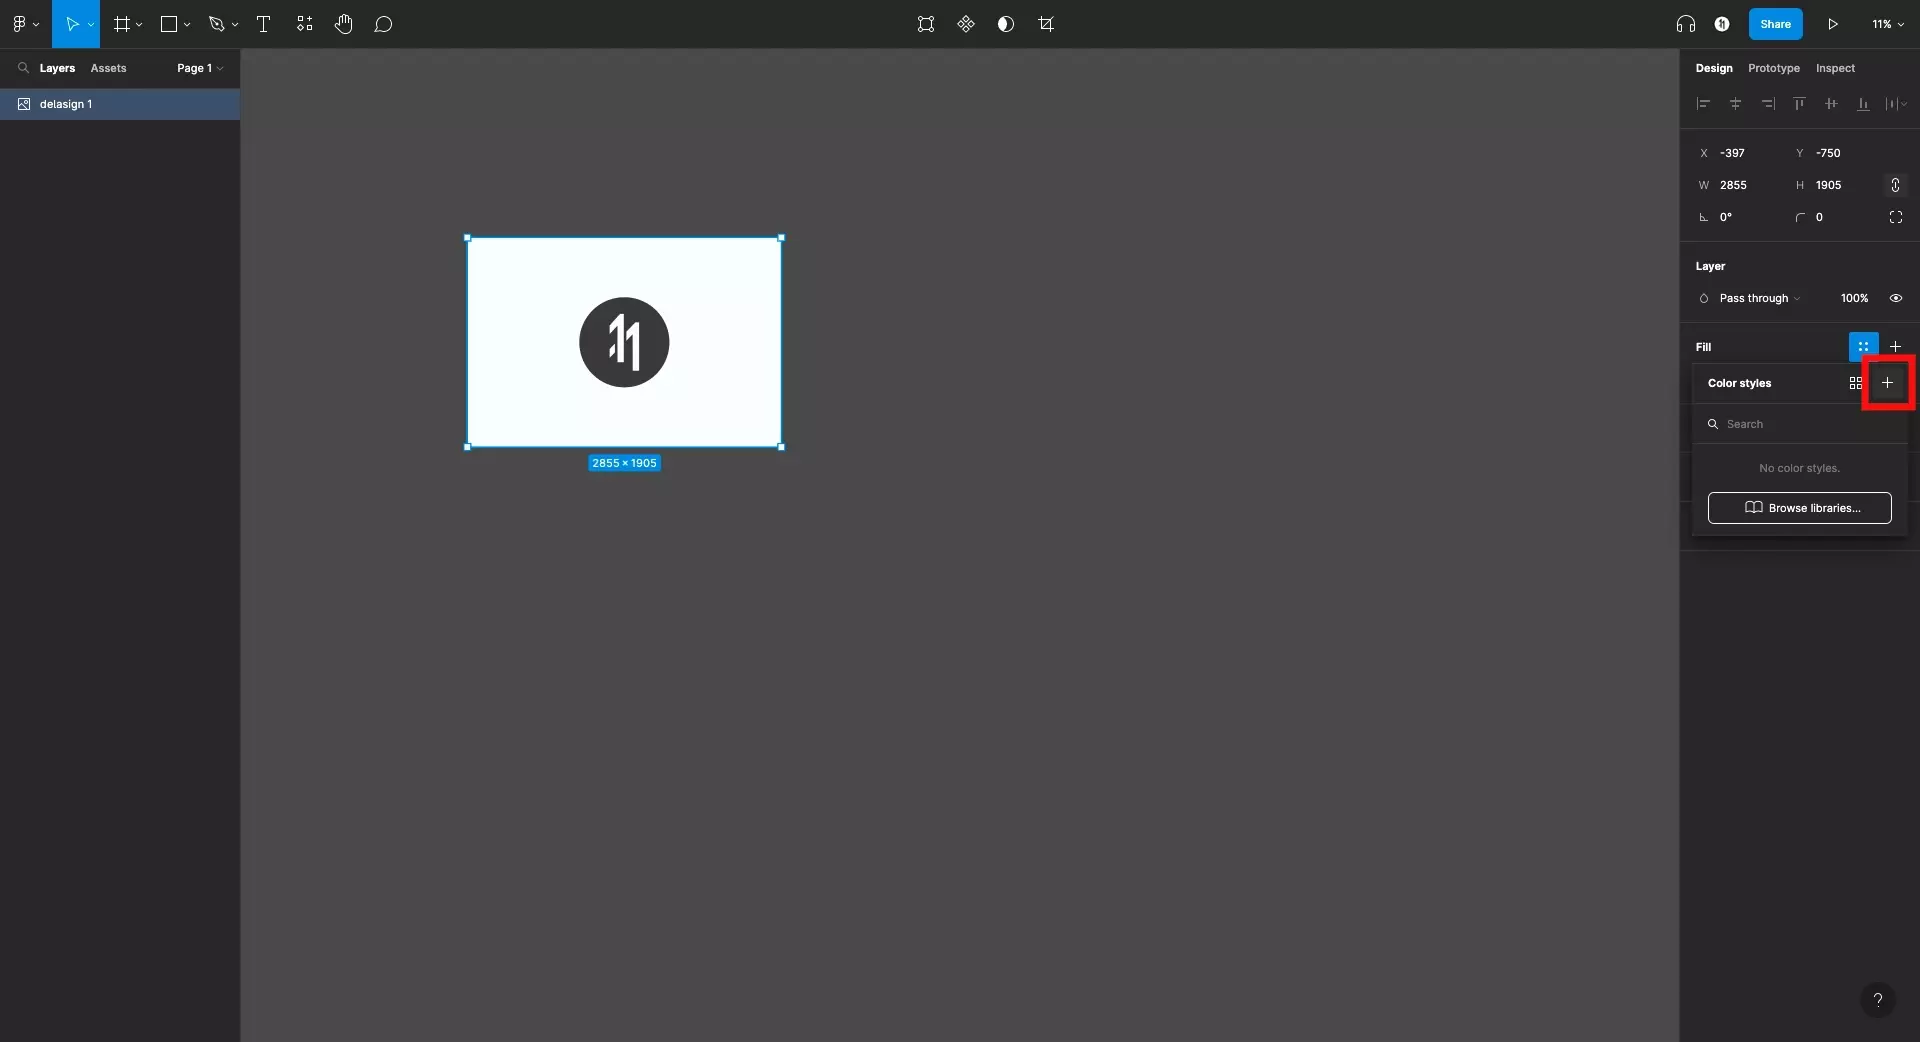
Select the newly added image and in the design inspector on the right side of the screen carry out the following steps:
A | Select the Style menu
Select the four circles next to Fill to open up the Color Styles menu.
Please note that the Images will be stored as Color Styles.
B | Select +
In the pop up that appears, select + to convert your image into a style.
C | Name and Create Style
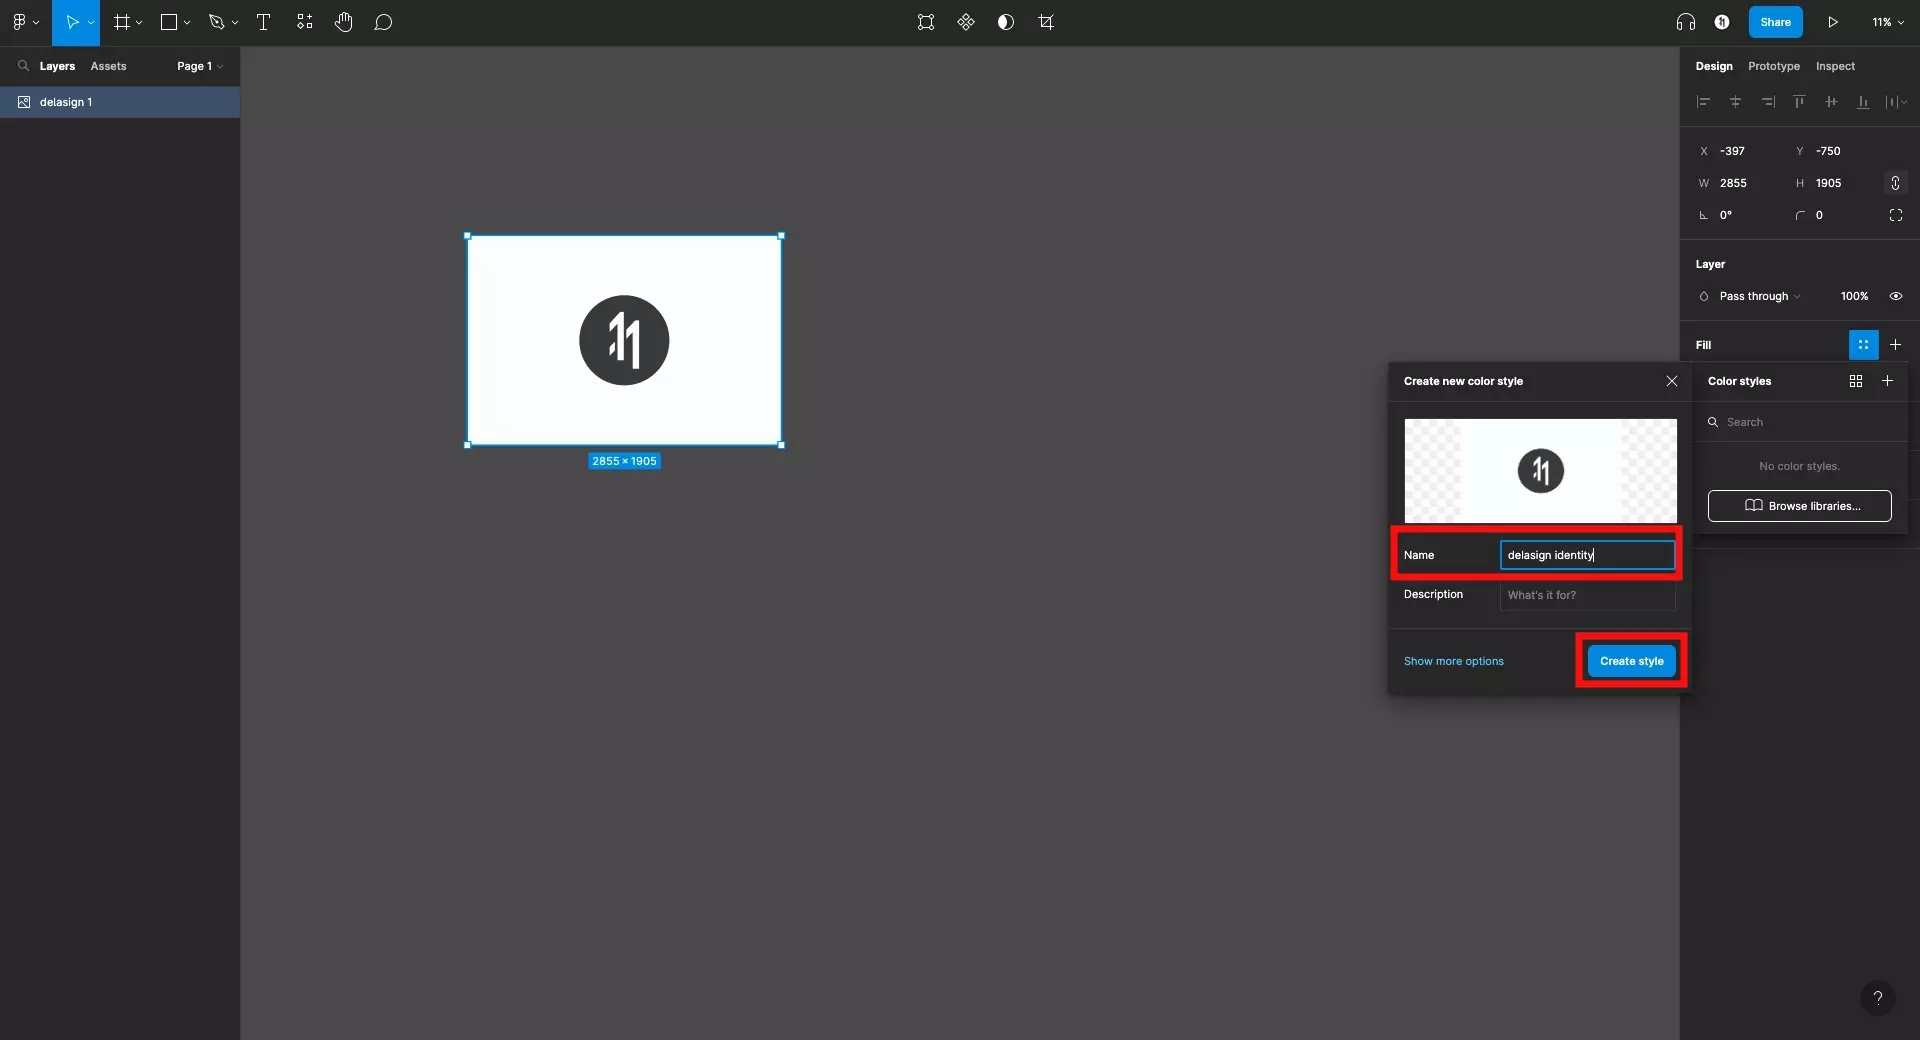
Give a name to the image style that you wish to create and press Create style.
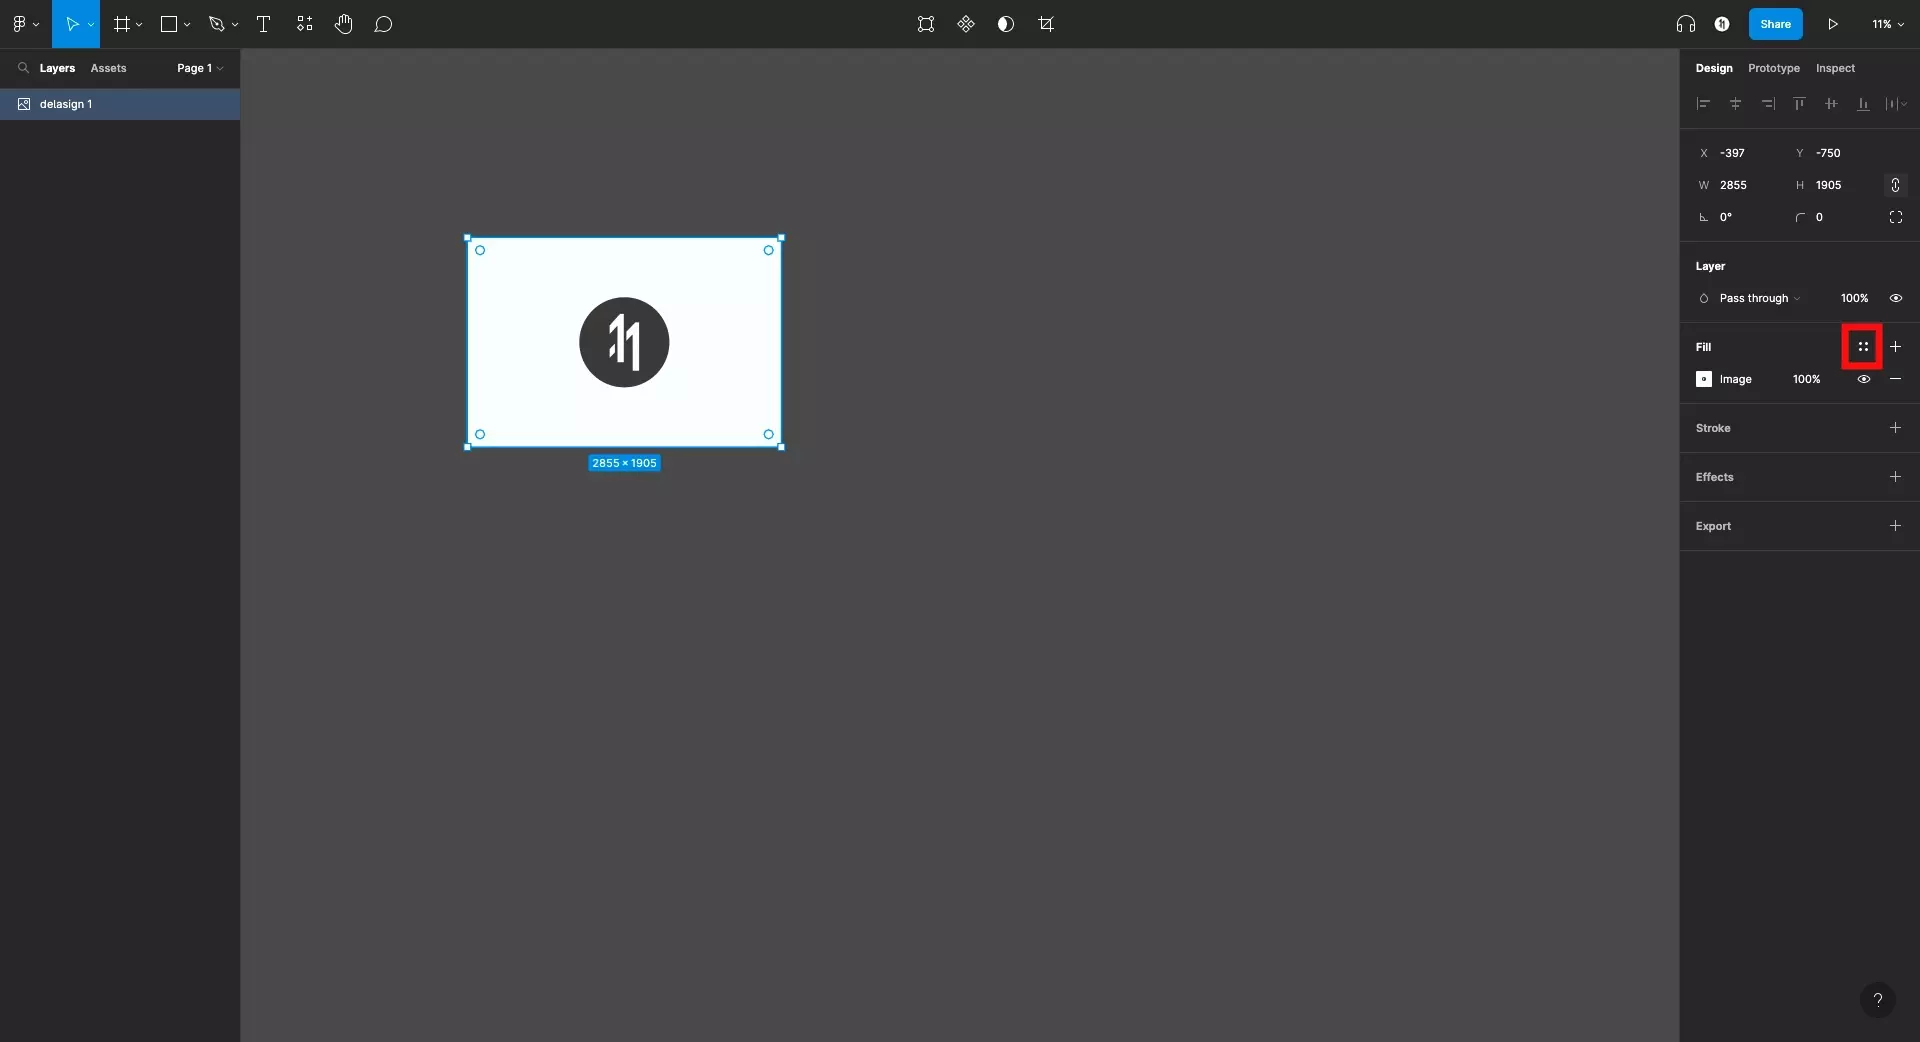
Step Three: Draw a shape
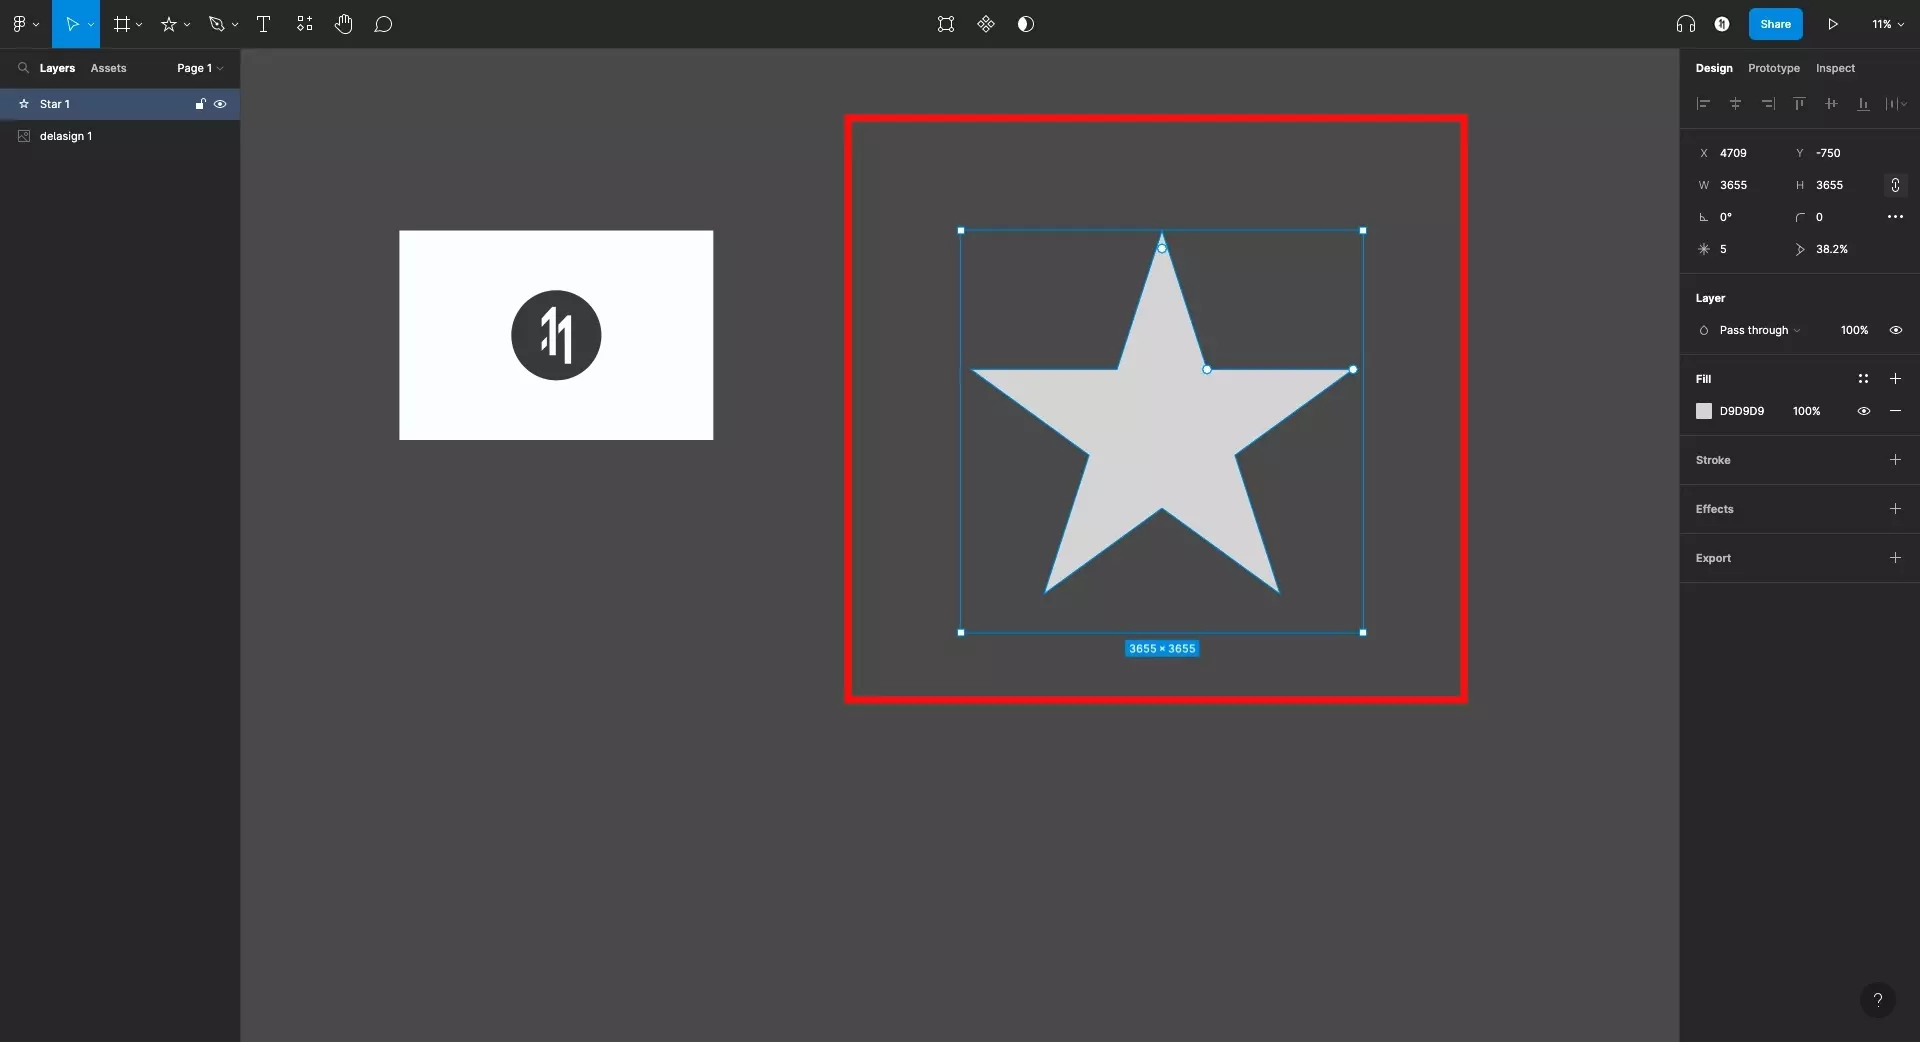
Draw a shape that you wish to apply the image to. In our case, we have draw a start to show how it can also be used to quickly apply masks or custom crops.
Step Four: Use the style
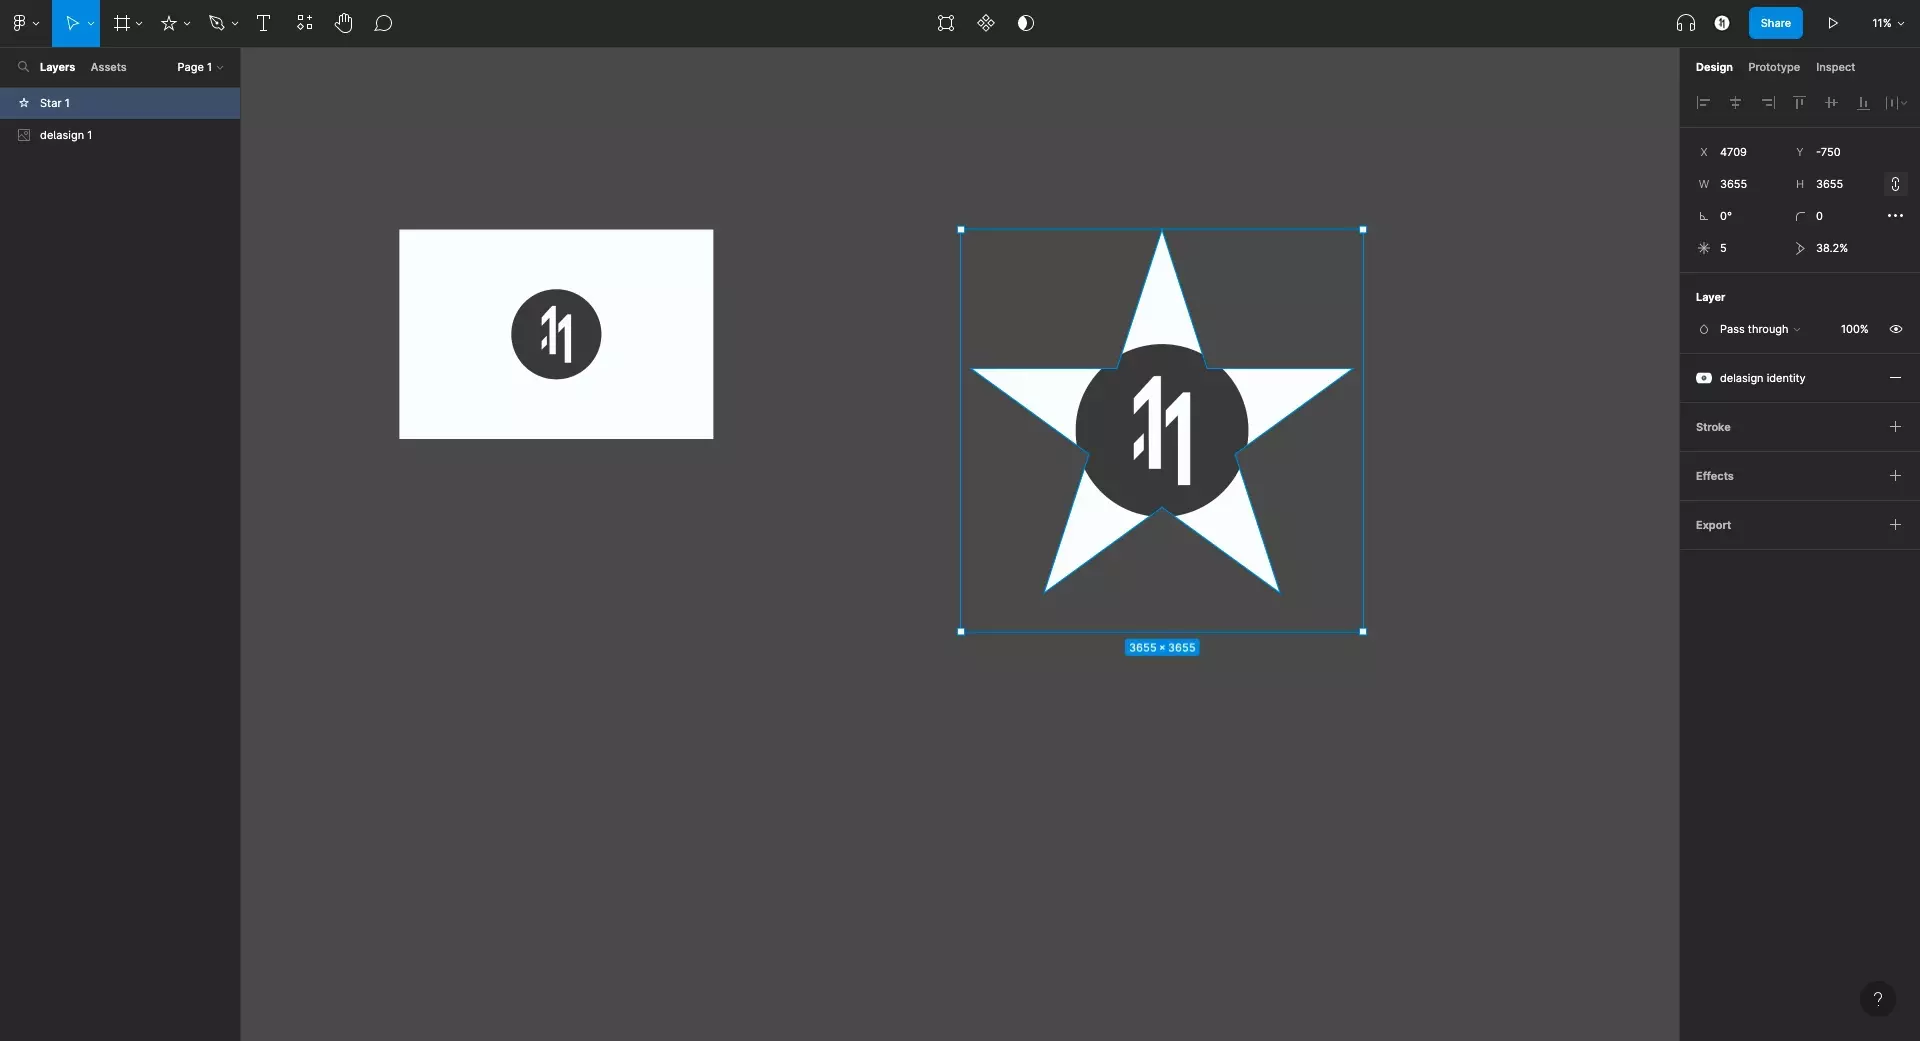
Select the newly drawn shape, and in the design inspector on the right side of the screen carry out the following steps:
A | Select the Styles menu
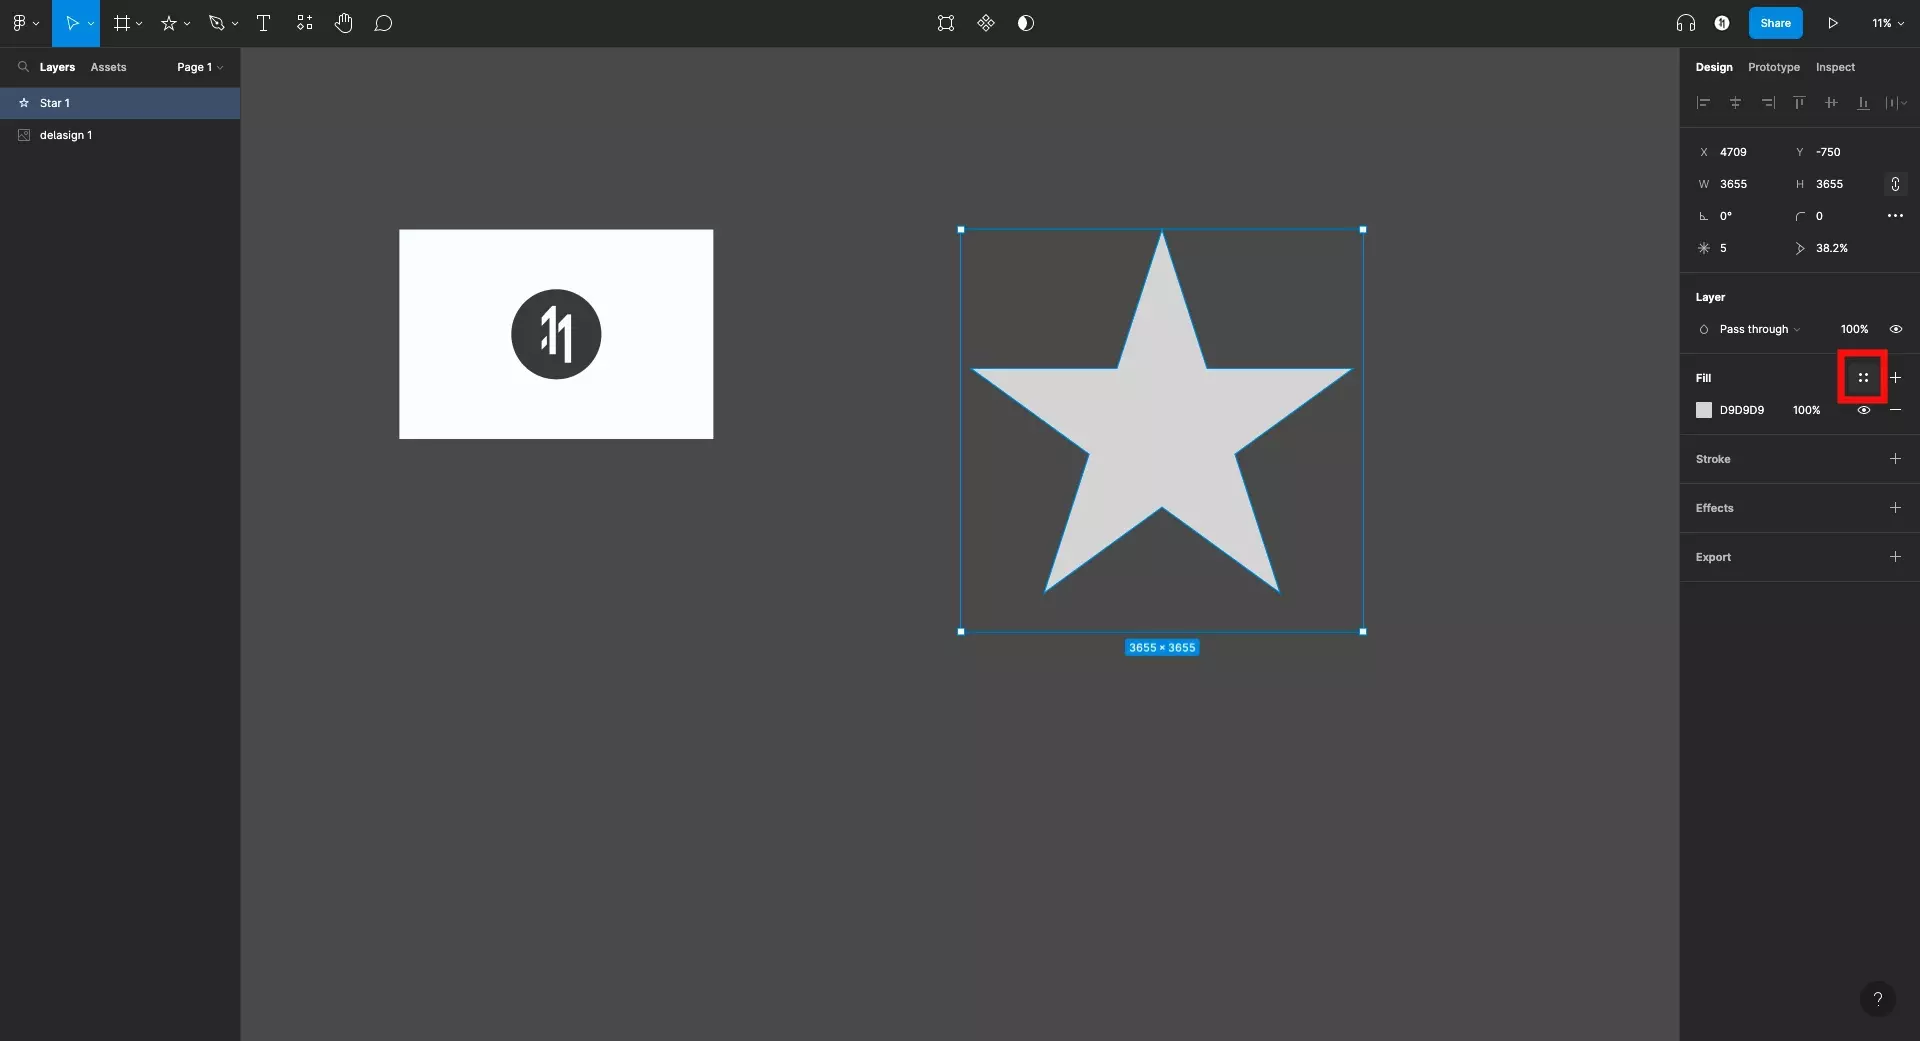
Select the four circles next to Fill to open up the Color Styles menu.
B | Apply the image style

Select the style you wish to apply. In our case, it's the delasign identity that we just created.
If at any moment you want to edit the style, remove, delete or detach it, follow one of the tutorials linked below.
Looking to learn more about things you can do with Figma ?
Search our blog to find educational content on learning how to use Figma.
Any Questions?
We are actively looking for feedback on how to improve this resource. Please send us a note to inquiries@delasign.com with any thoughts or feedback you may have.