How to group styles in folders in Figma
Right click on the style and select add folder. You can also drag and drop existing styles into folders.

Right click on the style and select add folder. You can also drag and drop existing styles into folders.
SubscribeWhat are Styles in Figma?The following tutorial teaches you how to create folders for styles, through the lens of Color styles, with the purpose of organizing styles; as well as how to rearrange or add existing styles to existing folders.
For tutorials on creating text, color or image styles please use the links provided below.
Step One: Select the Canvas
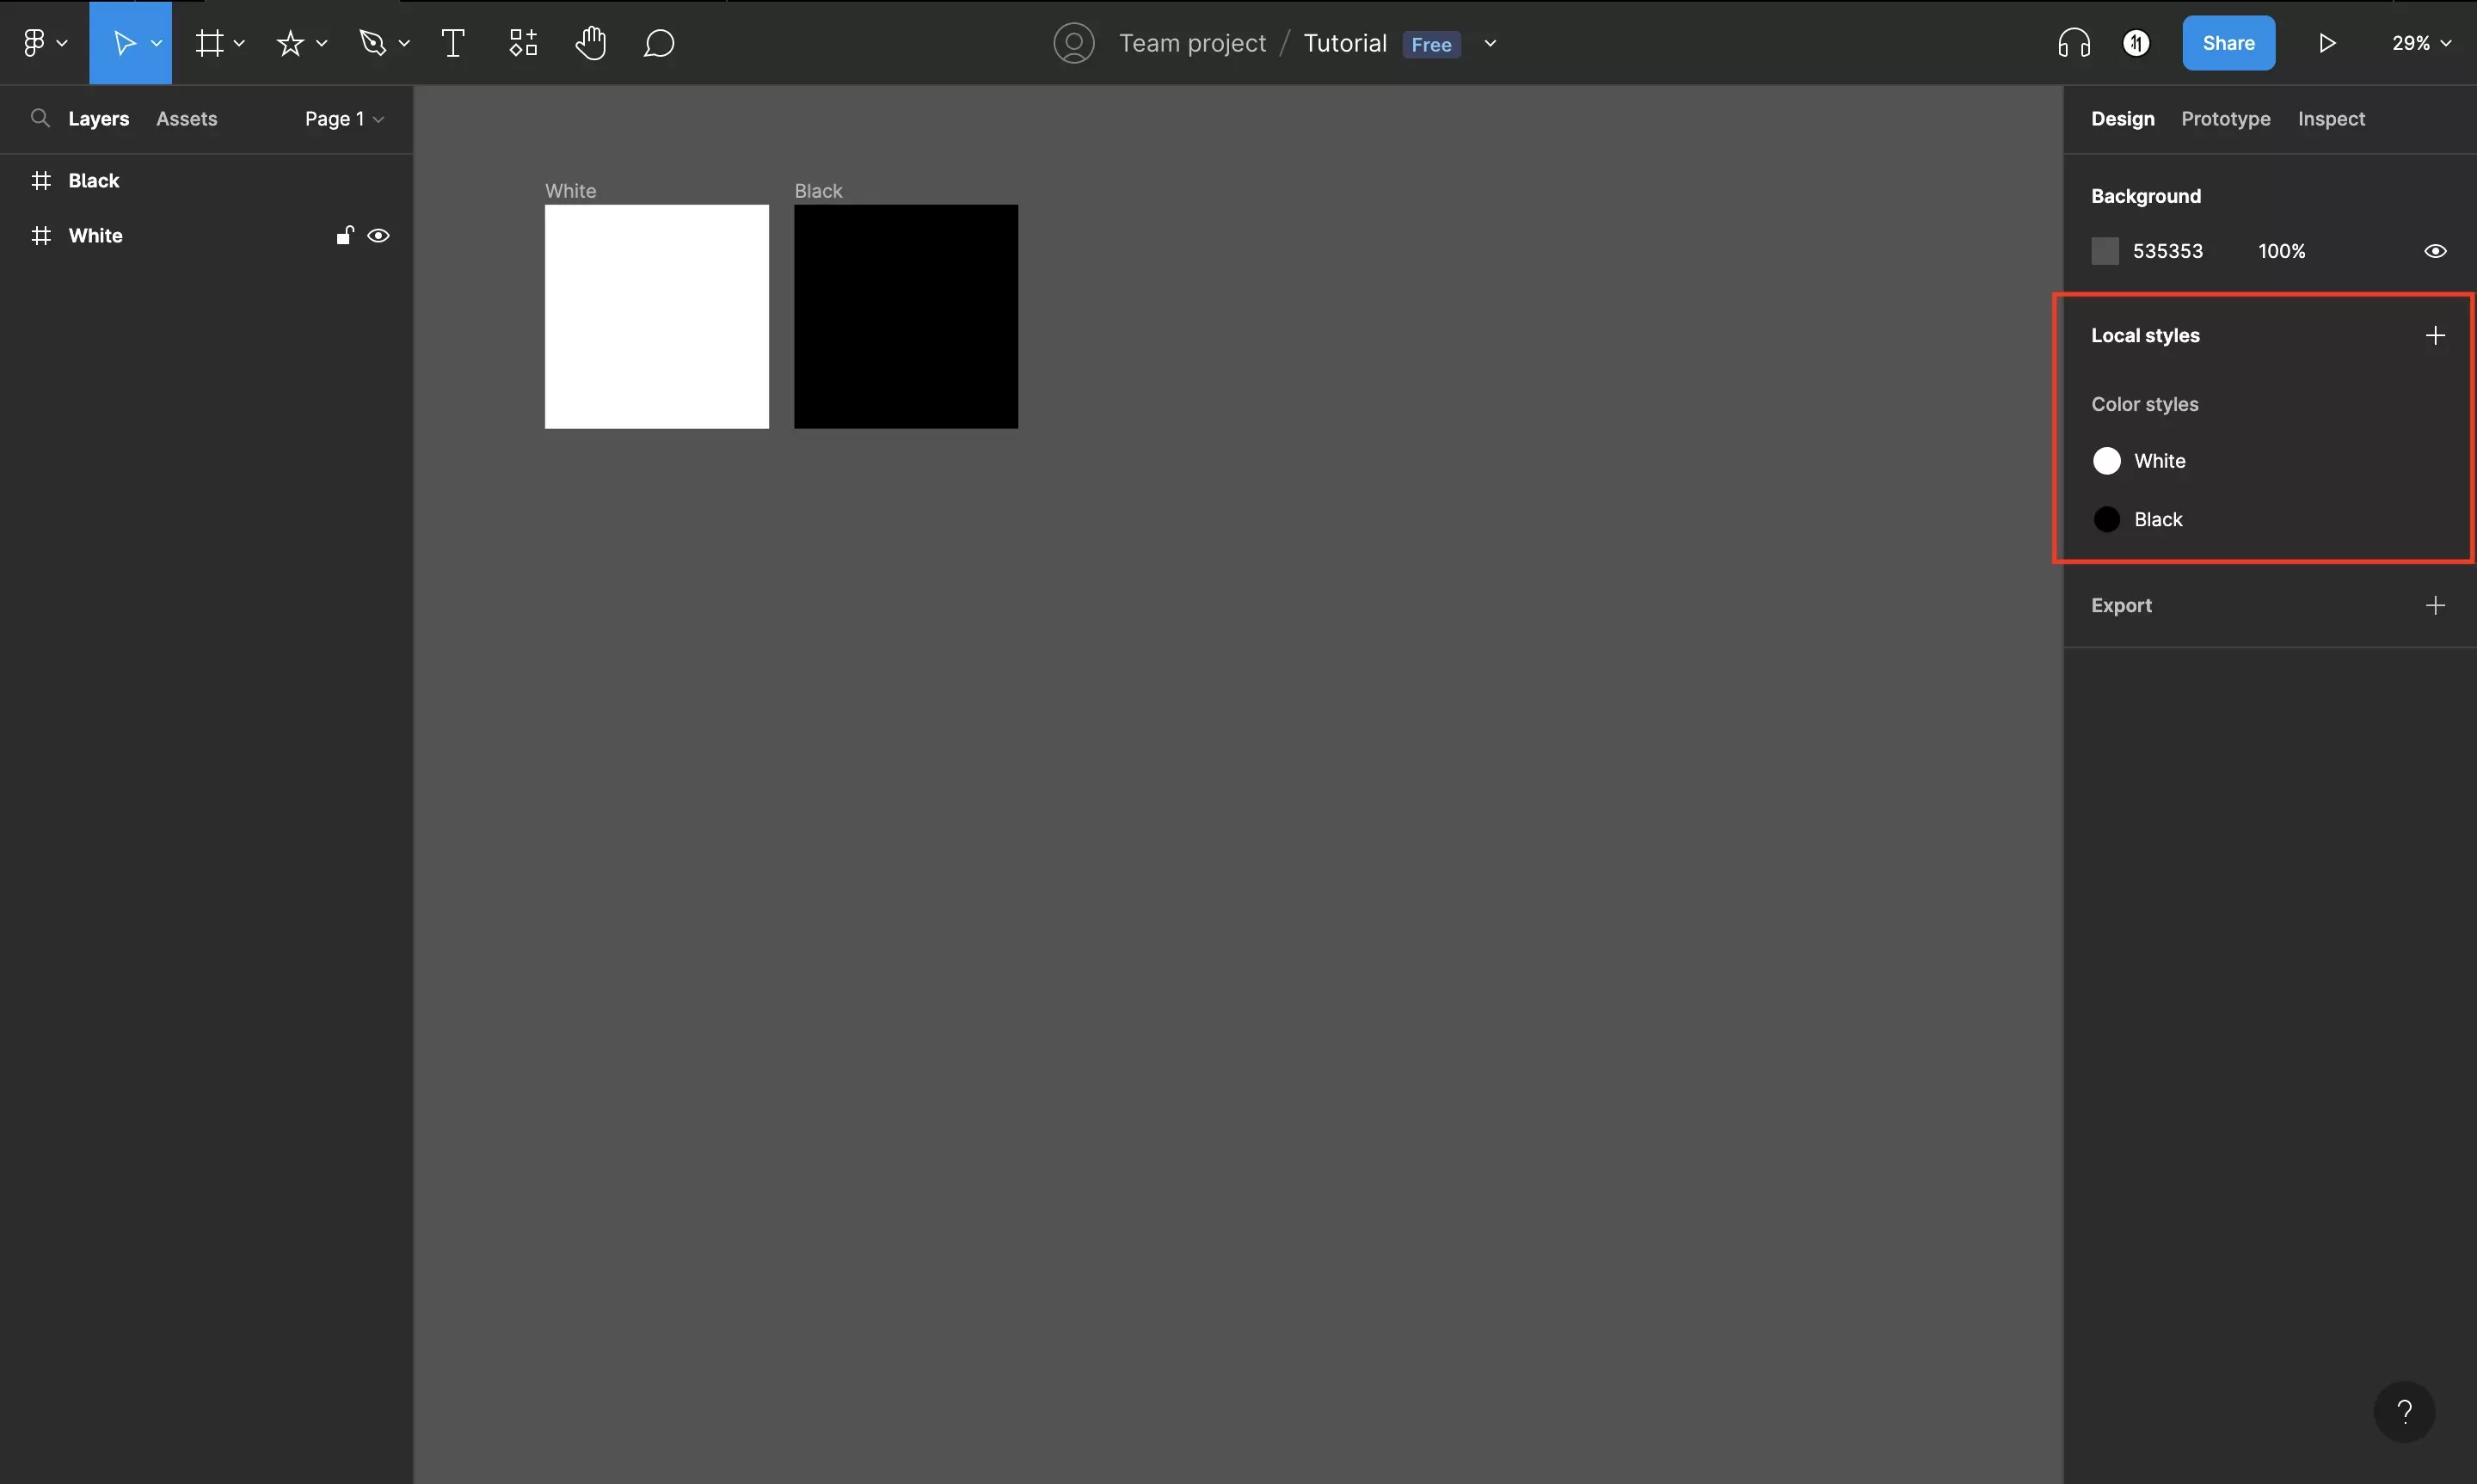
In Figma, select the Canvas. This will make all the styles appear on the right side menu bar.
Step Two: Right click to create folder
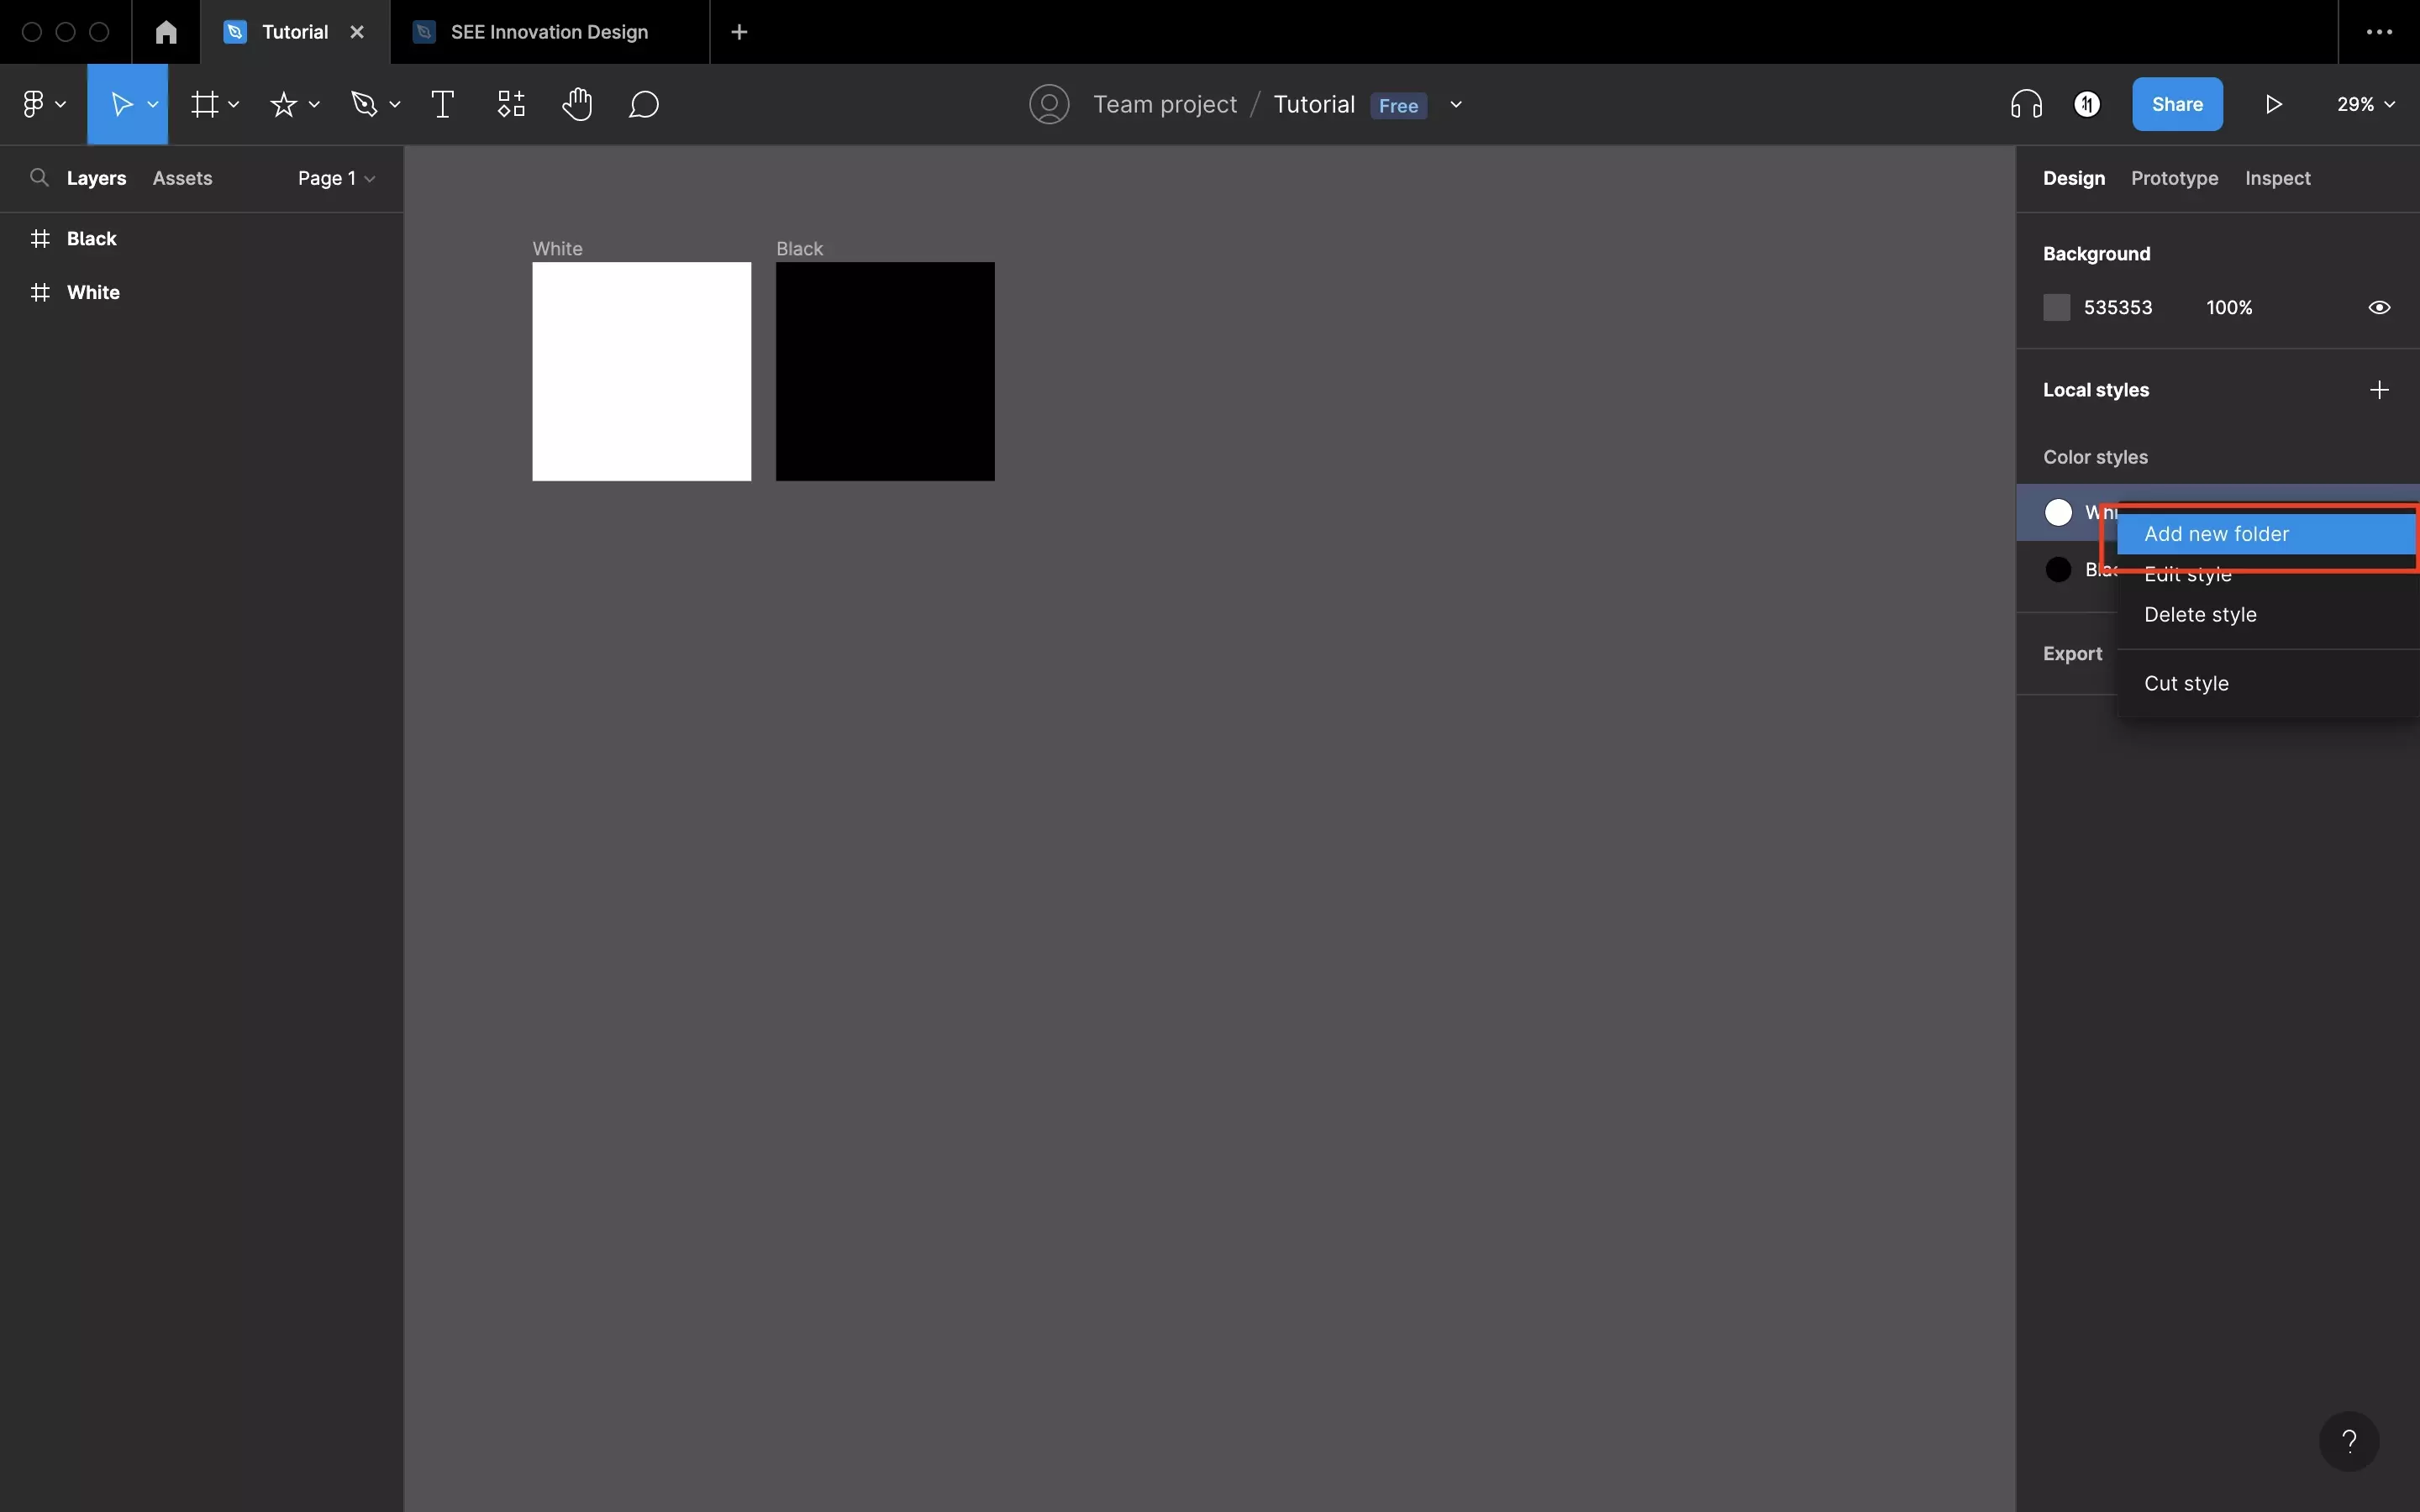
Right click on the style that you wish to create a folder for.
This will open a pop up menu that contains four options Add new folder, Edit style, Delete style & Cut style.
Select Add new folder to create a folder for the style.
Step Three: Name the folder
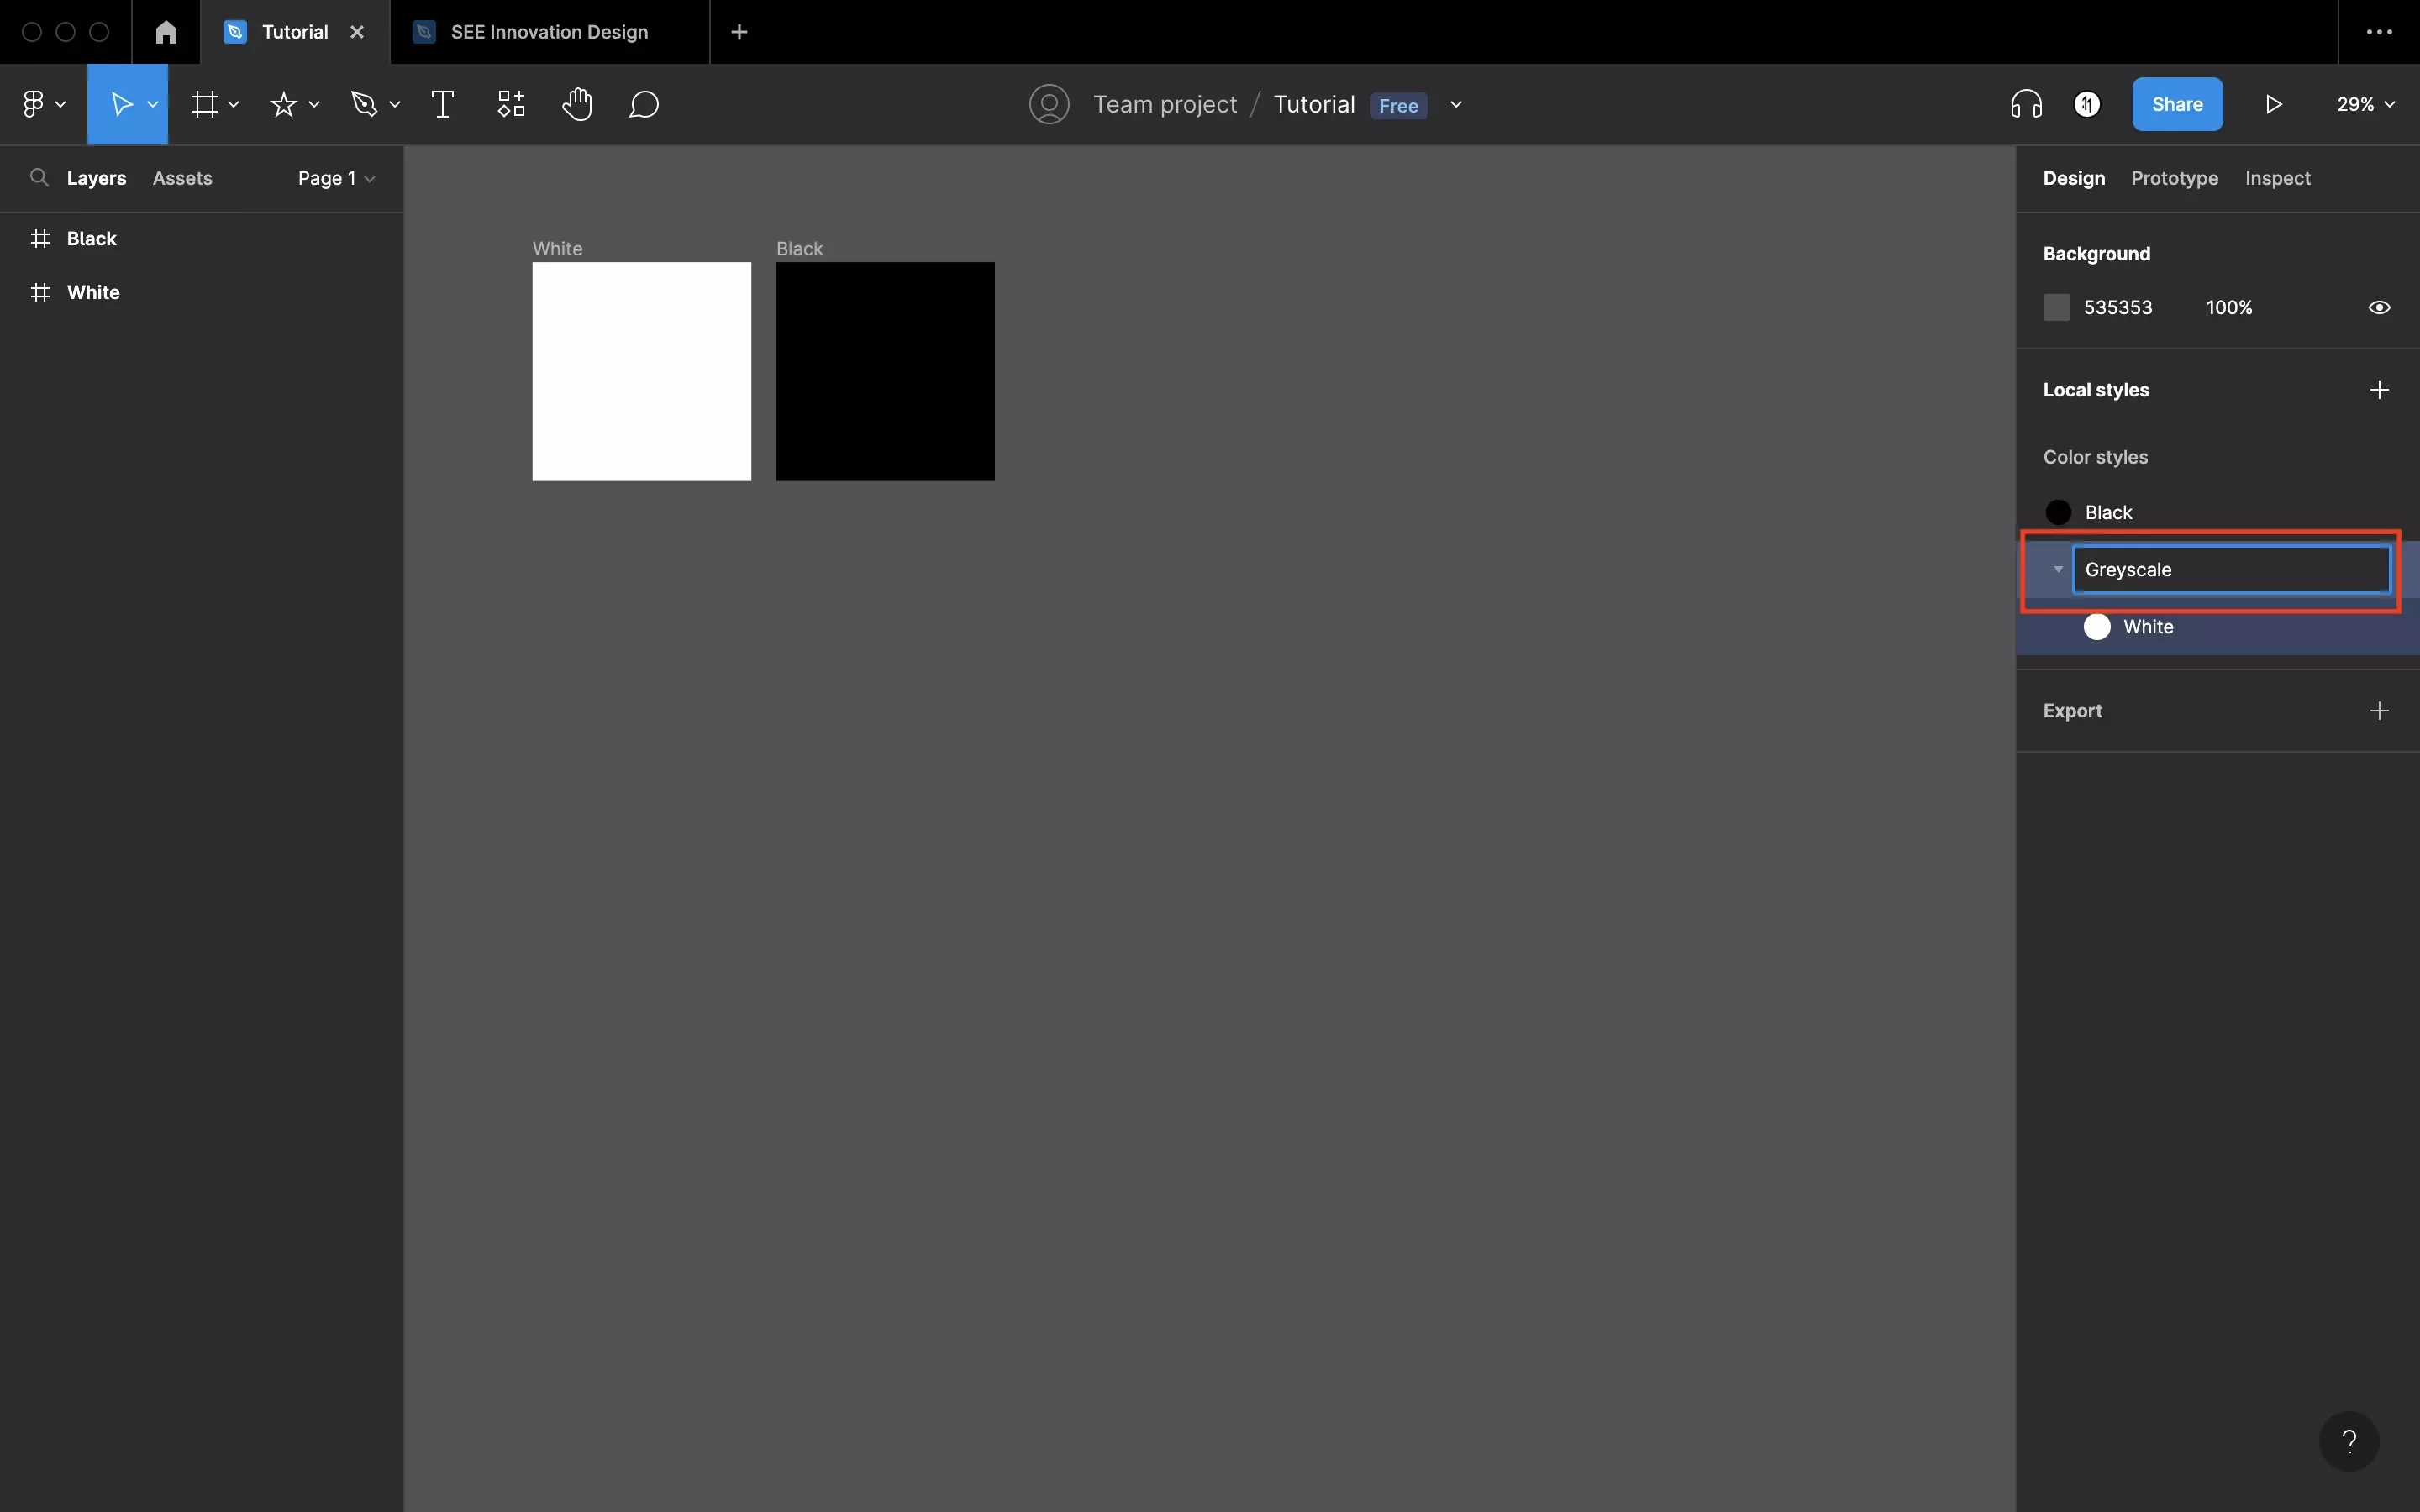
Selecting Add new folder creates a new folder with the style that you selected within it. It will then give you the chance to name the folder automatically, which initially comes as Untitled.
We recommend that you plan the name of your folders to enhance organizational efficiency.
Step Four: Drag and drop other styles to reorder
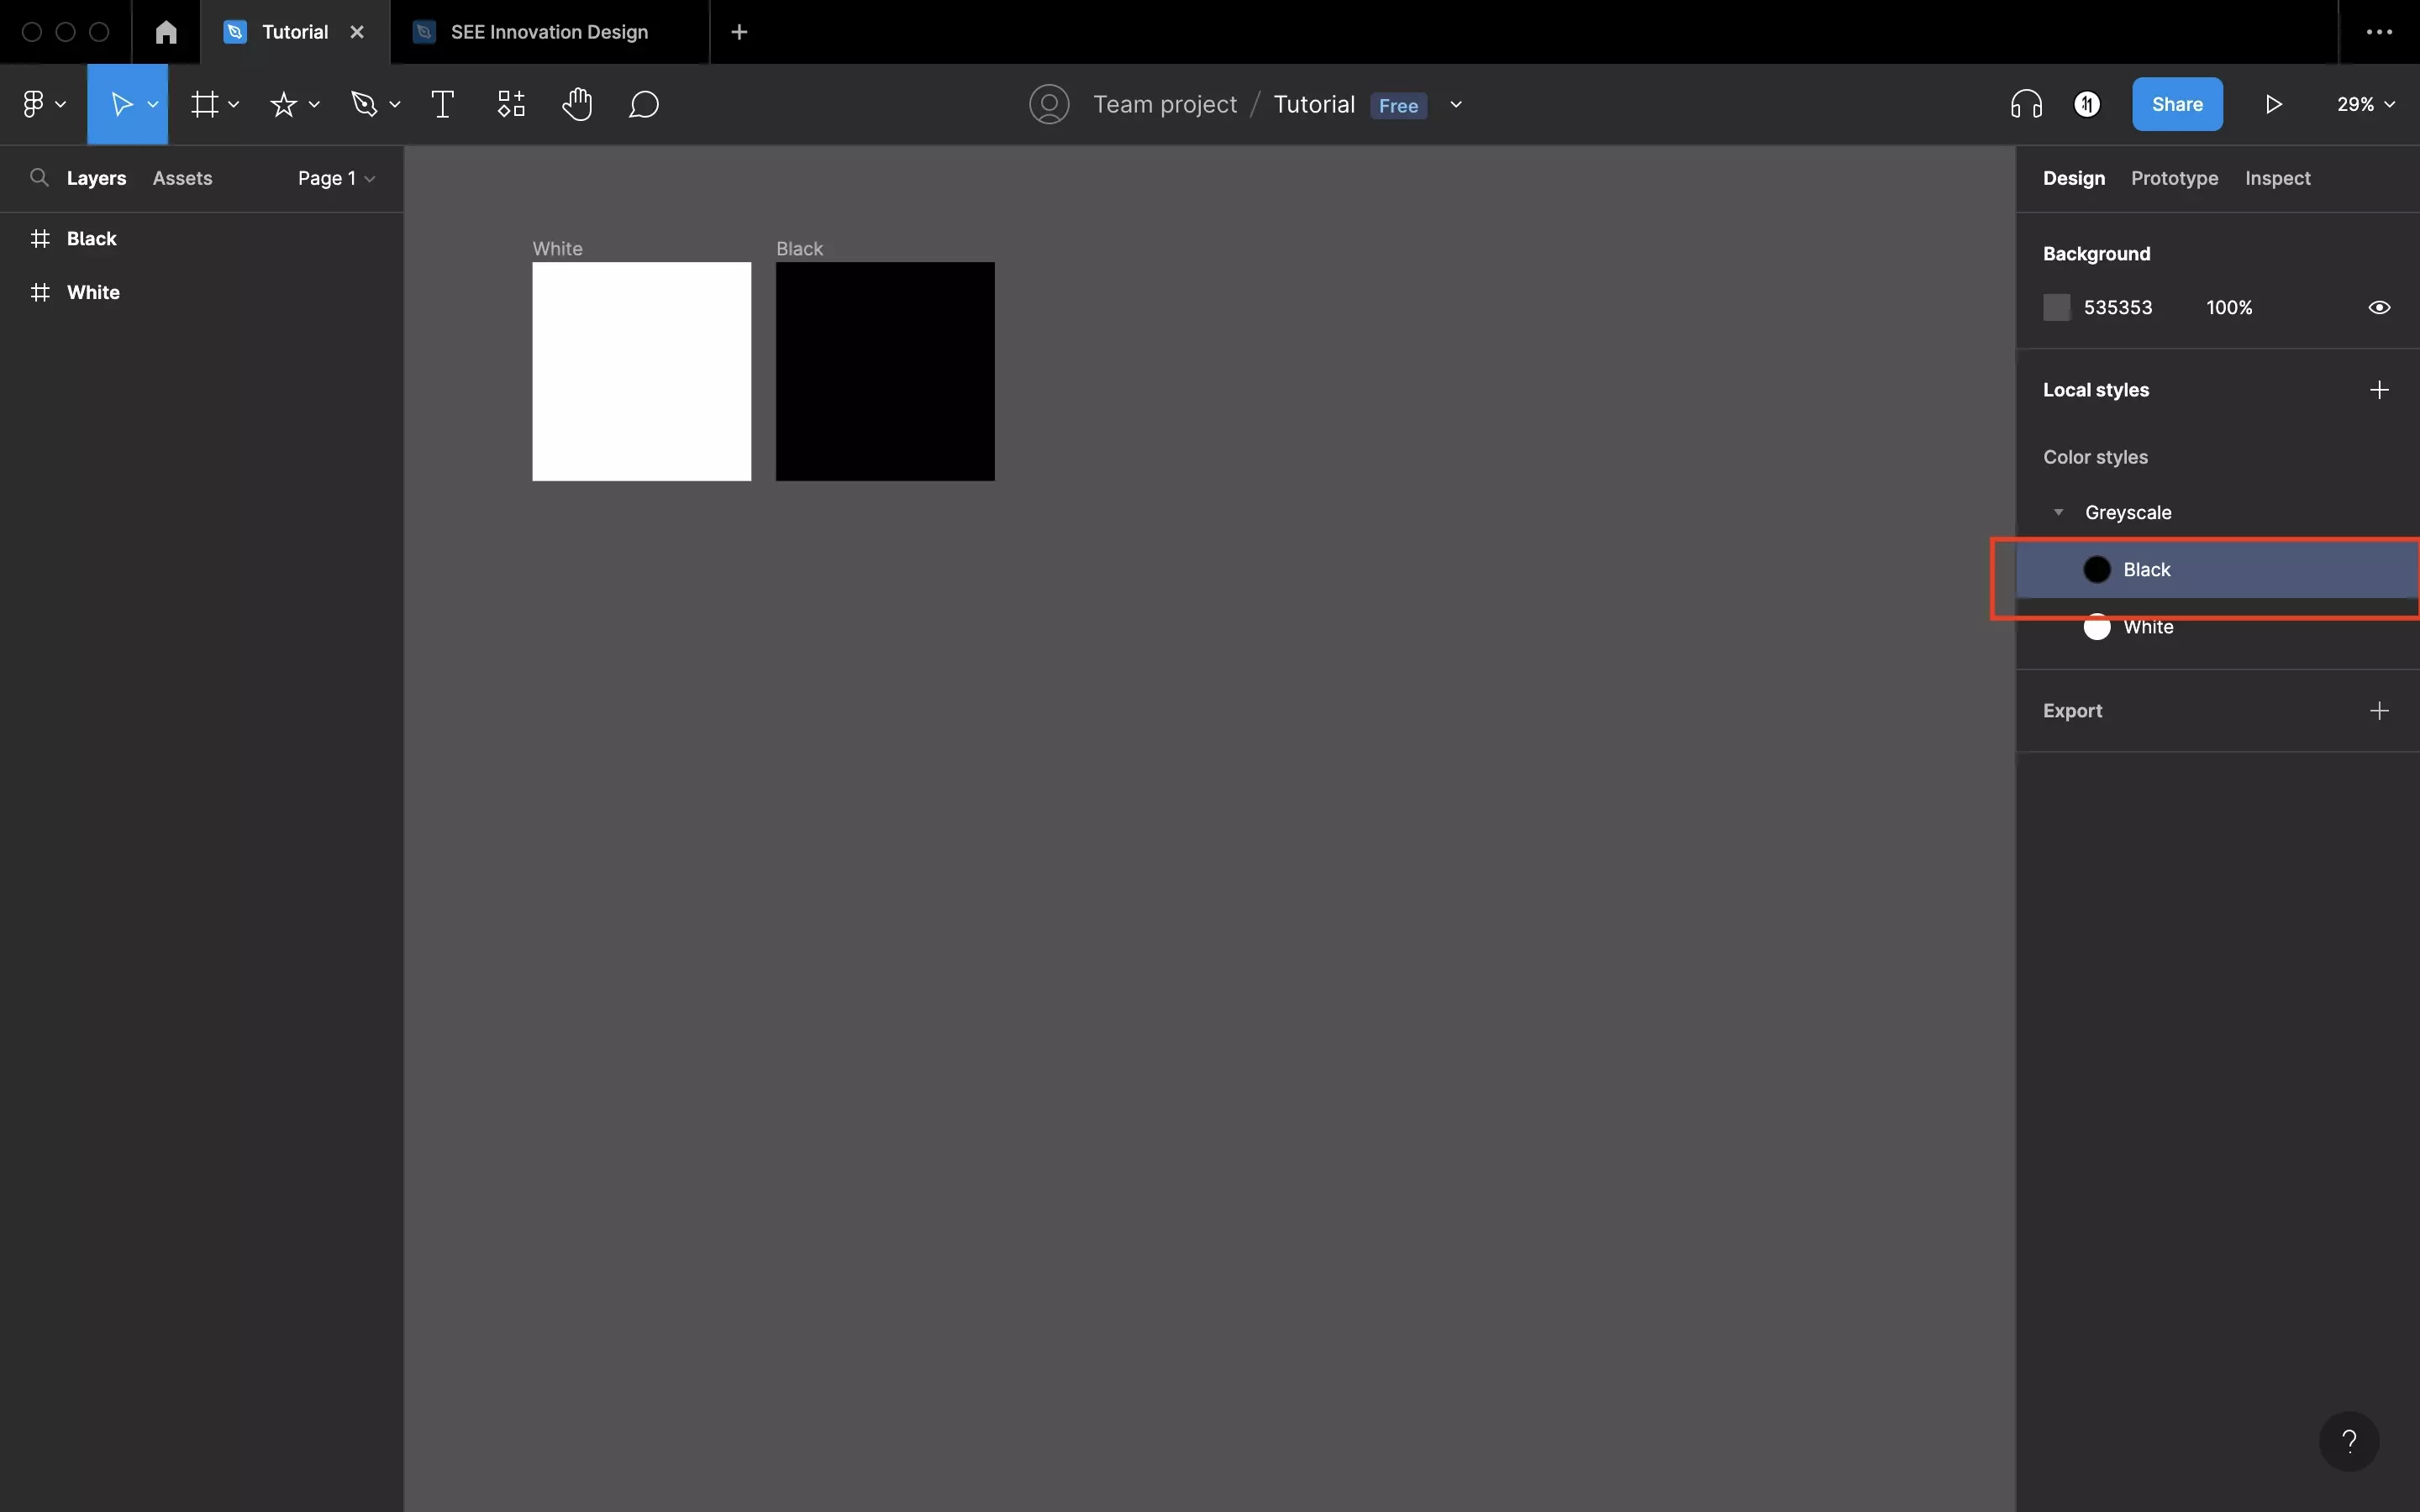
If you wish to reorder styles within your folder or to add other styles to the folder, select the style and change its position to its desired order or folder.
In our case we dragged Black into our newly created Greyscale folder.
Looking to learn more about things you can do with Figma ?
Search our blog to find educational content on learning how to use Figma.
Any Questions?
We are actively looking for feedback on how to improve this resource. Please send us a note to inquiries@delasign.com with any thoughts or feedback you may have.