How to add a Background Image to a Frame or Shape in Figma

Oscar de la Hera Gomez
A flower that represents Figma with the text “Background Image” beneath it.

A step by step guide on adding one or more background images a frame or shape in Figma and customizing it to your need.
Step One: Select a Frame or a Shape

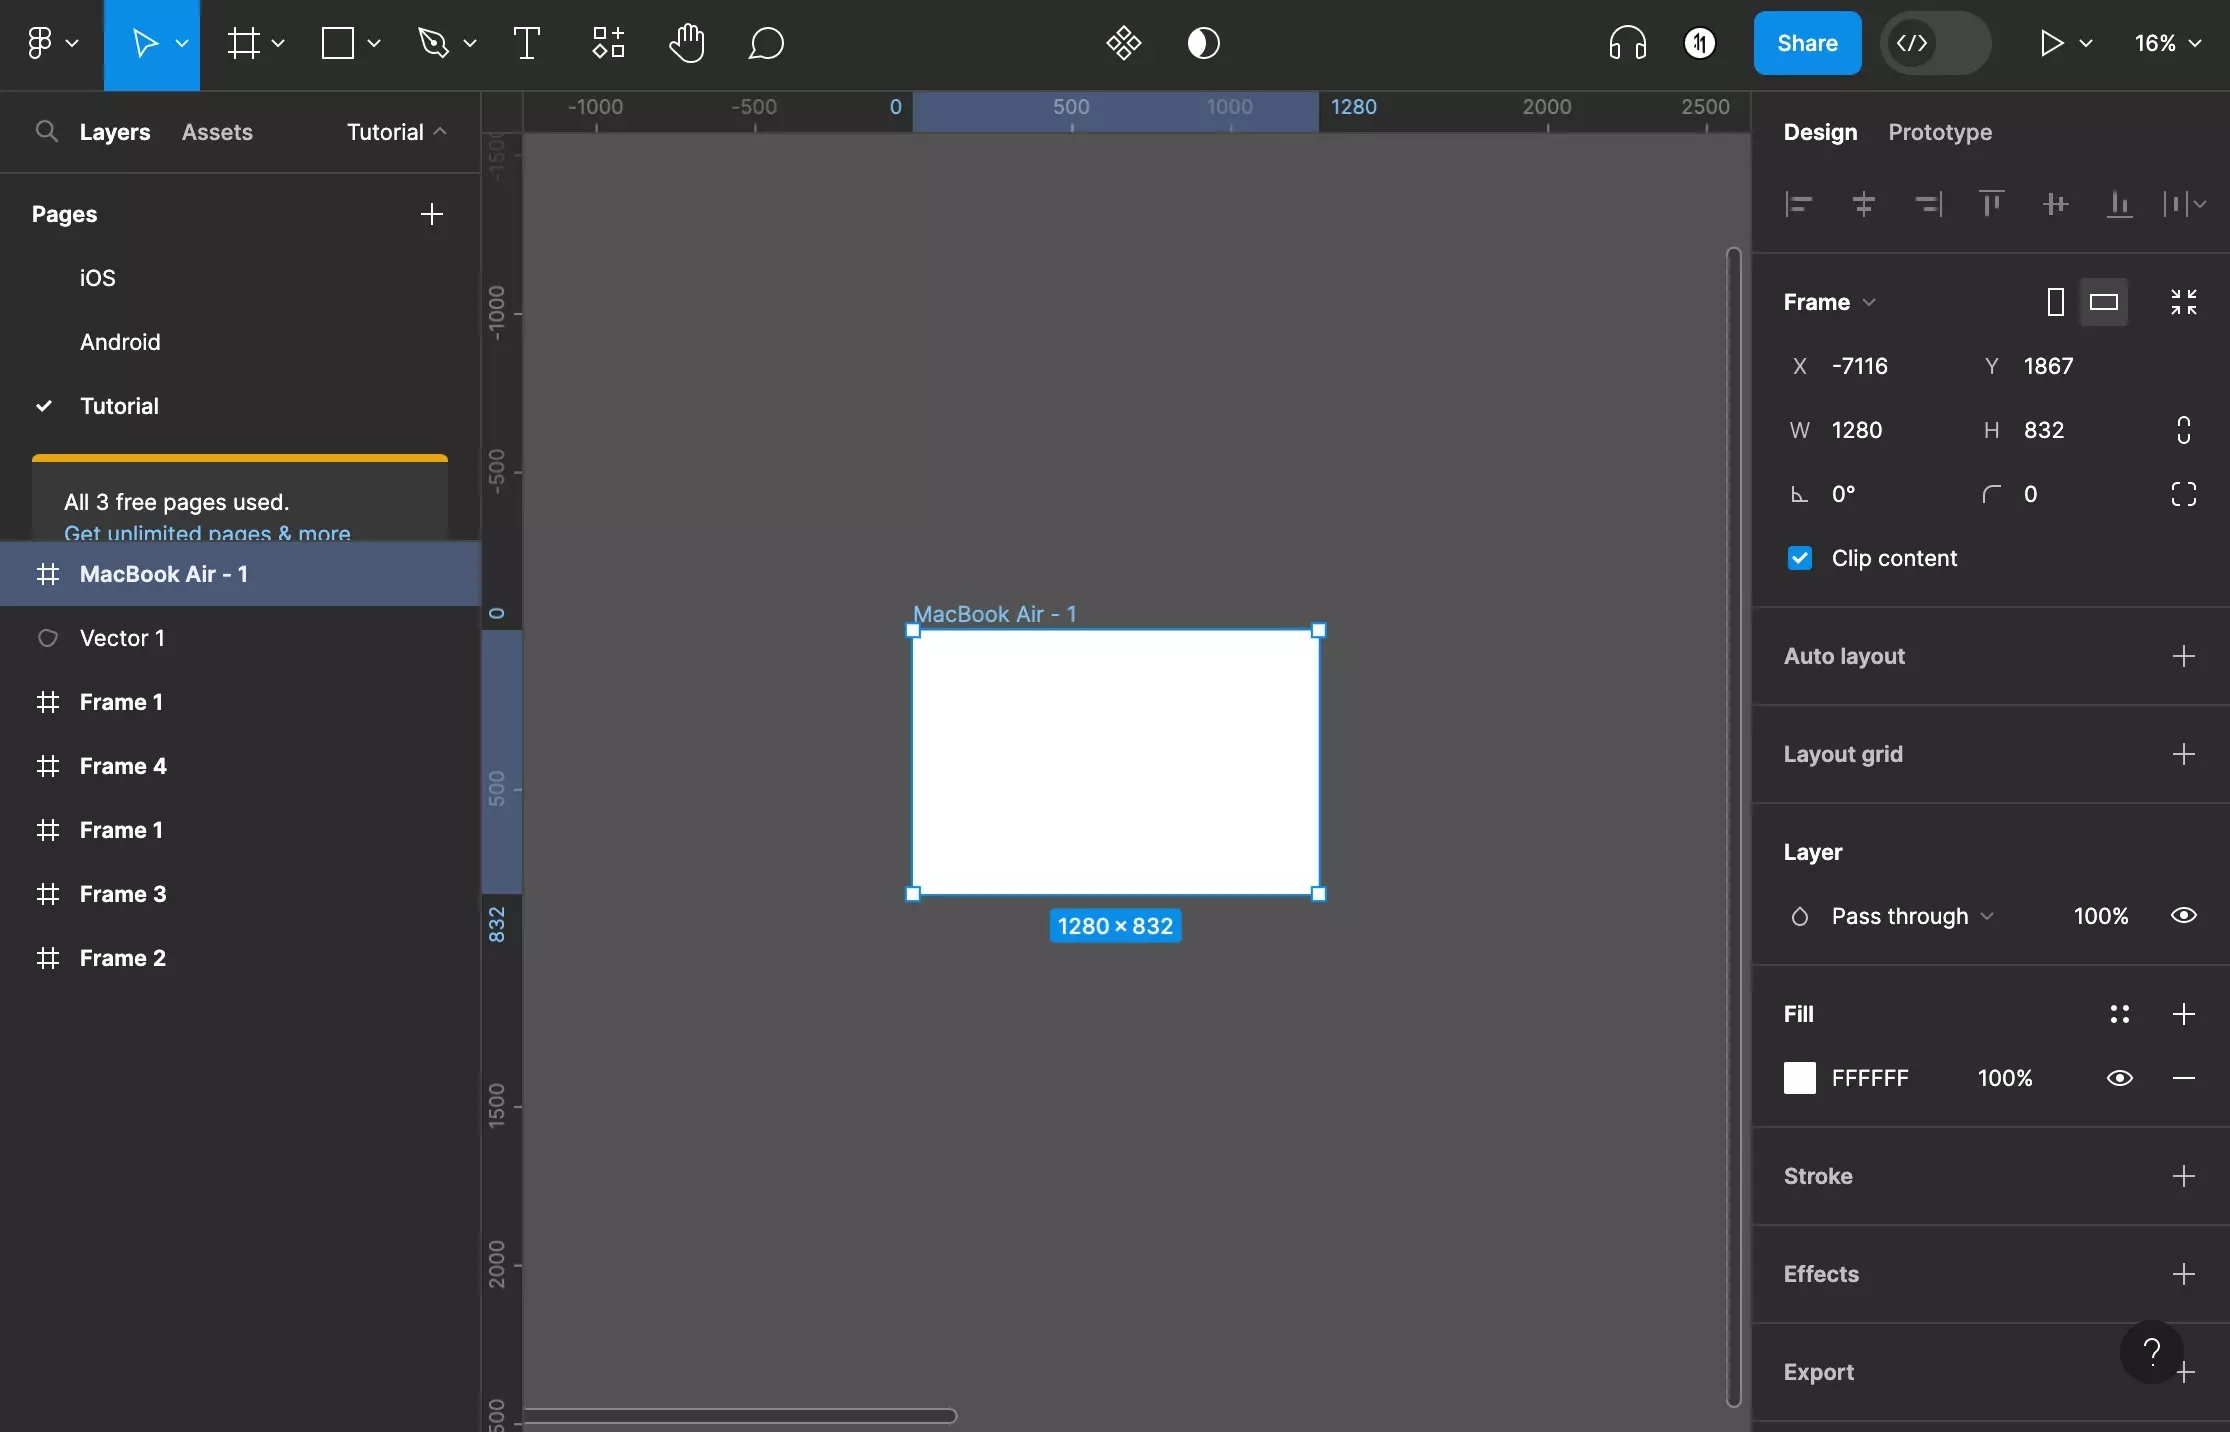
A screenshot of Figma with a Frame selected.

In Figma, select the frame or shape.

Step Two: Open the Color Menu
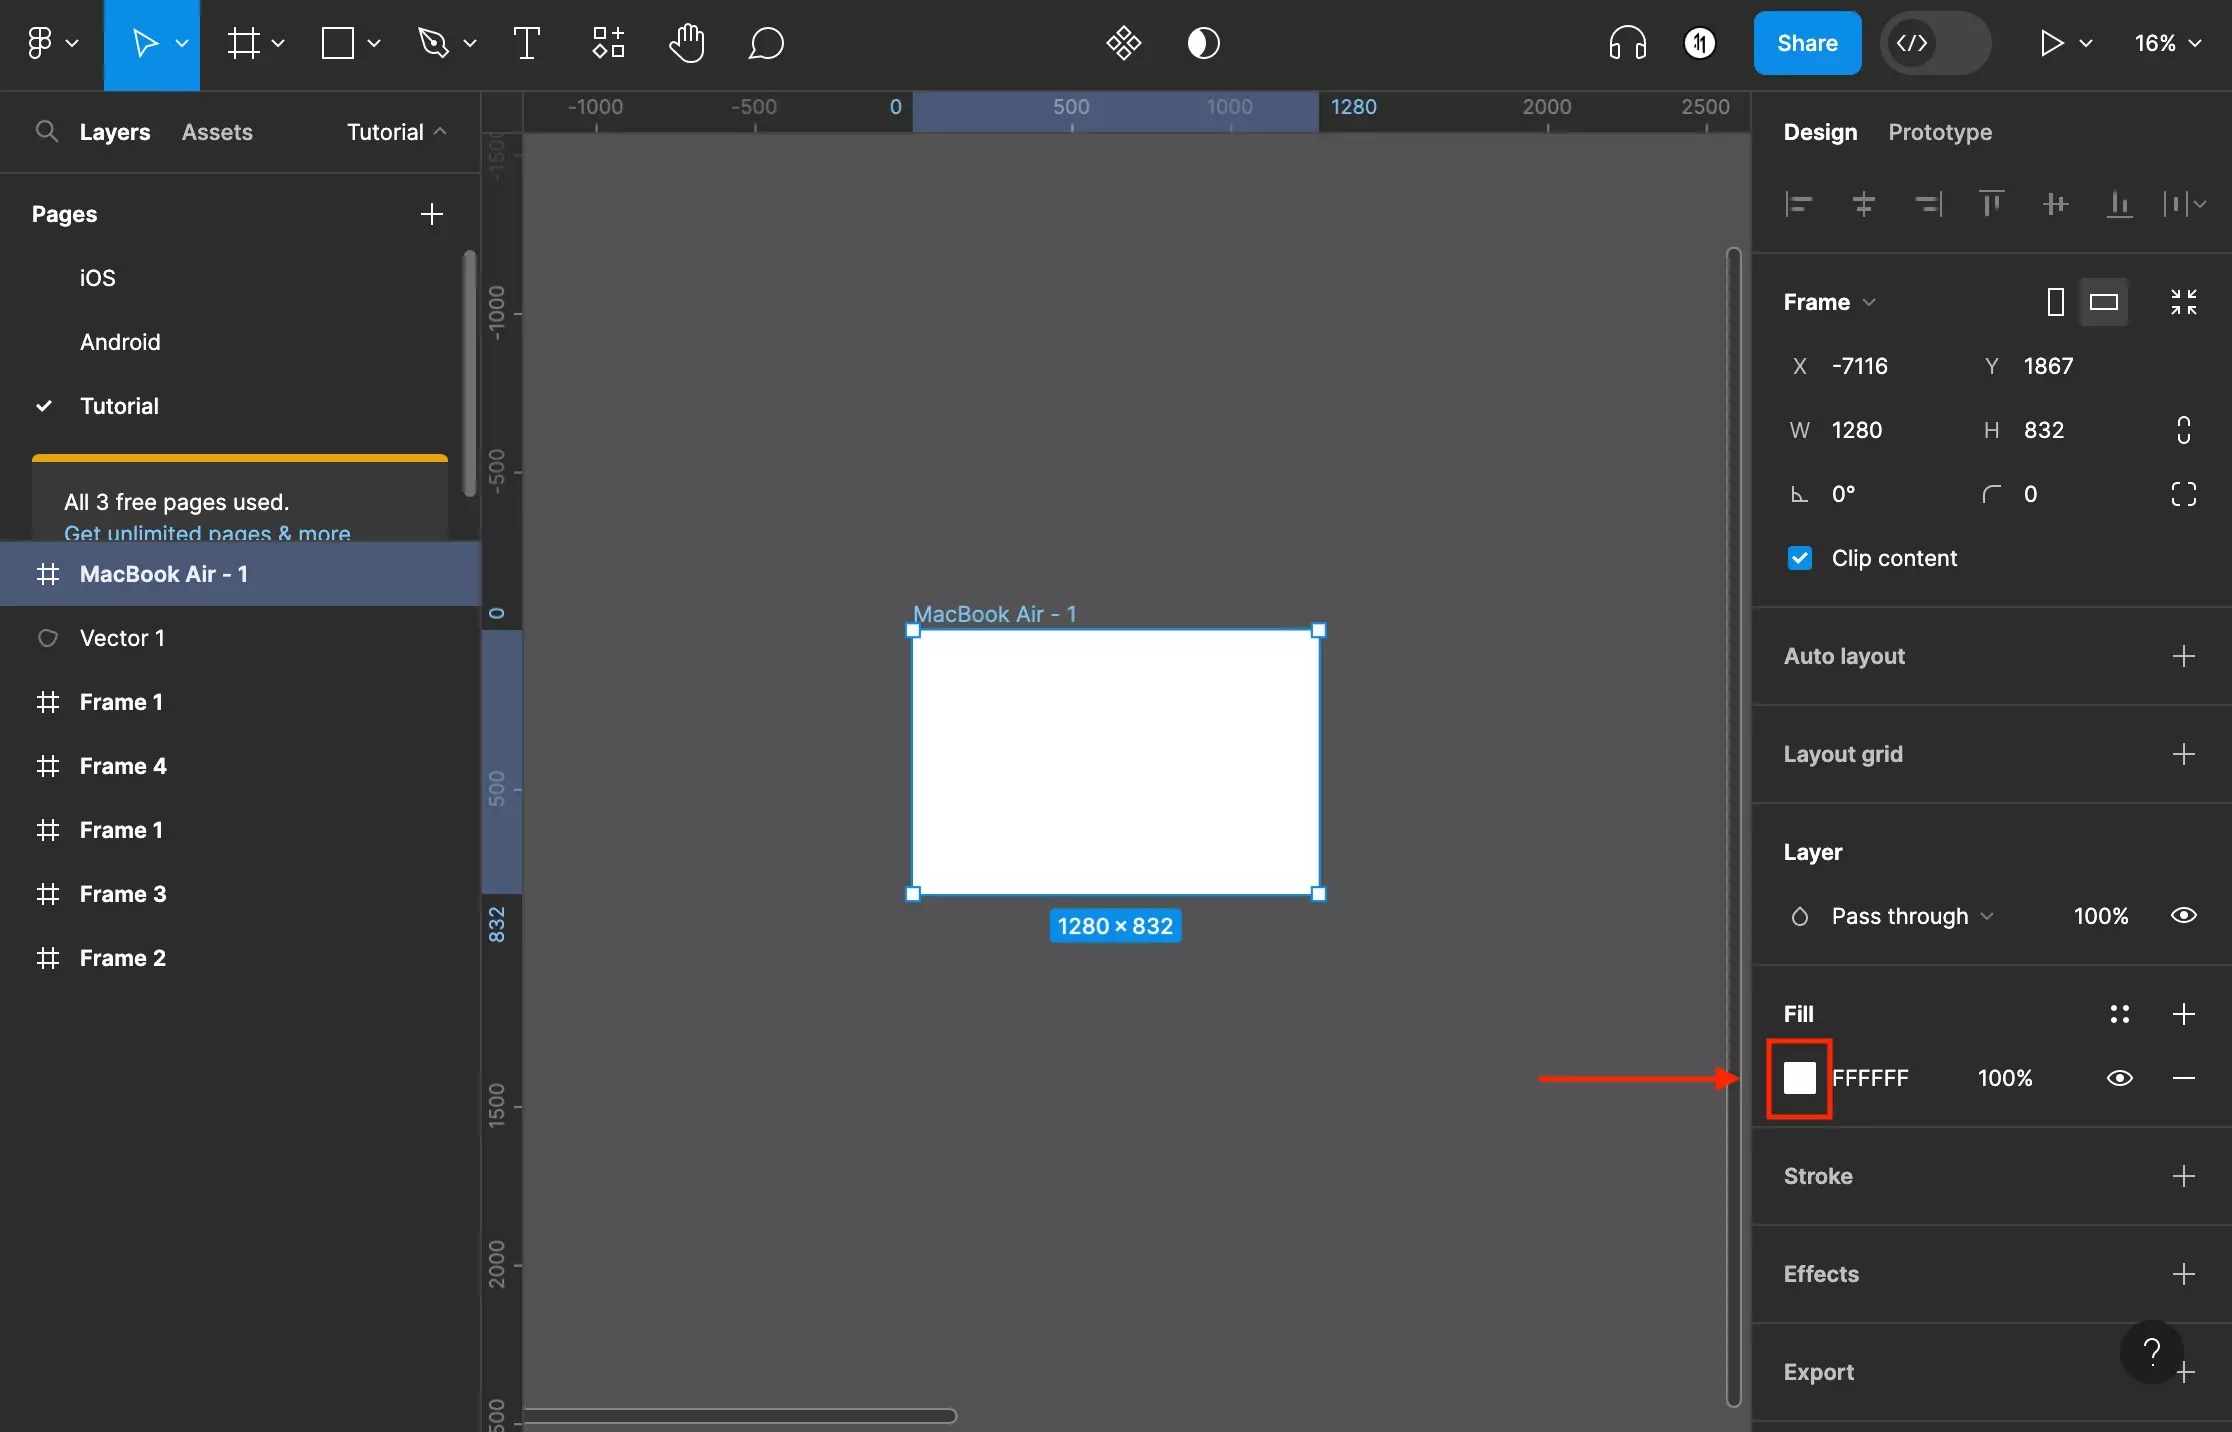
A screenshot of Figma that shows you how to frame that has been selected. Highlighted on the right menu side bar under fill is a box that has a color on it. Click it to open the color menu.

On the right side bar, click the color square under Fill to open up the color menu.

Step Three: Select the Image option
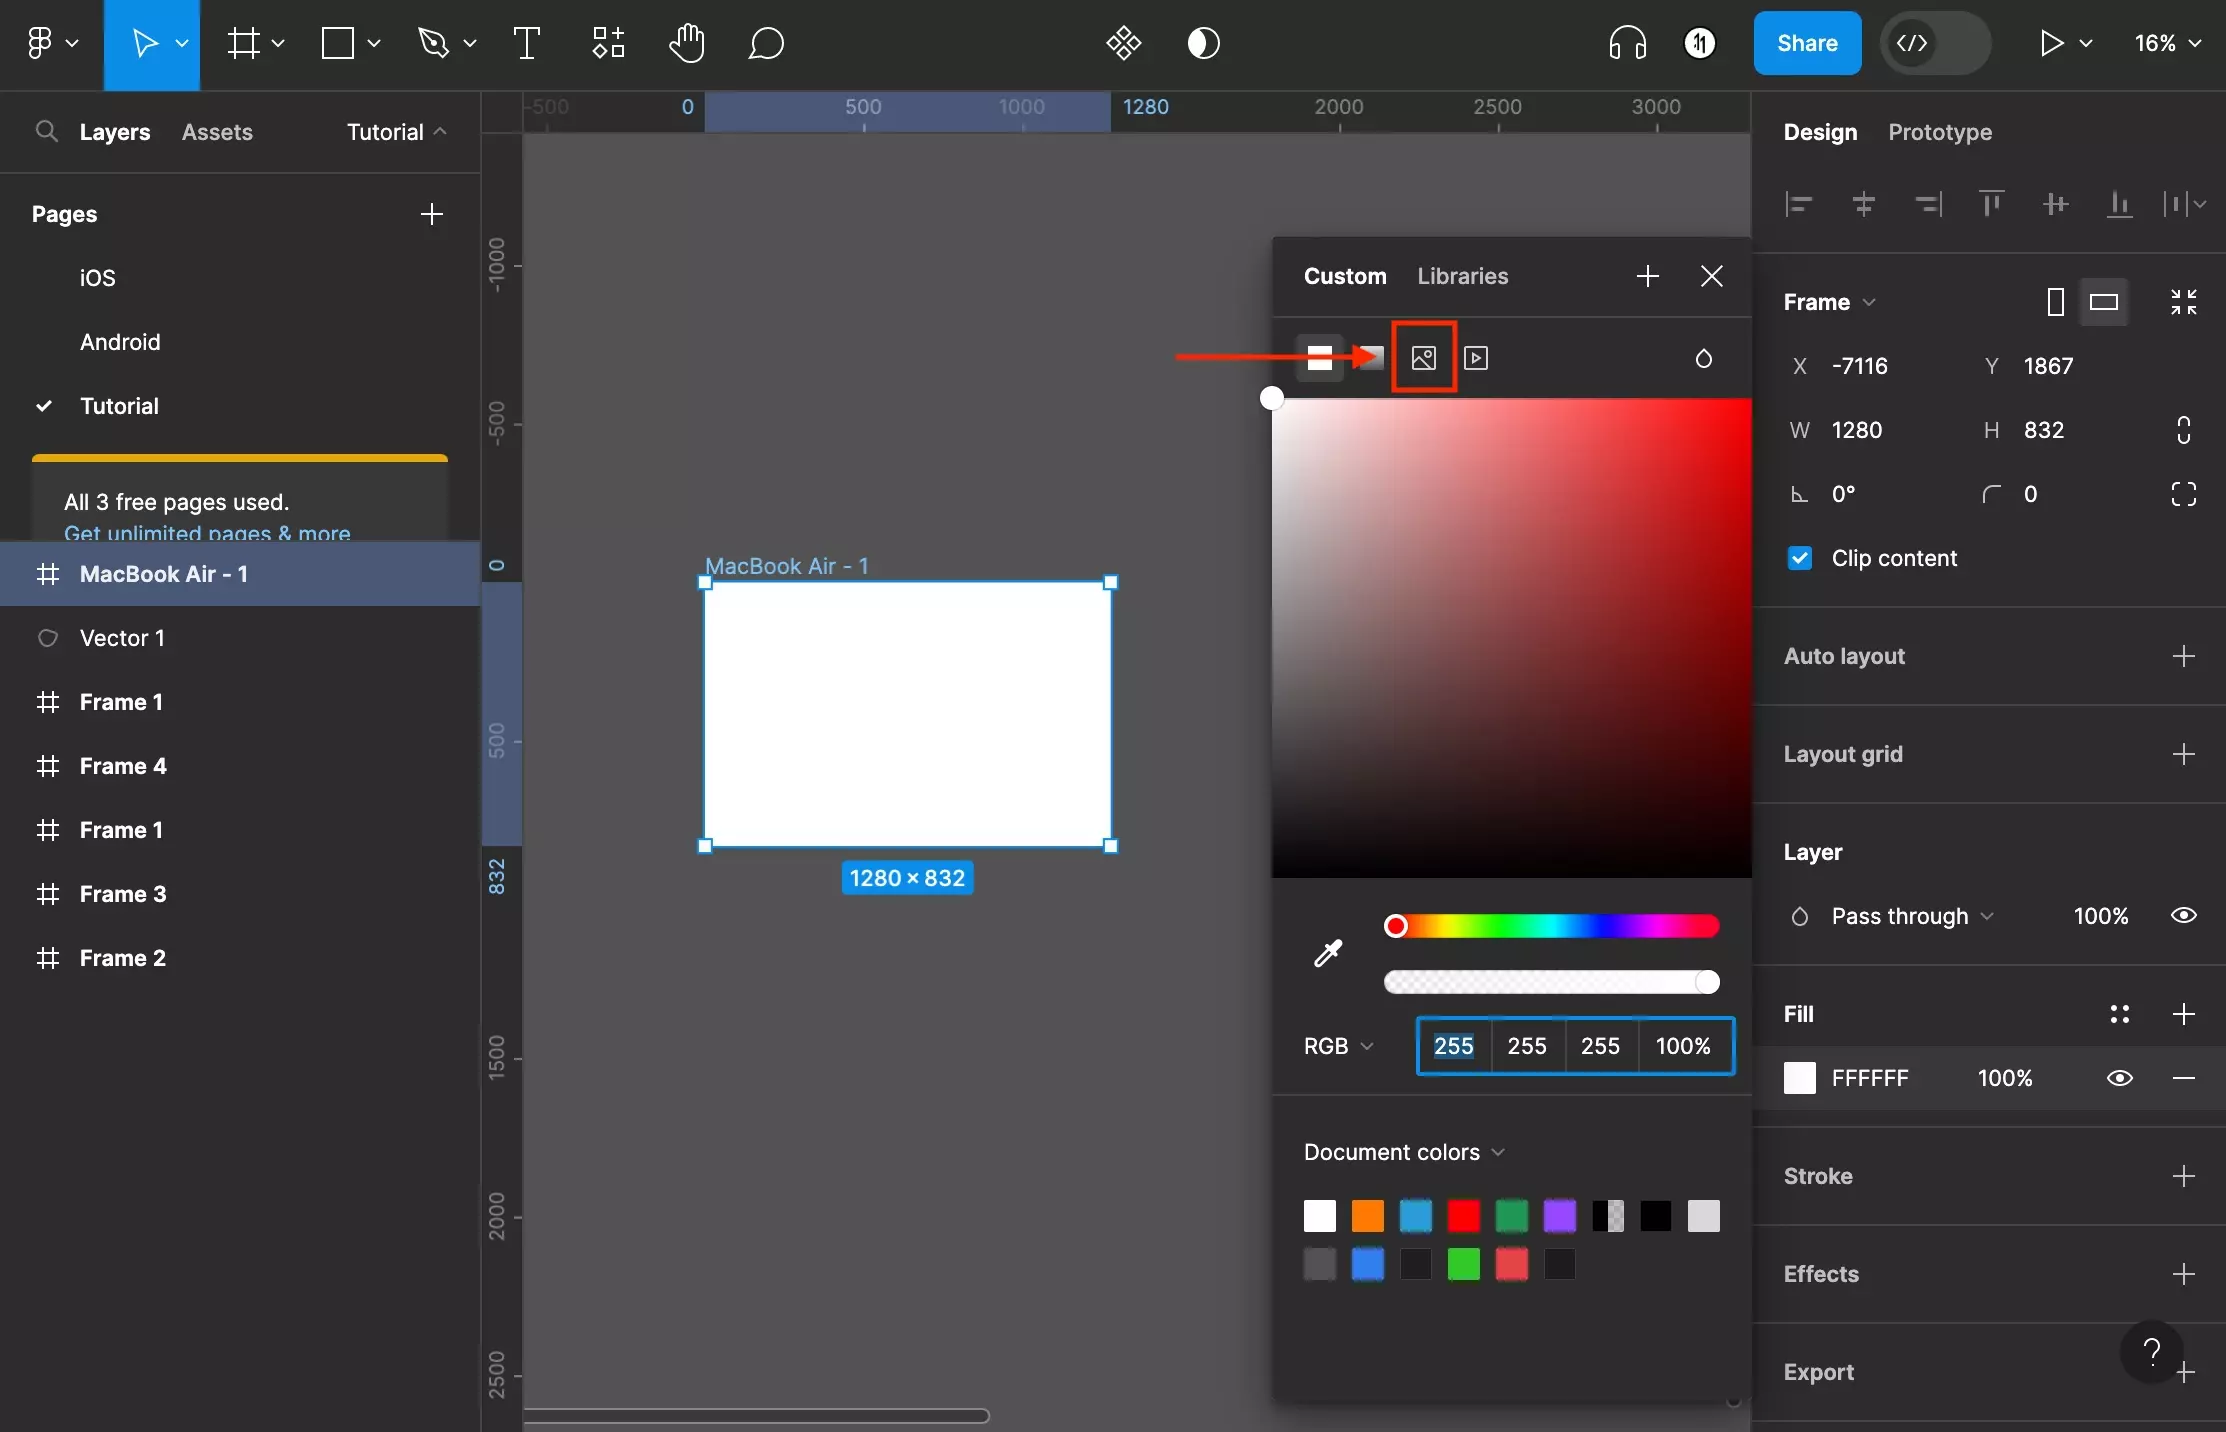
A screenshot of Figma that shows you how to frame that has been selected. The color menu has been opened and we have highlighted the image option within the menu. It is found at the top of the color menu, three items from the left.

At the top of the menu, select the gradient icon (third from the left).

Step Four: Choose an Image
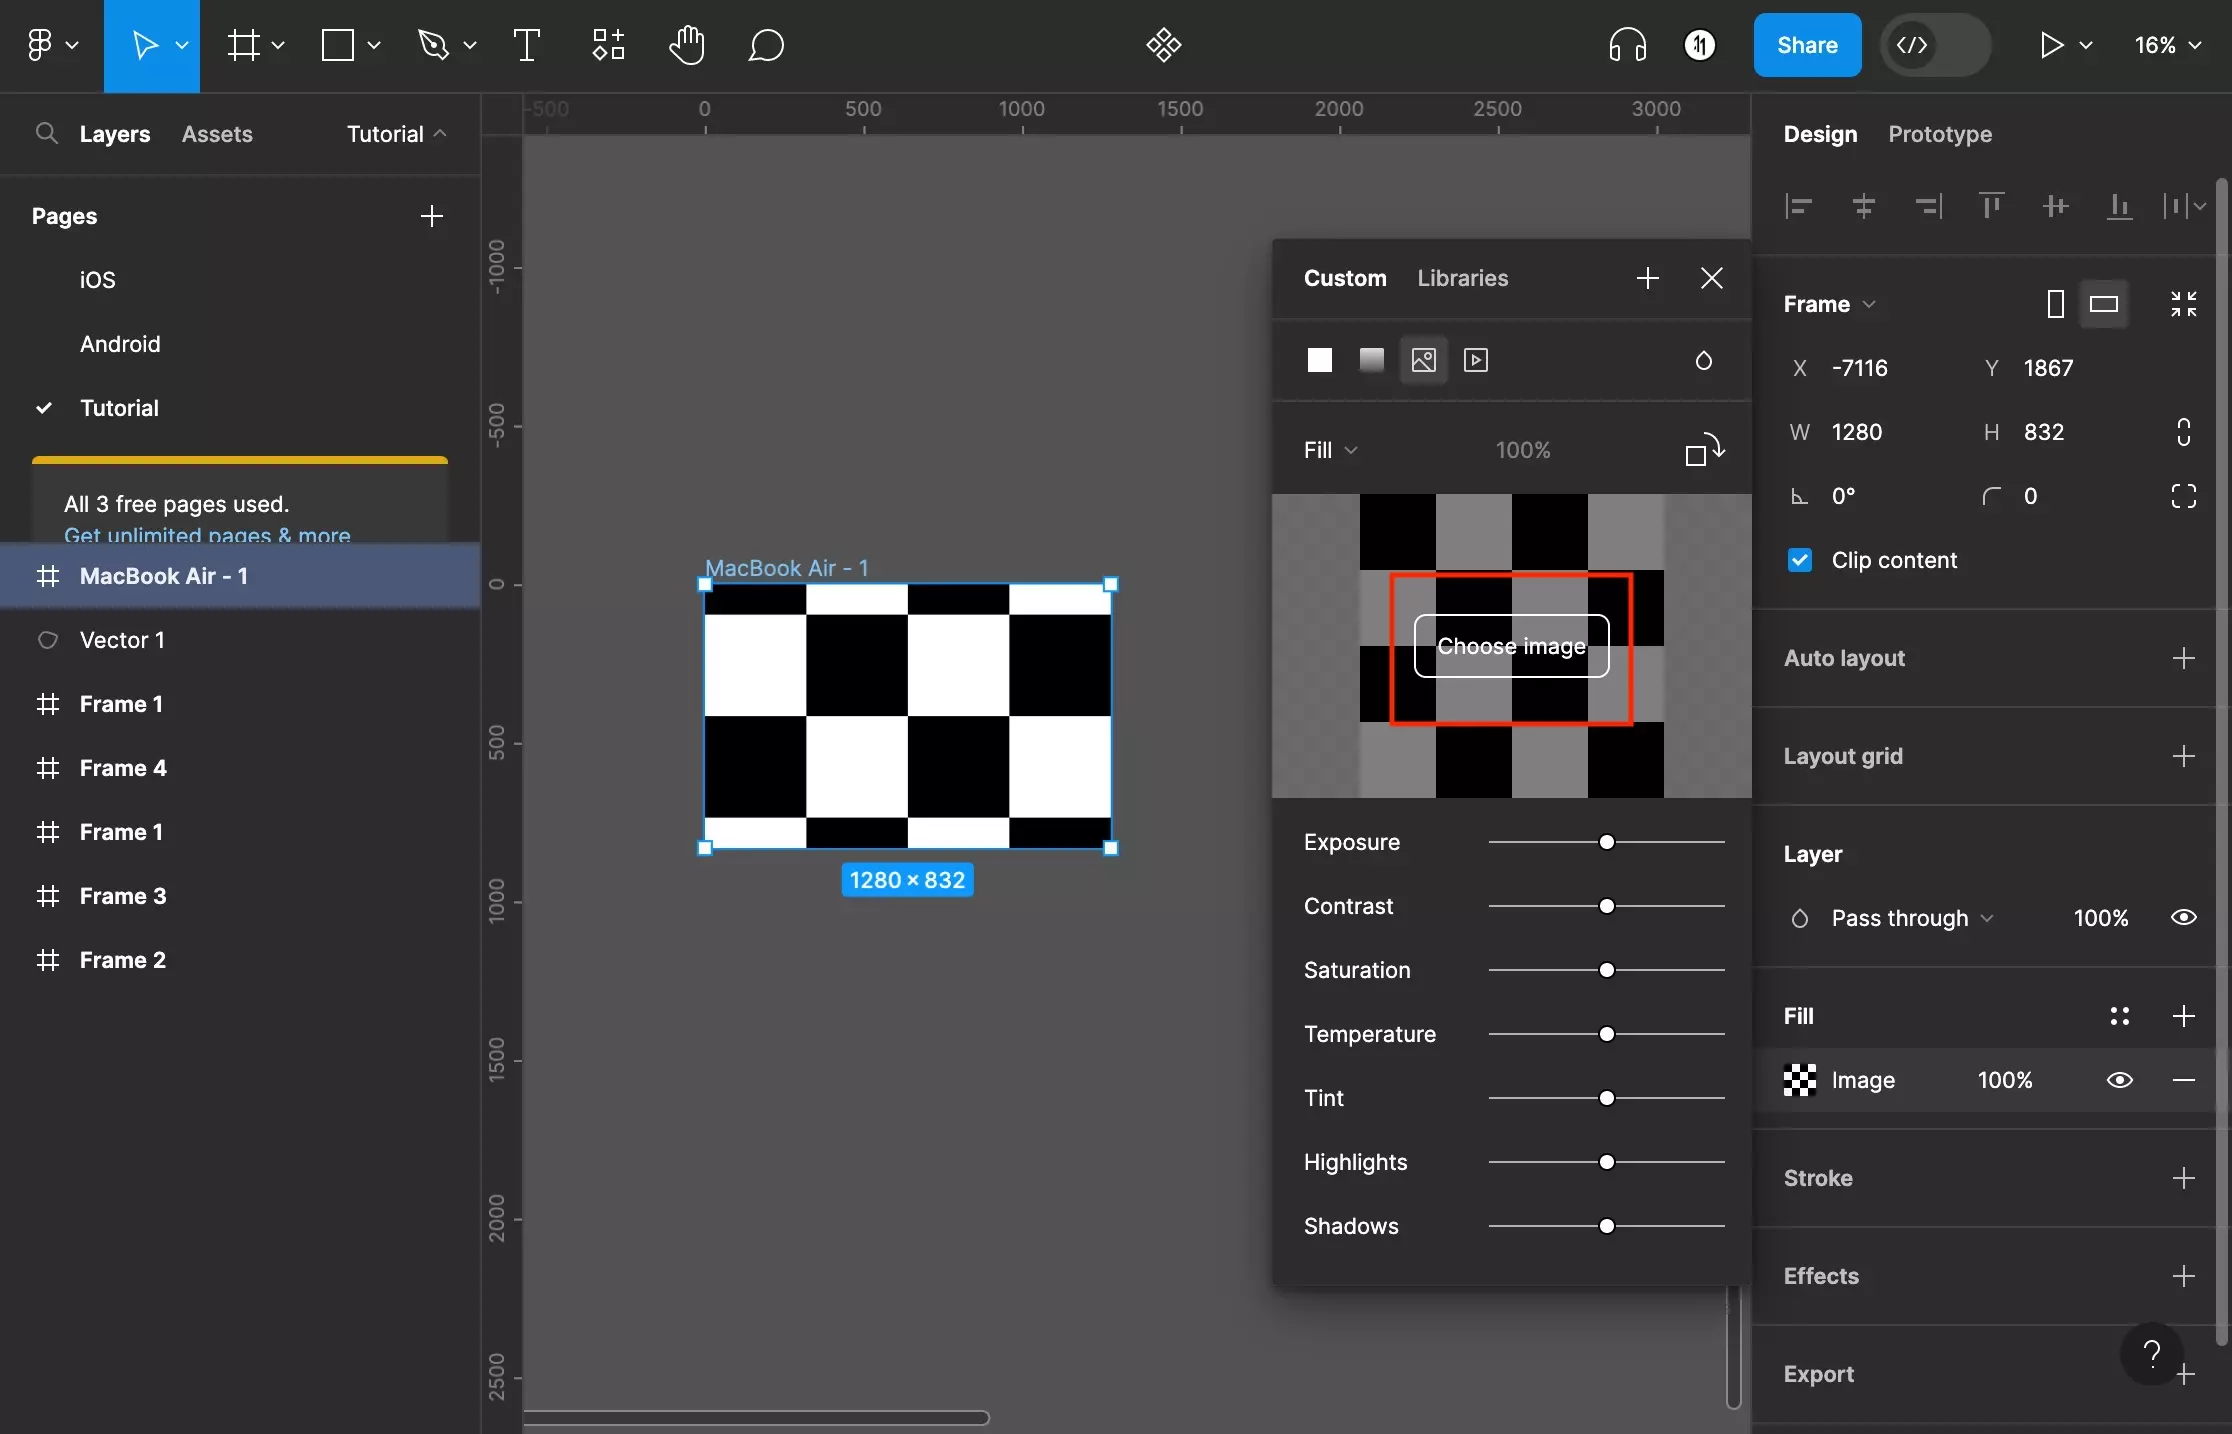
A screenshot of Figma that shows you how to frame that has been selected. The color menu has been opened and has been set to an image mode. This has made the artboard change to a temporary background image. Highlighted on the color menu is the “choose image” button. Click it to open a file inspector that allows you to upload a background image.

Press Choose Image to open up a window that allows you to upload your chosen image.

Step Five: Modify the Appearance
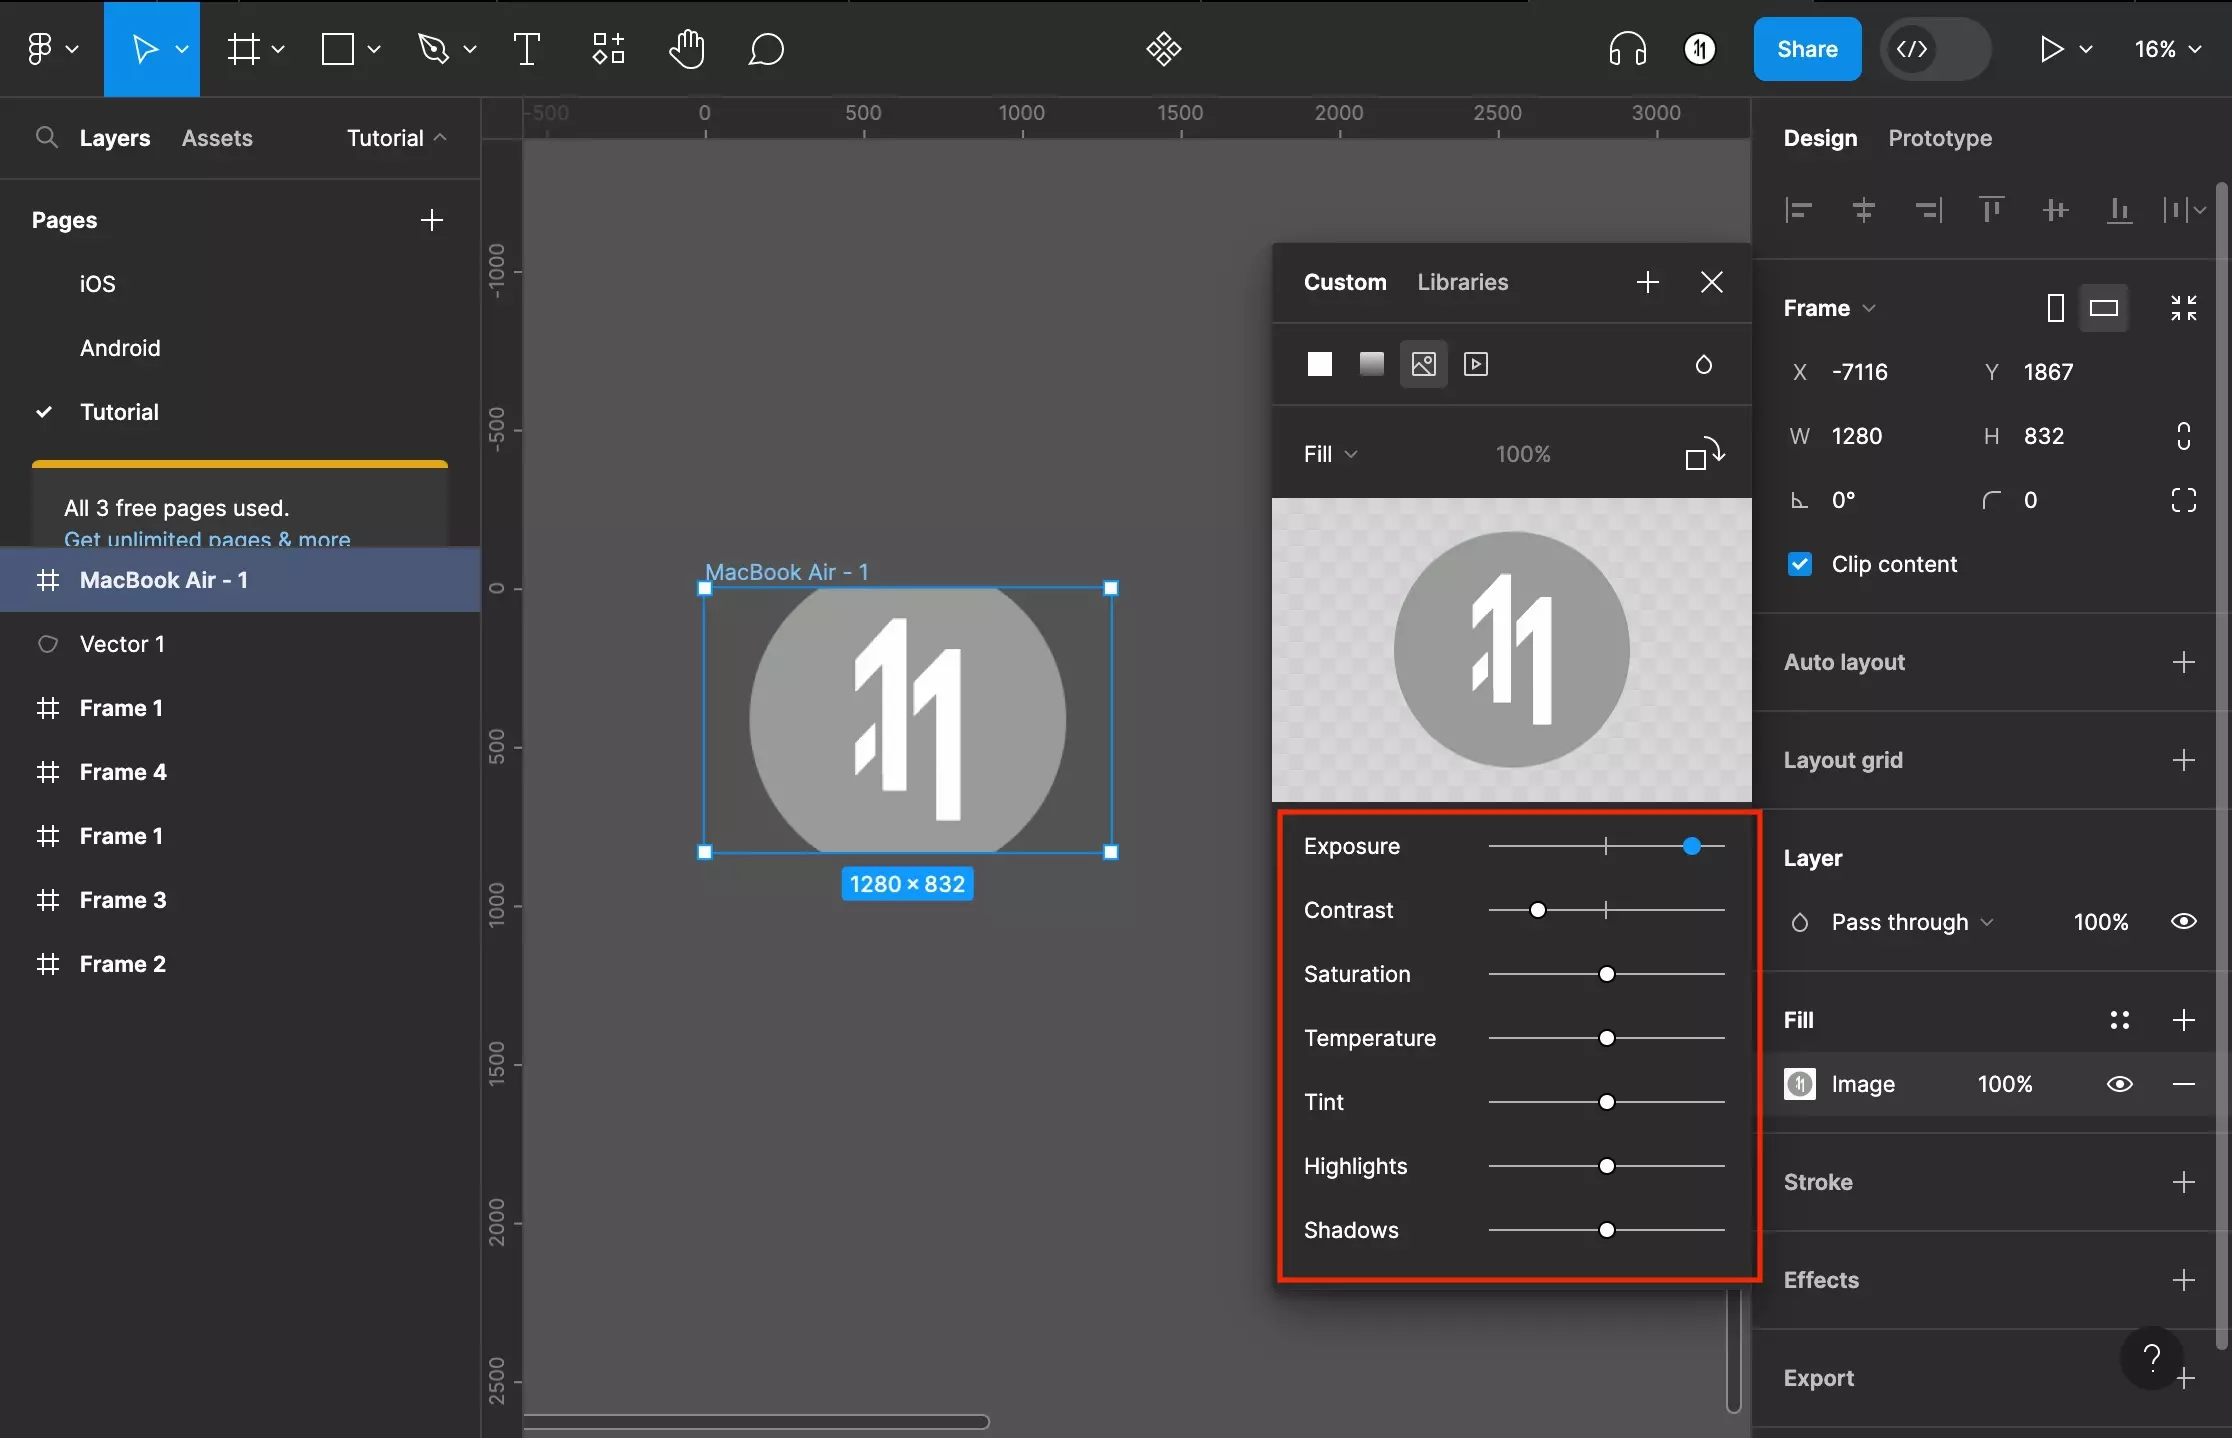

<p>A screenshot of Figma that shows you how to frame that has been selected. The color menu has been opened and has been set to an image mode. An image has been uploaded and we have shown how how can modify an image is appearance by using the effects configuration  sliders below the image upload tool.</p>
<p></p>

Use the sliders under the image upload tool to change the appearance of the image.

Step Six: Rotate the Image
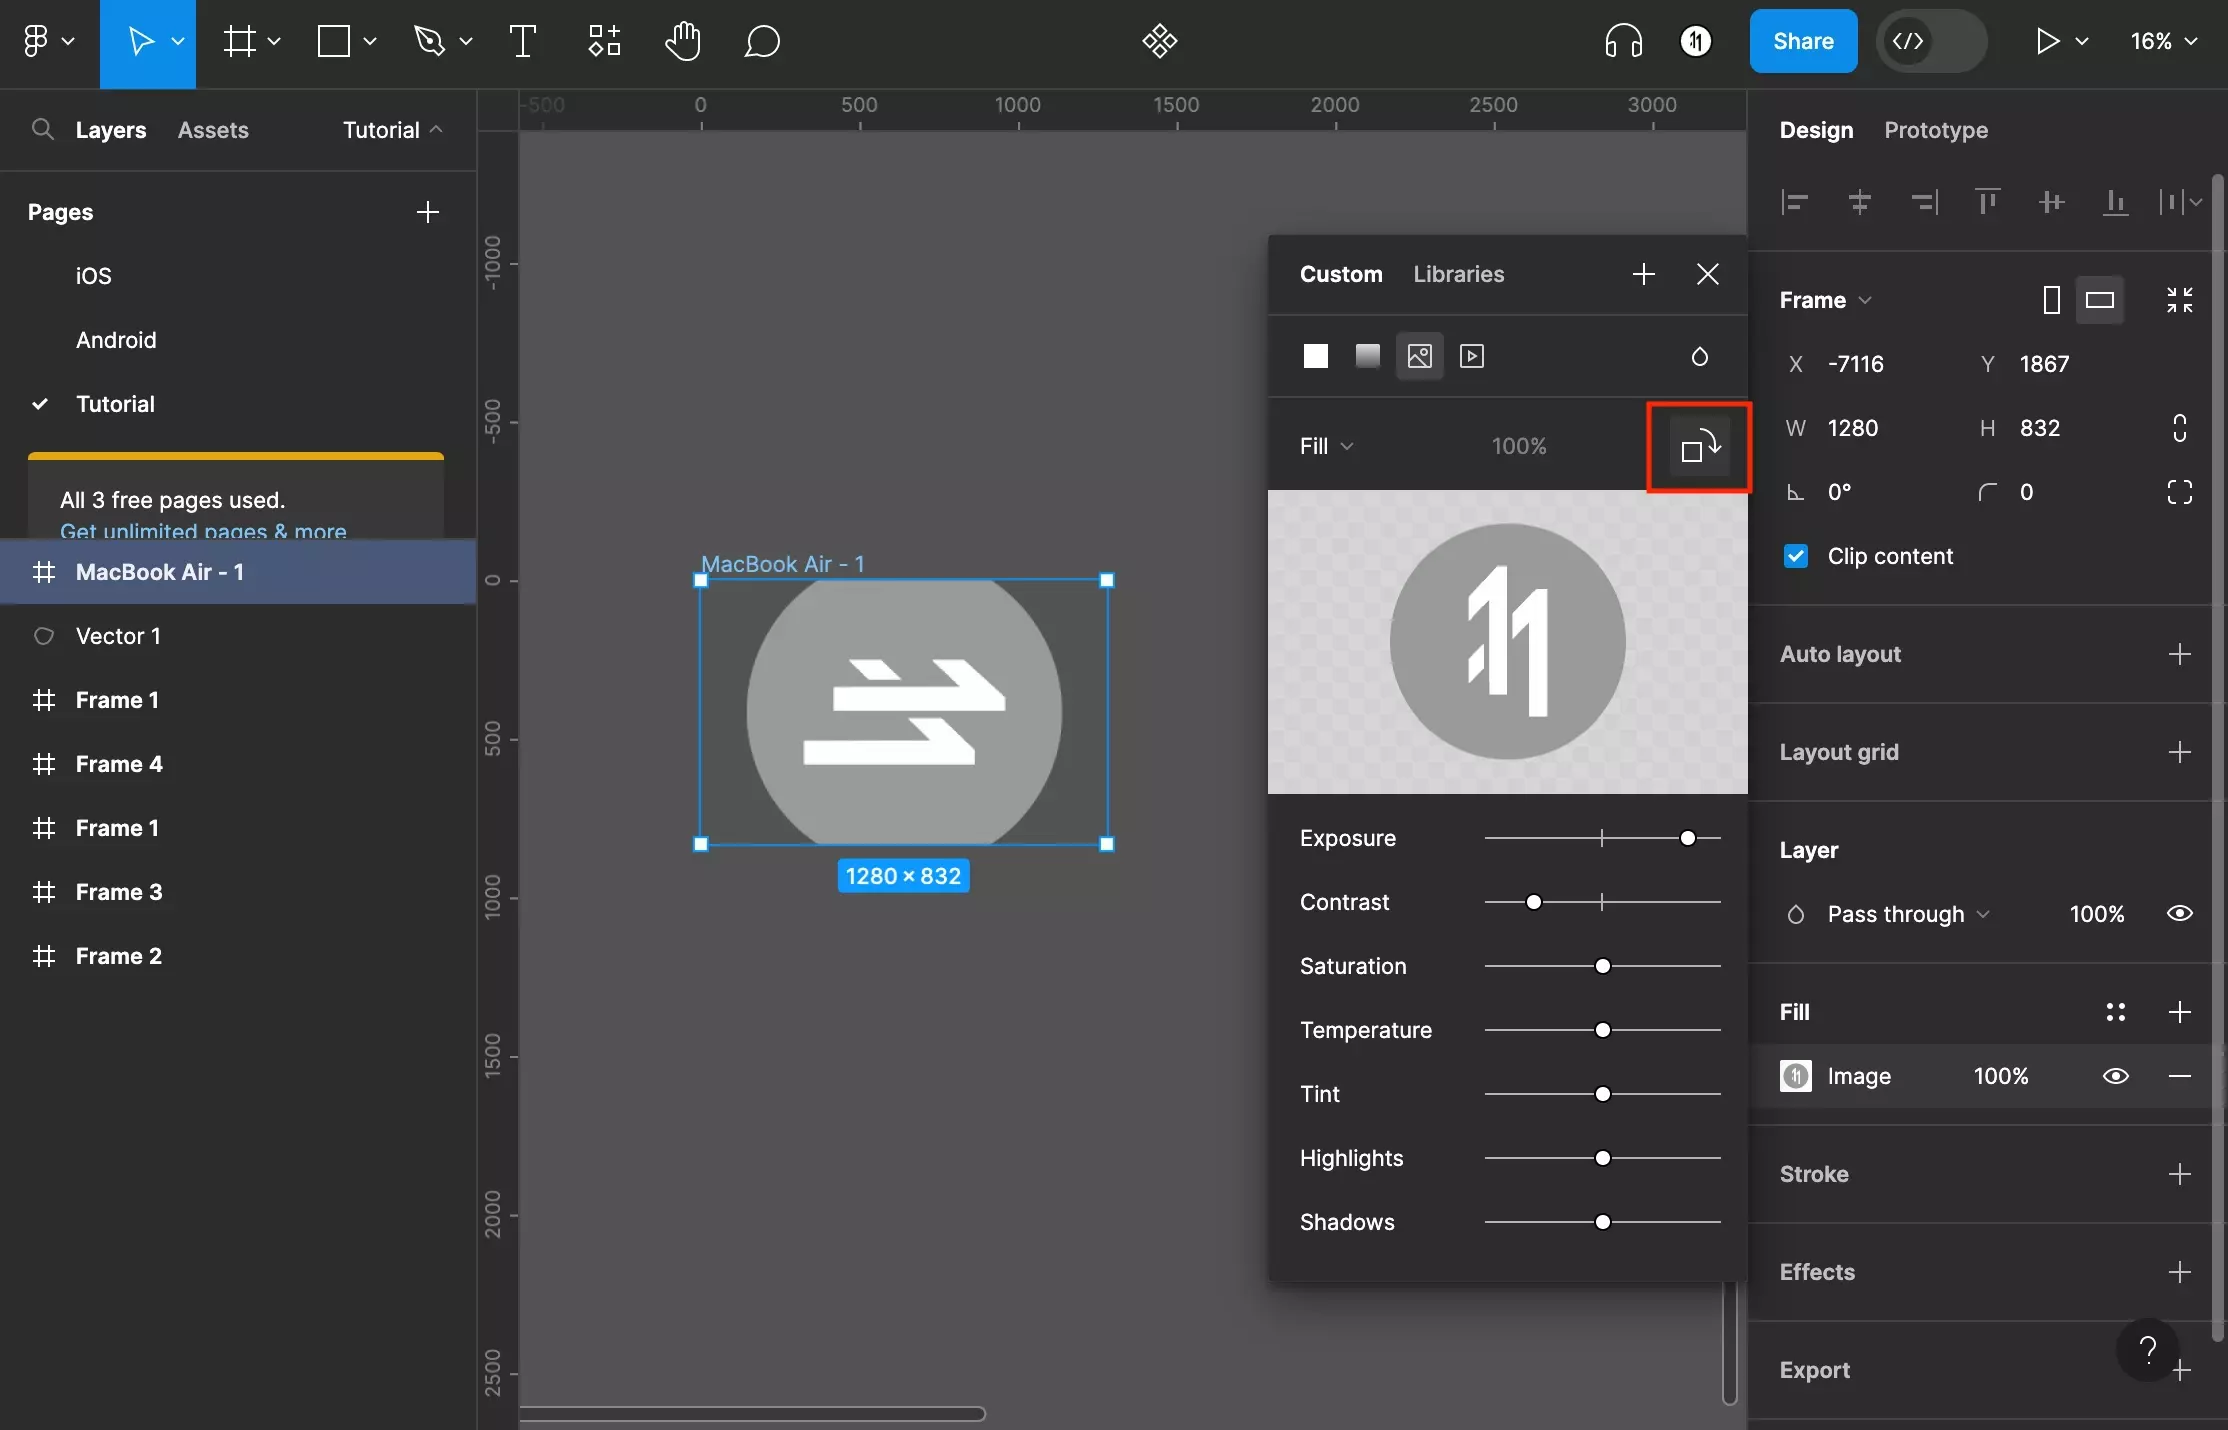
A screenshot of Figma that shows you how to frame that has been selected. The color menu has been opened and has been set to an image mode. An image has been uploaded it has been rotated. We have highlighted how to do this - press the rotate icon above to the image upload tool to rotate the image 90 degrees clockwise.

Click the rotate tool above the image upload tool to rotate the image 90 degrees clockwise.

Step Seven: Change the Background Image Mode
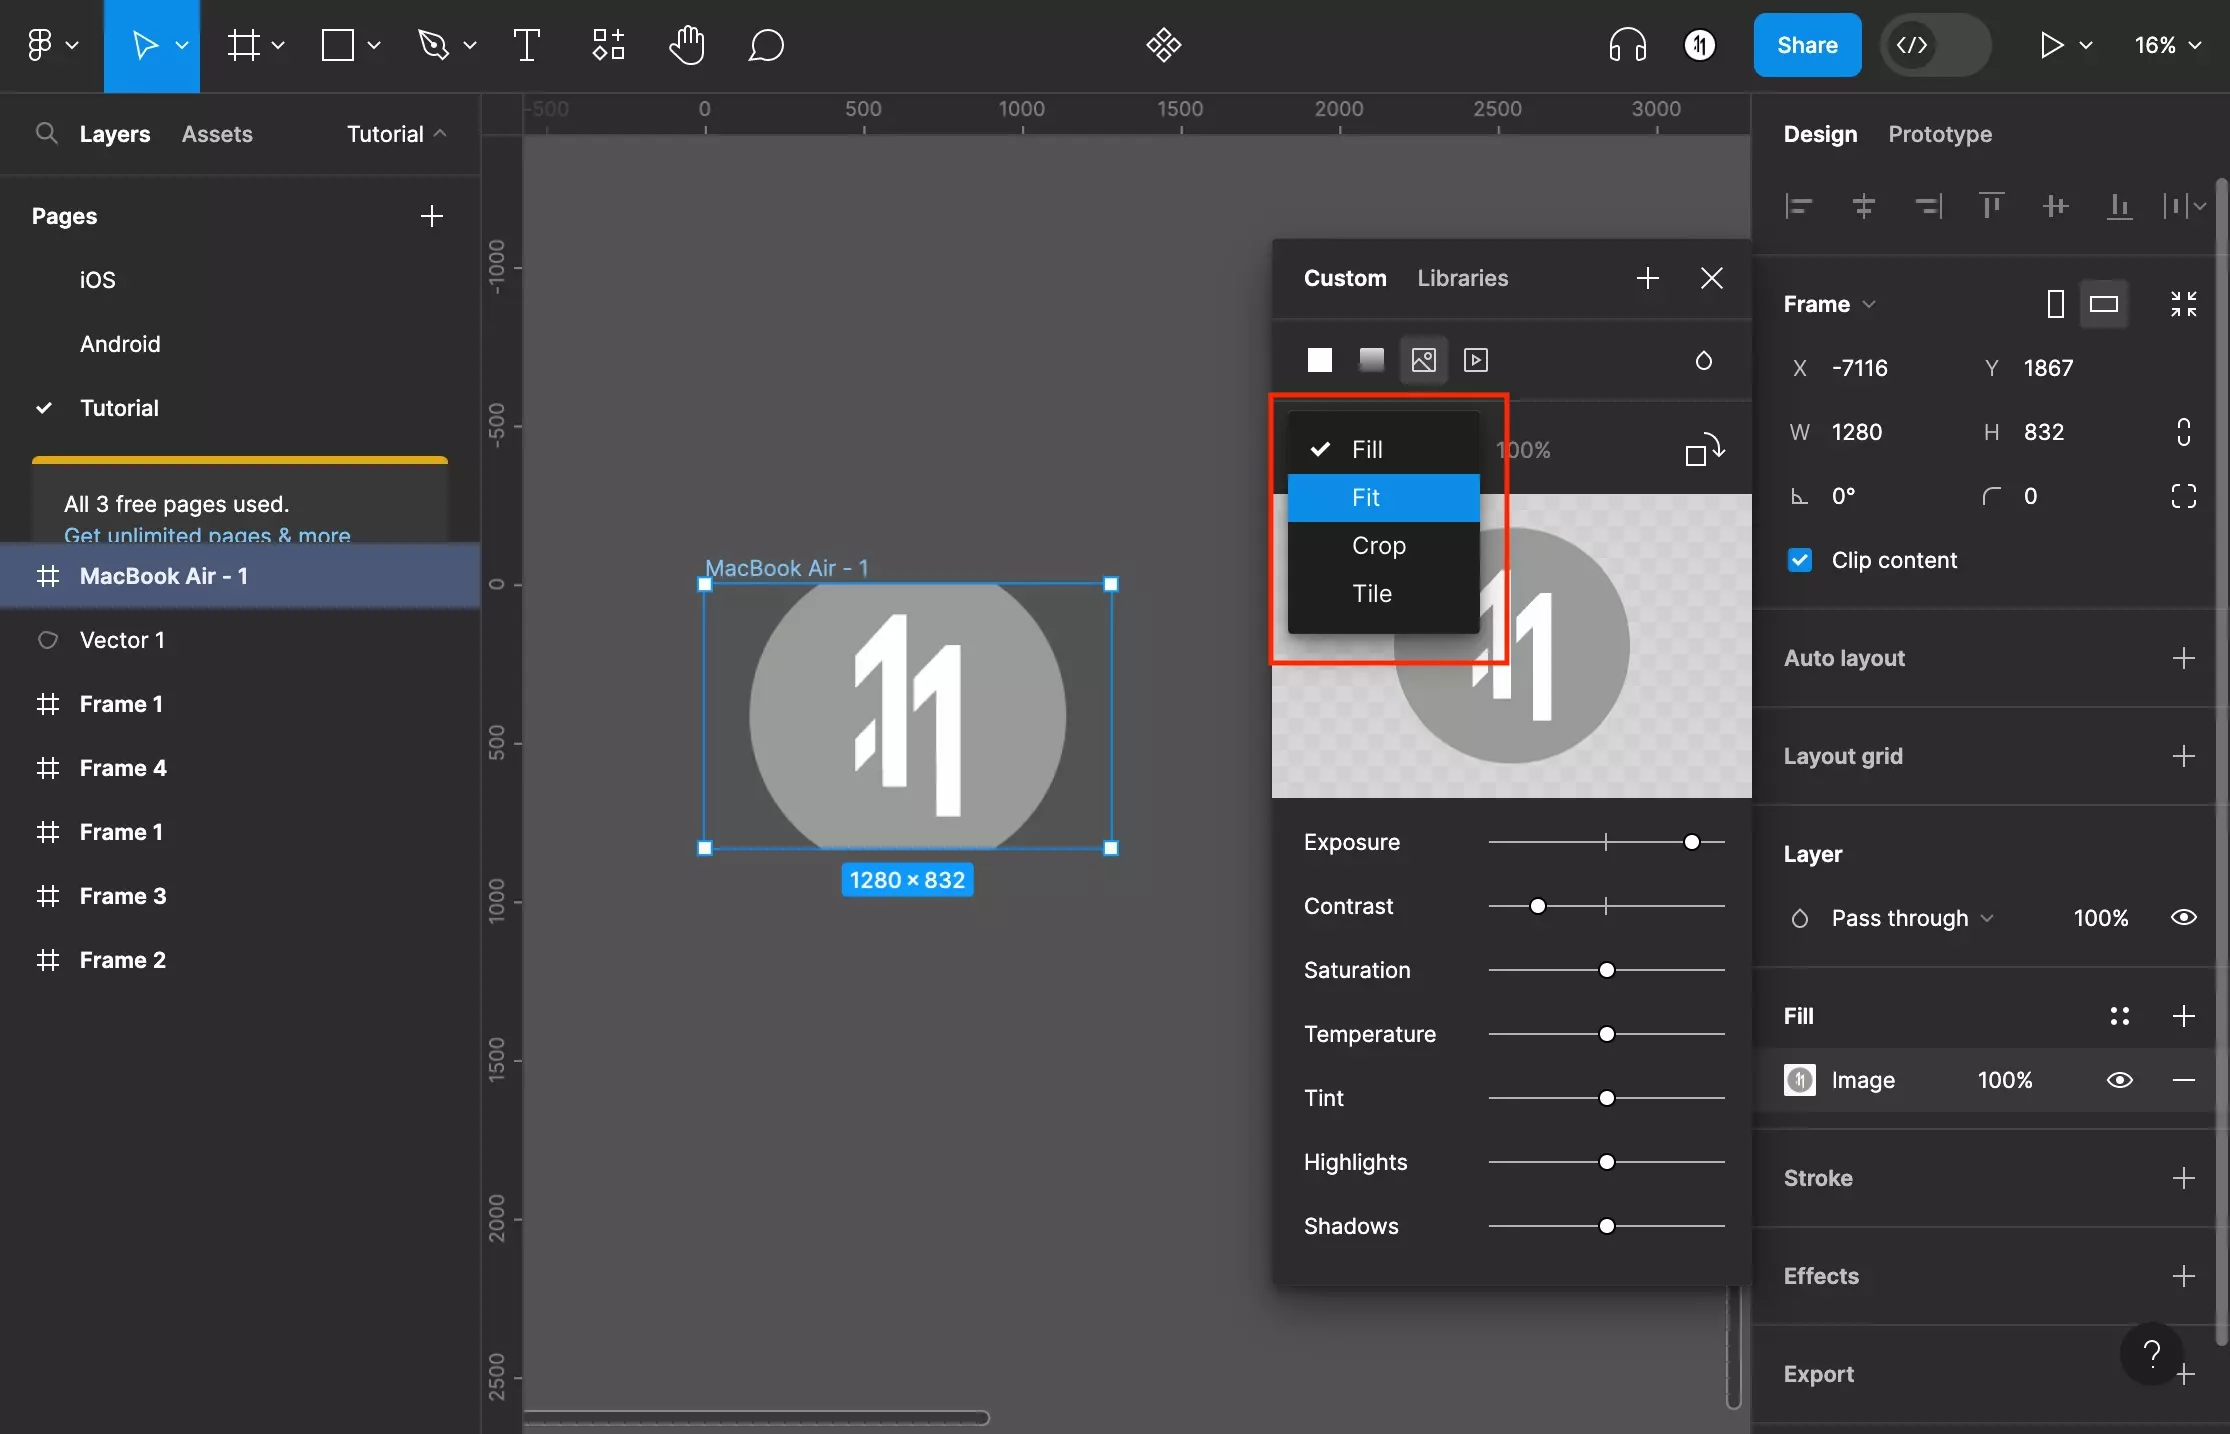
A screenshot of Figma that shows you how to frame that has been selected. The color menu has been opened and we have opened the dropdown which can be accessed when you click the caret next to fill. It shows the image mode options, they include Fill (default), Fit, Crop and Tile.

To change the background image mode, click the caret next to Fill to open a dropdown. The options are:

  • Fill (default)
  • Fit
  • Crop
  • Tile

Step Eight: Change the Blend Mode
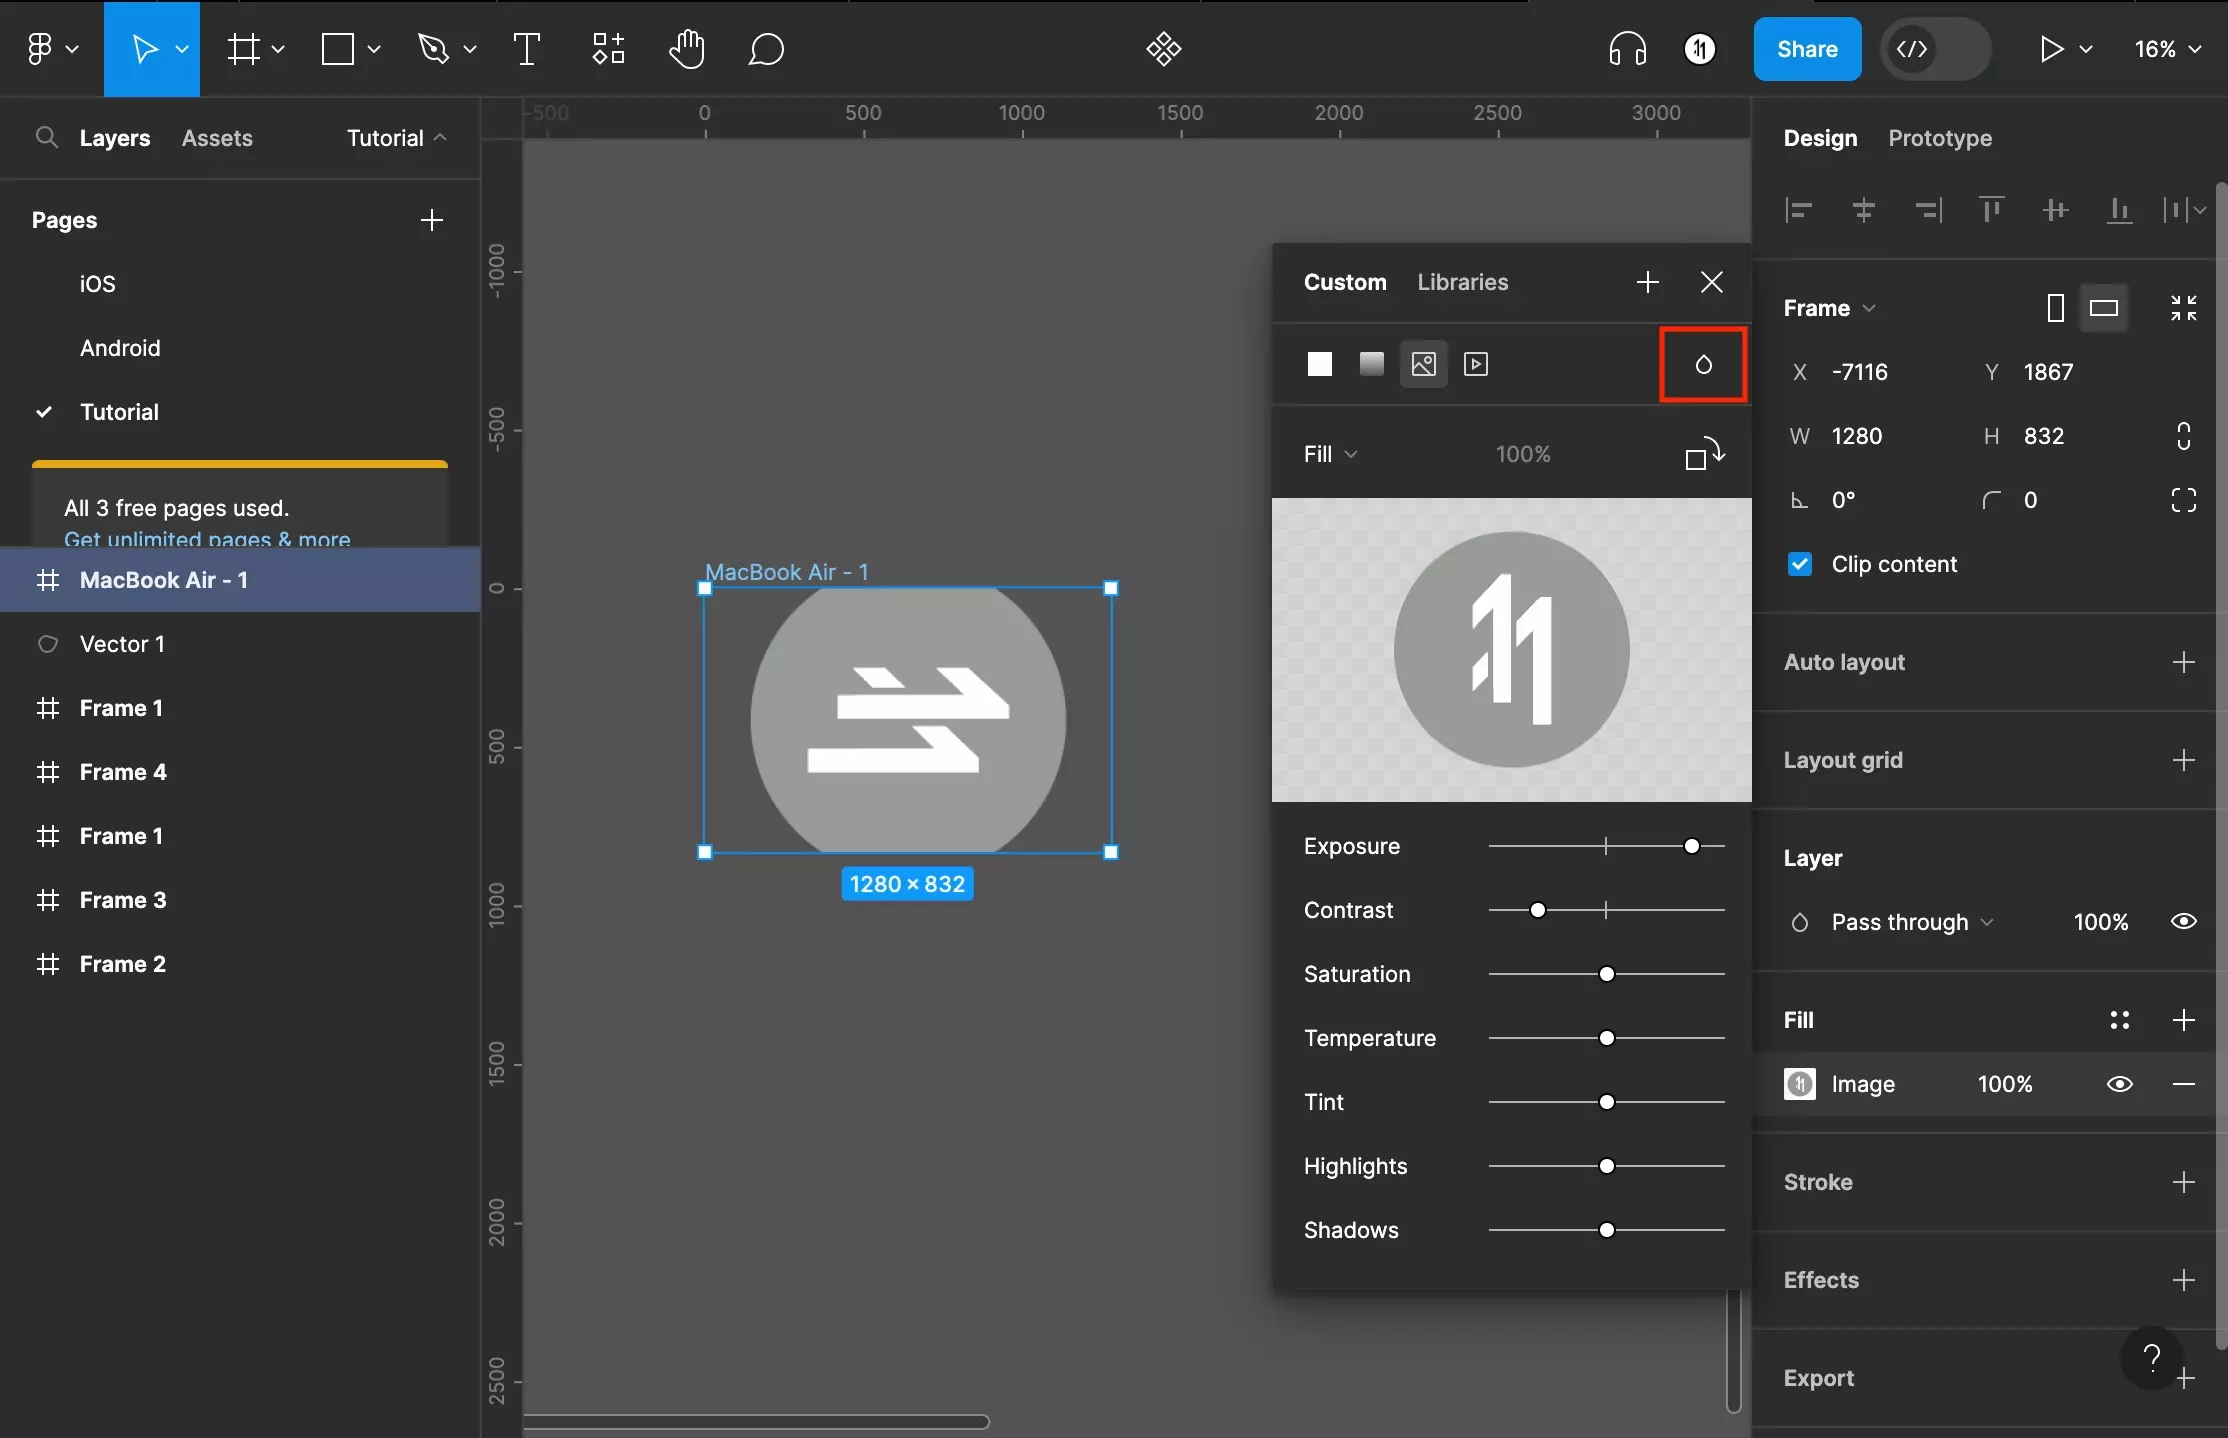
A screenshot of Figma that shows you how to frame that has been selected. The color menu has been opened and we have highlighted the tear icon on the top right. Click it to change the blend mode.

Click the tear icon to open the blend mode menu. The options are:

  • Normal
  • Darken
  • Multiply
  • Color Burn
  • Lighten
  • Screen
  • Color Dodge
  • Overlay
  • Soft Light
  • Hard Light
  • Difference
  • Exclusion
  • Hue
  • Saturation
  • Color
  • Luminosity

Select an option to change the blend mode.
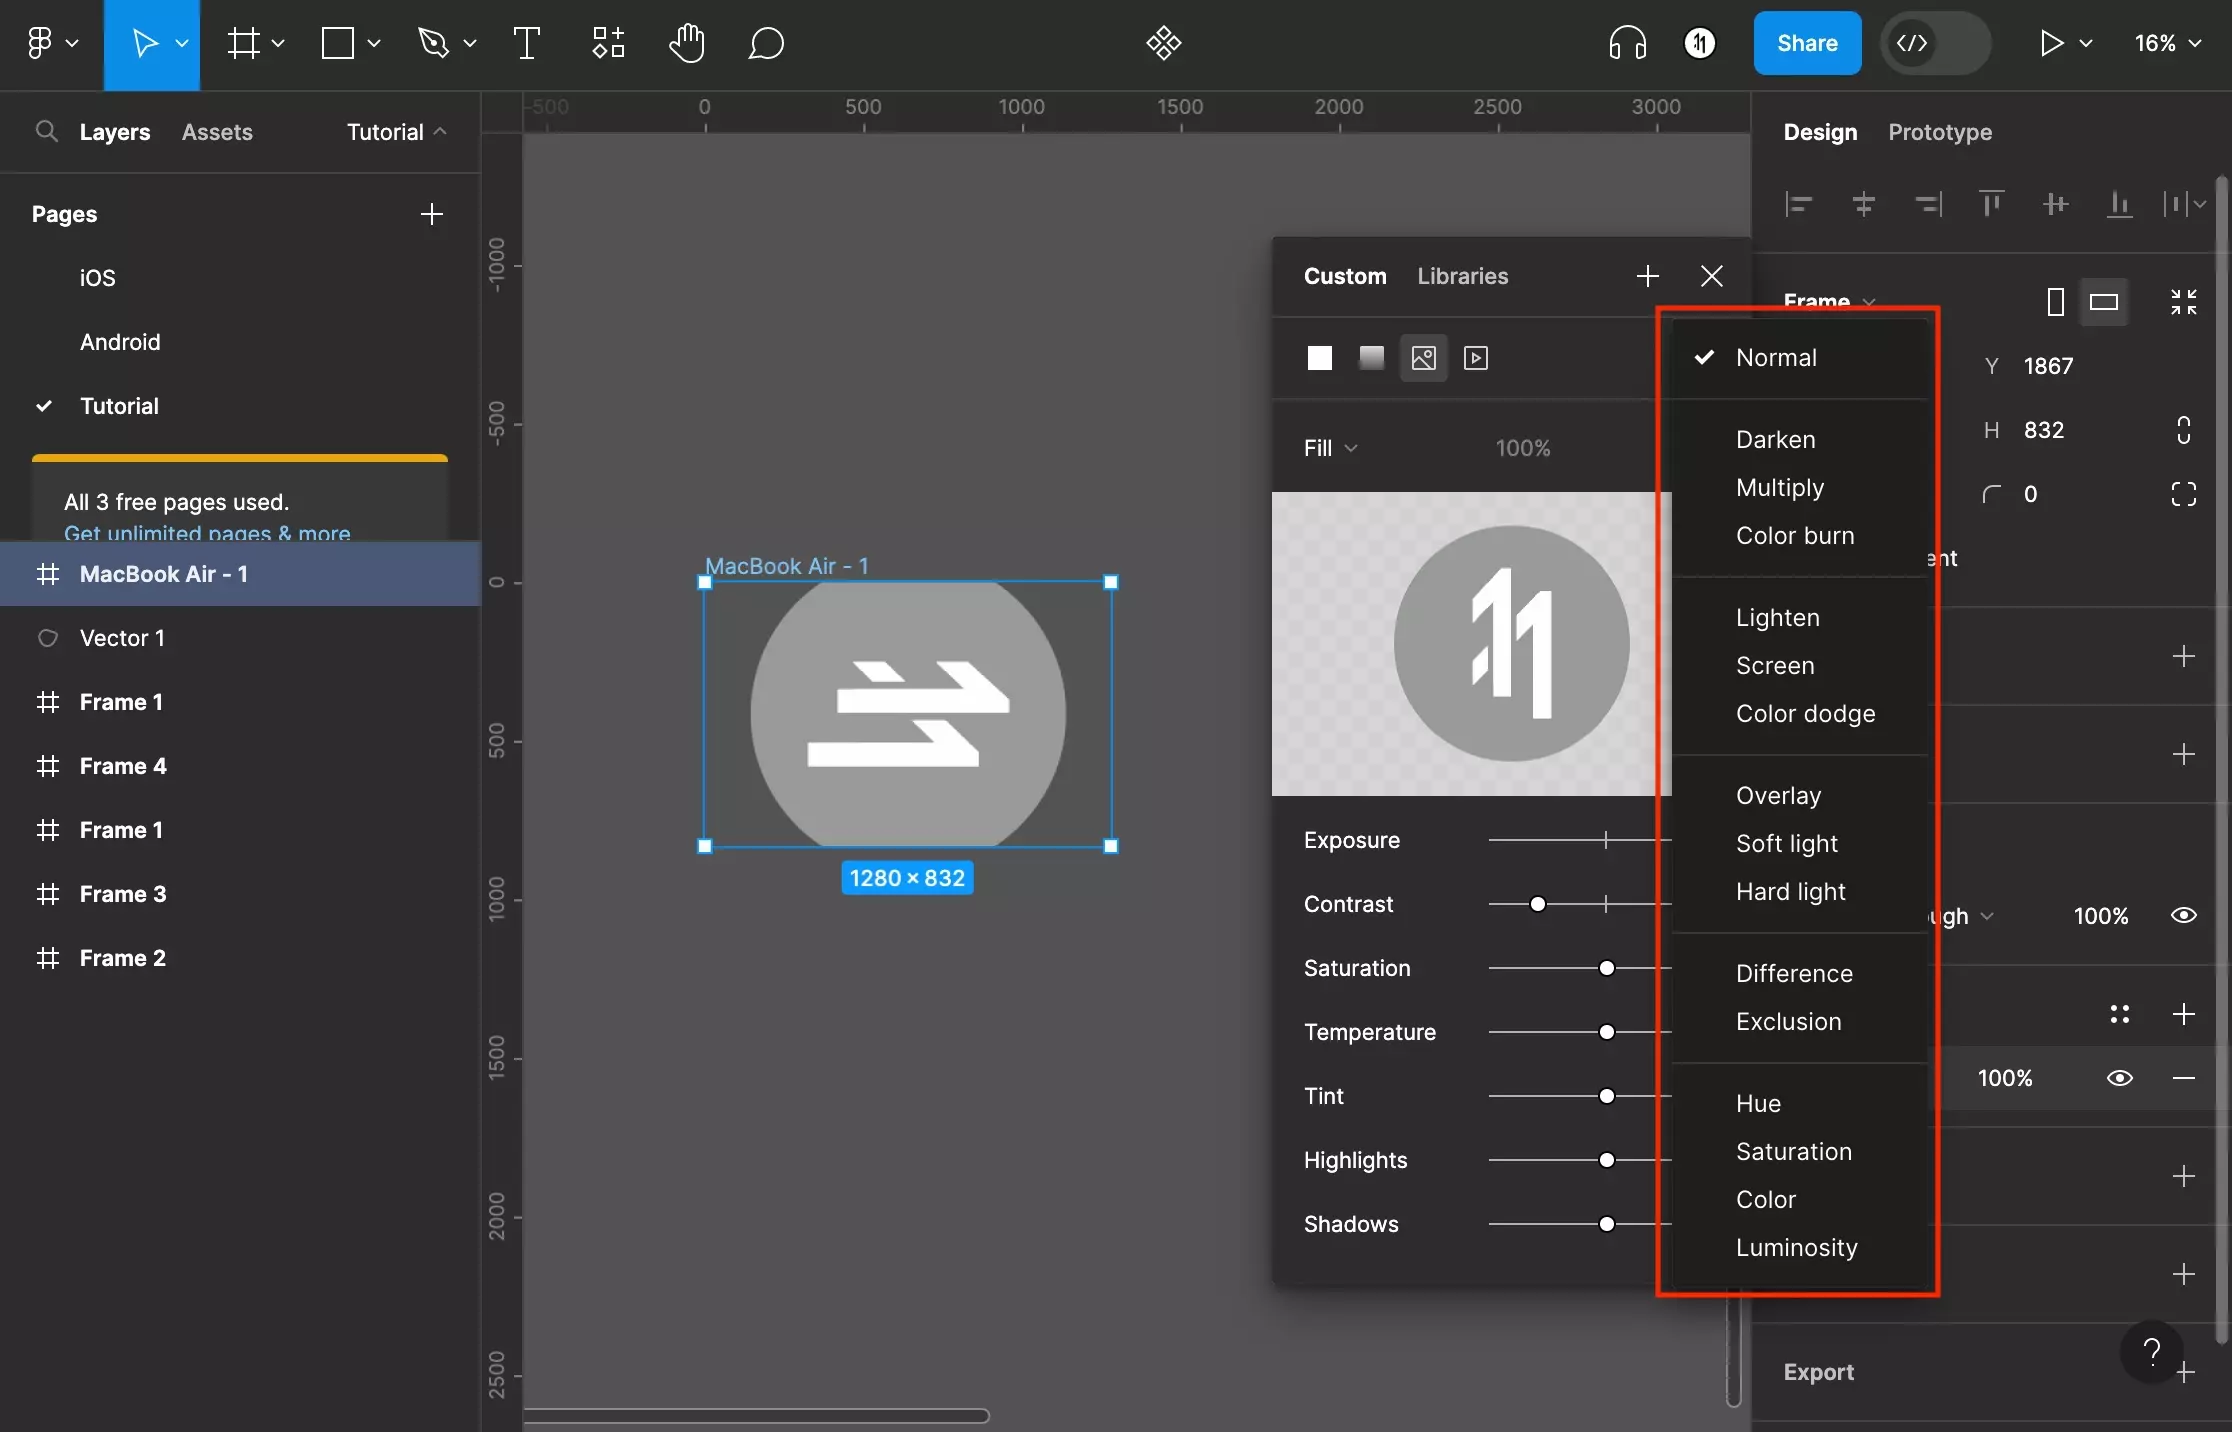
A screenshot of Figma that shows you how to frame that has been selected. The color menu has been opened and the blend mode menu is open. The options are Normal, Darken. Multiply, Color Burn, Lighten, Screen, Color Dodge, Overlay, Soft Light, Hard Light, Difference, Exclusion, Hue, Saturation, Color and Luminosity.

Step Nine: Add another Background Image
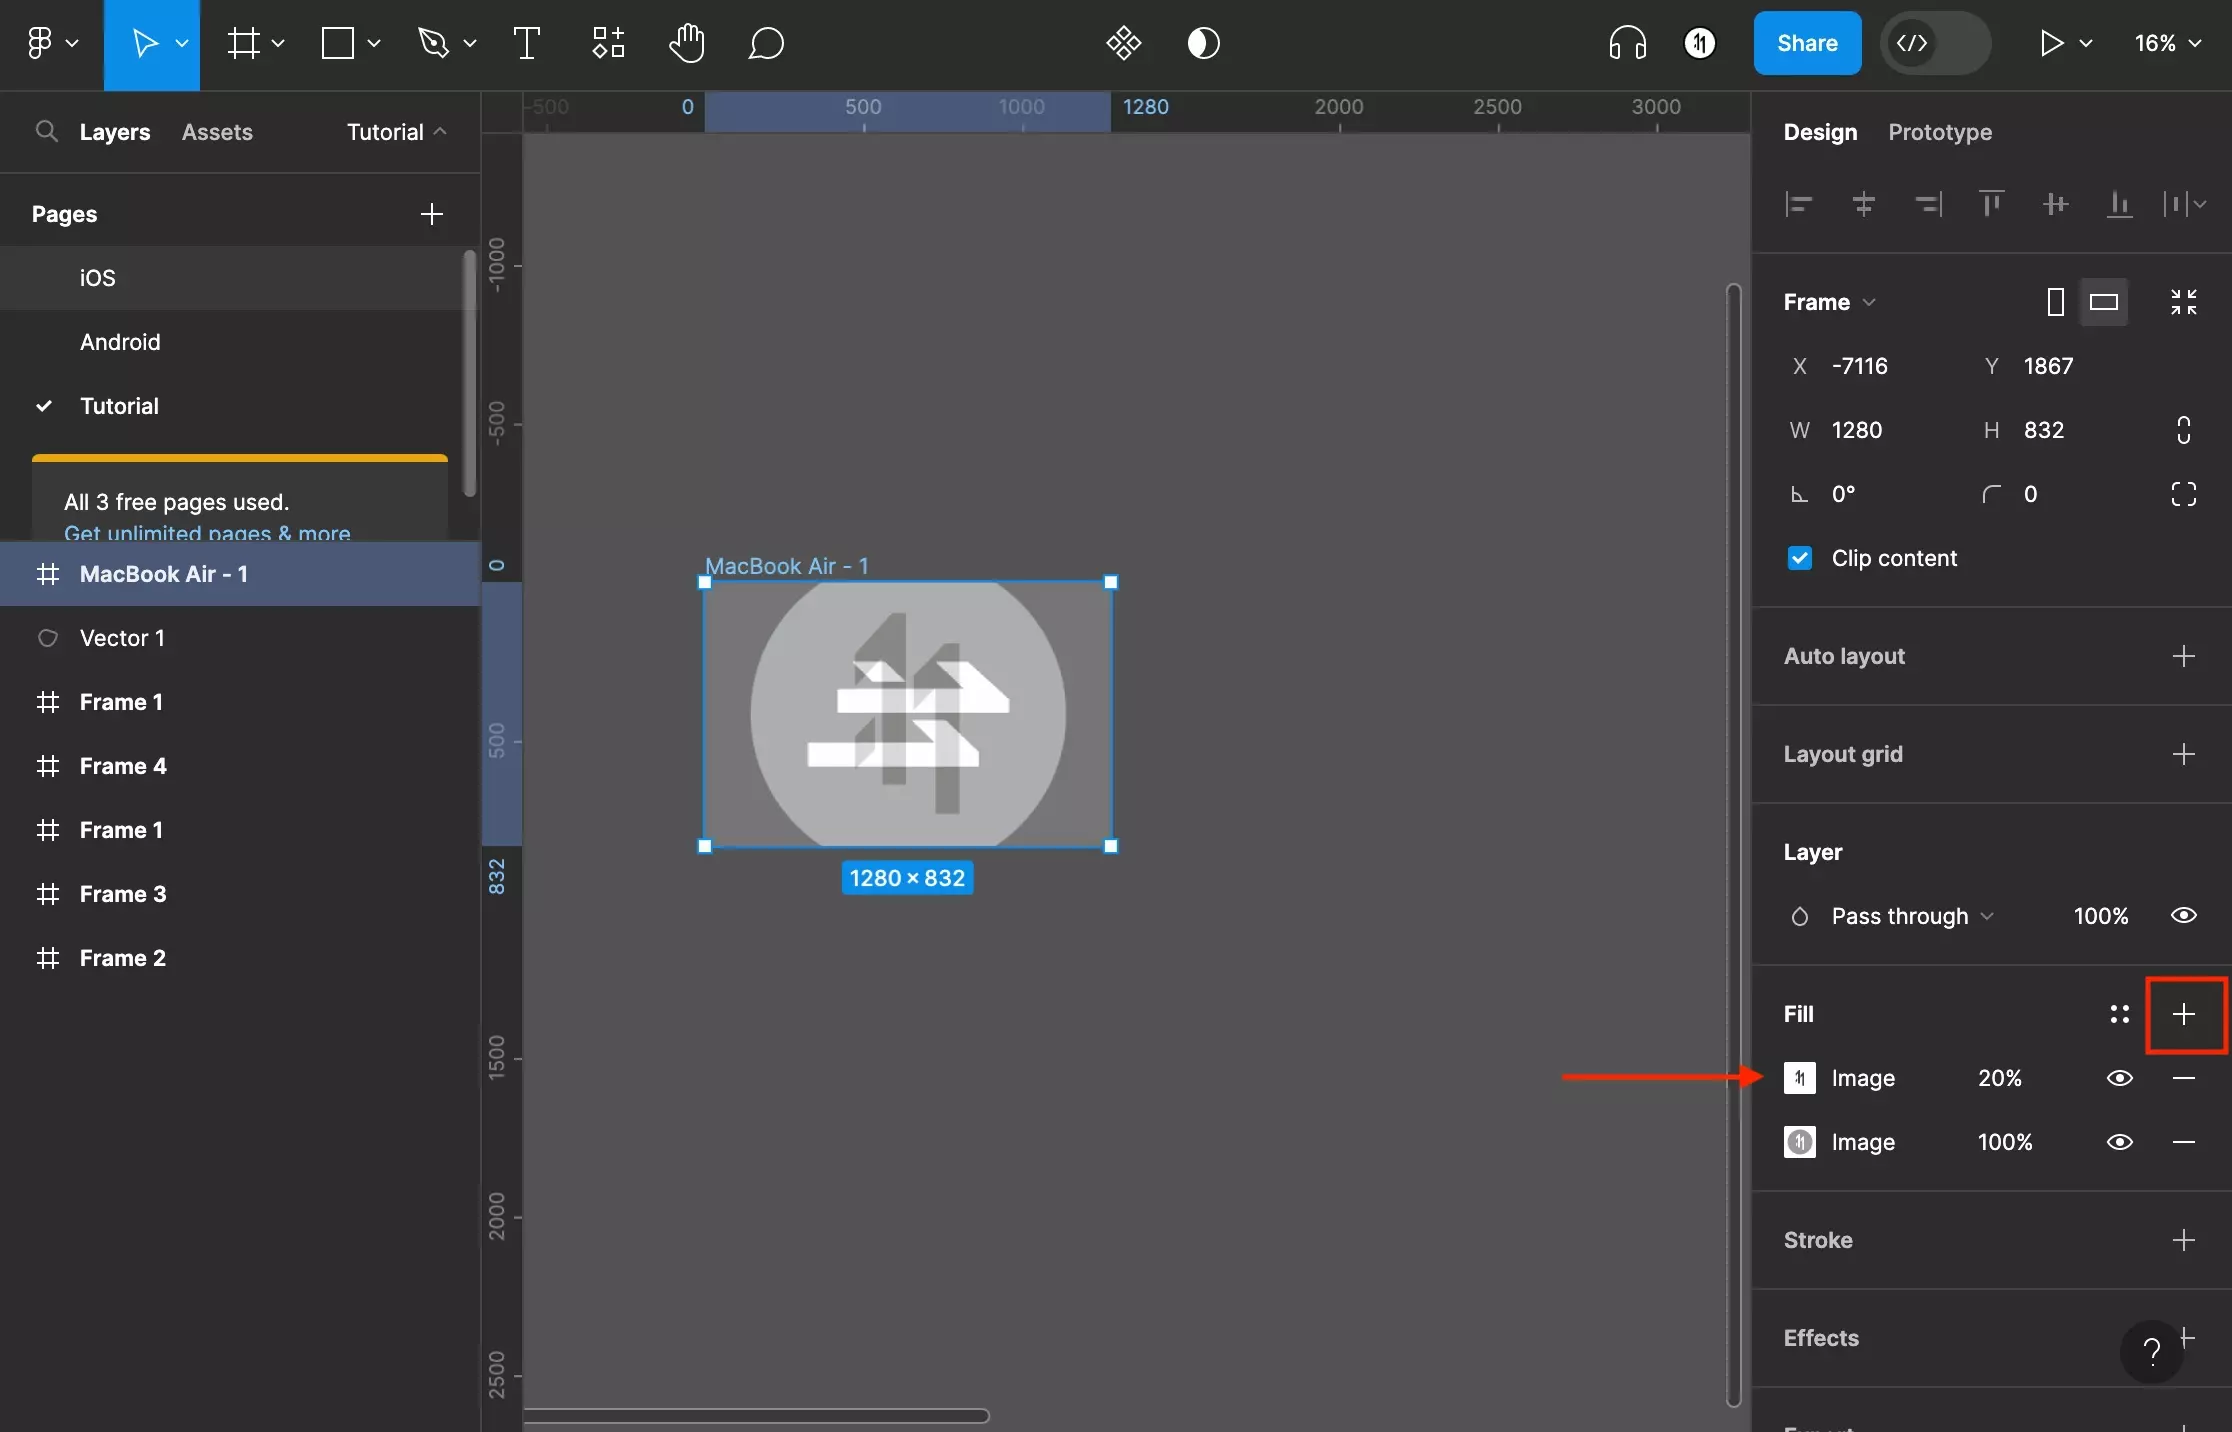
A screenshot of Figma that shows you how to frame that has been selected. There are two background images. To add another image, select the + next to fill and follow the steps above. It will add another row to the colors under fill.

On the right menu sidebar, click the + next to Fill to add another color. Follow the steps above to configure it to your desired image.

Step Ten: Reorder, Hide or Remove
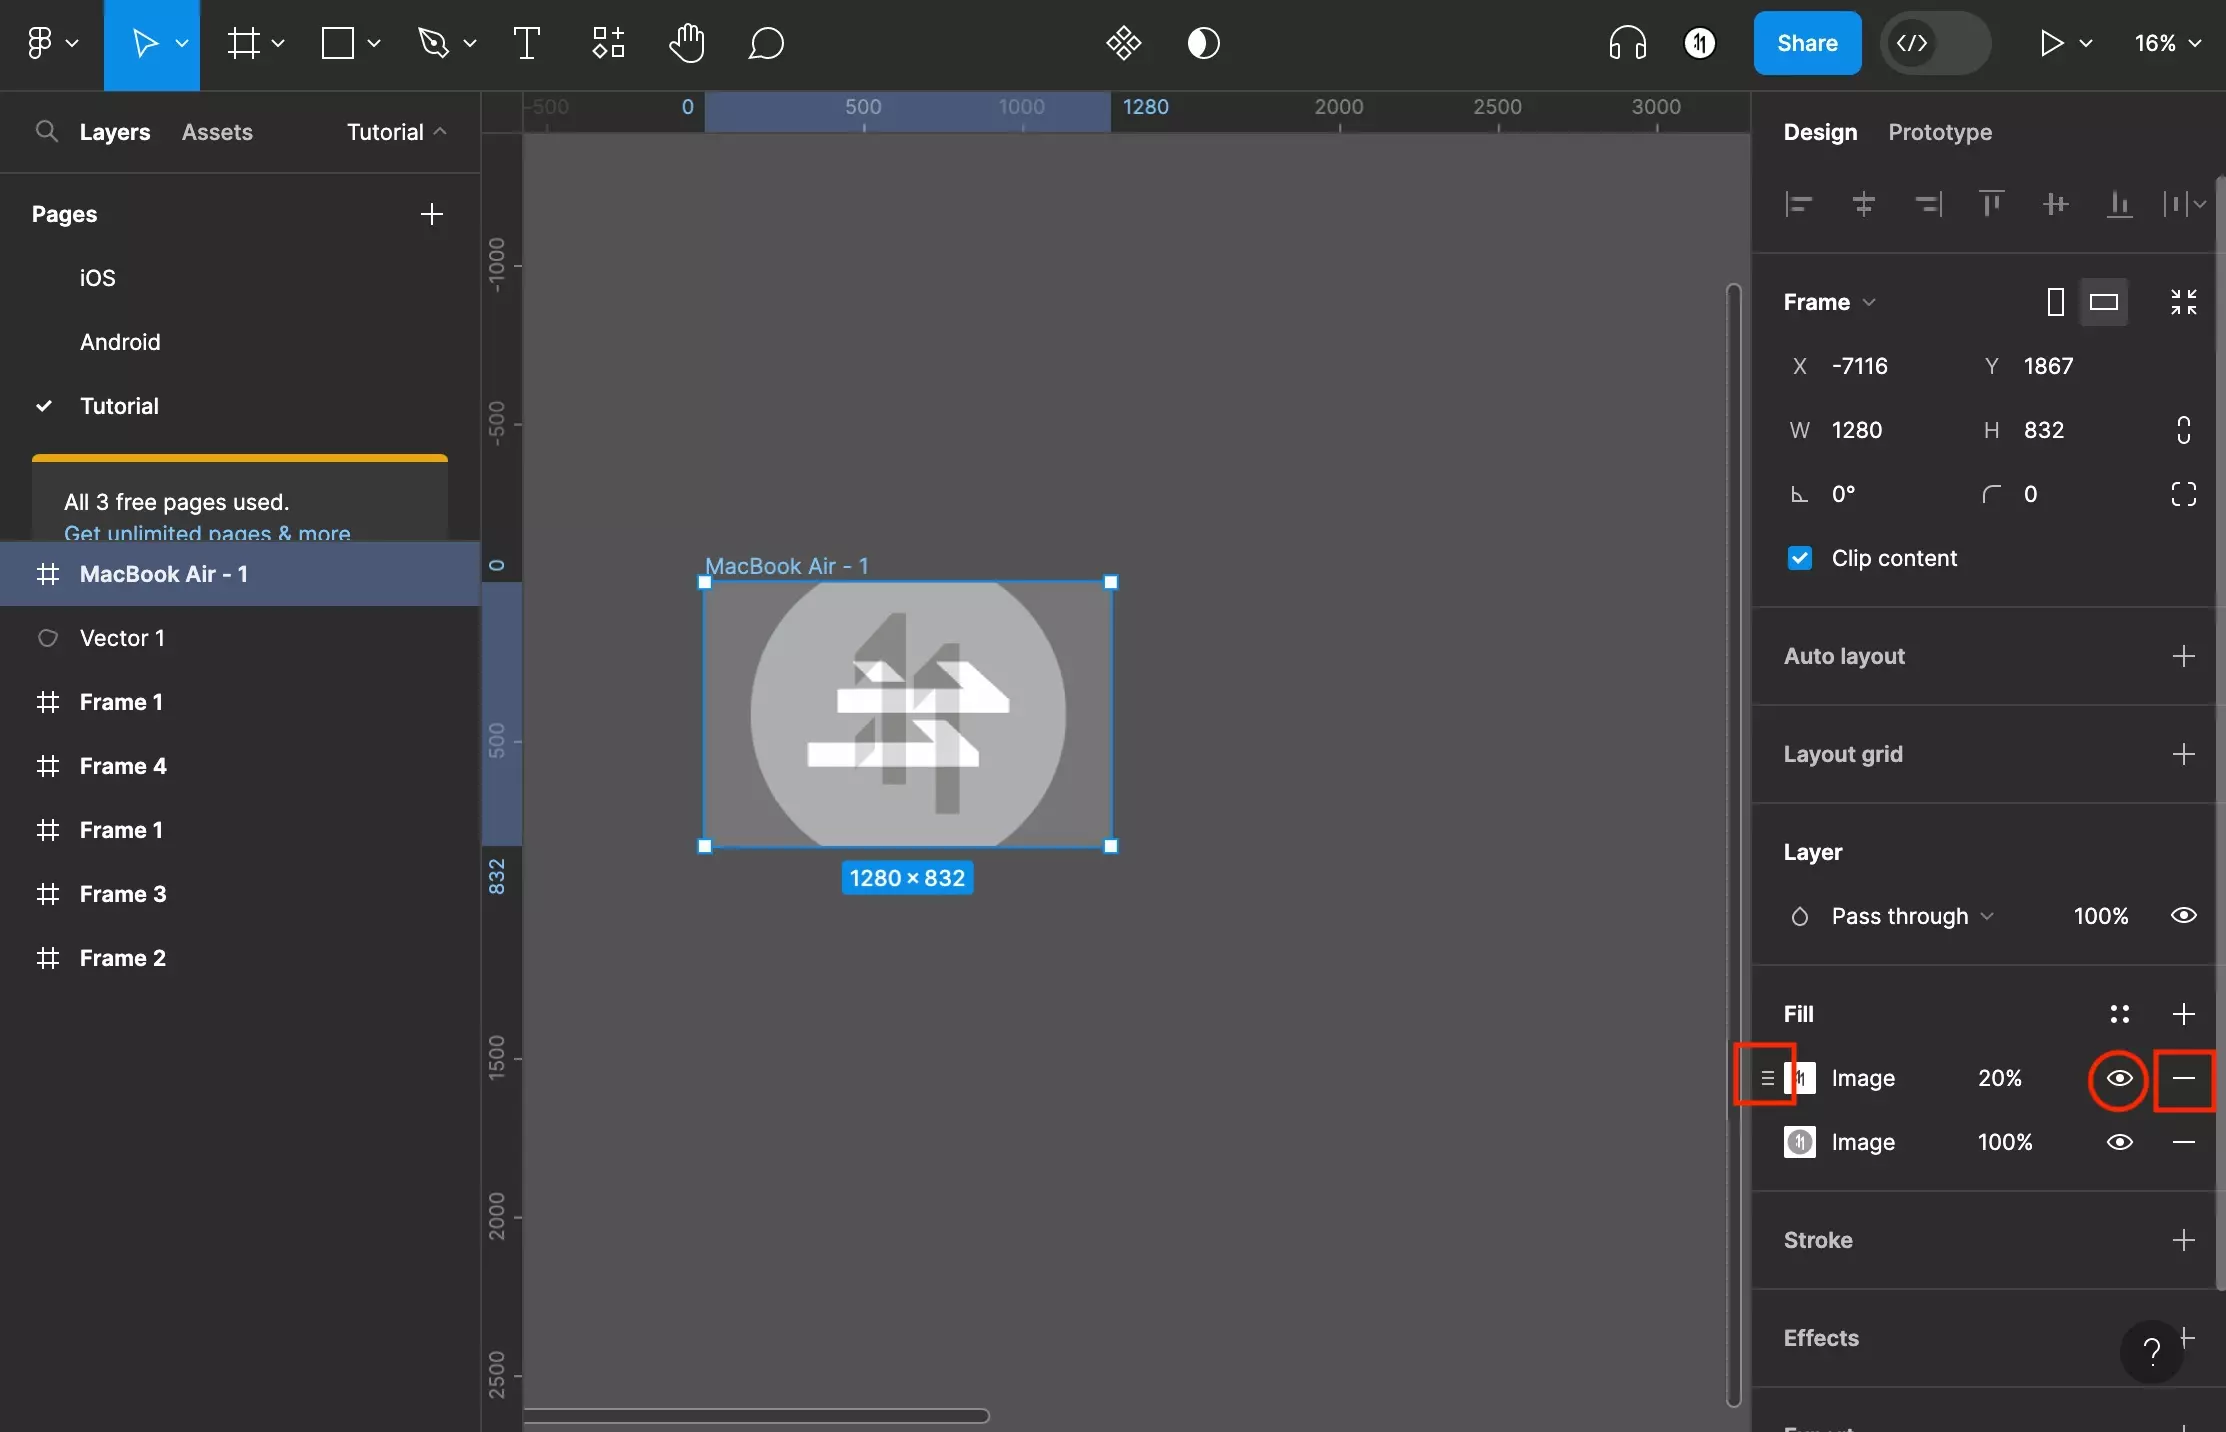
A screenshot of Figma with a Frame selected. Highlighted on the right menu bar under the fill section is an image. If you highlight the image, it will present handles on the left side of the bar - this allows you to change its position within the hierarchy. The lower down it is, the further down it is in the background. To the right of it there is an eye, this allows you to show or hide the color. Finally, to the right of it, there is a - icon. If pressed this removes the image.

To change the order of the image, highlight a image input. This will present a handle icon which will allow you to reorder the image by clicking and dragging the image. The lower down a image is, the further down it is in the background (i.e. higher up images are overlays whilst the lowest one is the "true background").

If you wish to hide/show the image, toggle the eye icon to the right of the image.

Finally, to remove an image, press the minus icon to the far right of the image.

Looking to learn more about the basics behind styling frames, paths, shapes and text in Figma ?

Consult the list below to learn more about the basics behind styling text, shapes, paths and frames in Figma.

Any Questions?

We are actively looking for feedback on how to improve this resource. Please send us a note to inquiries@delasign.com with any thoughts or feedback you may have.
delasign logo

Book a Free Consultation.

An icon of an email.

Click here to email us.

Fill in the details below to book a free consultation or to let us know about something else. Whatever it is, we are here to help.

How can we help you ?

Contact Details