How to change the Background Color of a Frame or a Shape in Figma
A step by step guide on changing the background color or add multiple colors to a frame or shape in Figma.
A step by step guide on changing the background color or add multiple colors to a frame or shape in Figma.
SubscribeCheck out our free mobile e-commerce Figma design fileStep One: Select the Frame or Shape
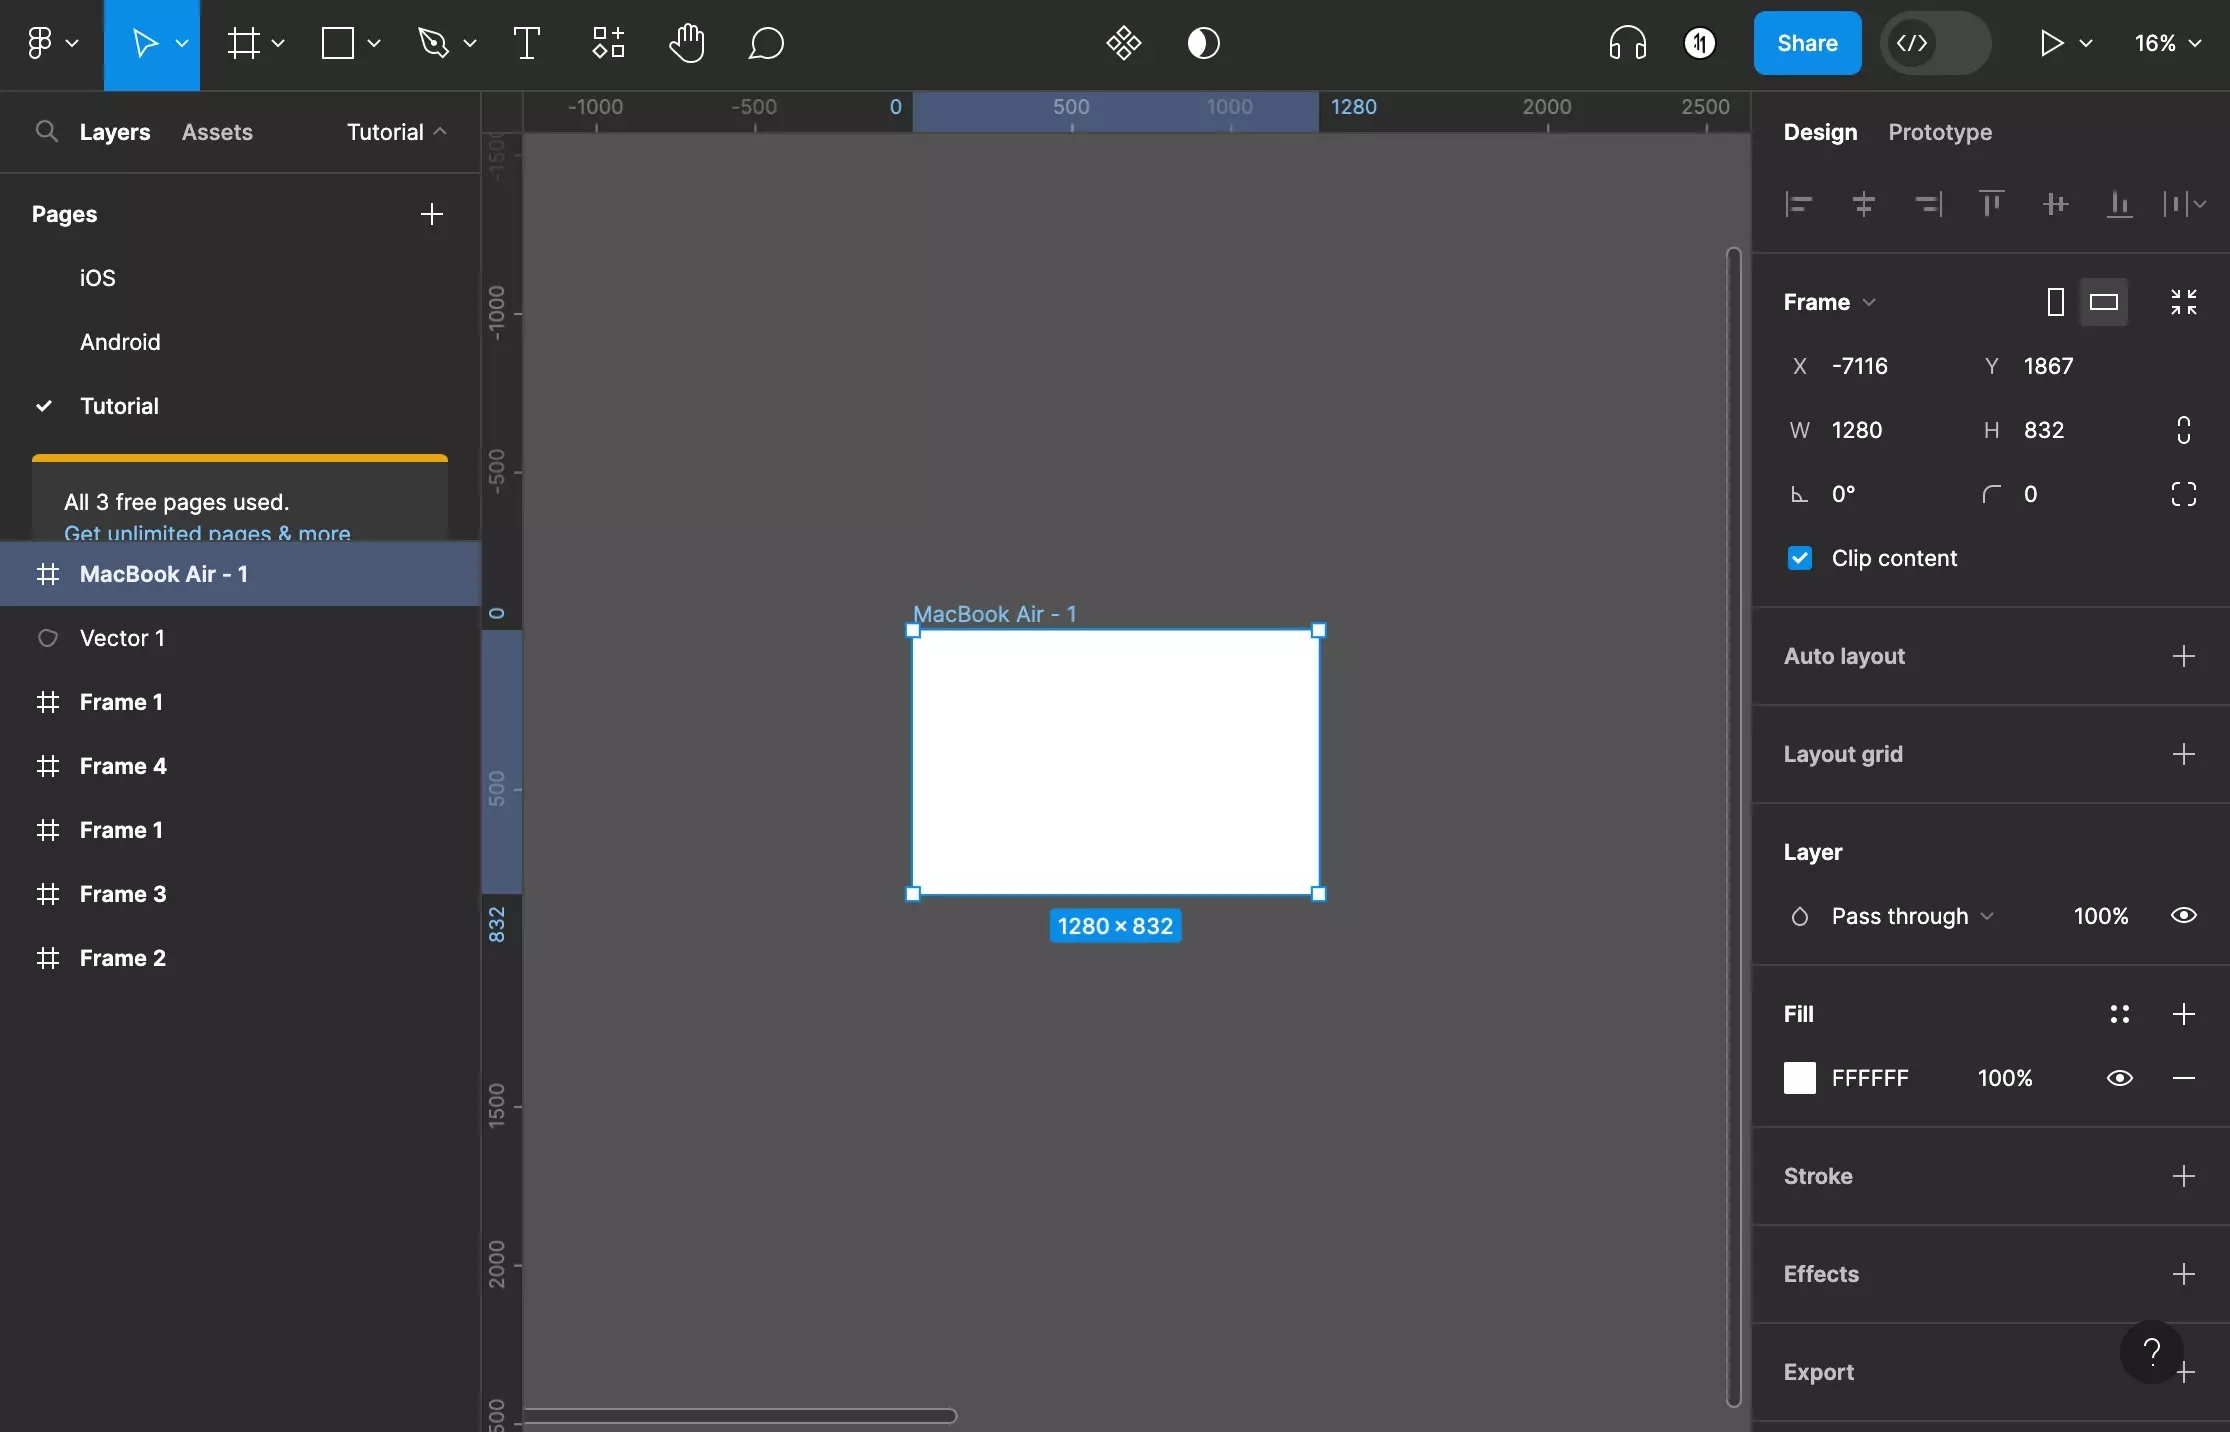
In Figma, select the frame or shape.
Step Two: Change the Color
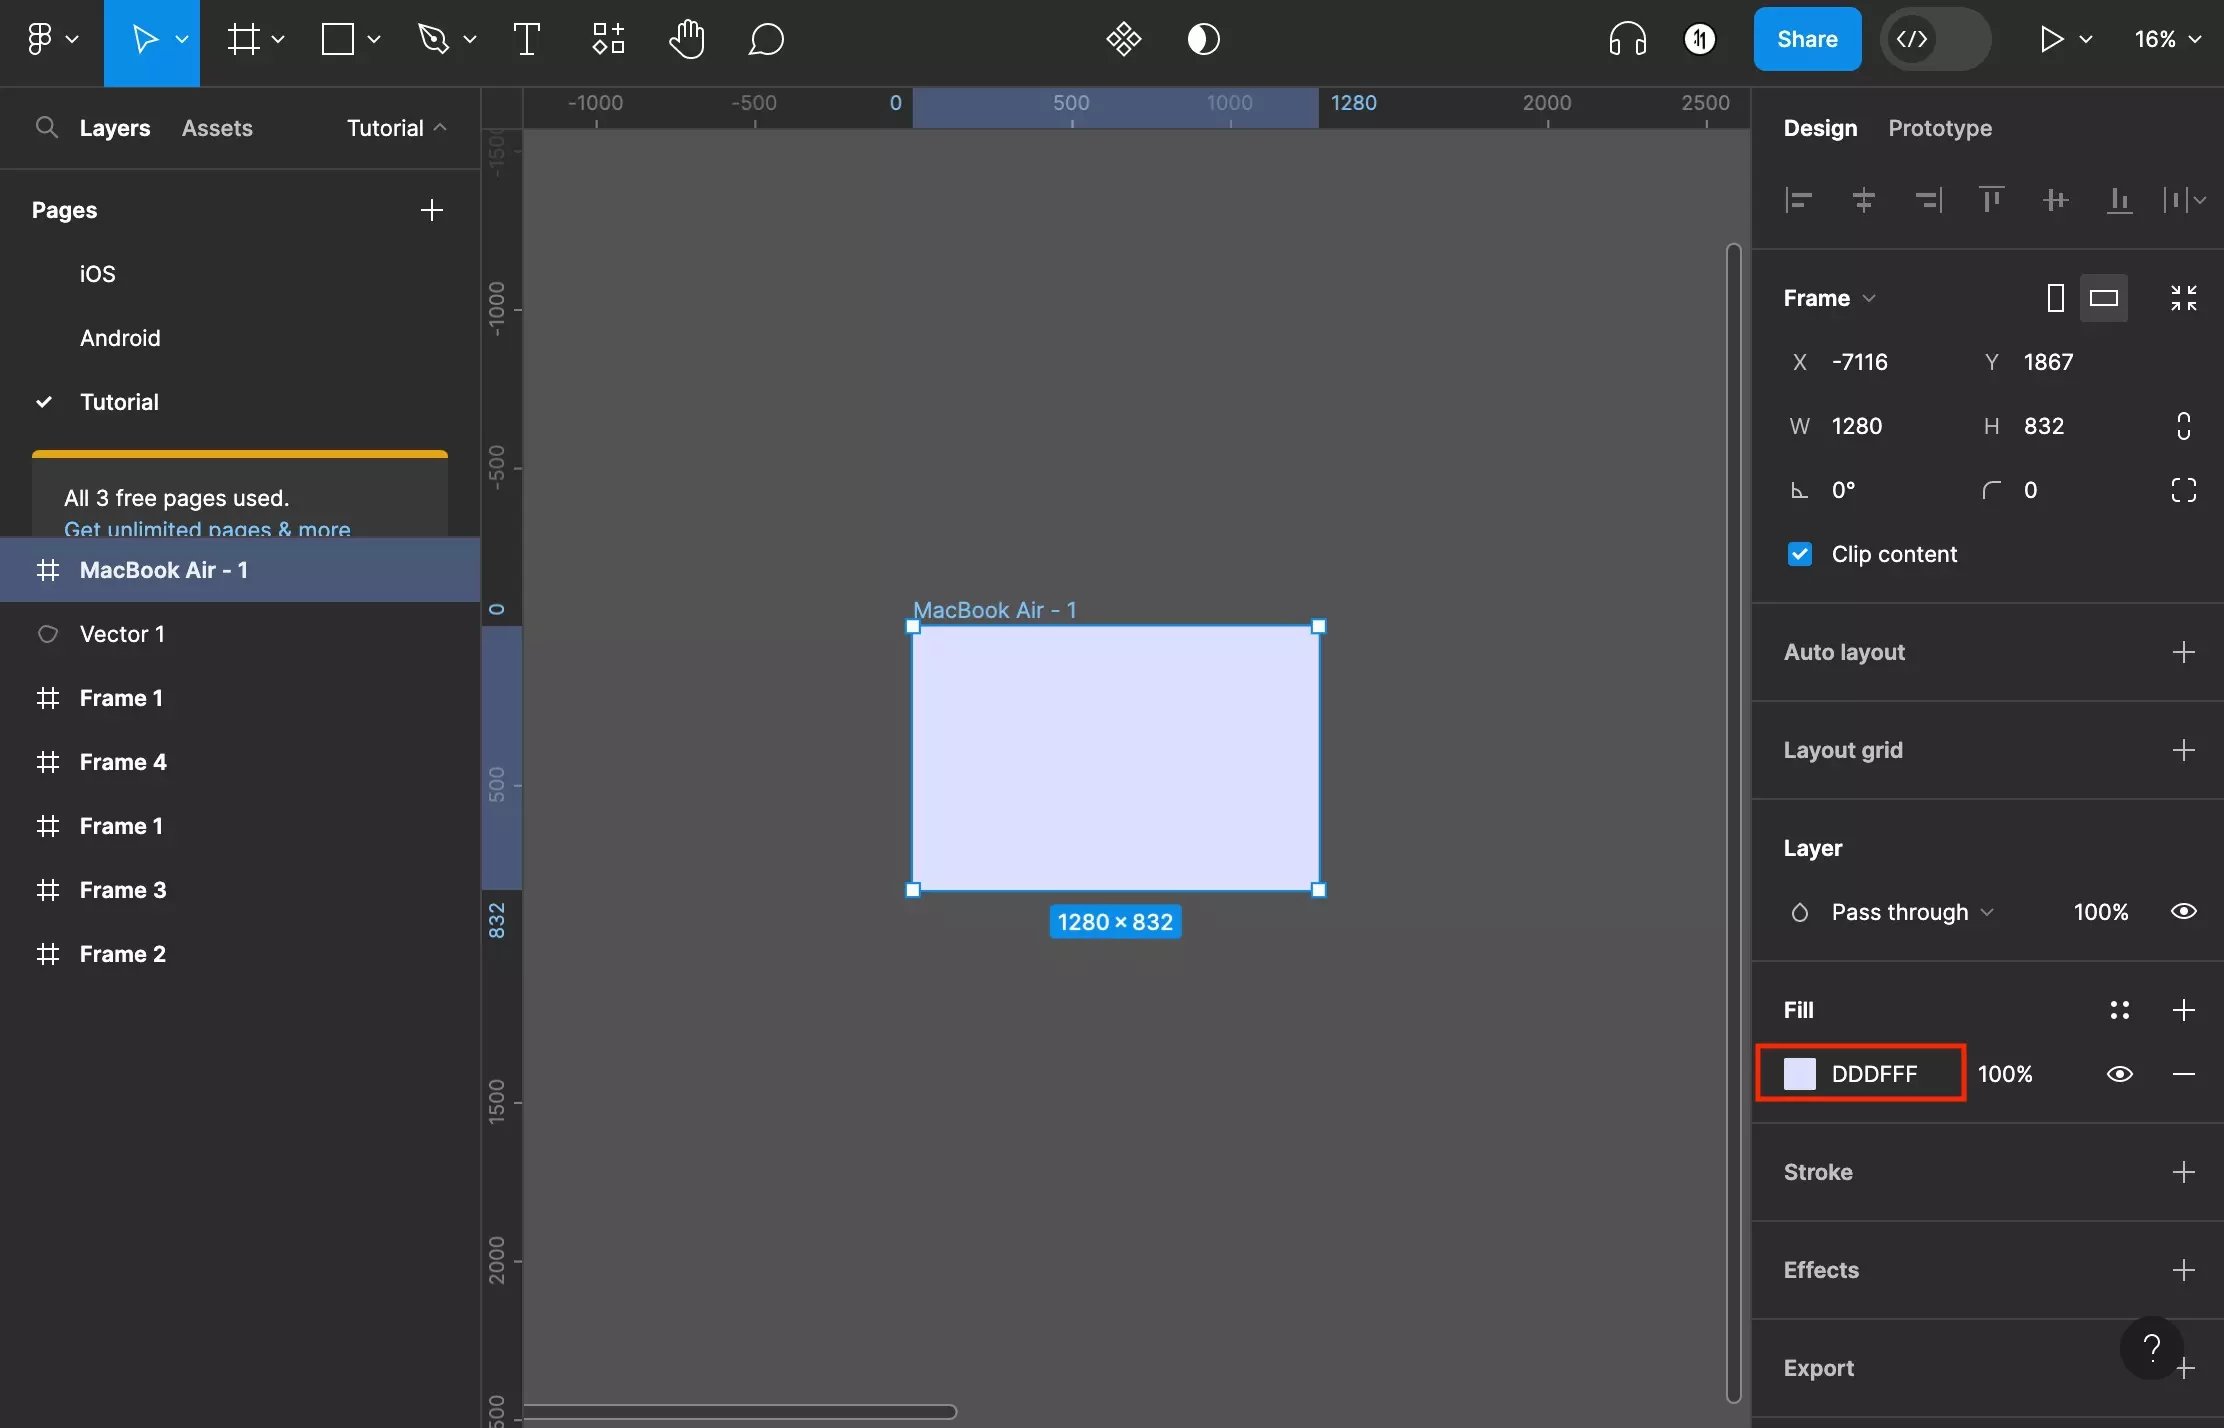
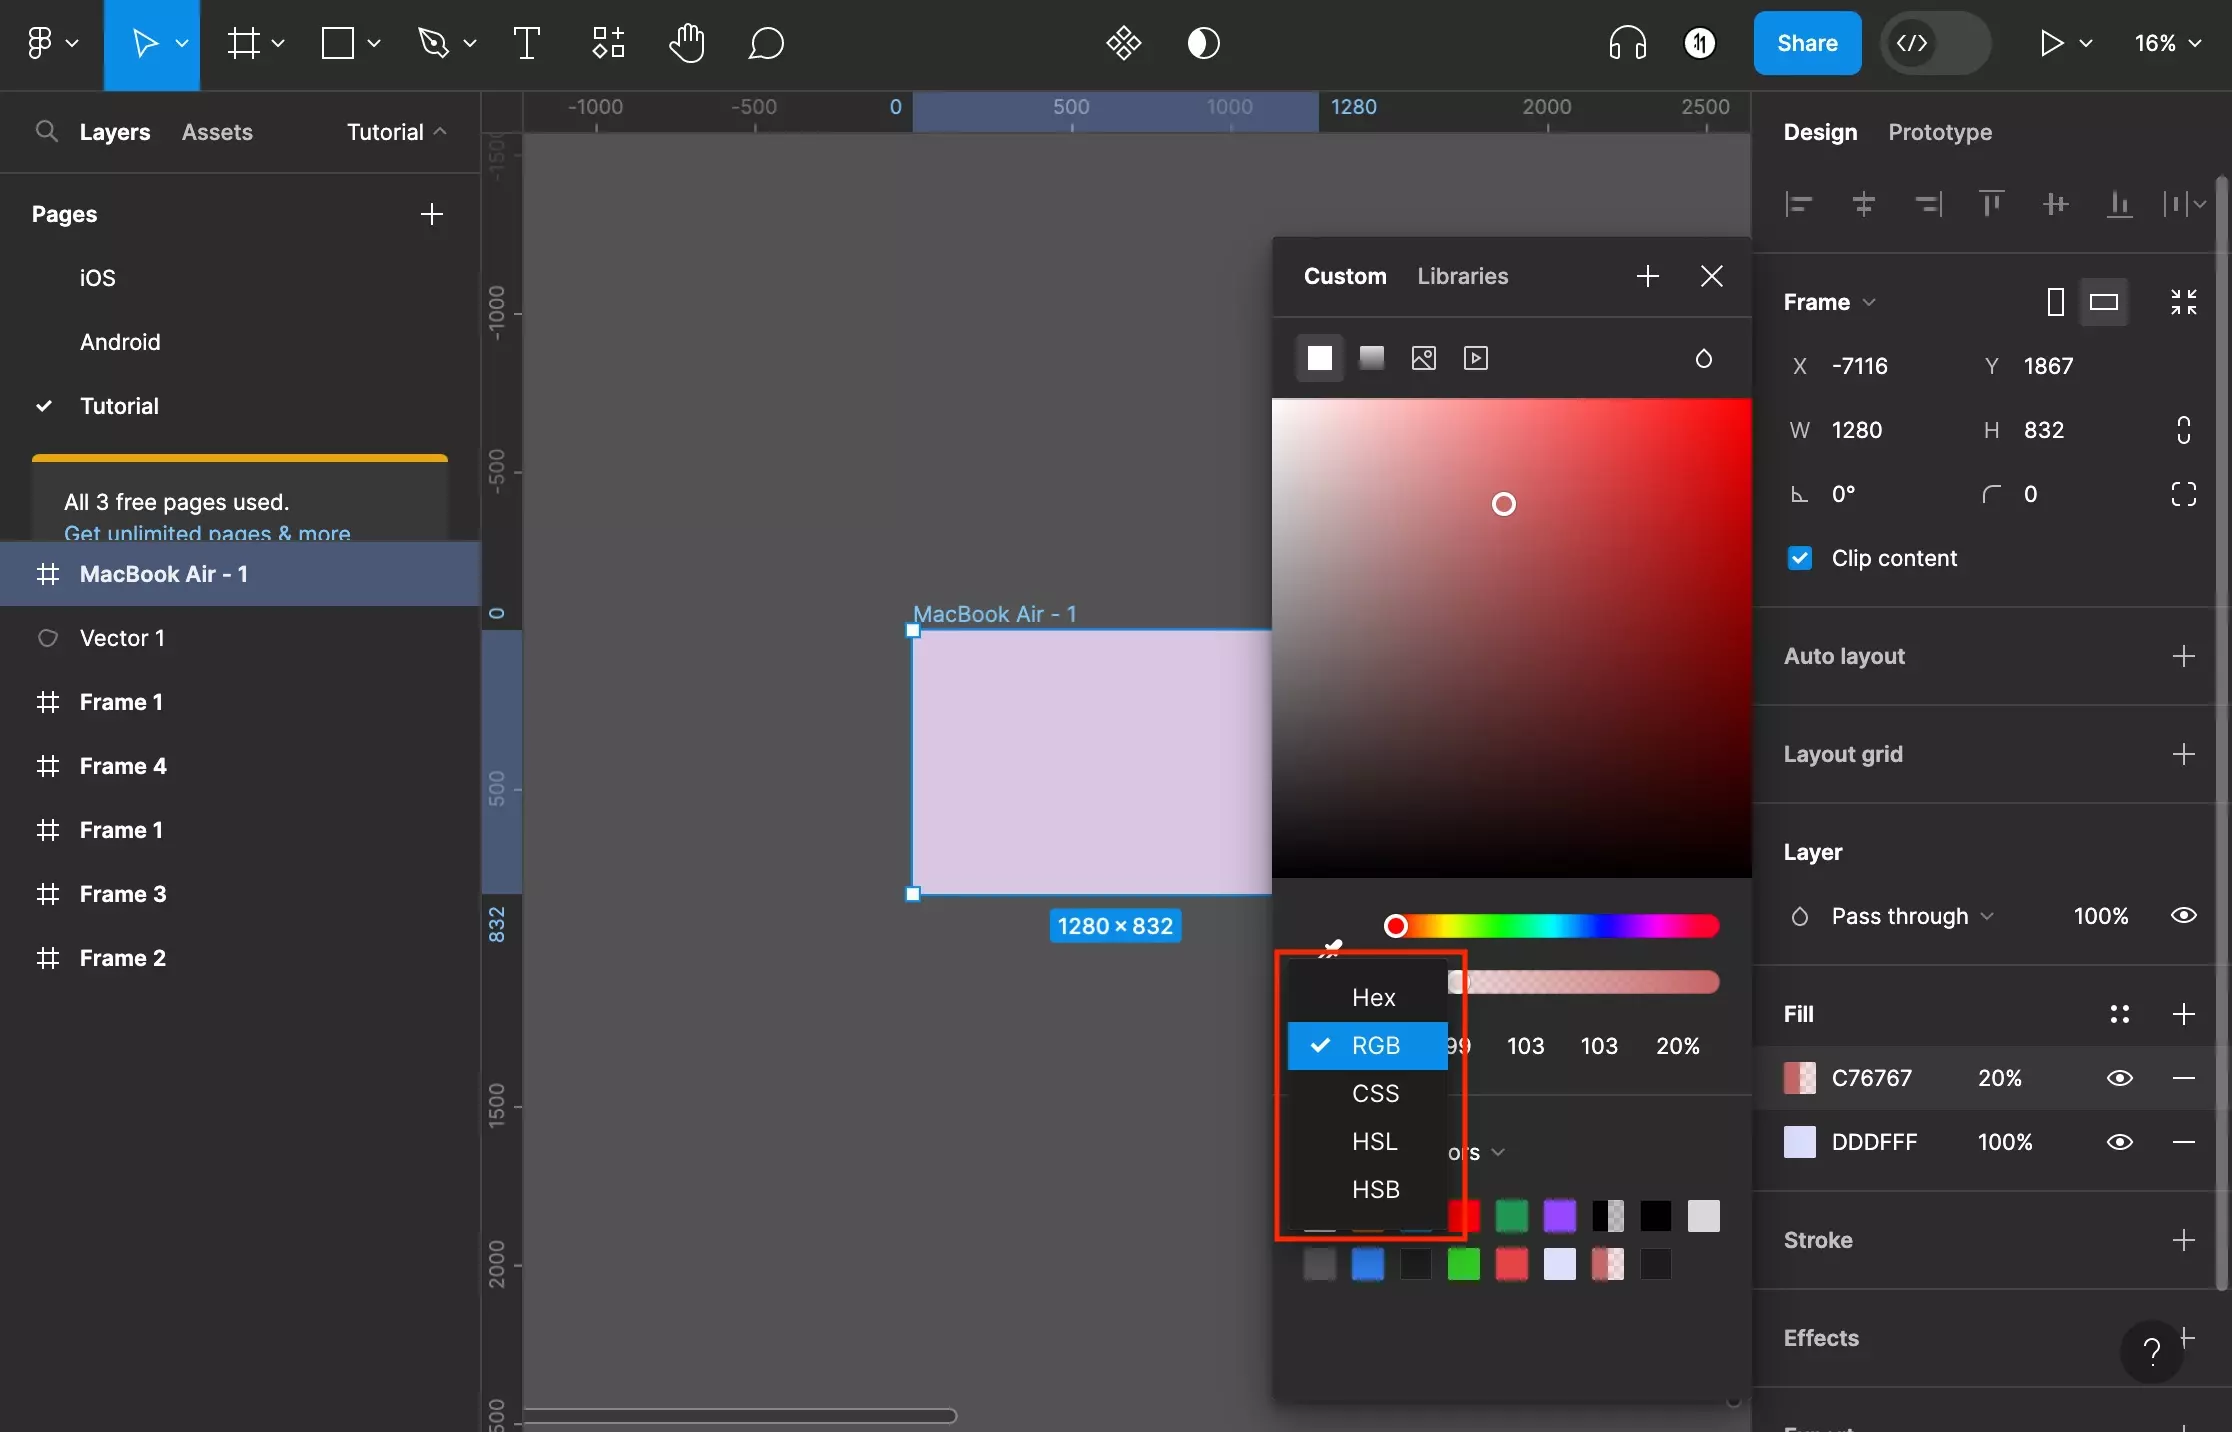
Set the background color by changing the Fill hex value, or click the colored square to open up the color picker.
If you wish to change the opacity, change the % value (i.e. 100%) next to the hex value.
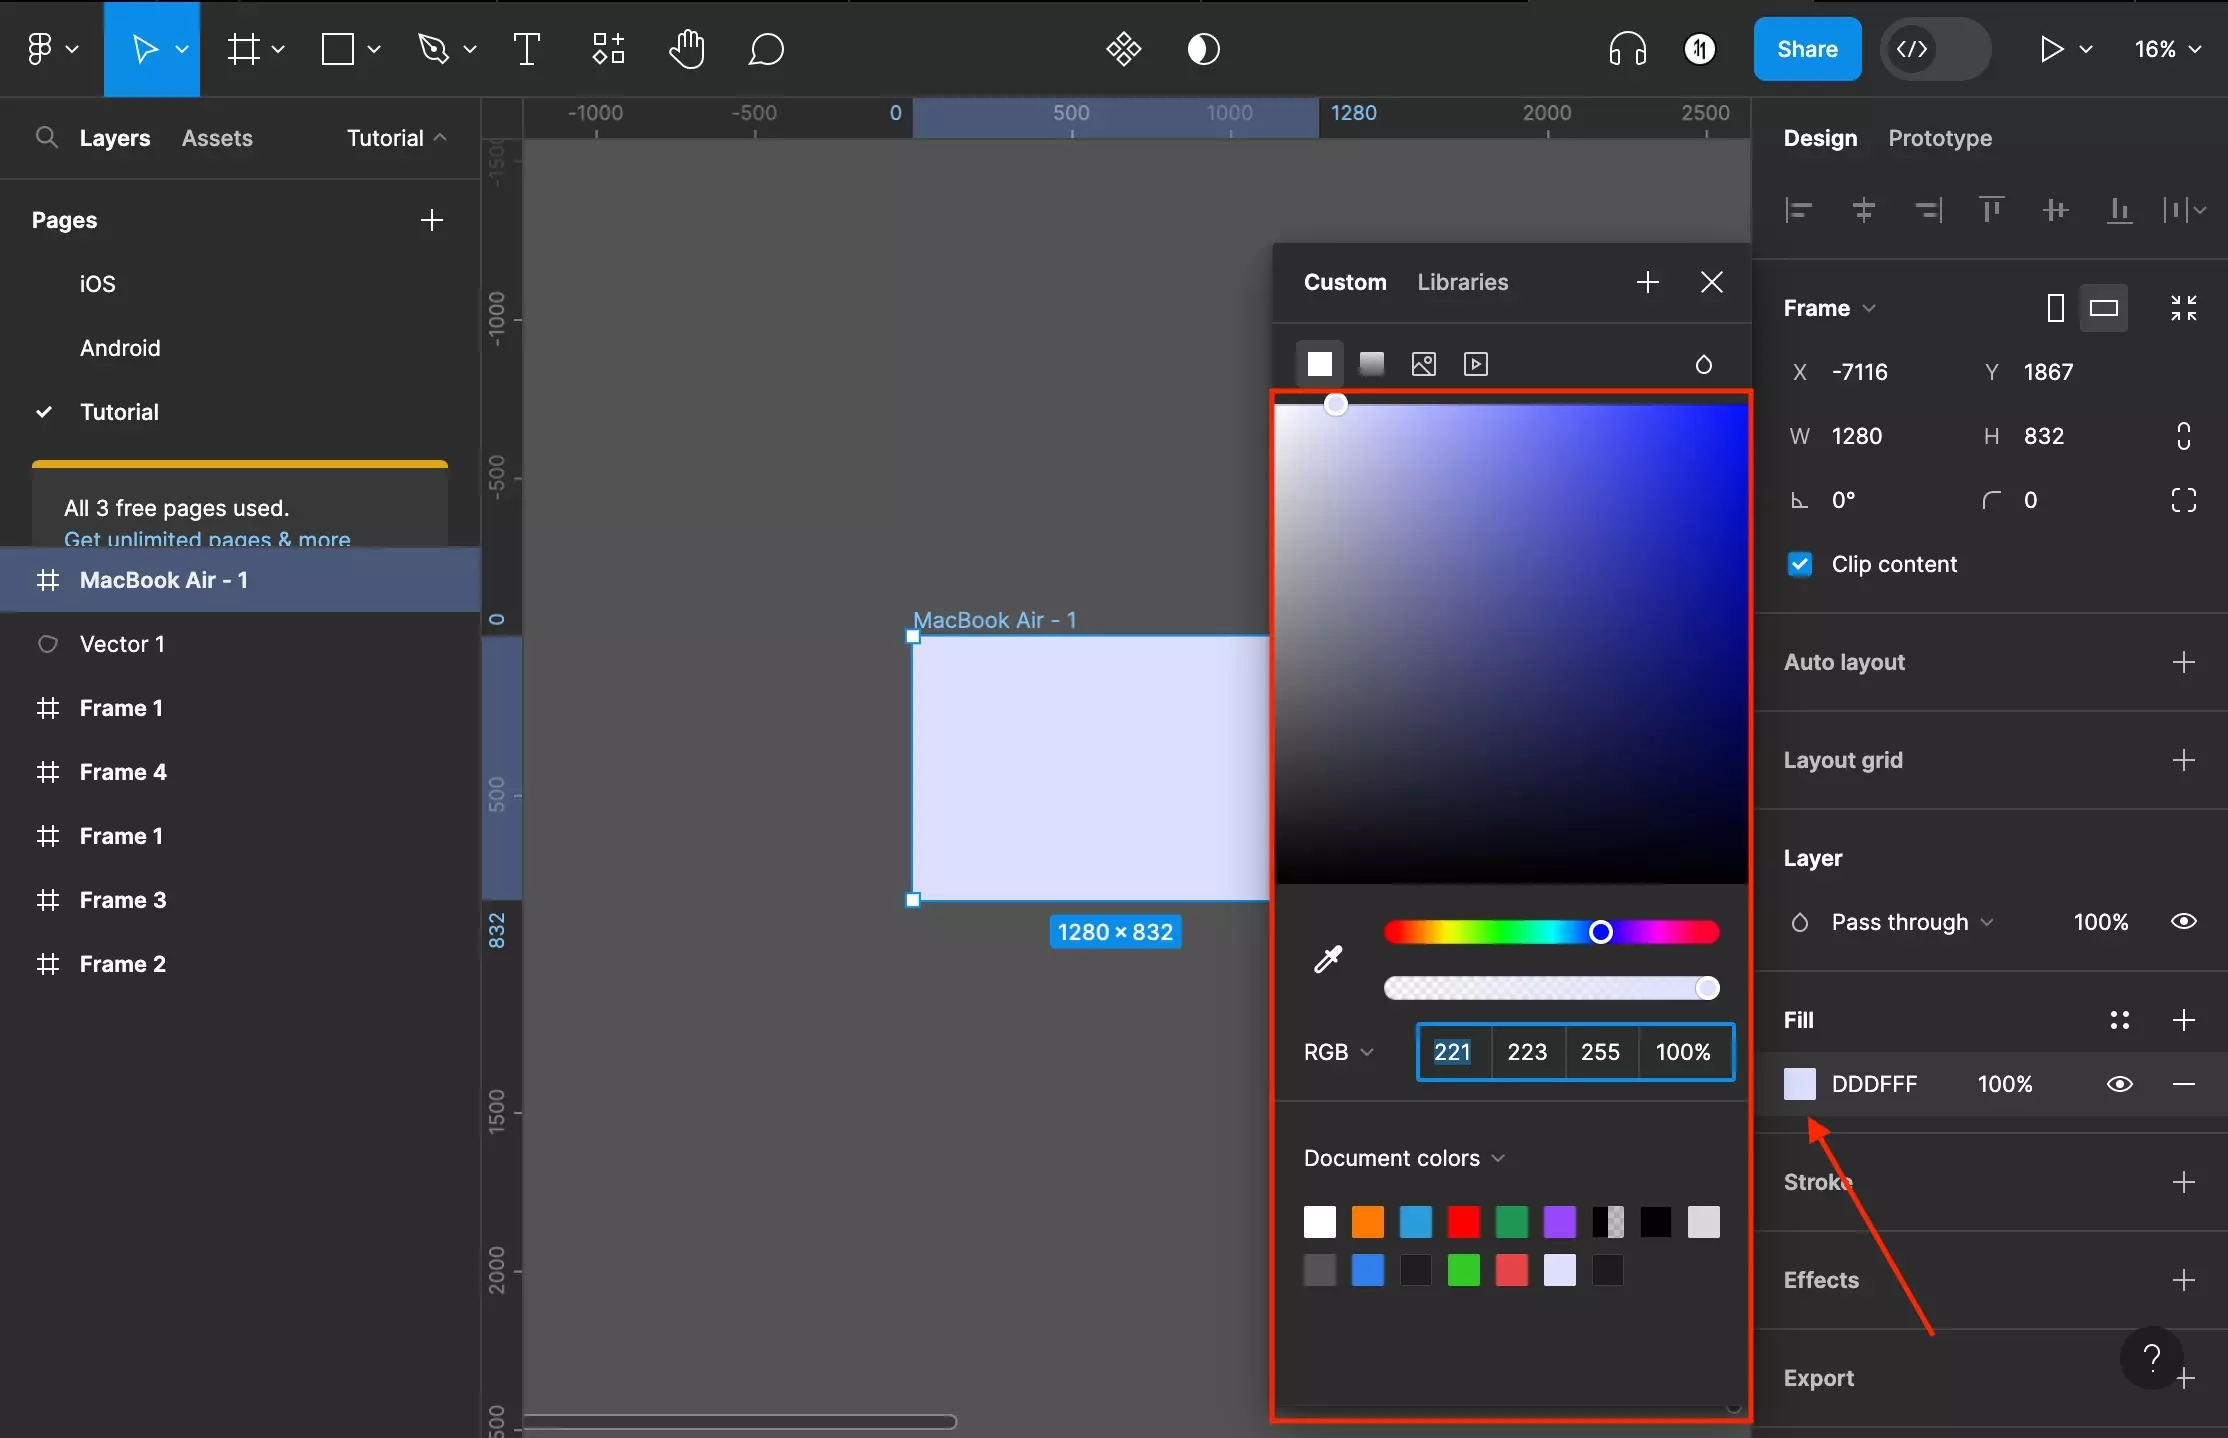
Select the colored box to open the color menu.
To change the way the color is formatted, click the RGB caret in the color menu to open the dropdown. The options are Hex, RGB, CSS, HSL and HSB.
Step Three: Add another Color
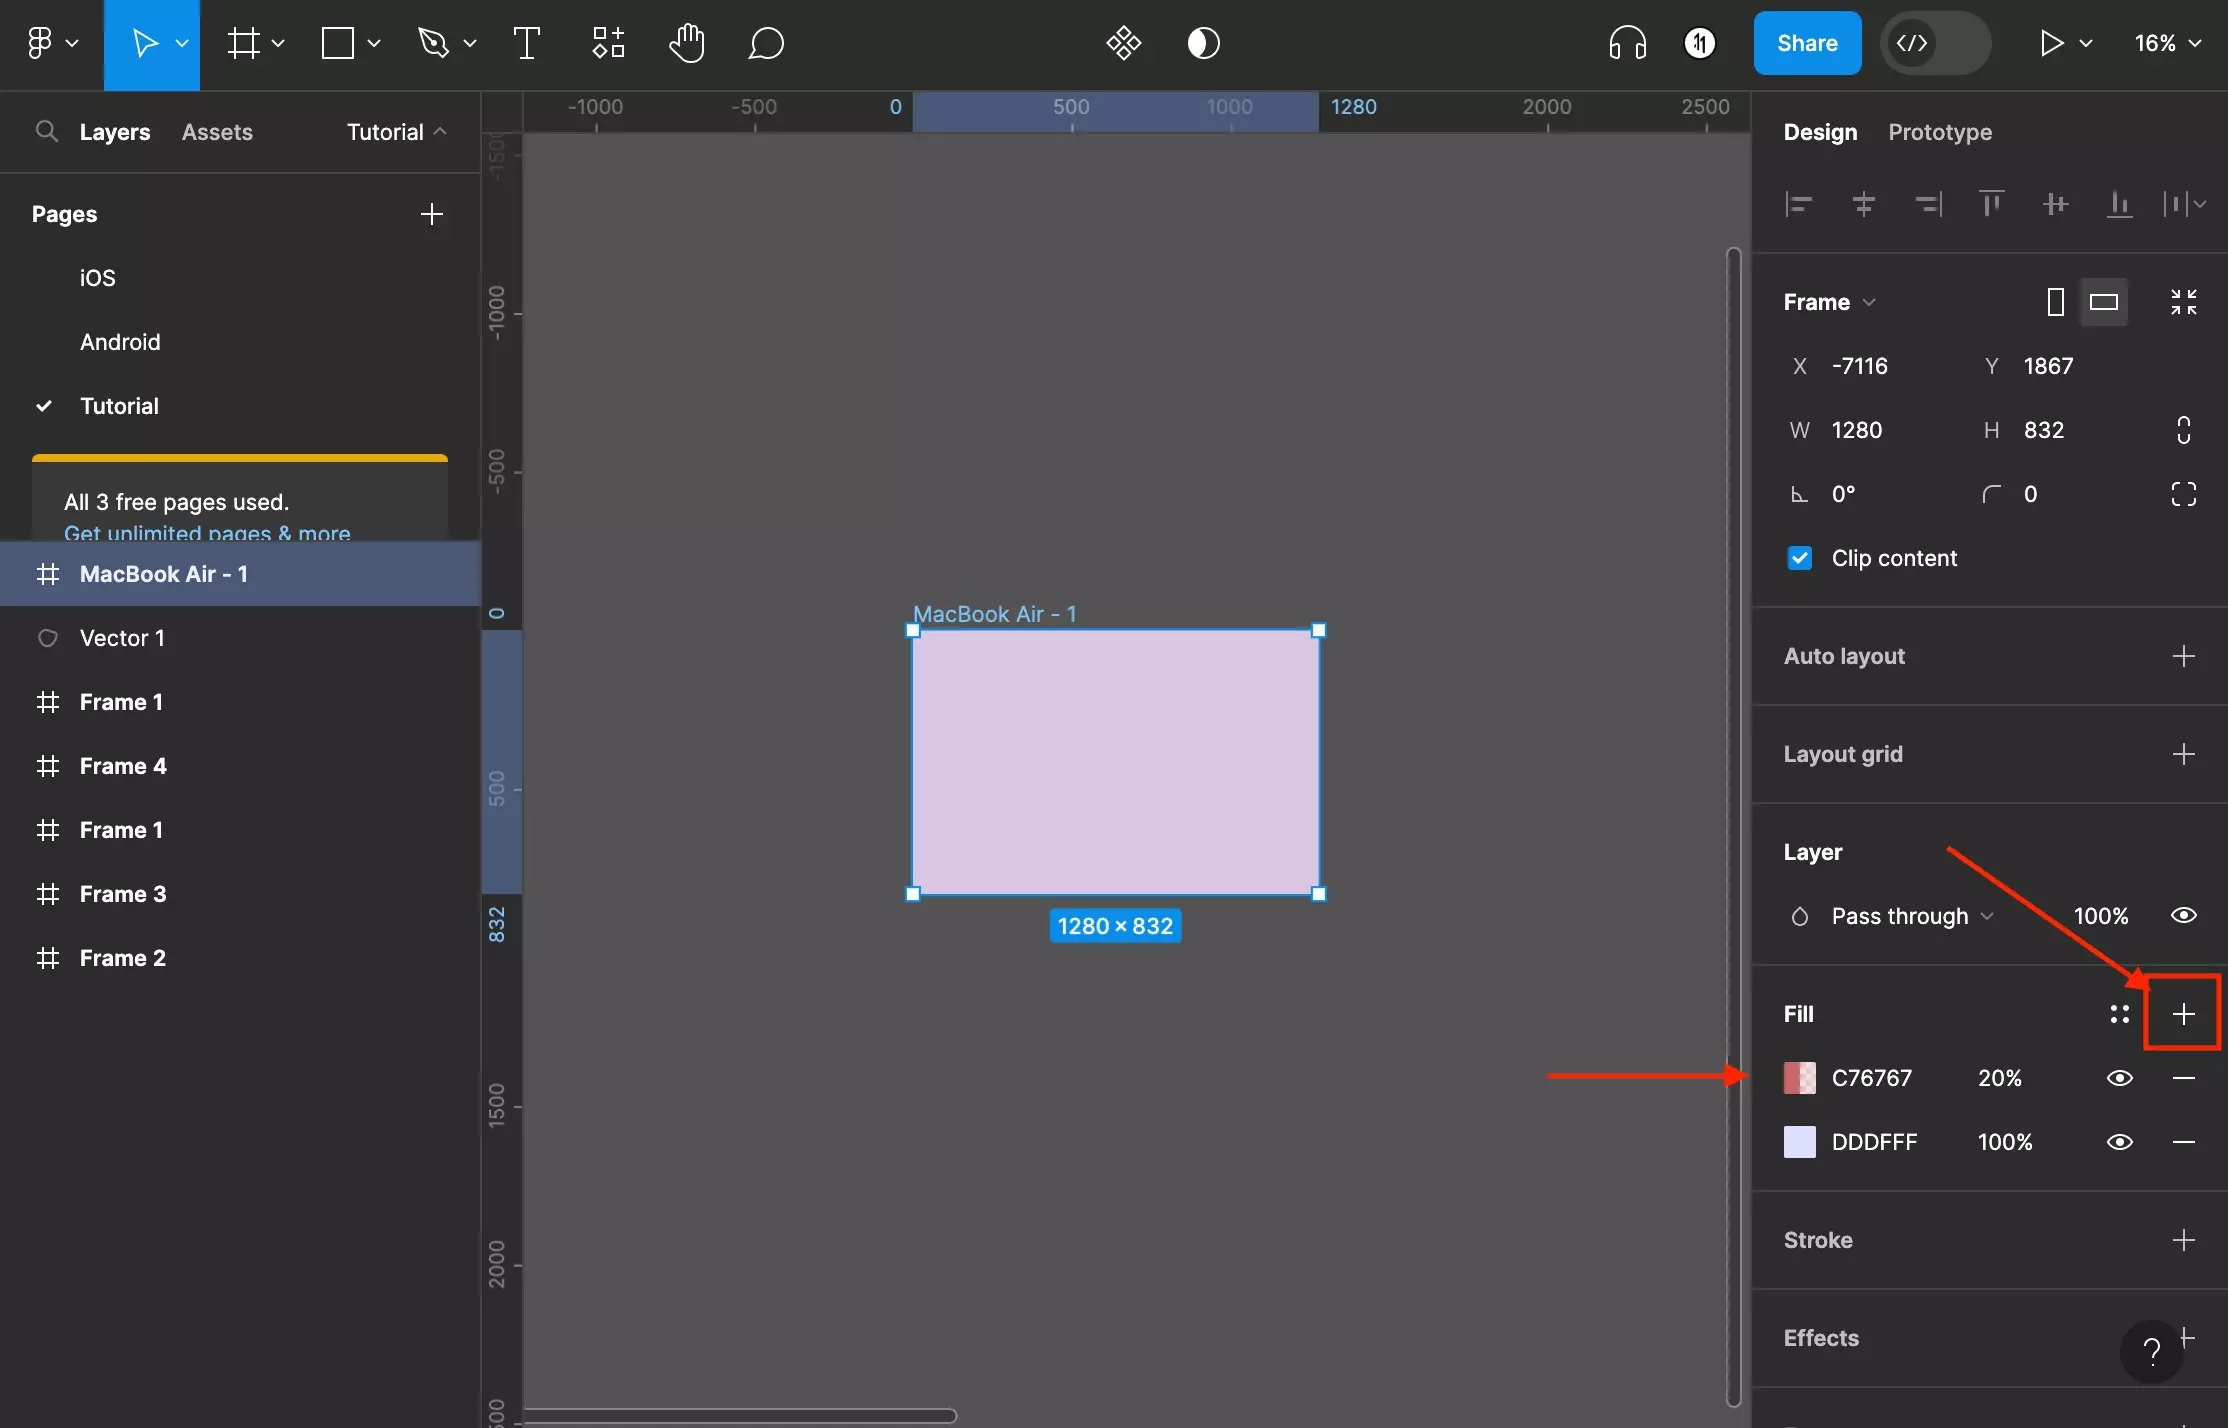
If you wish to add another color, press the + next to Fill and configure the new color in the same way described in Step Two.
Step Four: Reorder, Hide or Remove
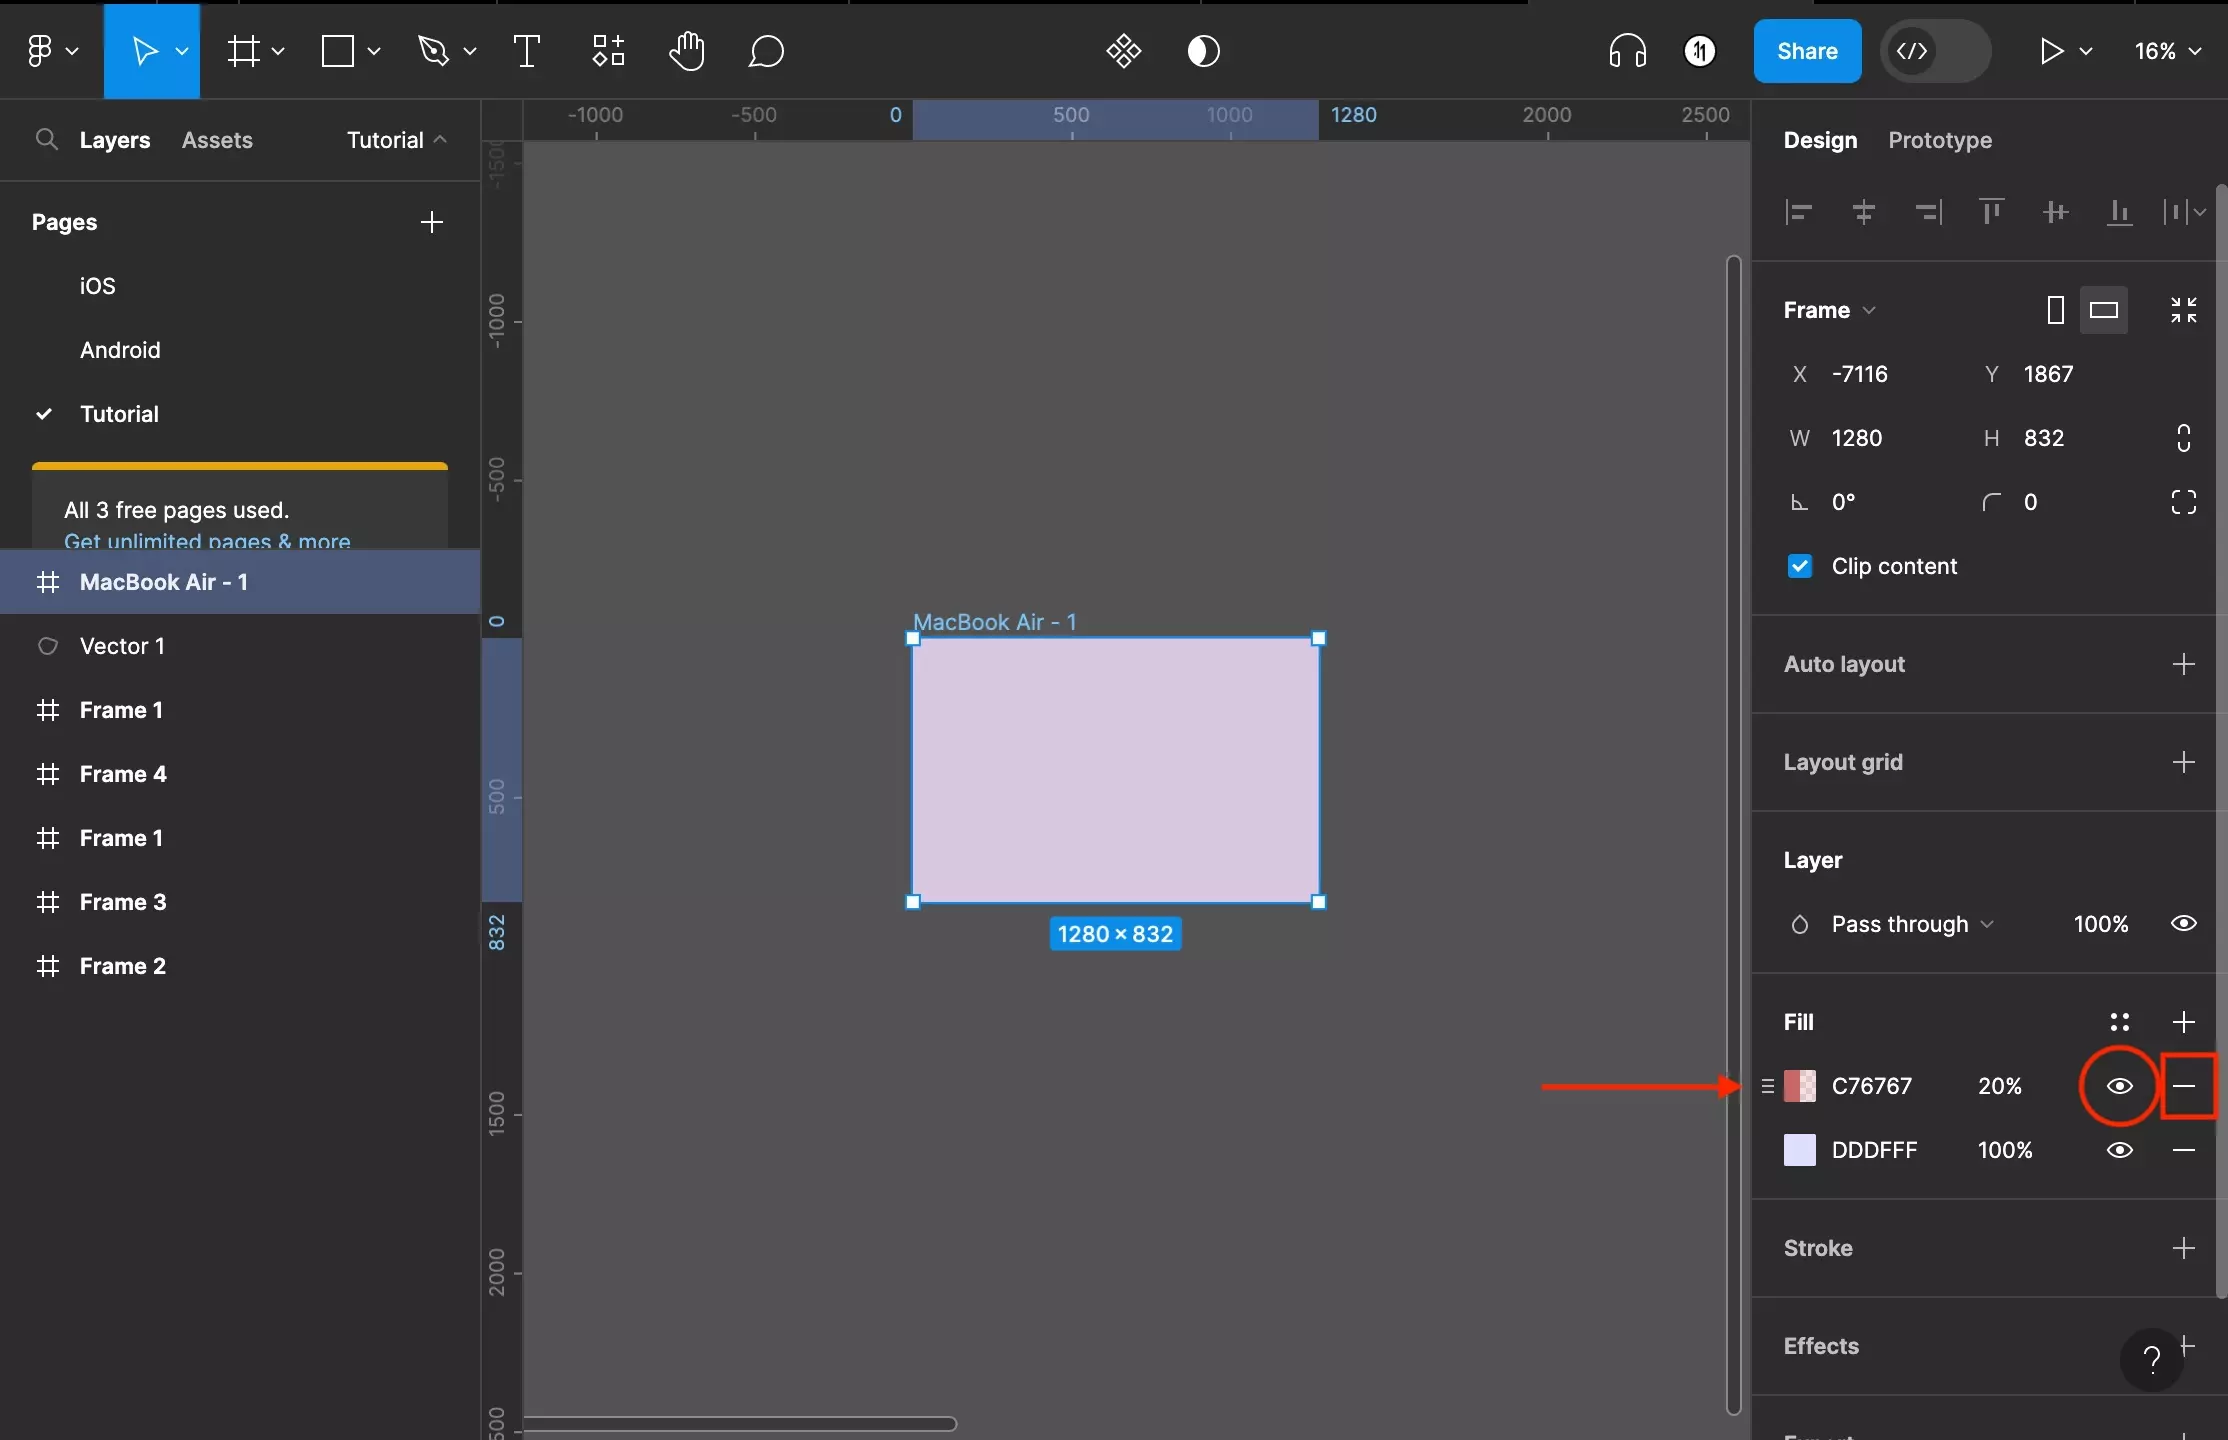
To change the order of the colors, highlight a color input. This will present a handle icon which will allow you to reorder the color by clicking and dragging the color. The lower down a color is, the further down it is in the background (i.e. higher up colors are overlays whilst the lowest one is the "true background").
If you wish to hide/show the color, toggle the eye icon to the right of the color.
Finally, to remove a color, press the minus icon to the far right of the color.
Looking to learn more about the basics behind styling frames, paths, shapes and text in Figma ?
Consult the list below to learn more about the basics behind styling text, shapes, paths and frames in Figma.