How to set the minimum and maximum width or height of a frame in Figma

A step by step guide on setting and updating the min and max values for the width or height of an artboard in Figma.

Oscar de la Hera Gomez
Written by Oscar de la Hera Gomez
First published on 07/13/2023 at 10:50
Last Updated on 07/18/2023 at 11:11
A flower that represents Figma with the text “Minimum and Maximum Width or Height” beneath it.

A step by step guide on setting and updating the min and max values for the width or height of an artboard in Figma.

SubscribeCheck out our free mobile e-commerce Figma design file

Step One: Select a Frame

A screenshot of Figma that shows that a frame has been selected.

In Figma, select a Frame (artboard).

How to create a Frame in Figma

Step Two: Activate Auto Layout

A screenshot of Figma showing you how to turn on Auto Layout. Highlighted on the right sidebar is the "+" next to "Auto Layout" click it to activate auto layout. Alternatively, press Shift + A on your keyboard.

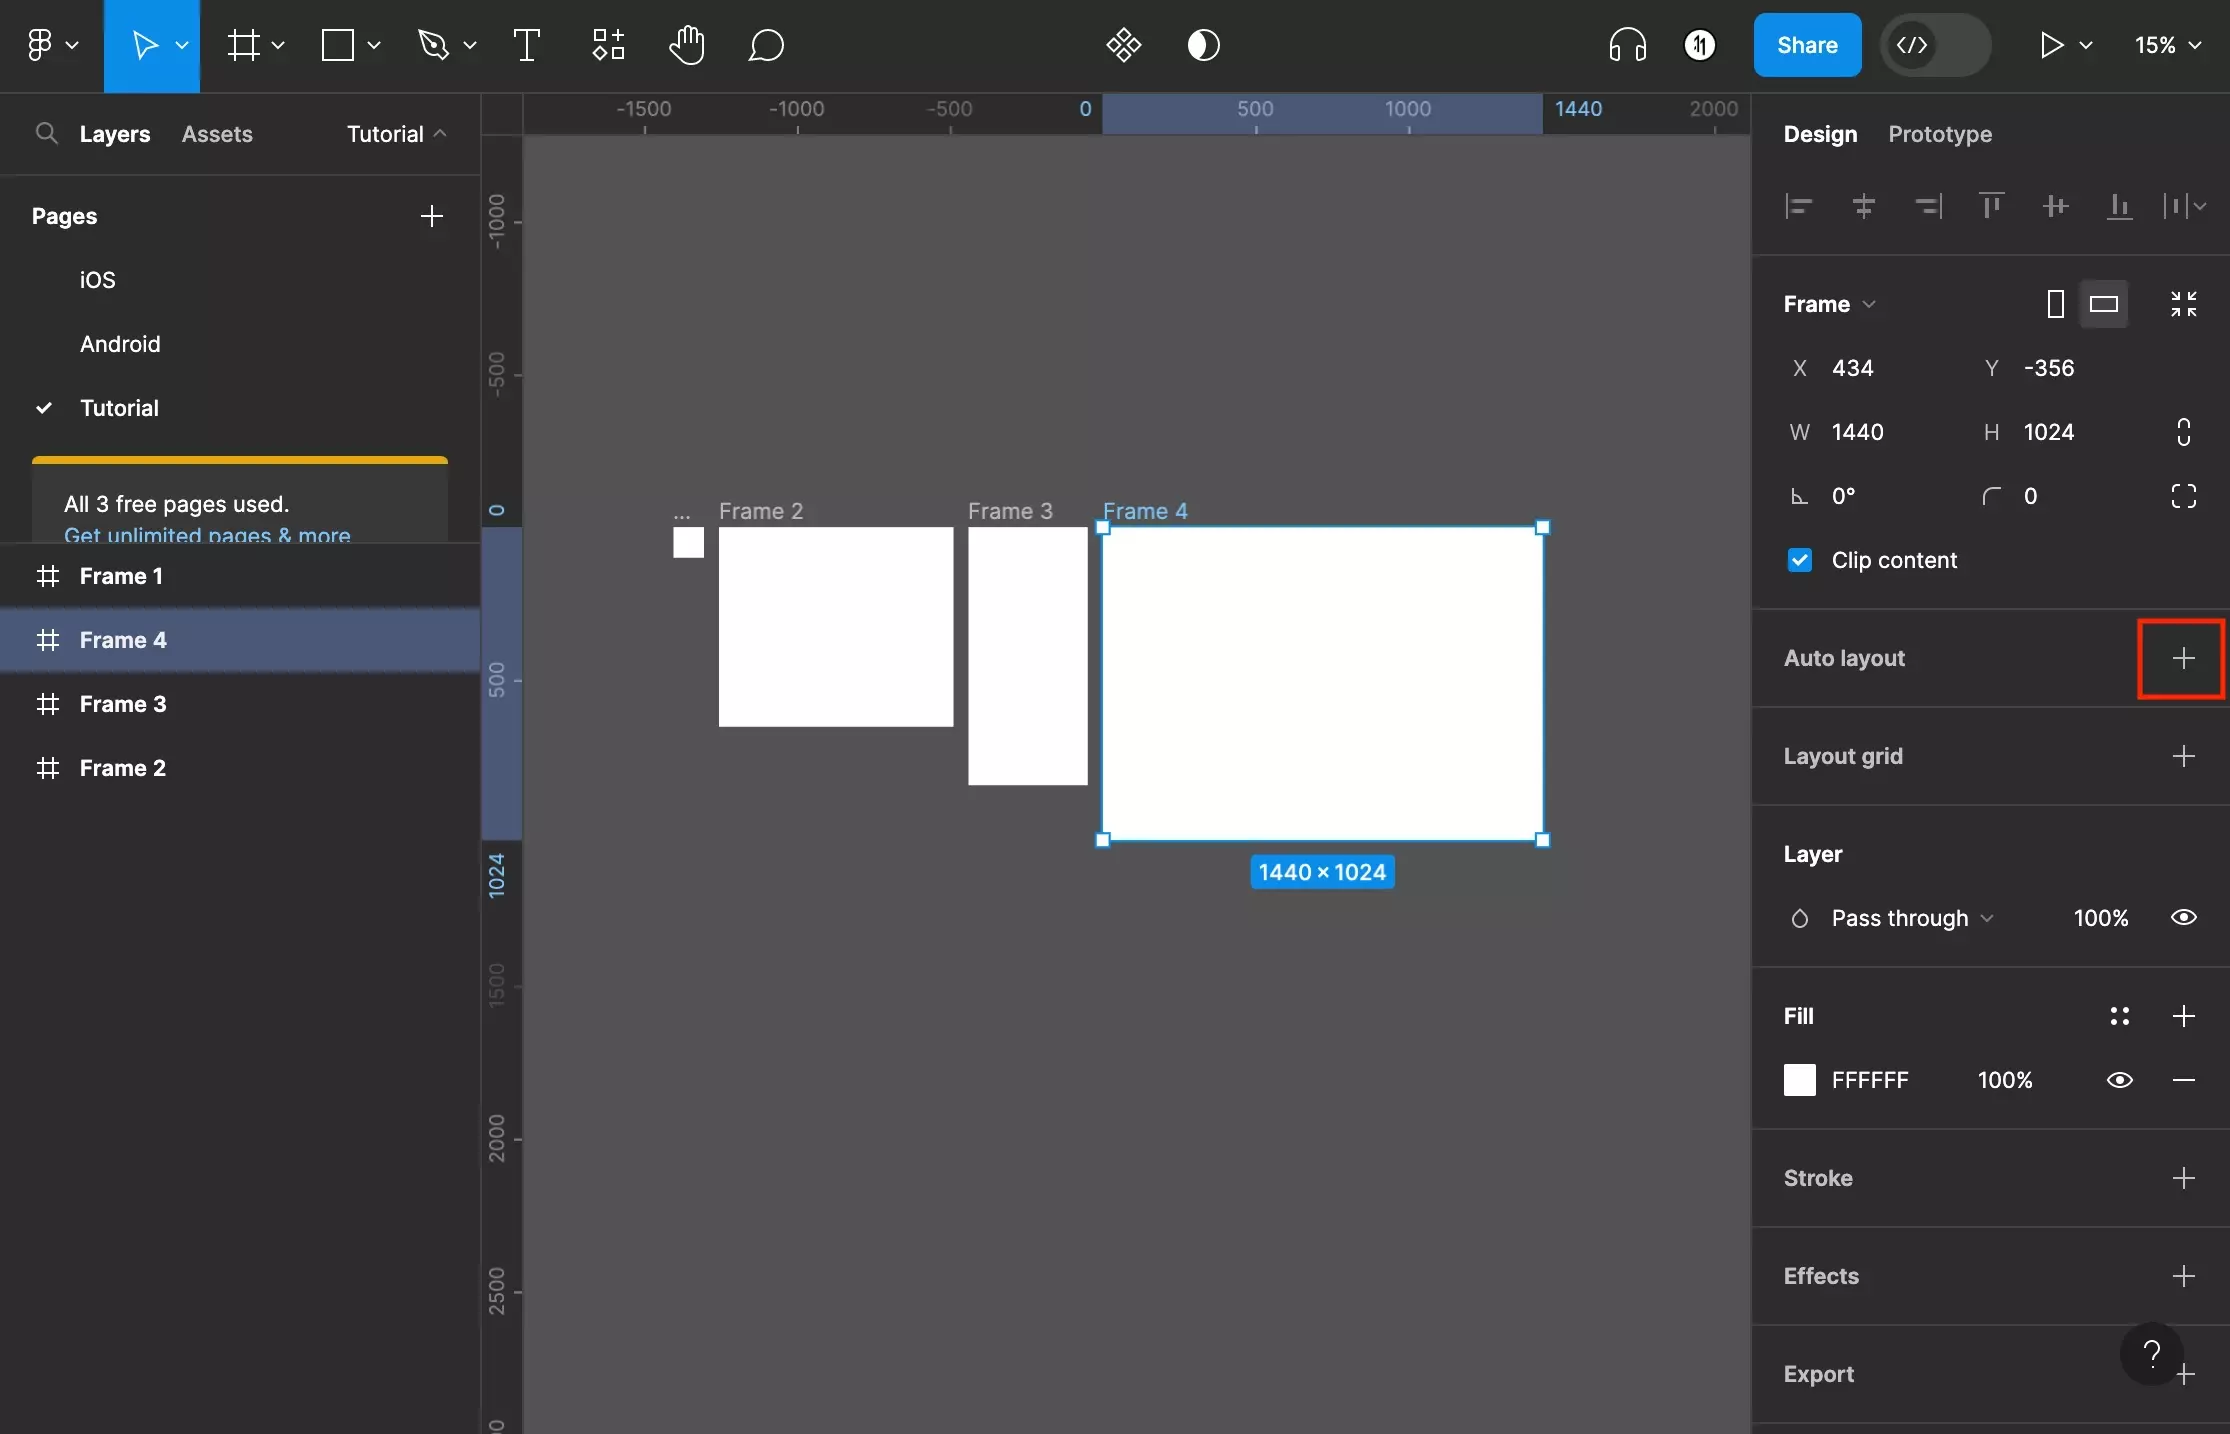
Press Shift + A or click + next to Auto layout on the right menu sidebar.

How to use auto layout in Figma

Step Three: Activate a minimum or maximum constraint

A screenshot of Figma that shows you how to activate the min or max width. The menu is available by pressing the "V" dropdown selector next to the width on the right menu side bar.

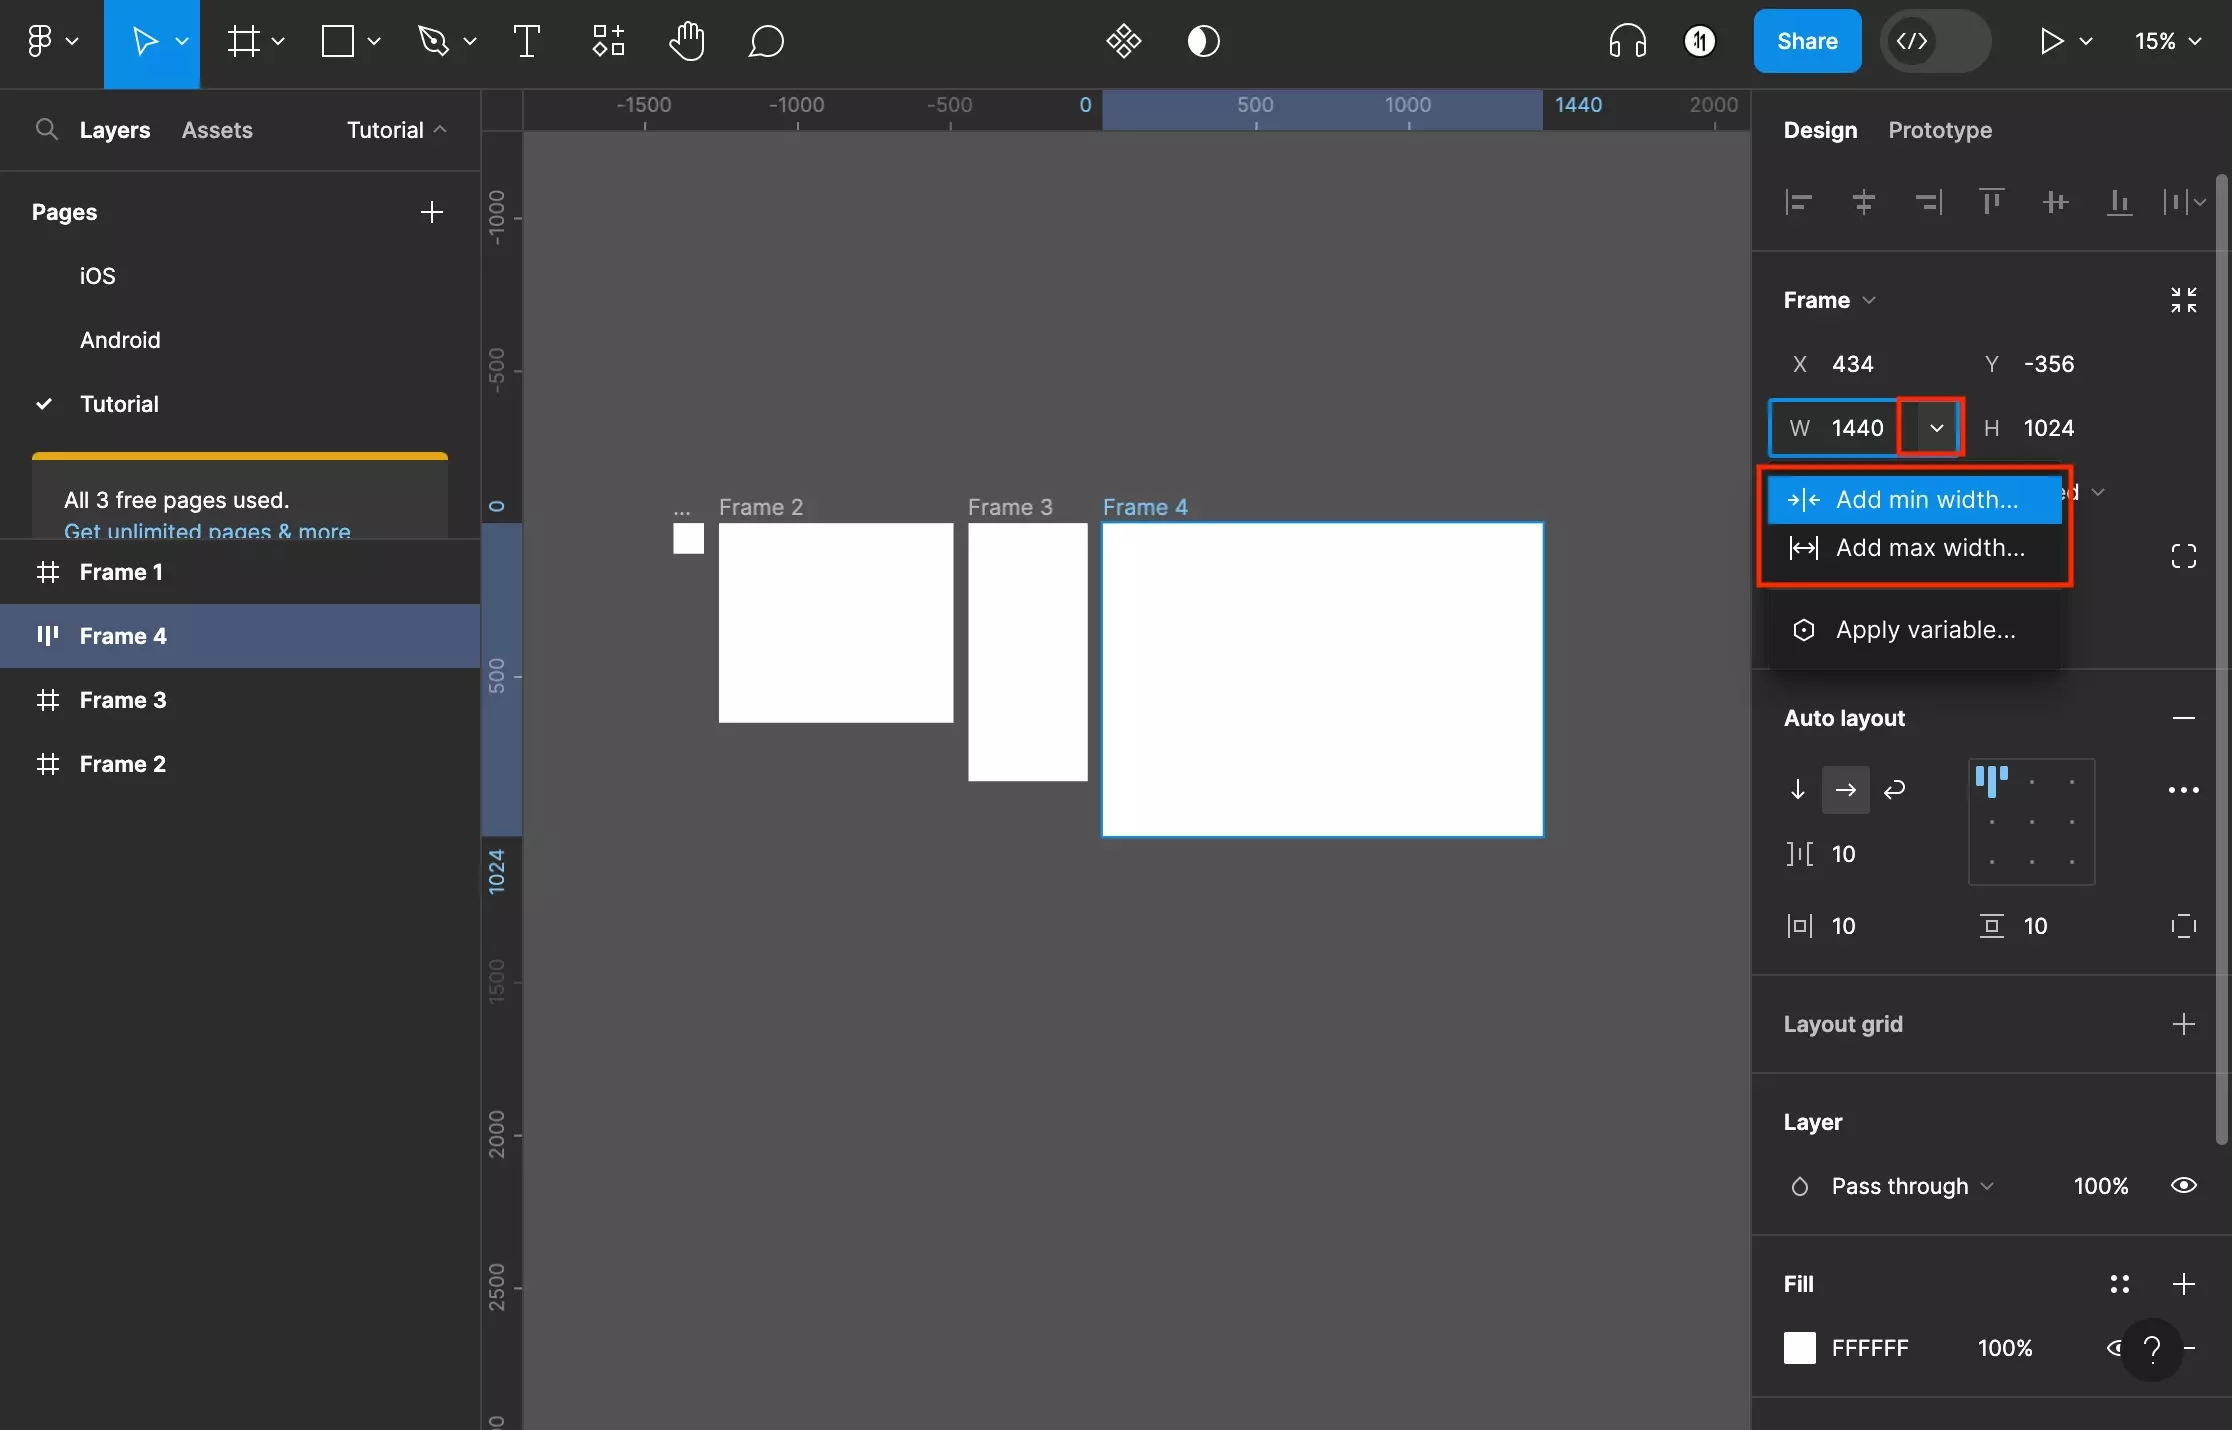
Open the dropdown next to width or height and click Add min width/height or Add max width/height to activate the constraint.

Step Four: Fill in the value

A screenshot of Figma that highlights how the max width has been set to 1440 on the right sidebar. We have also highlighted that this detail now shows up on the artboard that is selected.

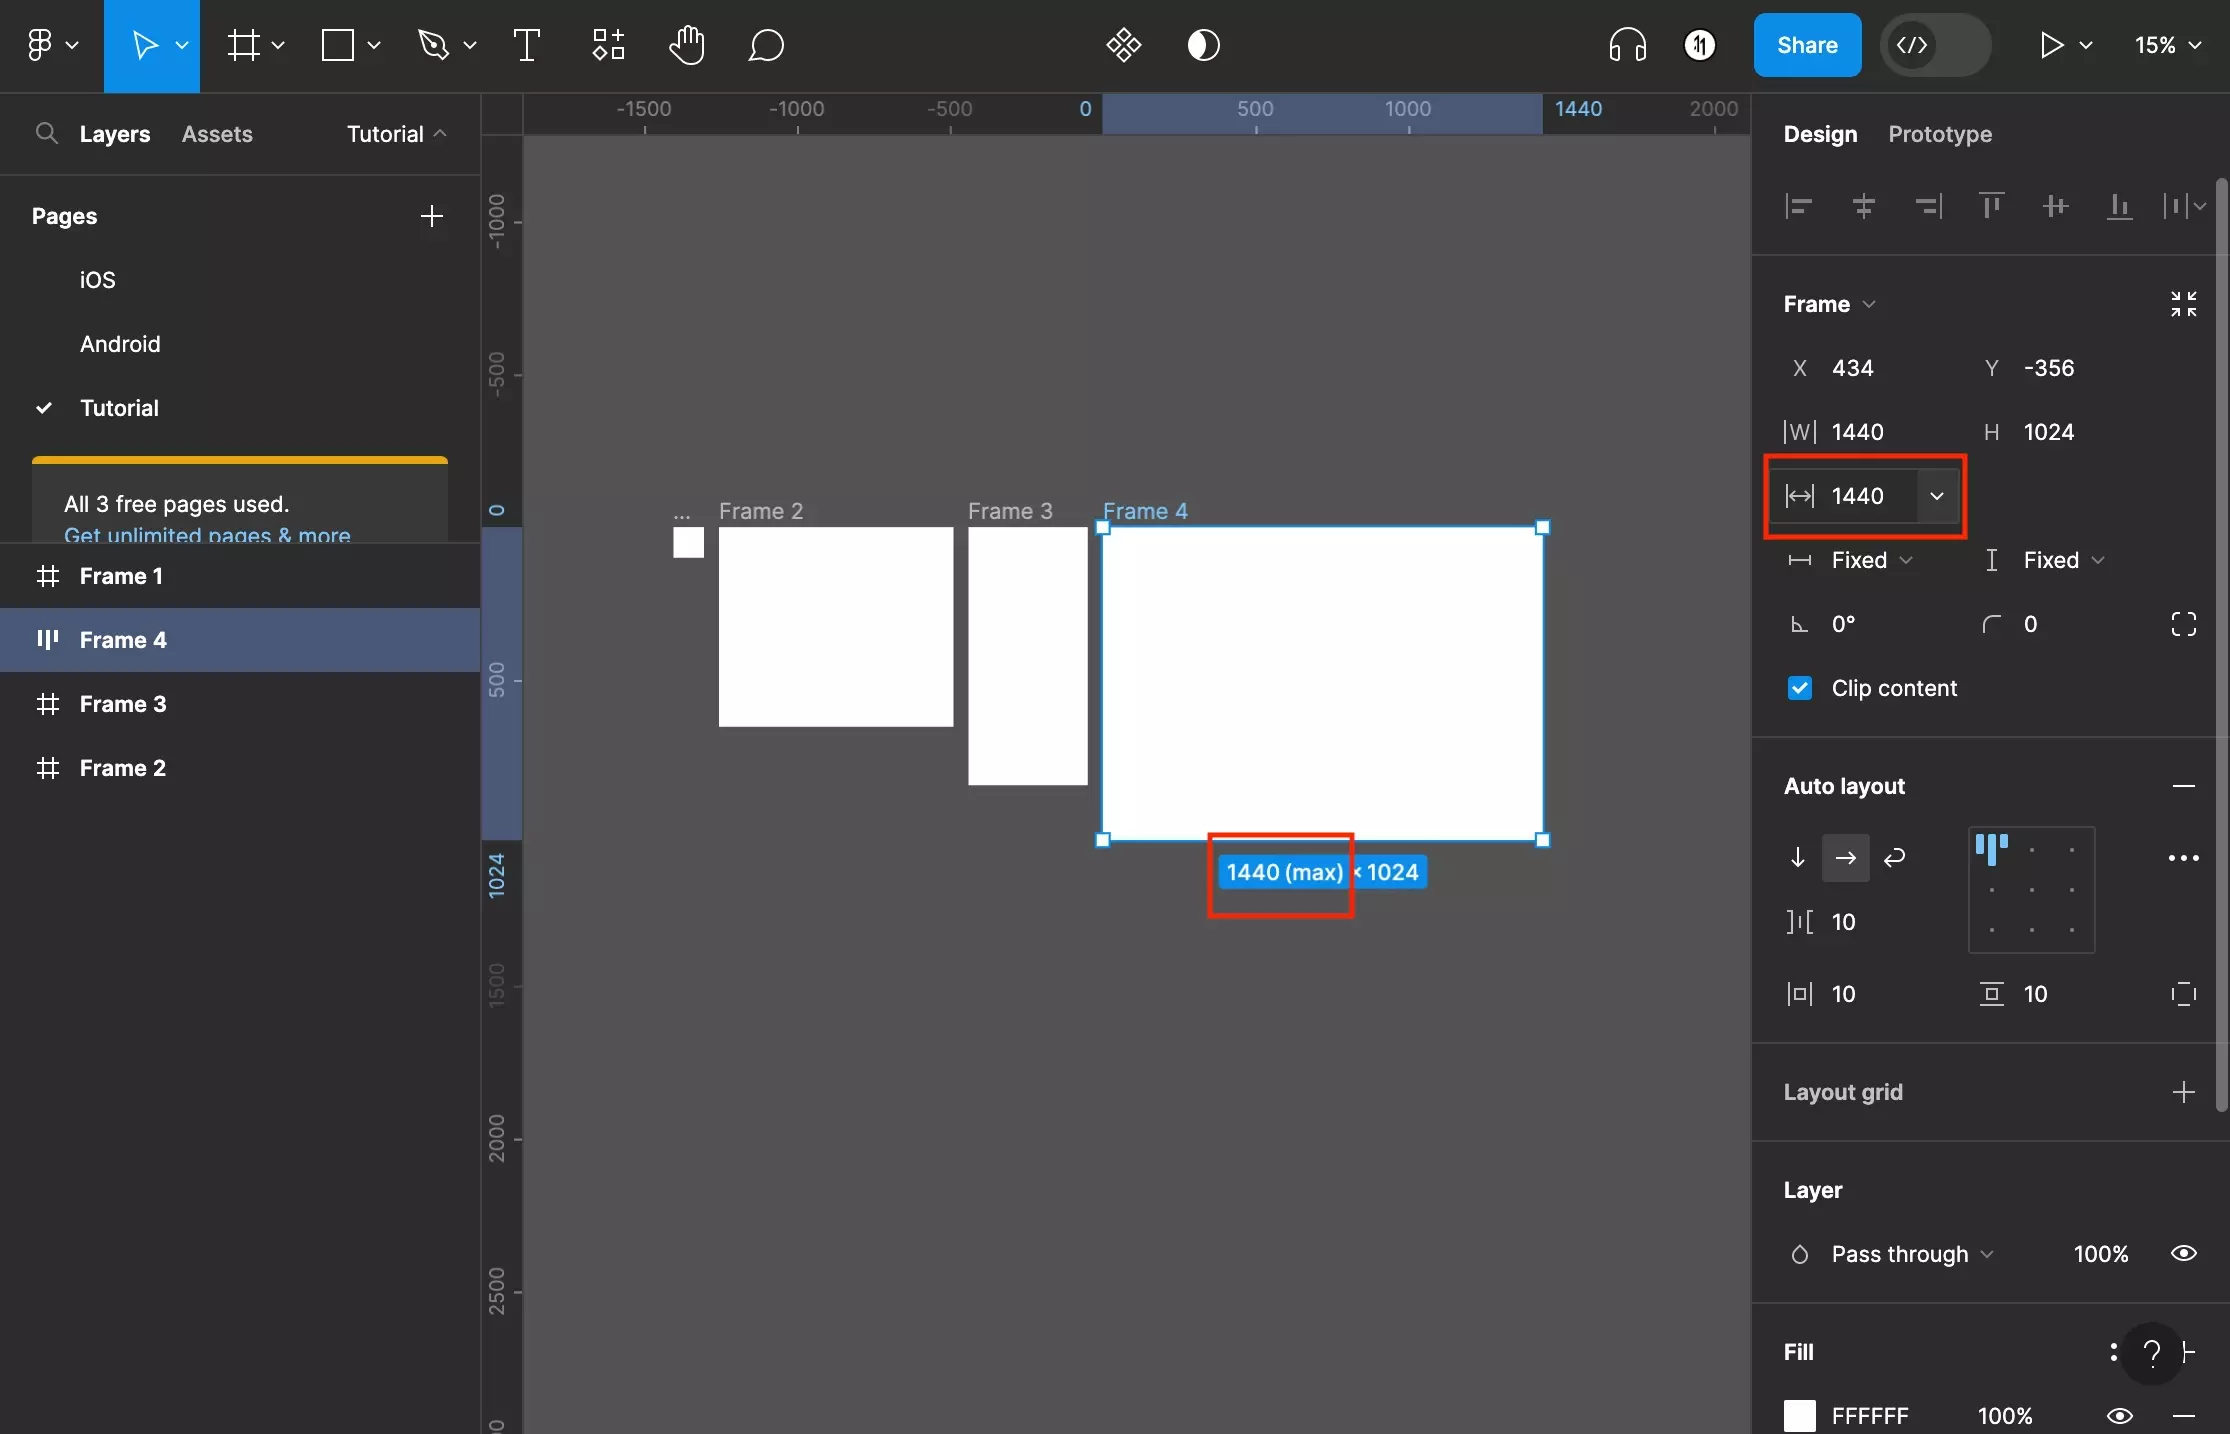
Type in the value next to the input that appears.

Step Five: Set remaining constraints

A screenshot of Figma showing that the values for the minimum and maximum width and height have been set on the right menu side bar.

Repeat steps three and four to add the remaining minimum and maximum width and height constraints for the frame.

If you wish to update them, simply click the input for the given constraint and change the value.

Looking for more tutorials on the basics behind Frames?

Consult the list below to learn more about the basics behind artboards in Figma.

How to create a Frame in FigmaHow to use auto layout in FigmaHow to change the dimensions of a Frame in FigmaHow to switch a Frame to Landscape or Portrait orientation in FigmaHow to change the dimension of a frame to a different preset in FigmaHow to clip content to a frame or allow it to overflow in FigmaSearch blog for all Figma tutorials

Any Questions?

We are actively looking for feedback on how to improve this resource. Please send us a note to inquiries@delasign.com with any thoughts or feedback you may have.
SubscribeContact UsVisit our BlogView our ServicesView our Work

Partner with us

We would love to get to know you and see how we can help your organization with its goals and needs.
Let's Talk

Stay Informed

Get occasional updates about our company, research, and product launches.
Subscribe