How to add shapes to a Frame in Figma
A step by step guide on adding rectangles, lines, arrows, ellipses, polygons and stars to a frame in Figma.

A step by step guide on adding rectangles, lines, arrows, ellipses, polygons and stars to a frame in Figma.
SubscribeCheck out our free mobile e-commerce Figma design fileStep One: Select the Shape
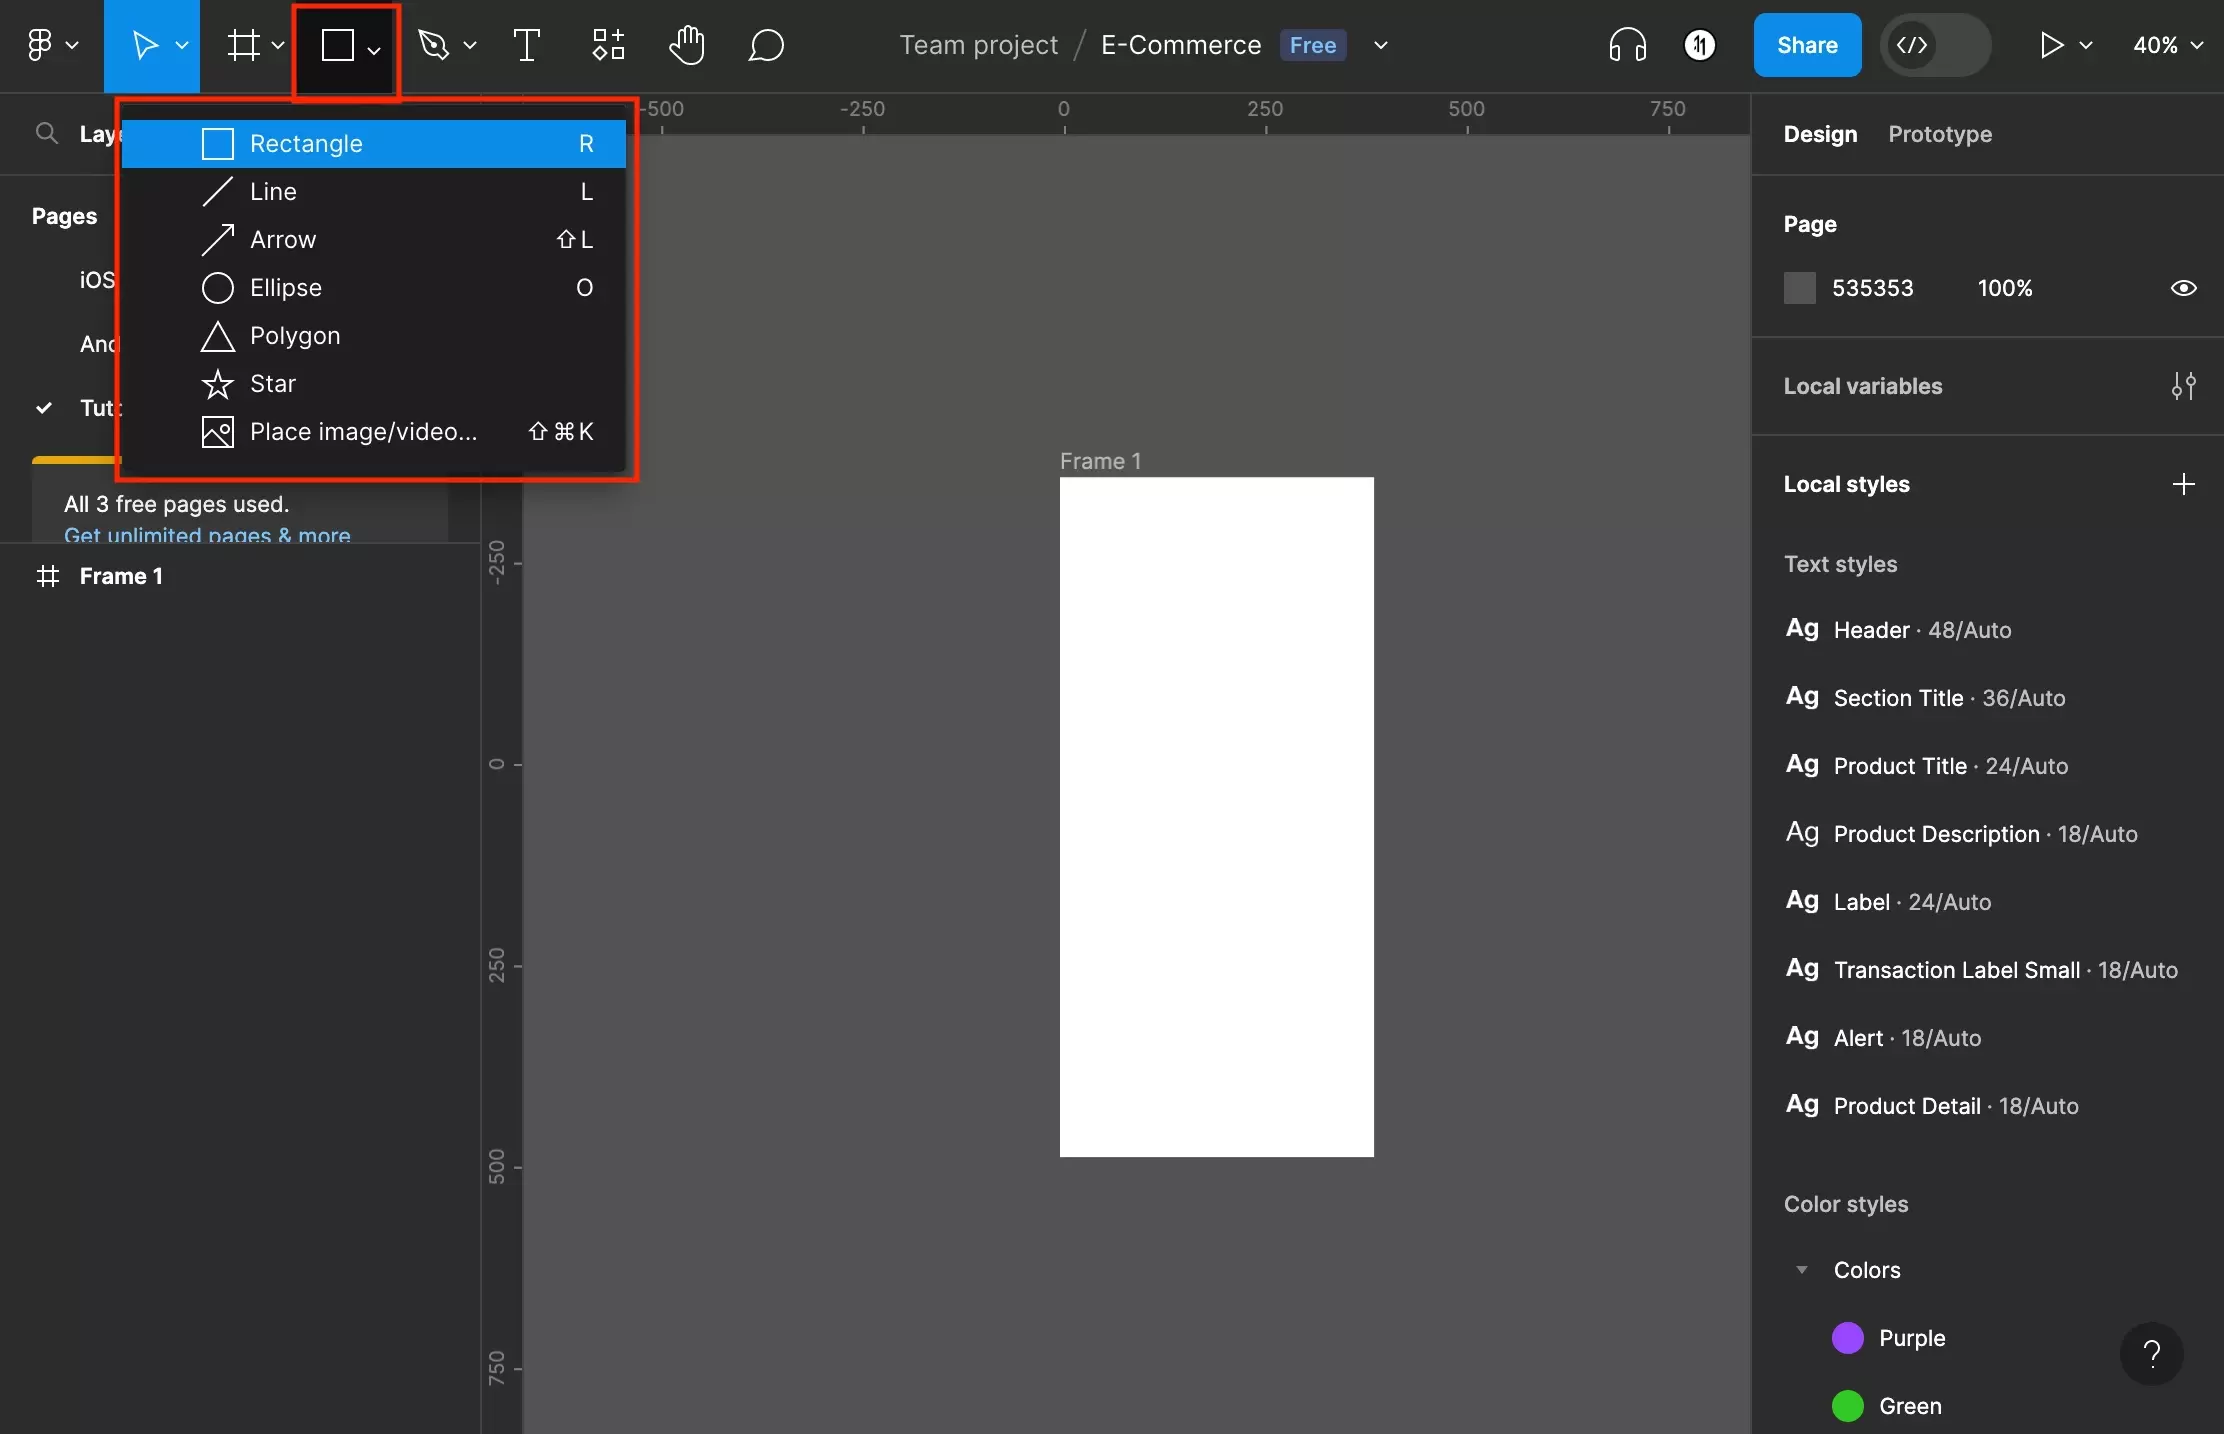
Click the caret next to the square on the top bar to open the shapes dropdown menu.
The options include Rectangle, Line, Arrow, Ellipse, Polygon and Star.
Select the option that you are looking for.
Step Two: Draw the Shape

Click and drag to create the shape.
Step Three: Resize
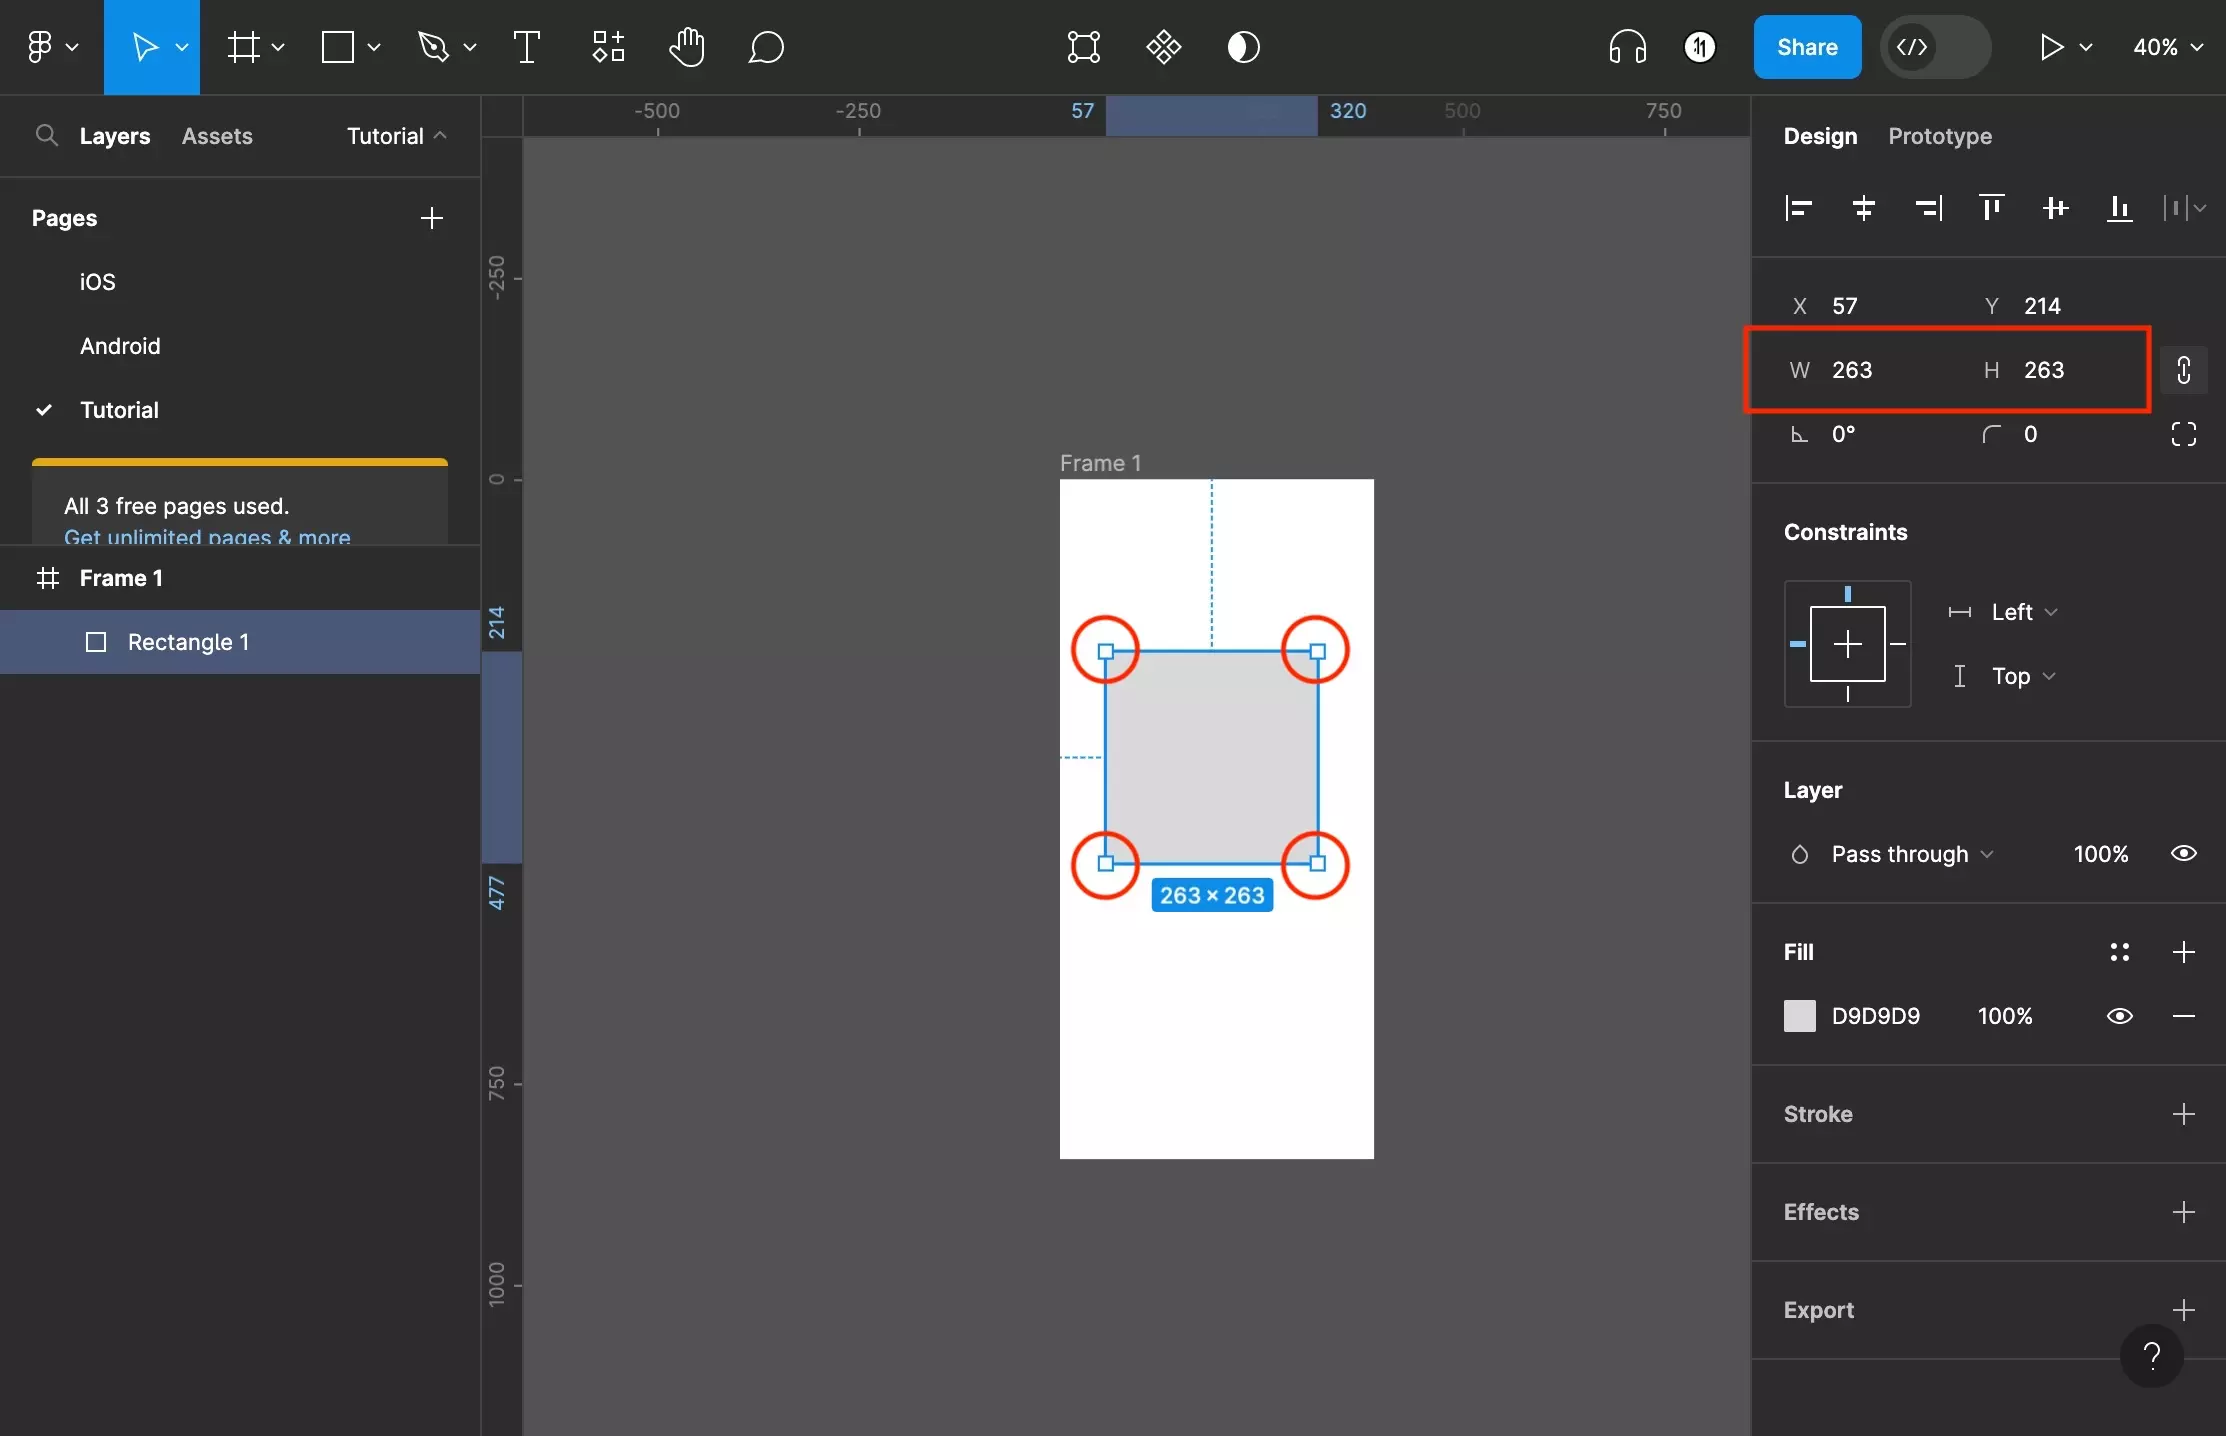
Using the shapes handles or the inspector on the right side bar, change the dimensions of the shape.
Looking to learn more about the basics behind text, shapes and media in Figma ?
Consult the list below to learn more about the basics behind text, shapes and media in Figma.