How to build an API that modifies an entry in Craft CMS
A step by step walkthrough in creating a PUT RESTful endpoint in Craft CMS that uses a controller action to modify an existing entry.

A step by step walkthrough in creating a PUT RESTful endpoint in Craft CMS that uses a controller action to modify an existing entry.
The following tutorial walks you through how to use a Controller action to modify an existing Subscriber entry, by marking a user as unsubscribed through a PUT Craft CMS endpoint. The tutorial forms part of our Open Source series that details how to create API endpoints that manage the subscribers to the delasign website.
This tutorial assumes that you have created a channel called subscribers and that you there are users for you to alter but we would like to note that the knowledge shared in this tutorial can be adapted to suit your needs.
We recommend downloading and setting up our Open Source Craft CMS starter project and checking out the main branch and carrying out the steps below. The changes carried out can be found on tutorial/unsubscribe.
git clone git@github.com:delasign/craft-cms-starter.gitStep One: Create your API endpoint base
Please follow the tutorials linked below to create your RESTful API with an API key. We recommend testing it in Postman before continuing.
Please note that you must run this line after creating the API base for the API to register:
composer dump-autoload -aStep Two: Complete the API
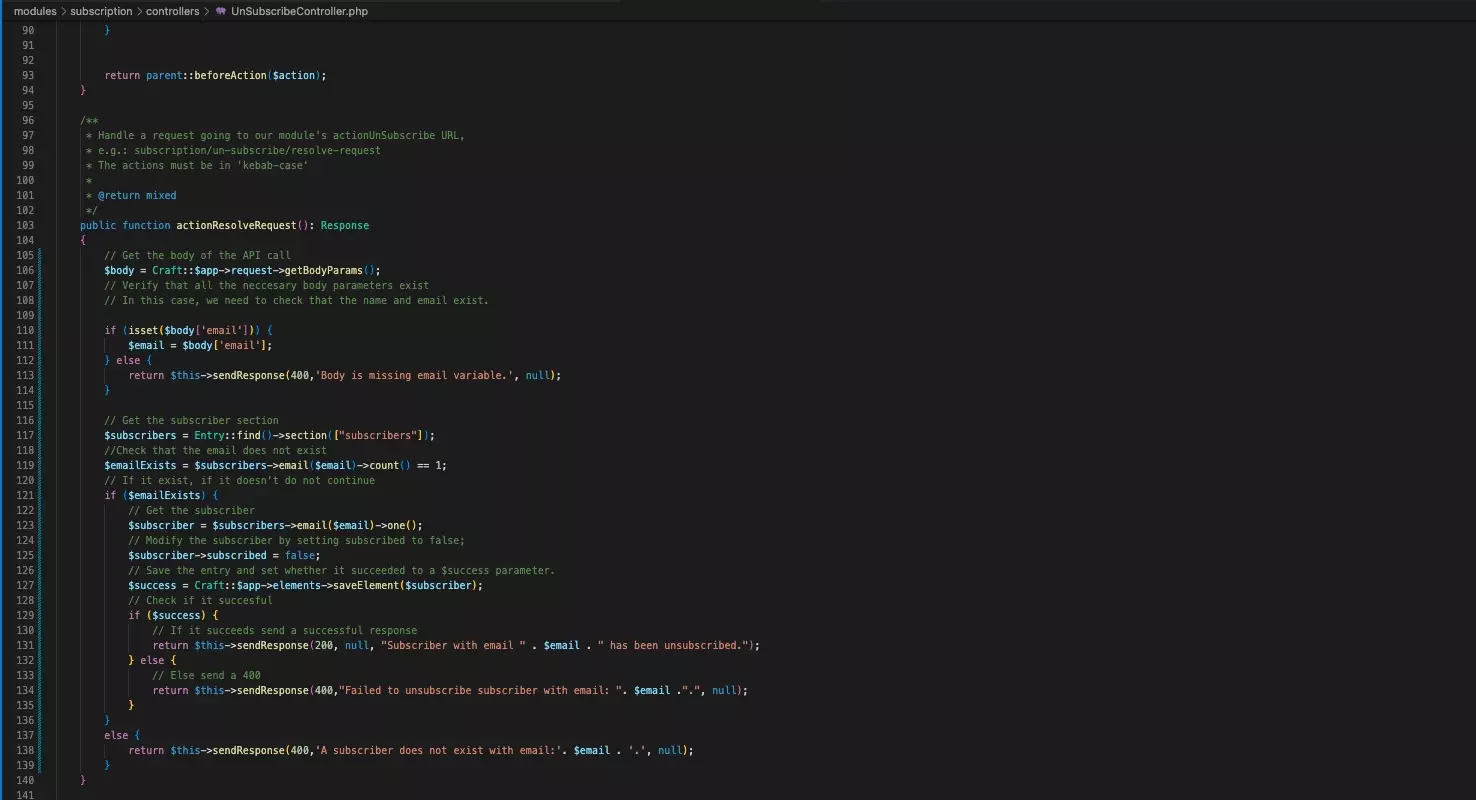
To complete the API you must first make sure that all the body parameters are present, then make sure that an entry with the details exists and finally, modify the entry and save it.
A | Check that all the body parameters are present
Gather the body using the following line
$body = Craft::$app->request->getBodyParams();Subsequently make sure that all the parameters are present and set them to variables that you can use later, through code similar to:
if (isset($body['YOUR_VARIABLE'])) { $YOUR_VARIABLE = $body['YOUR_VARIABLE']; } else { return $this->sendResponse(400,'Body is missing YOUR_VARIABLE variable.', null); }Please note that if the variable doesn't exist we return a standardized bad request with an error stating that the variable is missing.
B | Make sure that an entry exists
In order for any Entry related code to be written, we must import the follow statement above your controller class
use craft\elements\Entry;Subsequently, you must check that the subscriber exists. If it does not, you must respond with an error that the subscriber does not exist.
In our case, we did this by checking that the count for subscriber entries with an email field equal to the email parameter in the POST request body is equal to 1.
C | Modify the entry
Finally, you must modify the entry using code similar to the one below and save it. The saveElement function produces a result that informs you if it succeeded or not. Use that to give your API response as to whether it succeeded or failed.
Here is a sample Controller that gathers all the subscriber and returns them as a JSON.
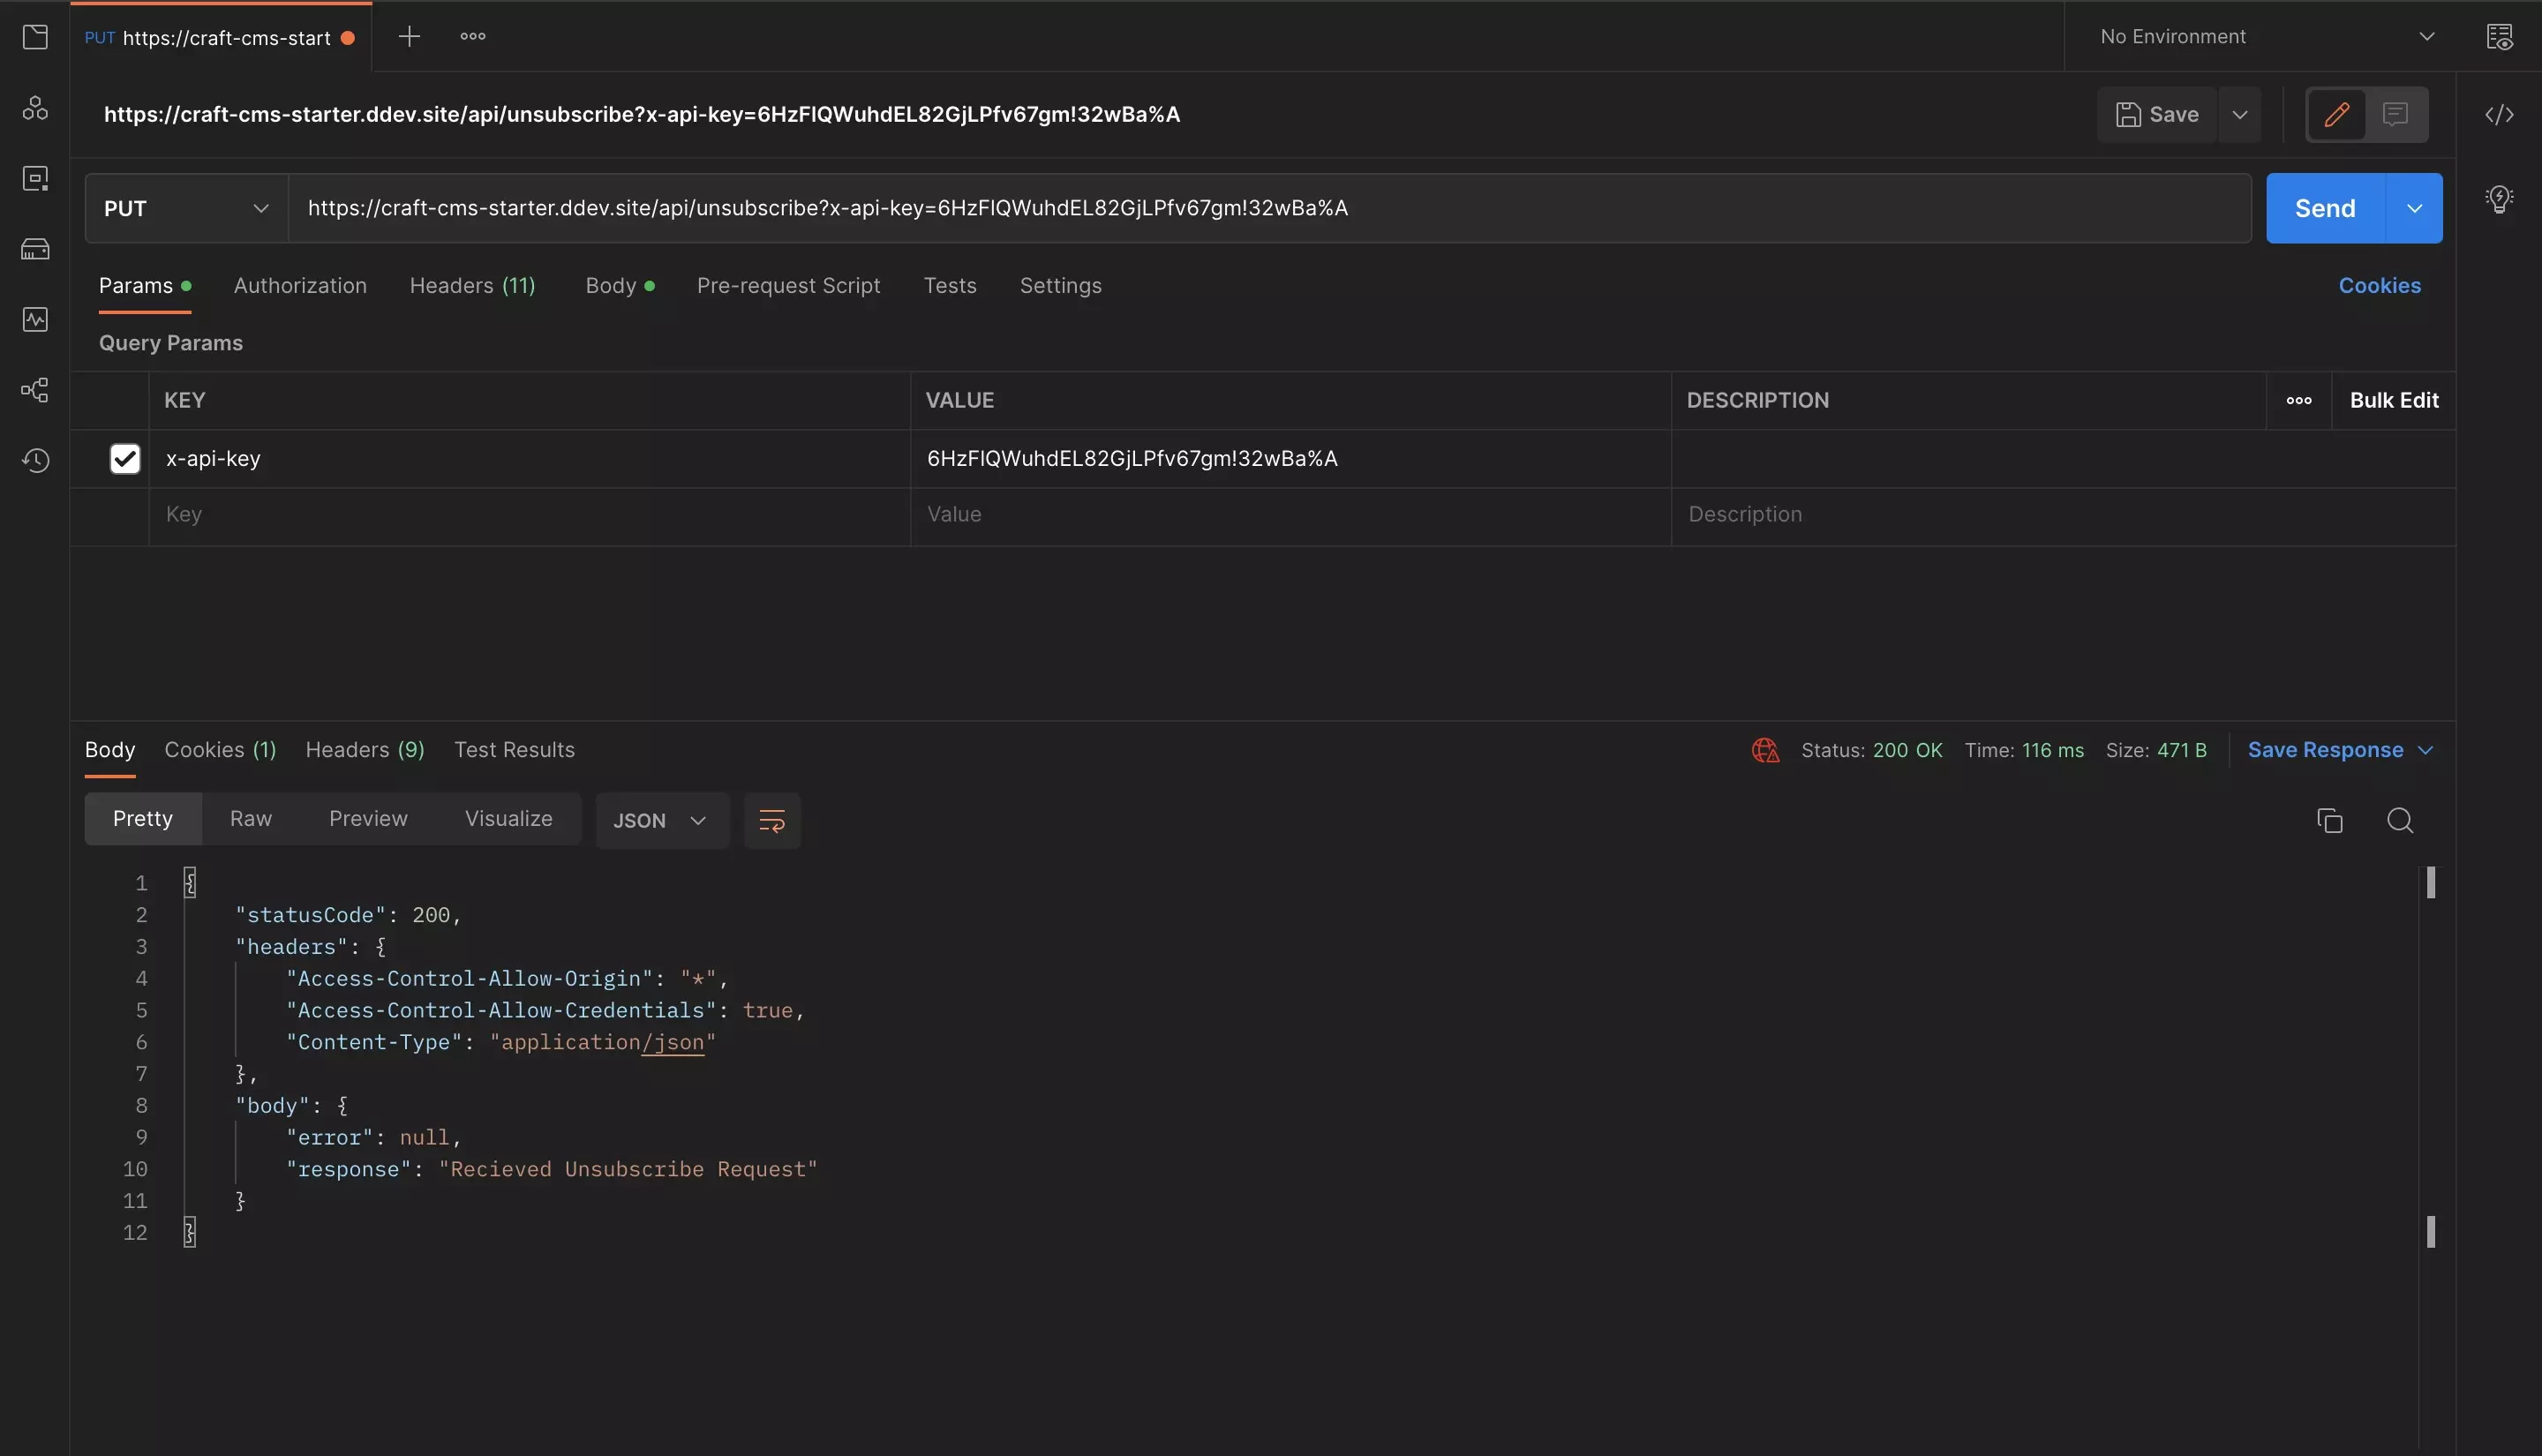
Step Three: Test
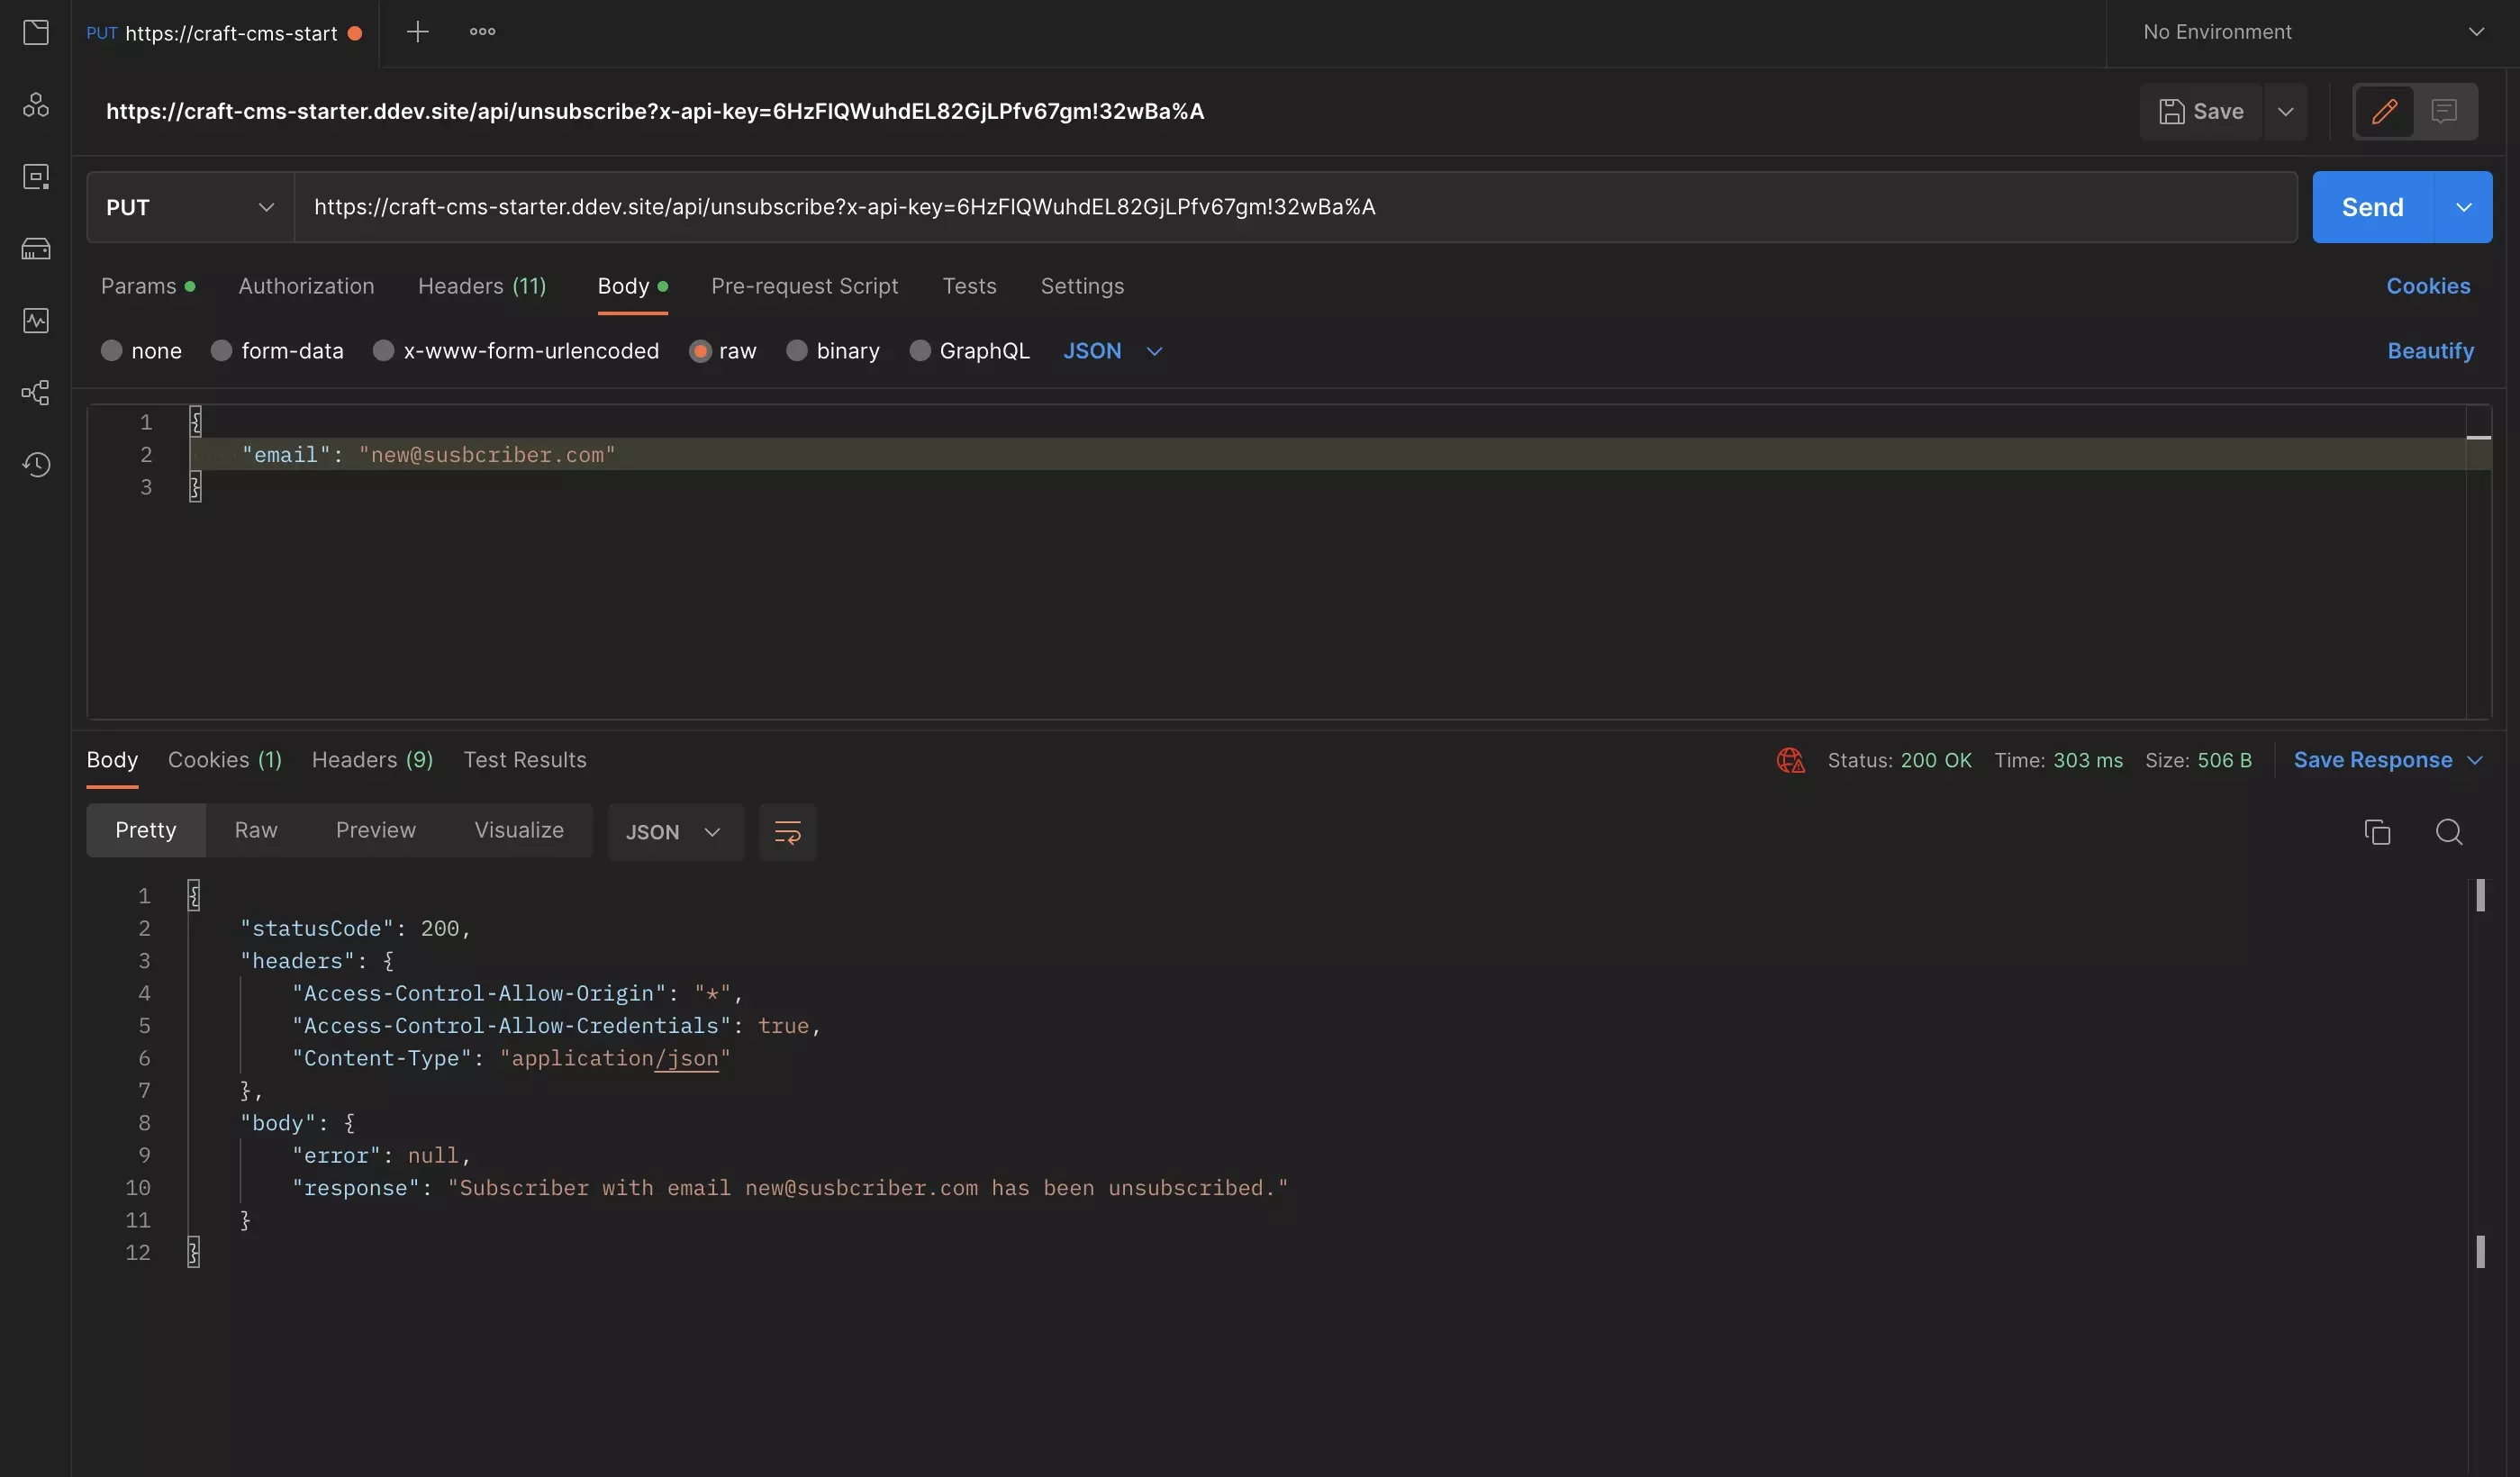
Confirm that the API functions as expected by making a Postman call to your endpoint.
Any Questions?
We are actively looking for feedback on how to improve this resource. Please send us a note to inquiries@delasign.com with any thoughts or feedback you may have.