How to block pushes to a branch in Bitbucket

A step by step guide on creating branch restrictions that deny pushes to specific branches in Bitbucket.

Oscar de la Hera Gomez
Written by Oscar de la Hera Gomez
First published on 06/16/2023 at 11:48
Last Updated on 09/01/2023 at 14:57
Three flowers that represent Bitbucket, Terminal and Sourcetree side by side. Beneath them sits the text "Deny Pushes to a Branch."

A step by step guide on creating branch restrictions that deny pushes to specific branches in Bitbucket.

SubscribeHow to block commits and pushes to a branch in Github

If you are looking to block commits to a local branch, we recommend that you follow the tutorial below.

How to prevent commits to a branch using a pre-commit githook script

Step One: Go to the Repository Settings

A screenshot of Bitbucket showing a respository. Highlighted on the left menu side bar is the "Repository Settings" tab. Click it and move to the next step.

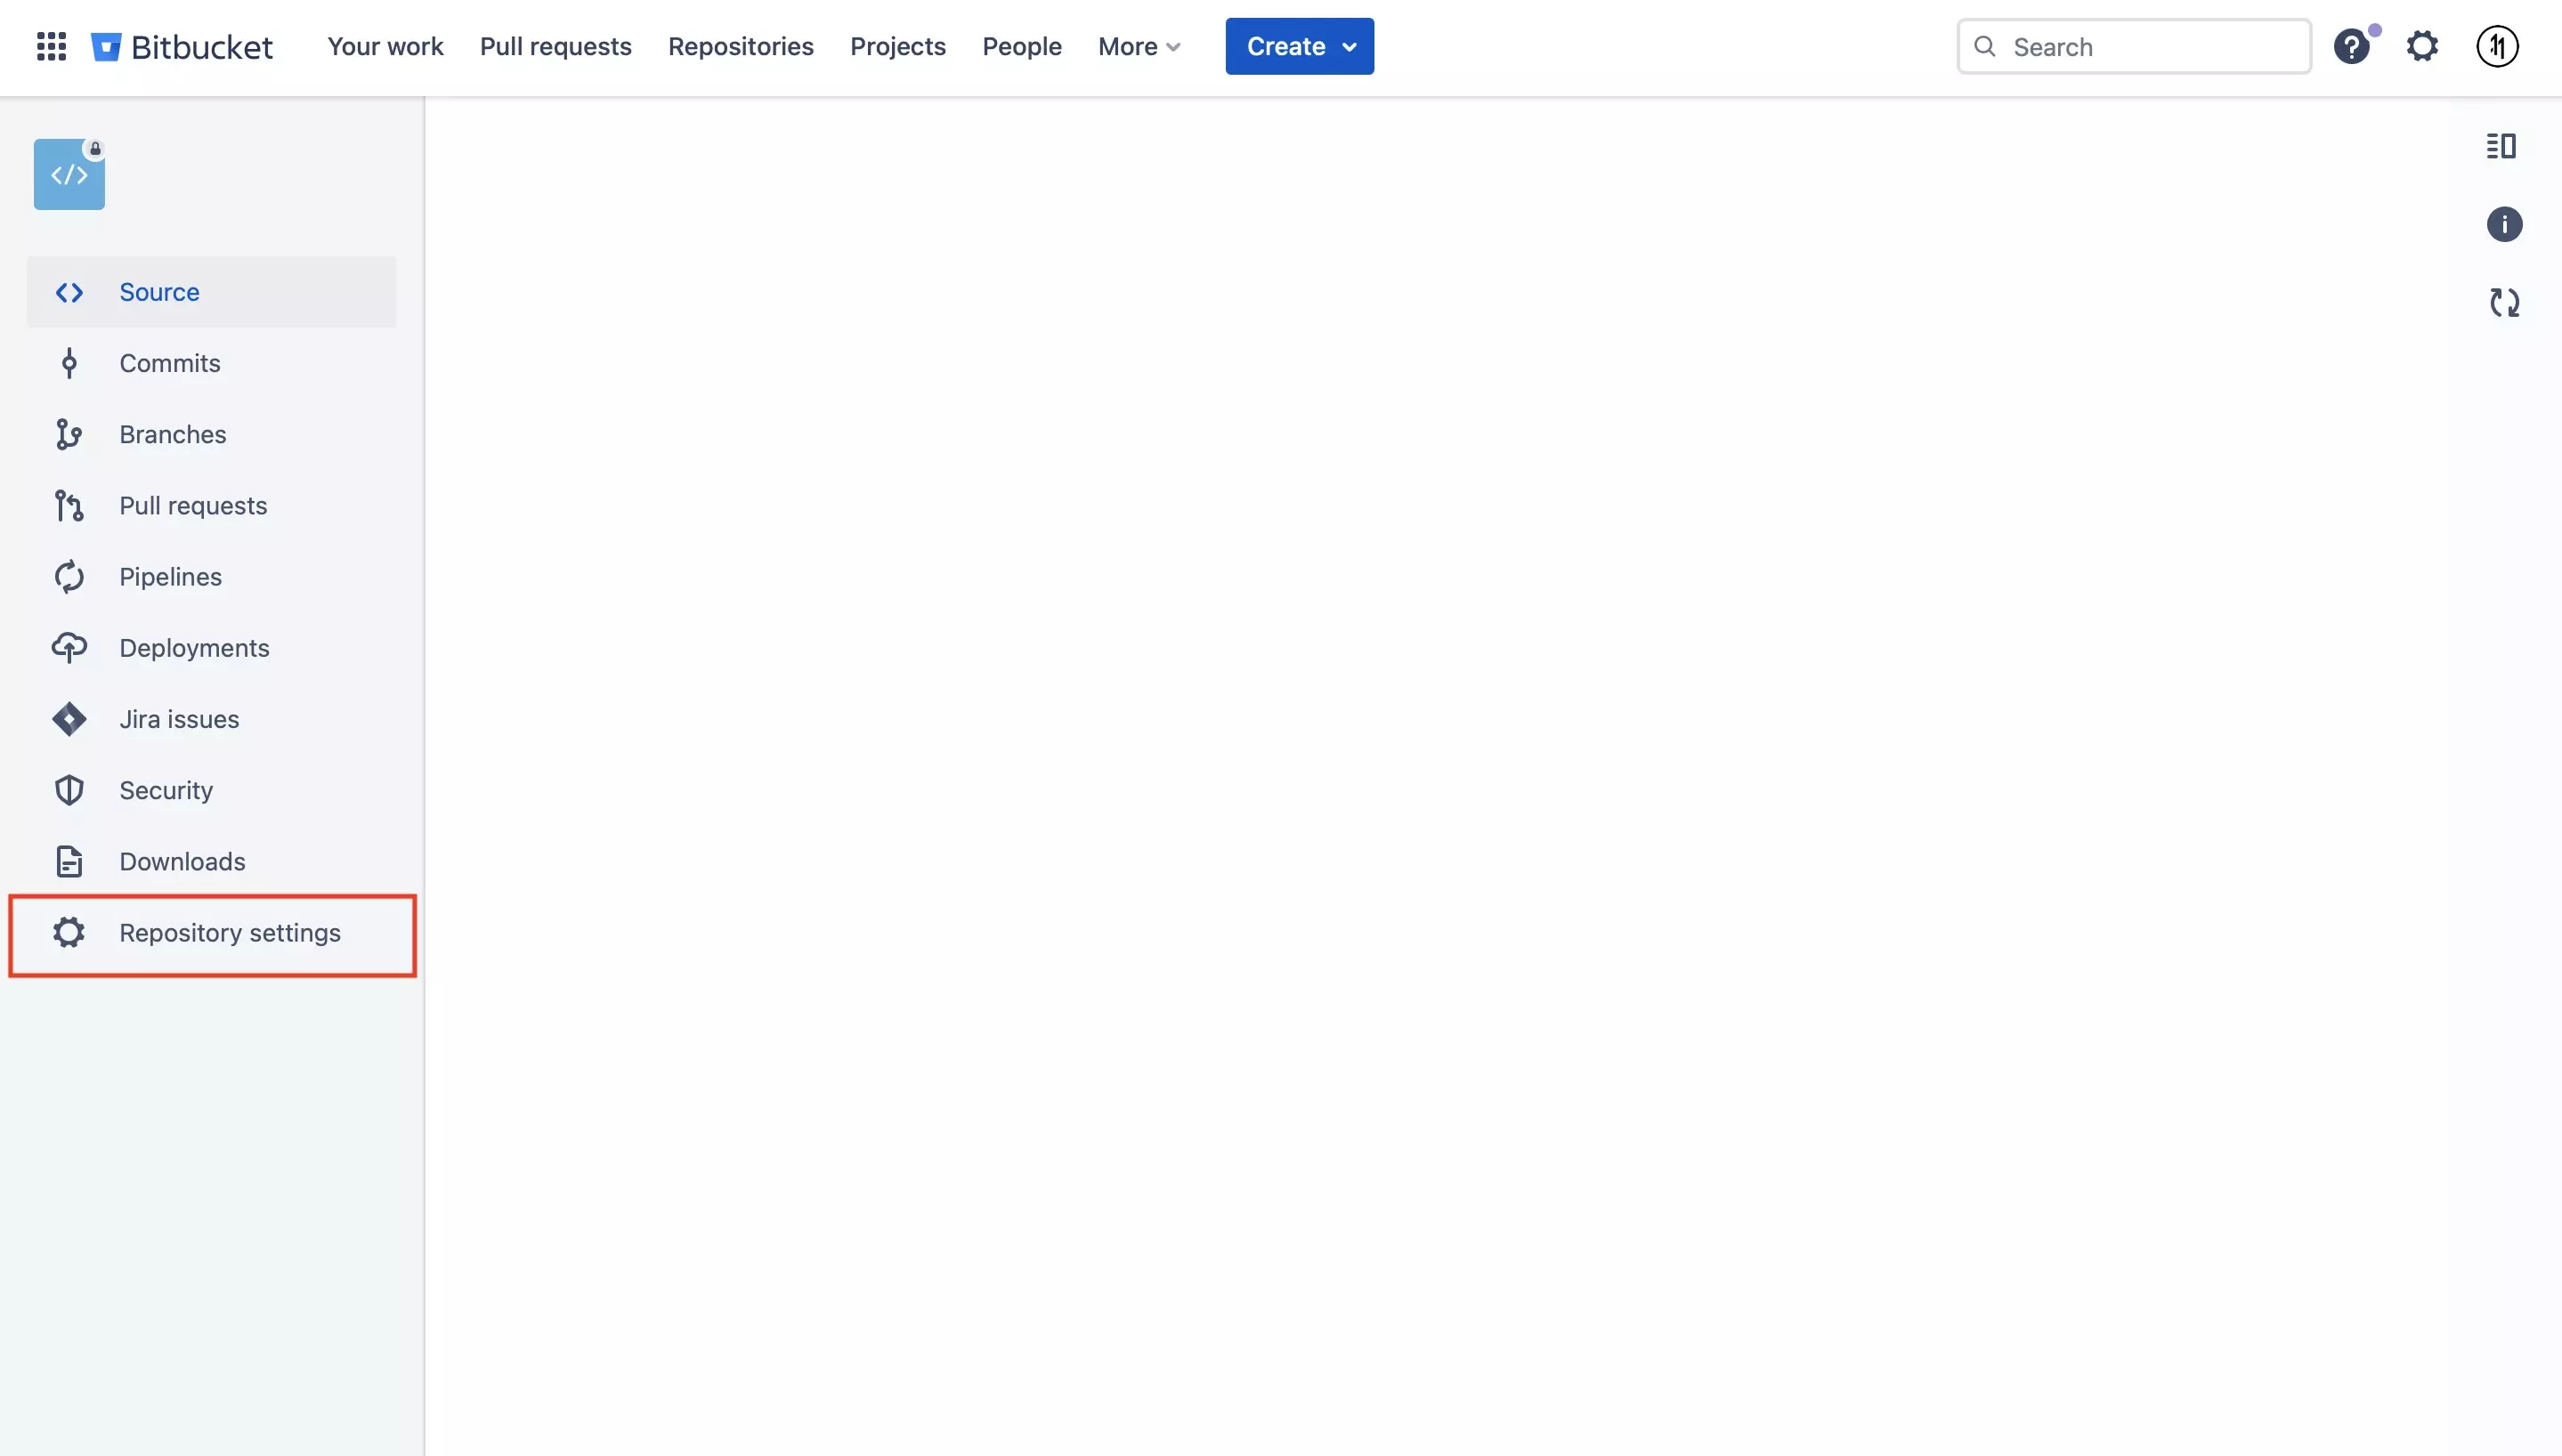
In Bitbucket, navigate to the repository and select Repository Settings.

Step Two: Select Branch Restrictions

A screenshot of Bitbucket showing the menu bar that appears in the Repository Settings. Highlighted is the "Branch Restrictions" tab. Click it and move to the next step.

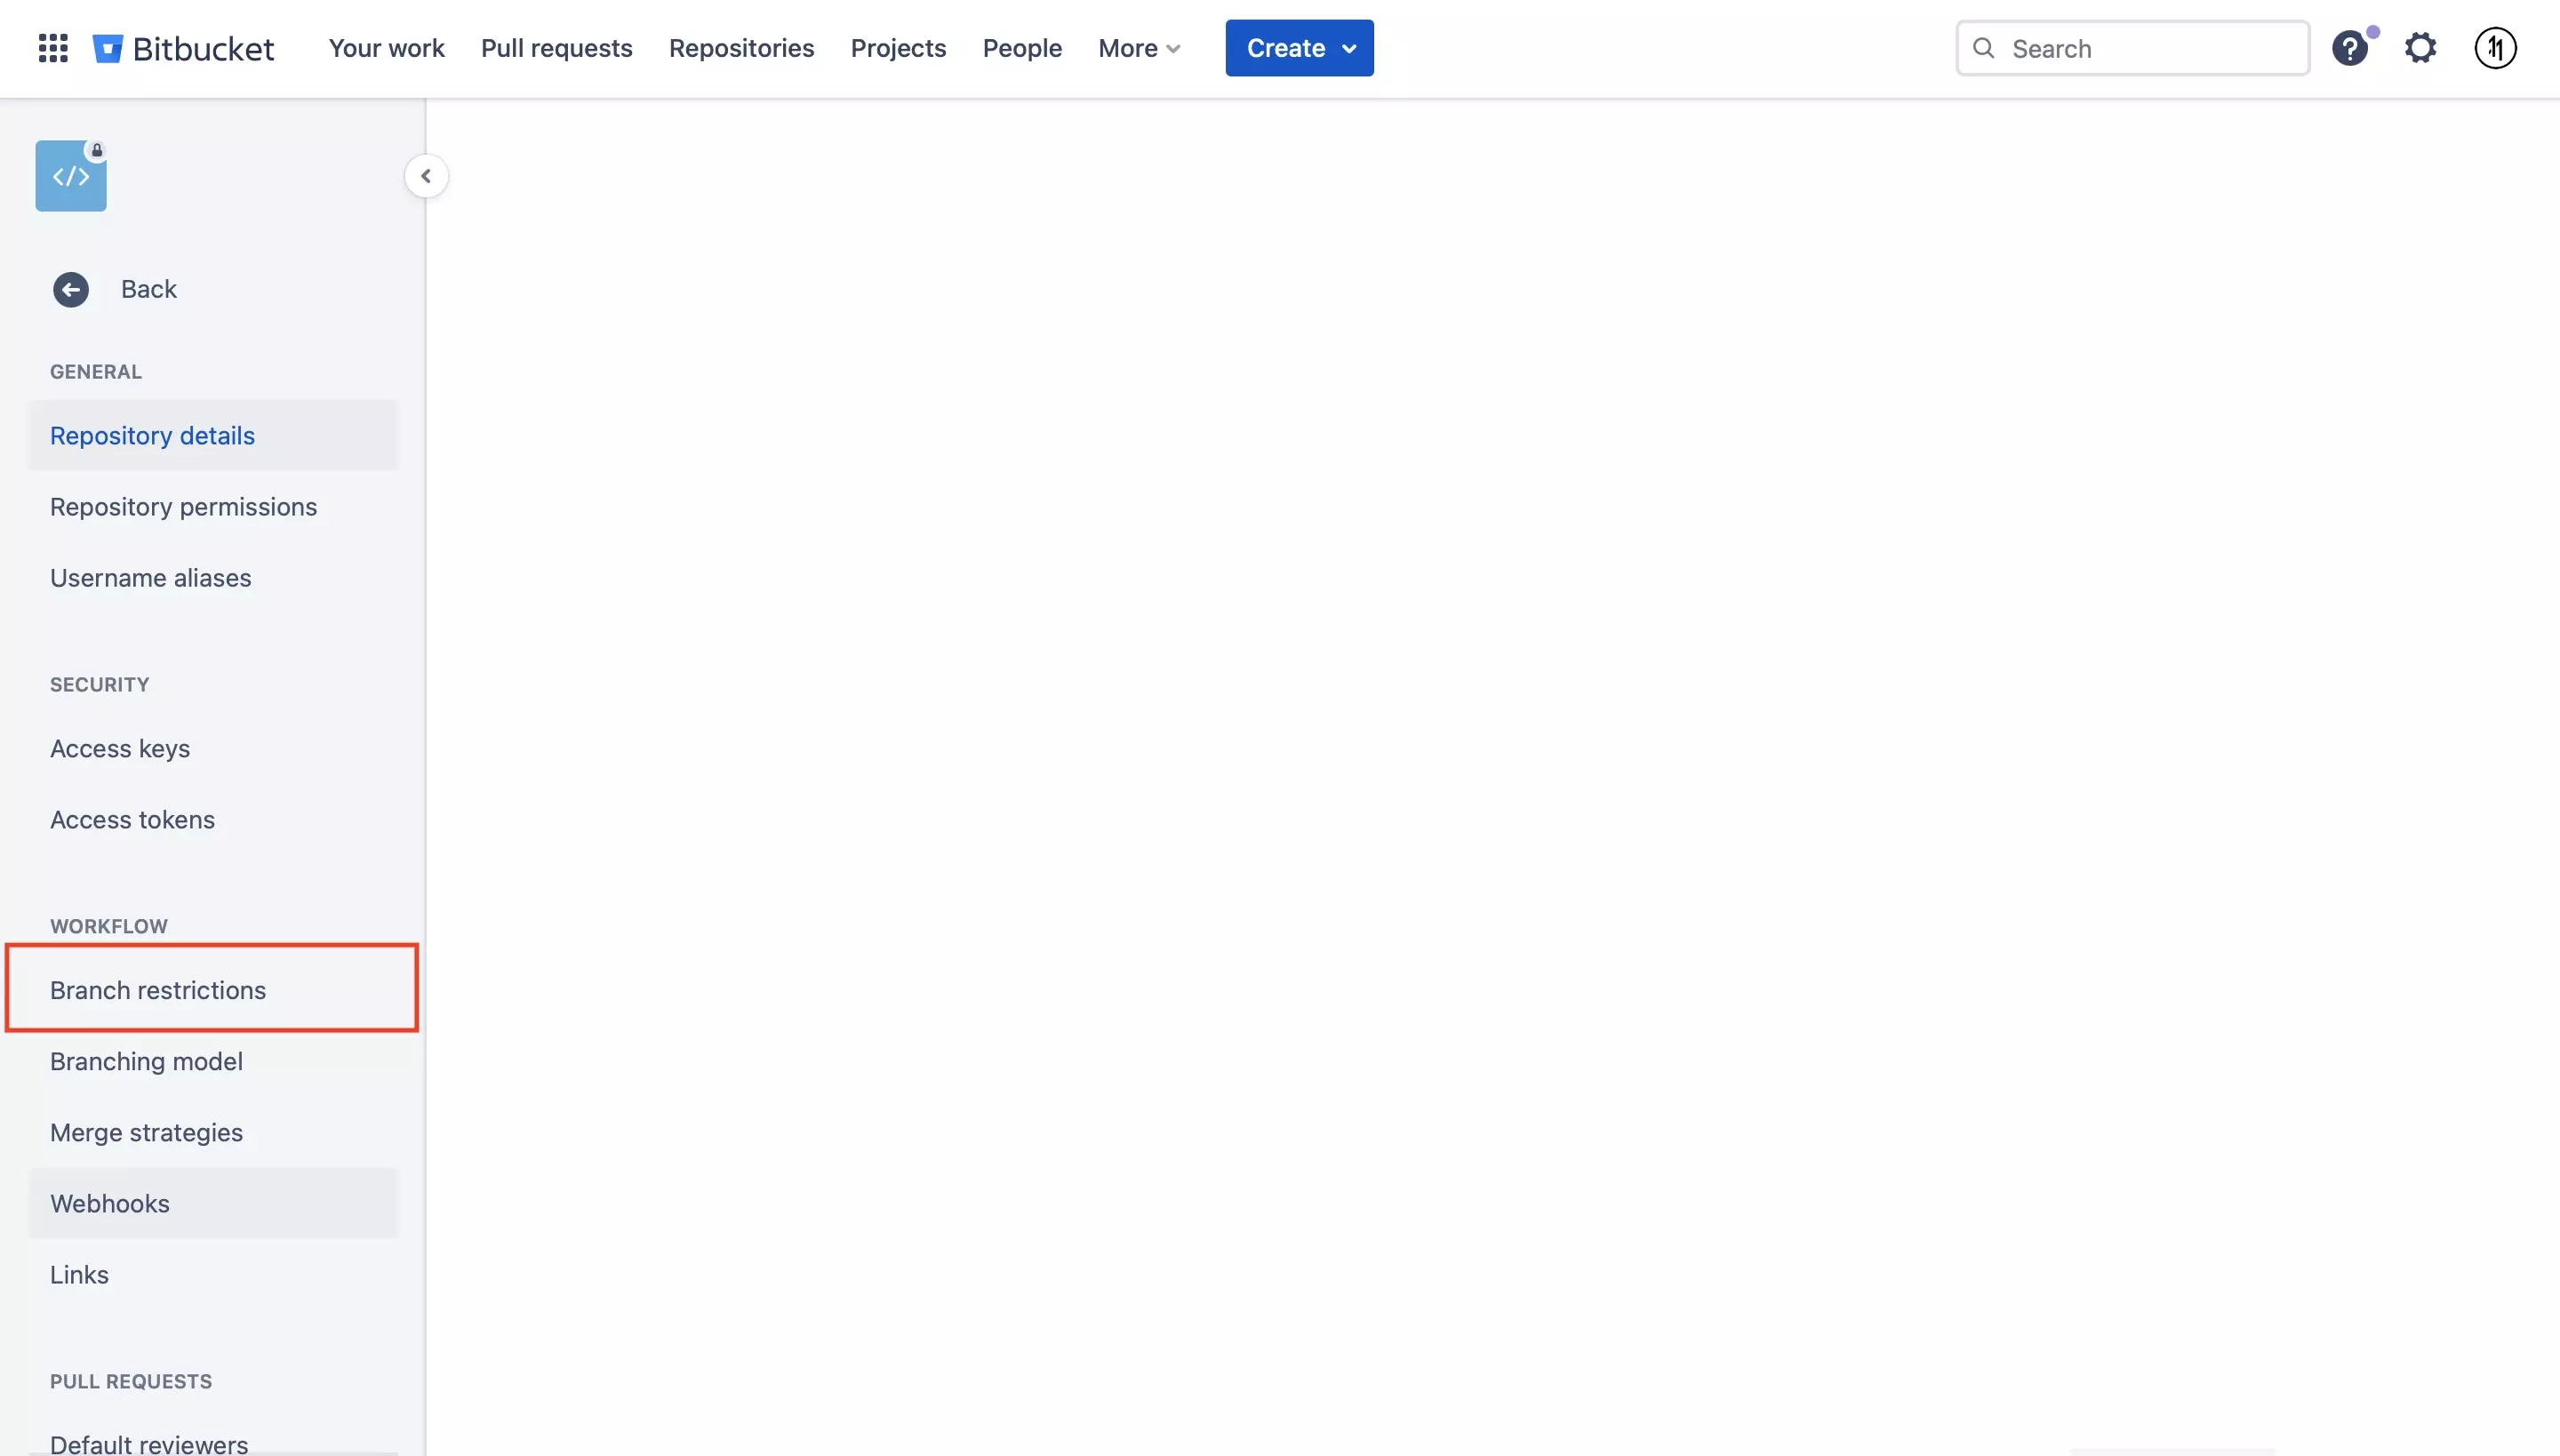
On the left menu side bar, select Branch Restrictions.

Step Three: Add a Branch Restriction

A screenshot of the Bitbucket Branch Restriction screen. It has no branch restrictions. We have highlighted the "Add Branch Restriction" button that appears on the center.

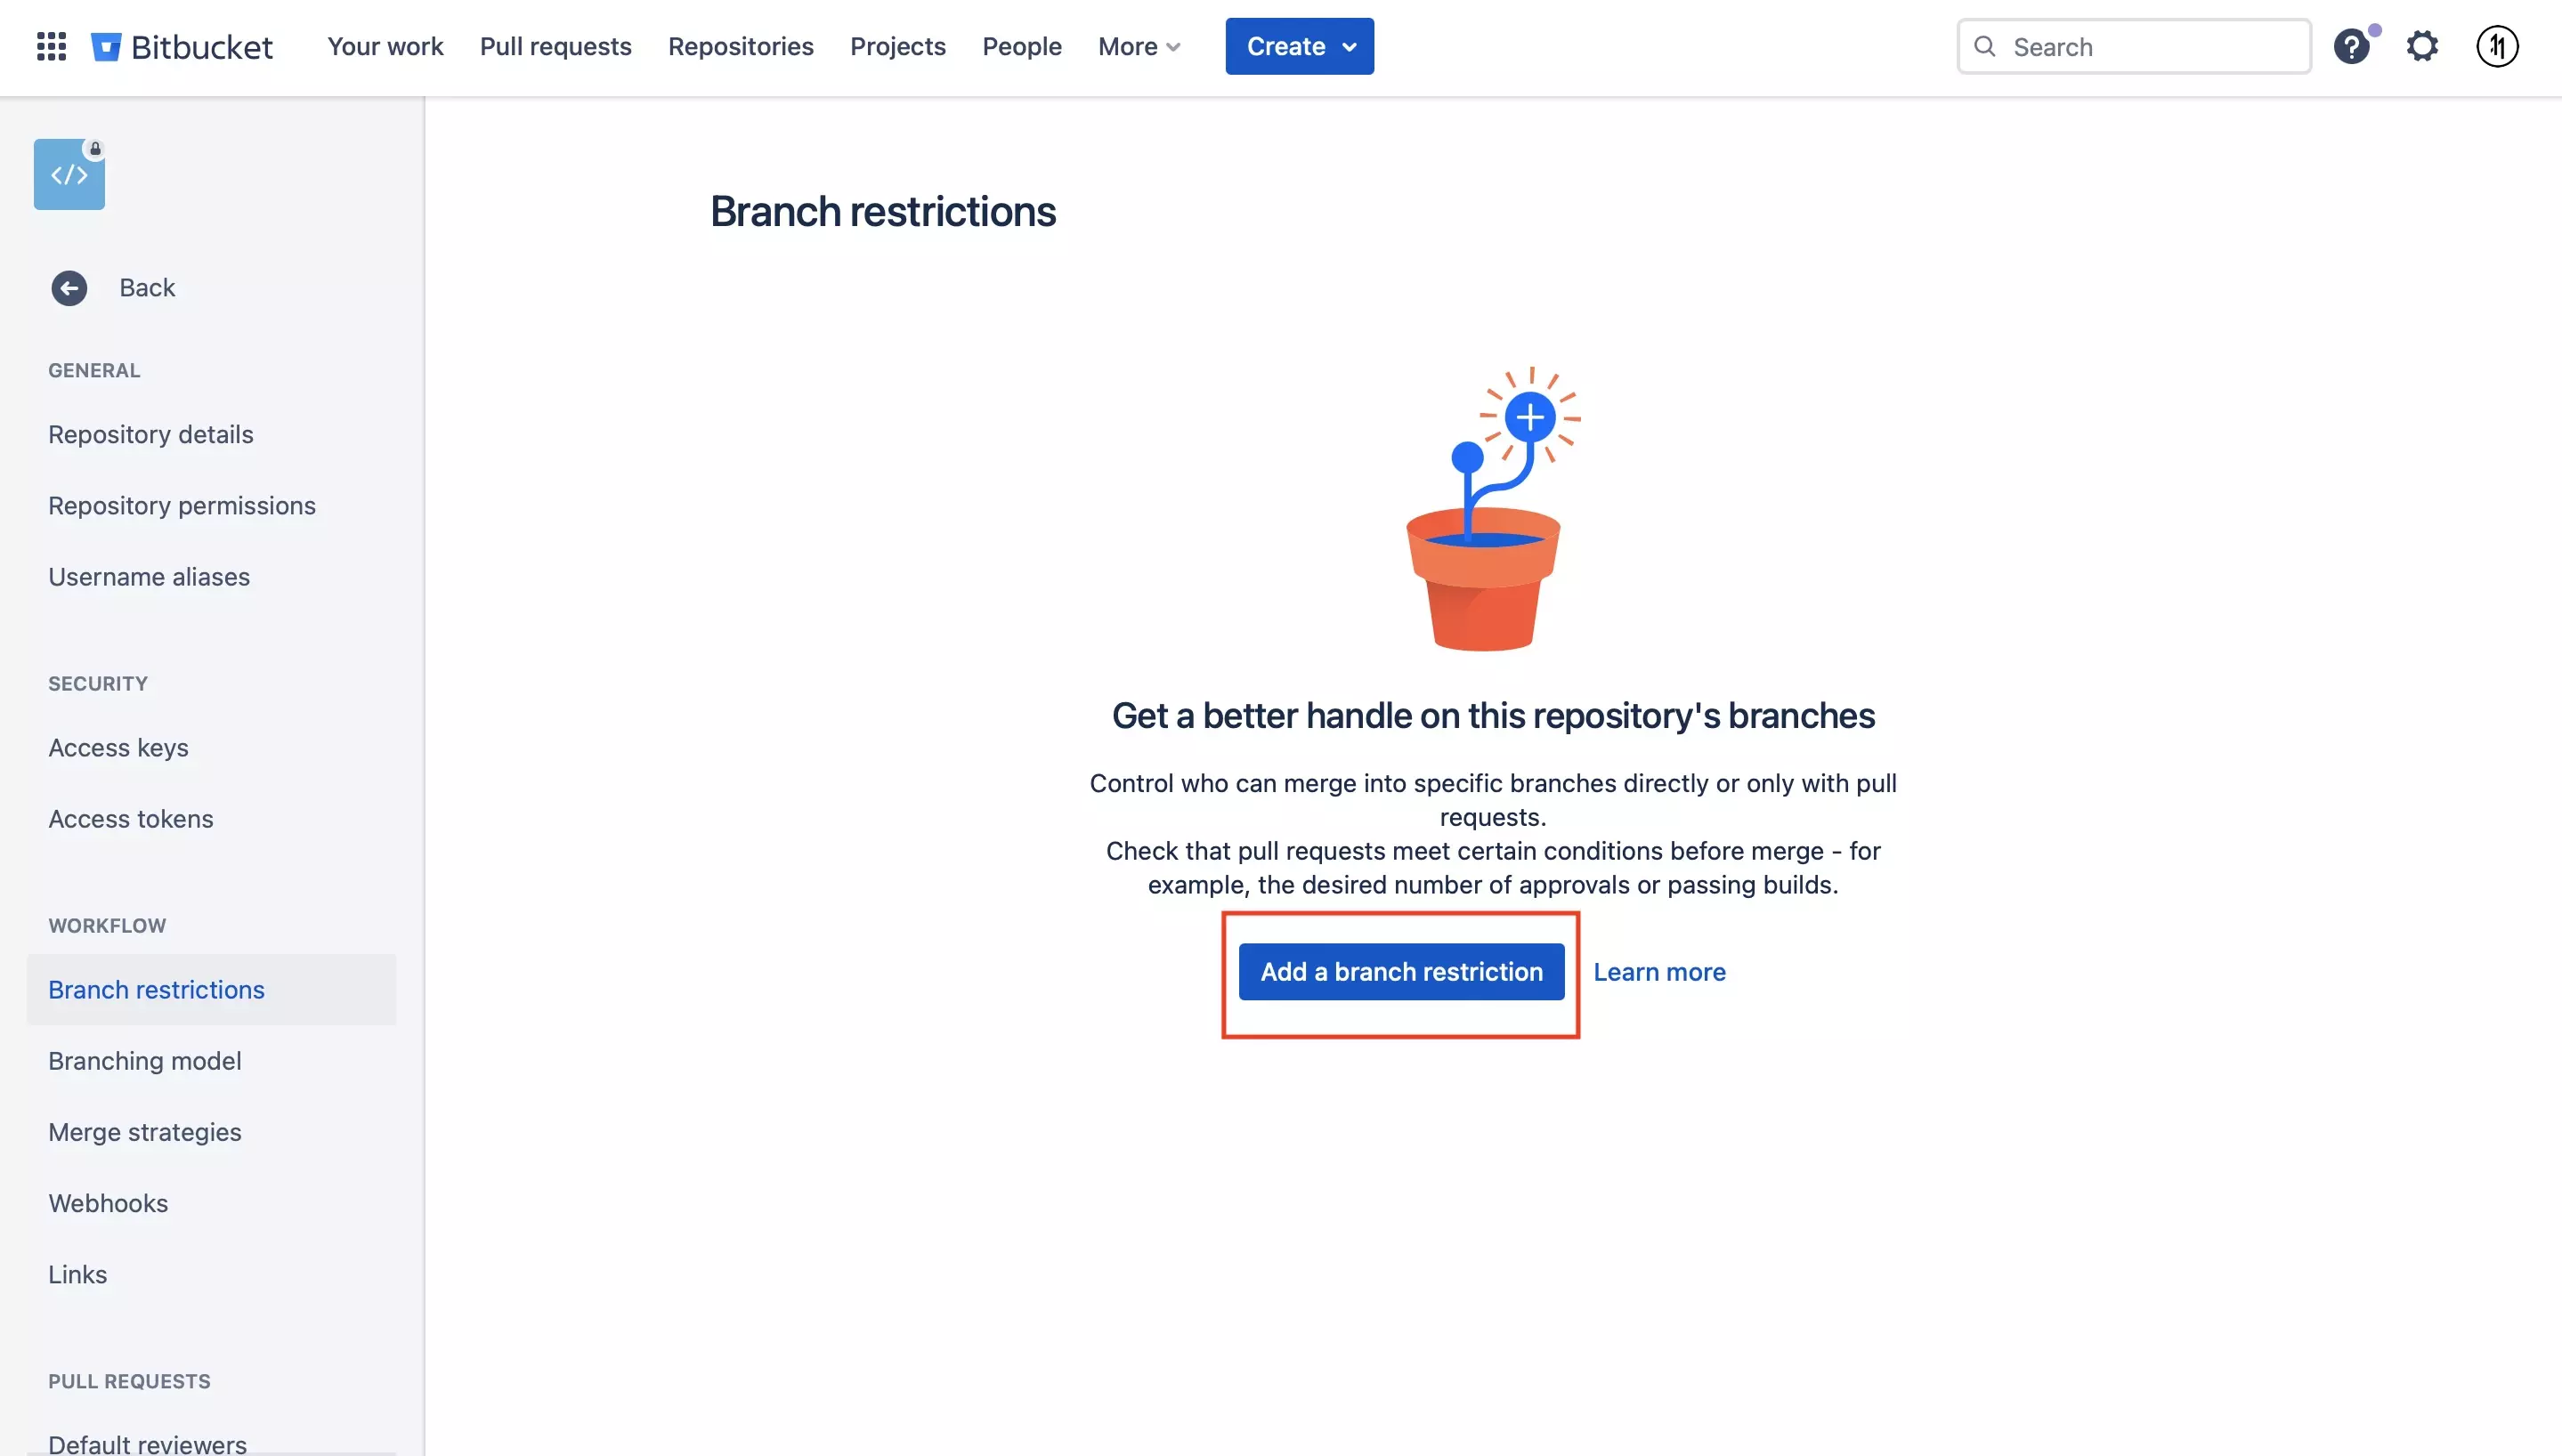
Click Add a Branch Restriction.

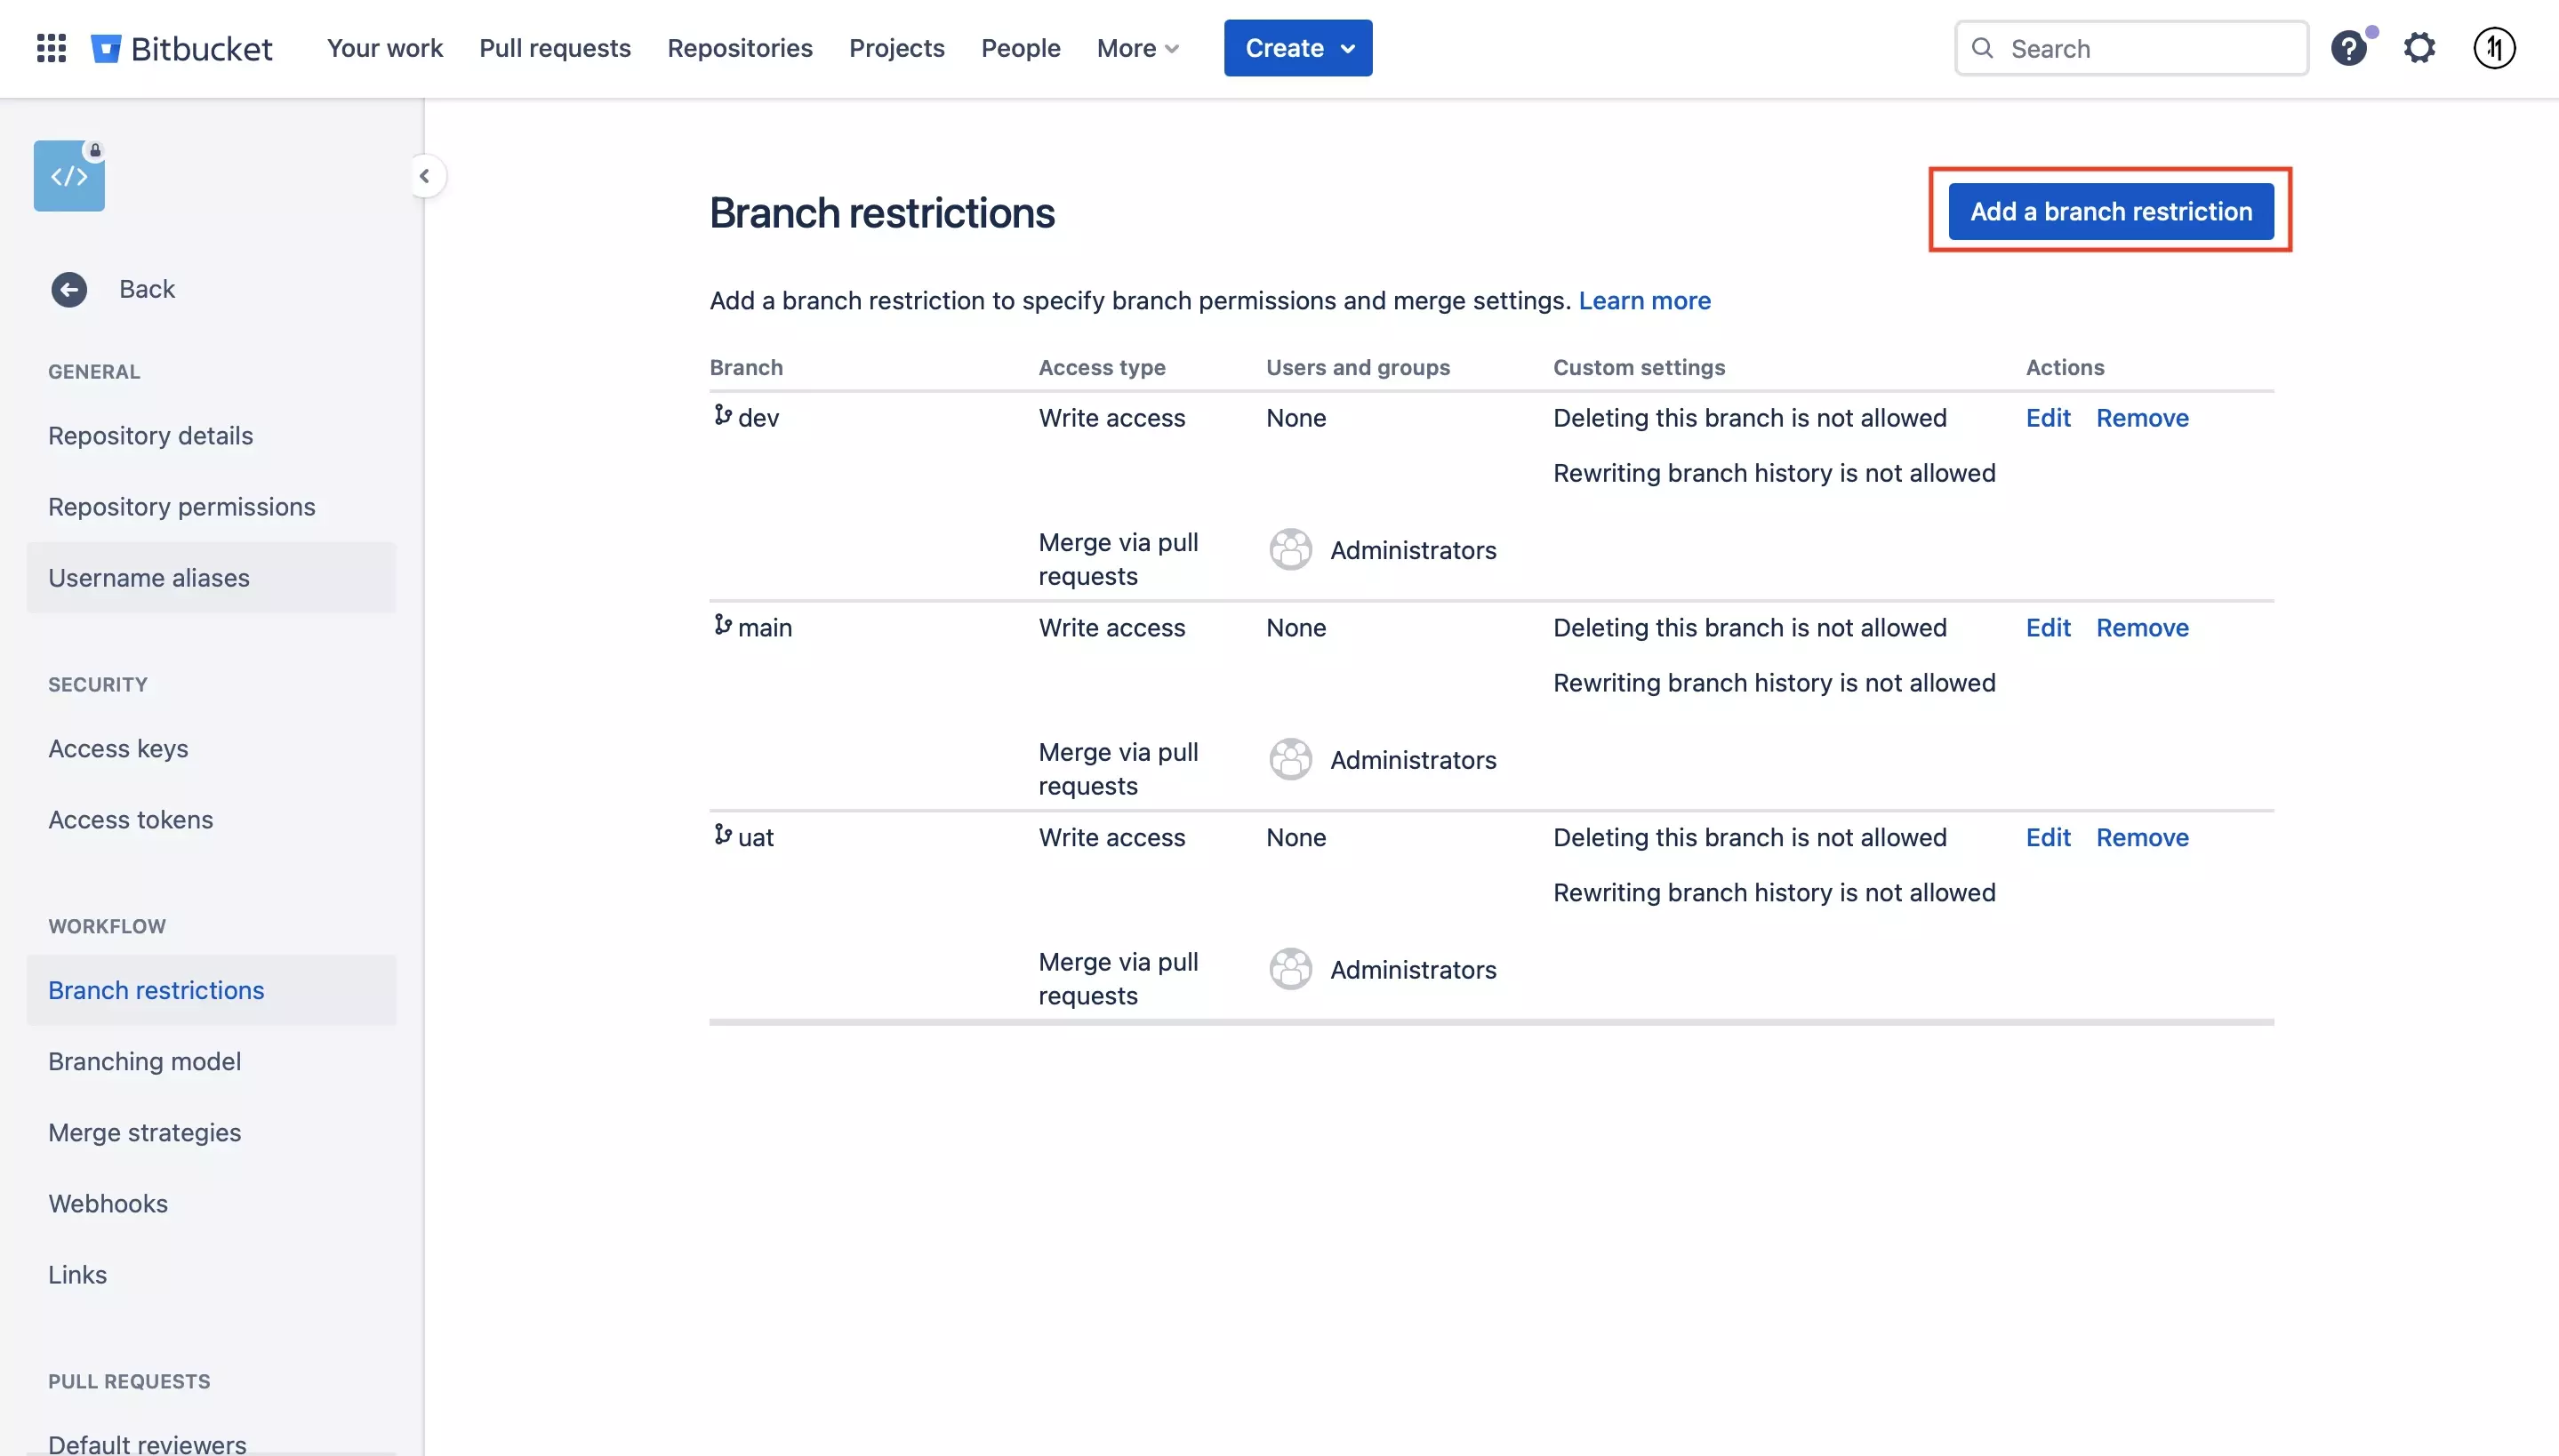
Please note that if branches are present this button will appear on the top right as shown below.

A screenshot of Bitbucket on the Branch Restriction screen. There are three branch restrictions being displayed. The Add Branch Restriction button now appears on the top right of the screen.

Step Four: Fill in the details

A screenshot of the Bitbucket Add Branch Restriction modal that appears when you click Add Branch Restrictions. We have highlighted the area where you input the branch name (in this case "Main"). We have also highlighted the areas where you can restrict pushes and only allow merges from certain groups or individuals. Finally highlighted is the "Save" button on the bottom right which must be clicked once everything looks good to create the branch restriction.

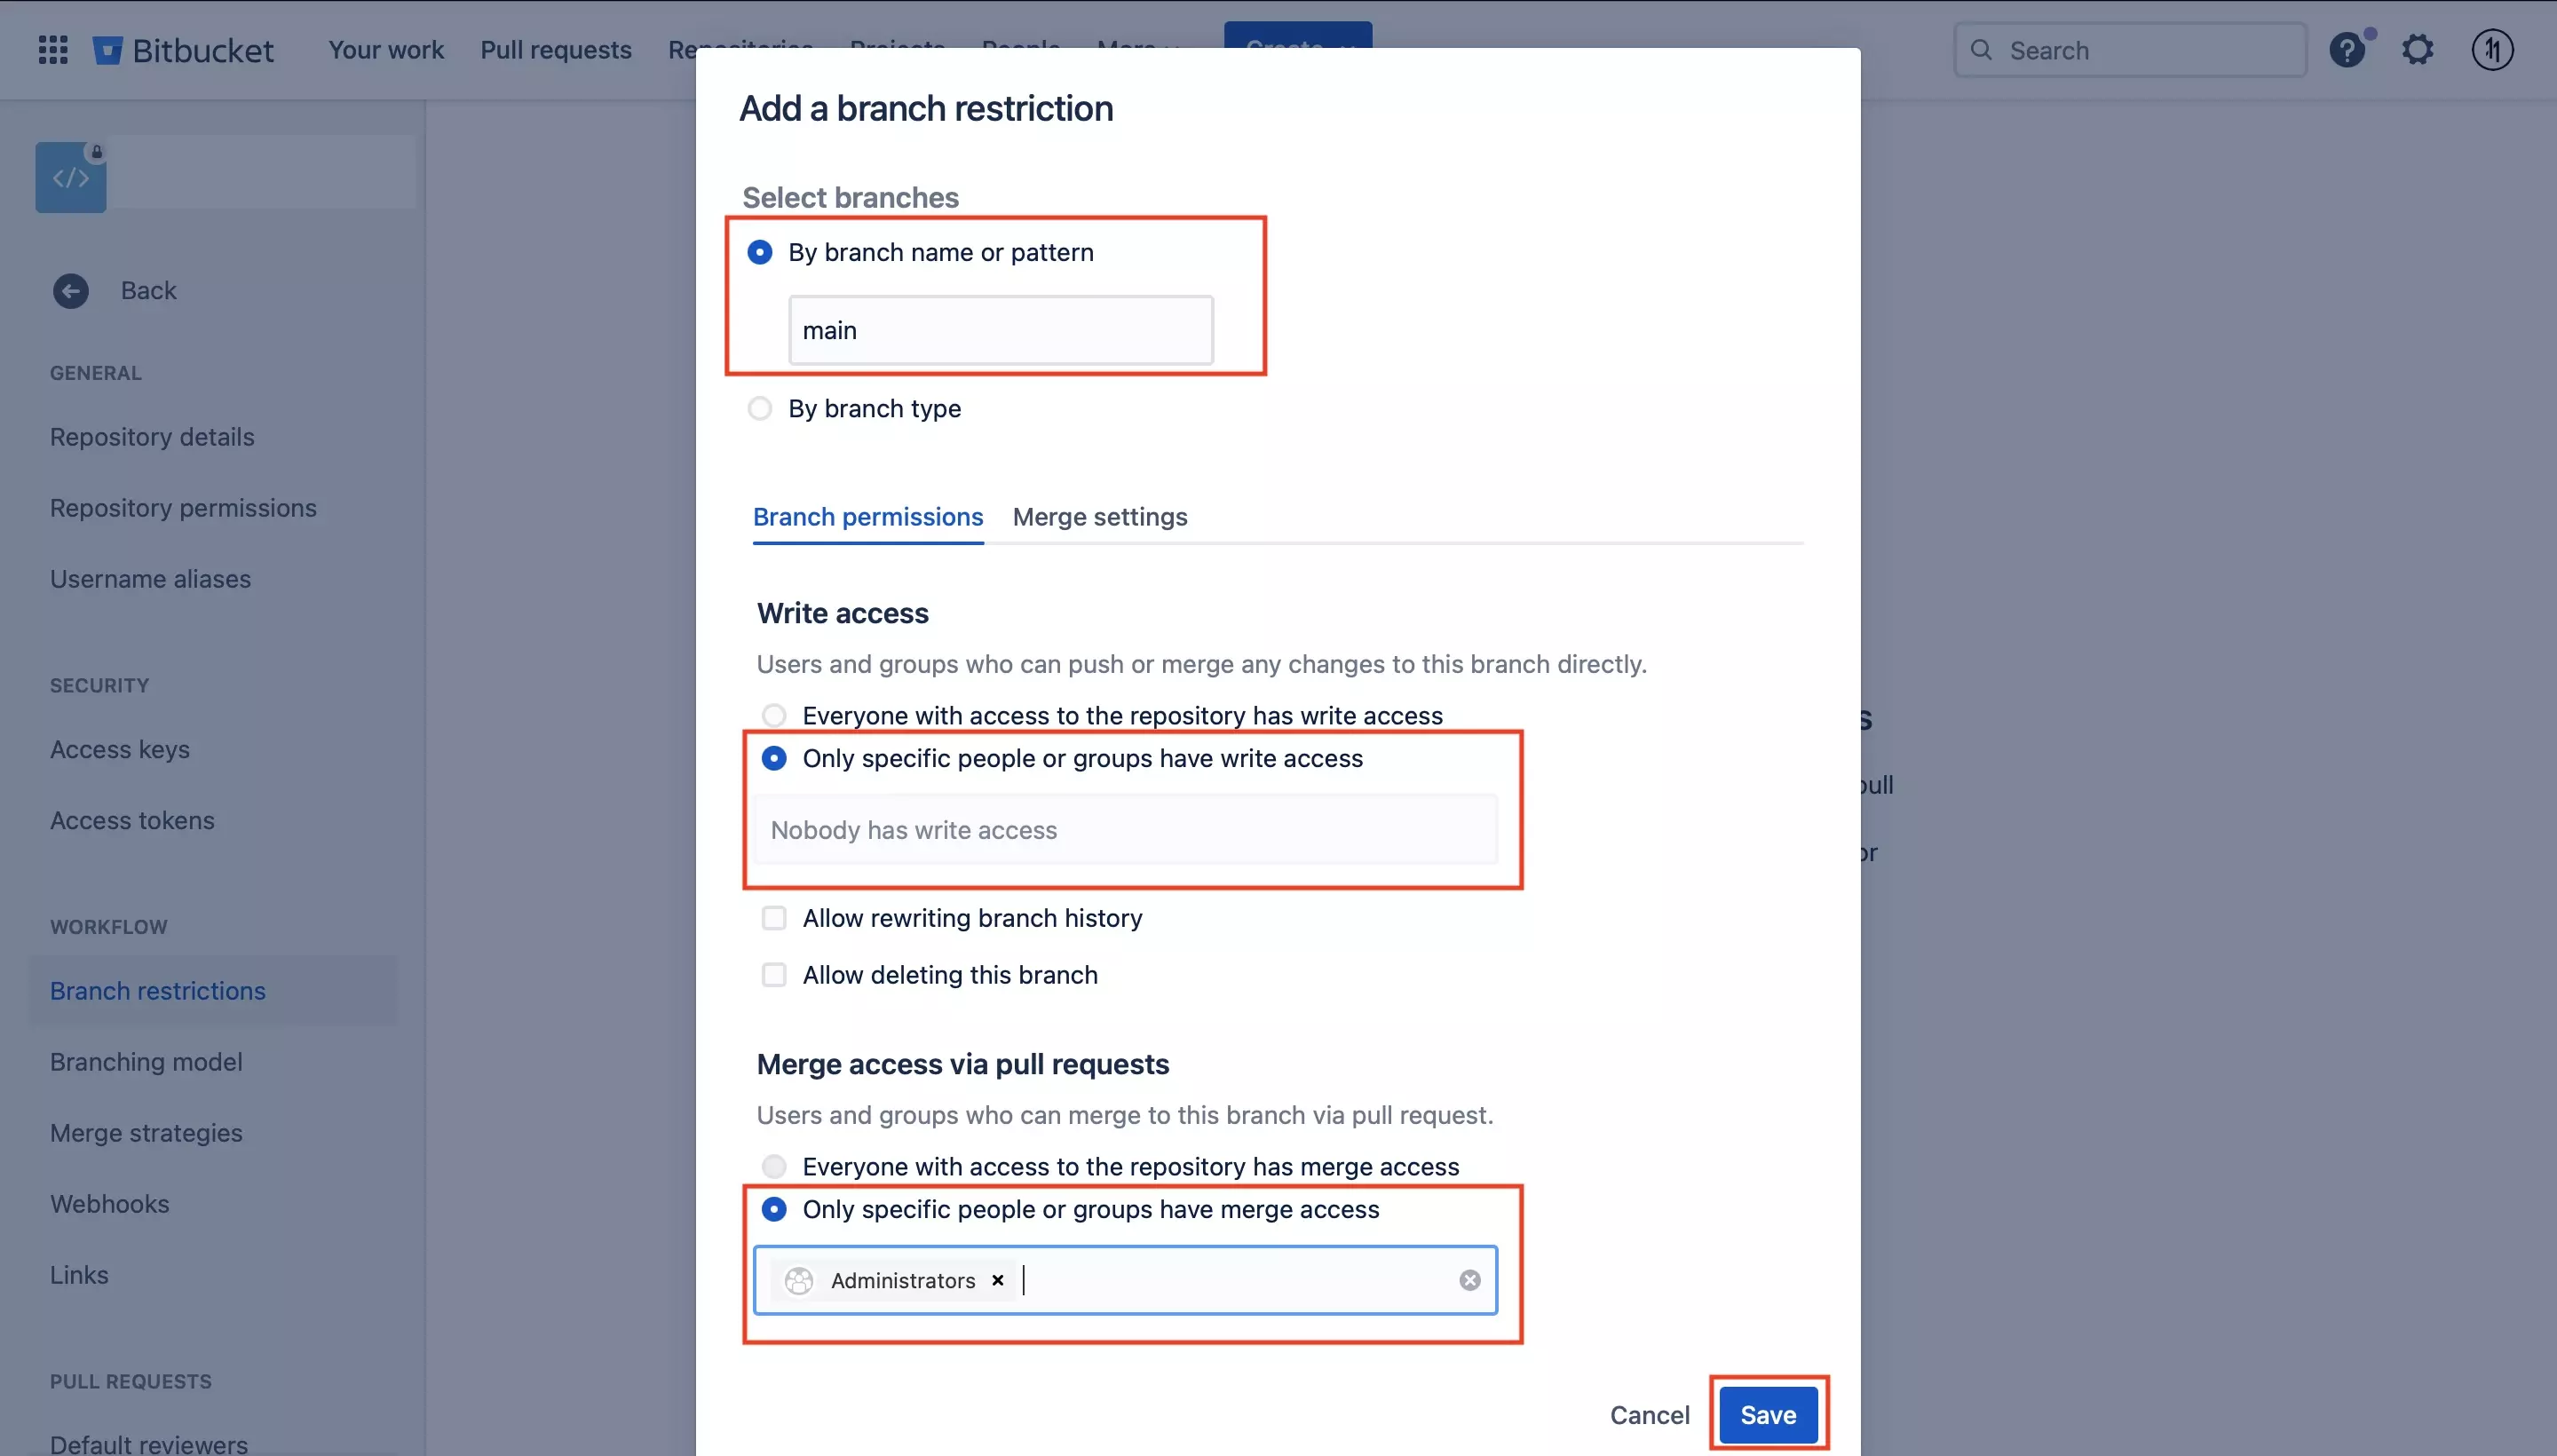
Fill in the details for the branch restriction that you wish to create and click Save.

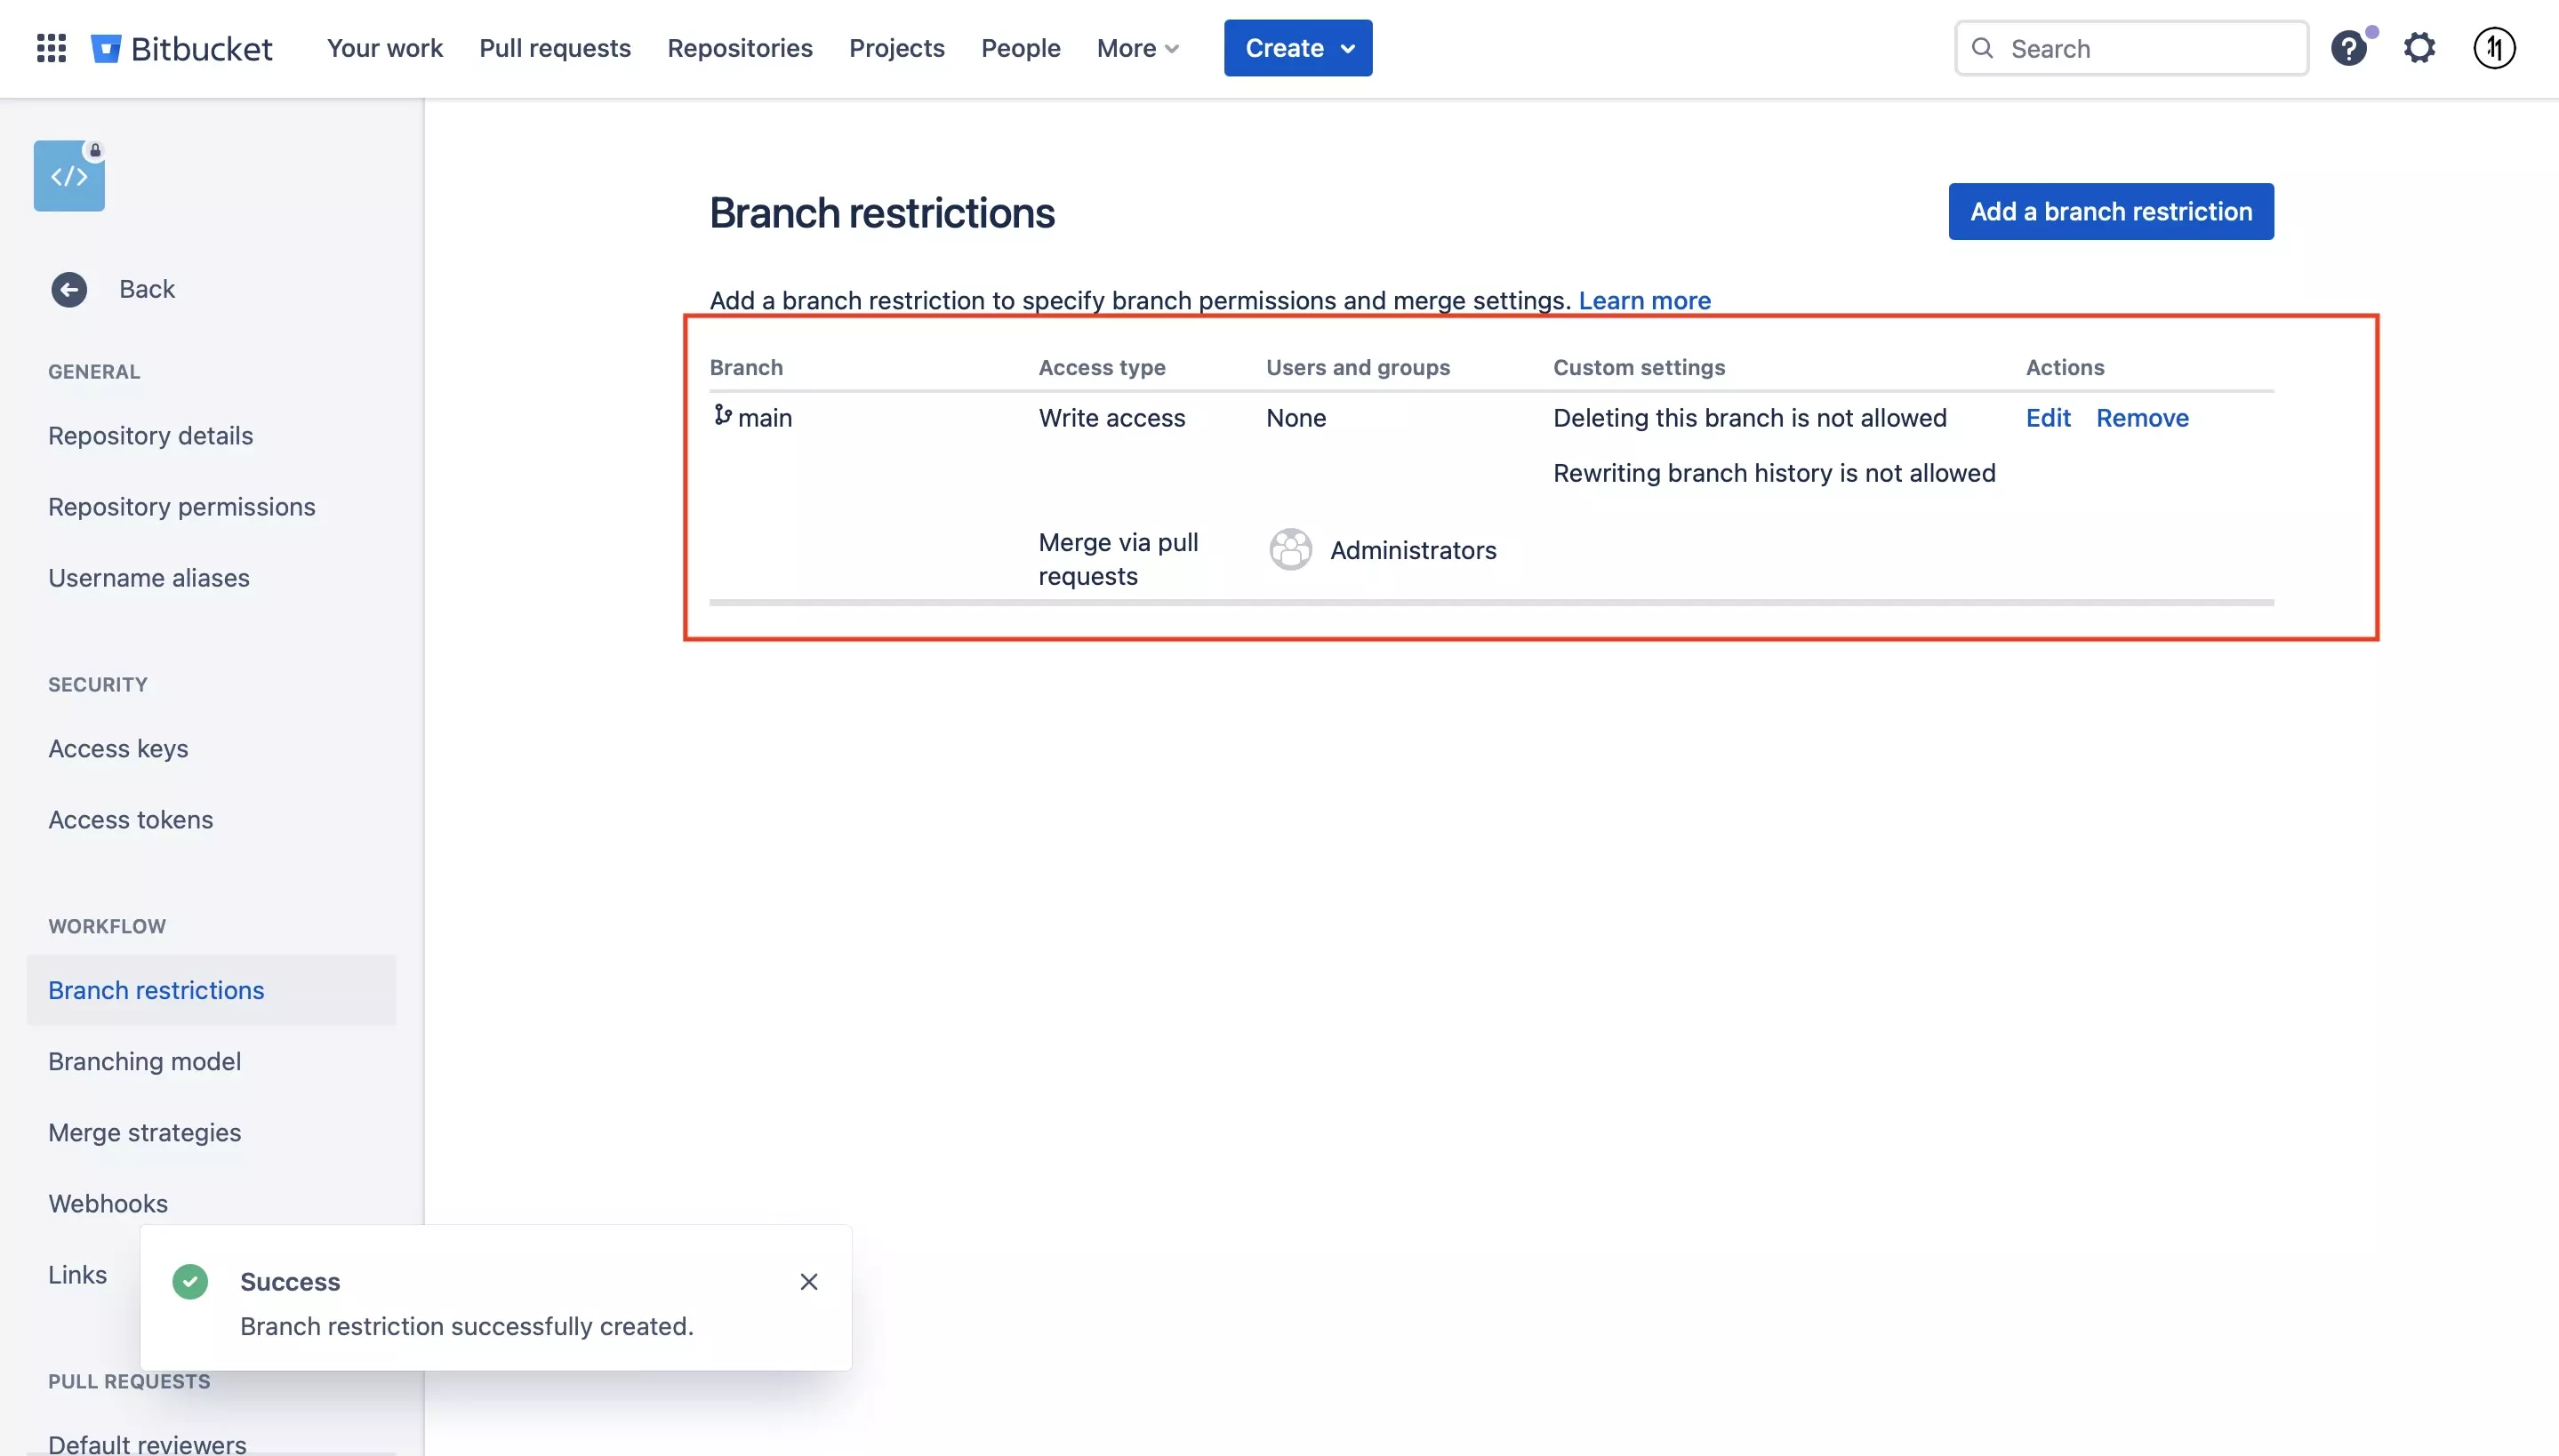
The branch will now appear in the Branch Restriction page as shown below.

A screenshot of the Branch Restriction screen with the restriction that we detailed in the prior picture showing up on the screen. This confirms that it has been created.

Step Five: Test

A screenshot of SourceTree showing that a push to the branch has been denied.

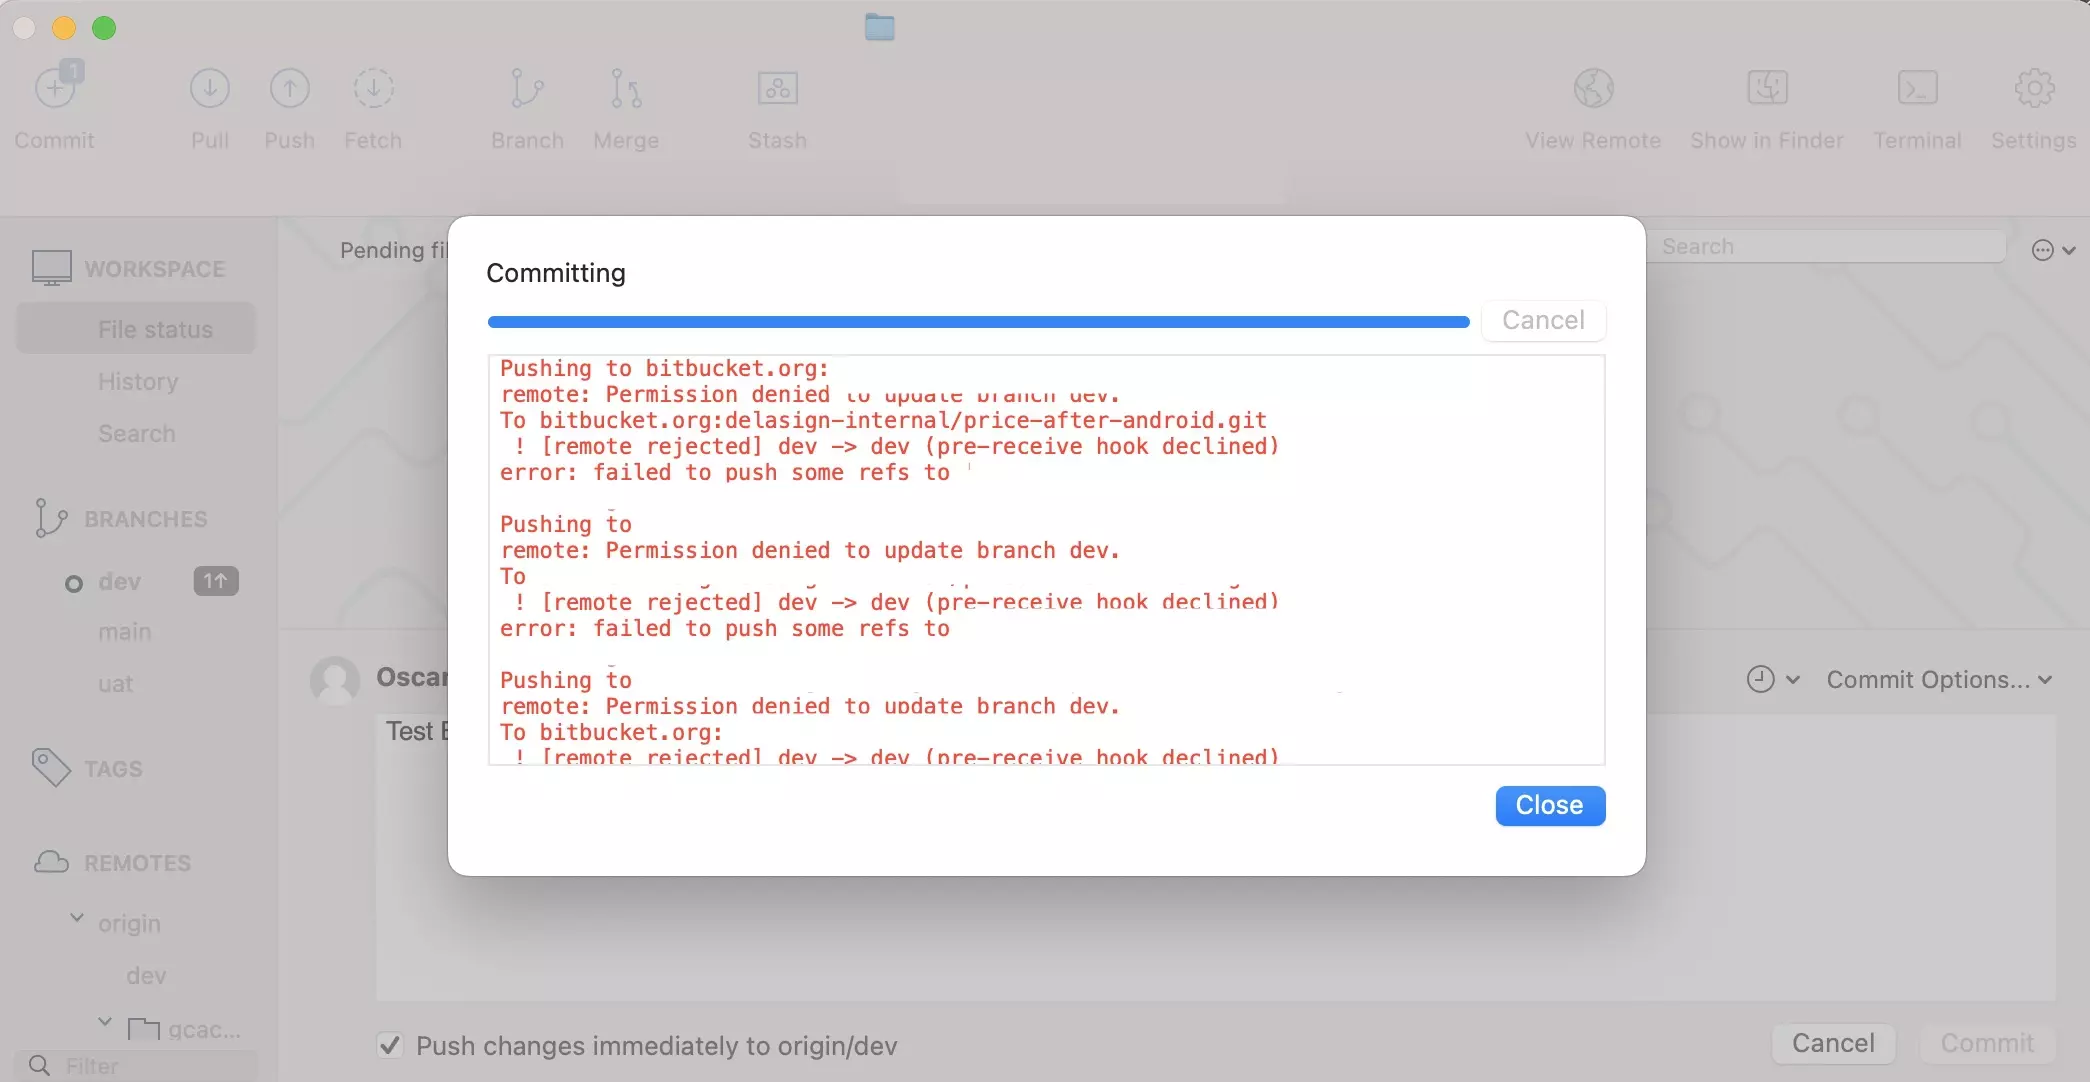
In Terminal or Sourcetree, try to push an innocent commit to your repo and confirm that it is denied.

Looking to prevent commits to a local branch ?

To prevent commits to specific local branches, you must use a pre commit githook script.

Read the article linked below to learn about the code that you must use.

How to prevent commits to a branch using a pre commit githook script

Any Questions?

We are actively looking for feedback on how to improve this resource. Please send us a note to inquiries@delasign.com with any thoughts or feedback you may have.
SubscribeContact UsVisit our BlogView our ServicesView our Work

Partner with us

We would love to get to know you and see how we can help your organization with its goals and needs.
Let's Talk

Stay Informed

Get occasional updates about our company, research, and product launches.
Subscribe