How to create an attributed label in Swift
A step by step tutorial on creating and updating custom labels in Swift (iOS). Github repository included.

A step by step tutorial on creating and updating custom labels in Swift (iOS). Github repository included.
The following tutorial builds on our Styleguide and Open Source project which is available via the button below.
Attributed text styles are custom typographic styles for labels that allow you more control over the visual style of your typography.
Step One: Create the attributed label extension
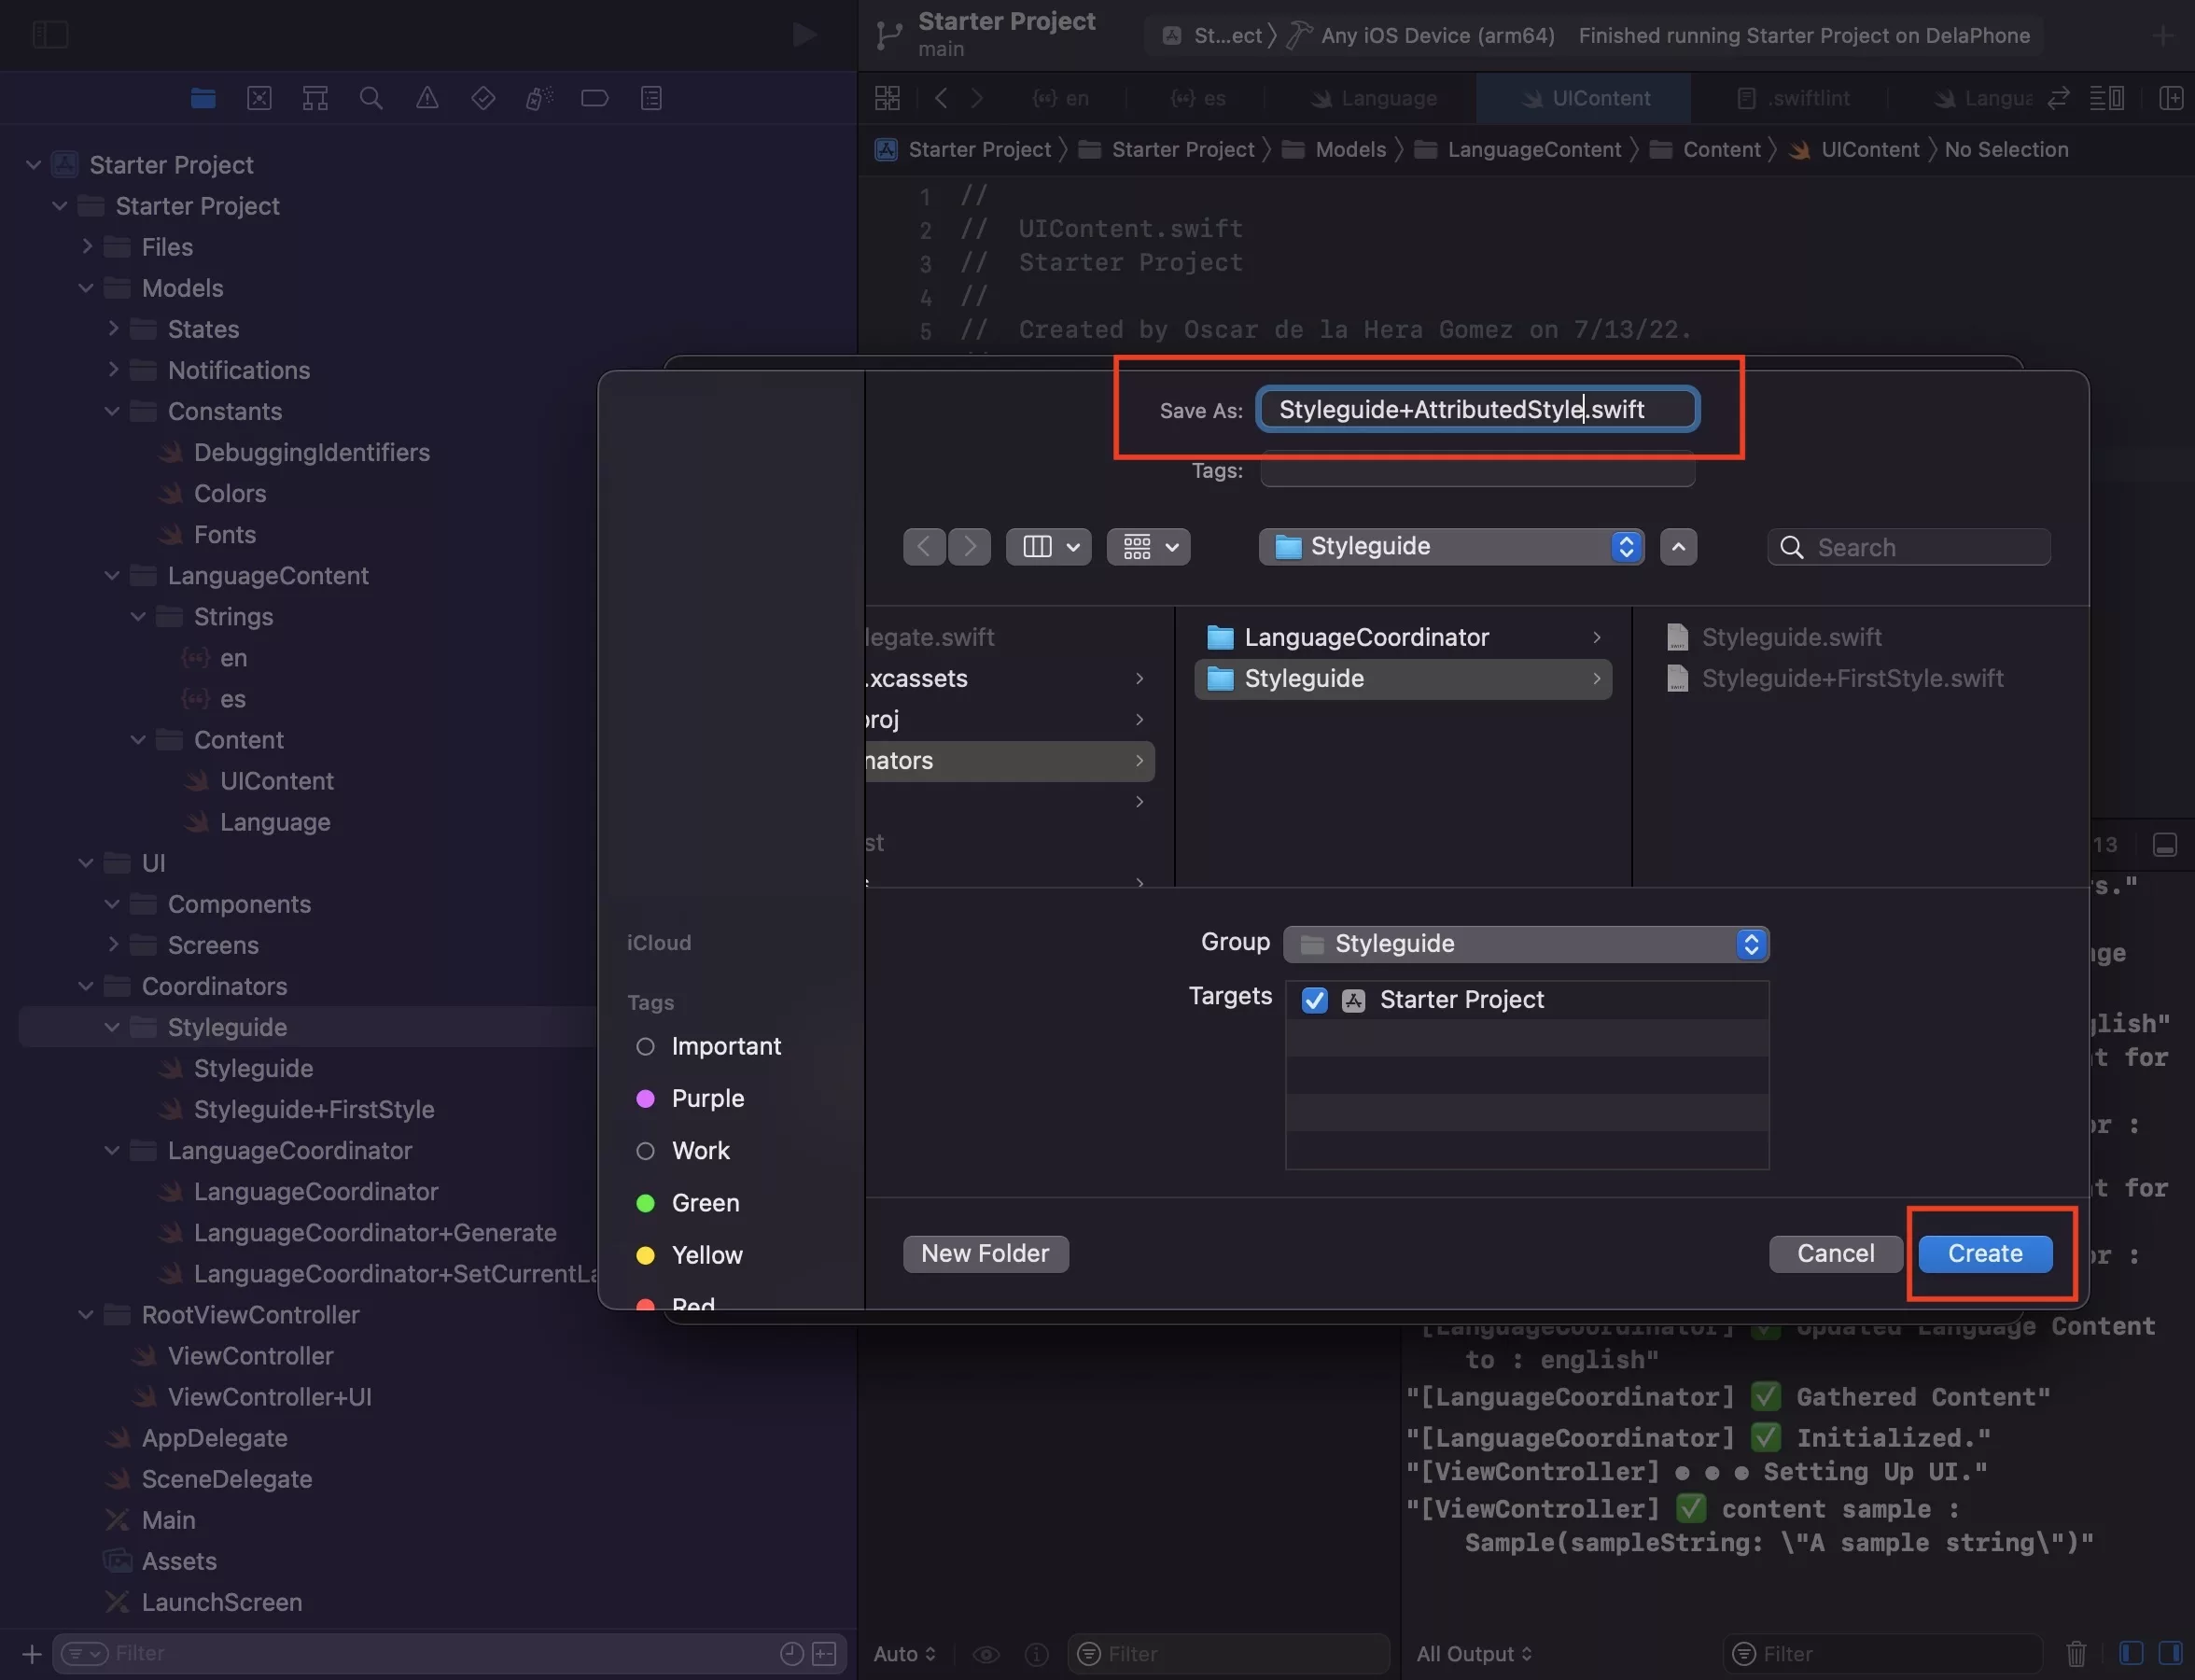
Select the Styleguide folder and press Command + N.
This will select the Swift, iOS file type. Press Next.
After that enter the name of your file - Styleguide+AttributedStyle - and press Create.
Please note that AttributedStyle should be the name of your style and should match the name of the style in your styleguide.
Step Two: Code your attributed label style
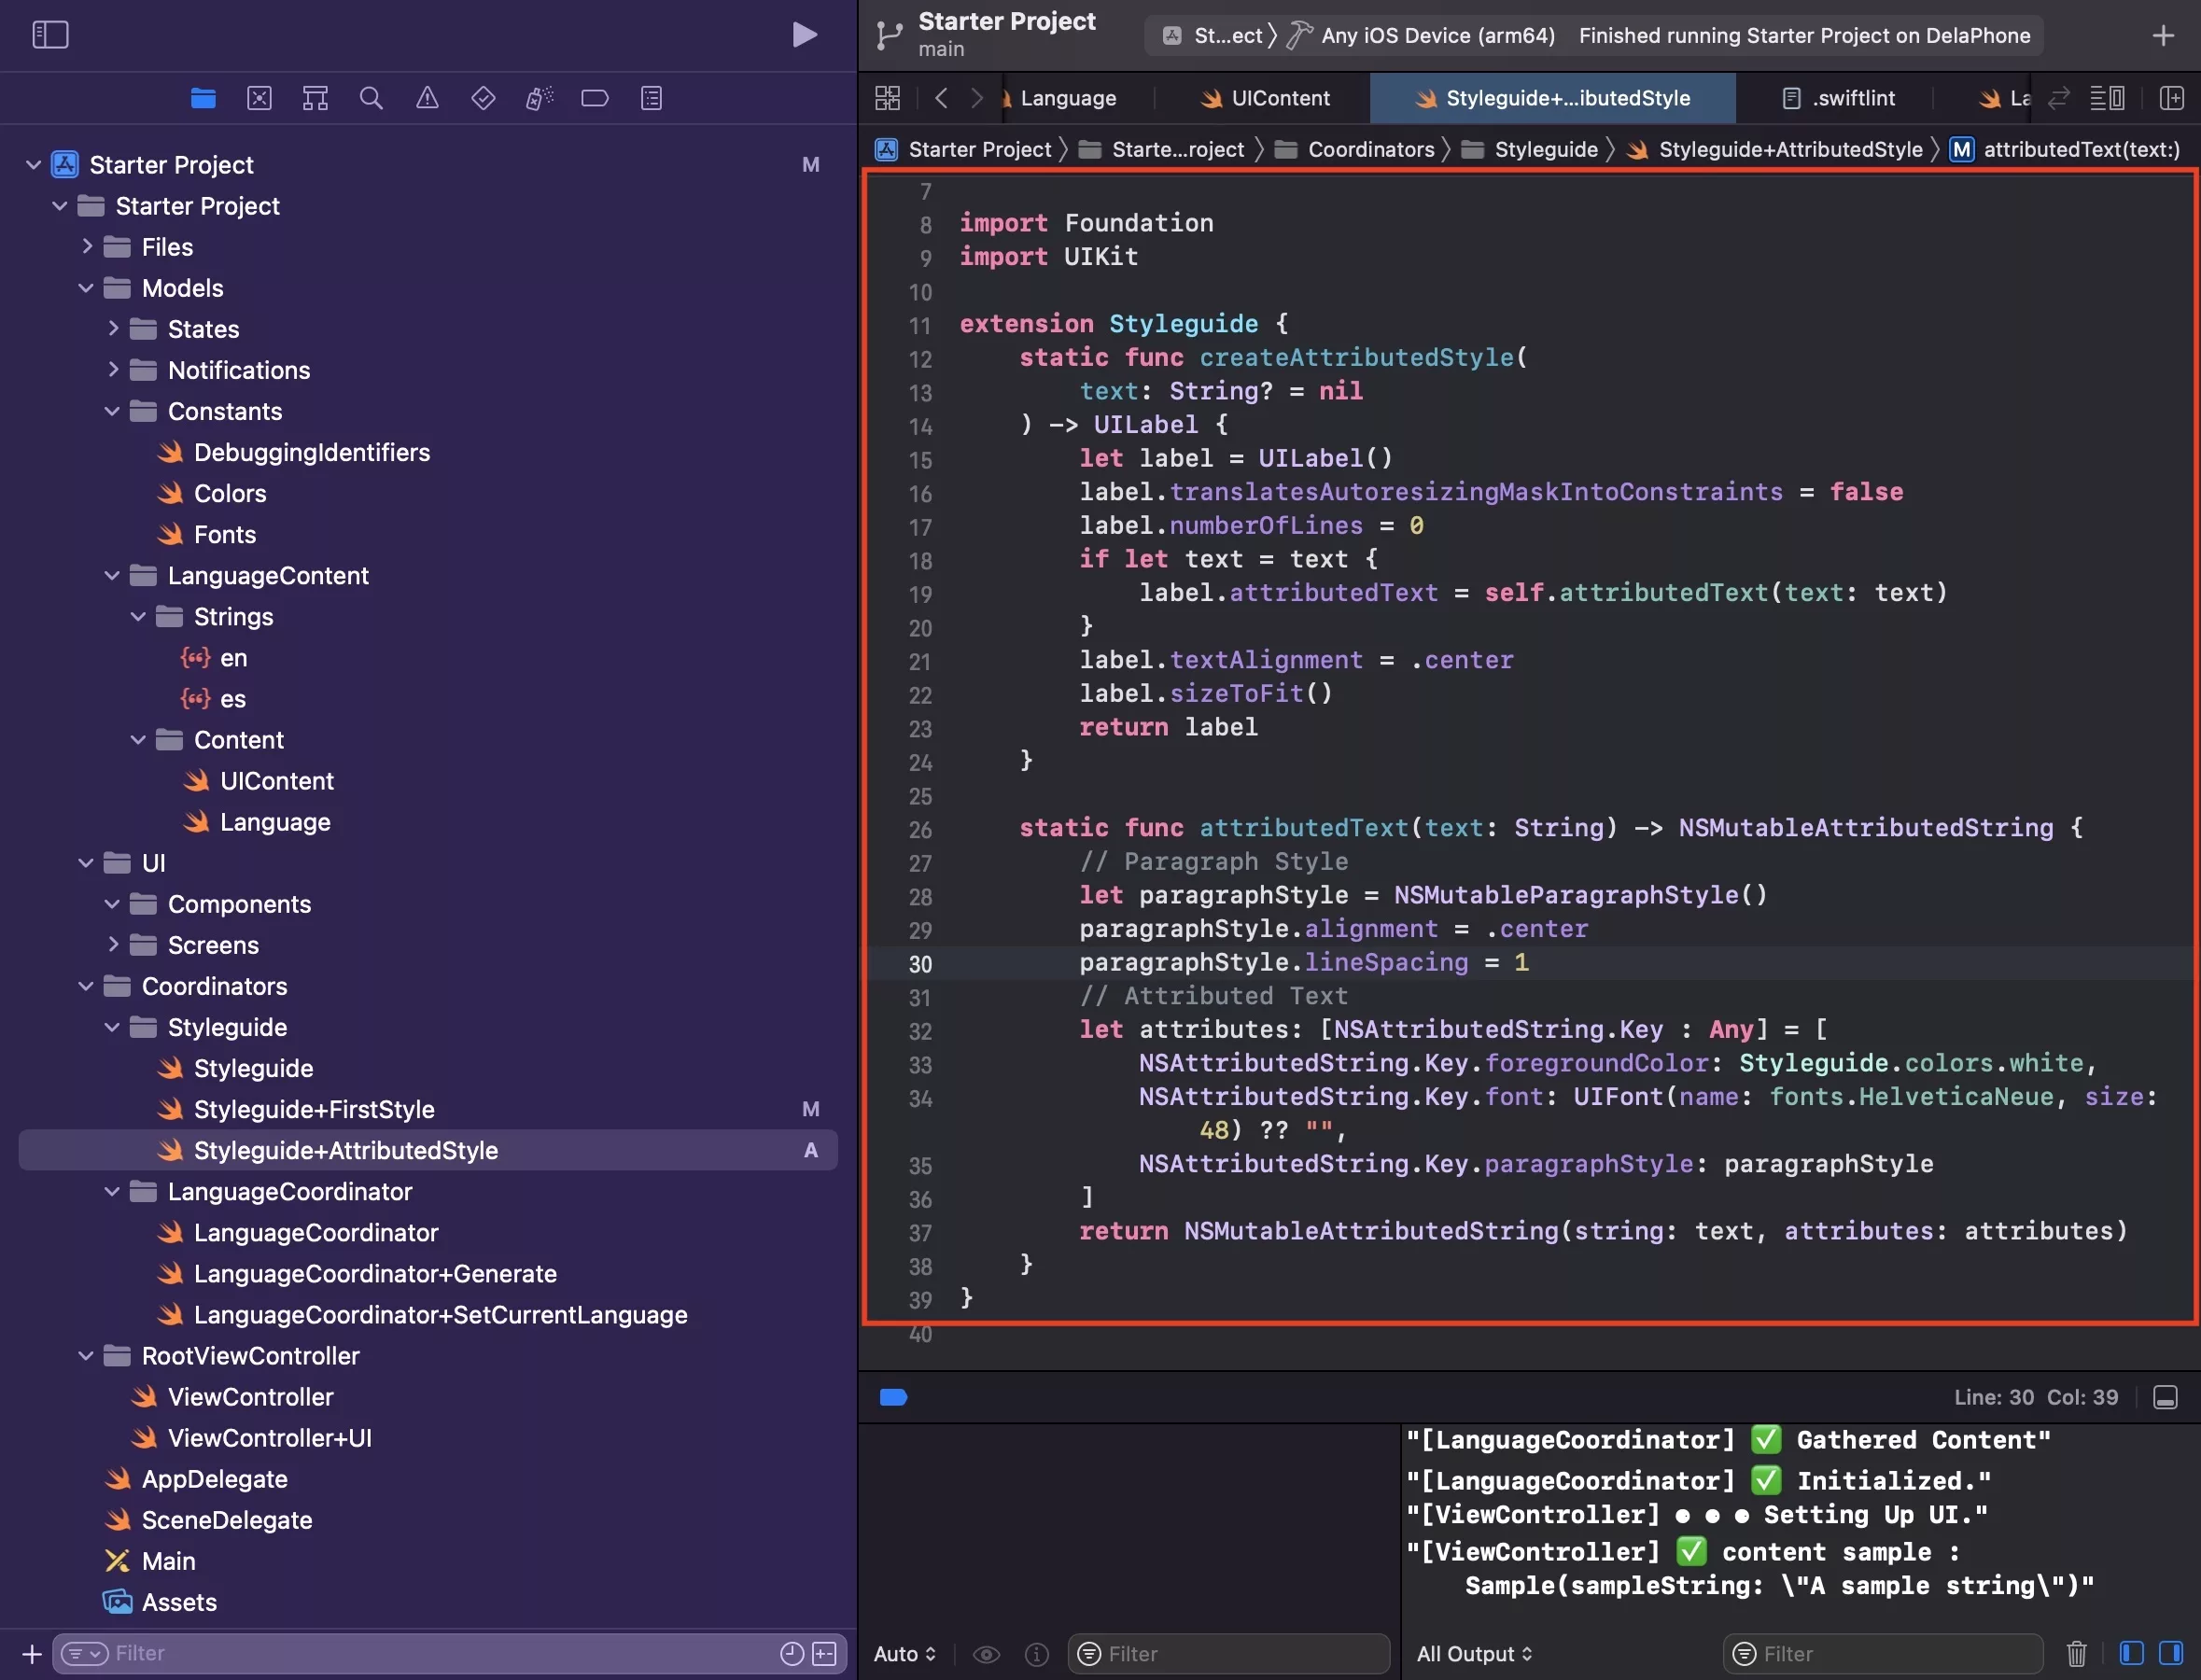
Copy the code below into your extension. It is split into two parts:
- A function that creates the attributed label, with the option to initialize it with text or without text.
- A function that creates the attributed string with your chosen style.
This last function allows you to alter text using attributed keys. For more documentation use the links below.
Step Three: Implement your attributed label style
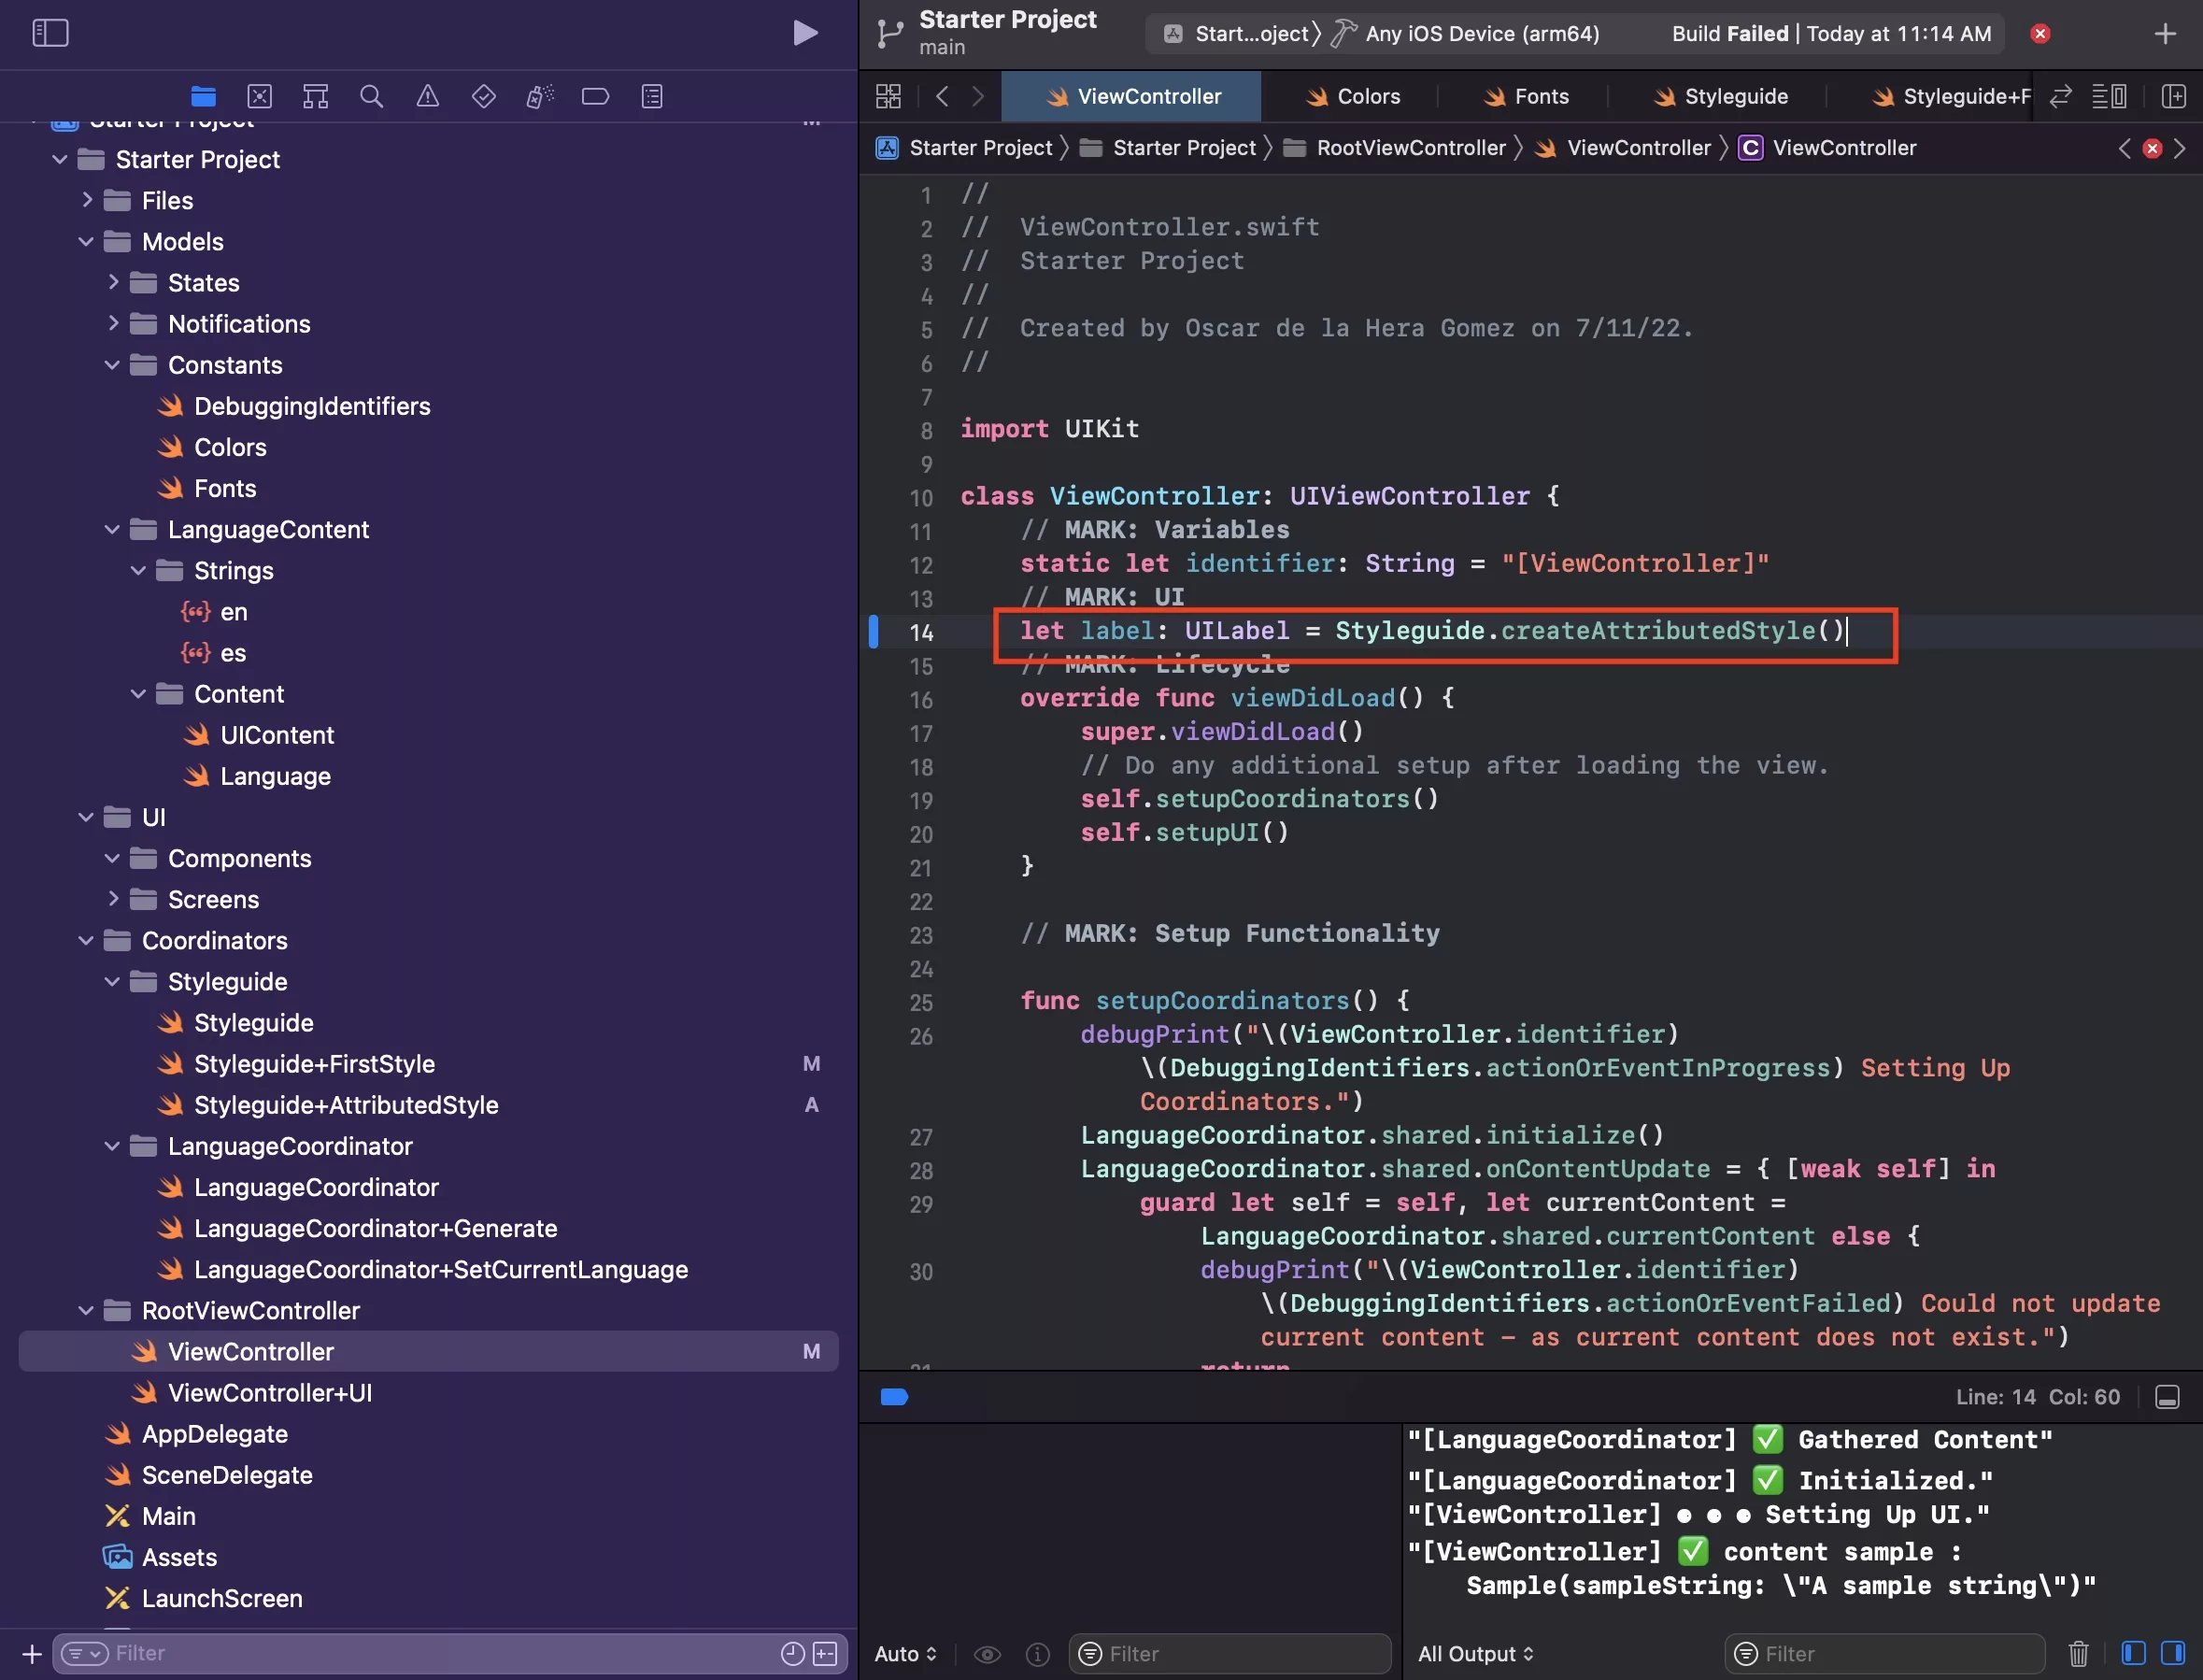
Implement the new label wherever you are using it.
In our case, we update our ViewController label to use the attributed label without the text, as we are updating it via the content update of our LanguageCoordinator.
Step Four: Update your attributed label text on content update
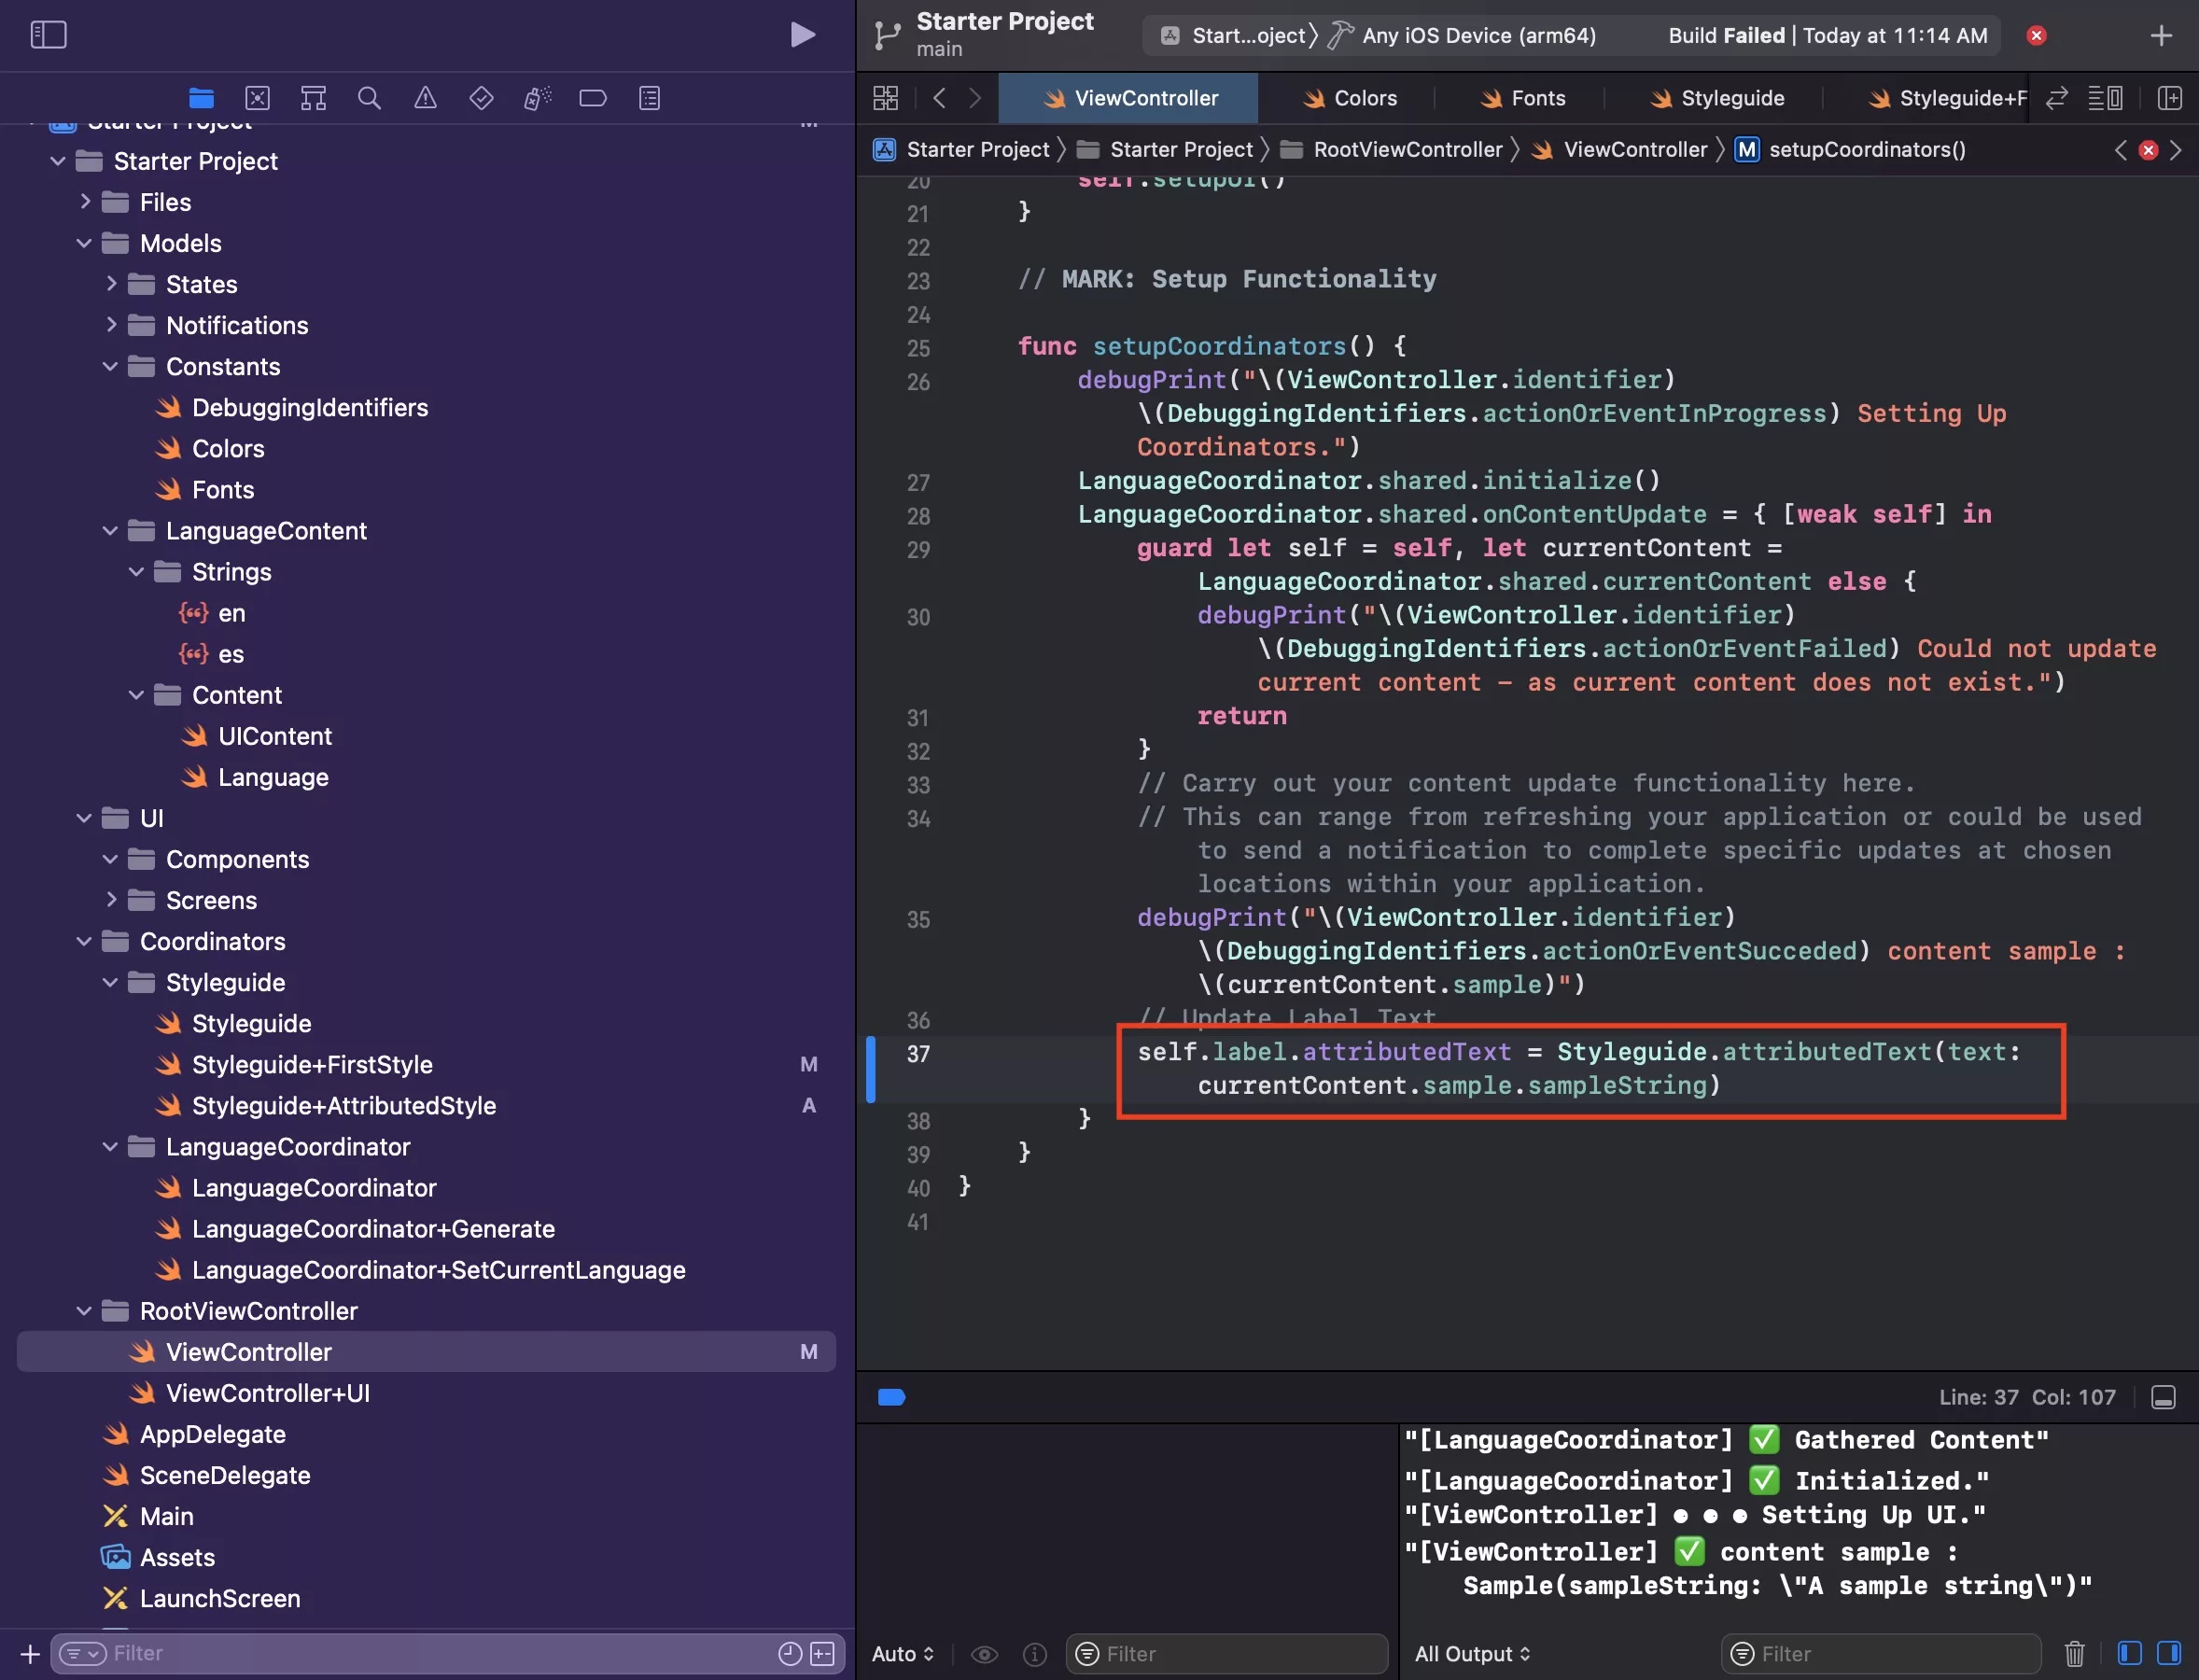
This step is only required if you are updating content after the label has been created as we do with our LanguageCoordinator, whose tutorial is available in the button above.
Please note that you must use self.label.attributedText (not .text) to implement the attributed text.
Step Five: Verify
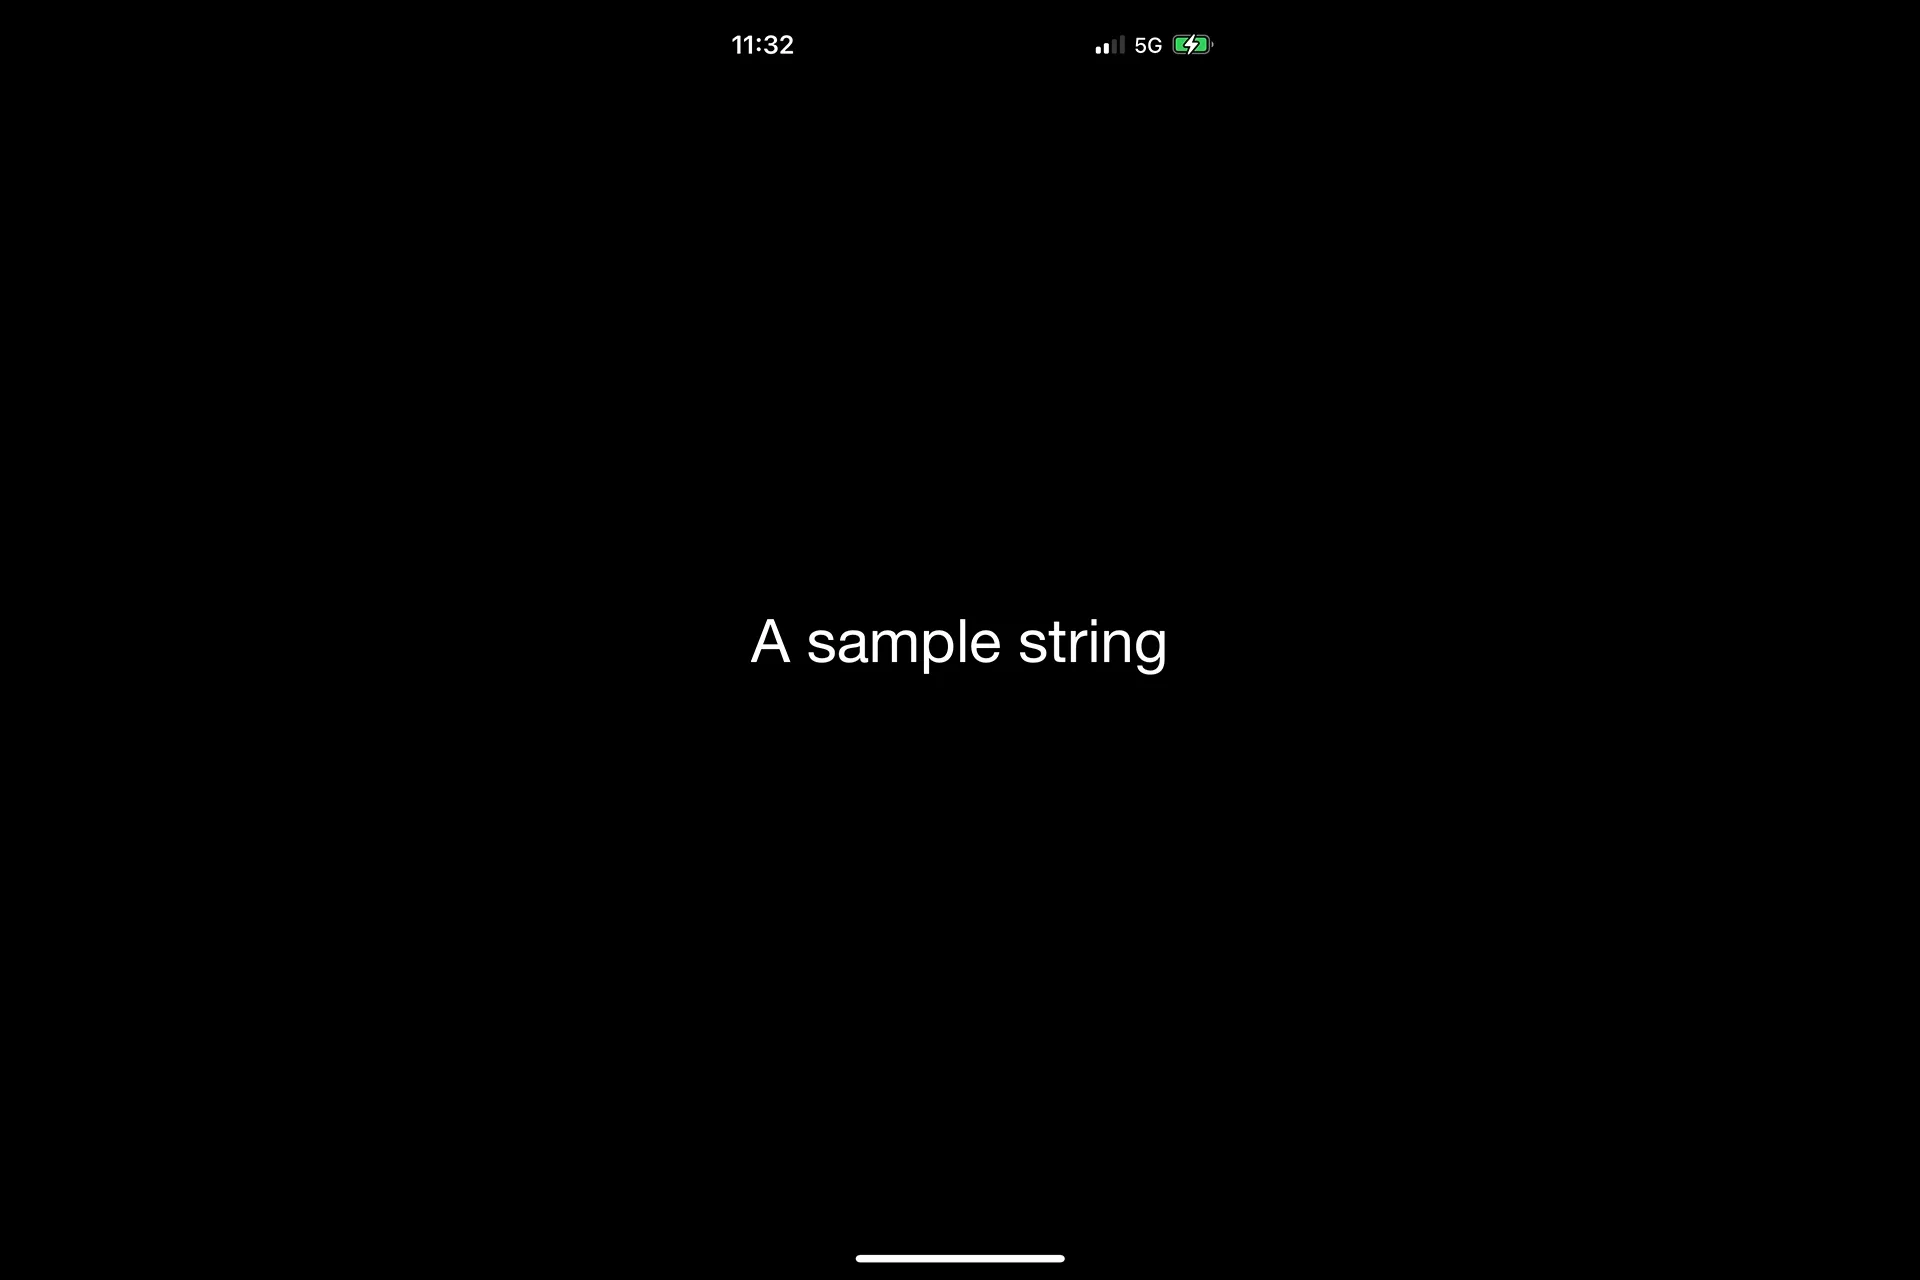
Run your app and see the label use the attributed style that you created.
Any Questions
We are actively looking for feedback on how to improve this resource. Please send us a note to inquiries@delasign.com with any thoughts or feedback you may have.