How to create and use classes in an Arduino project
Create and use reusable classes that optimize your code for modularity.

Create and use reusable classes that optimize your code for modularity.
SubscribeDownload Open Source ProjectThe code for the following tutorial is found on Github through our Open Source Arduino starter project. This can be cloned using the command below:
git clone git@github.com:delasign/arduino-starter-project.gitStep One: Create the Files

Create the Header and CPP file for the Class.
Step Two: Code the Header File
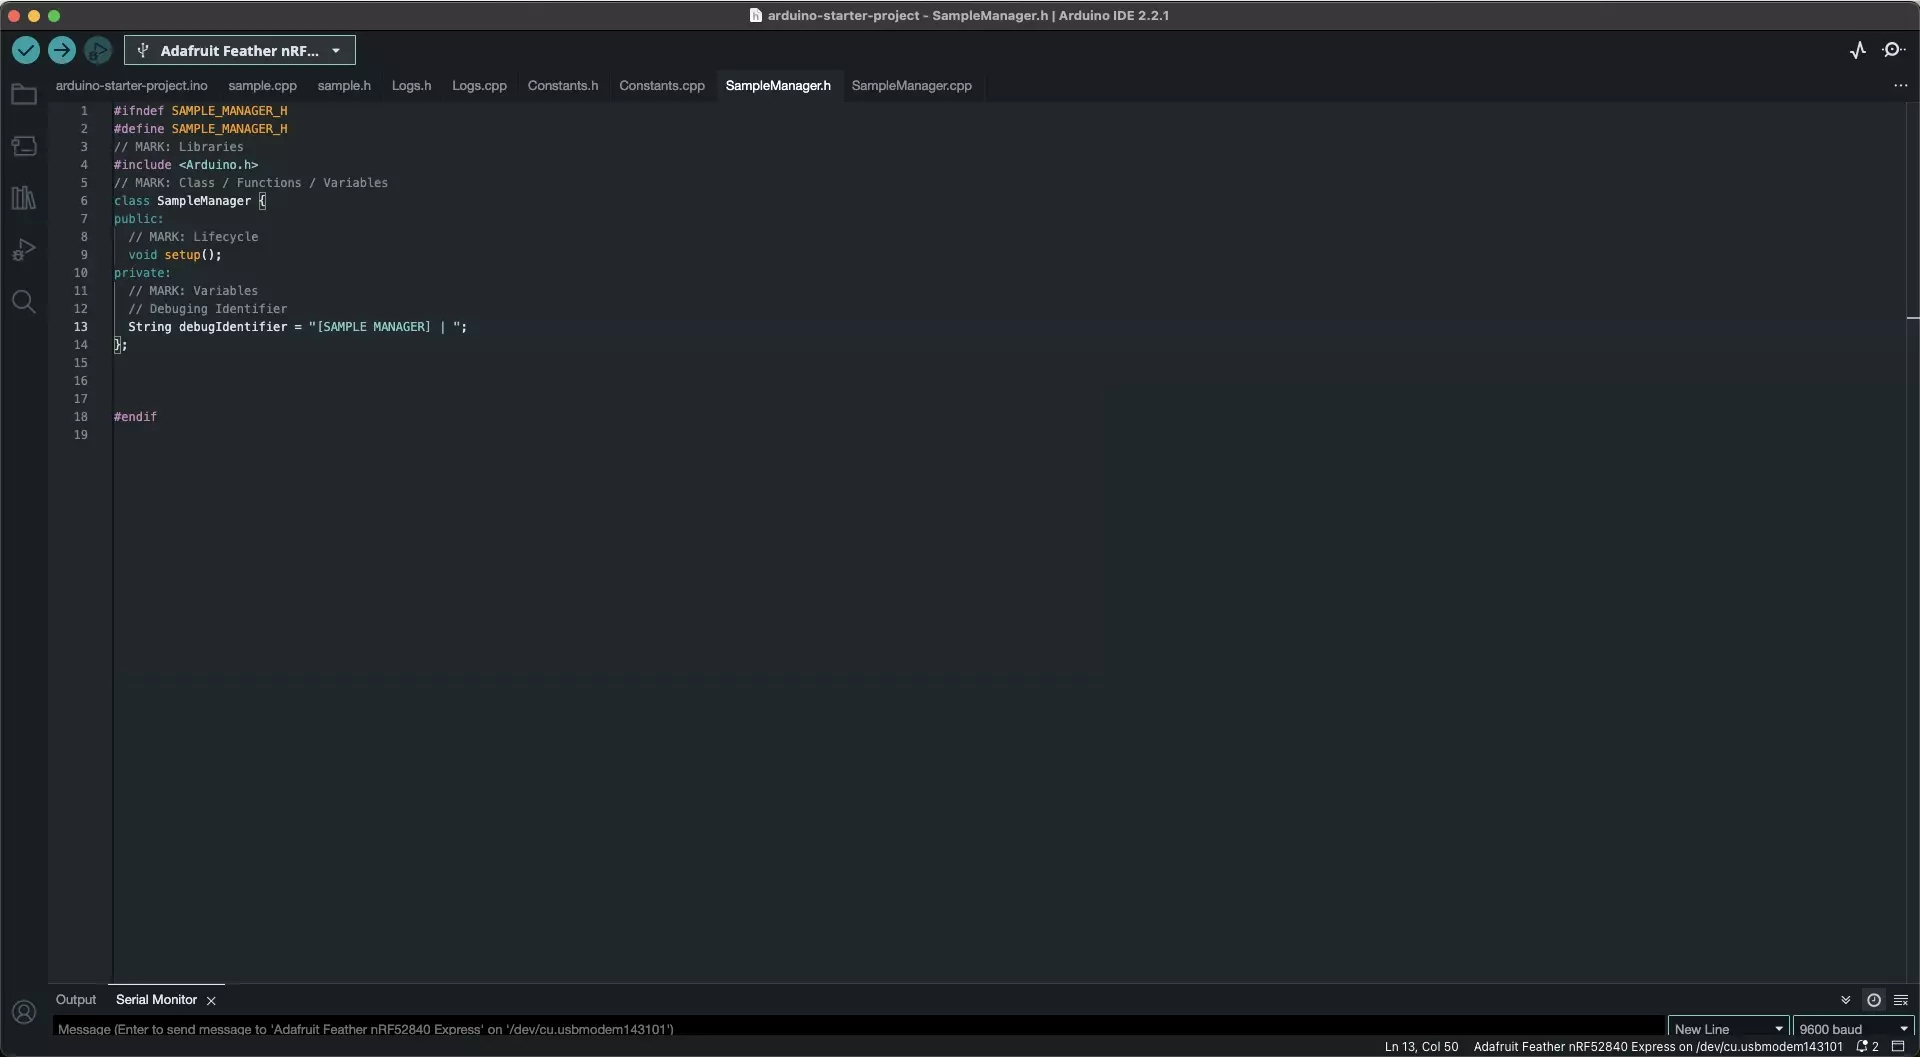
Write the code for the header of the class using code similar to the one below.
Please note that Public, Protected and Private will dictate that is available to scripts that use your class.
Step Three: Code the CPP File
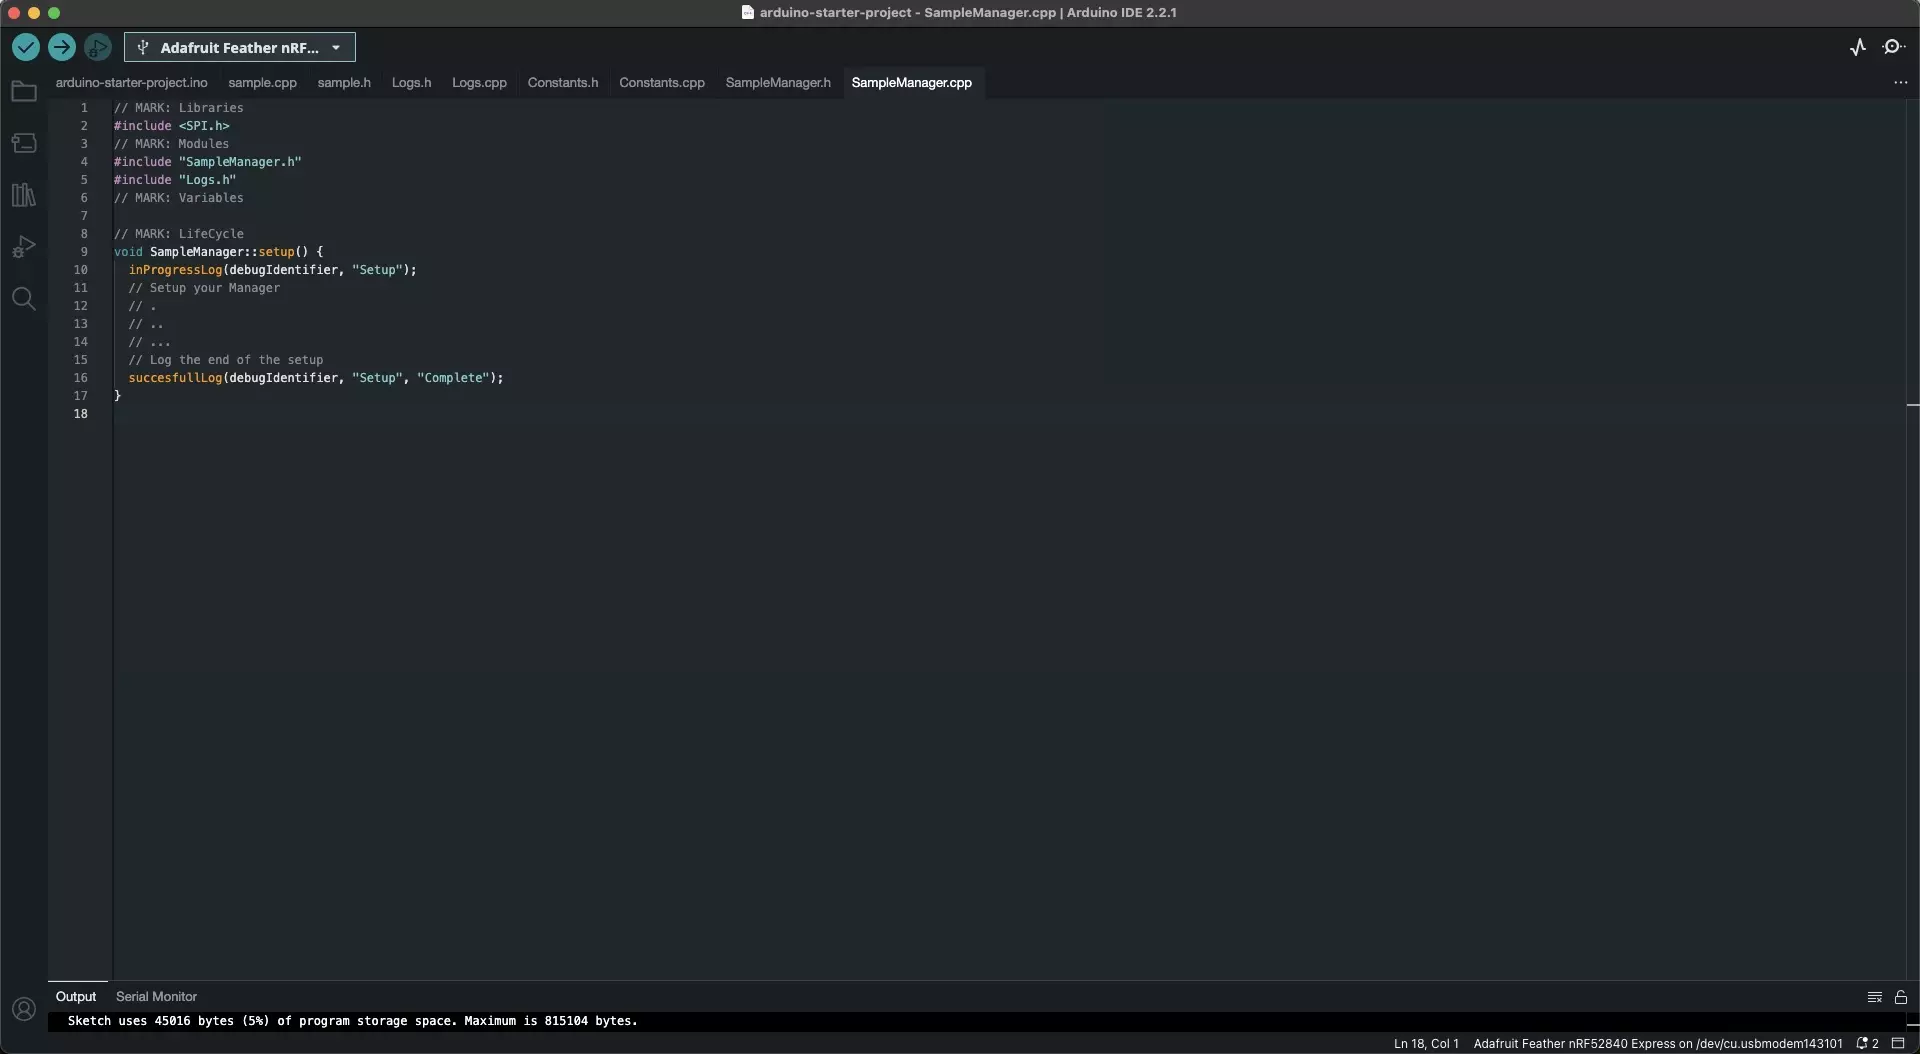
Write the code for the CPP file of the class using code similar to the one below.
Please note syntax for Public, Protected and Private do not need to be applied in the cpp file.
Step Four: Implement the Class
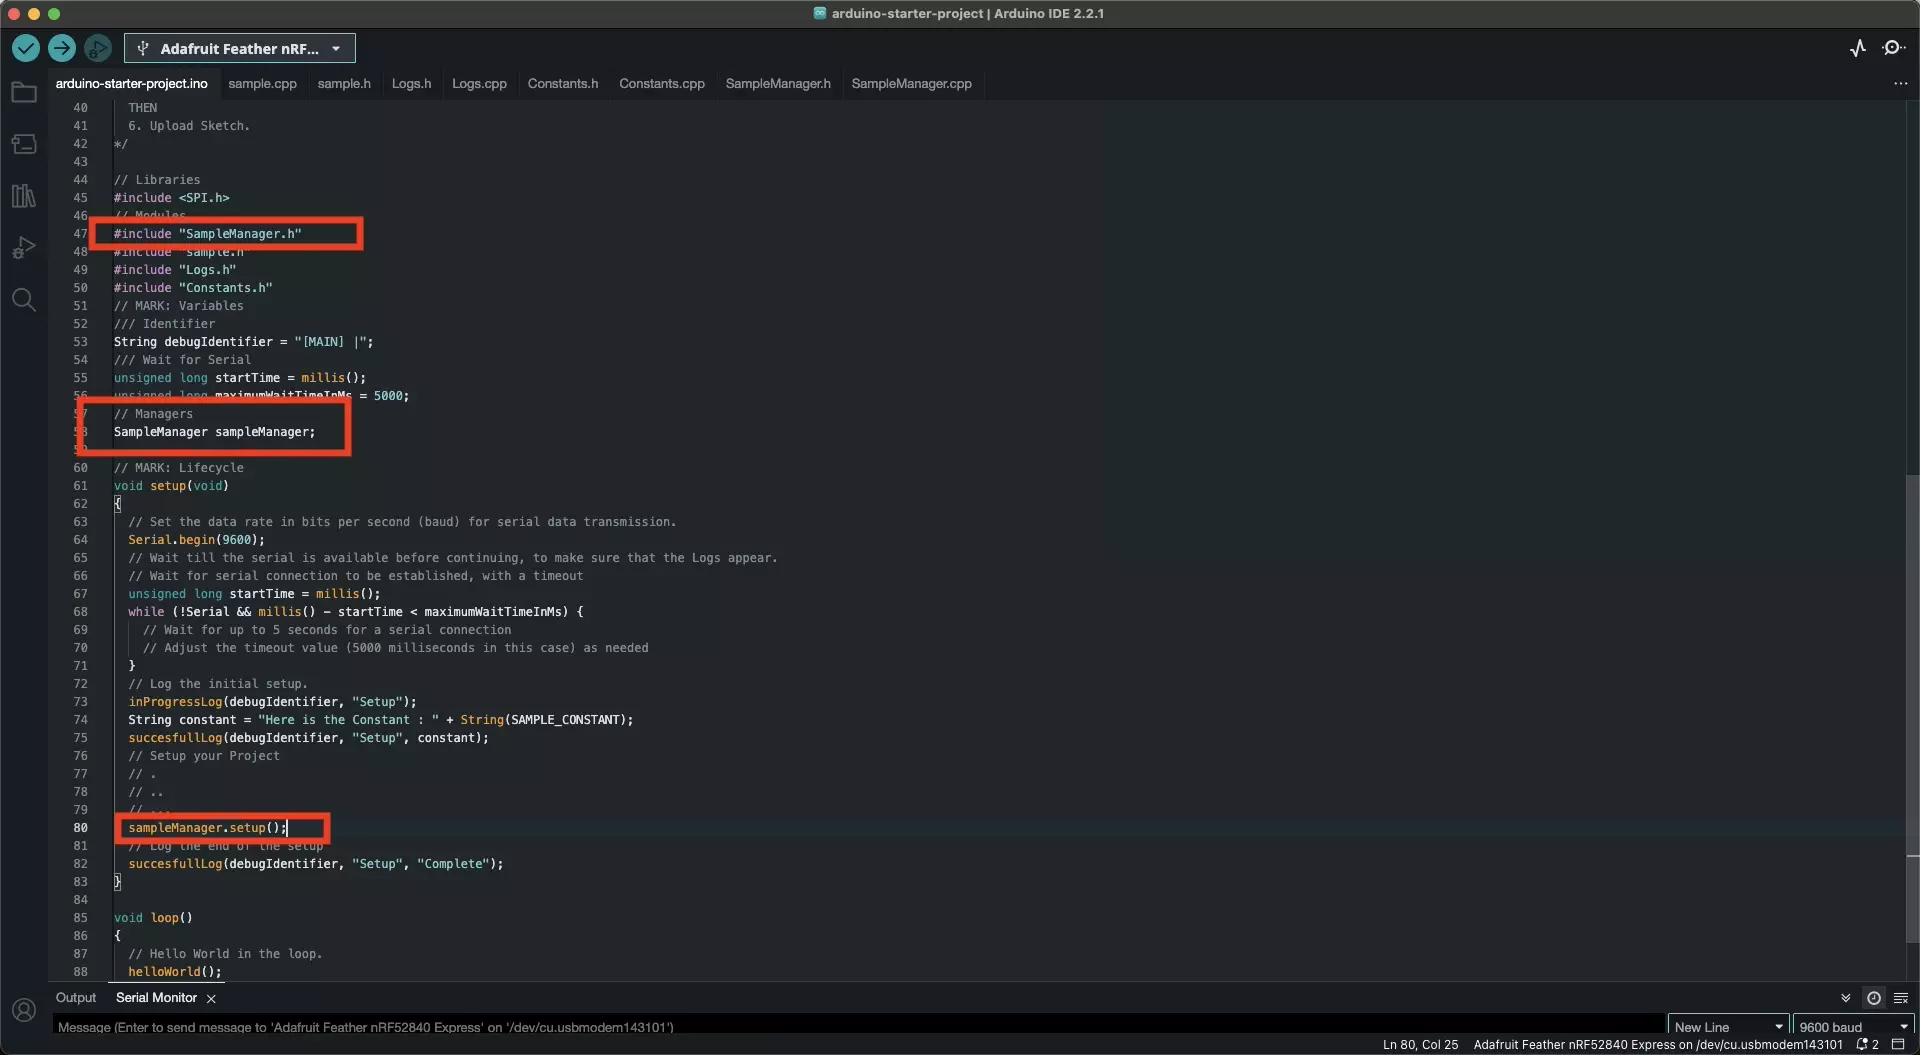
Implement the class into the Arduino script by:
- Including the Header file at the top of the script.
- Creating an object for the manager (i.e. SampleManager sampleManager;).
- Use its variables or apply its functionality in the script (i.e. sampleManager.setup();).
Step Five: Test
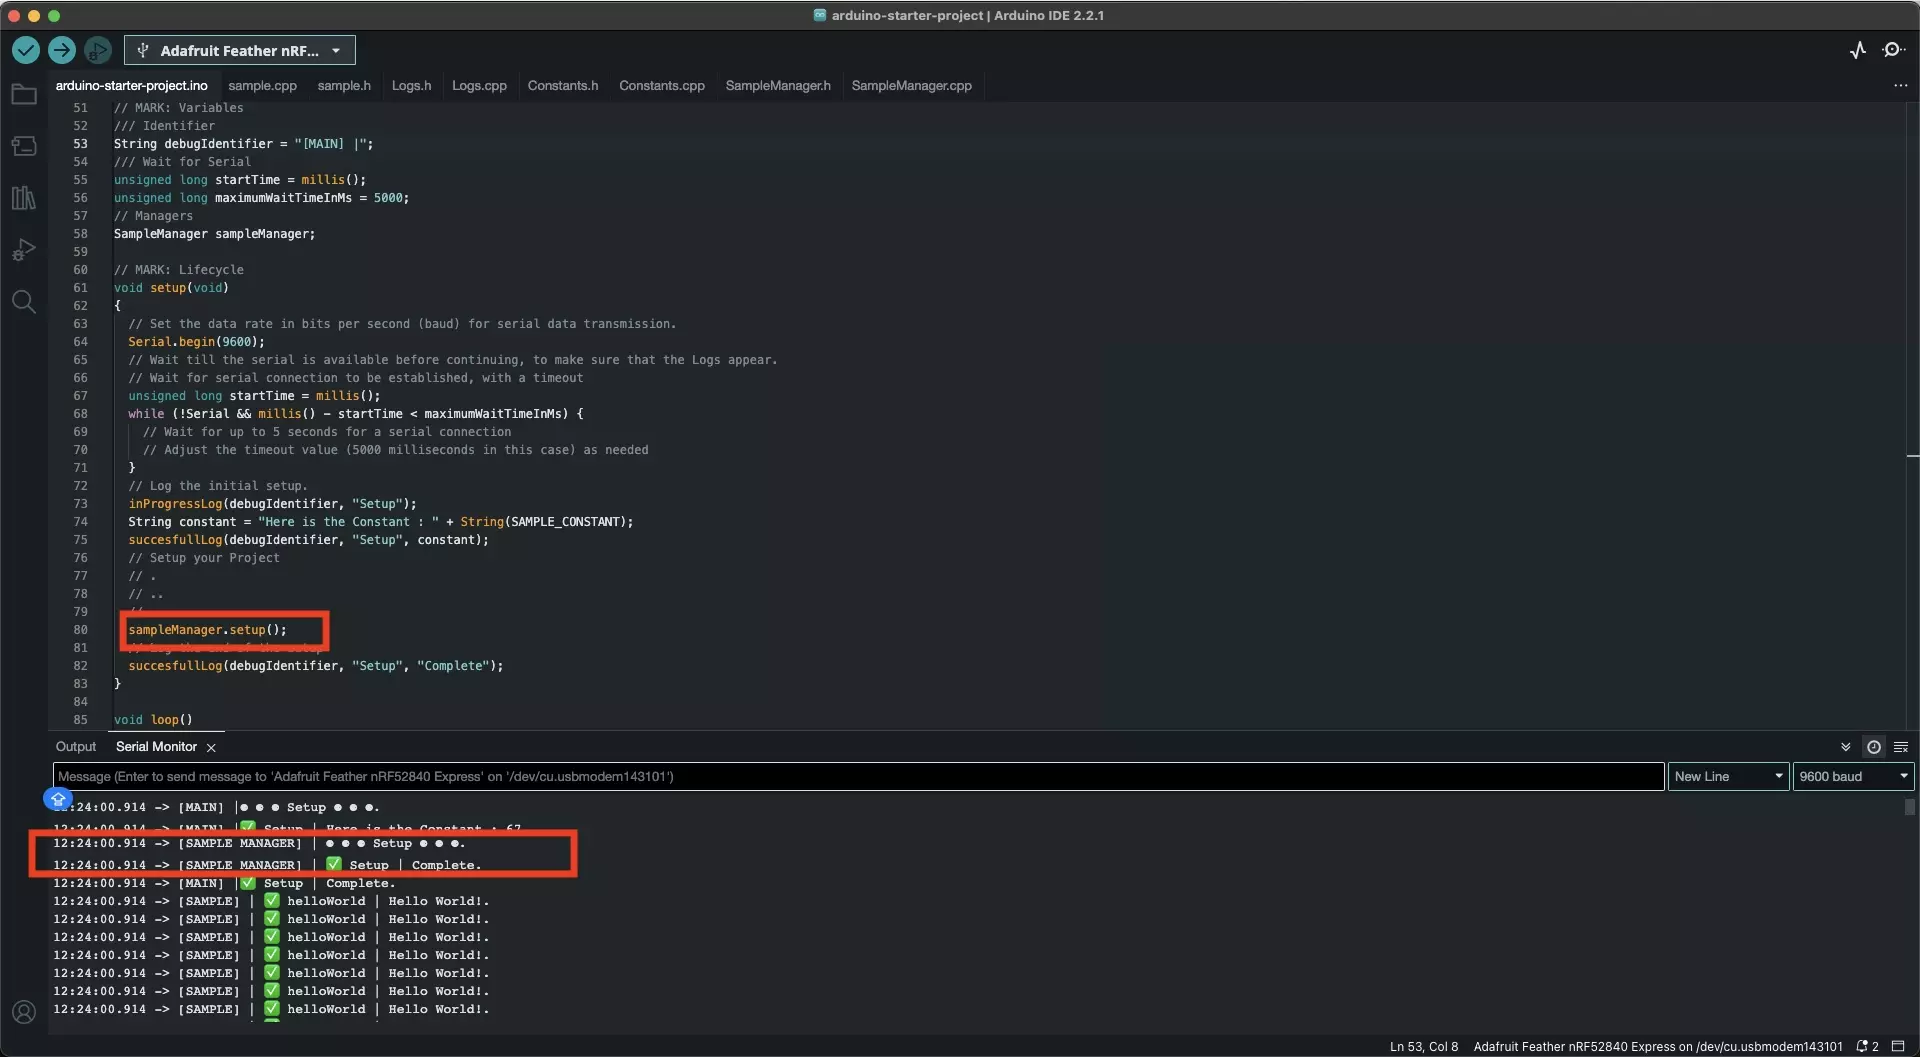
Upload the code onto your board and confirm that the code works as expected.
Looking to learn more about things you can do with Arduino ?
Search our blog to find educational content on Arduino.