How to add localizations to In-App Purchases in App Store Connect

A step by step guide on adding localizations to Consumables or Non-Consumables for iOS, iPadOS, MacOS, WatchOS or TVOS using App Store Connect.

Oscar de la Hera Gomez
Written by Oscar de la Hera Gomez
First published on 02/17/2023 at 10:42
Last Updated on 02/17/2023 at 18:00
A flower that represents App Store Connect with the text "Localize In-App Purchases" beneath it.

A step by step guide on adding localizations to Consumables or Non-Consumables for iOS, iPadOS, MacOS, WatchOS or TVOS using App Store Connect.

Subscribe

Step One: Access the In-App Purchase

A screenshot of the App Store Connect In App Purchases with a highlight on the reference name of a consumable.

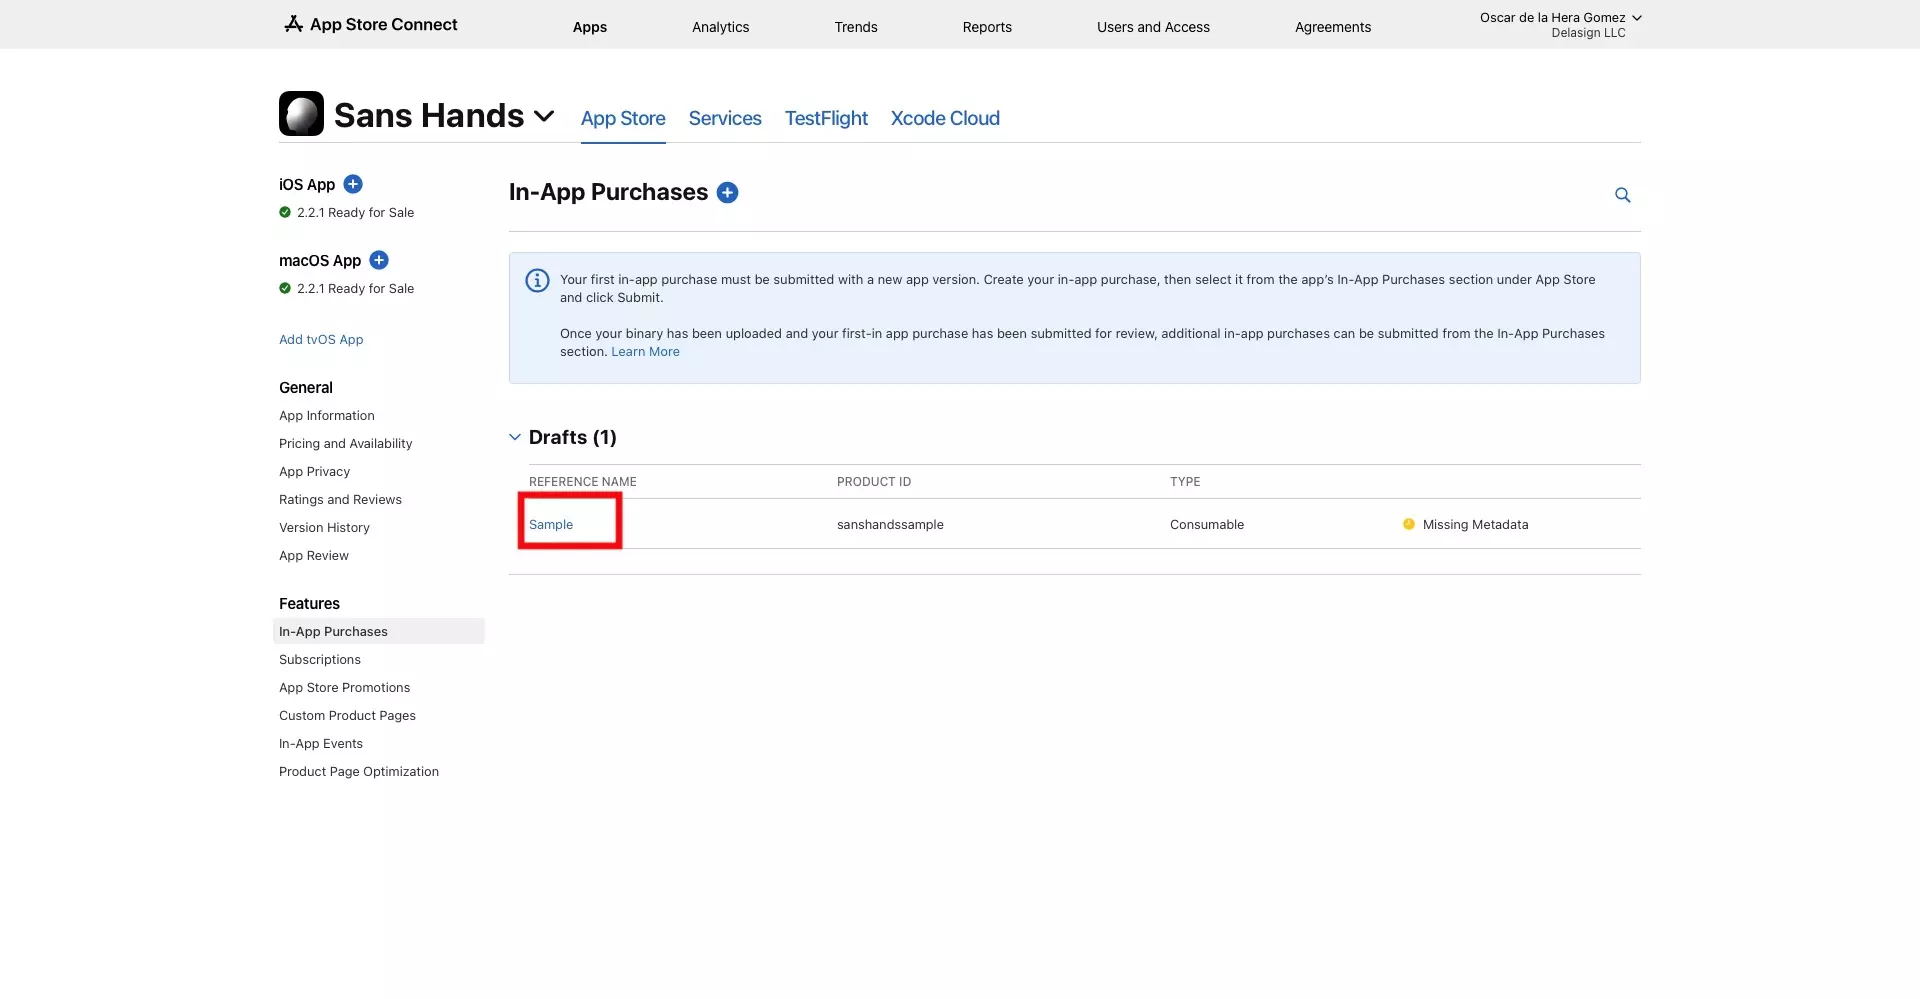
Access the In-App Purchase in App Store Connect.

How to access an In-App Purchase in App Store Connect

Step Two: Add Localization

A screenshot of the In-App Purchase page for the product that we selected showing that we added a localization. Steps are outlined below.

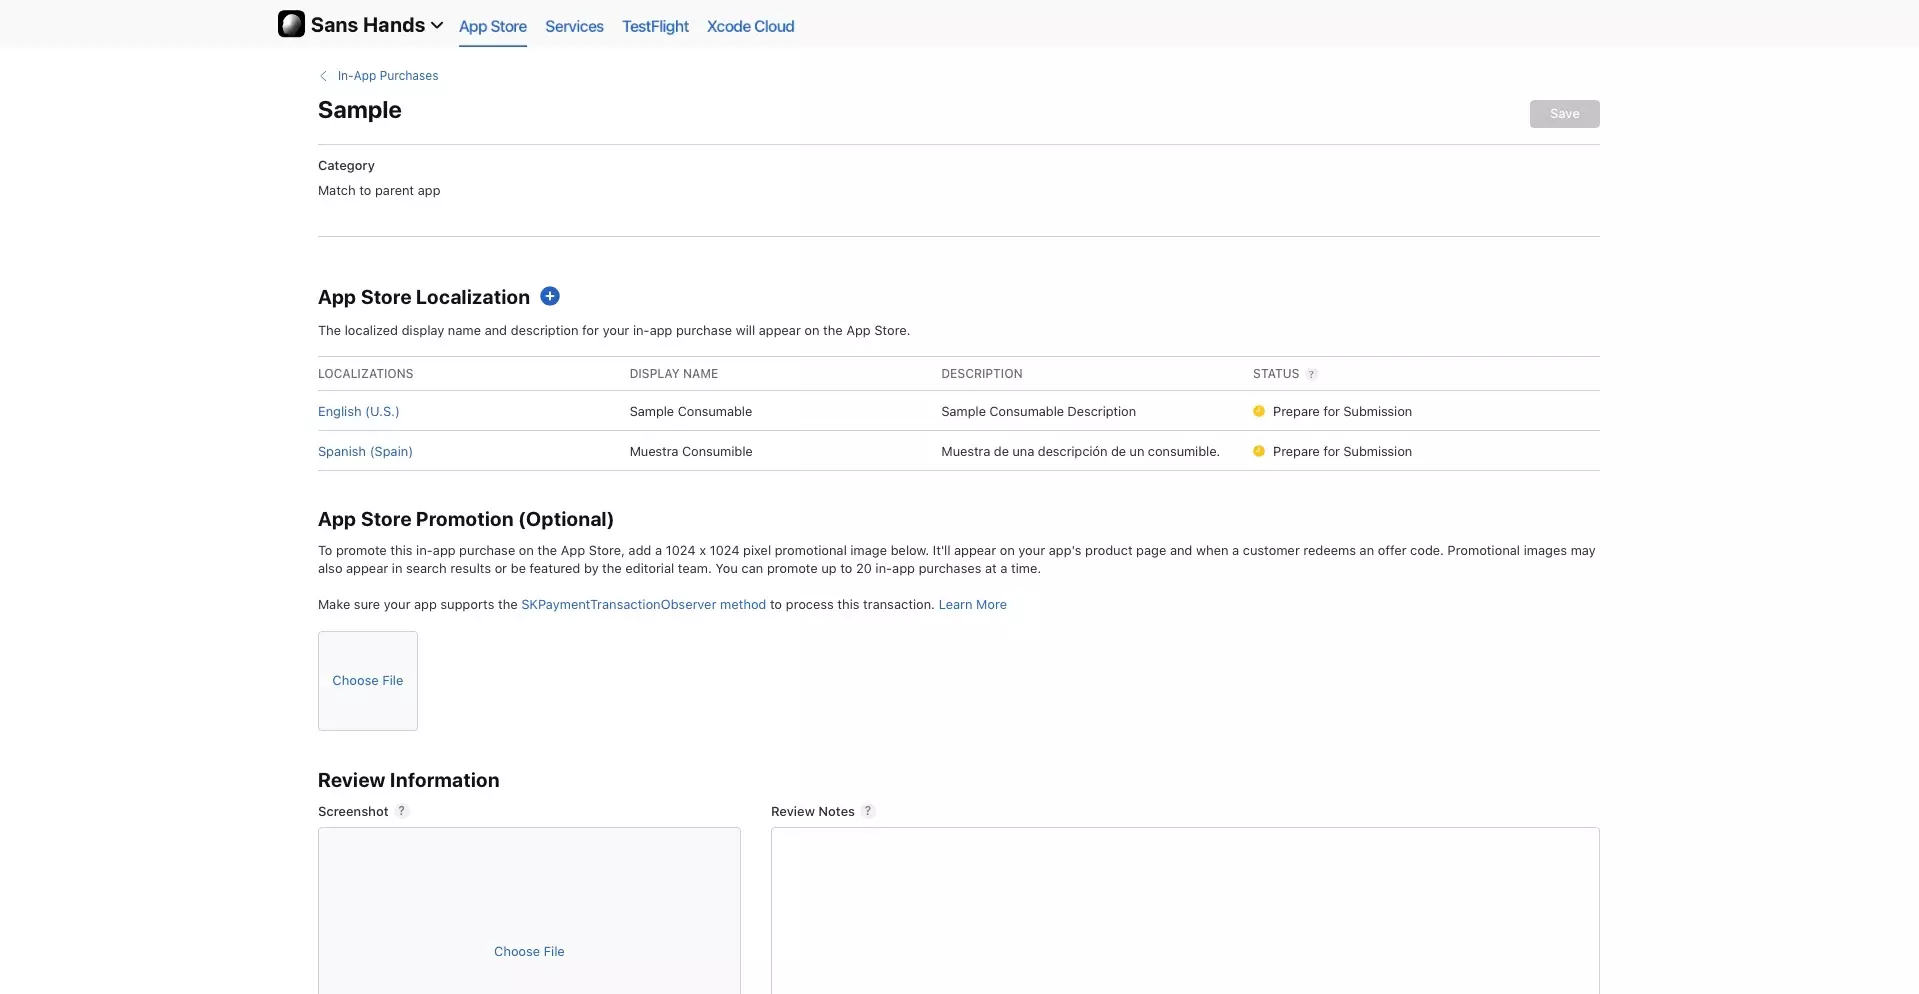
In the In-App Purchase page for the product you selected scroll down to the App Store Localization section.

Please note that this is the information that users see when they manage their products.

A | Select +

A screenshot of the In-App Purchases page for a product, with a highlight on the "+" button next to the  App Store Localization section title.

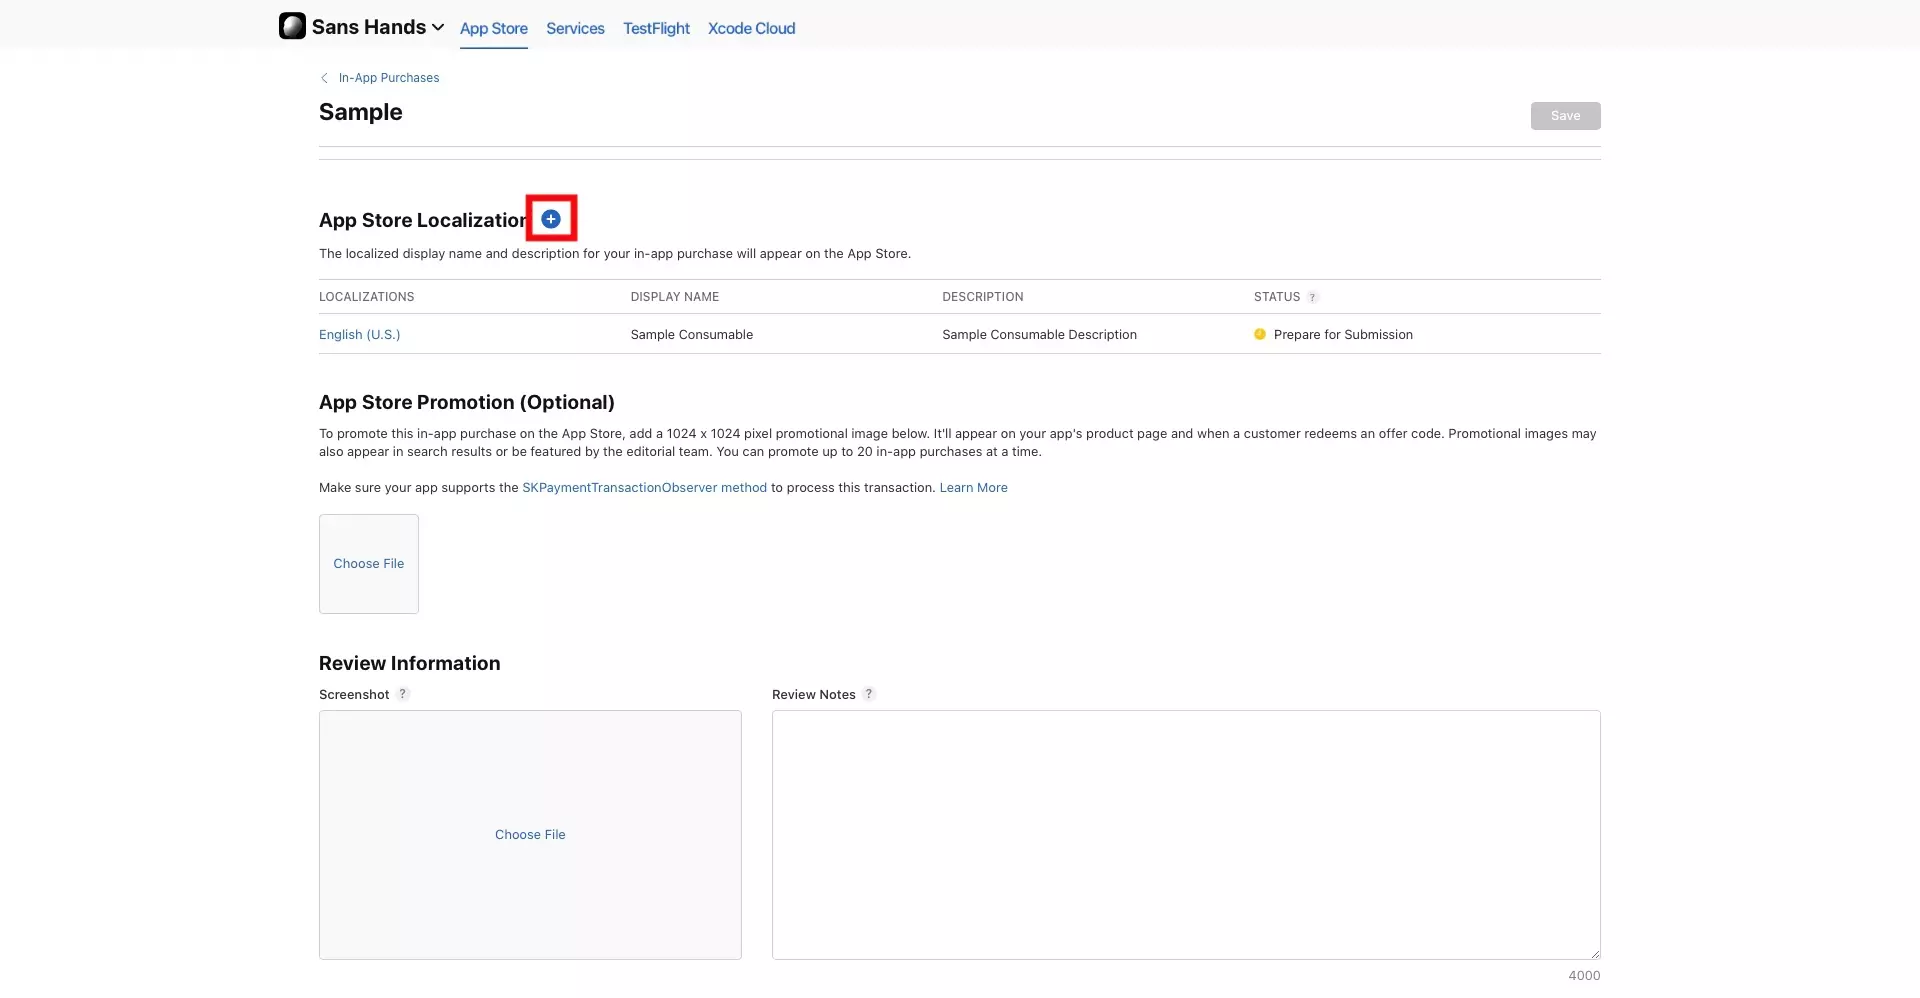
Click the "+" button next to the App Store Localization section title.

B | Fill in the details

A screenshot of the modal that appears when you add a new localization. Highlighted is the area that holds the details that you must input. These are outlined below.

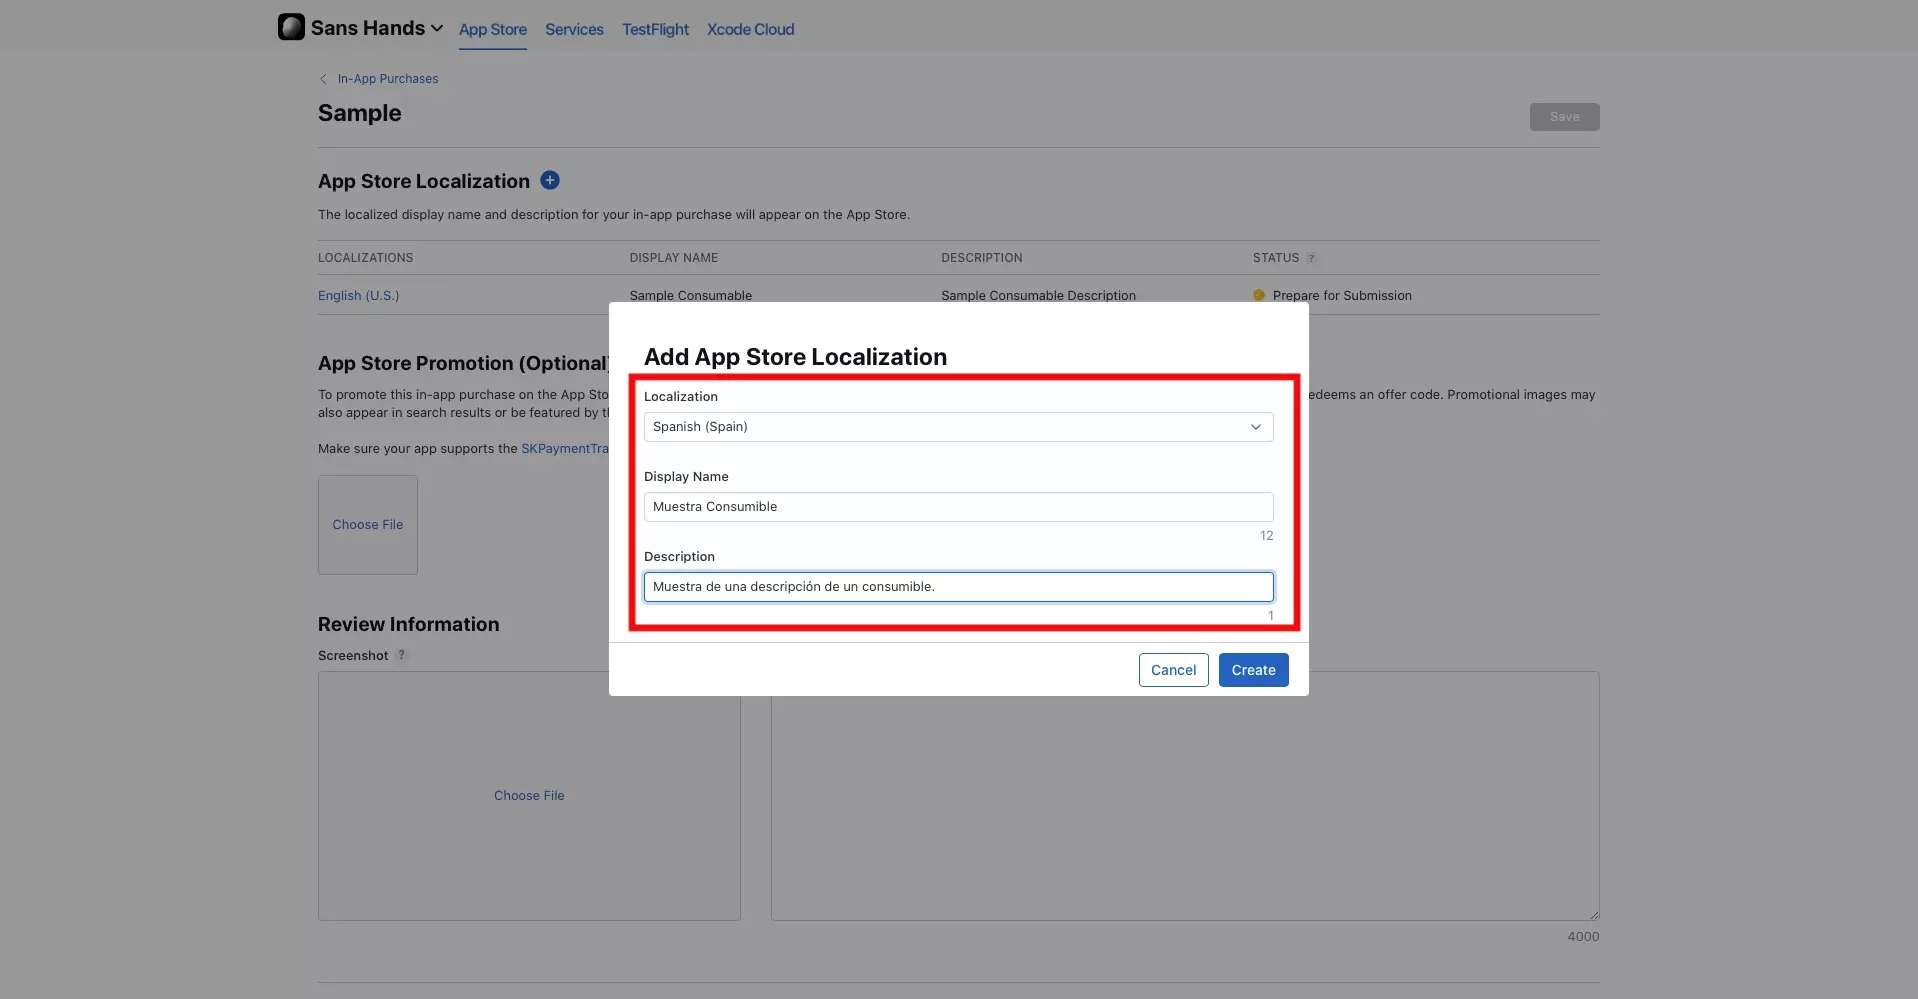
Select the localized region that you wish to create the localization for using the localization dropdown.

Subsequently, add the Display Name and Description for that locale.

C | Select Create

A screenshot of the modal that appears when you add a new App Store Localization. The details have been filled in and highlighted on the bottom right is the "Create" button, which must be pressed once everything looks good to add the localization to the product.

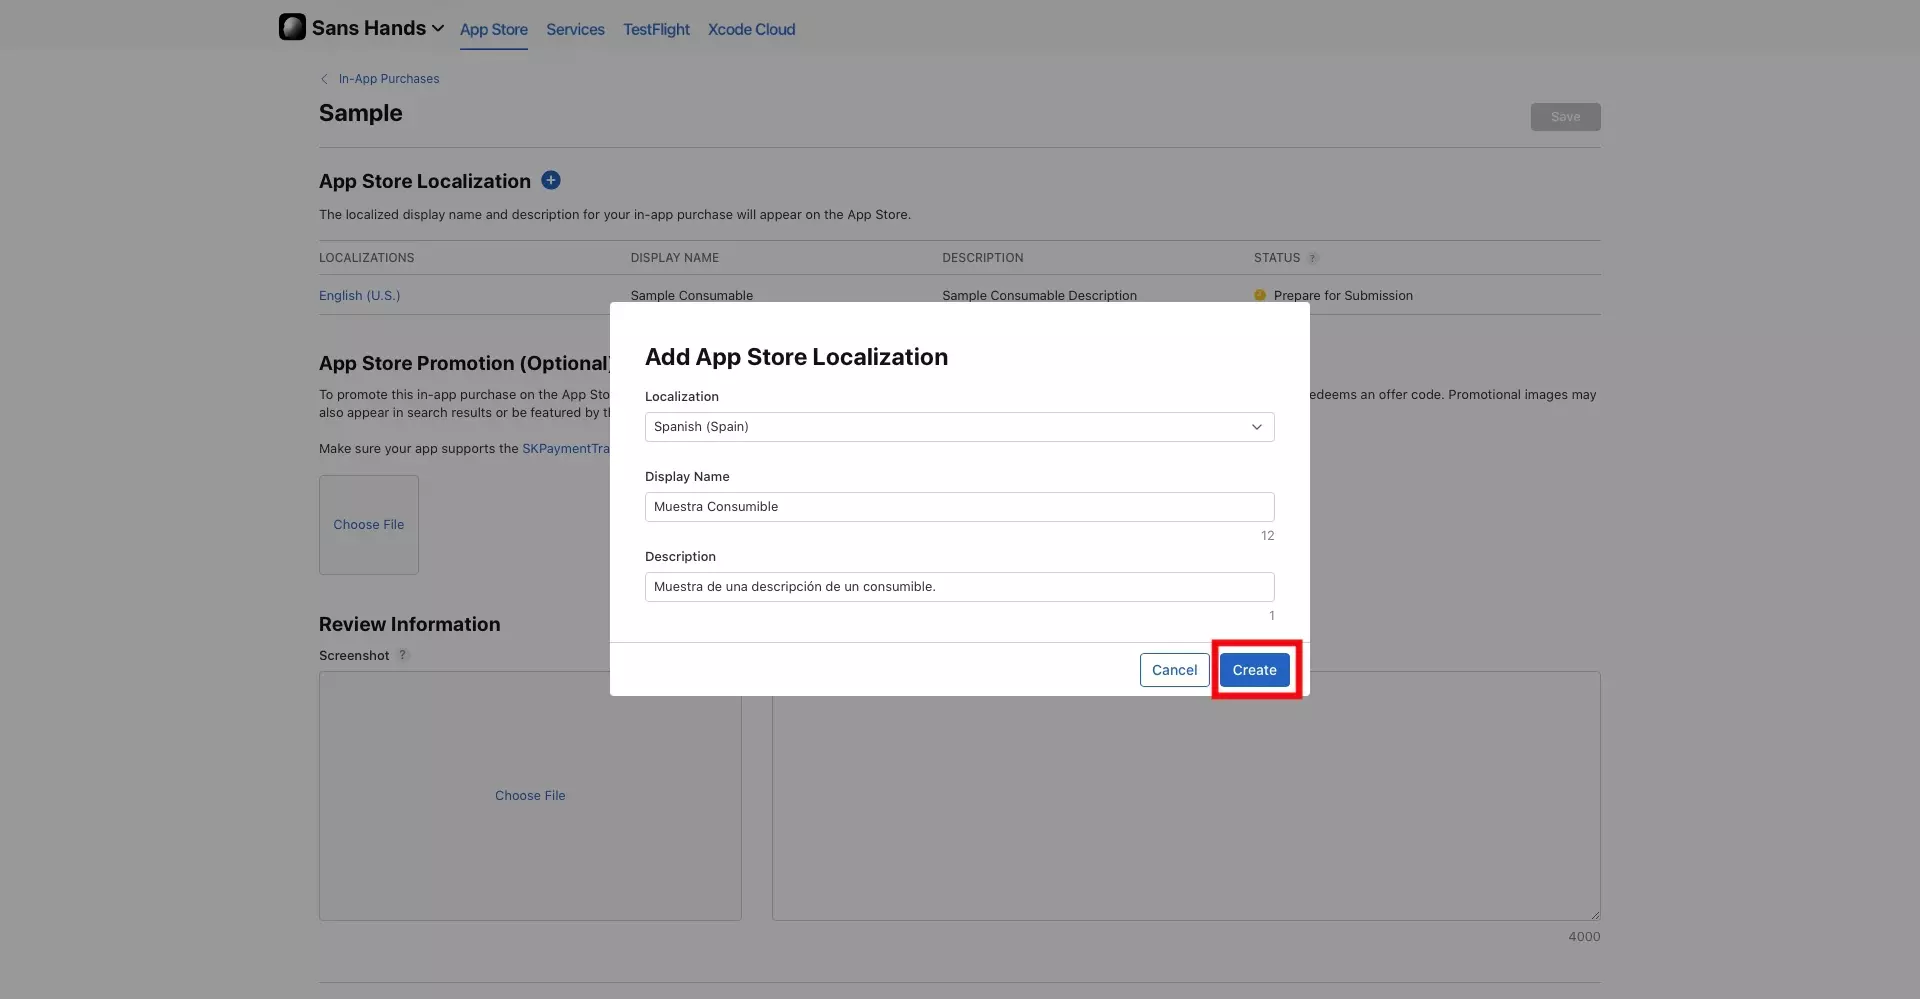
Click the create button to complete this tutorial.

As noted above, you do not need to "Save" your In-App Purchase in order for the new localizations to be saved to your In-App Purchase.

Any Questions?

We are actively looking for feedback on how to improve this resource. Please send us a note to inquiries@delasign.com with any thoughts or feedback you may have.
SubscribeContact UsVisit our BlogView our ServicesView our Work

Partner with us

We would love to get to know you and see how we can help your organization with its goals and needs.
Let's Talk

Stay Informed

Get occasional updates about our company, research, and product launches.
Subscribe