How to add ktlint and spotless to an Android project
A step by step guide on creating a ktlint and spotless enabled Kotlin Android project in Android Studio. Open Source GitHub repository included.

A step by step guide on creating a ktlint and spotless enabled Kotlin Android project in Android Studio. Open Source GitHub repository included.
SubscribeDownload Open Source Kotlin Starter ProjectDiscover ktlintDiscover SpotlessStep One: Install Dependencies
For ktlint and spotless to work, your machine must have java installed as well as ktlint.
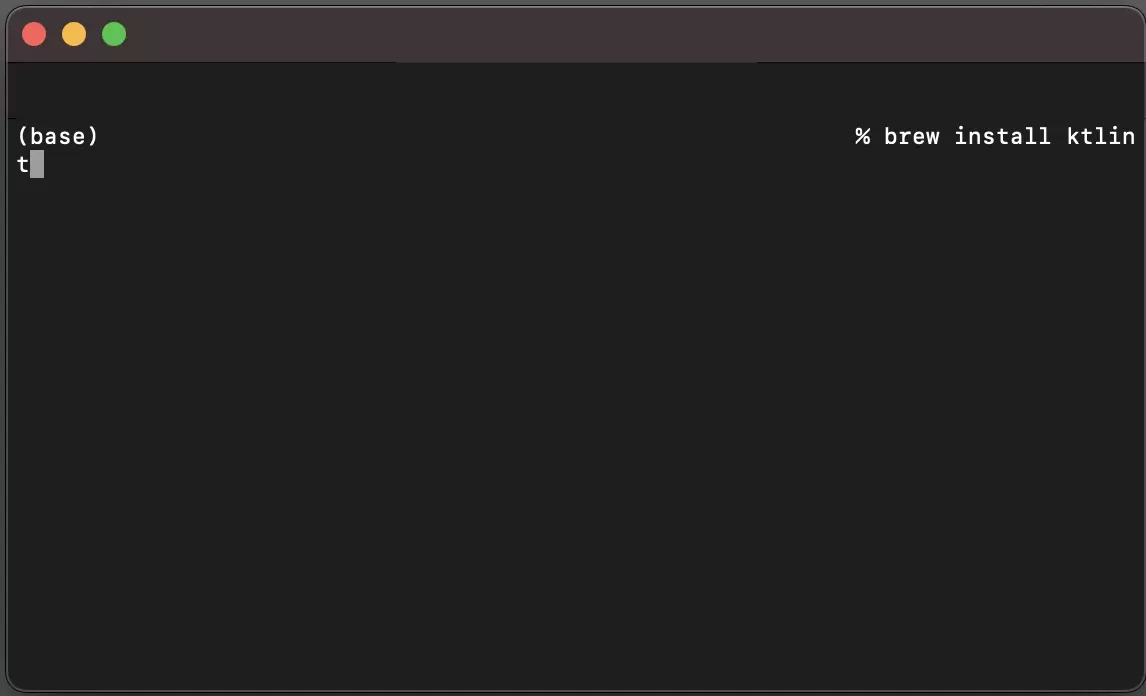
A | Make sure Java is installed and can be located

Your terminal will look like this if it cannot locate Java.
In Terminal, run the following line:
java --versionIf you could not locate a Java runtime, run the following line to install java using brew.
brew install java; brew install oracle-jdk --caskOnce you're done, run java --version again to make sure it registered.
B | Install ktlint
In Terminal, run the following line:
brew install ktlintStep Two: Upgrade Project Build Gradle
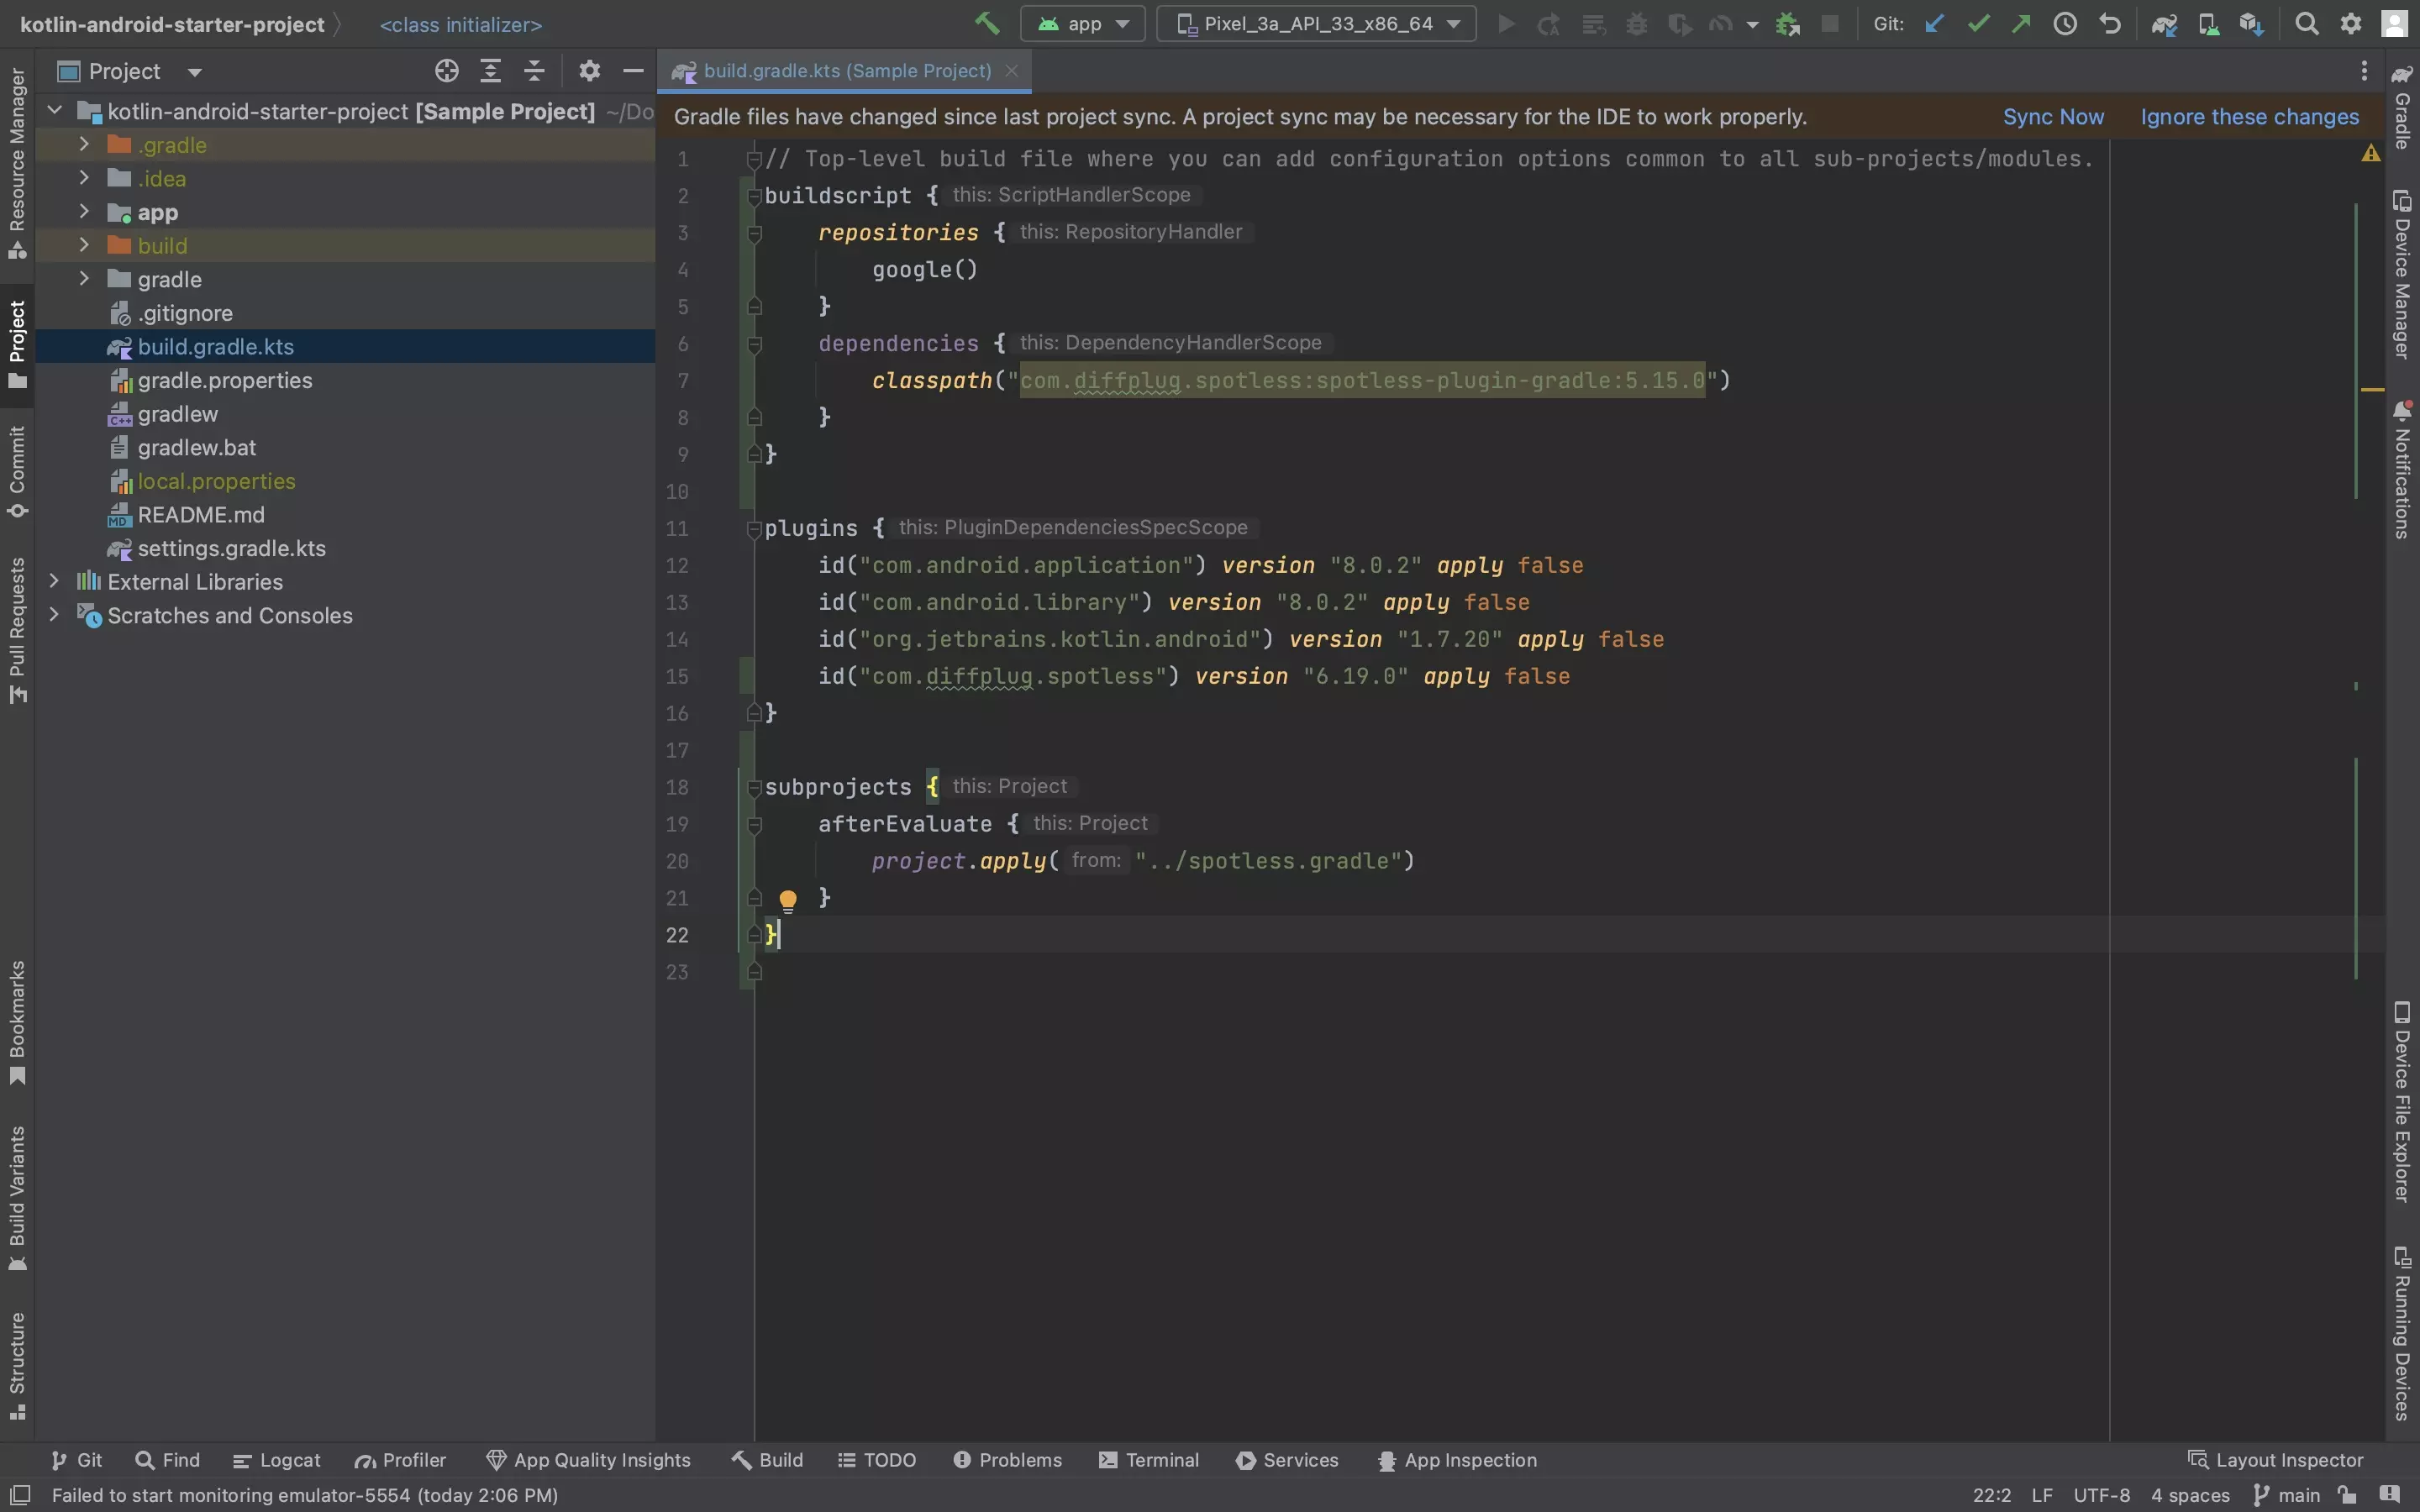
Please note that the spotless plugin and class path versions are not the latest and may be different in the code provided. Please use Android Studio to use the latest version available for the plugin and class path.
Open the project level build.gradle.kts and make the following changes.
A | Add the dependencies
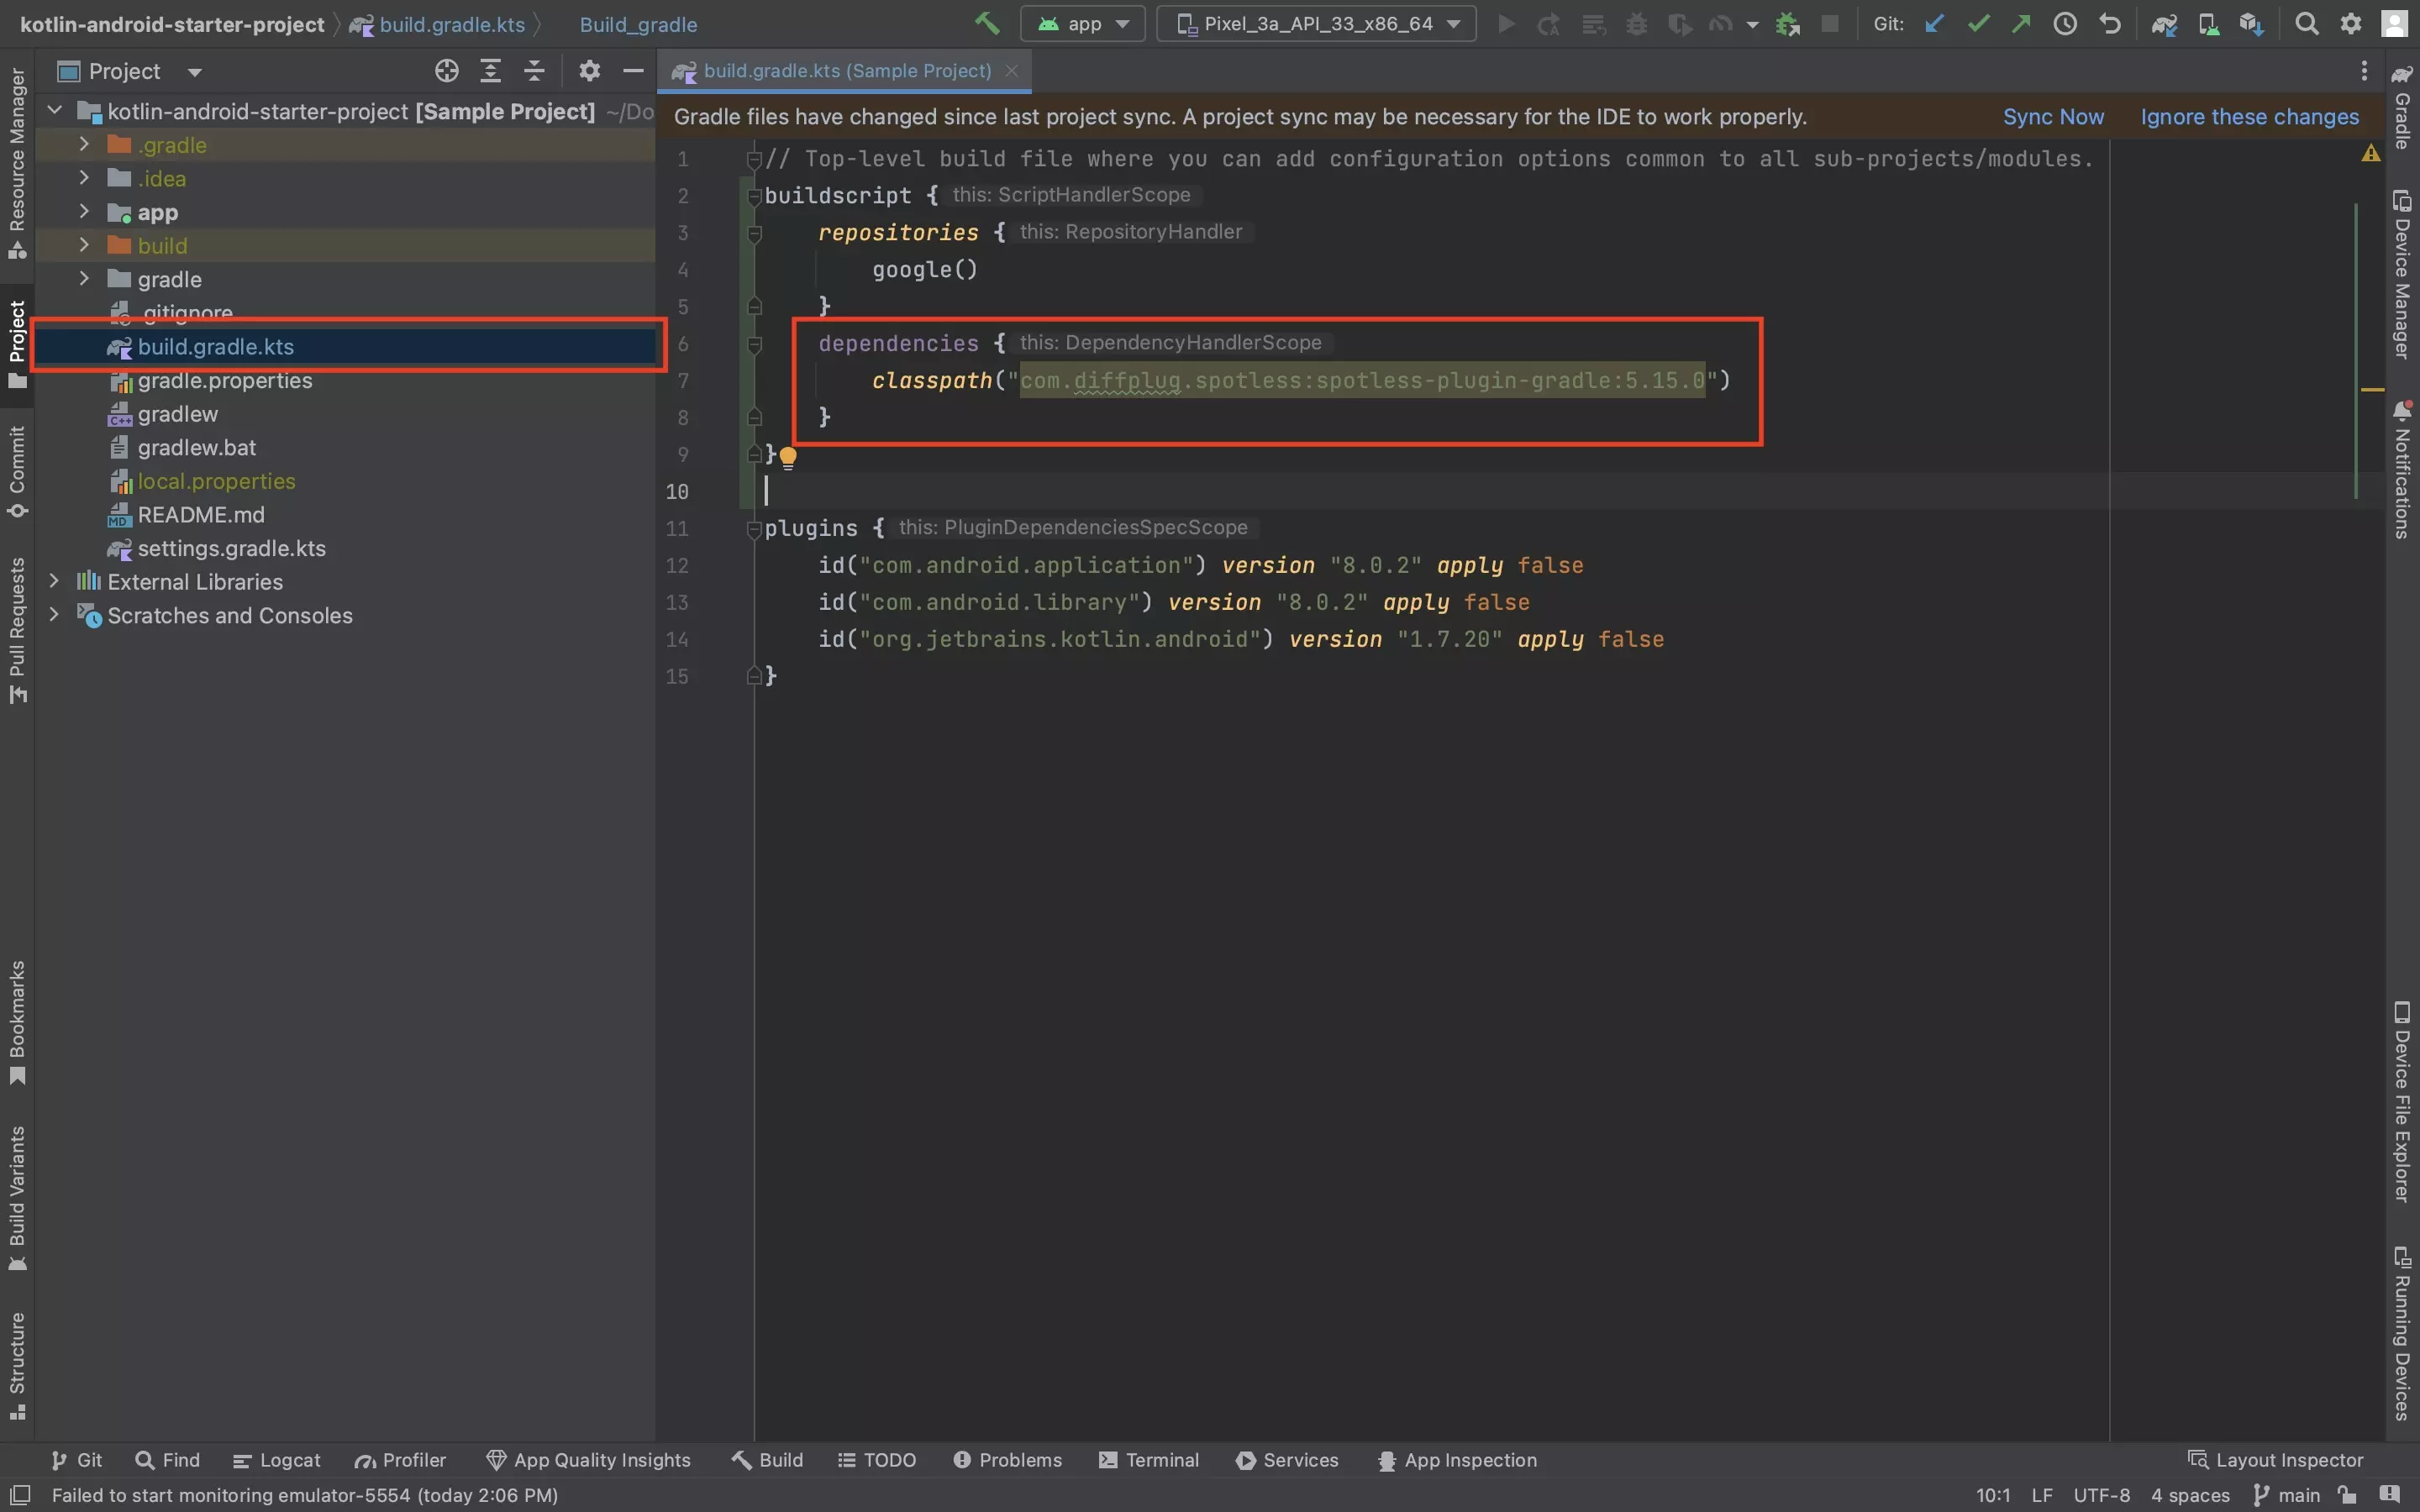
Please note that the spotless plugin and class path versions are not the latest and may be different in the code provided. Please use Android Studio to use the latest version available for the plugin and class path.
Add the Spotless dependency using code similar to that below.
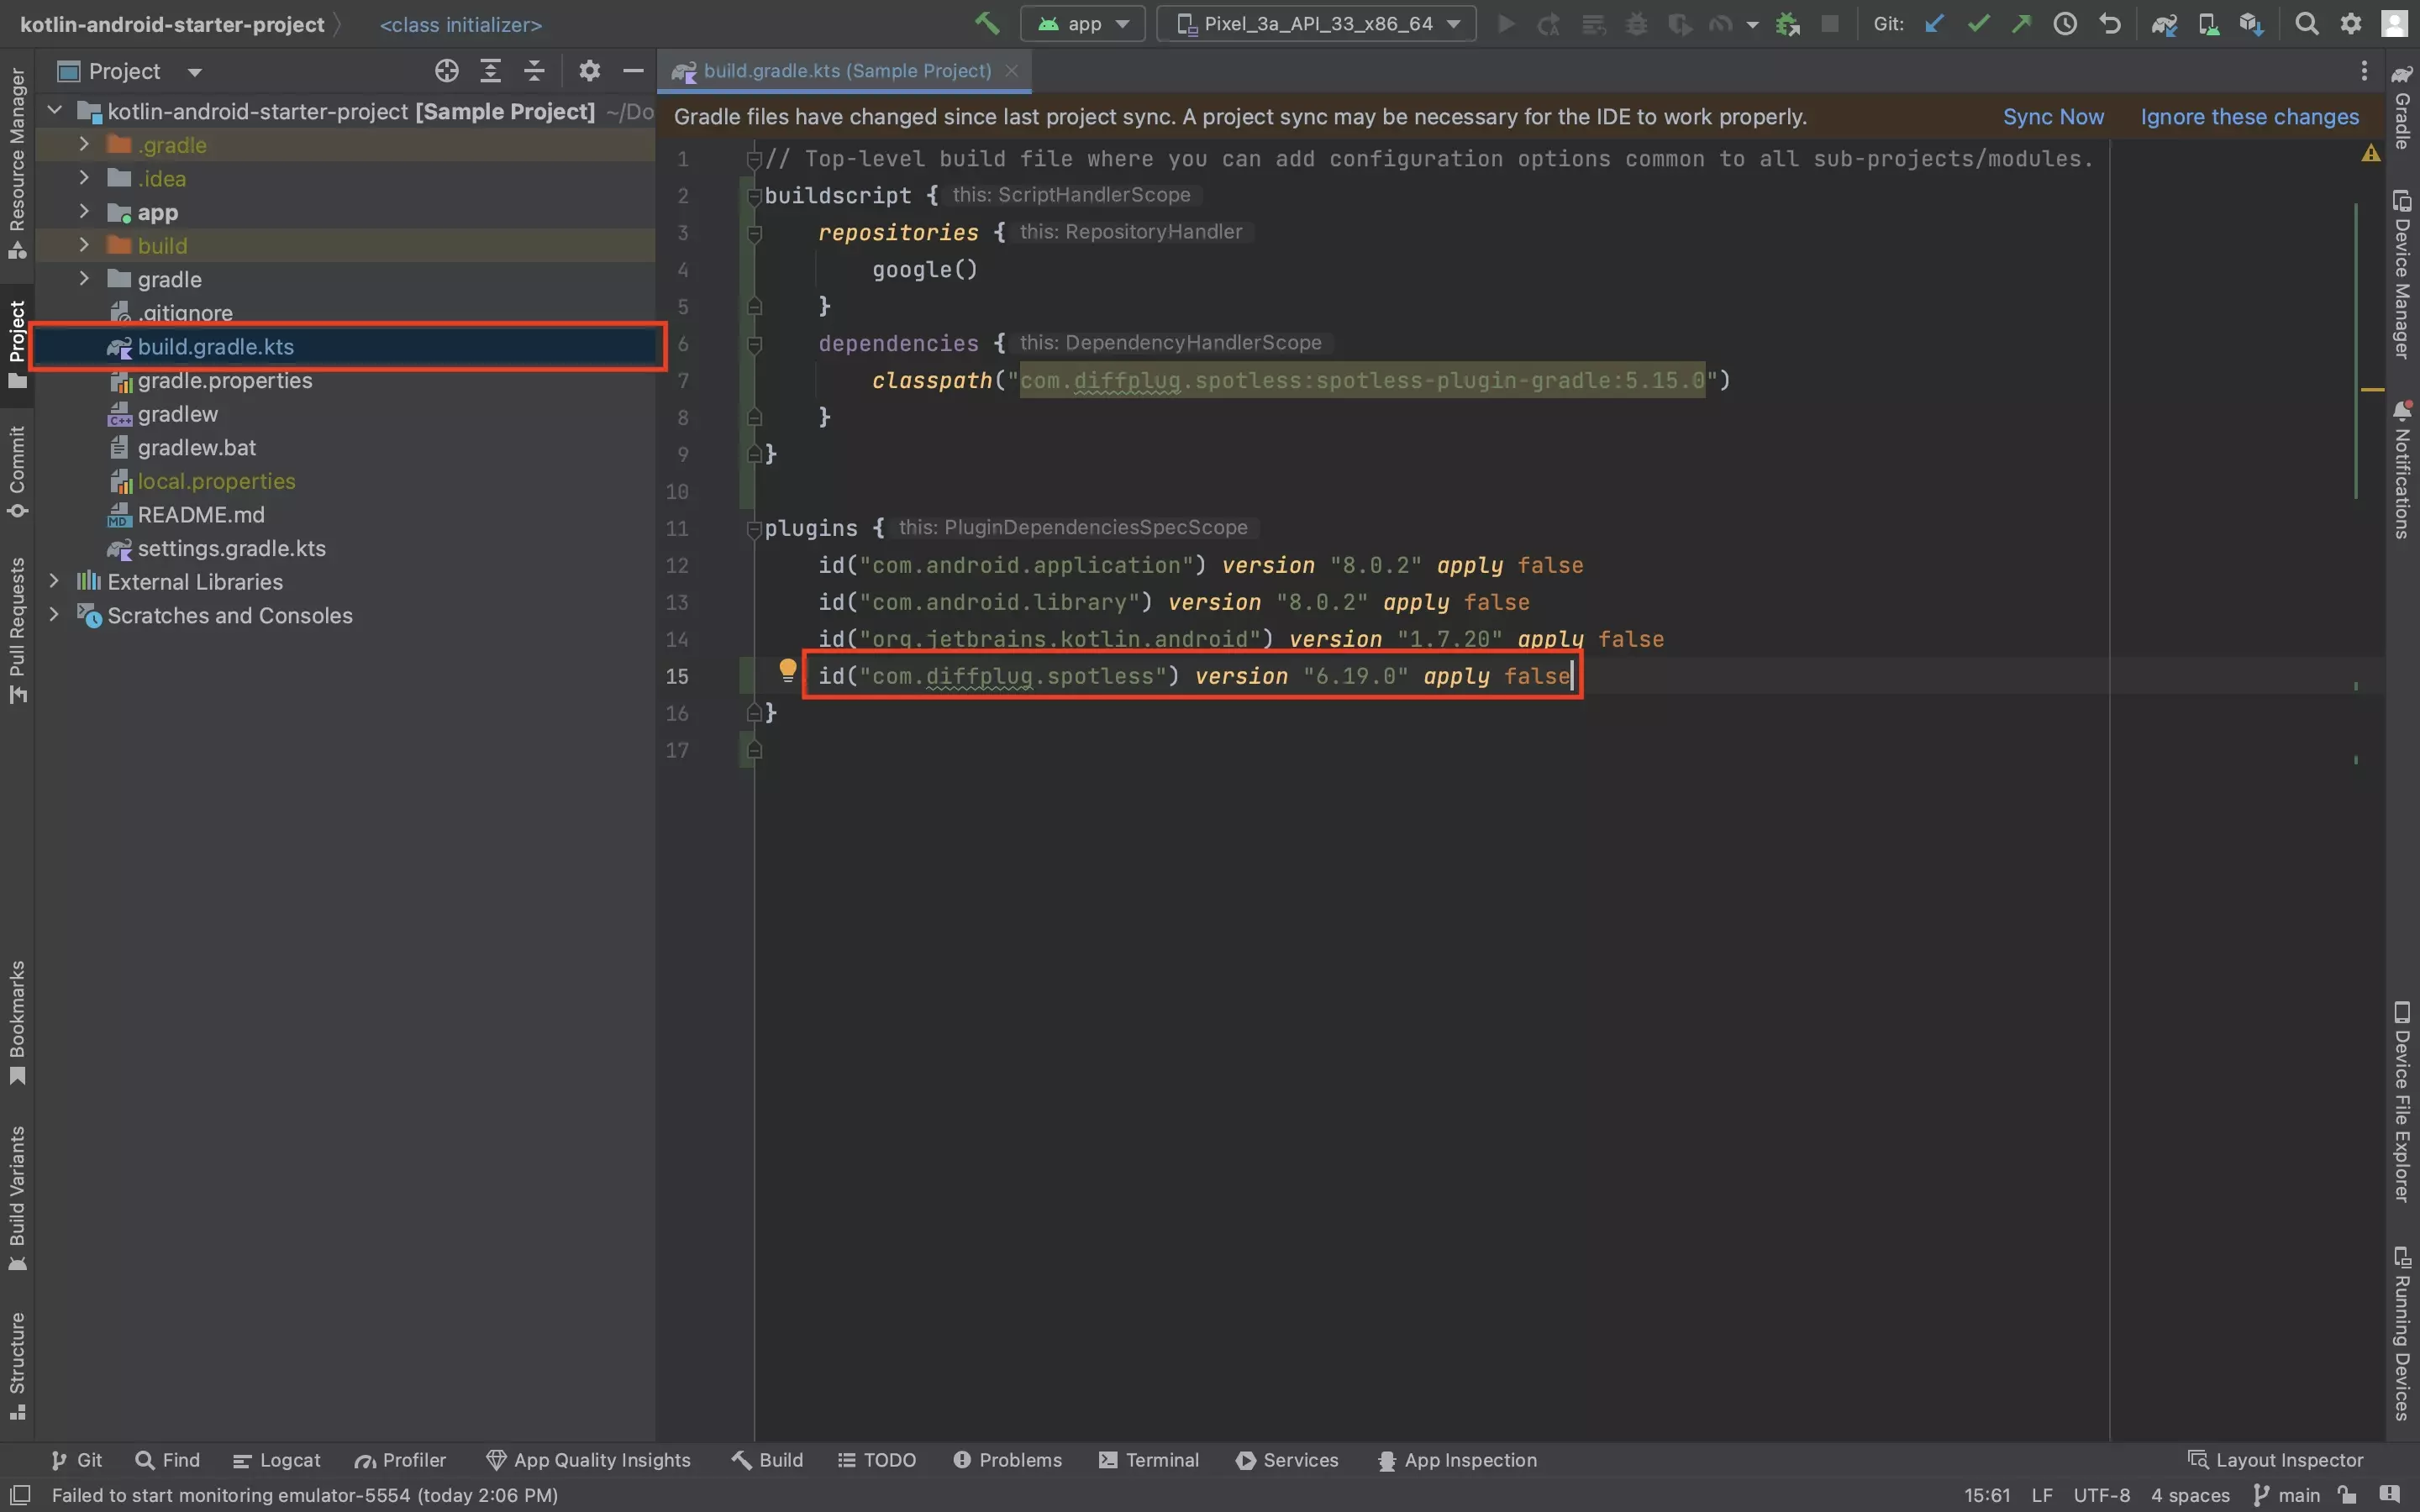
B | Add the plugin
Please note that the spotless plugin and class path versions are not the latest and may be different in the code provided. Please use Android Studio to use the latest version available for the plugin and class path.
Add the spotless plugin using code similar to that below
id("com.diffplug.spotless") version "6.19.0" apply falseC | Add the link to the spotless gradle
Please note that the spotless plugin and class path versions are not the latest and may be different in the code provided. Please use Android Studio to use the latest version available for the plugin and class path.
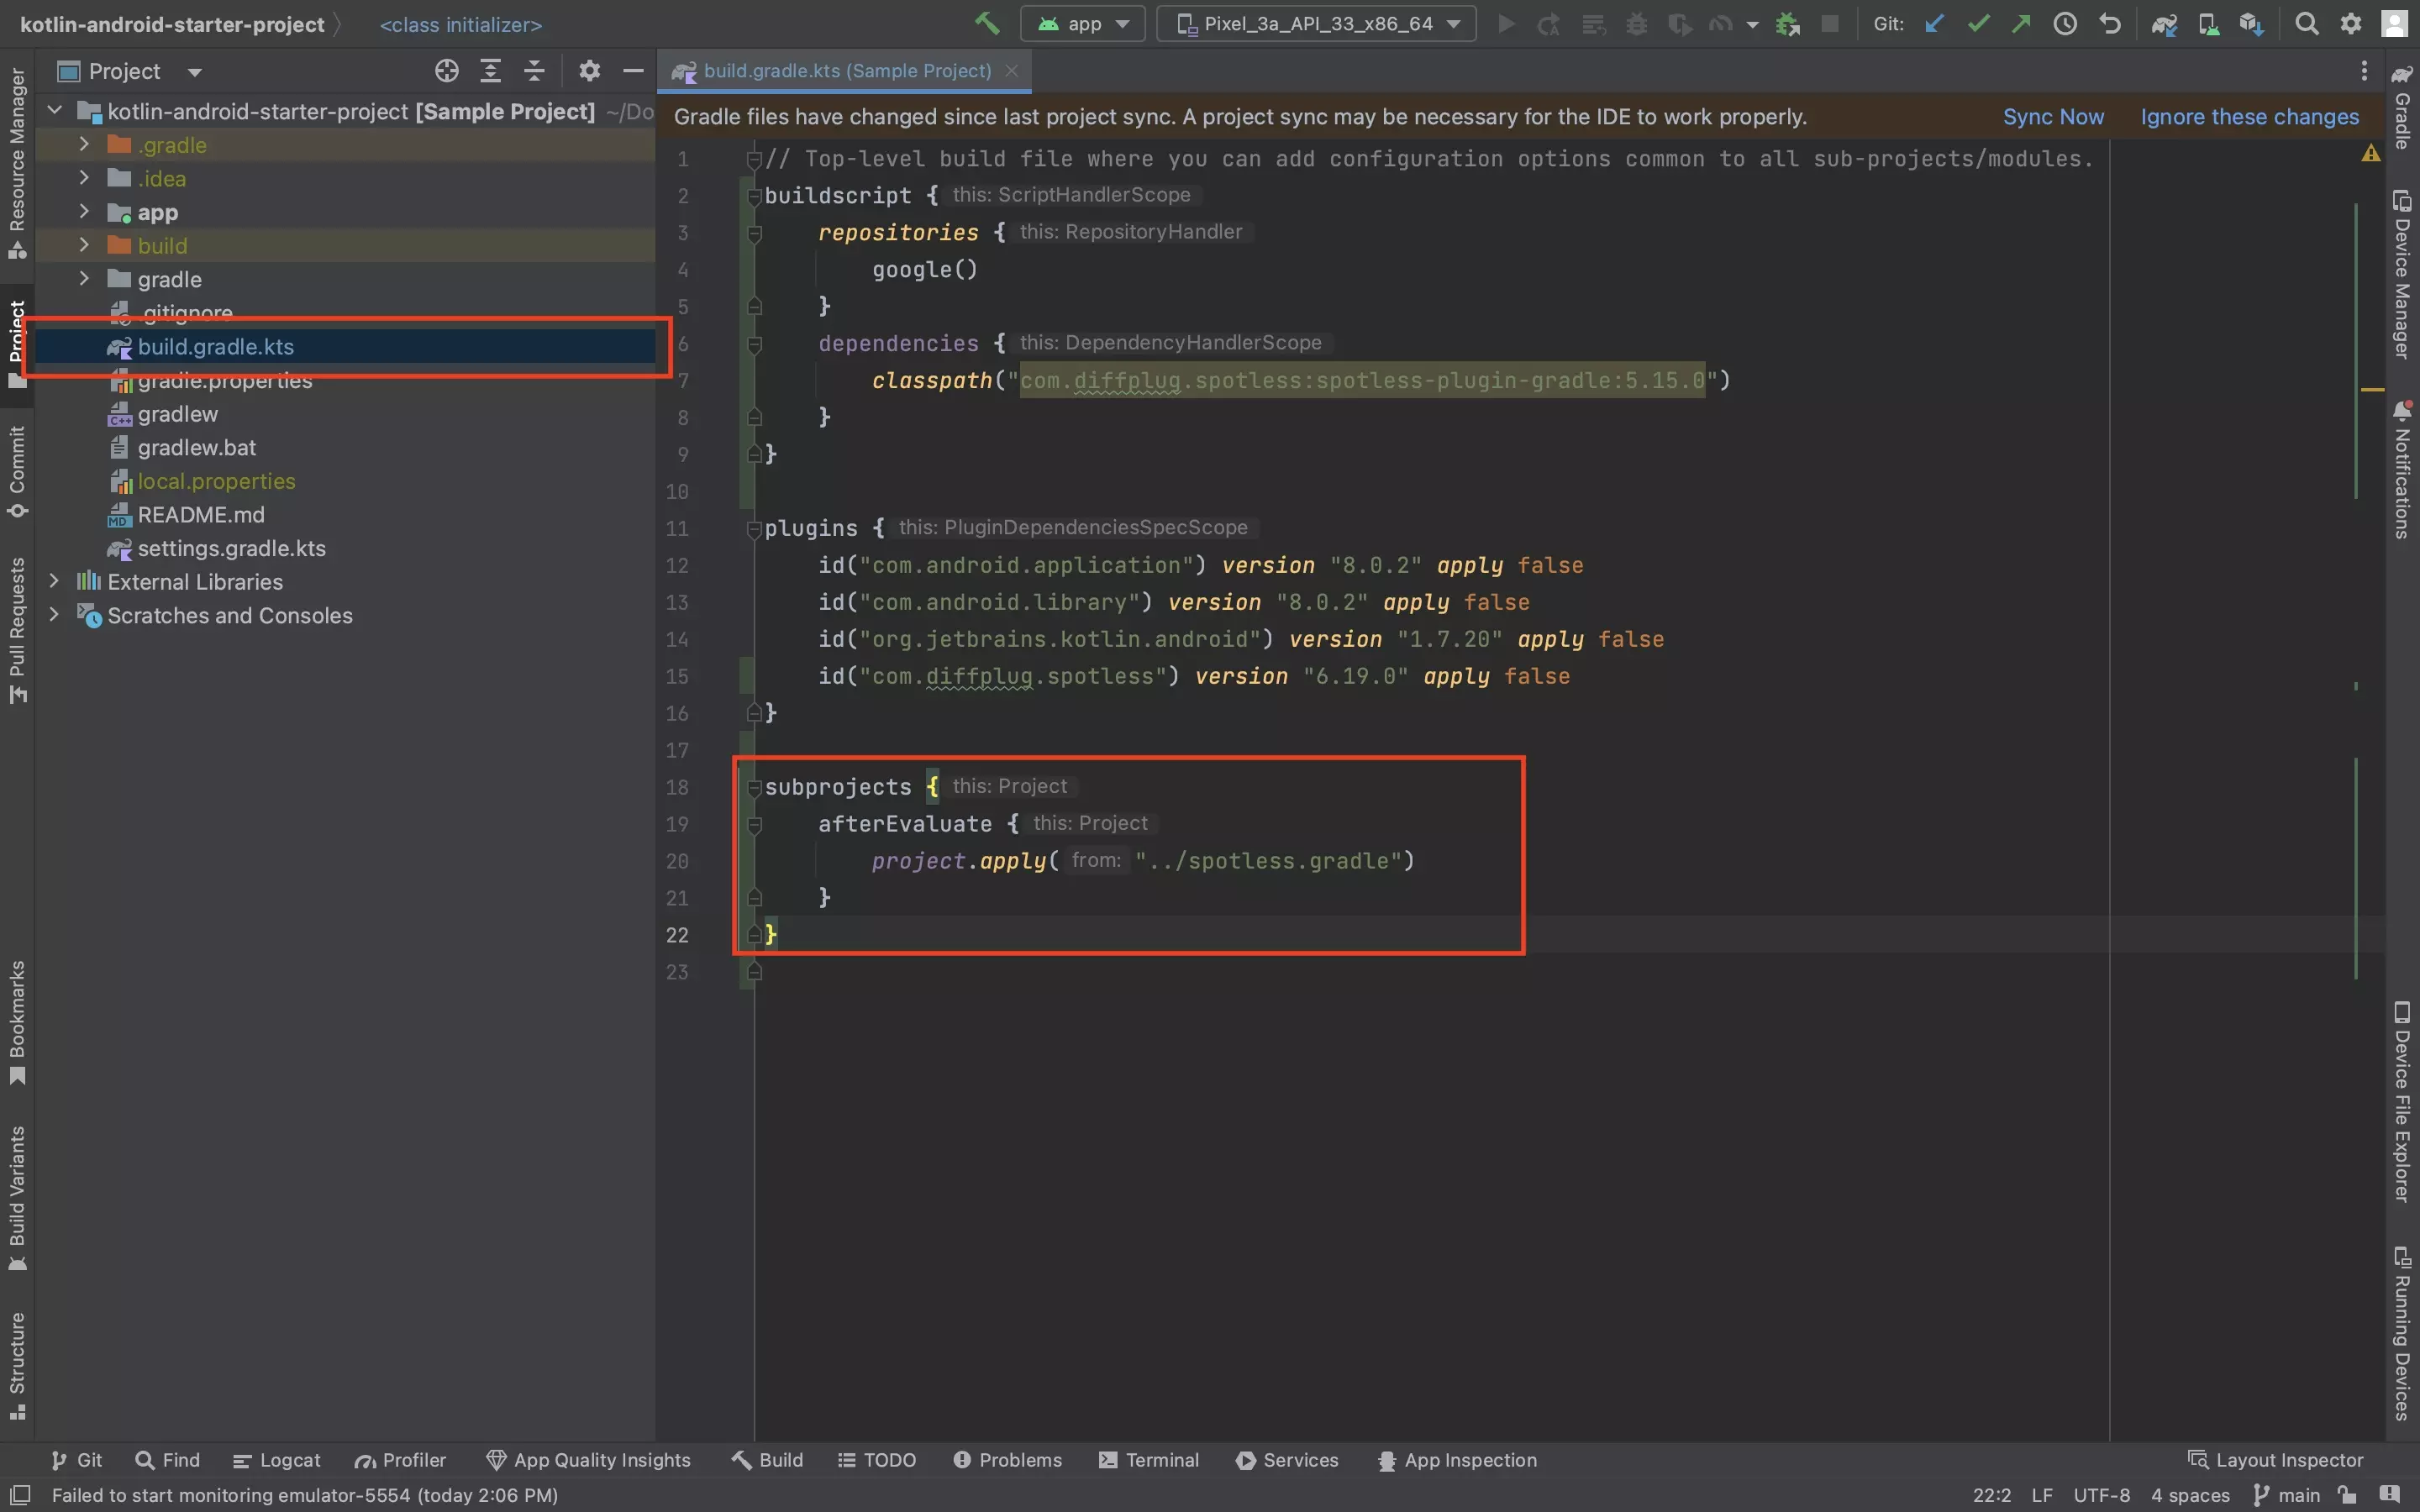
Finally, add the code below to the build.gradle.kts.
This code links the project to a Spotless gradle that sets the rules, which will be created in the next step.
Complete solution
If you are looking for the complete solution provided in our starter project, use the gist below.
Step Three: Create Spotless Gradle
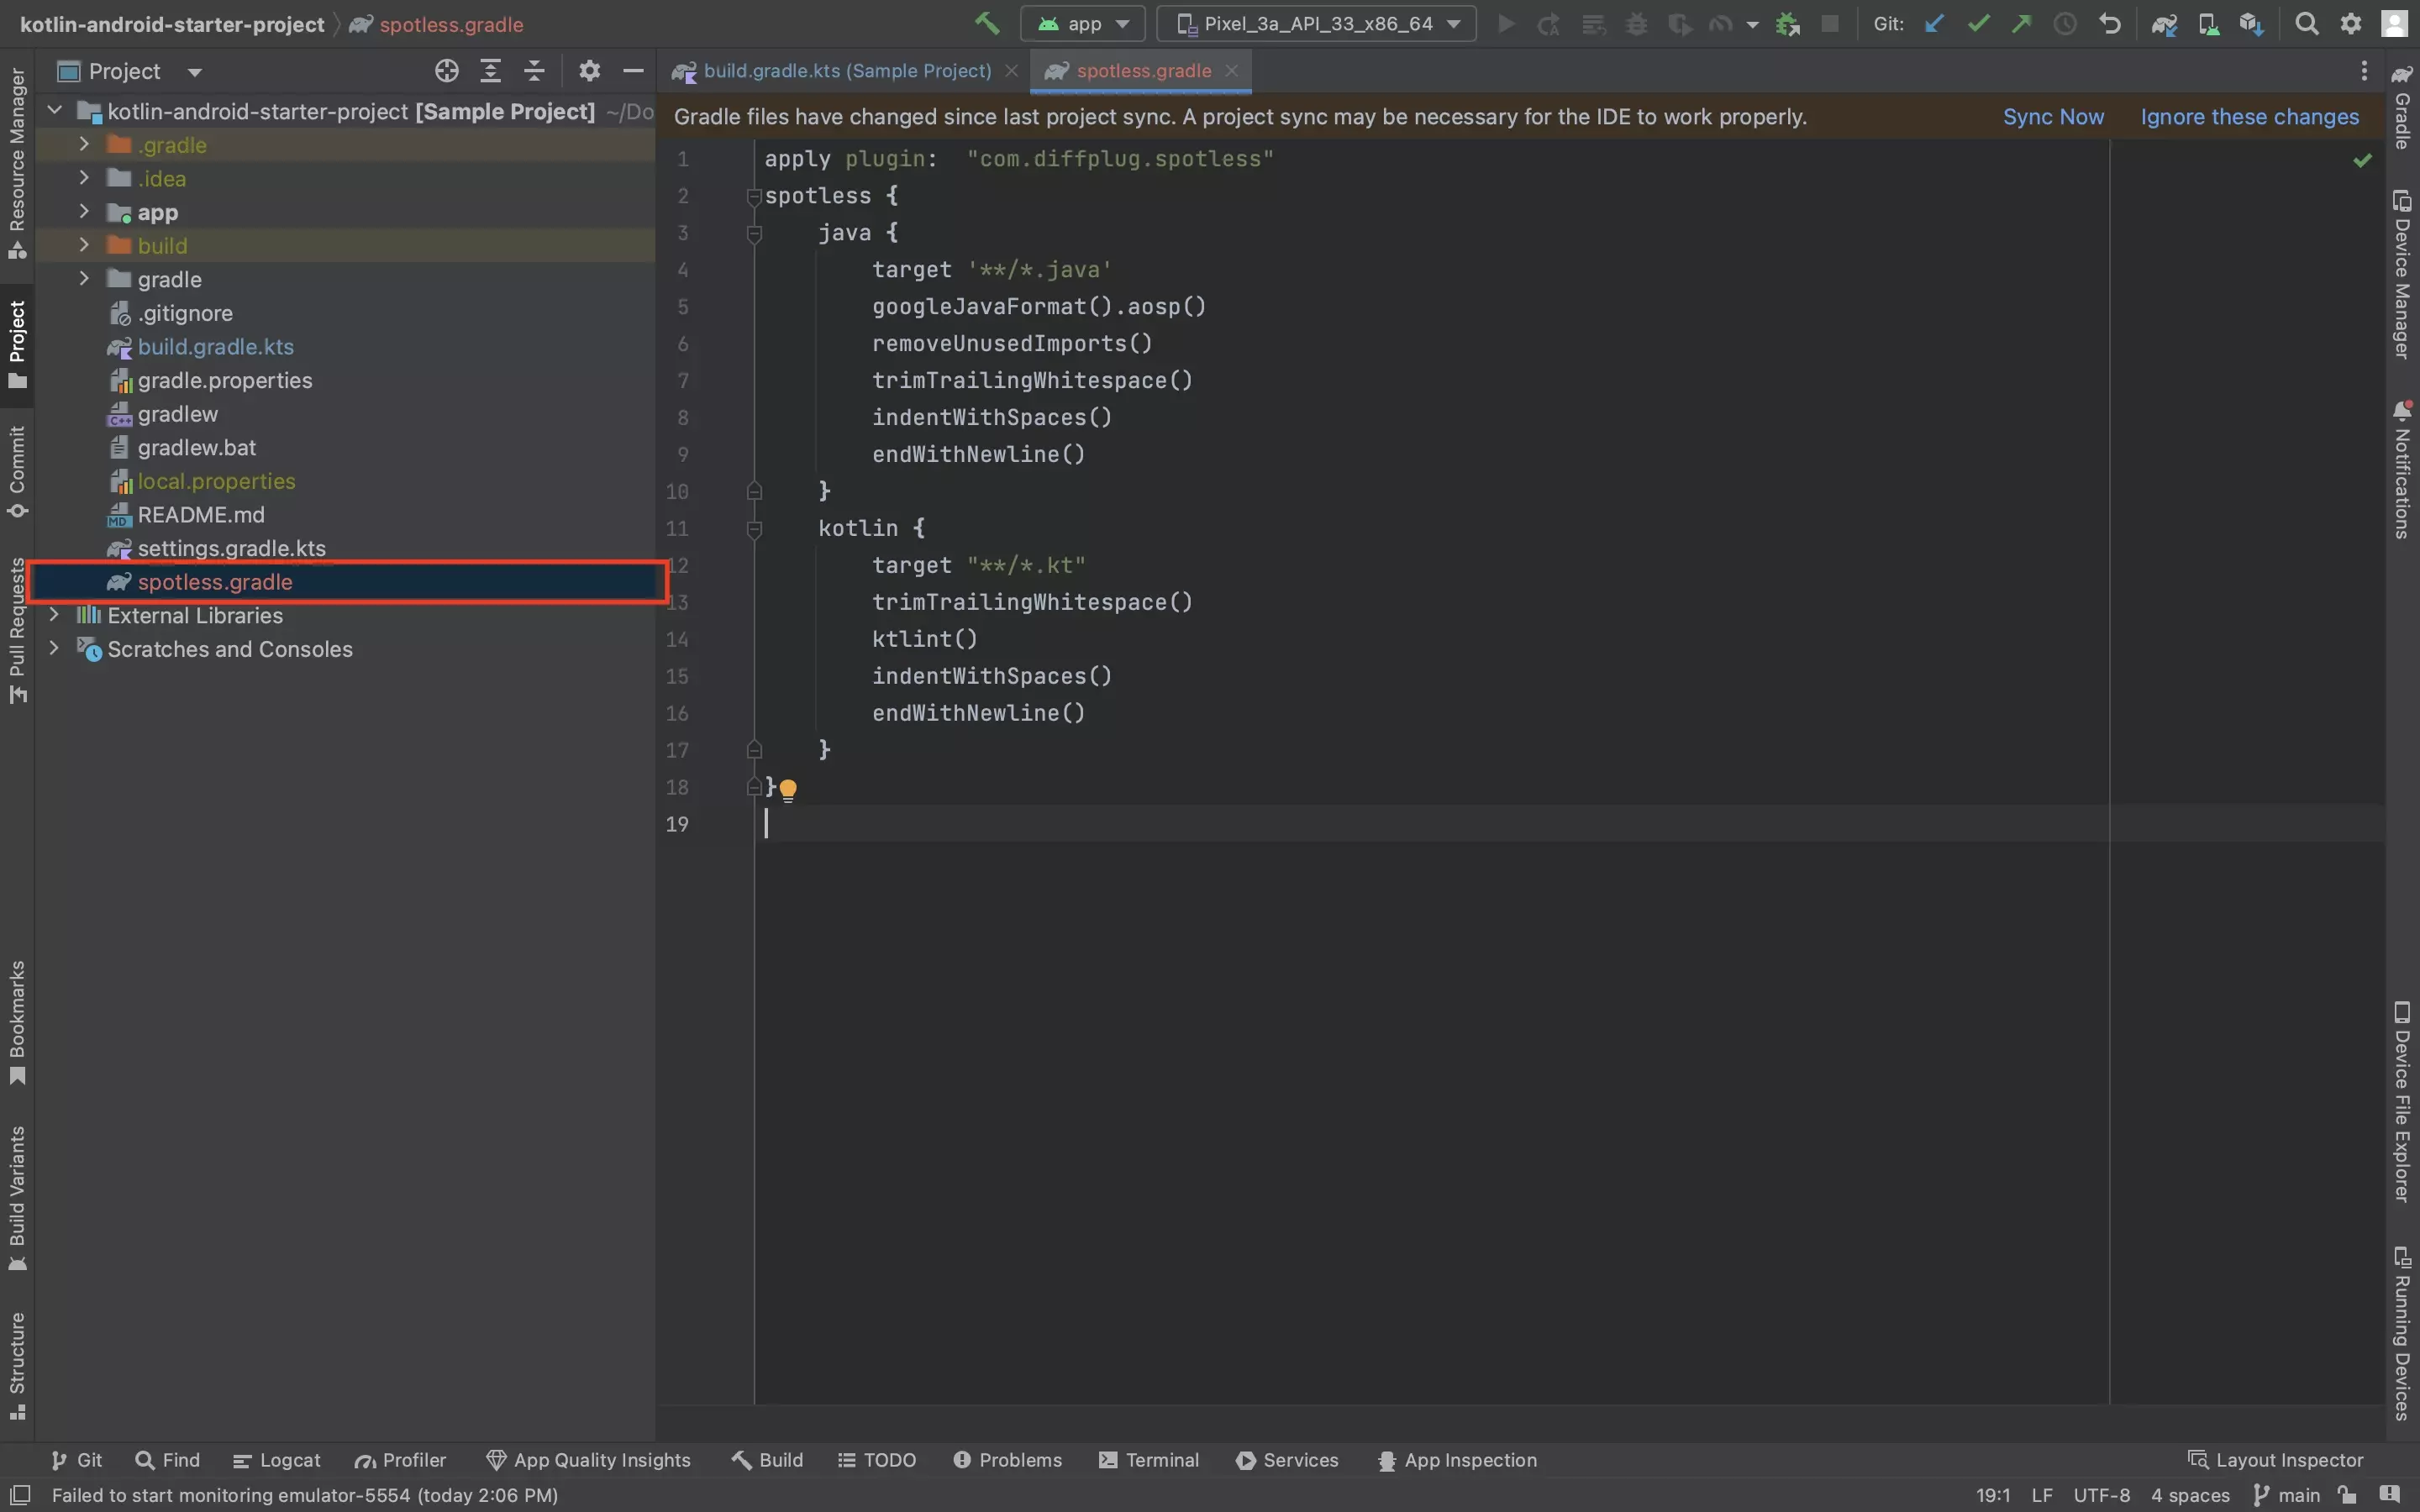
Create a new file at the root of your project called spotless.gradle and paste in the code below.
Note that there is no .kts extension.
To learn more about what you can do with this gradle file, consult the guide below.
Step Four: Sync Gradle
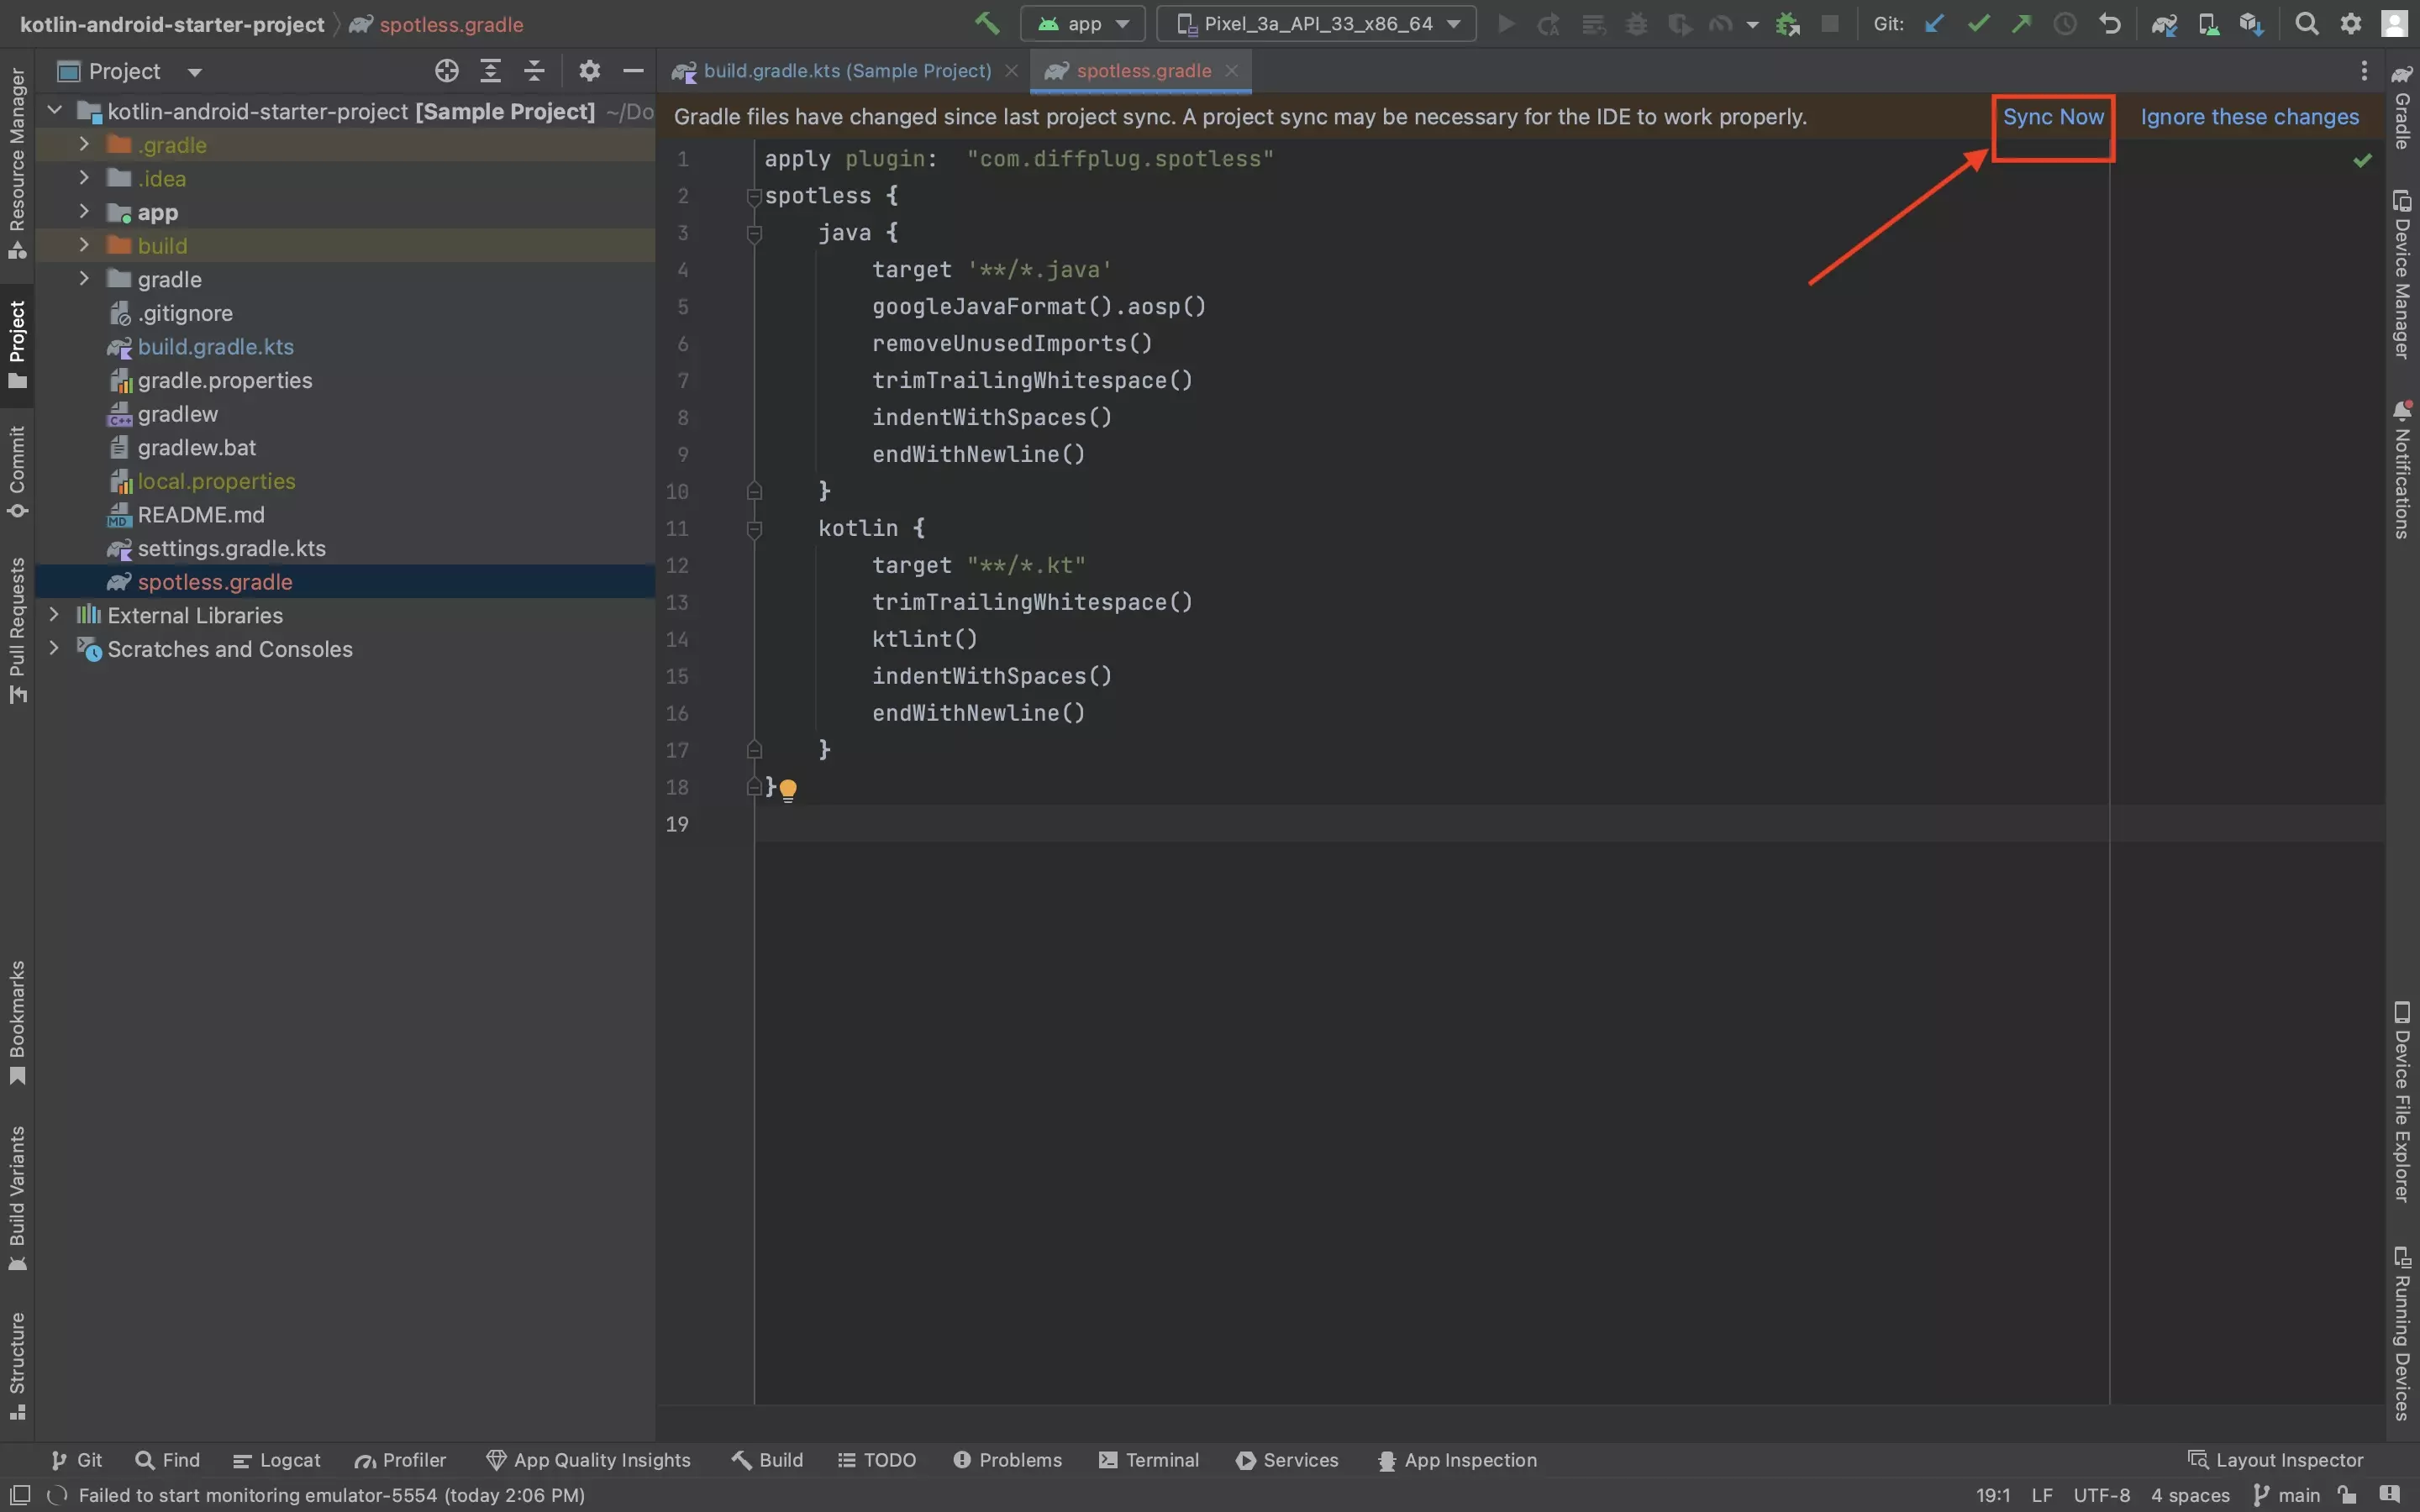
Press Sync Now to sync the Gradles.
Step Five: Test
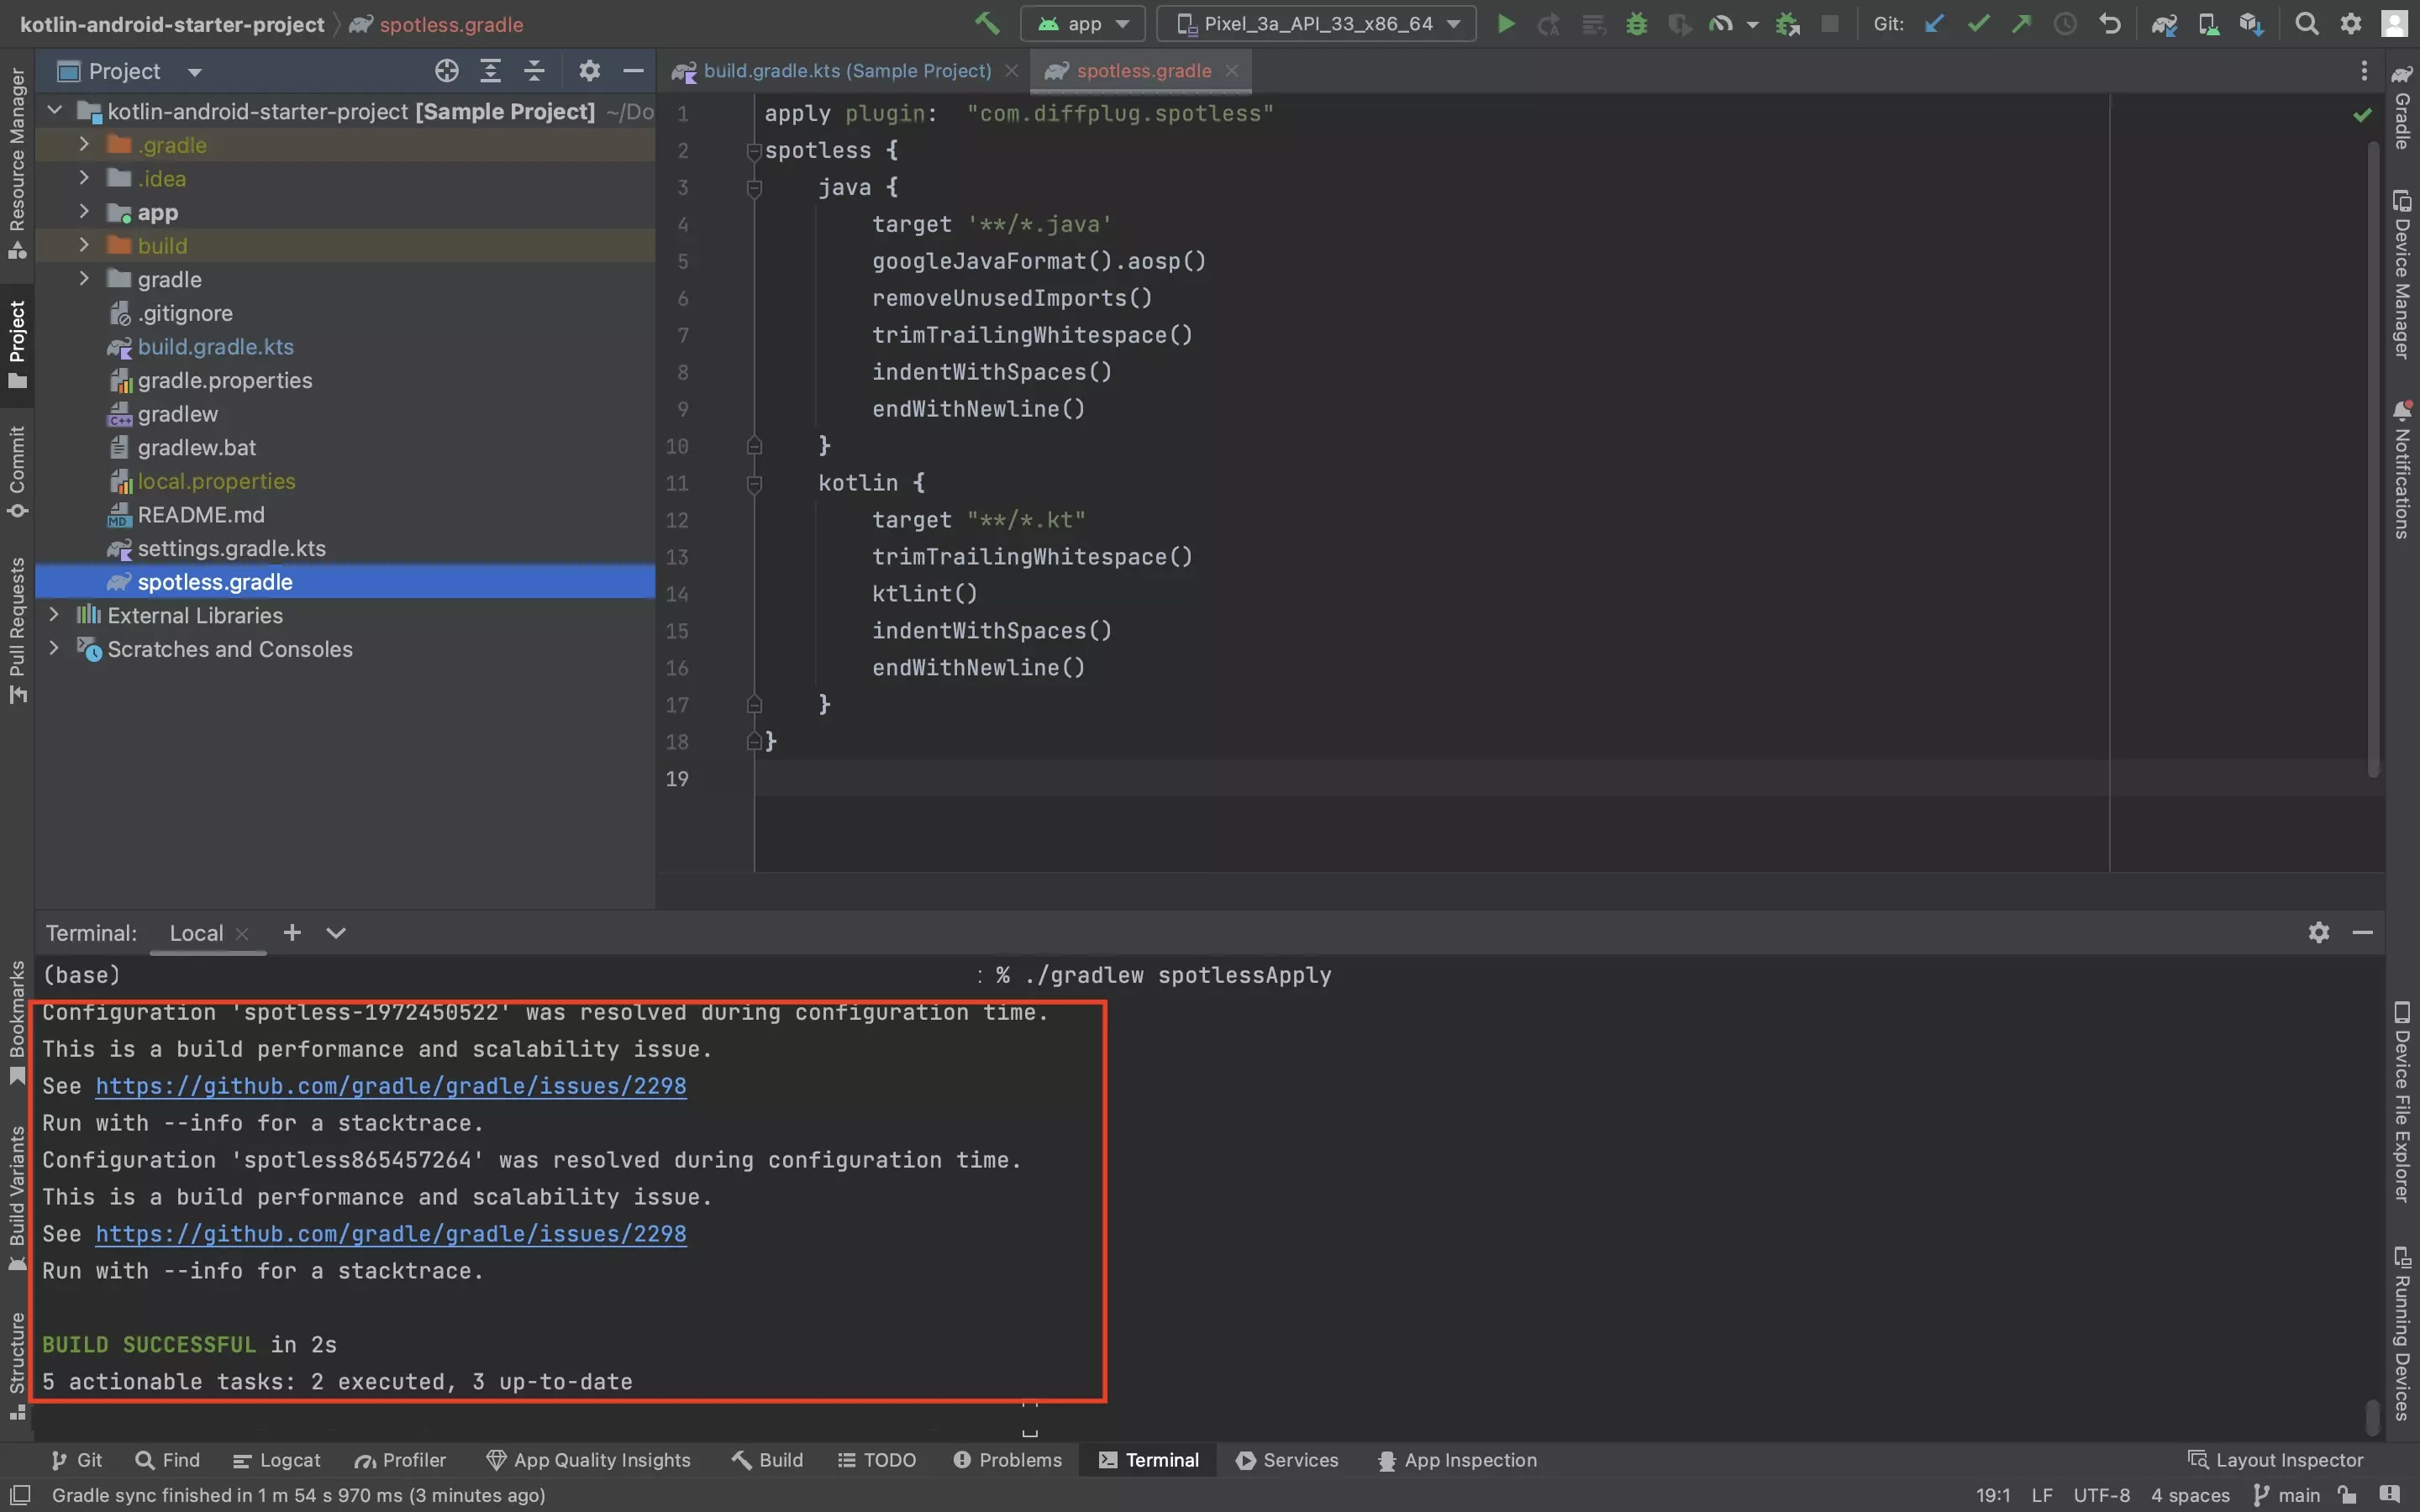
In the Android Studio Terminal, run the following line:
./gradlew spotlessApplyIf it is successful it will look like the image above.
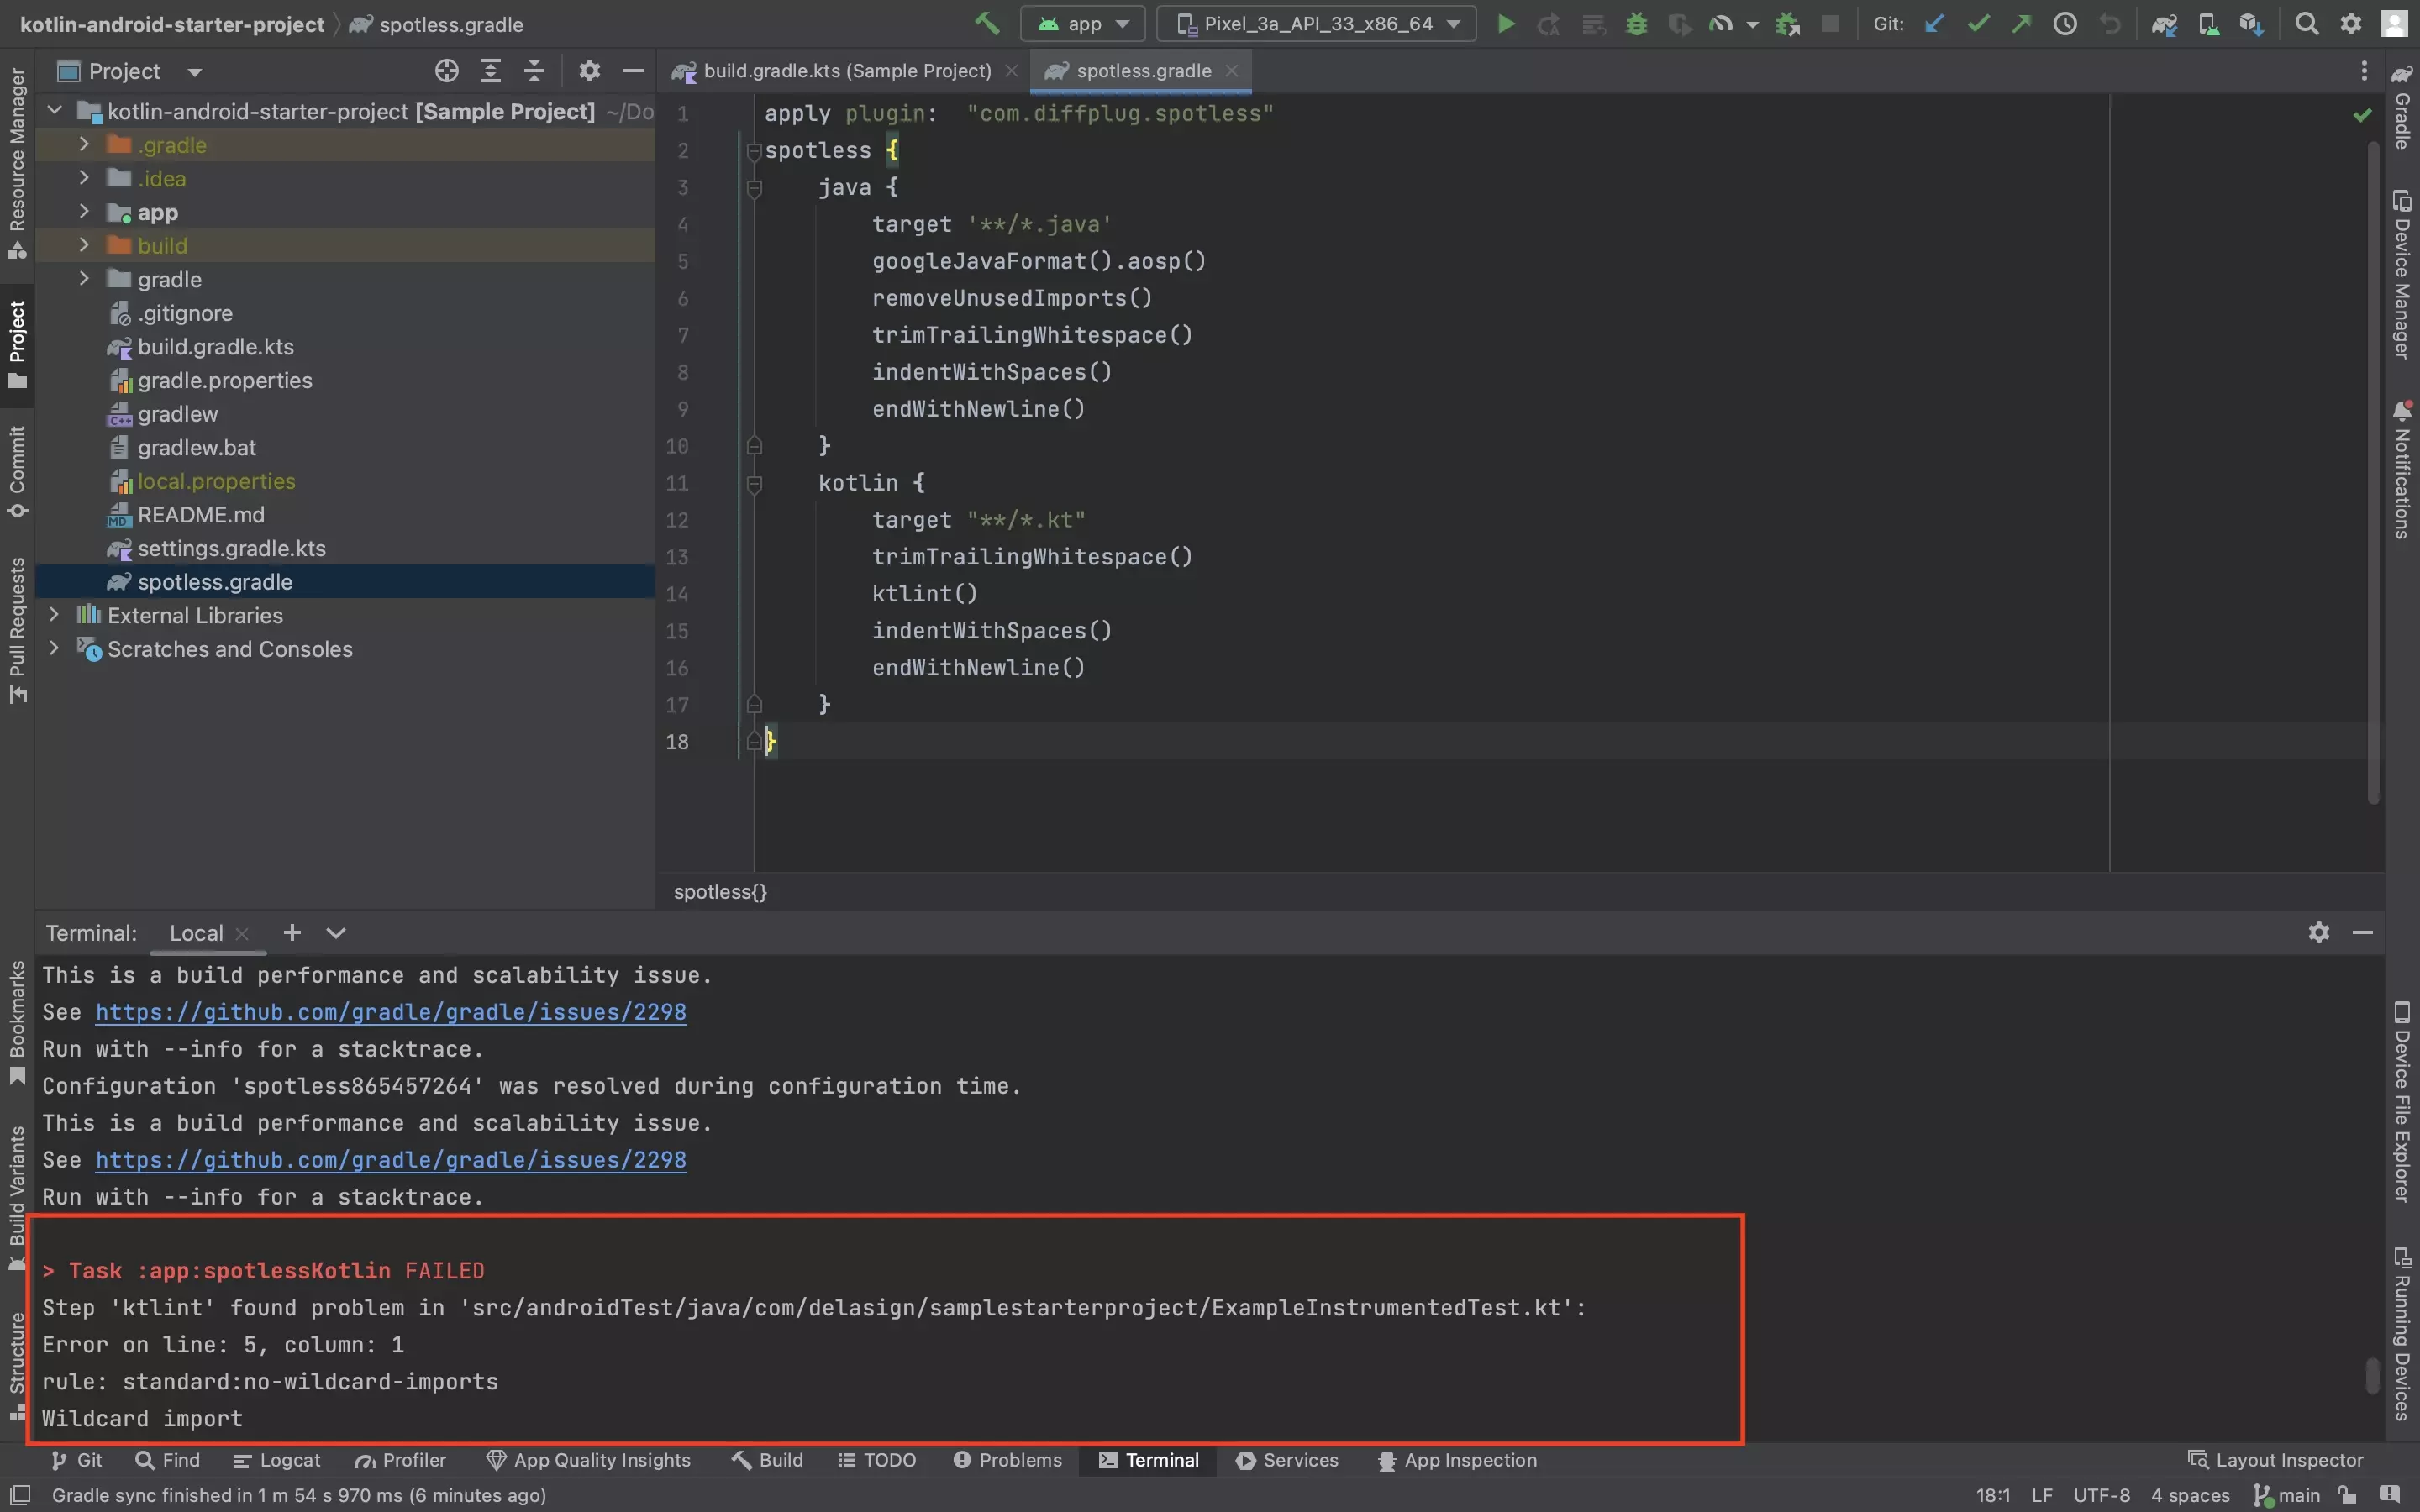
If not, an error will appear similar to the image shown below.
Troubleshooting: Invalid JAVA_HOME directory?

To fix the invalid JAVA_HOME directory, please consult the tutorial below.
Looking to add Spotless and ktlint to pre-commit git hooks?
Follow our guide below to create a pre-commit git hook script that applies spotless and ktlint to guarantee code consistency across your app.
If you wish to add it to your project so that it is accessible to your team in a way that they recieve updates, follow the tutorial below.