How to add a JSON file to an Android Studio project
A step by step guide on creating a JSON that can be read and processed by an app in Android Studio.

Written by Oscar de la Hera Gomez
First published on 06/13/2023 at 14:02
Last Updated on 06/14/2023 at 11:31
A step by step guide on creating a JSON that can be read and processed by an app in Android Studio.
SubscribeDownload Open Source Kotlin Starter ProjectStep One: Create an Assets Folder
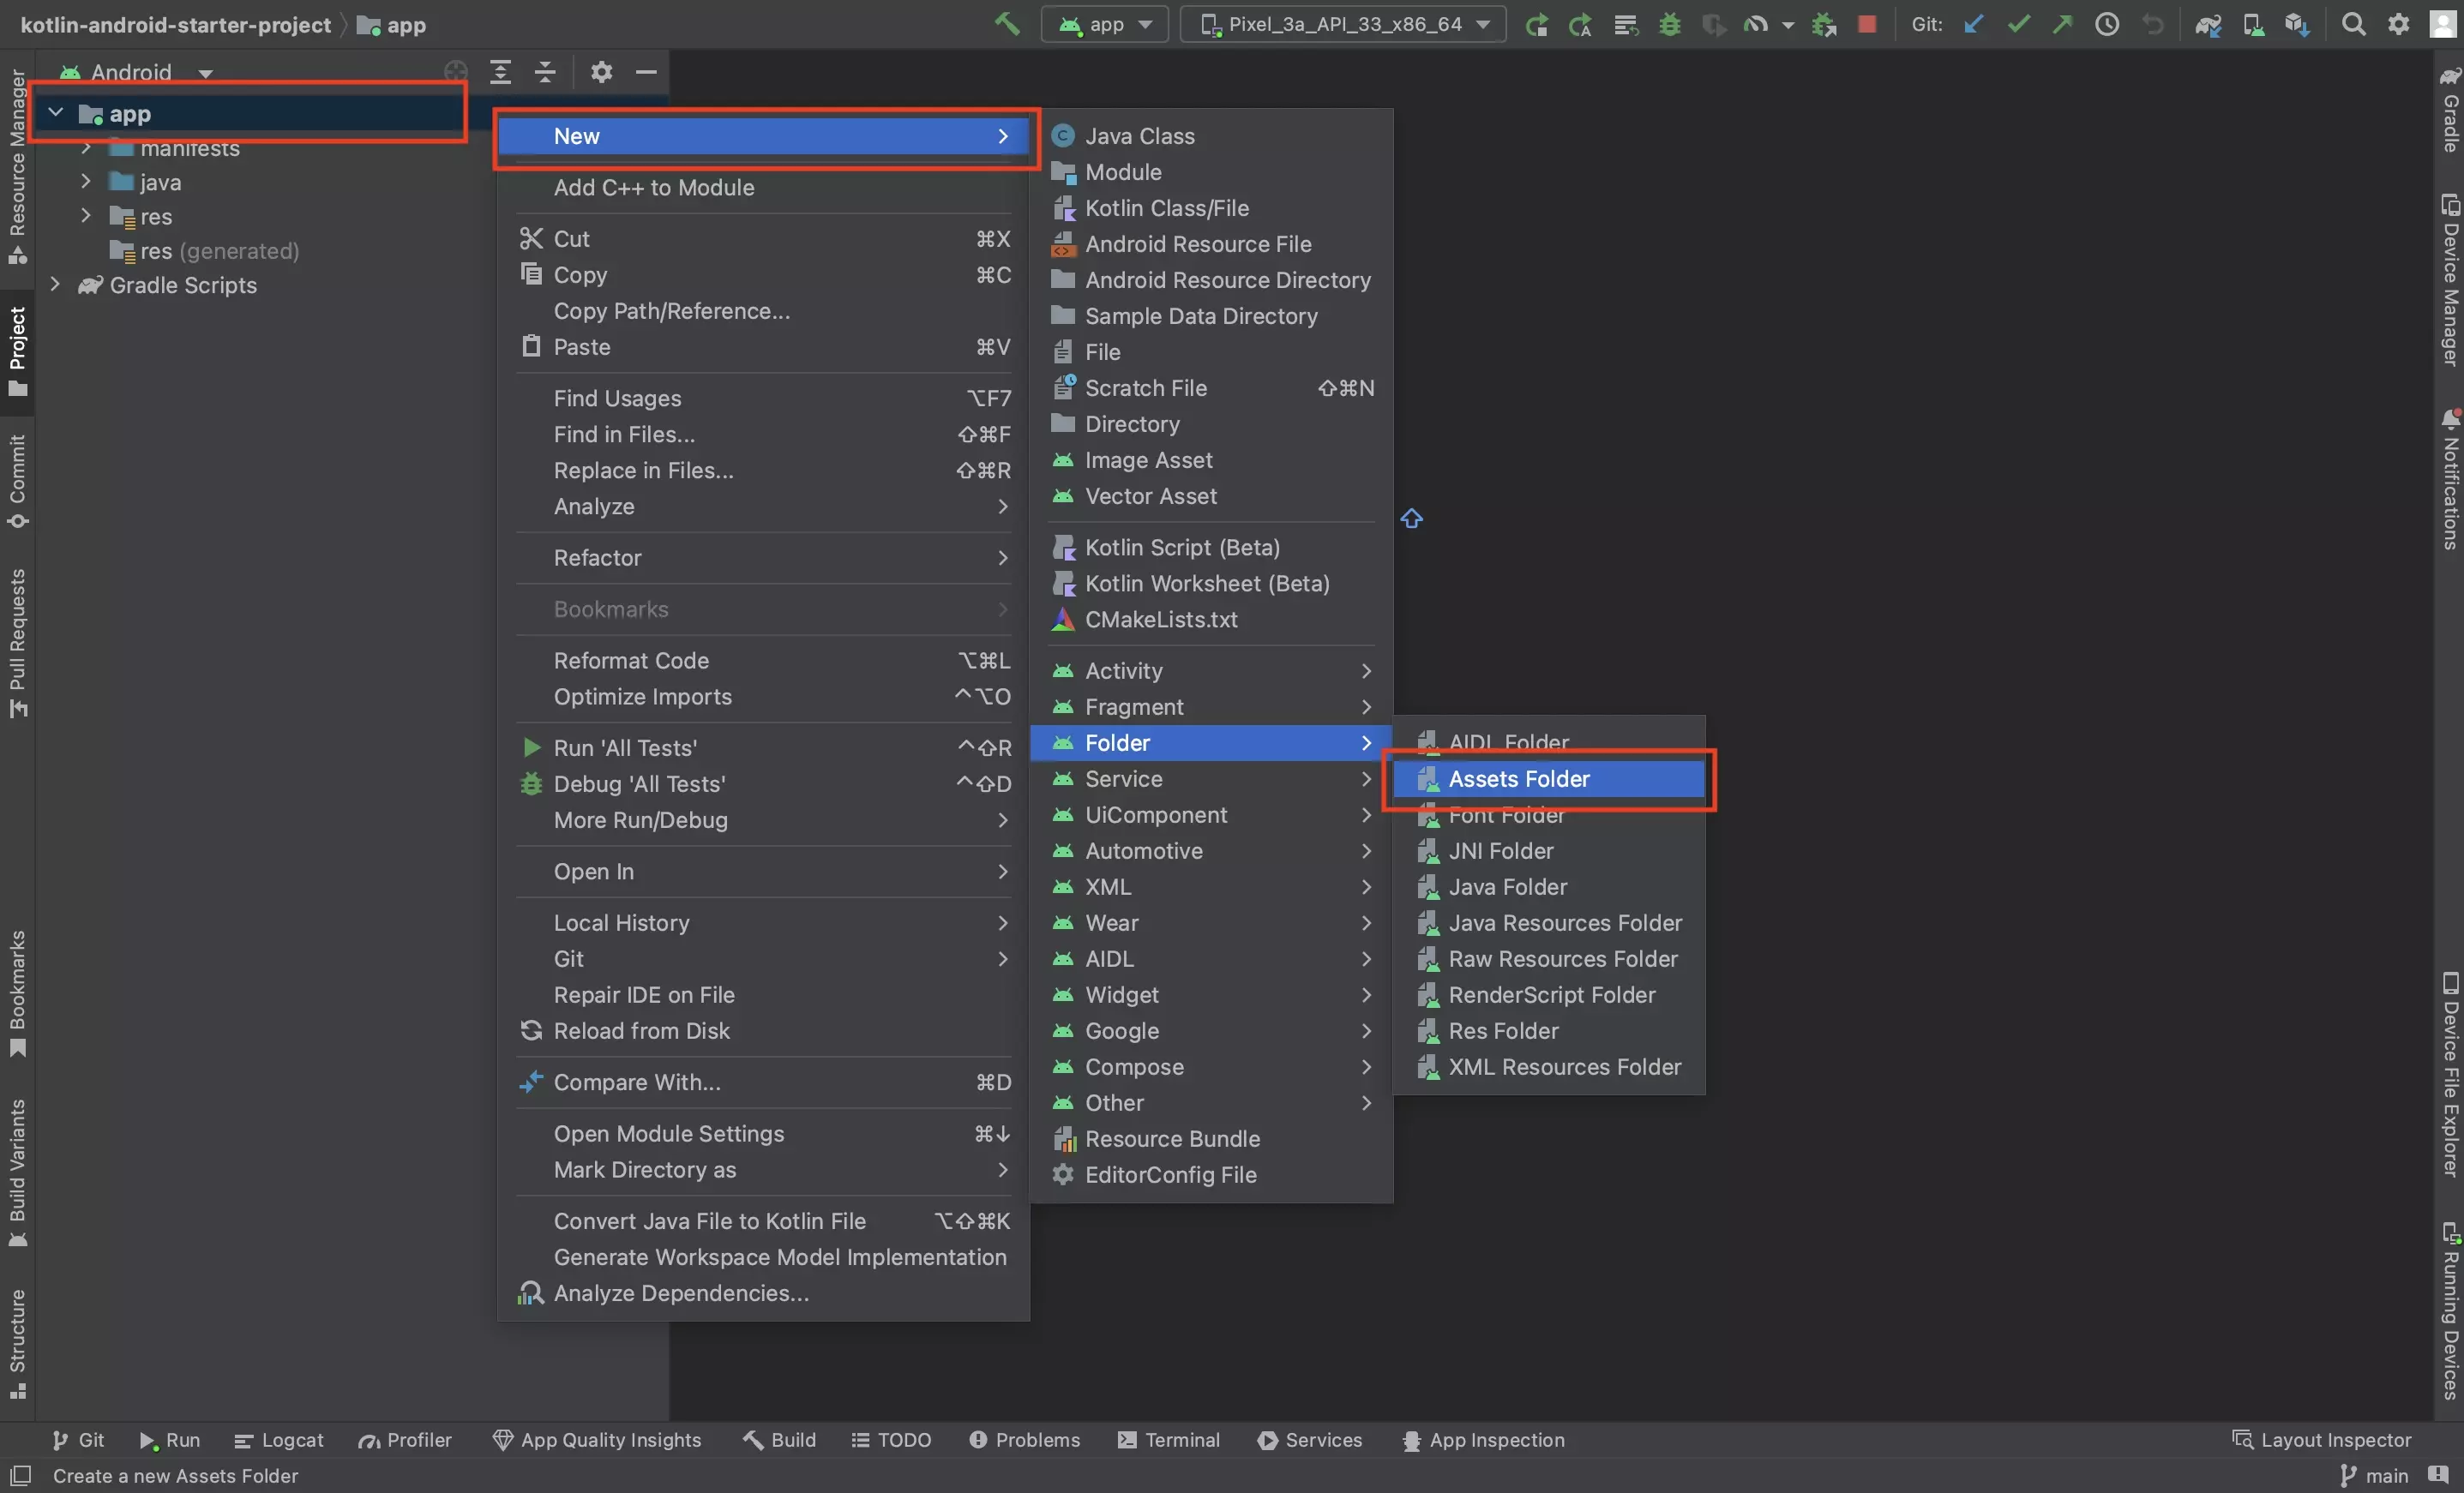
In the Project Inspector, right click the app folder and select New > Folder > Asset Folder.
If you already have an assets folder, skip this step.
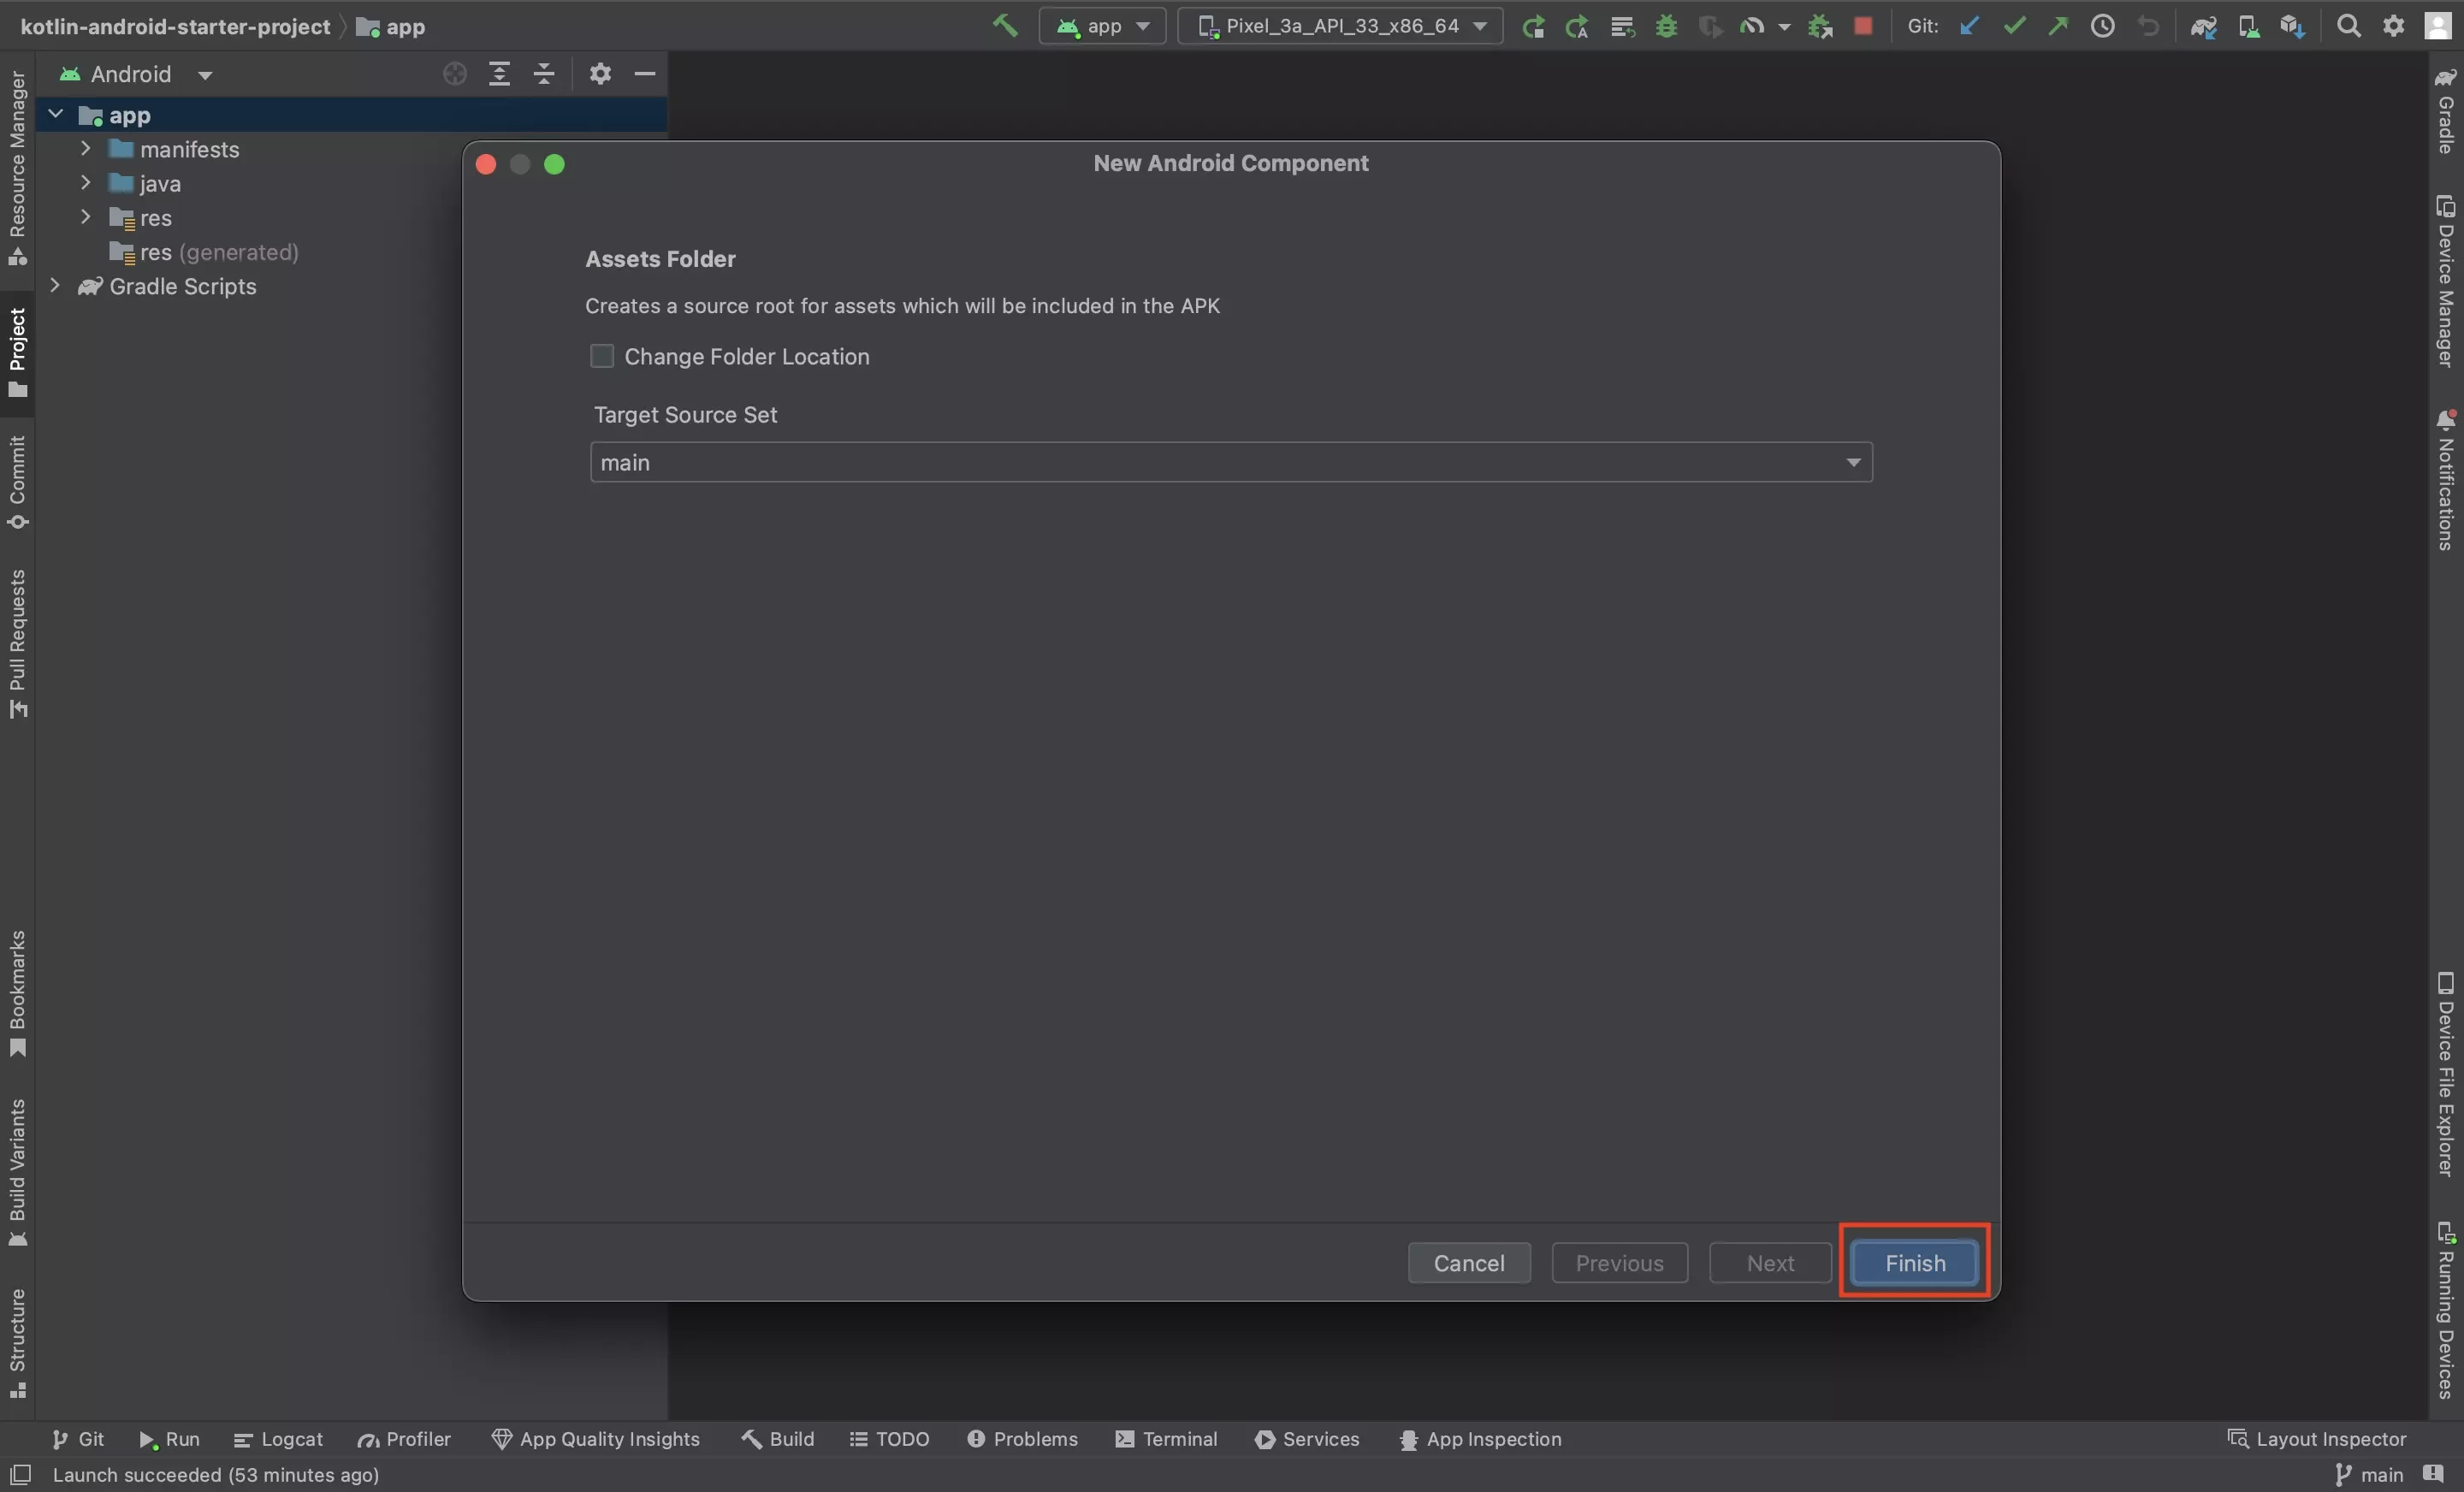
Click Finish.
Step Two: Create the JSON file

Right click on the Assets folder and select New > File.
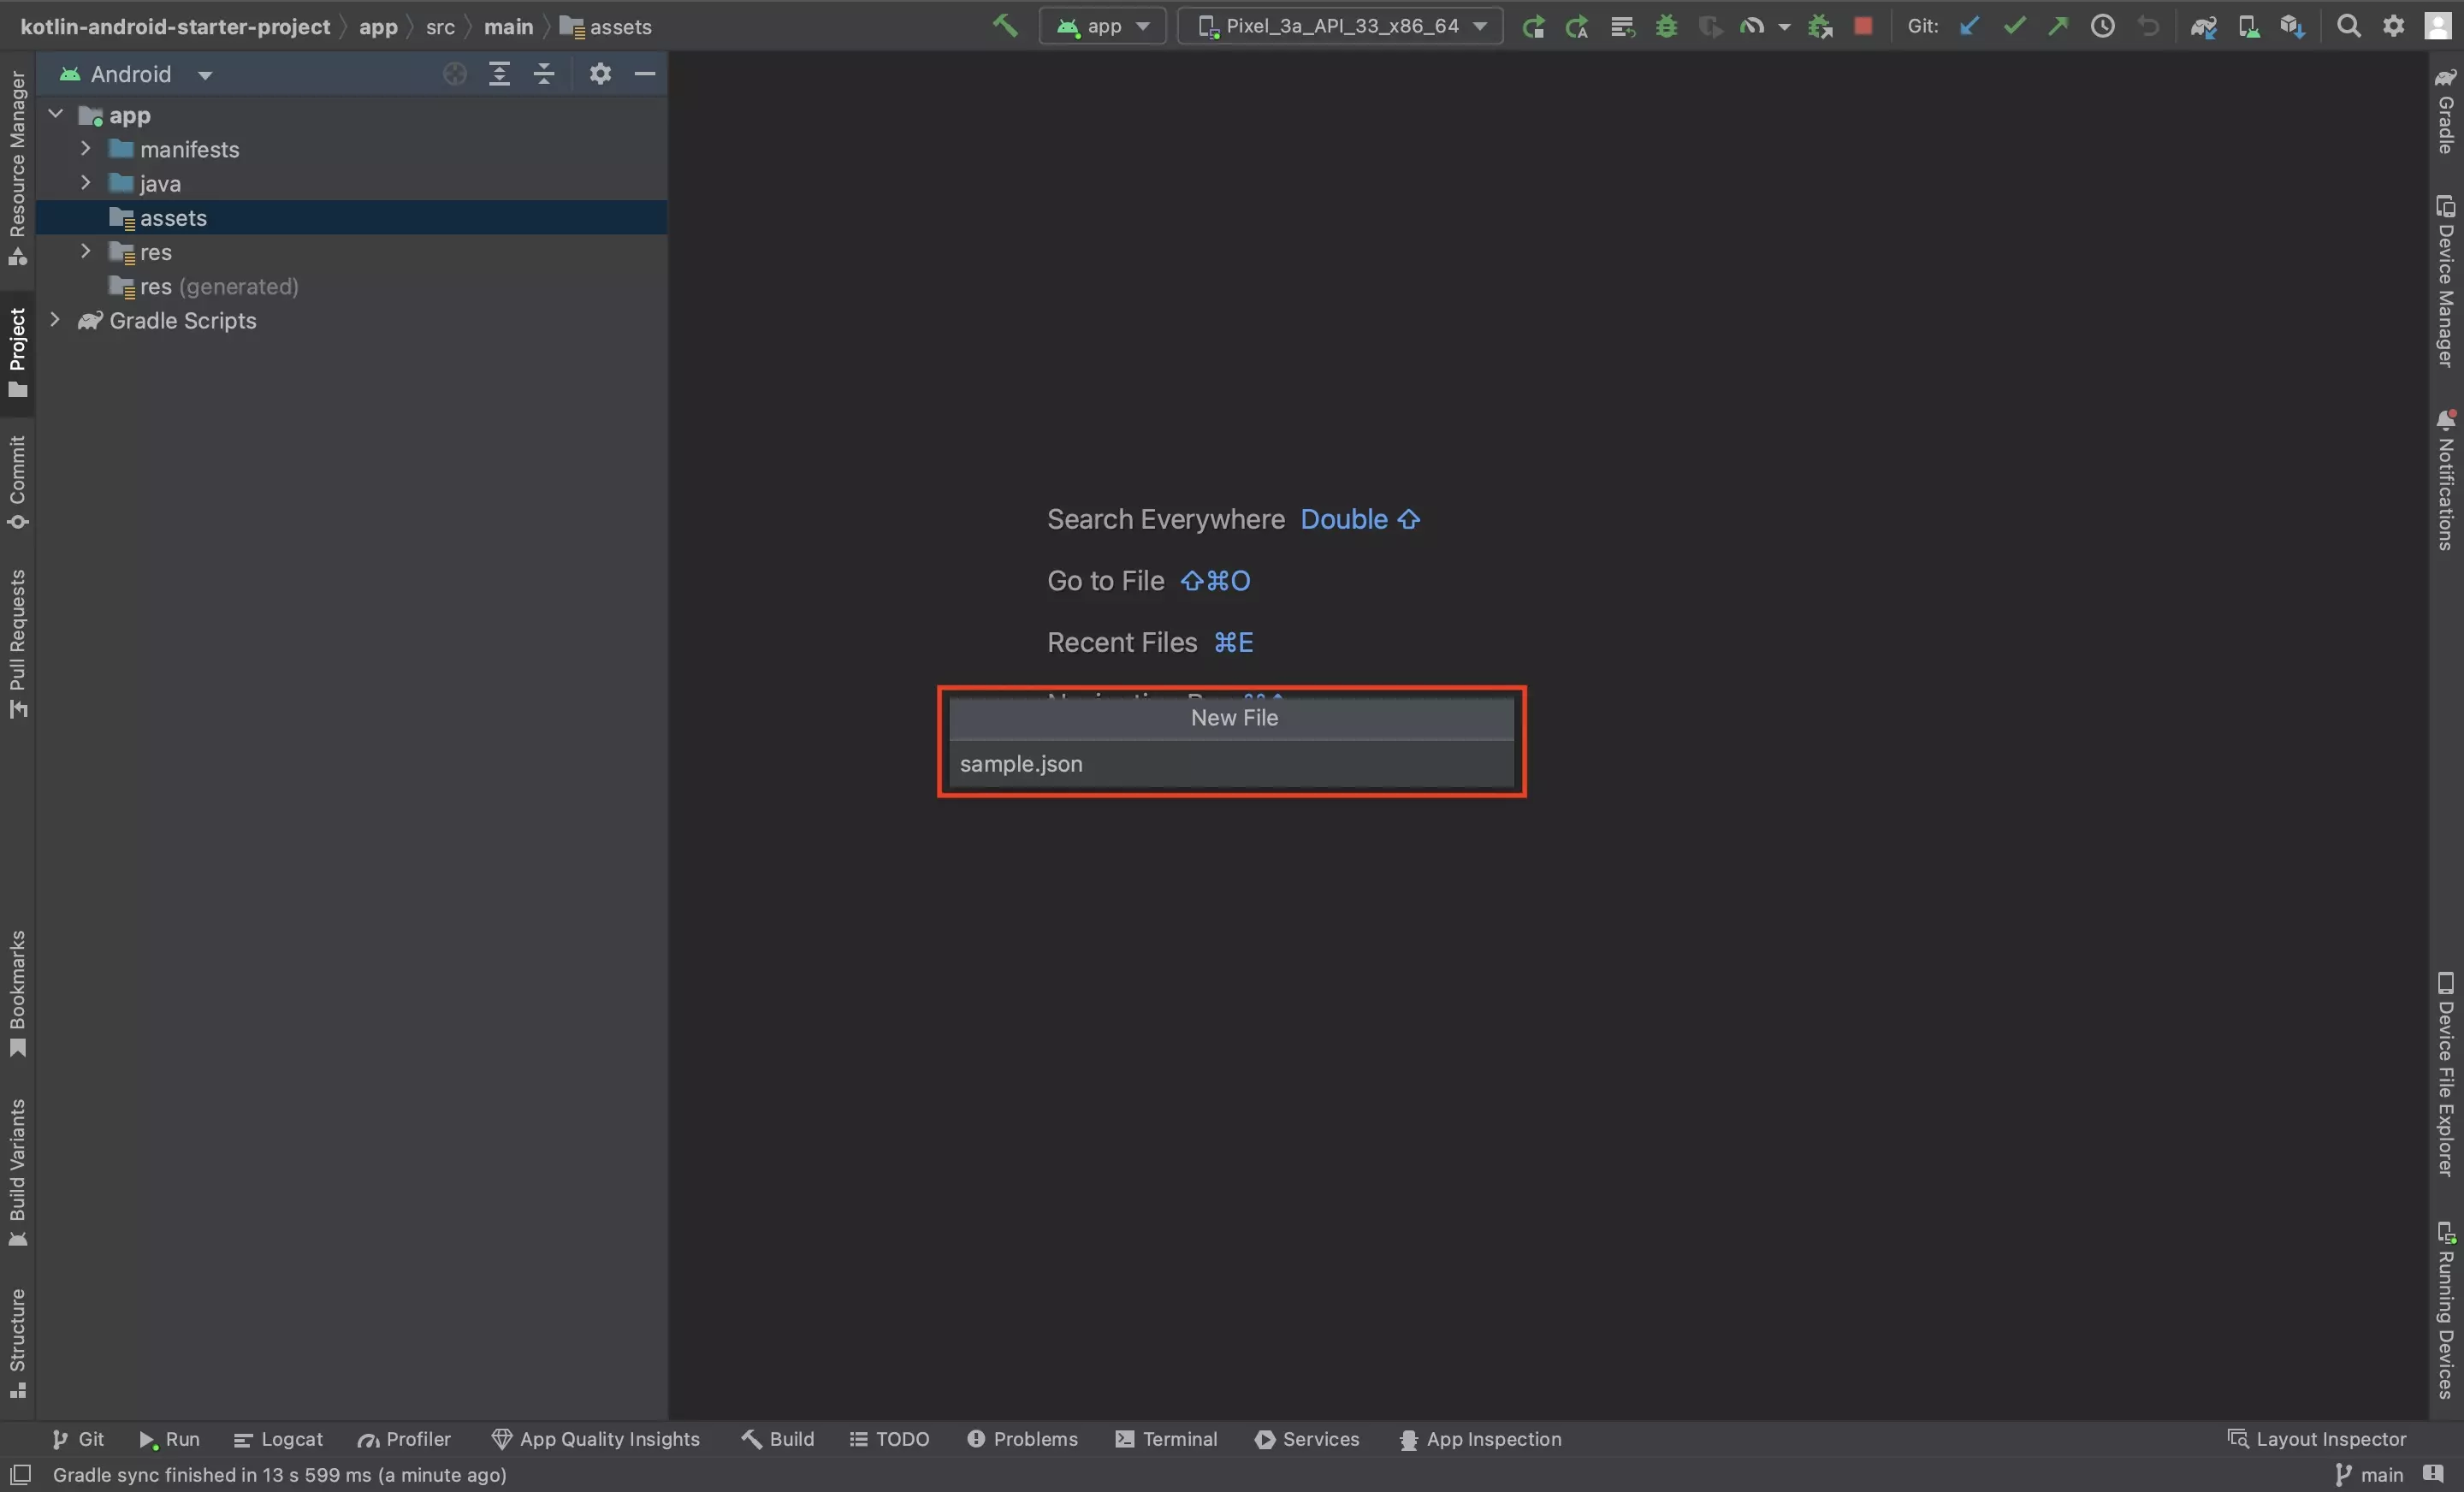
Write the name of your file (i.e. sample.json) in the pop up and press Enter.
Looking to learn how to read the JSON in Kotlin or convert the JSON to usable data?
Follow the relevant tutorial below to learn how to consume and use JSON data in Kotlin and Android Studio.
Any Questions?
We are actively looking for feedback on how to improve this resource. Please send us a note to inquiries@delasign.com with any thoughts or feedback you may have.
SubscribeContact UsVisit our BlogView our ServicesView our Work