How to store and retrieve data using the Android DataStore
A step by step guide on saving and gathering local data (preferences) from a users device using Android Studio and Kotlin.

A step by step guide on saving and gathering local data (preferences) from a users device using Android Studio and Kotlin.
SubscribeDownload Open Source Kotlin Starter ProjectStep One: Add the Dependencies
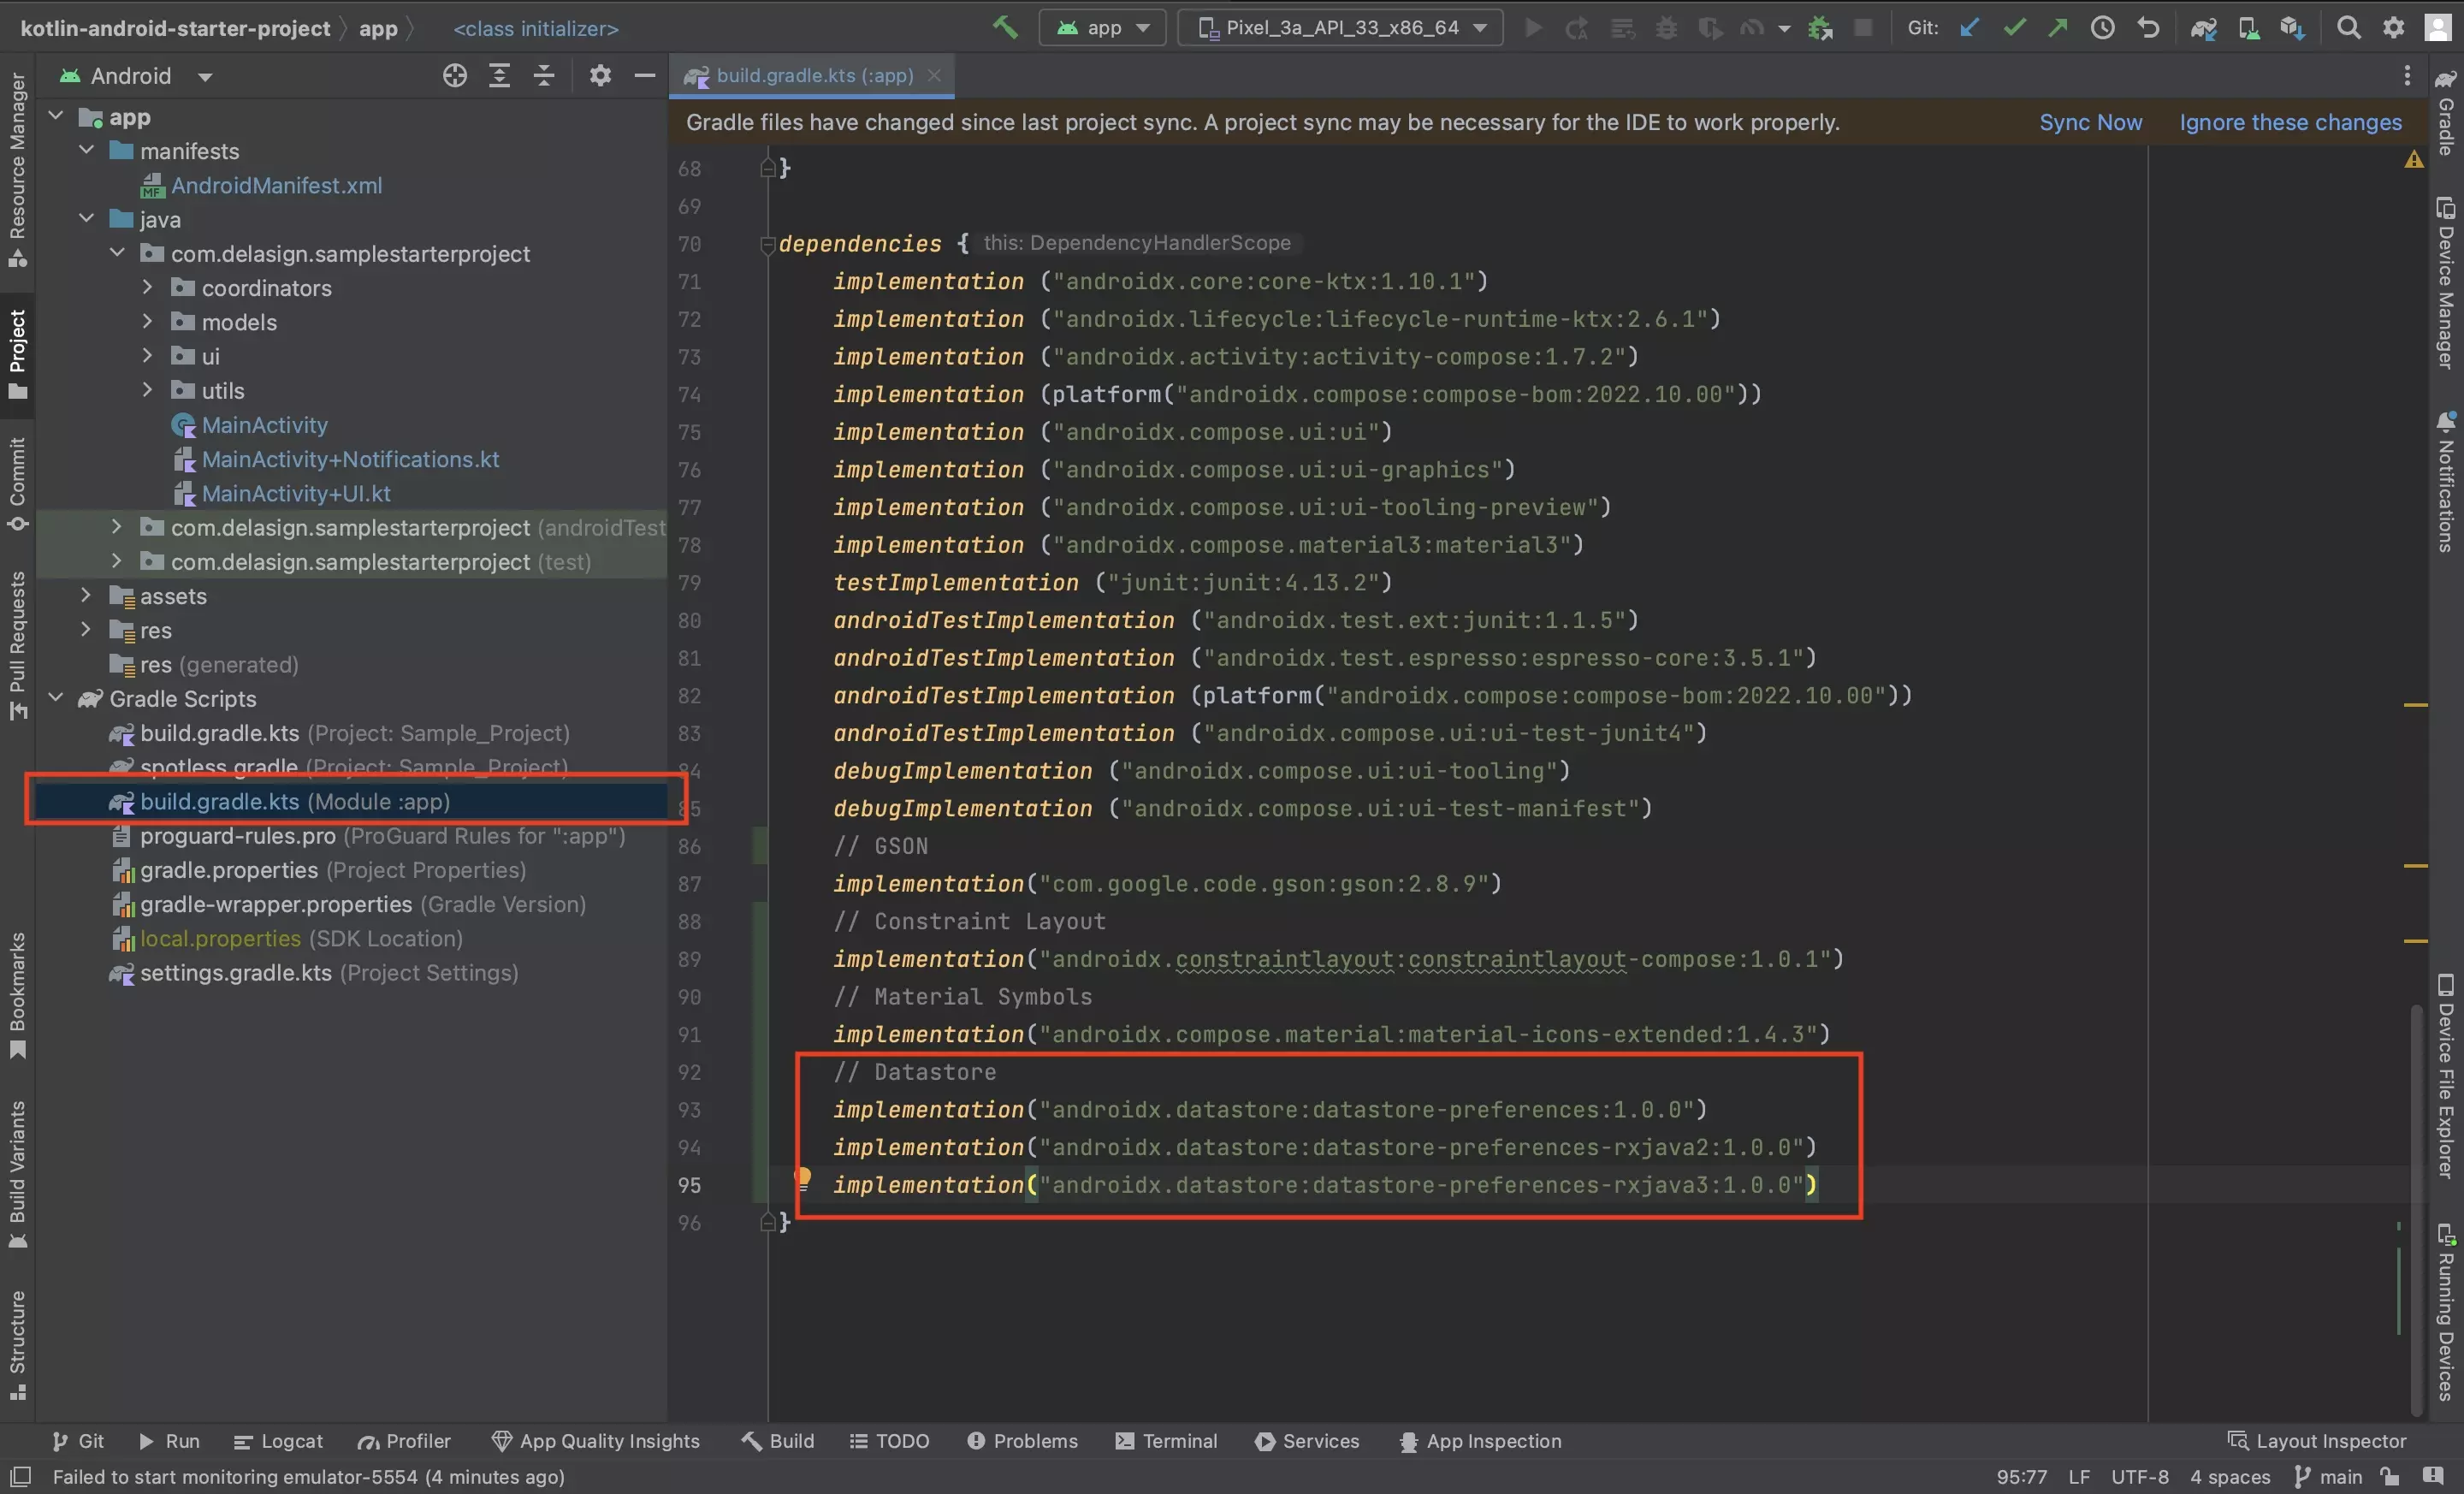
In the projects app level build.gradle.kts, add the following dependencies.
implementation("androidx.datastore:datastore-preferences:1.0.0")implementation("androidx.datastore:datastore-preferences-rxjava2:1.0.0")implementation("androidx.datastore:datastore-preferences-rxjava3:1.0.0")Please note that versions displayed above may not be the latest versions, please update the code above to the latest version in your Android Studio project.
Step Two: Sync the Gradles
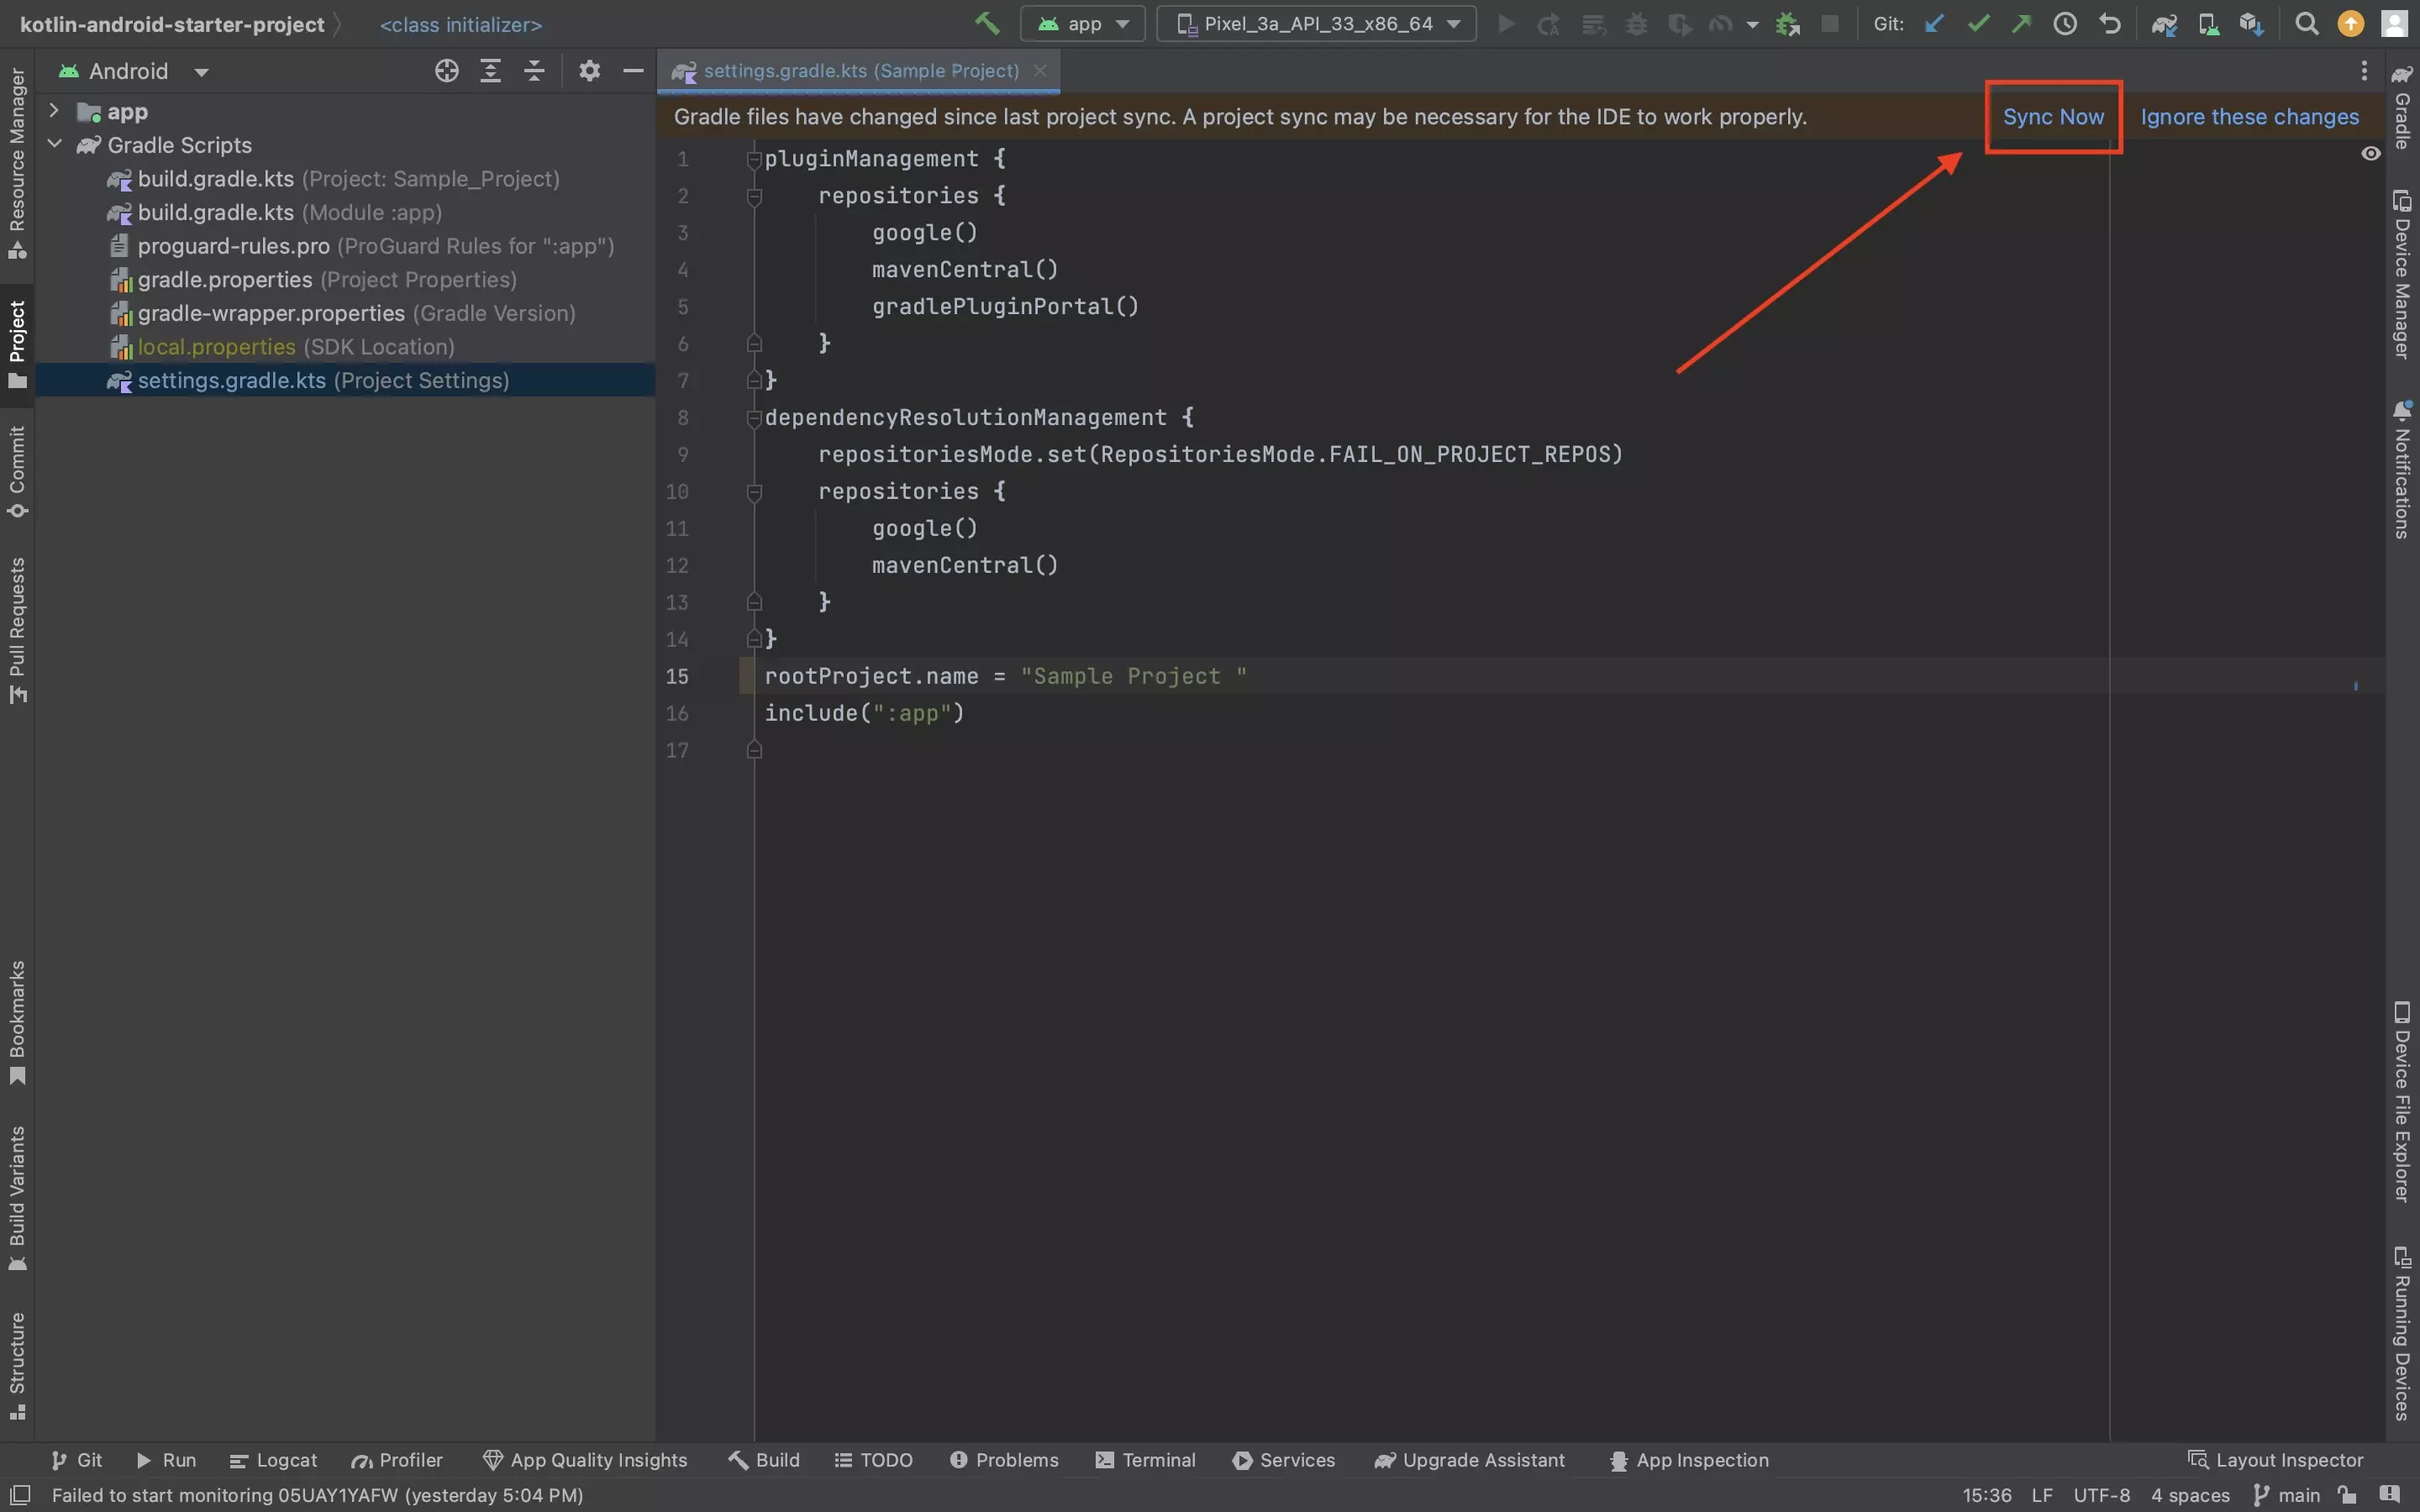
Press Sync Now in the bar above the Gradle to update the project dependencies.
Step Three: Create the Keys
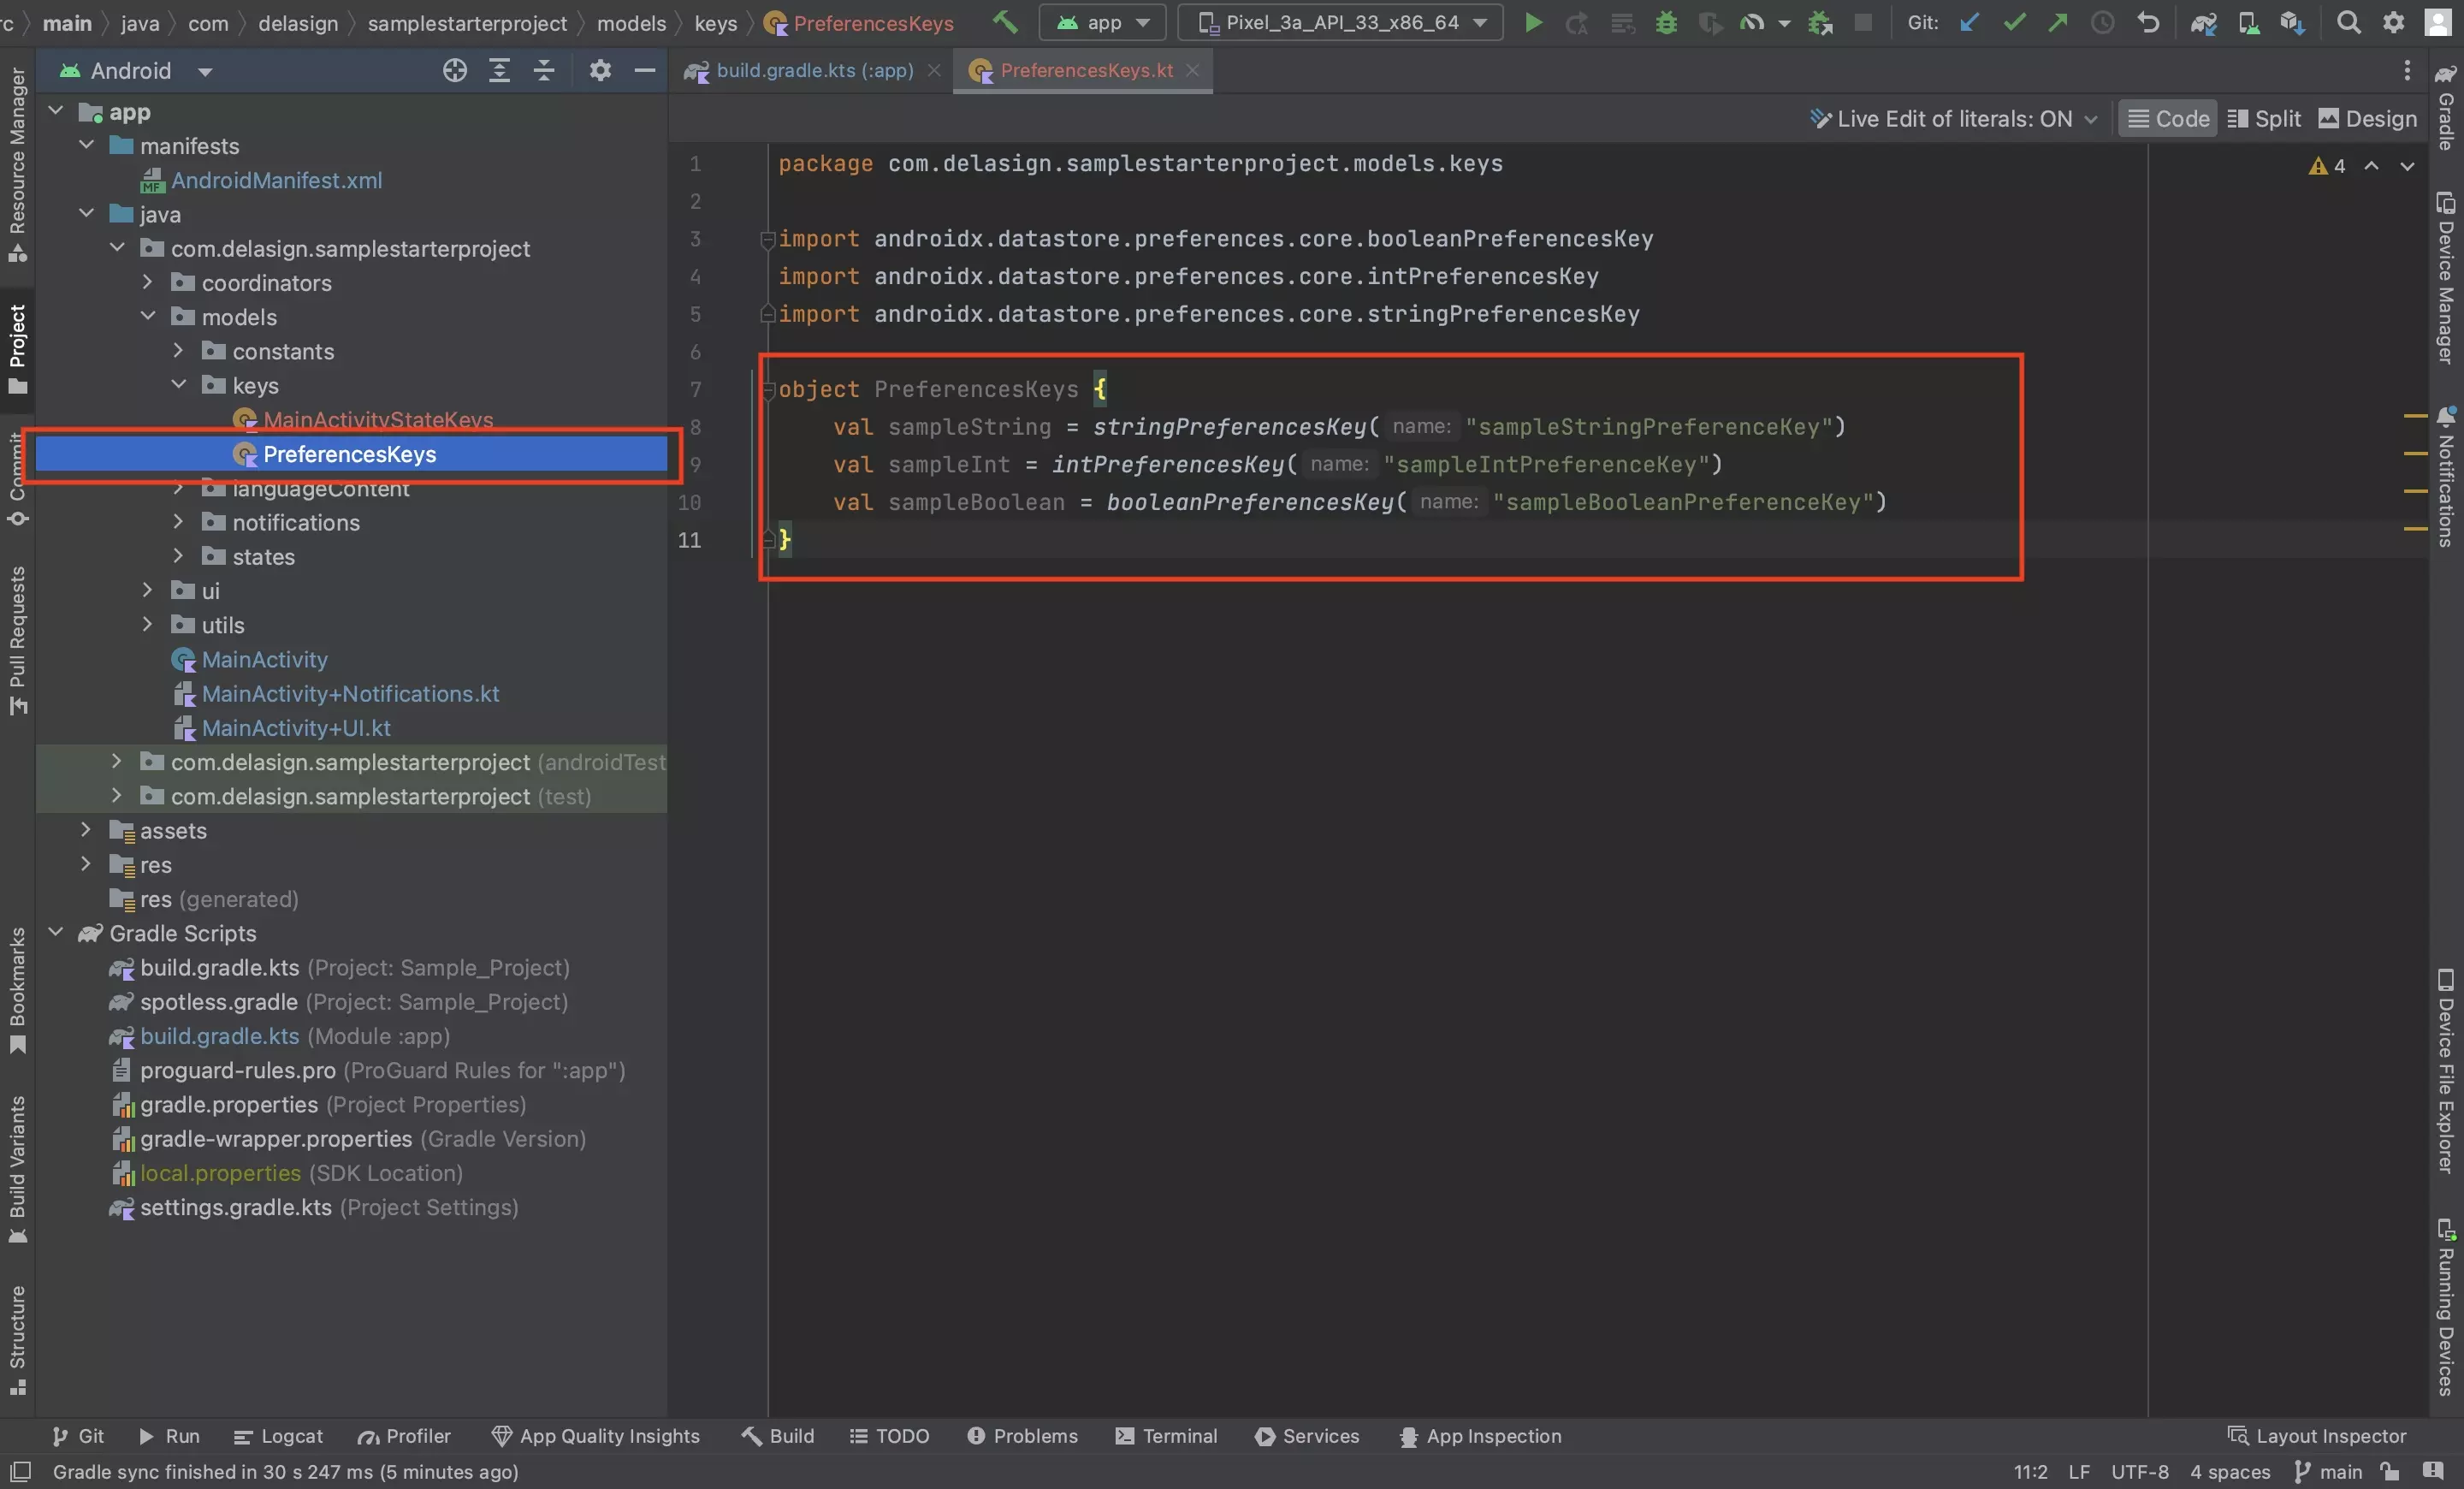
In your project, create a PreferenceKeys.kt file and create keys for each variable that you wish to store.
Step Four: Create the DataCoordinator files
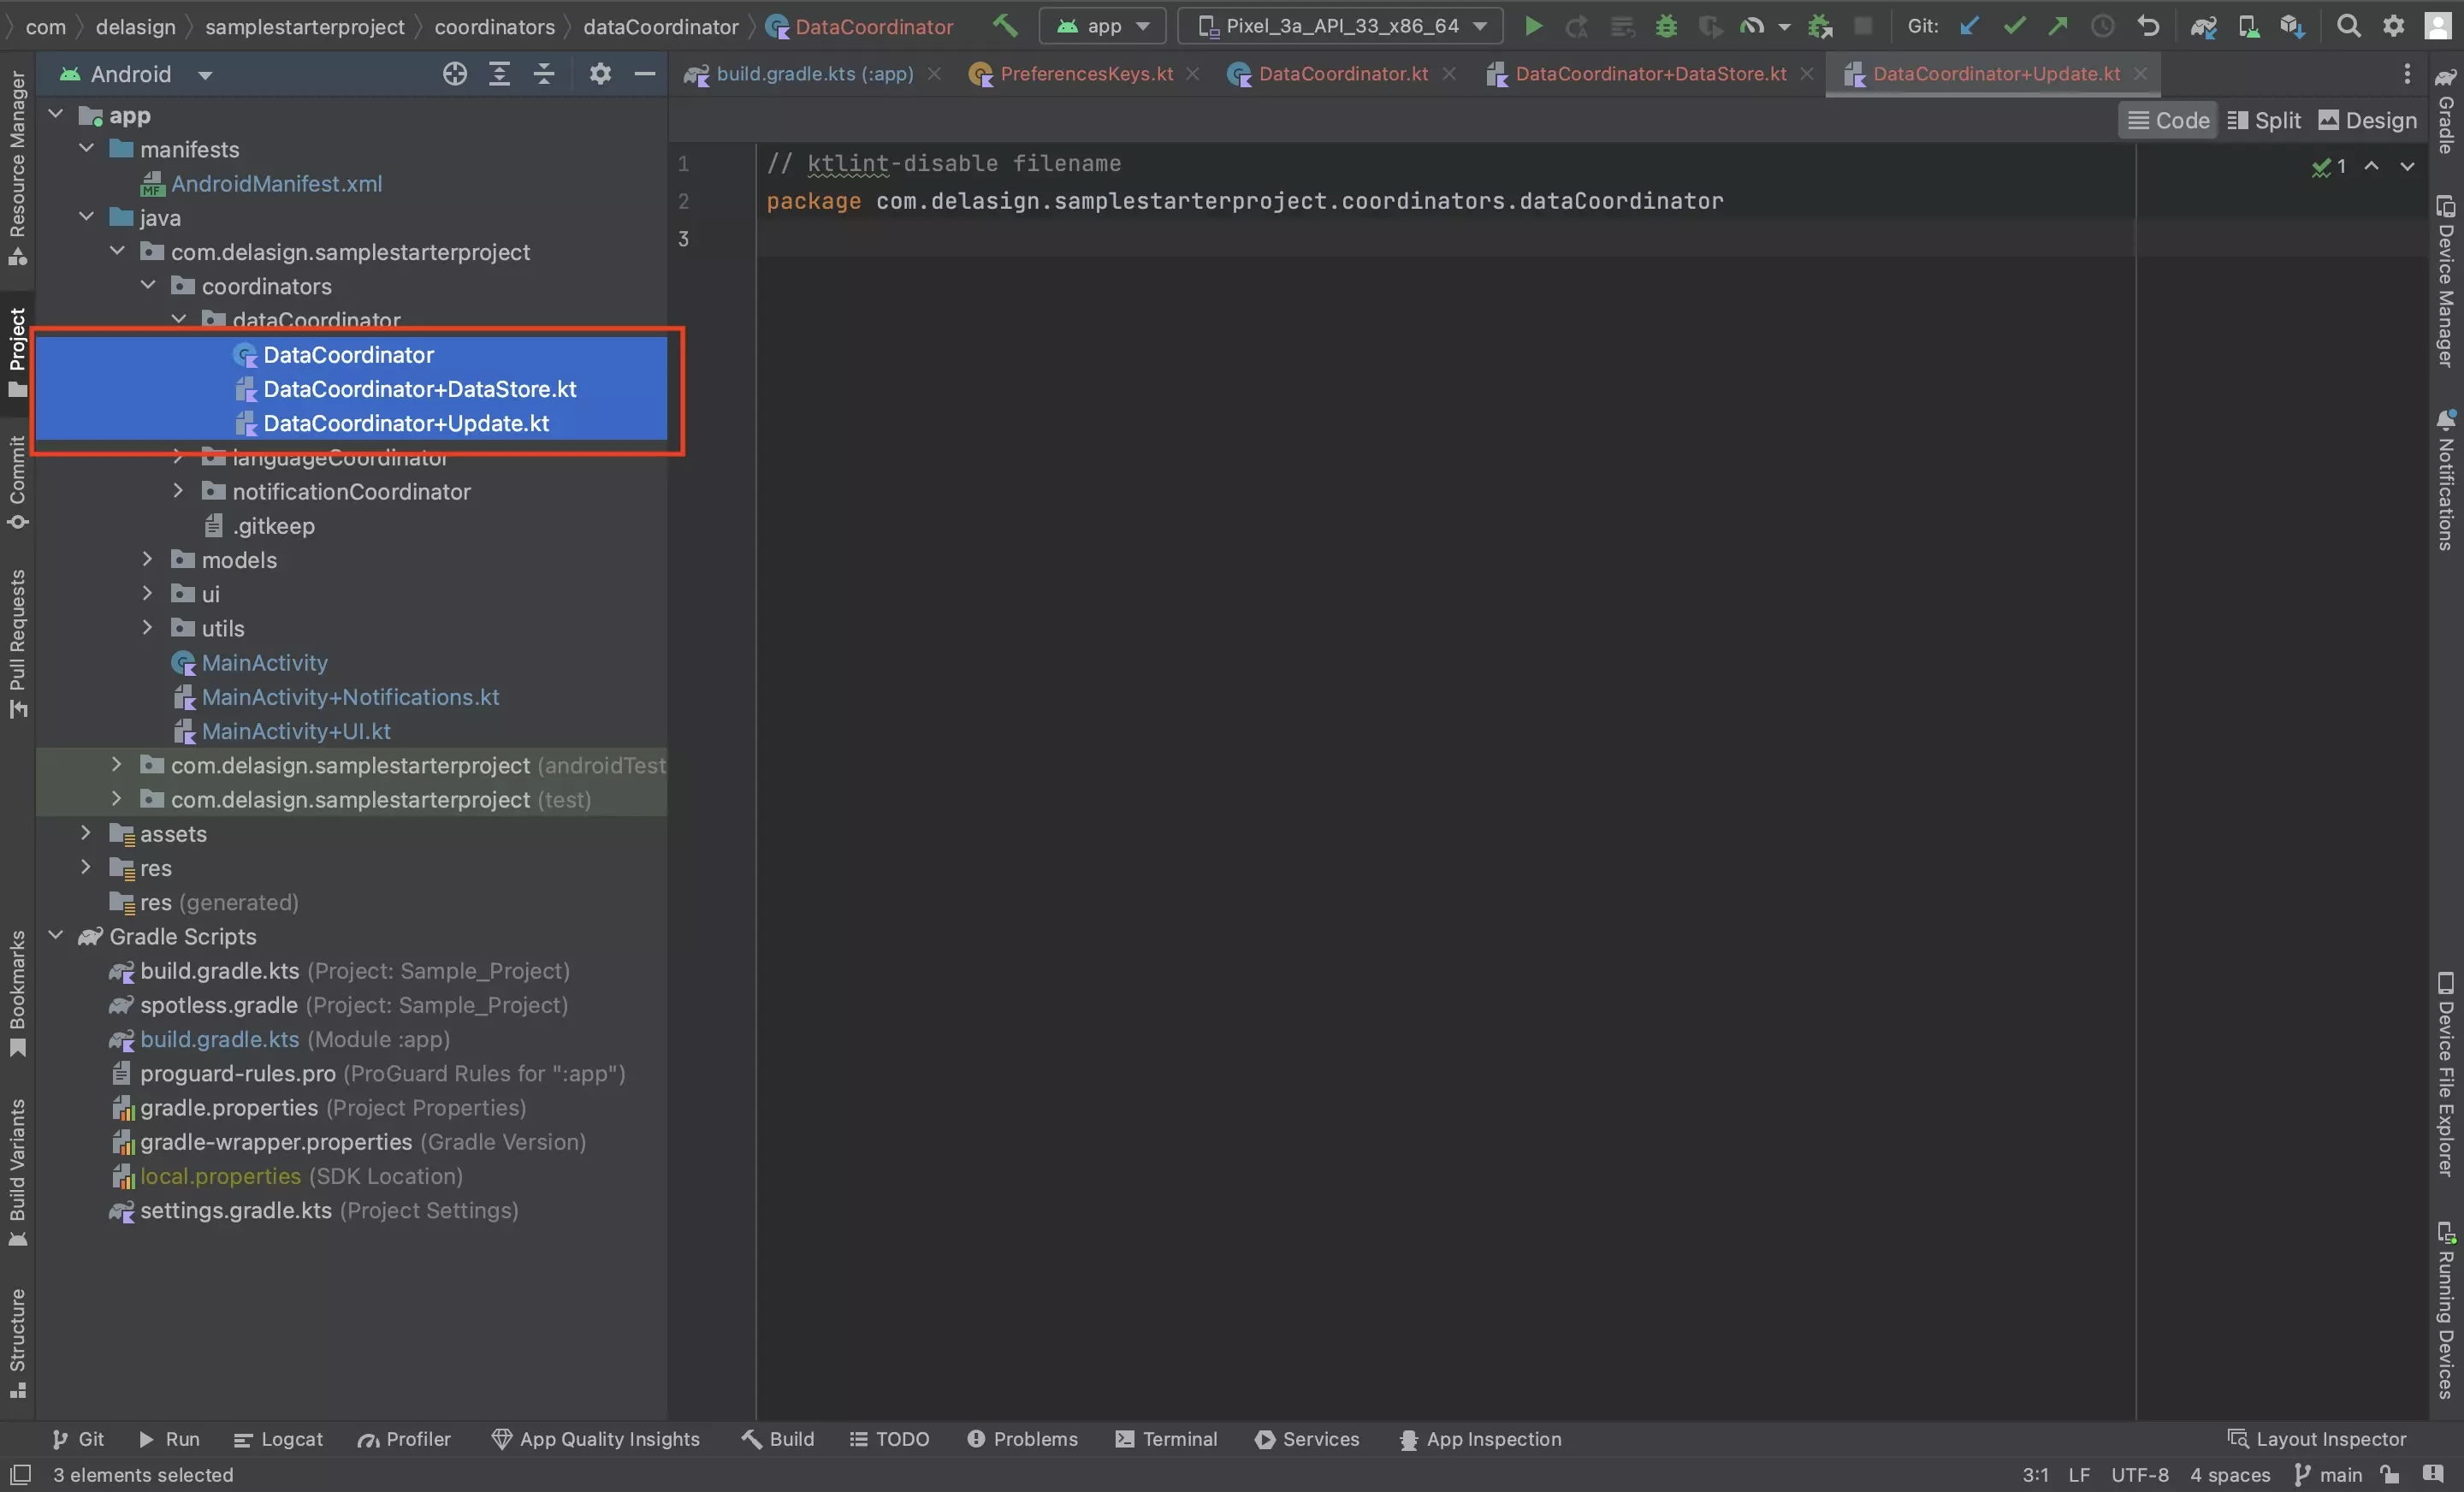
In the project, create 3 files called DataCoordinator.kt, DataCoordinator+DataStore.kt and DataCoordinator+Update.kt.
These files will allow us to create a singleton that manages the gathering, storing and offering of variables across the app.
Step Five: Setup the DataCoordinator
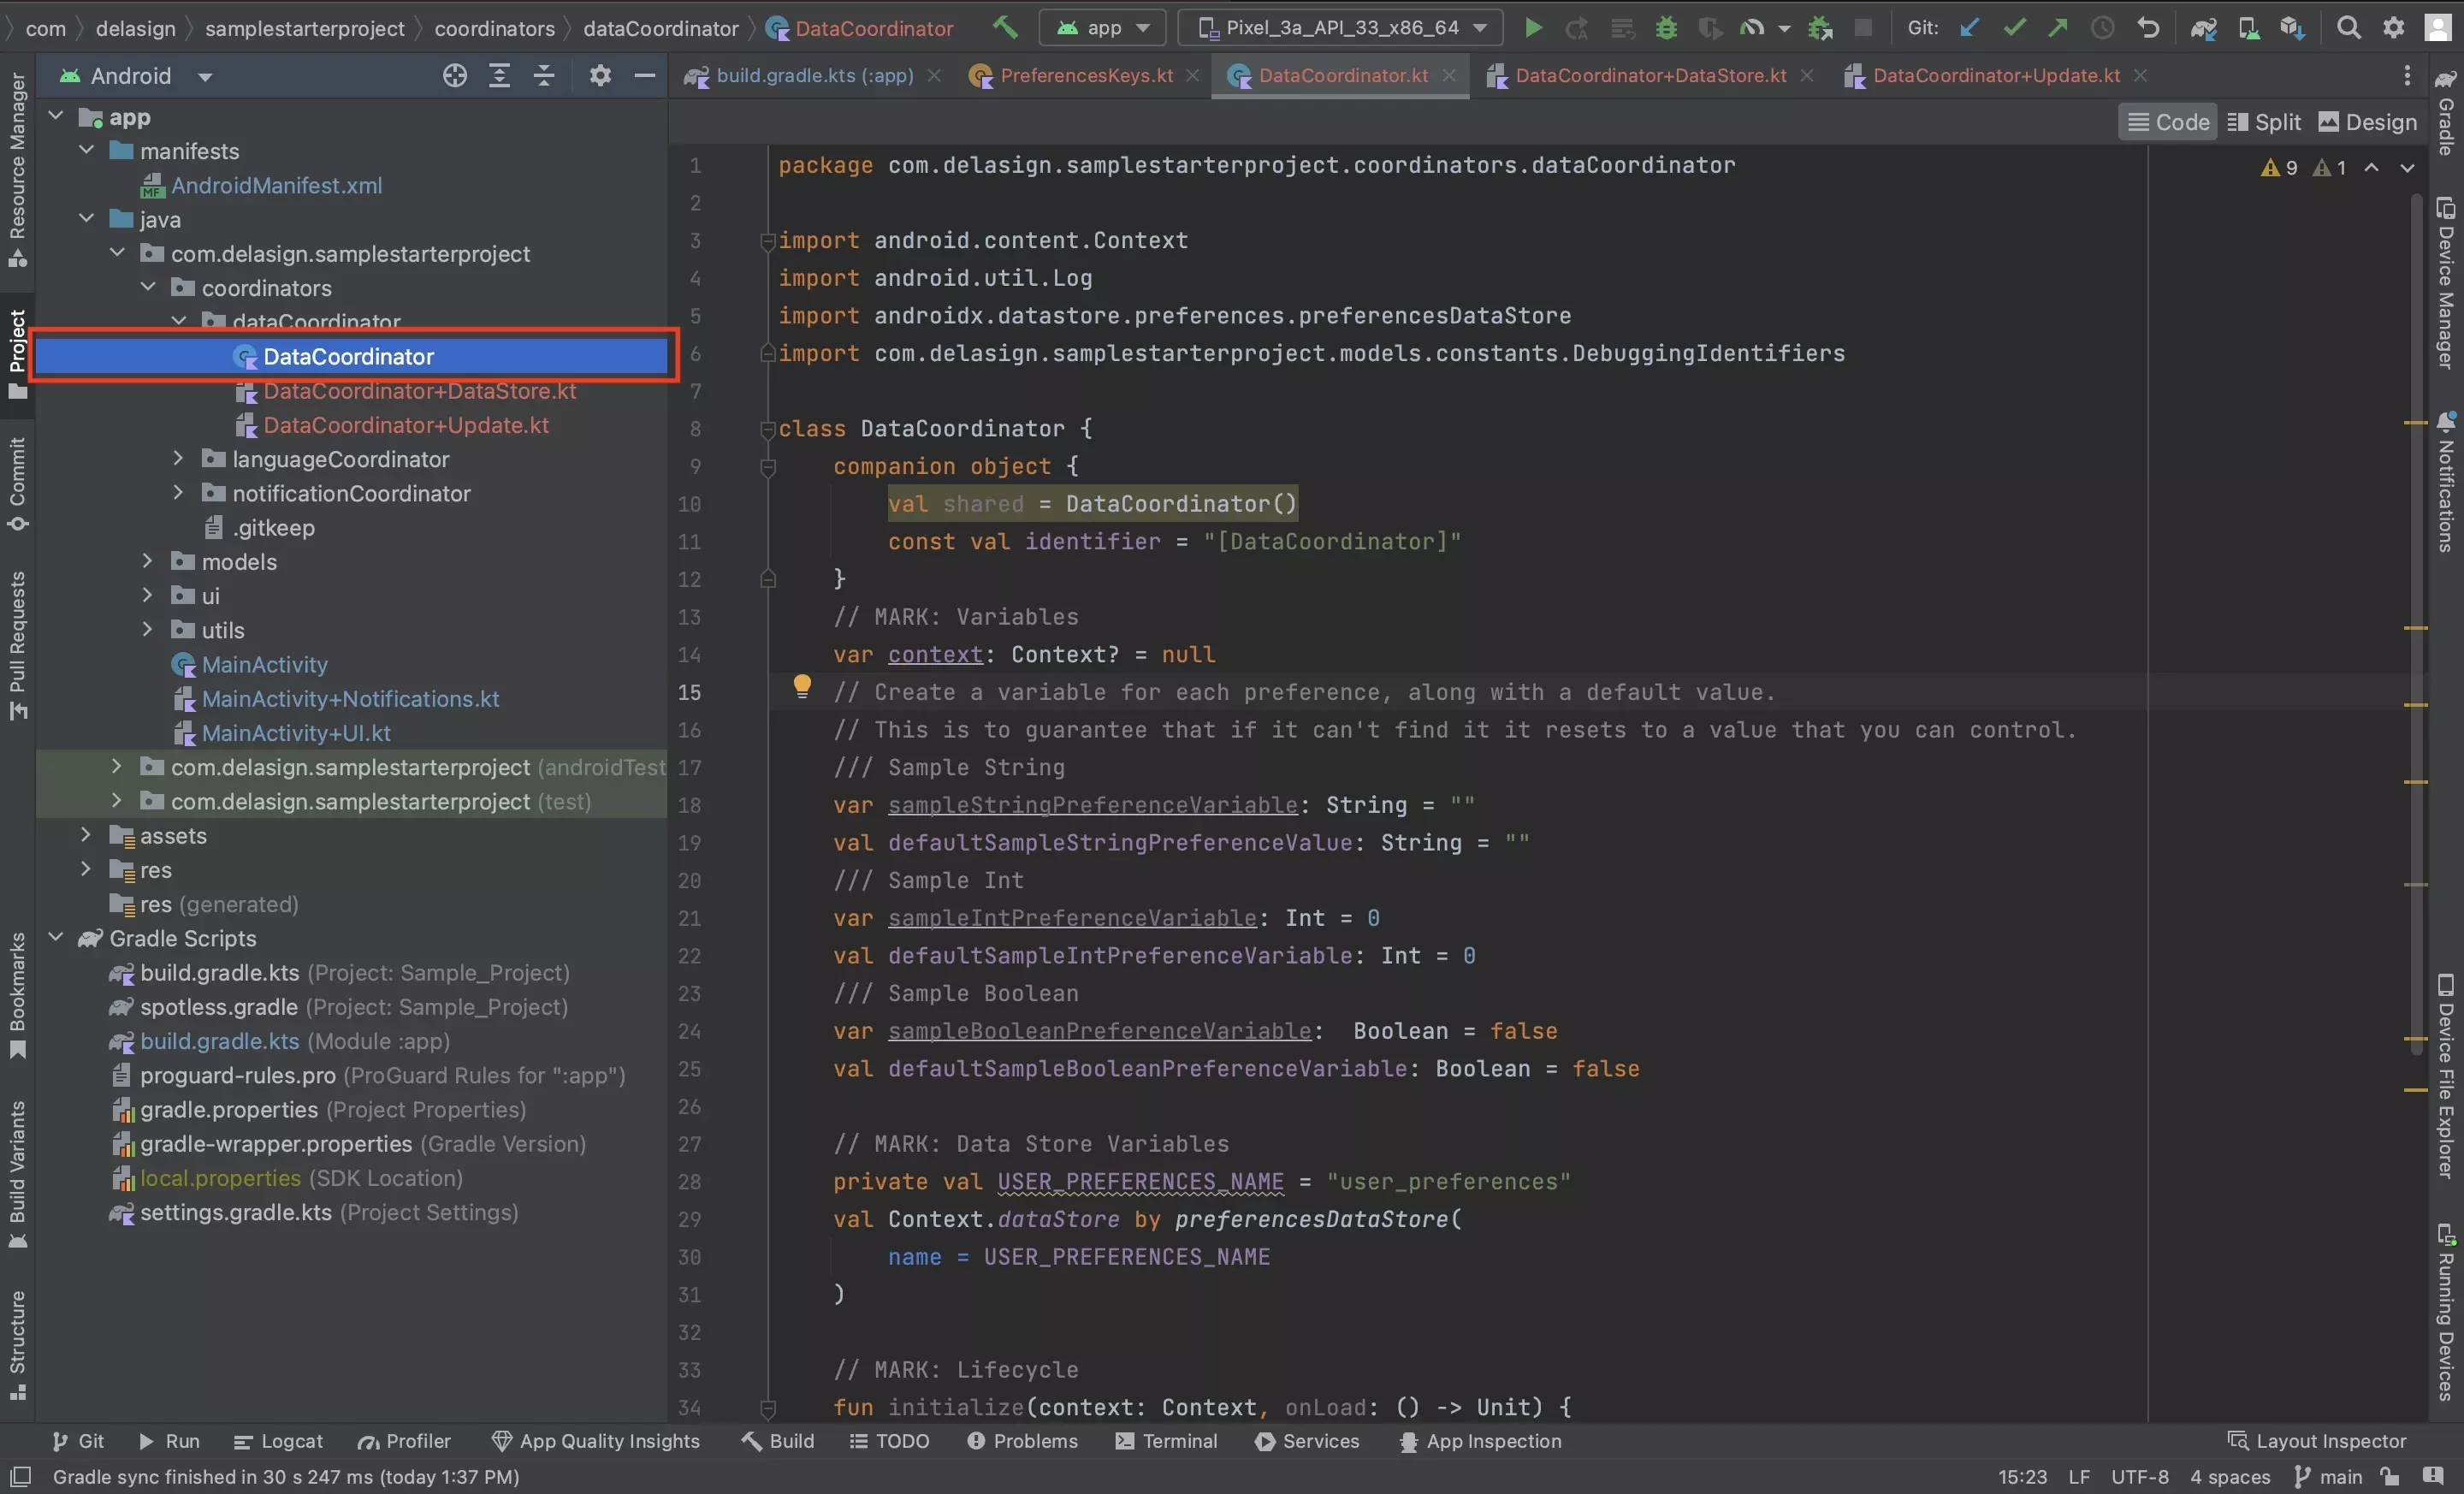
Setup the DataCoordinator.kt as a singleton and add the necessary variables and default values for each of parameters that you wish to store in the DataStore.
Please note that a variable and default should be created per key created in Step Three.
Step Six: Create the DataStore Set and Get Functionality
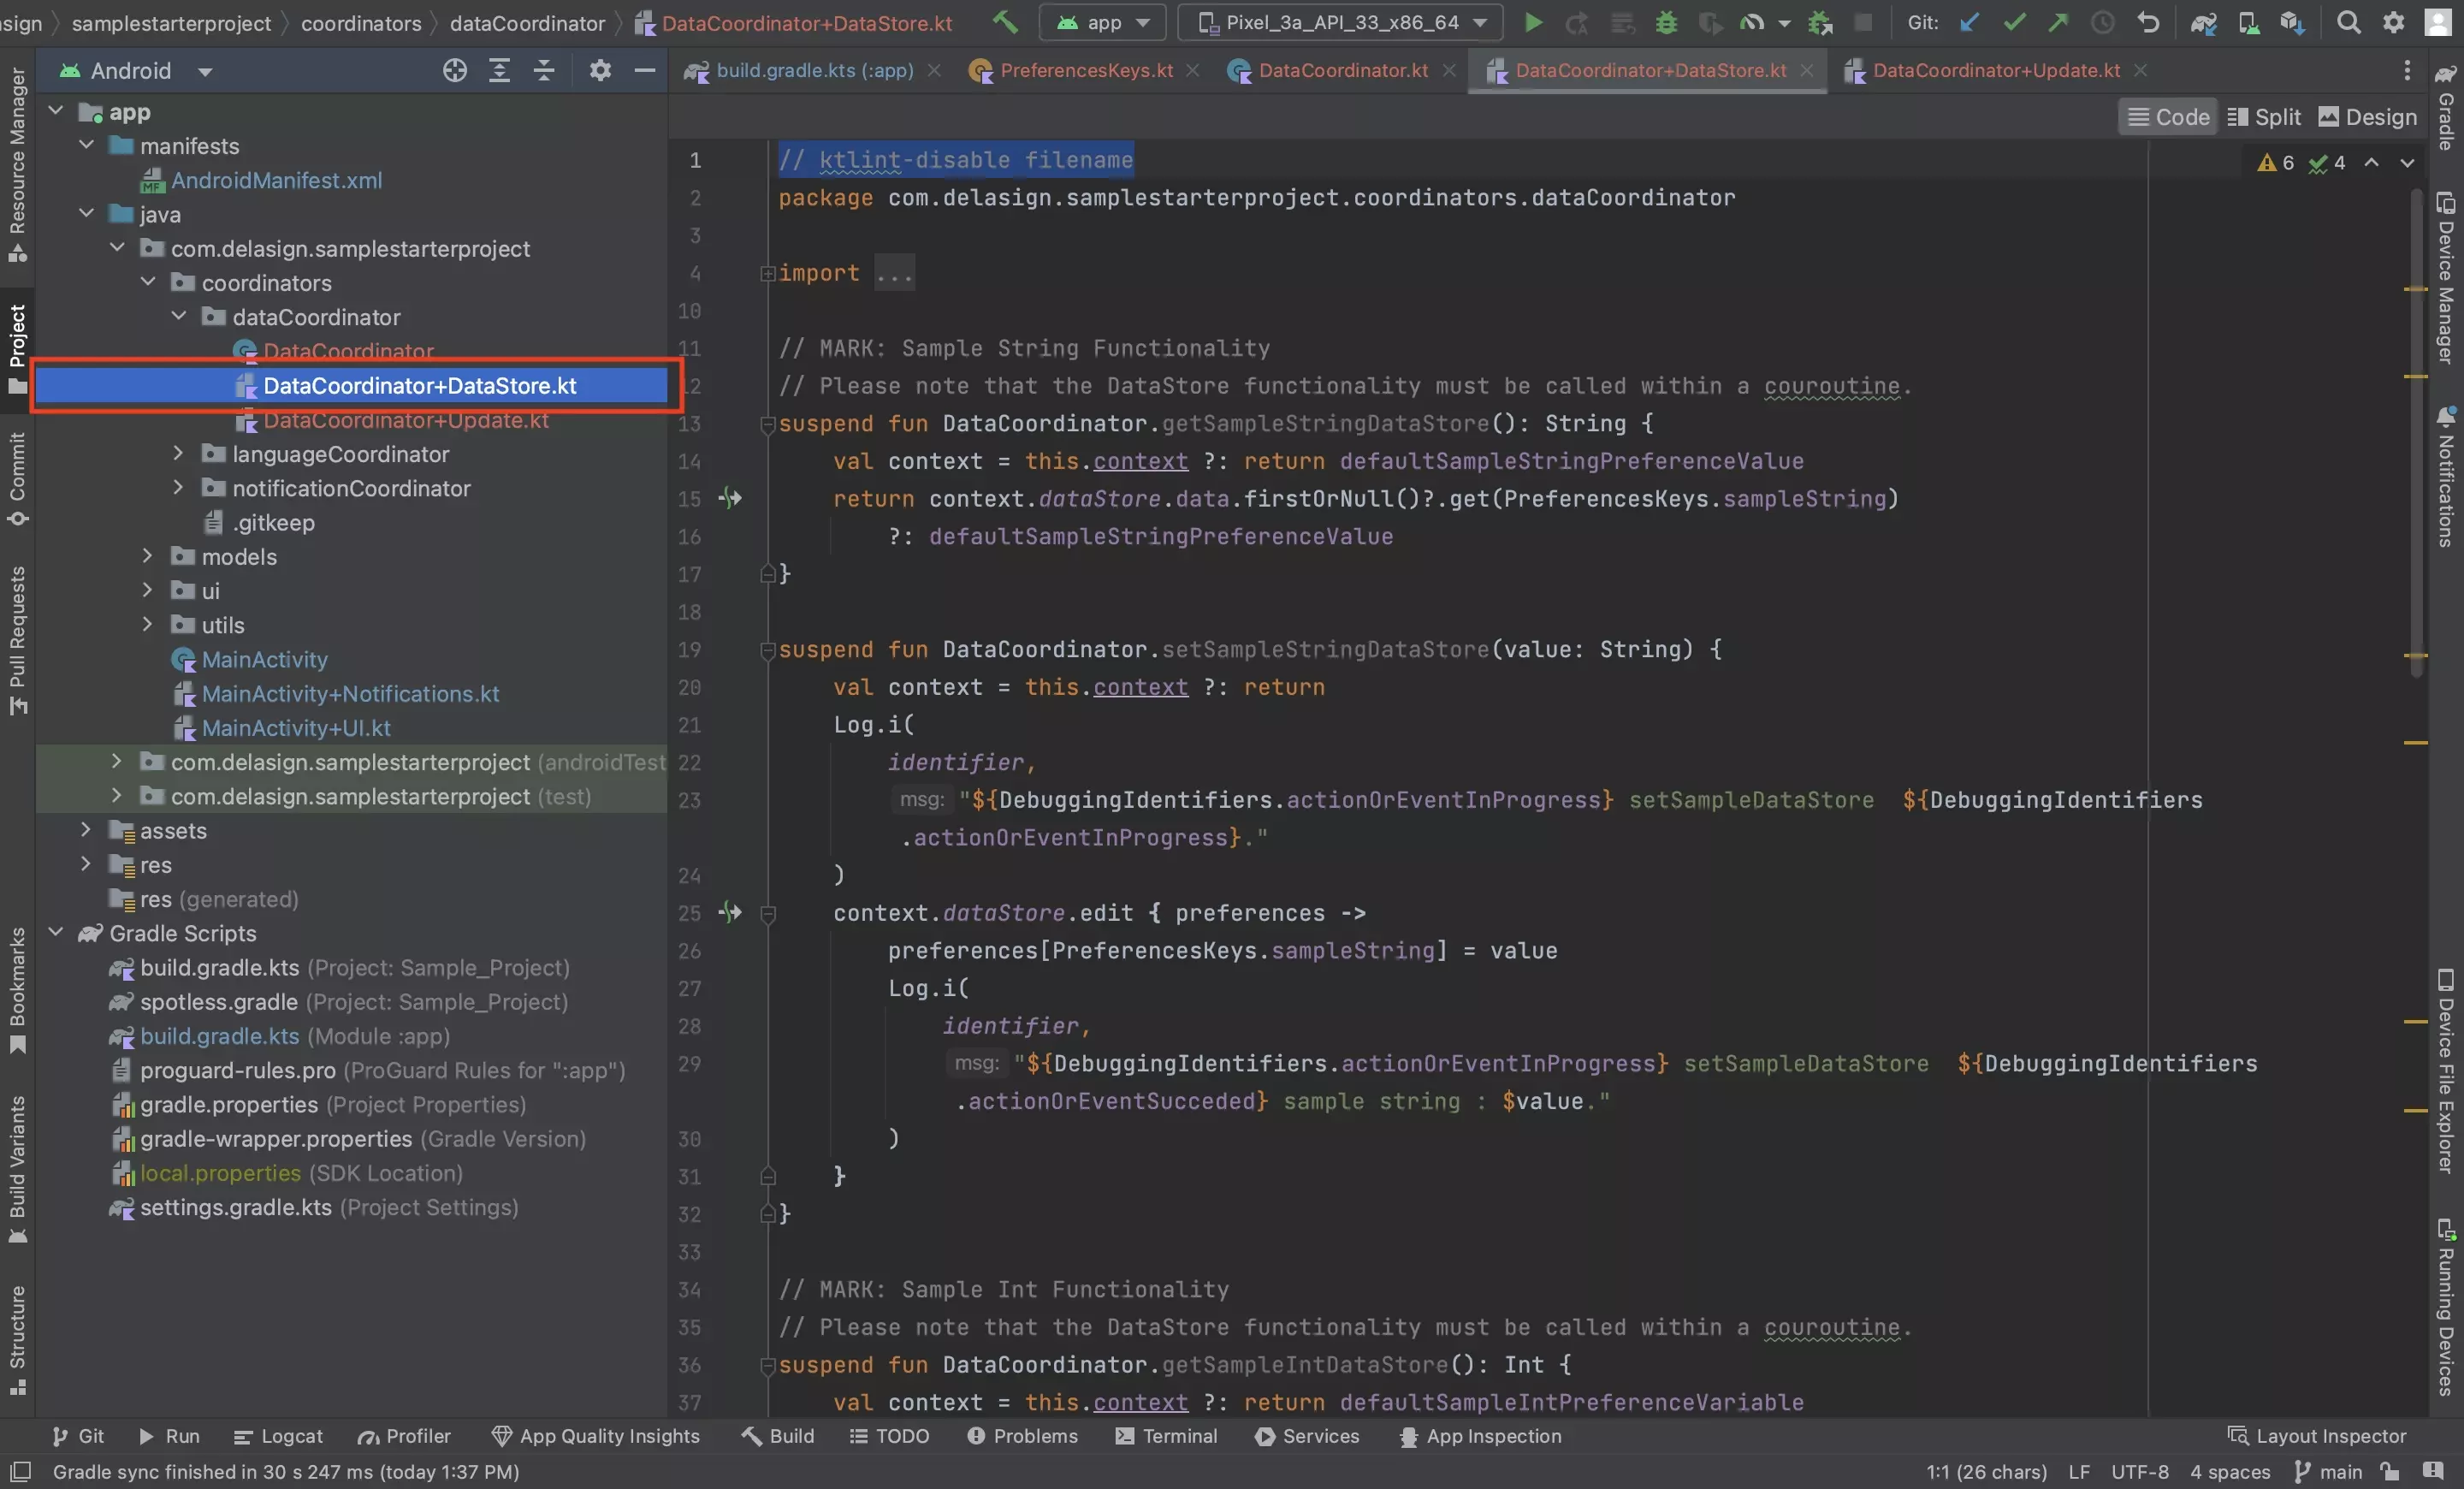
In the DataCoordinator+DataStore.kt file, create functions to save and retrieve each of the variables.
As demonstrated in the code below, the DataStore may not find the relevant variable, and requires a default value to be returned in the event it cannot find it. Please use the ones that were defined in the prior step.
Step Seven: Create the DataCoordinator Update Functionality

Complete the DataCoordinator's Update extension by creating functions that update each preference's variable and datastore variable.
This is done to create a unified way to update variables from anywhere in your app.
Step Eight: Complete the DataCoordinator Initialization Functionality
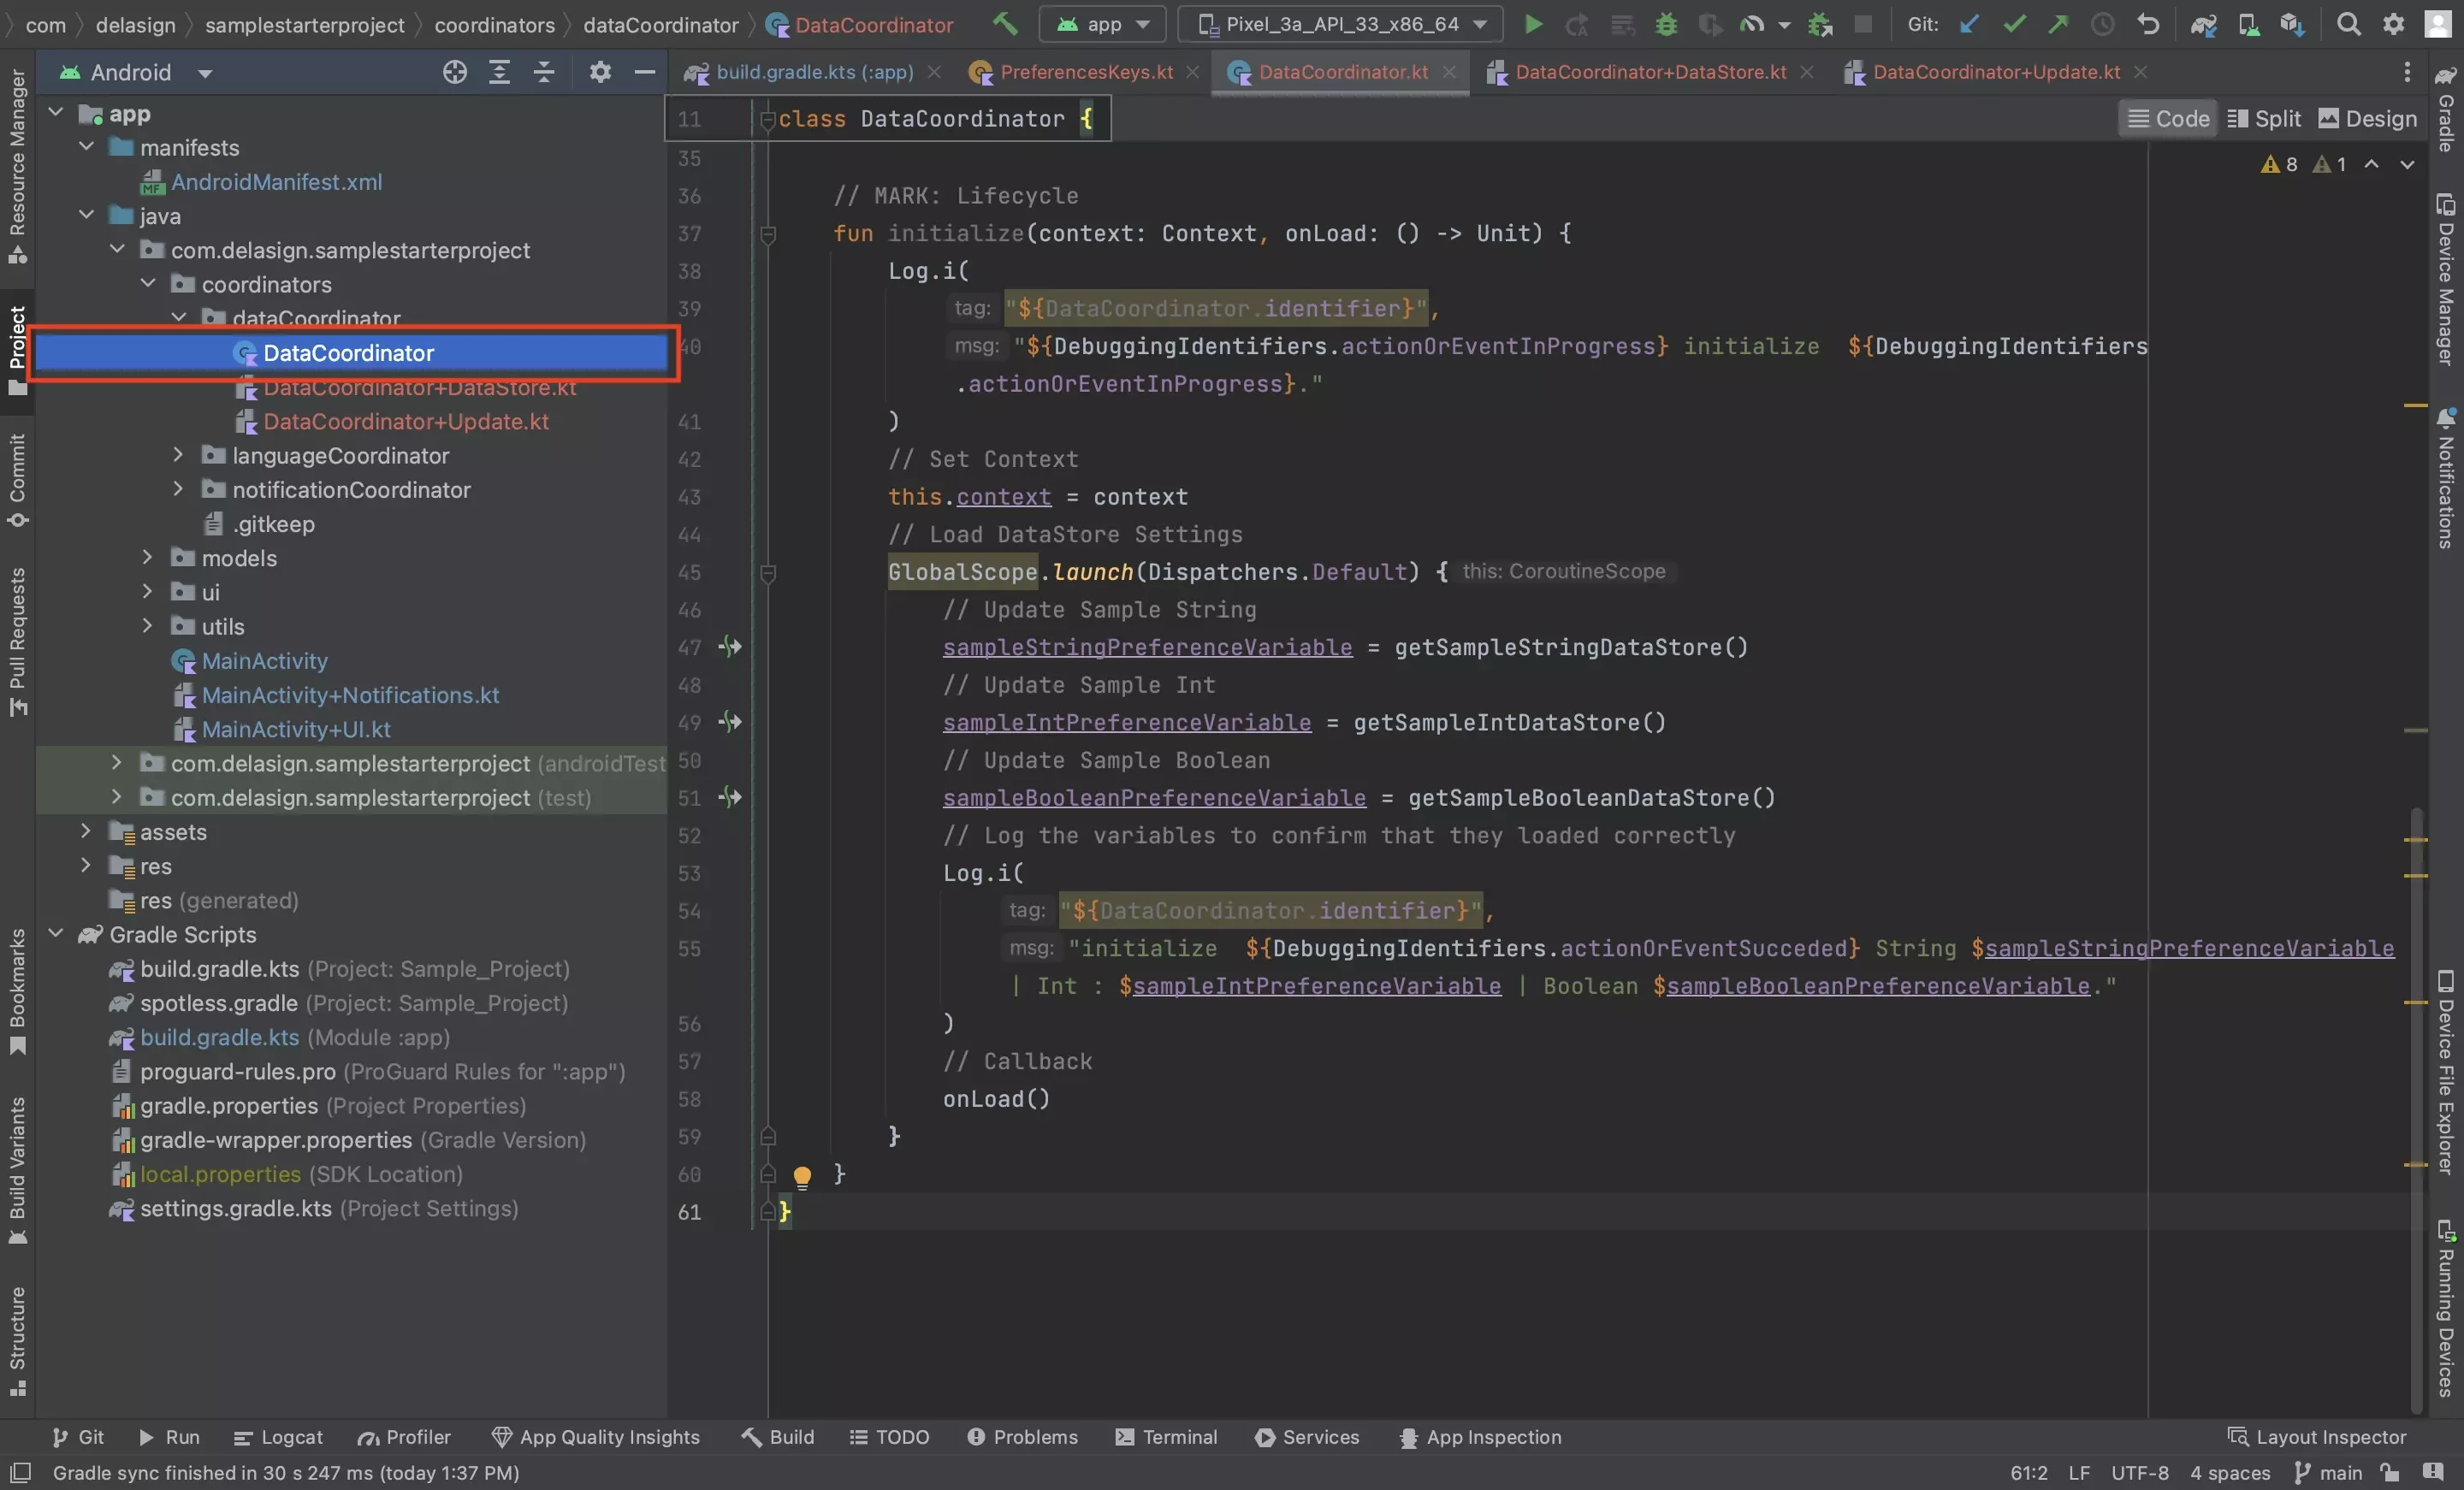
Complete the initialize function of the DataCoordinator to gather the variables on initialize using code similar to that below.
Step Nine: Initialize the DataCoordinator
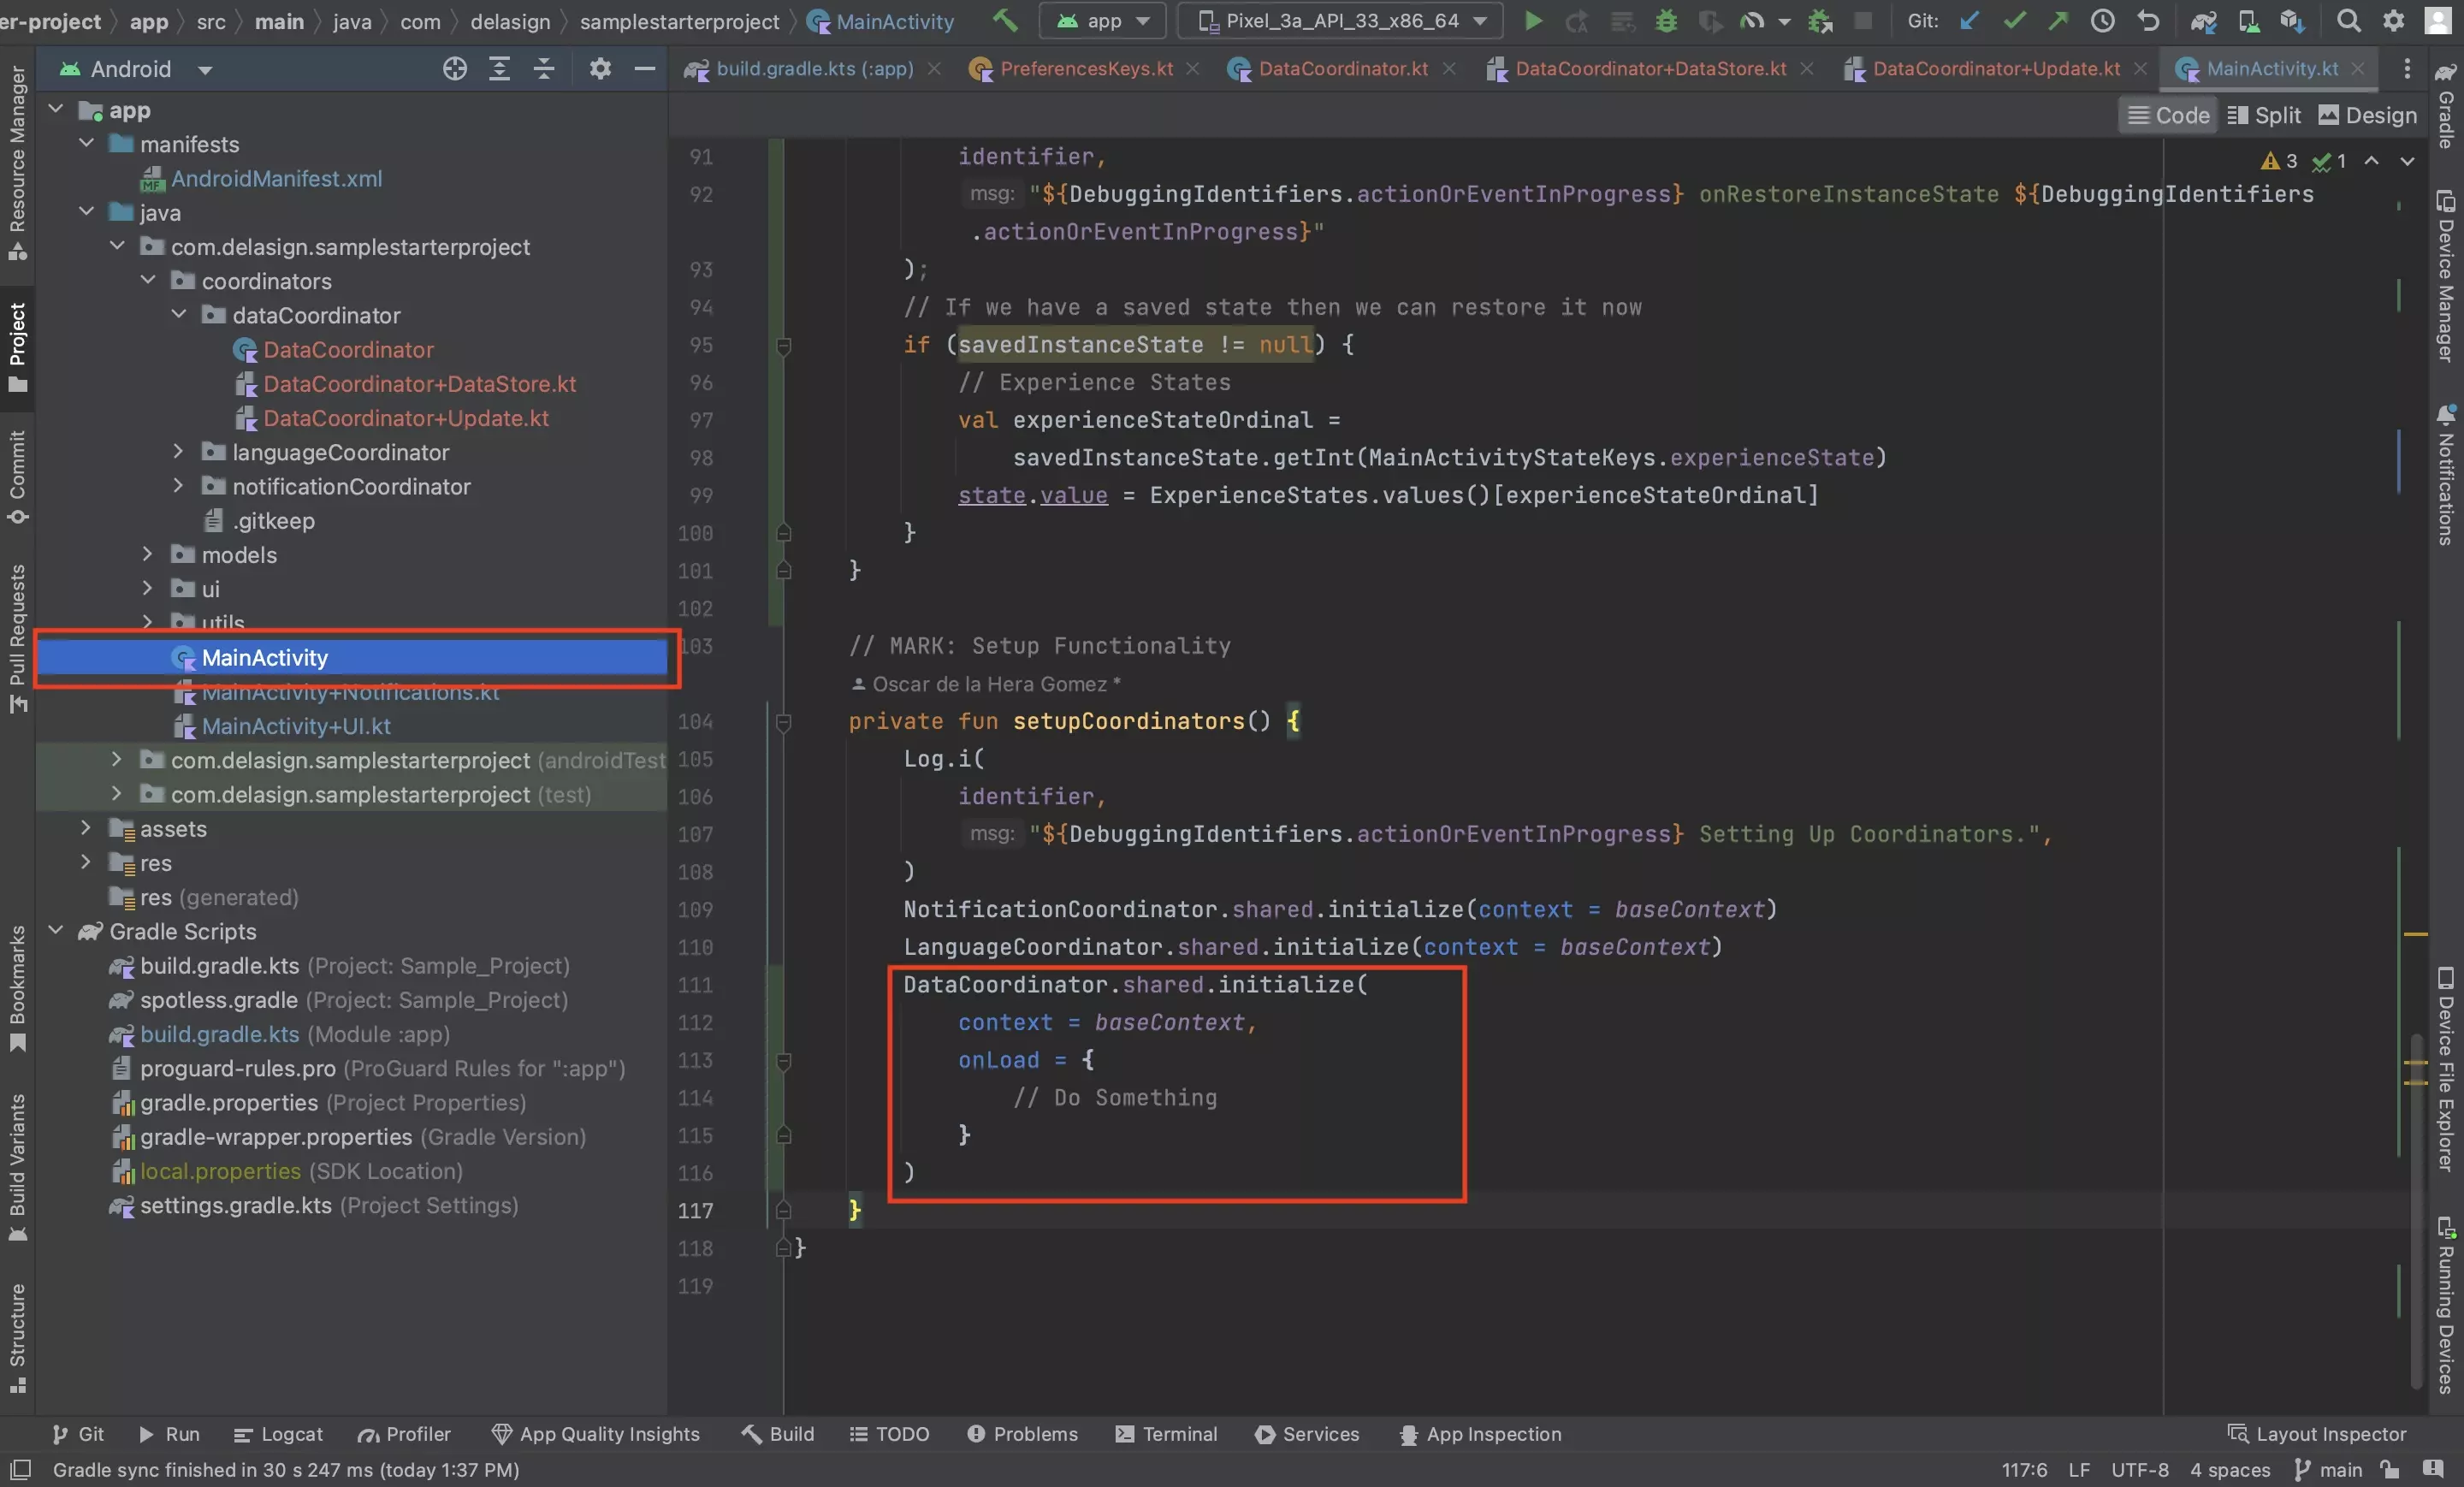
Initialize the DataCoordinator in the MainActivity.
Step Ten: Test
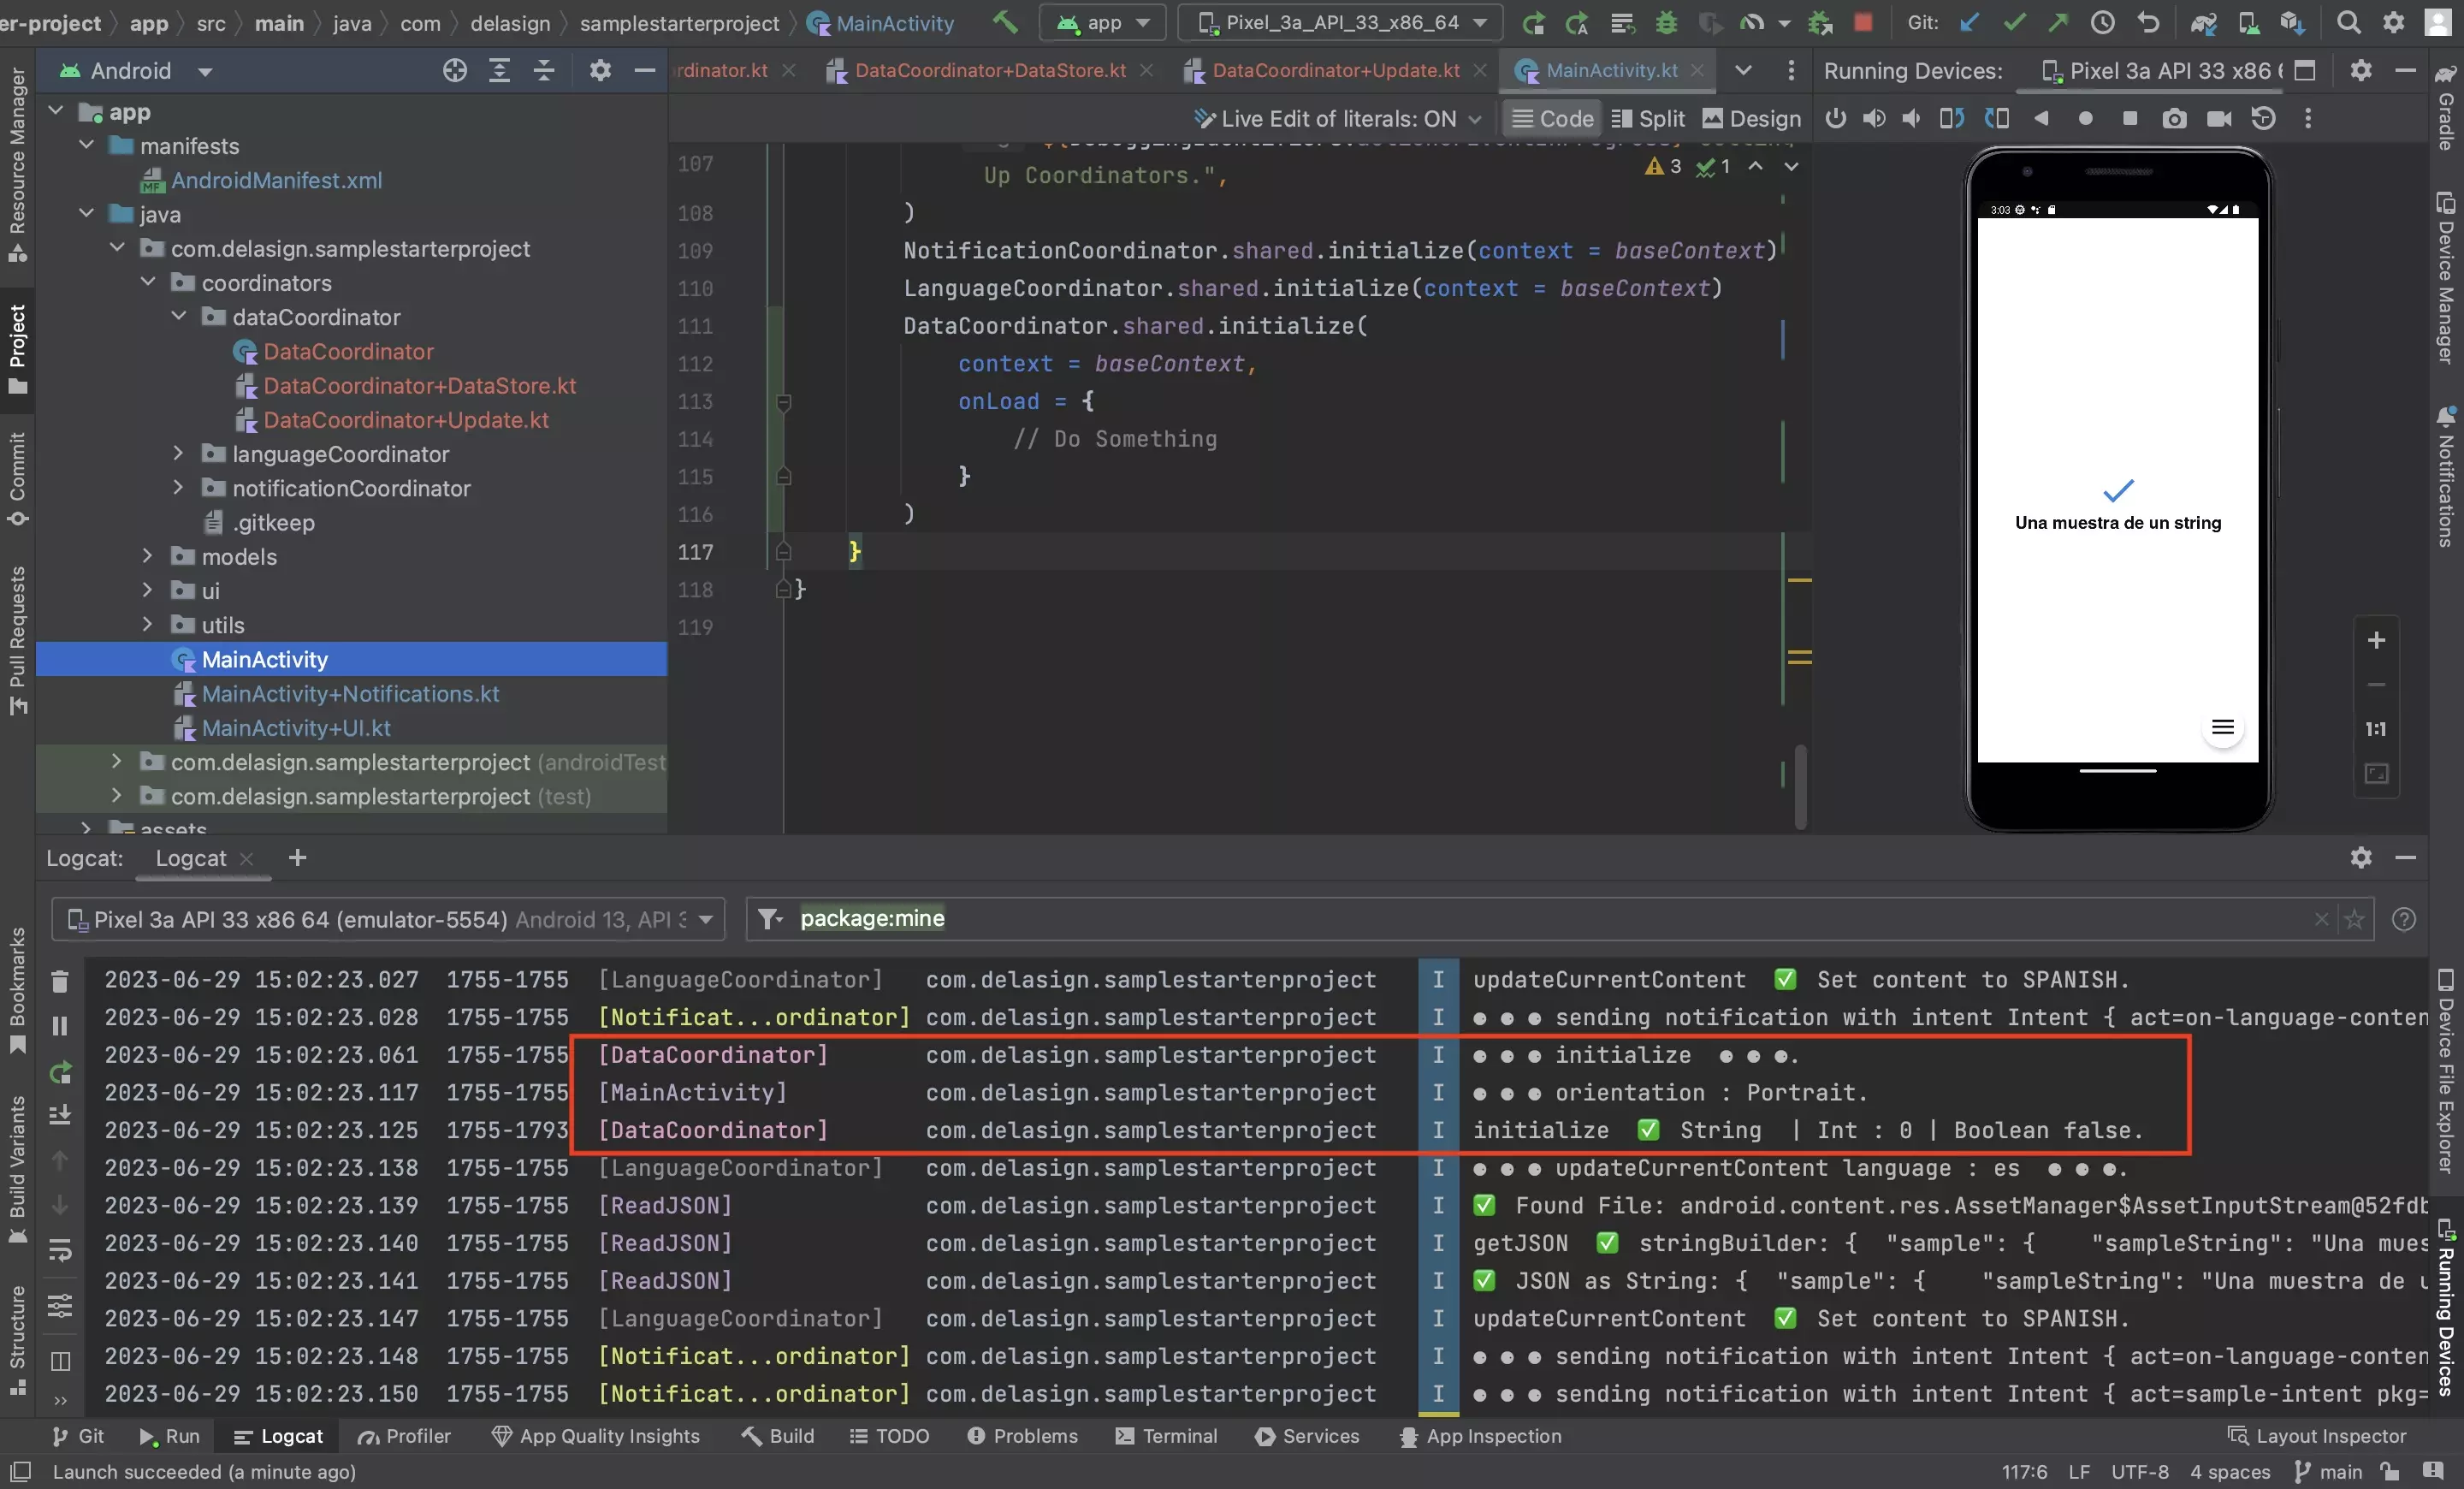
Run the app and confirm that the DataCoordinator works and loads the defaults.
Step Eleven: Update a DataStore variable
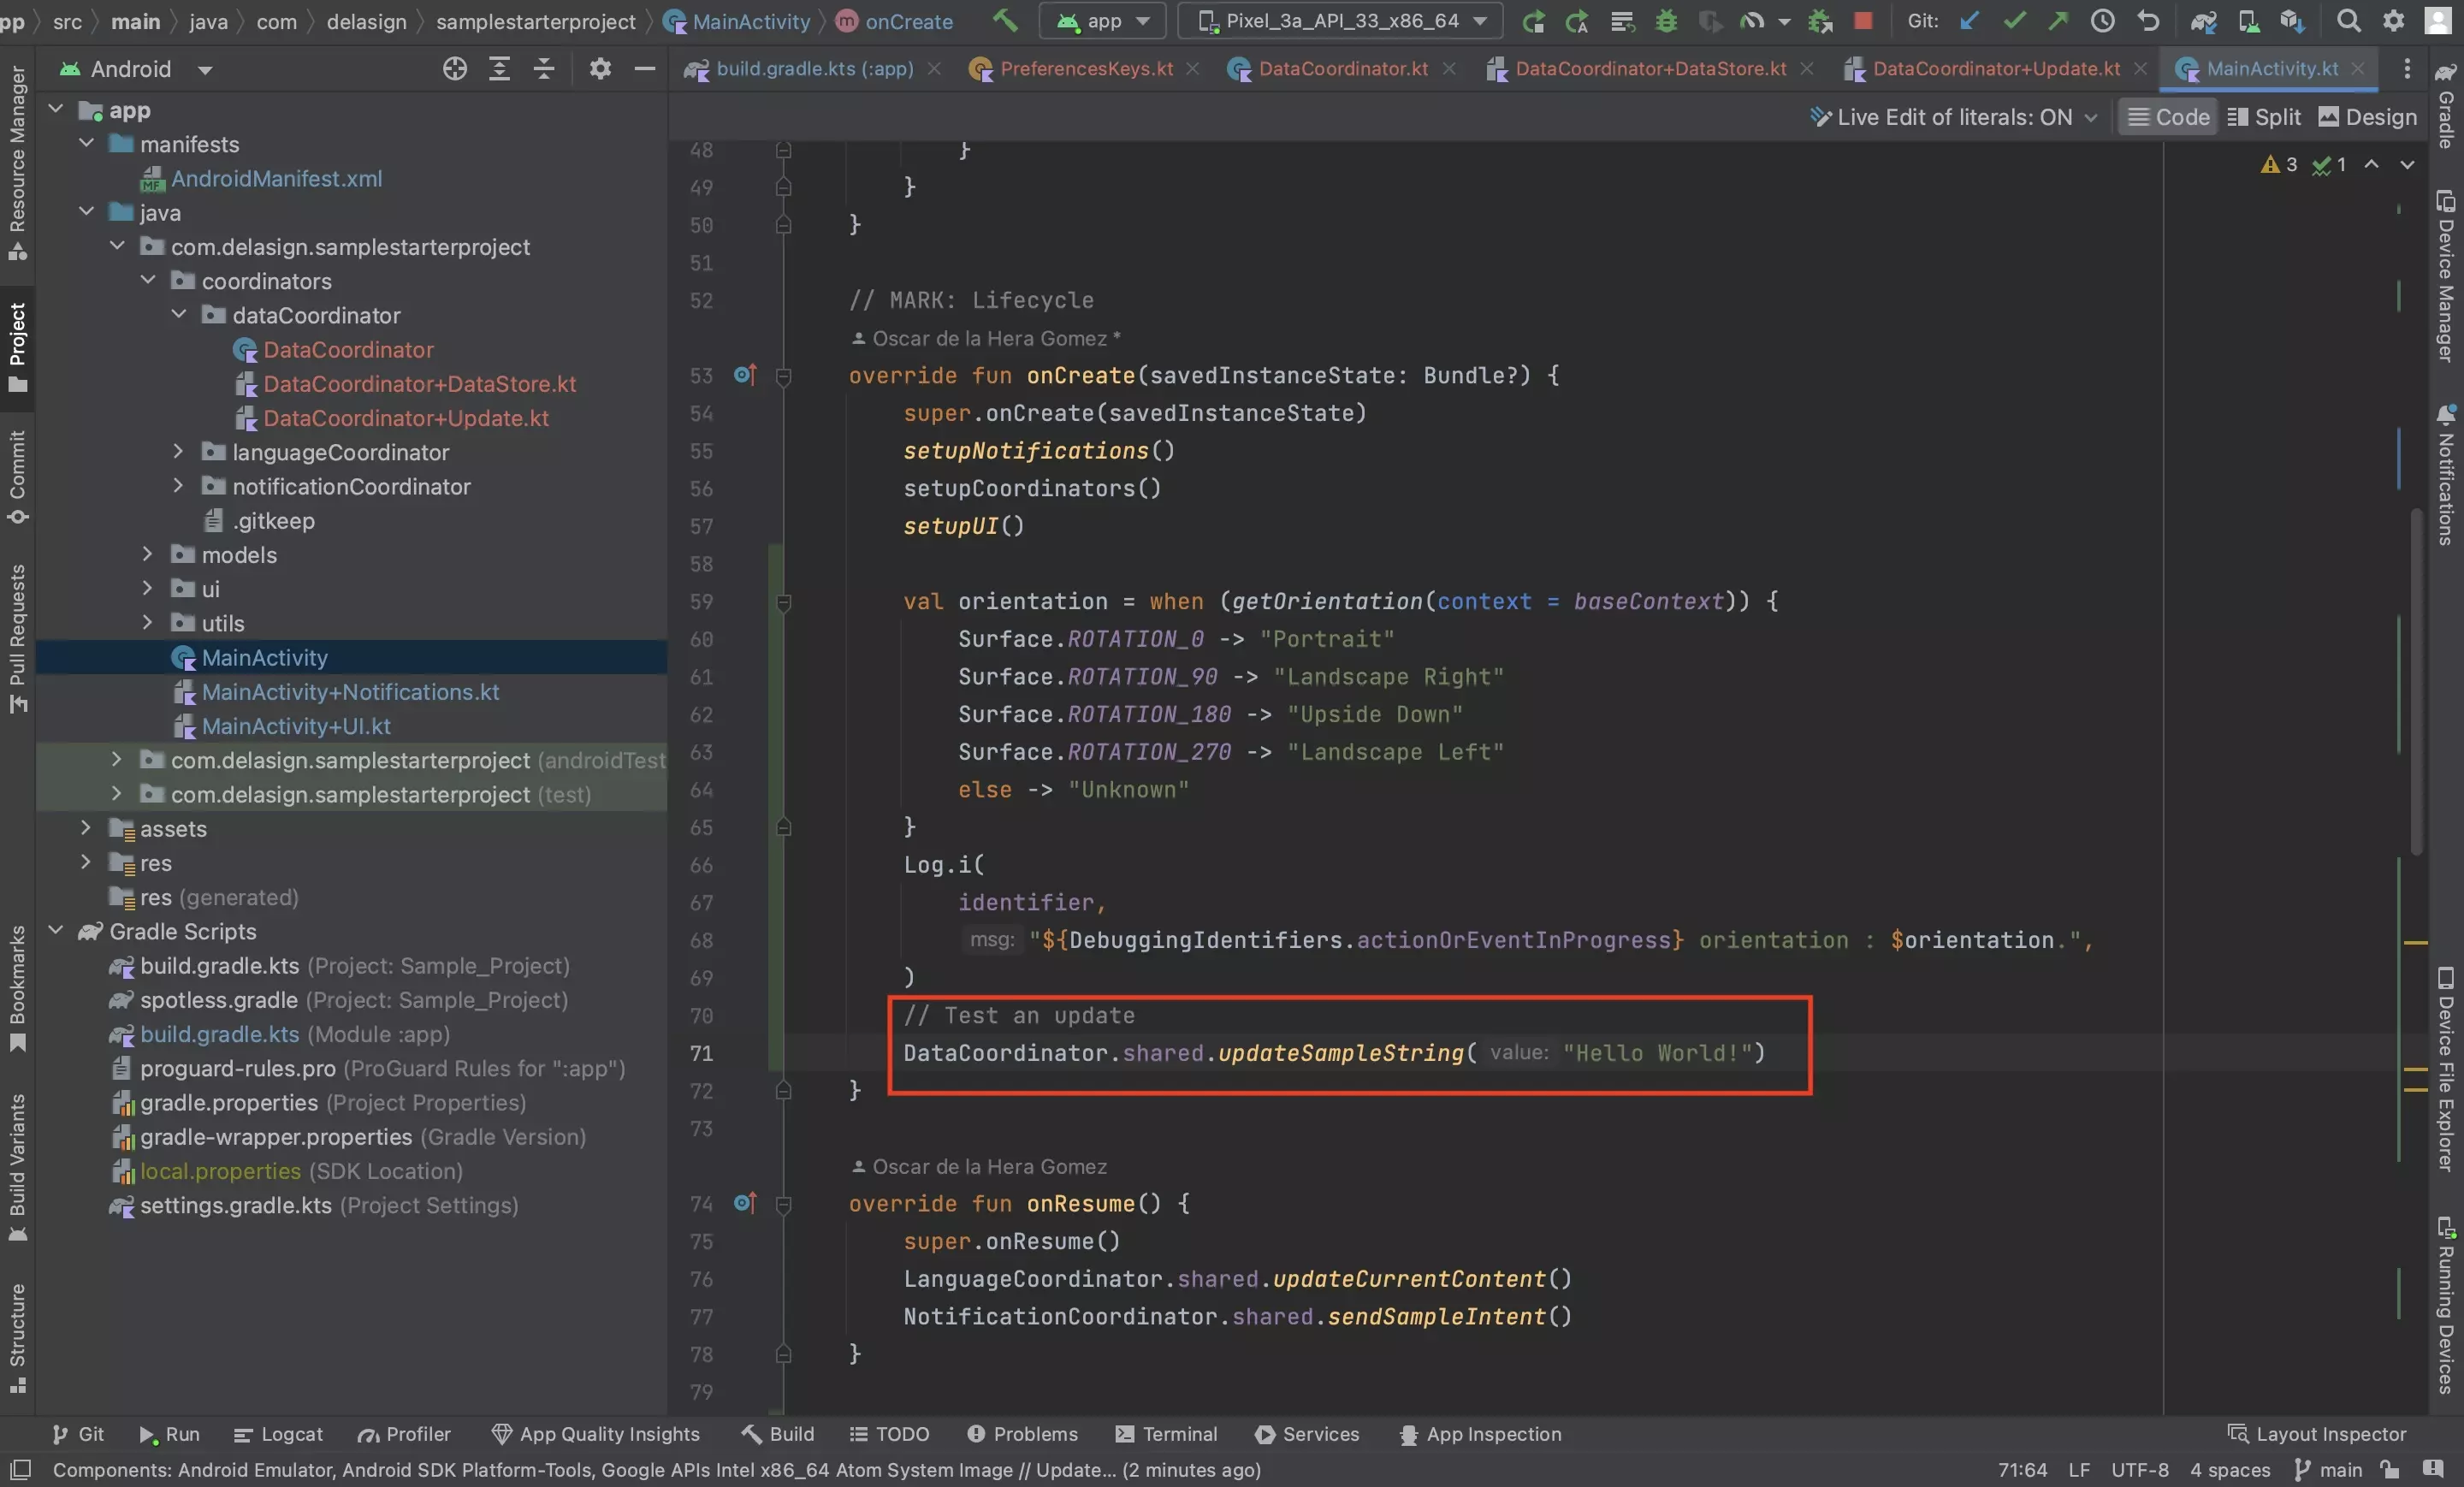
Call one of the update functions that you declared in Step Seven to allow you to test that the updates are working.
Please note that as we are using a Singleton, you can call this function from anywhere in the app.
Step Twelve: Test the Update
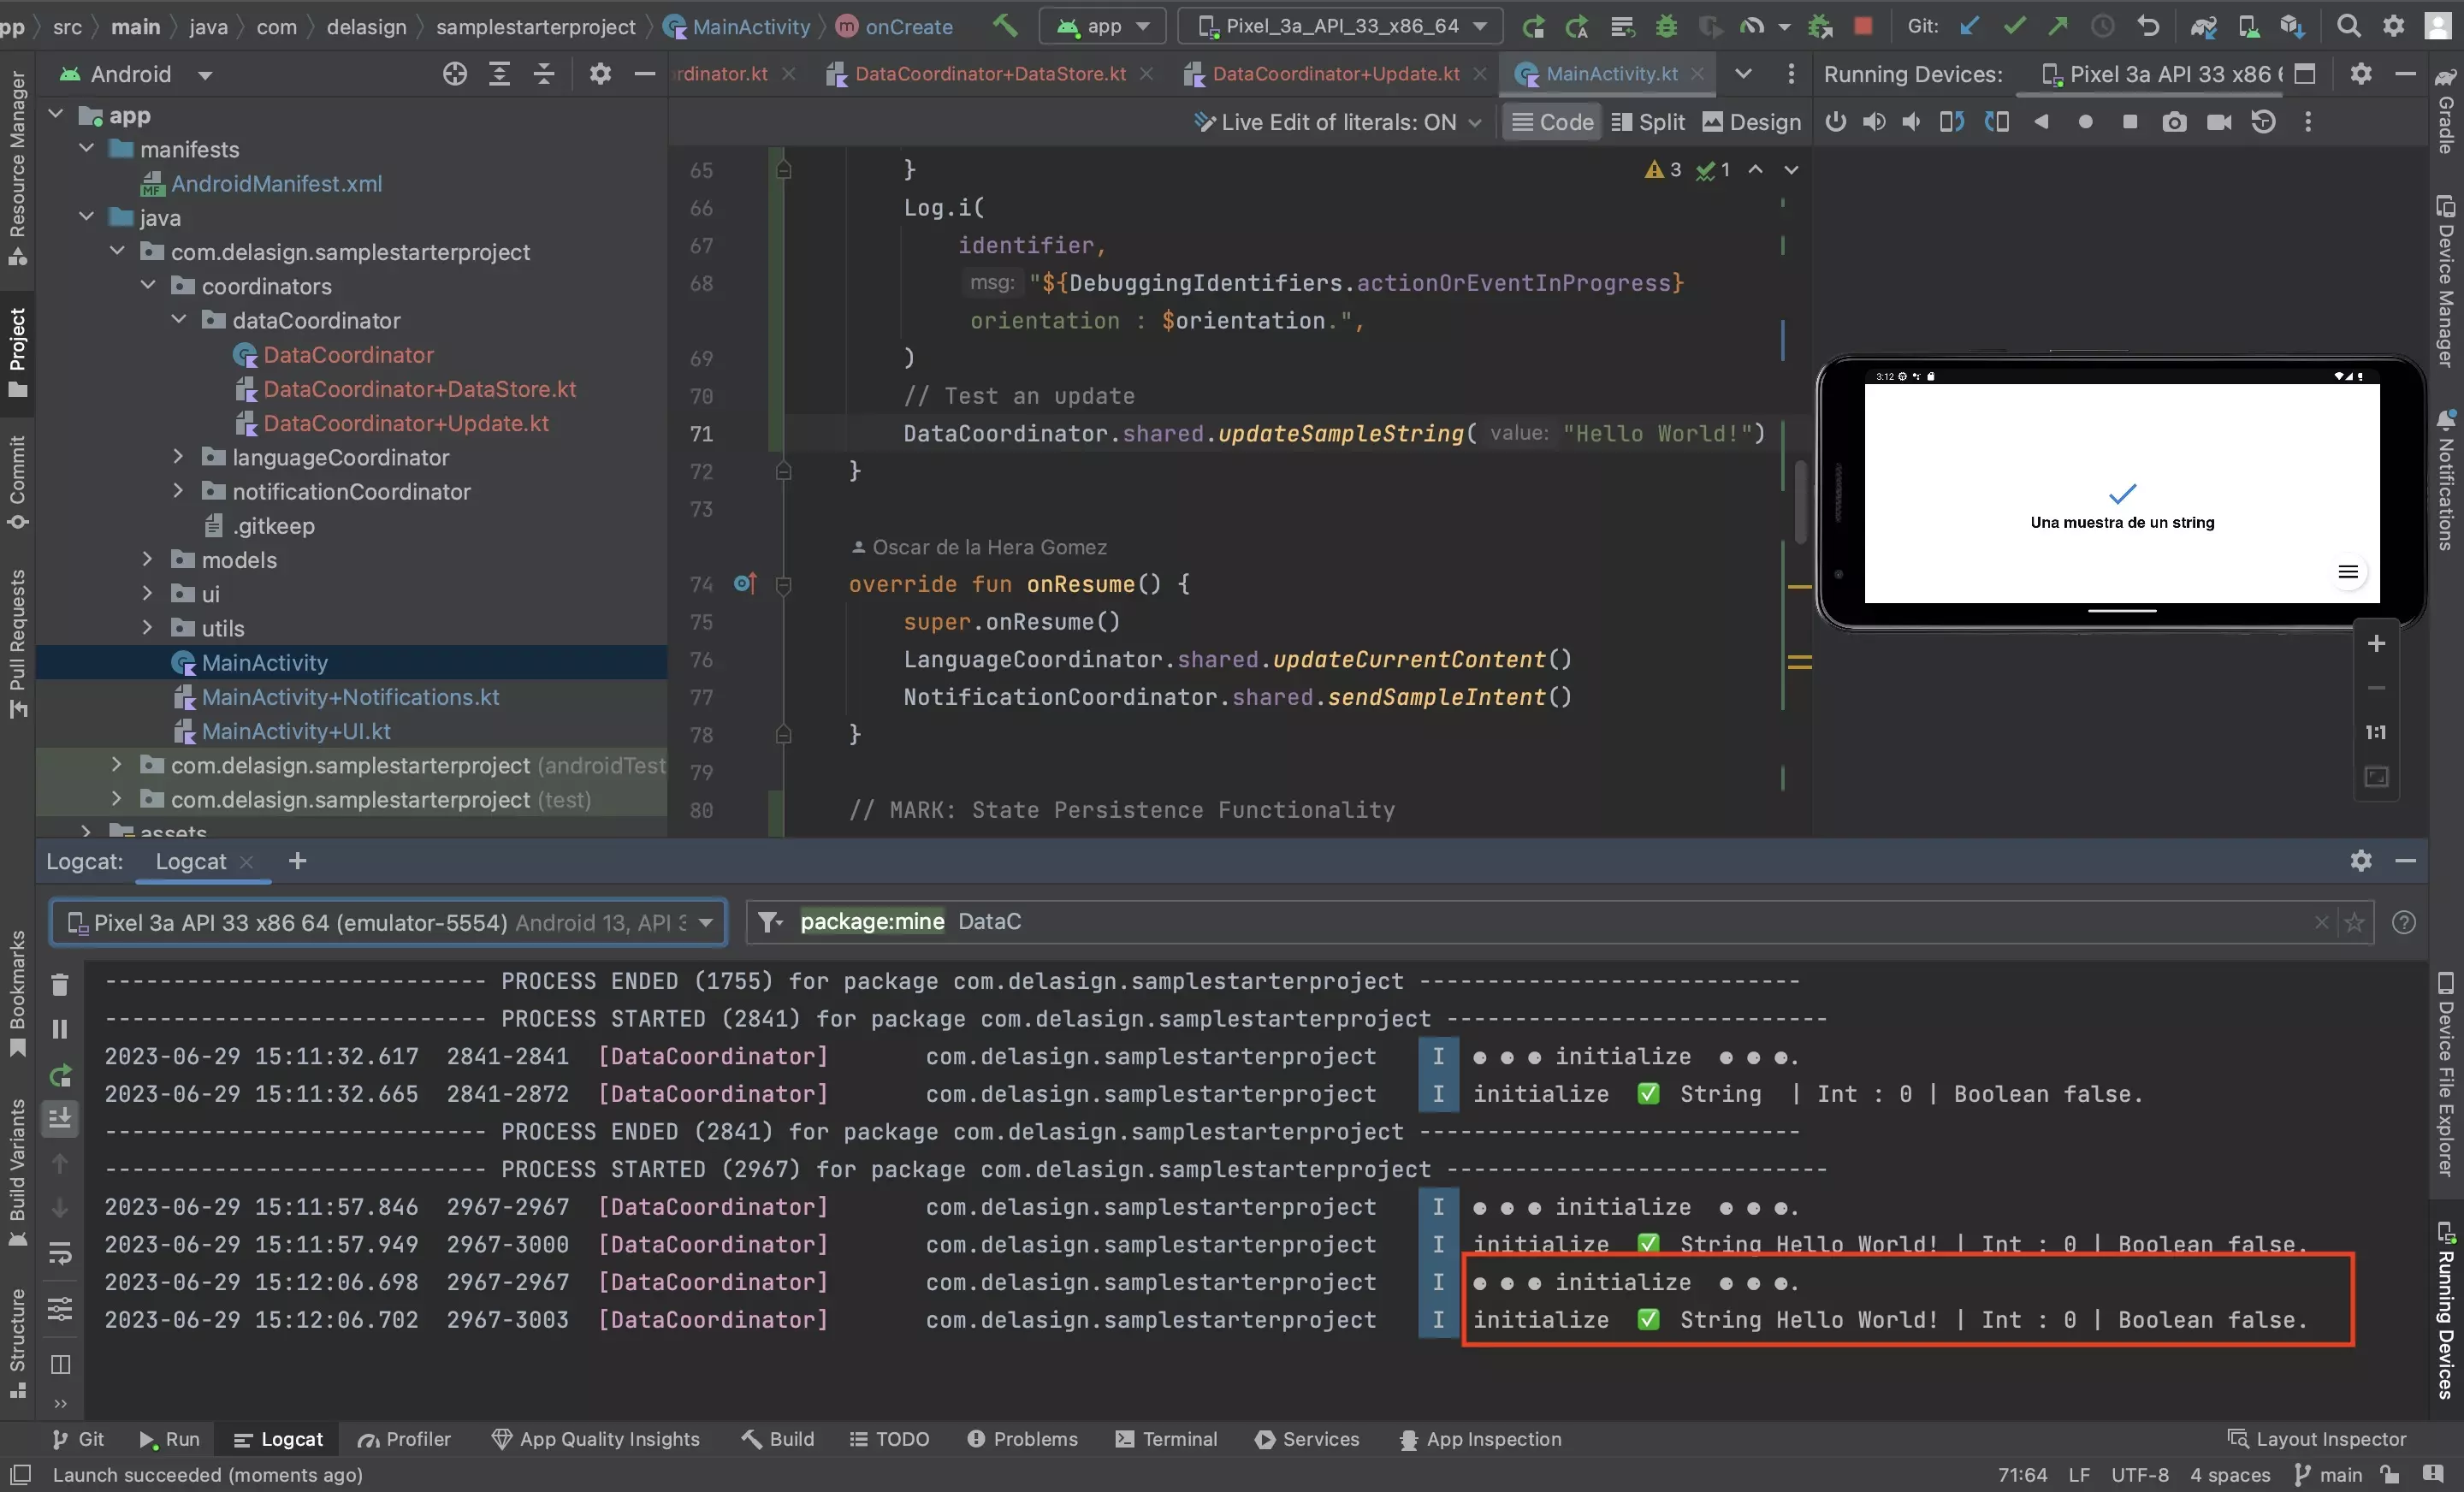
Run the app and perform the action required for the update. Then change orientation and confirm that the update went through.
Please note that we allow for configuration changes, meaning that every time that the app changes orientation, the app will load the variables from the DataStore.
How do I reset the DataStore or a variable ?
If you wish to reset the DataStore variable, you must either set each value to its default programmatically or delete the app and reinstall it.