How to make an API request in an Android app using Kotlin
A step by step guide on making API requests (GET, POST, PUT, PATCH, DELETE) and converting the JSON into a readable output.

A step by step guide on making API requests (GET, POST, PUT, PATCH, DELETE) and converting the JSON into a readable output.
SubscribeDownload Open Source Kotlin Starter ProjectThe following tutorial builds on our Open Source Kotlin project which can be downloaded using the link below, and aims to walk you through how to prepare your project for making API calls, through the examples provided by Google Volley's library.
We recommend that you checkout the main branch and carry out the steps described below. The changes that took place can be found on the tutorial/data/setup-api-requests branch.
git clone git@github.com:delasign/kotlin-android-starter-project.gitStep One: Add the Internet Permissions
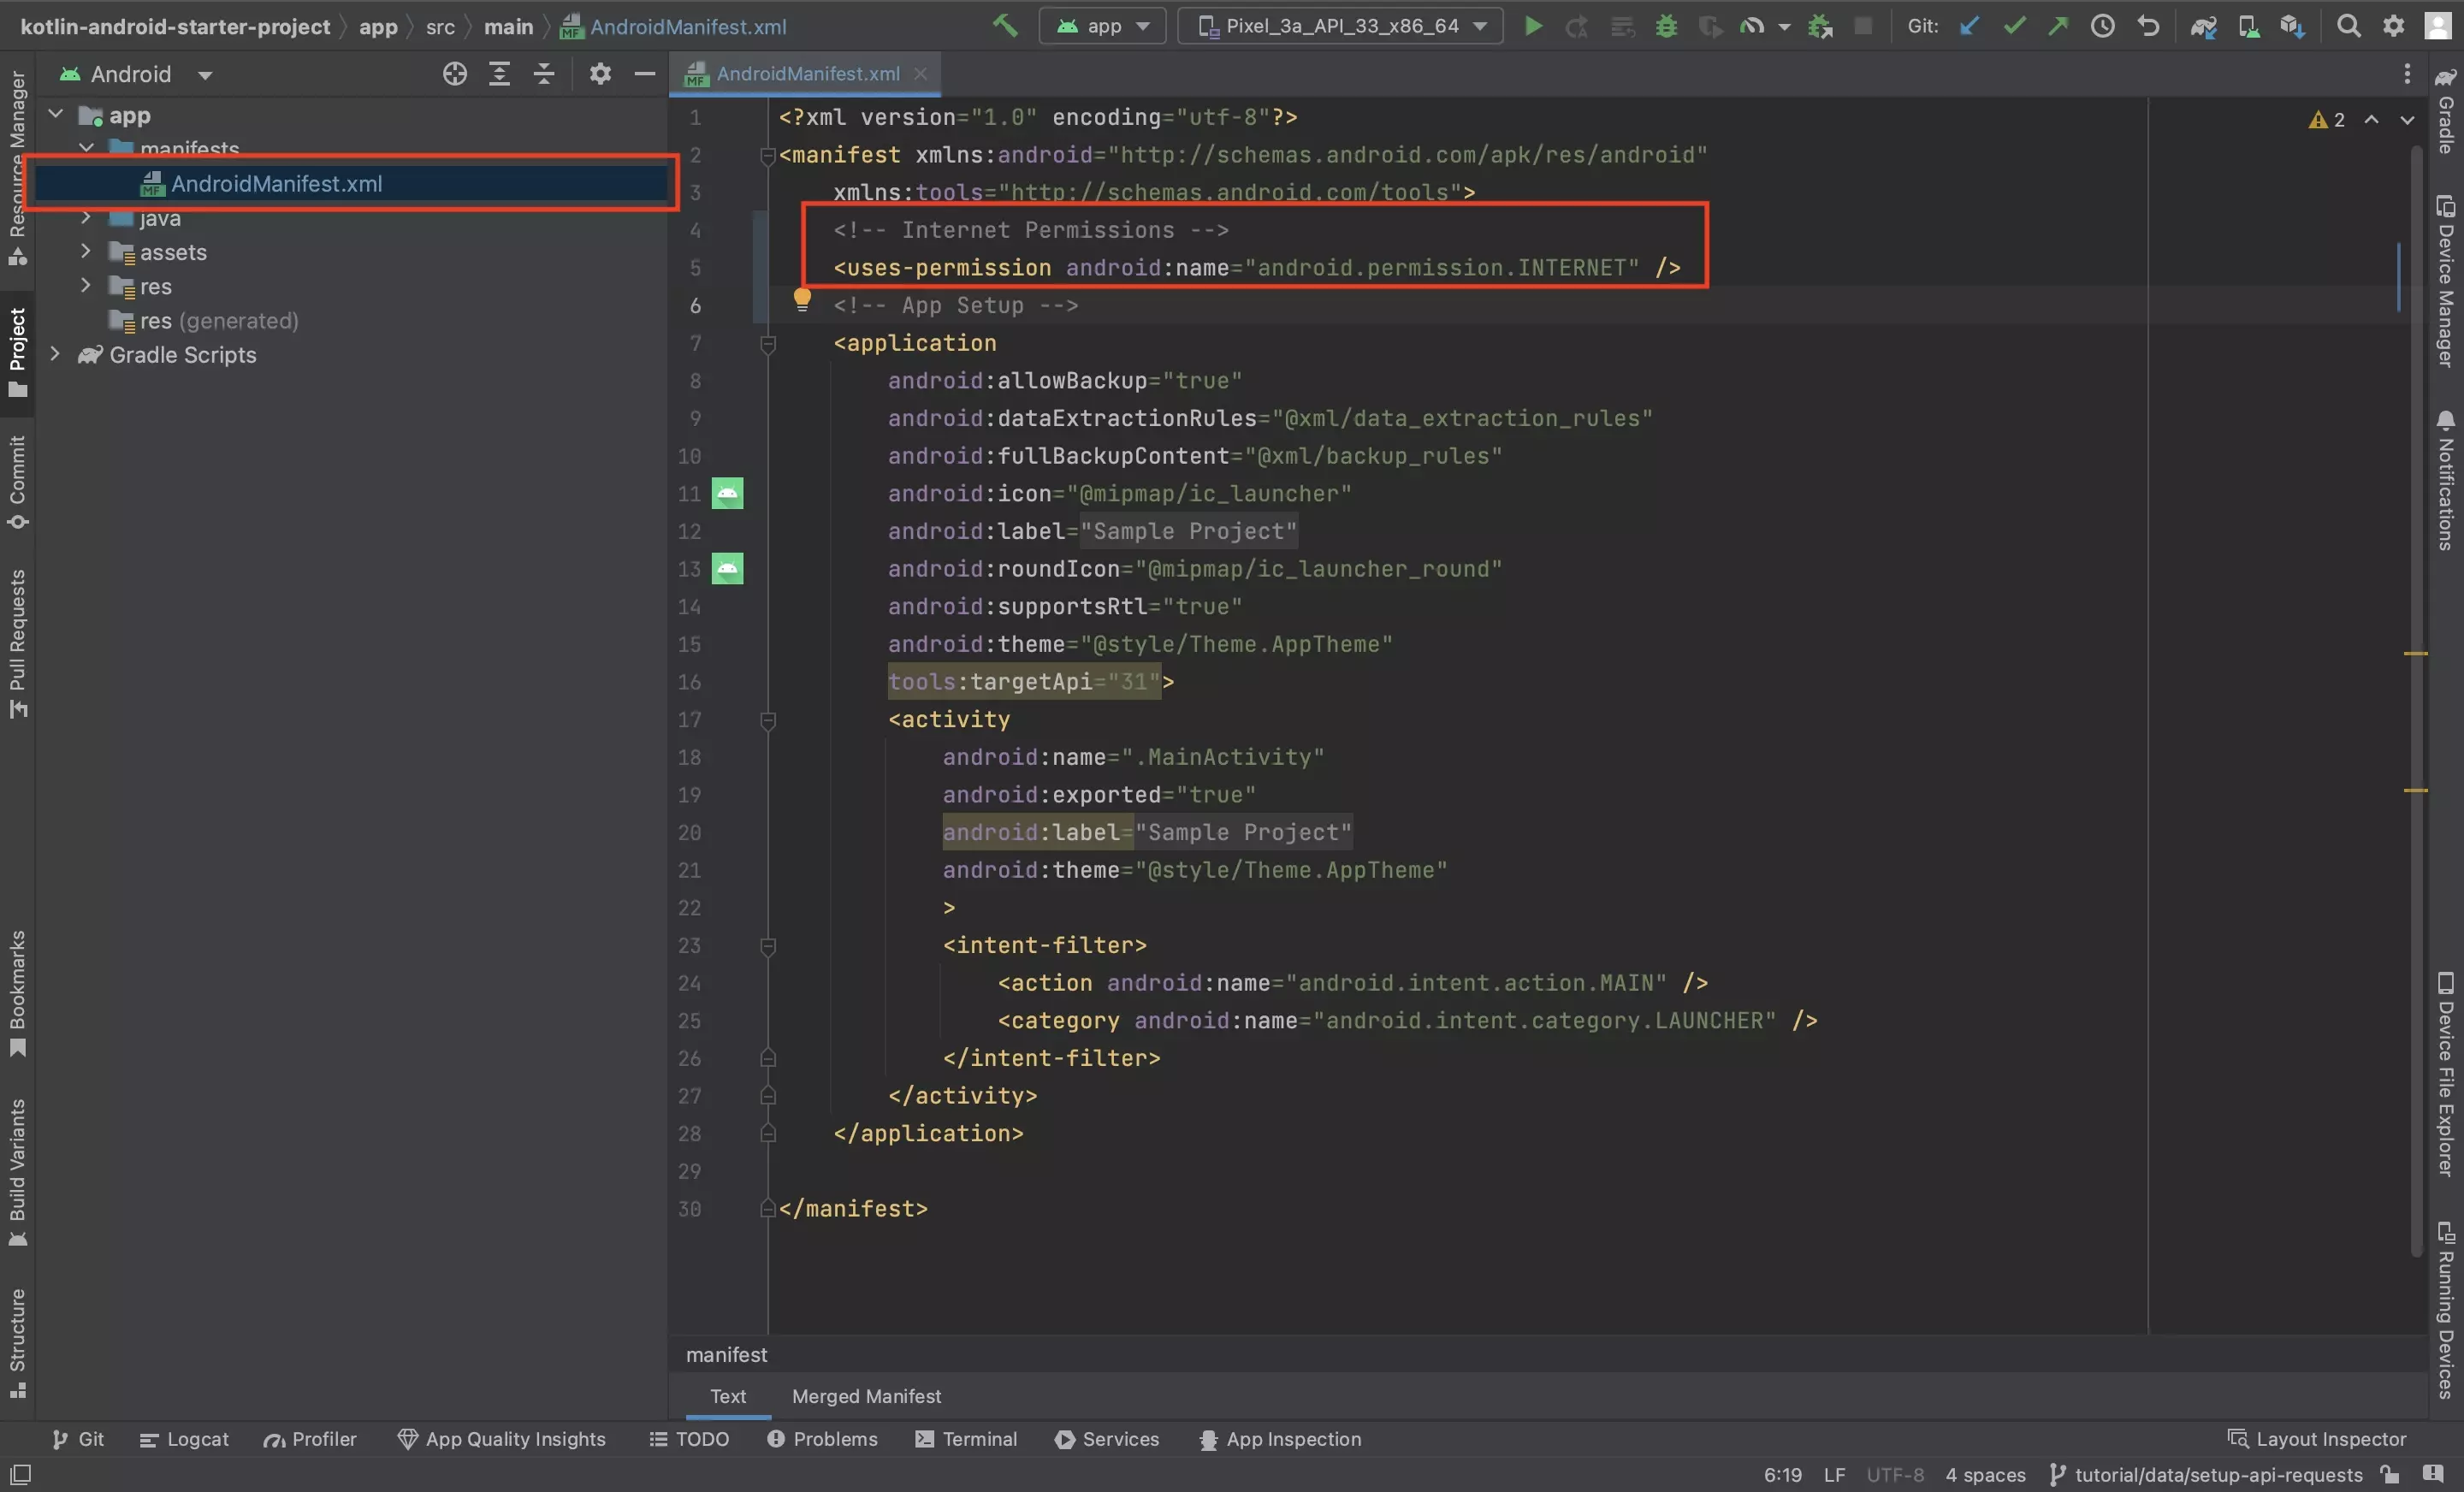
In the projects AndroidManifest.xml file, add the following permission:
<uses-permission android:name="android.permission.INTERNET" />Step Two: Add the Dependencies
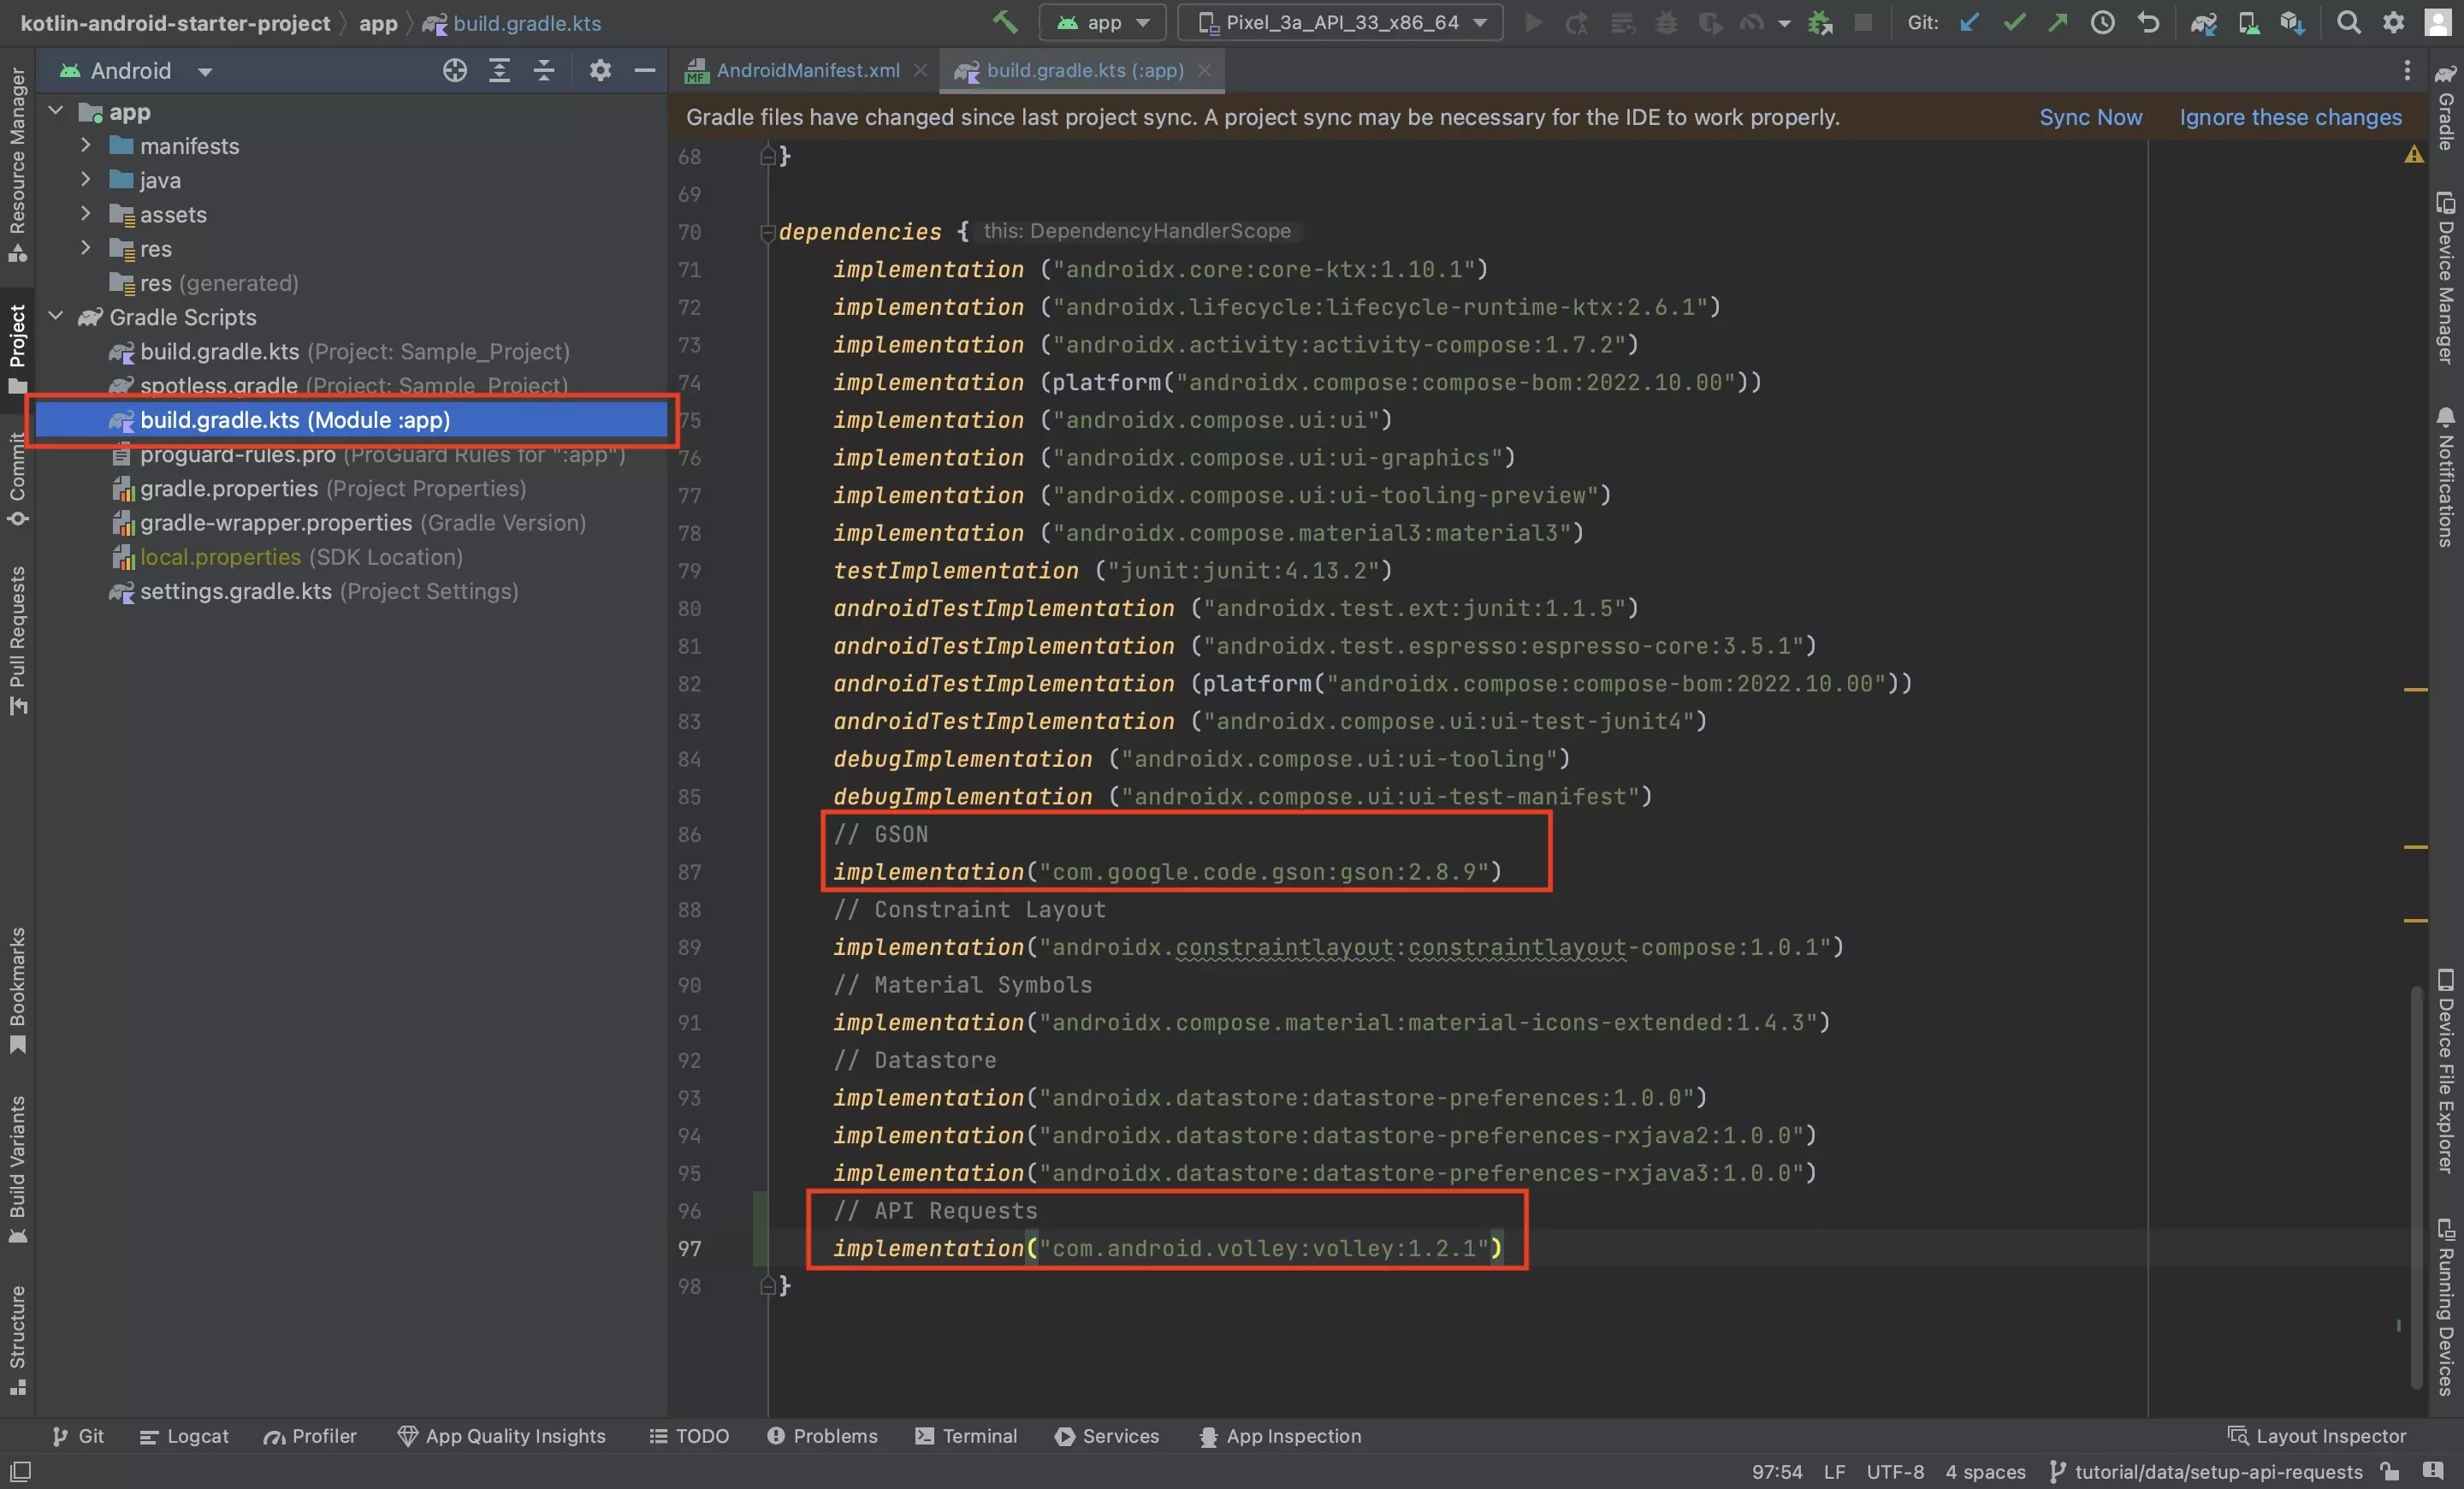
In the App Level build.gradle.kts file, add the following dependencies.
implementation("com.android.volley:volley:1.2.1")implementation("com.google.code.gson:gson:2.8.9")Please note that versions displayed above may not be the latest versions, please update the code above to the latest version in your Android Studio project.
Step Three: Sync the Gradles
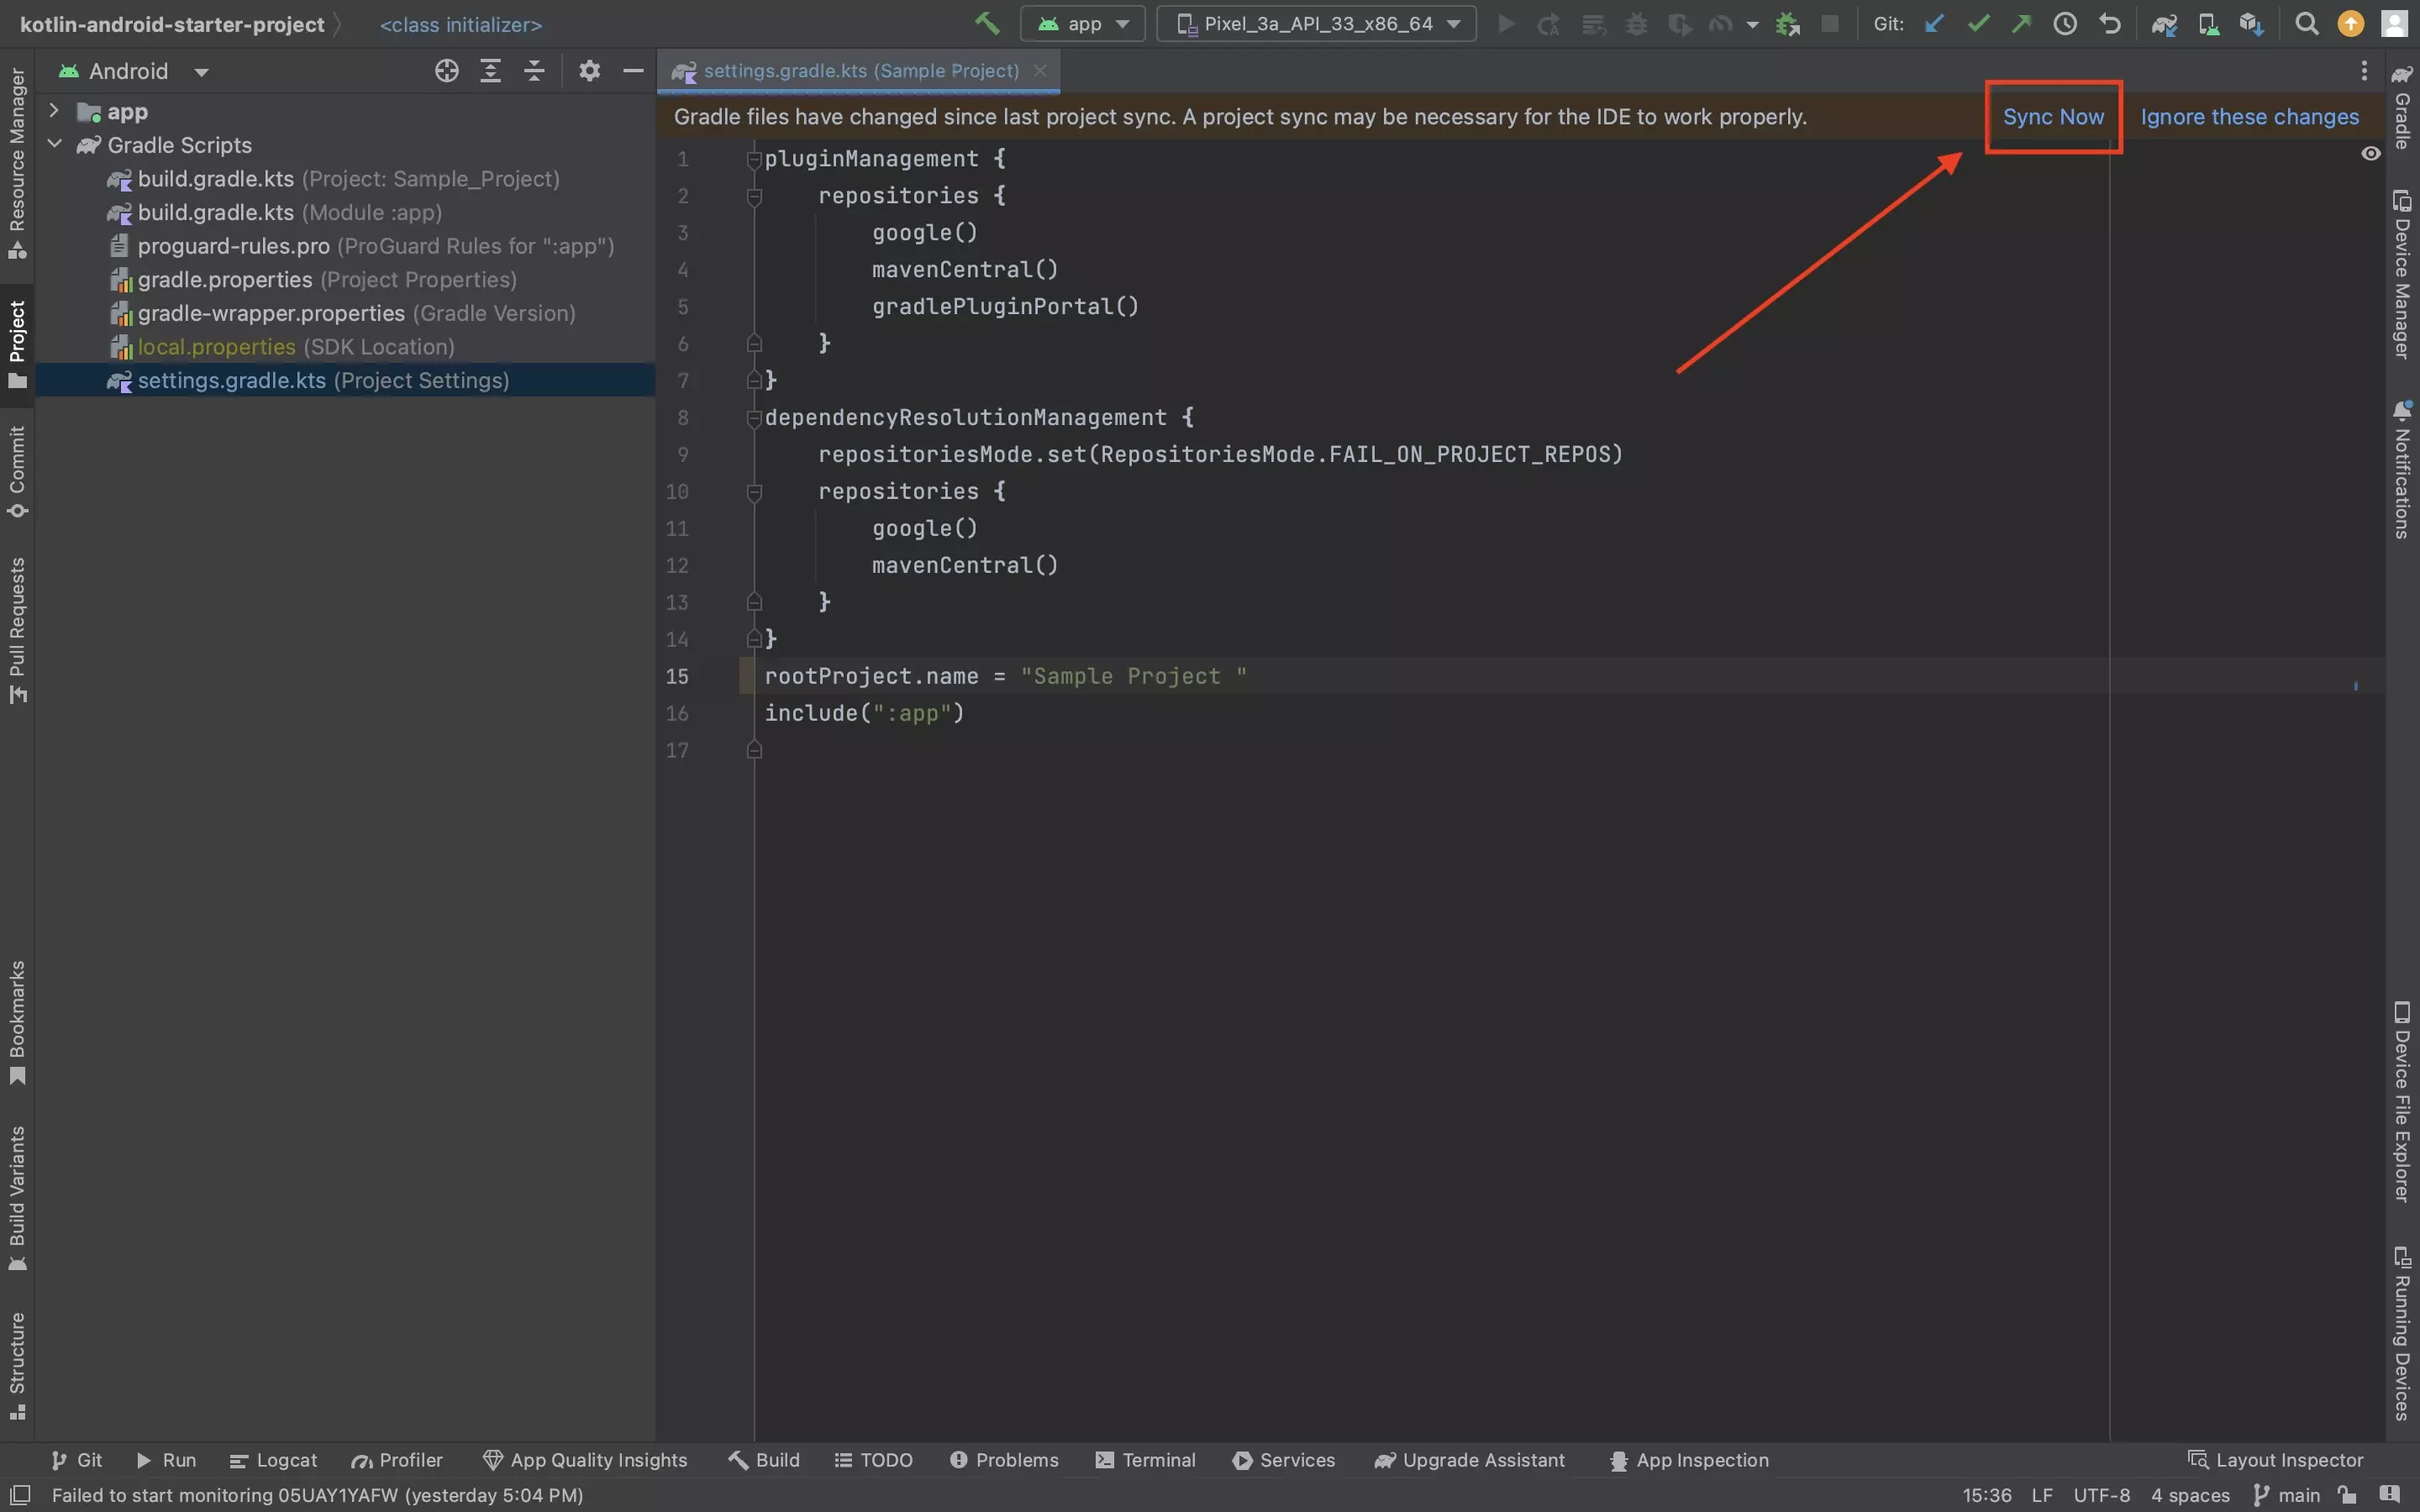
Press Sync Now in the bar above the Gradle to update the project dependencies.
Step Four: Create the GSON request class
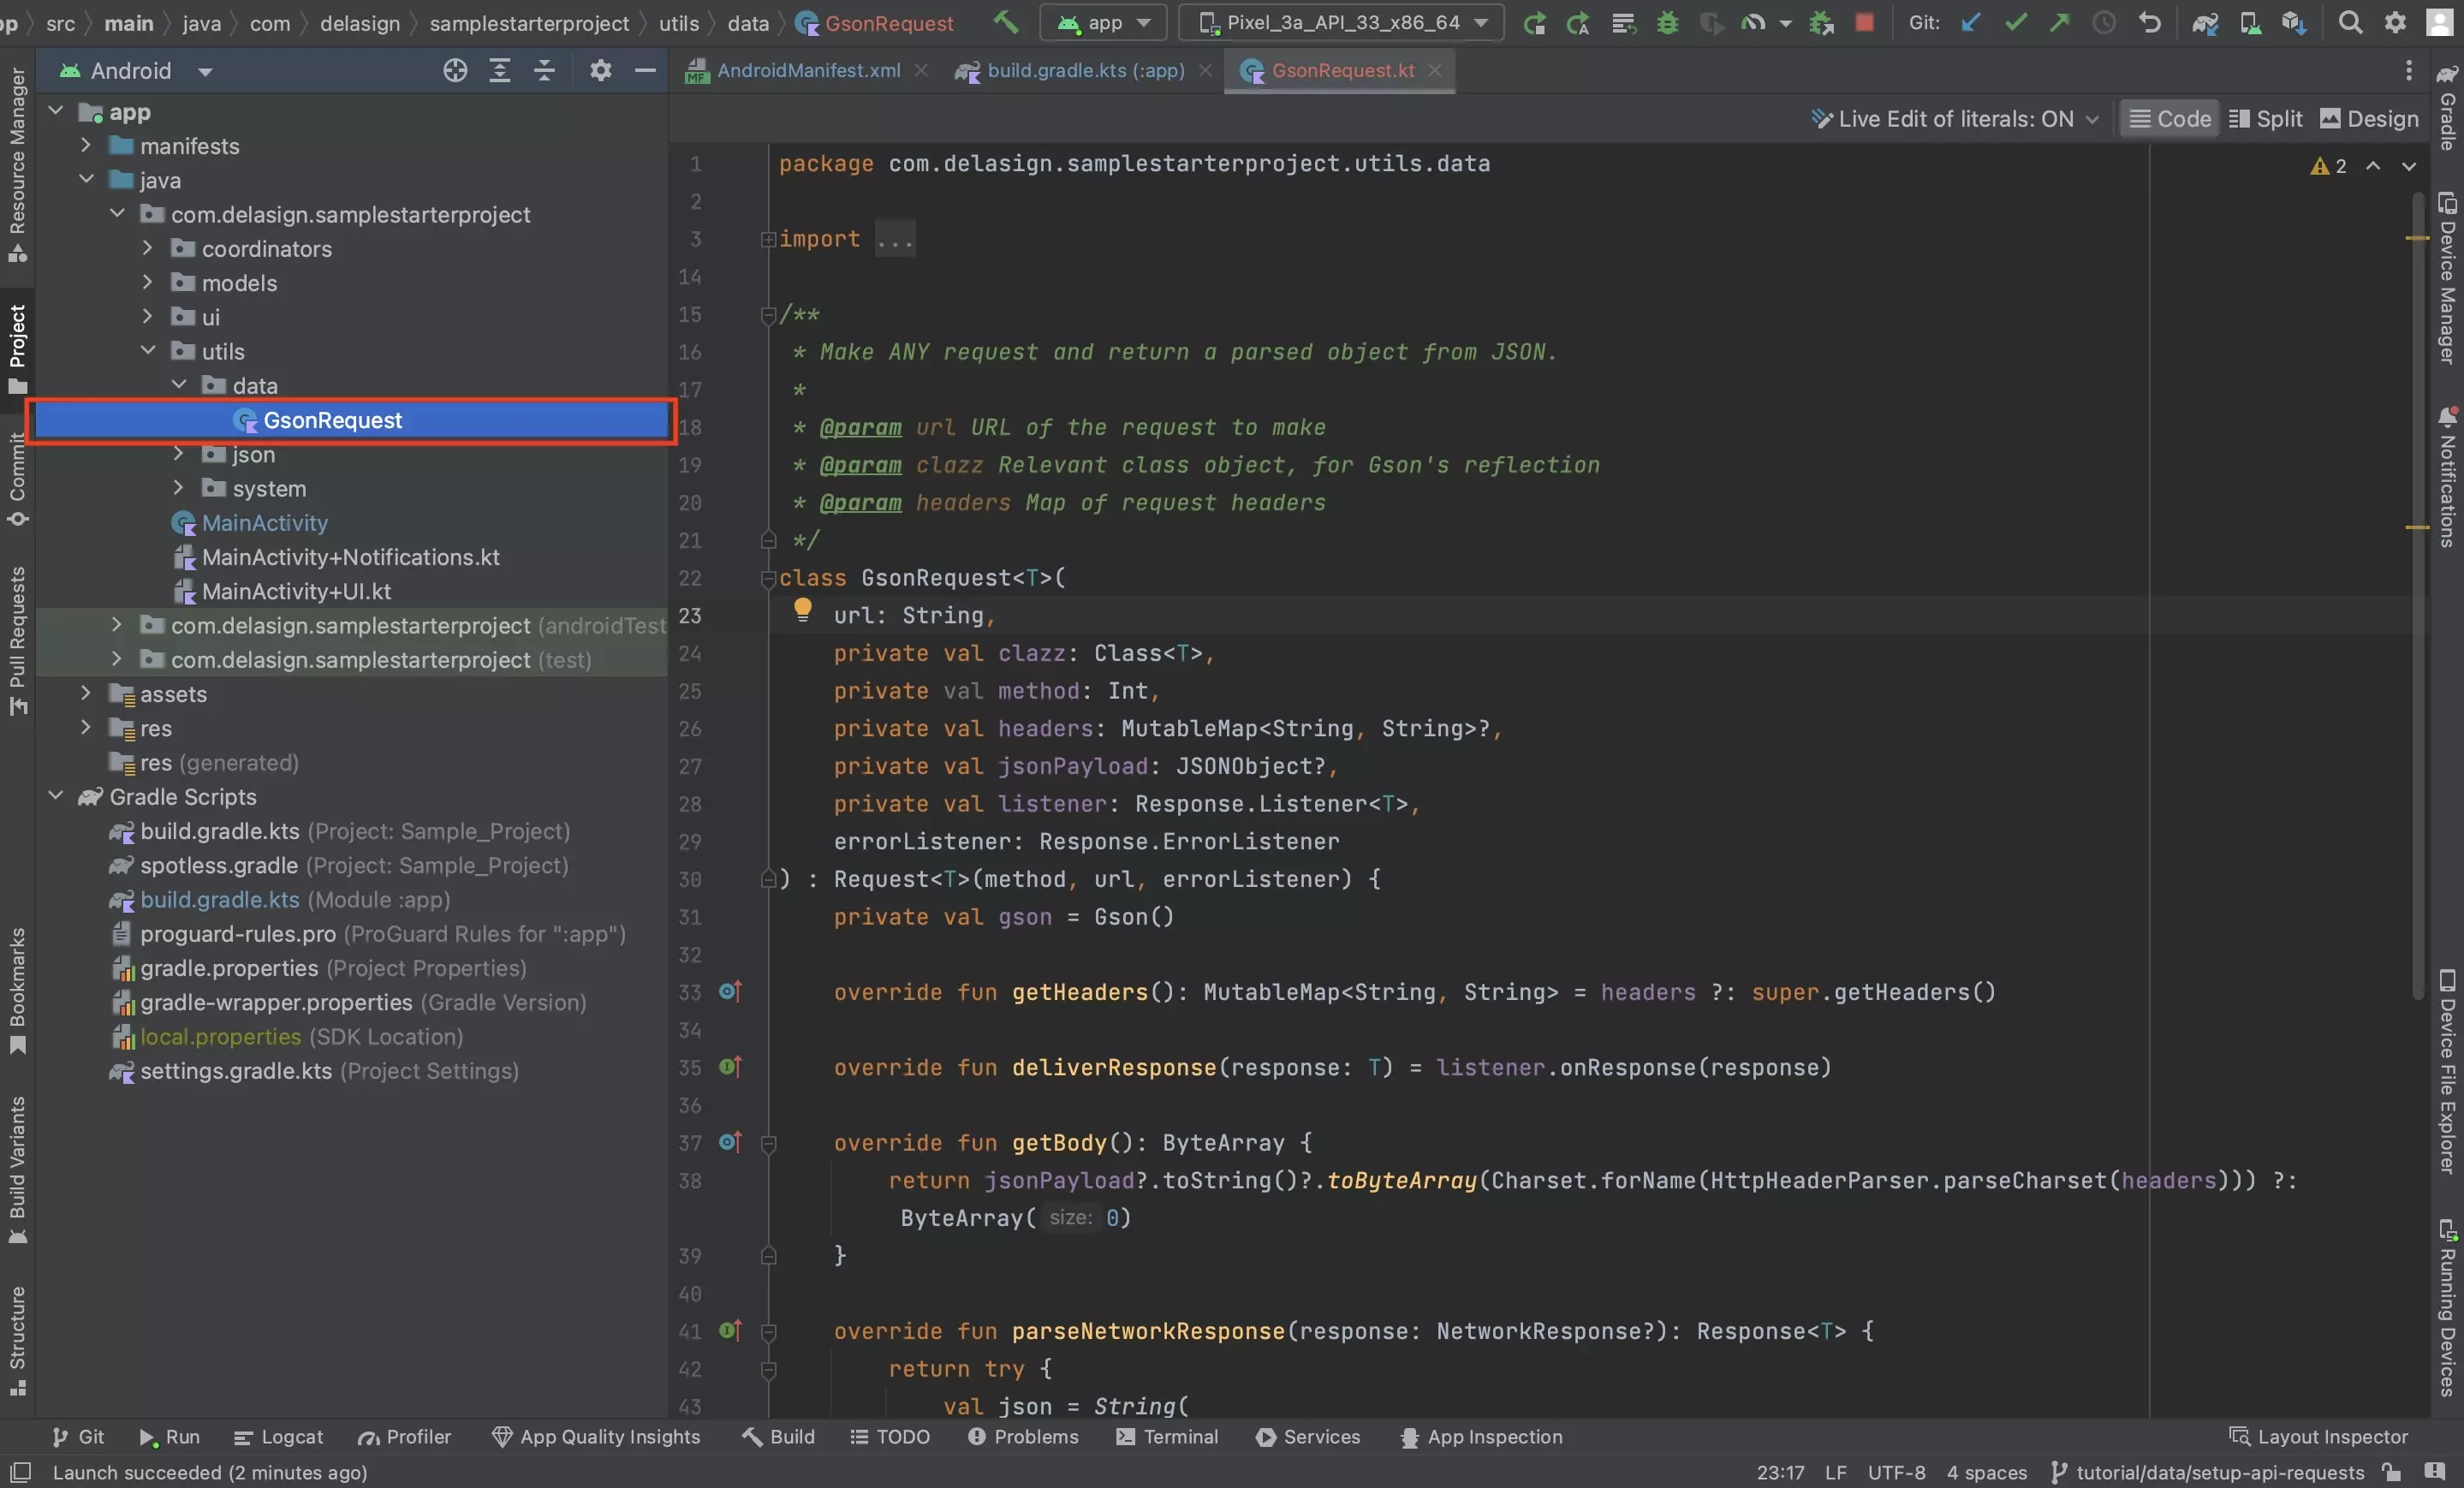
In the project, create a new file called GsonRequest.kt and paste in the code below.
Step Five: Create the Request Response class
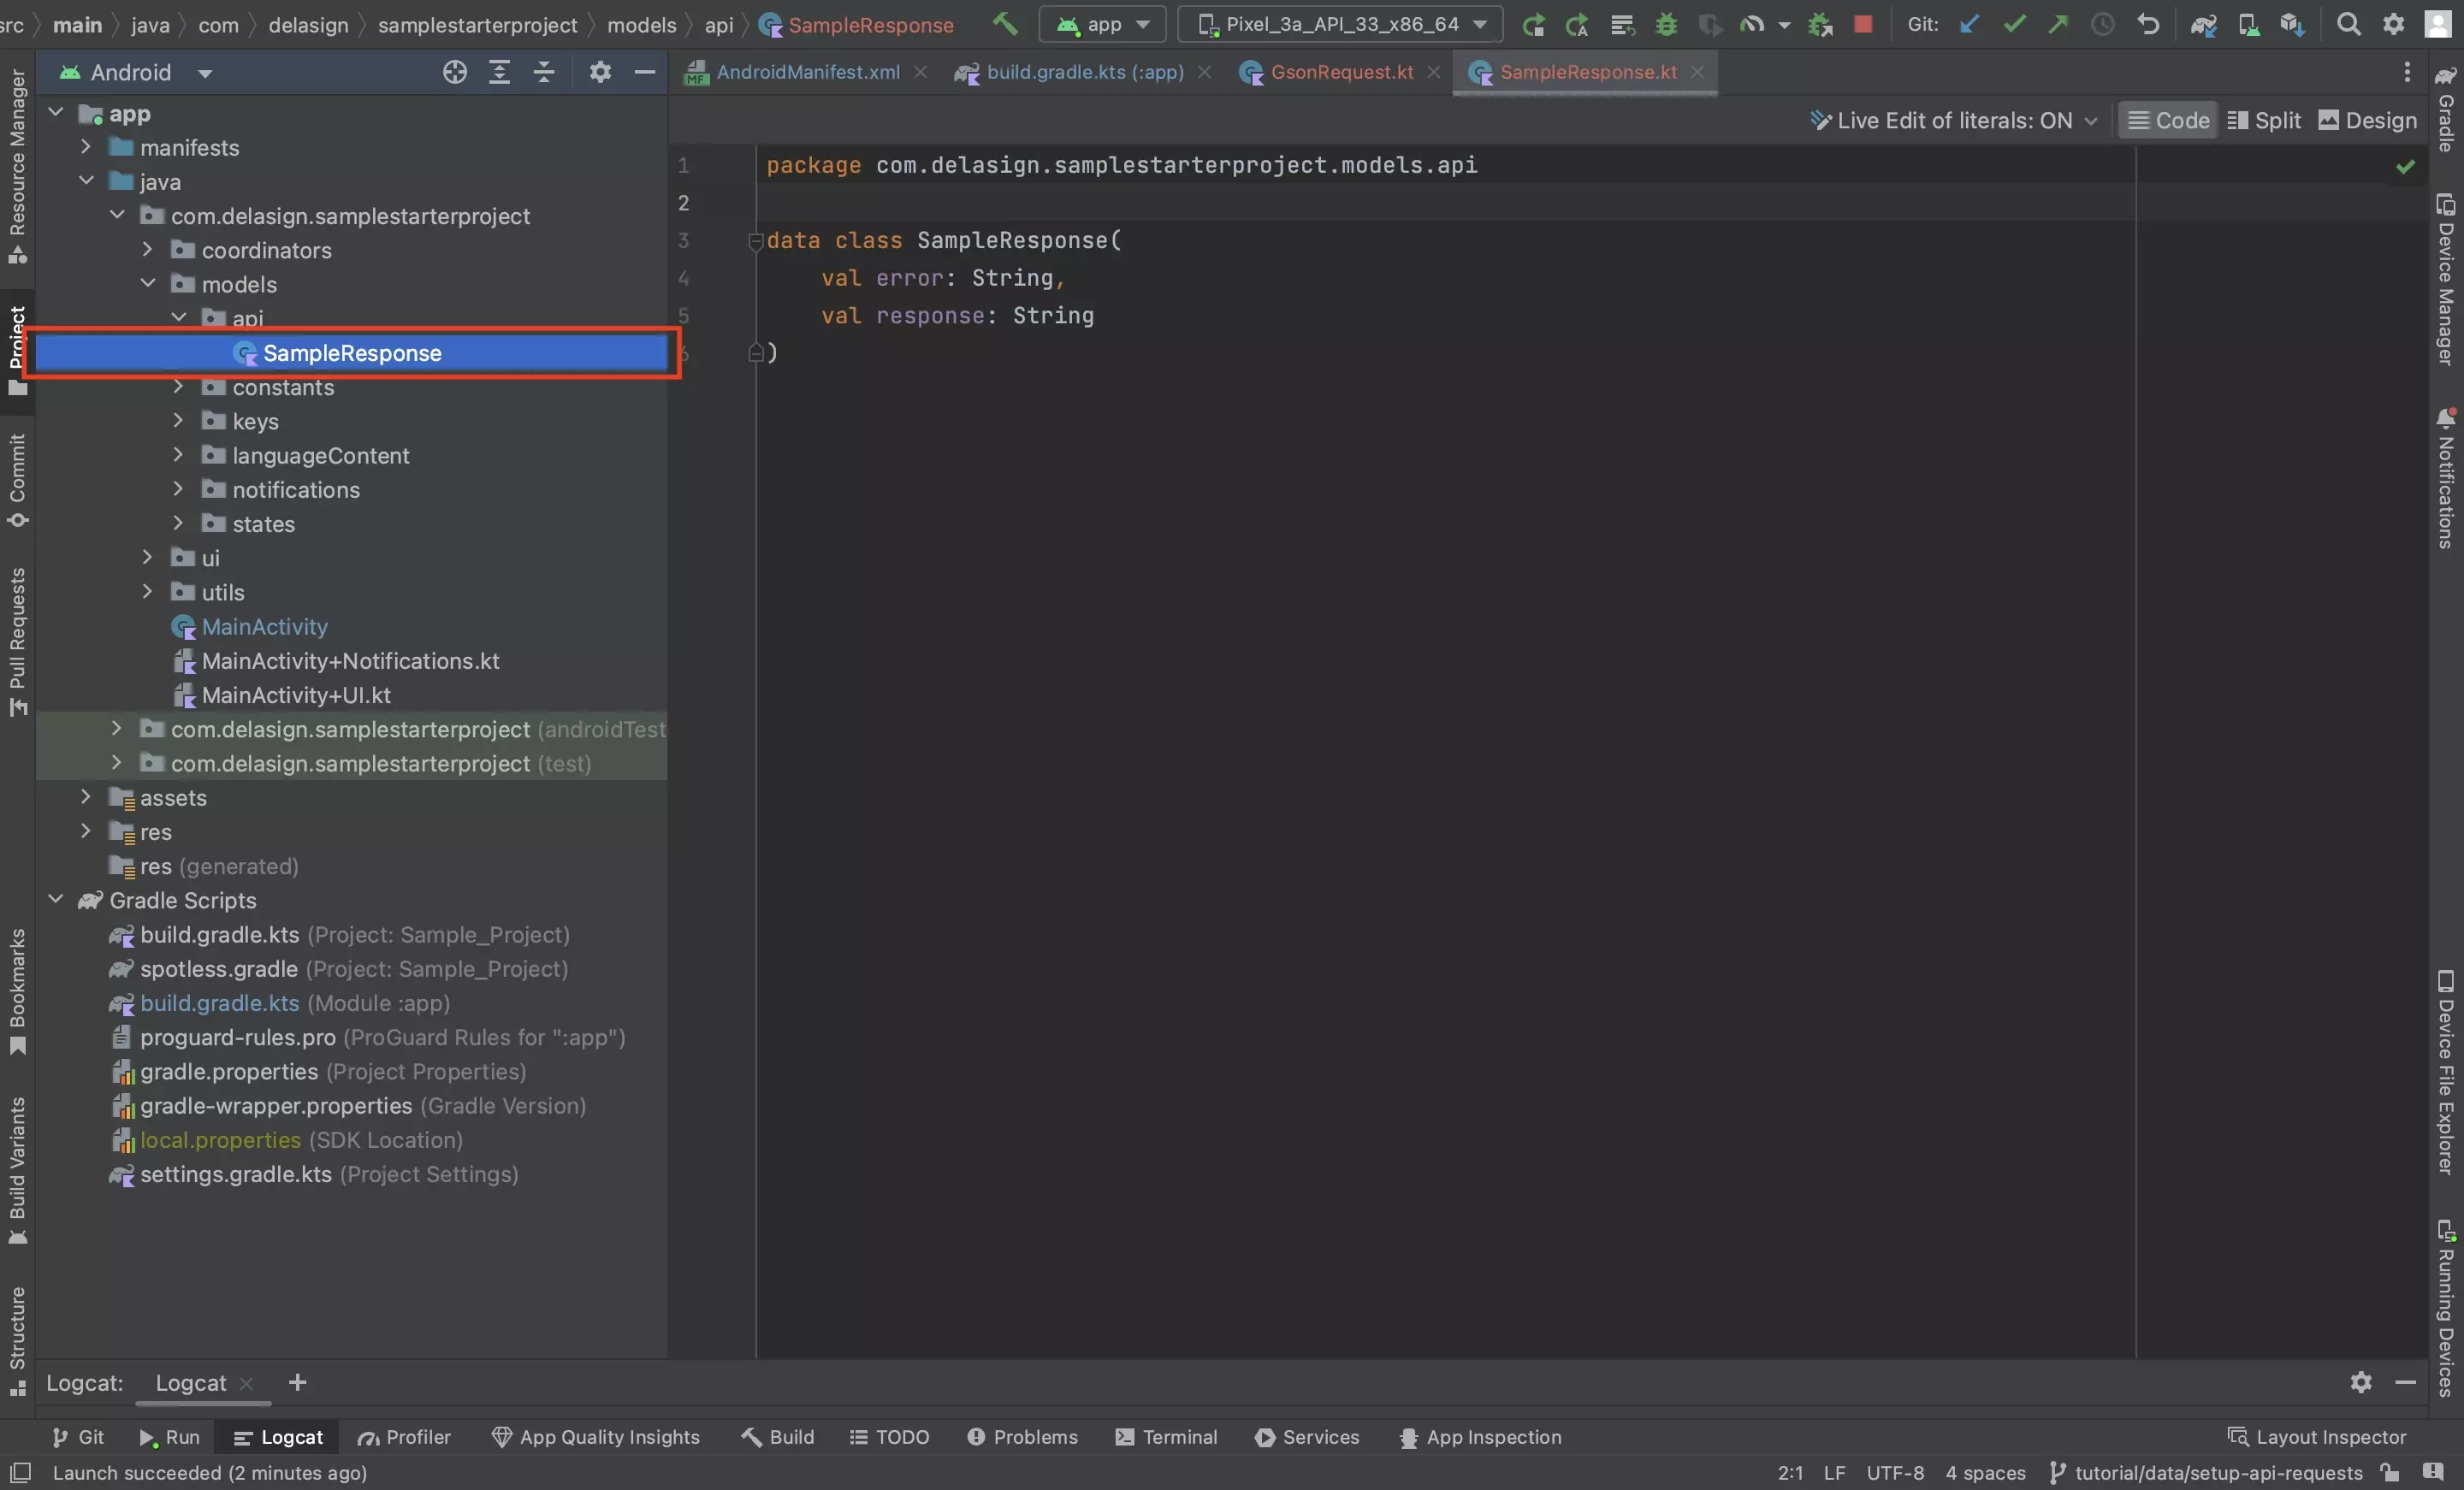
In the project, create a new file which is named after the data class of the API request's response.
Step Six: Create the Error class
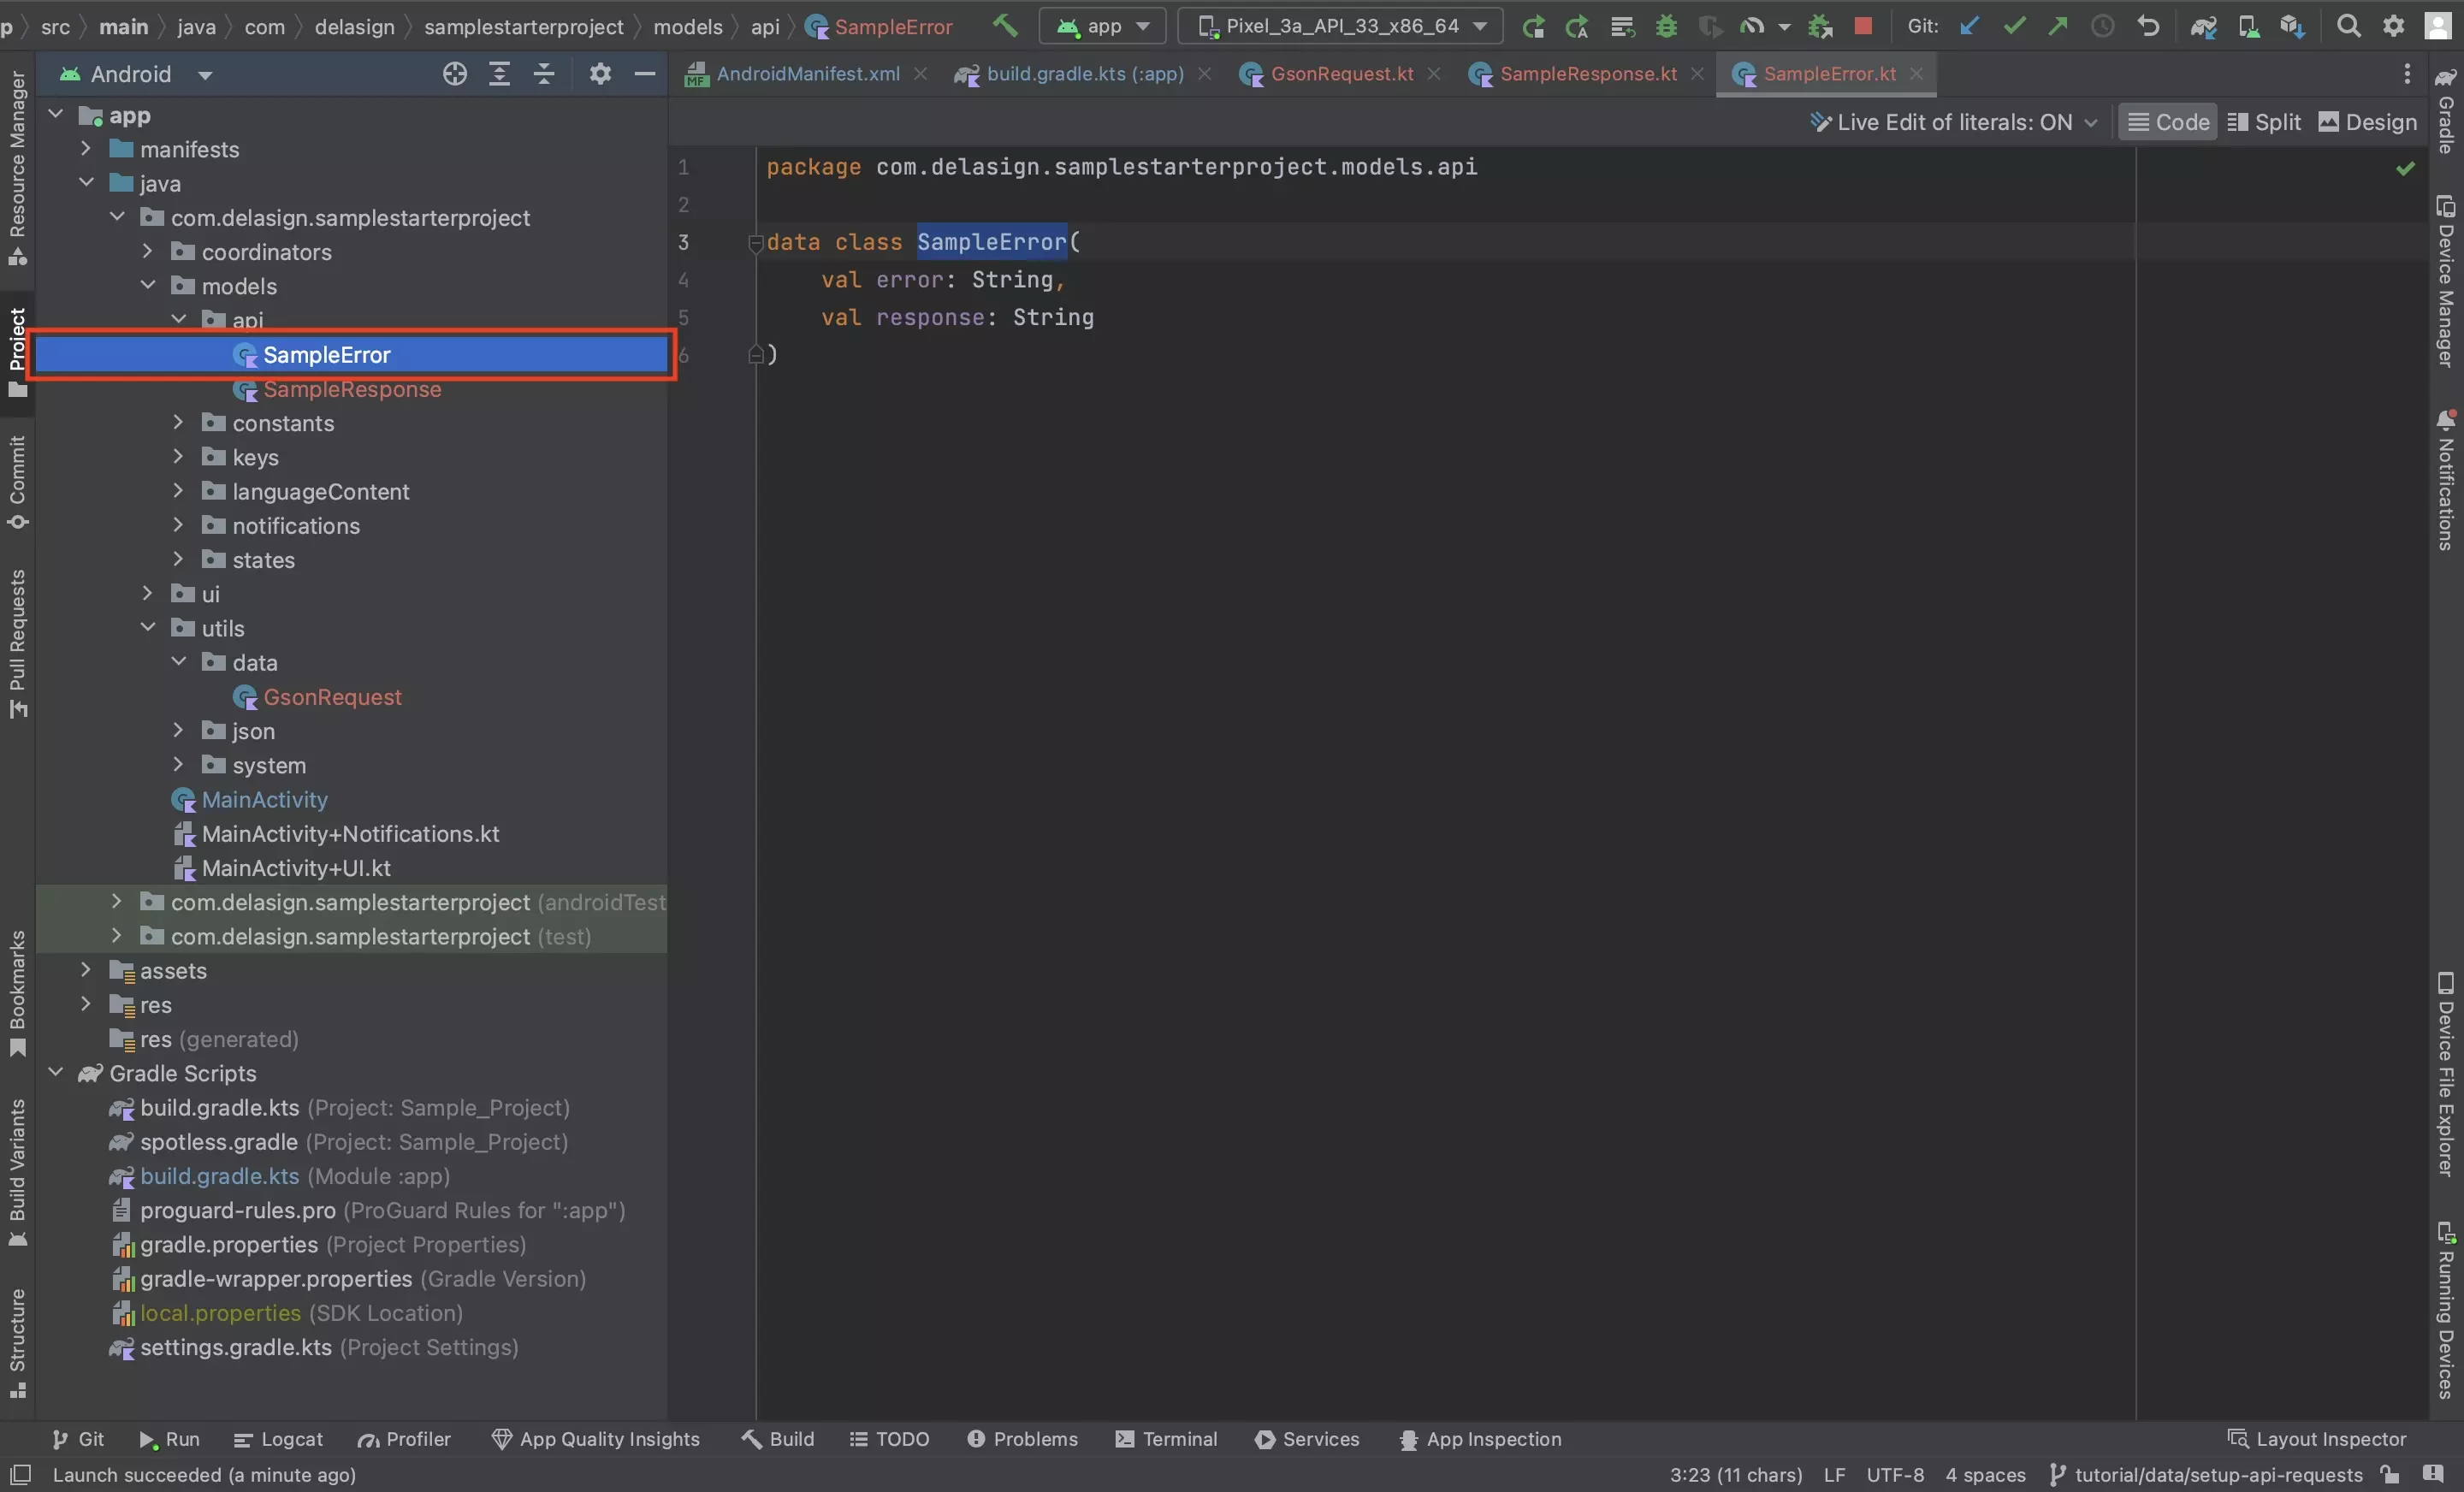
In the project, create a new file which is named after the data class of the API request's error.
Please note that in the case of the API which we used to test our code, the response and error are identical.
Step Seven: Add a Request Queue
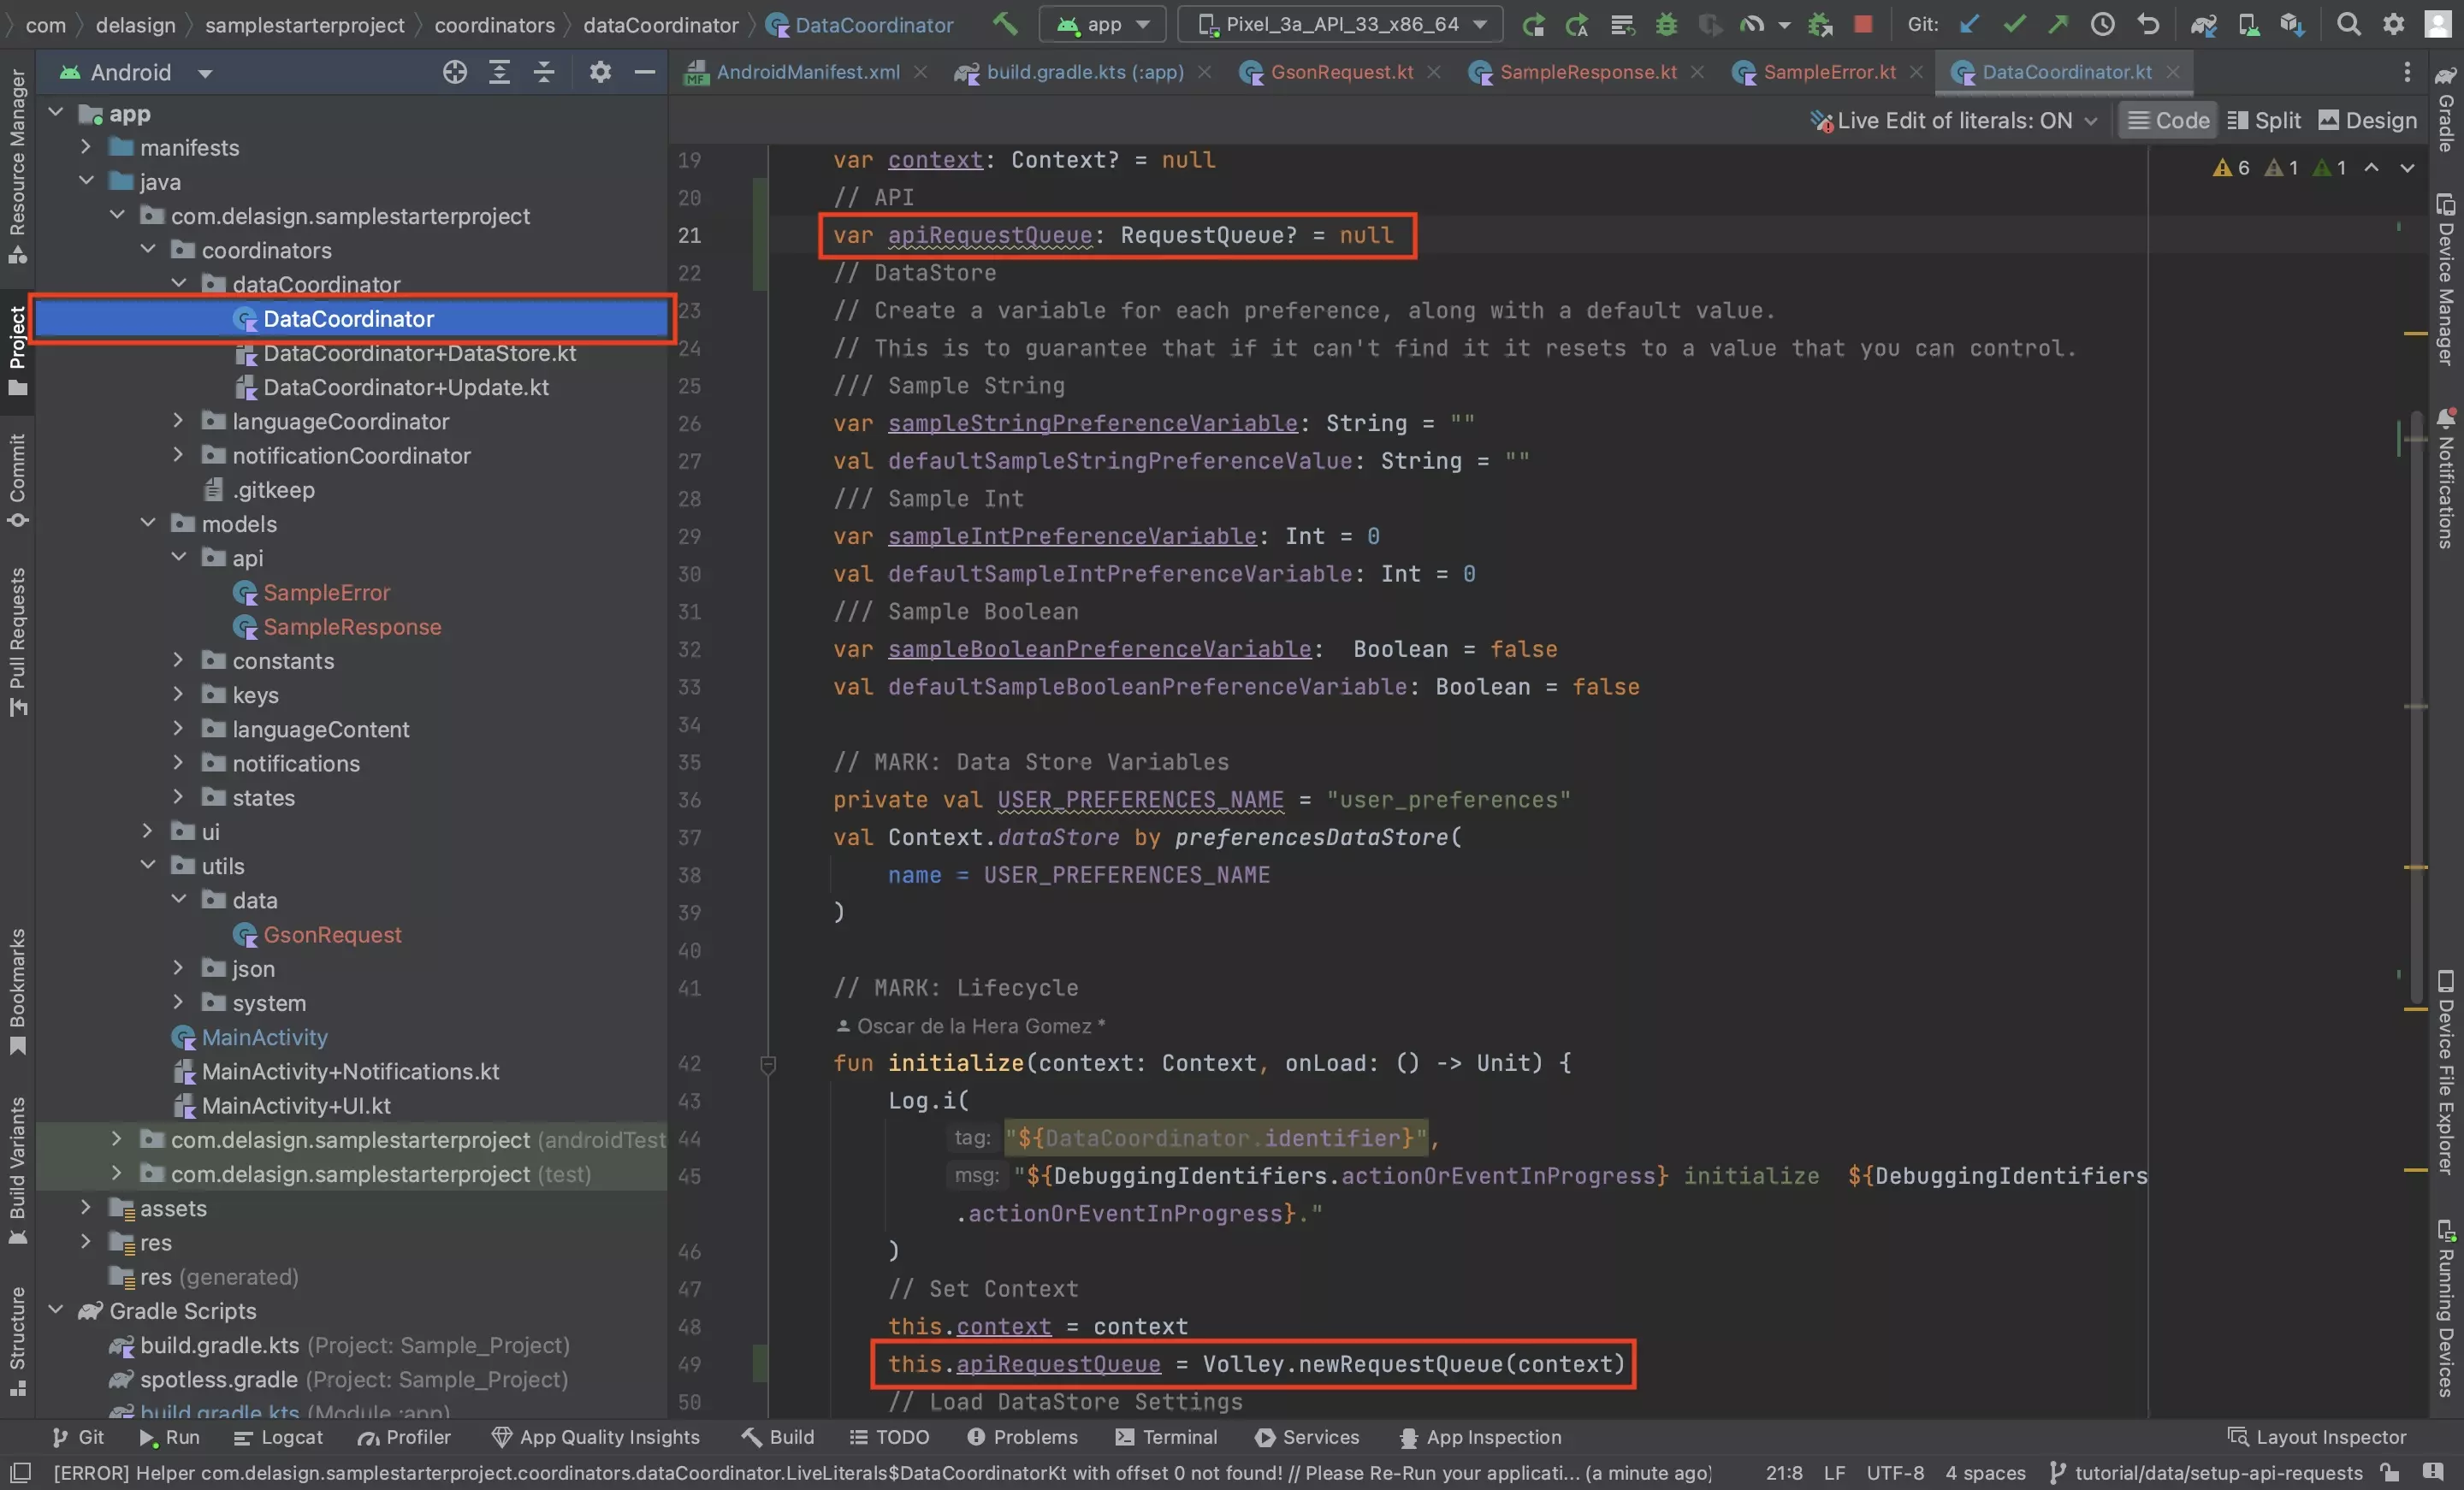
Wherever you wish to make API calls, declare a RequestQueue and initialize it.
We suggest that you do this in a manager such as the DataCoordinator, which we created as part of our DataStore tutorial.
Step Eight: Setup the API call
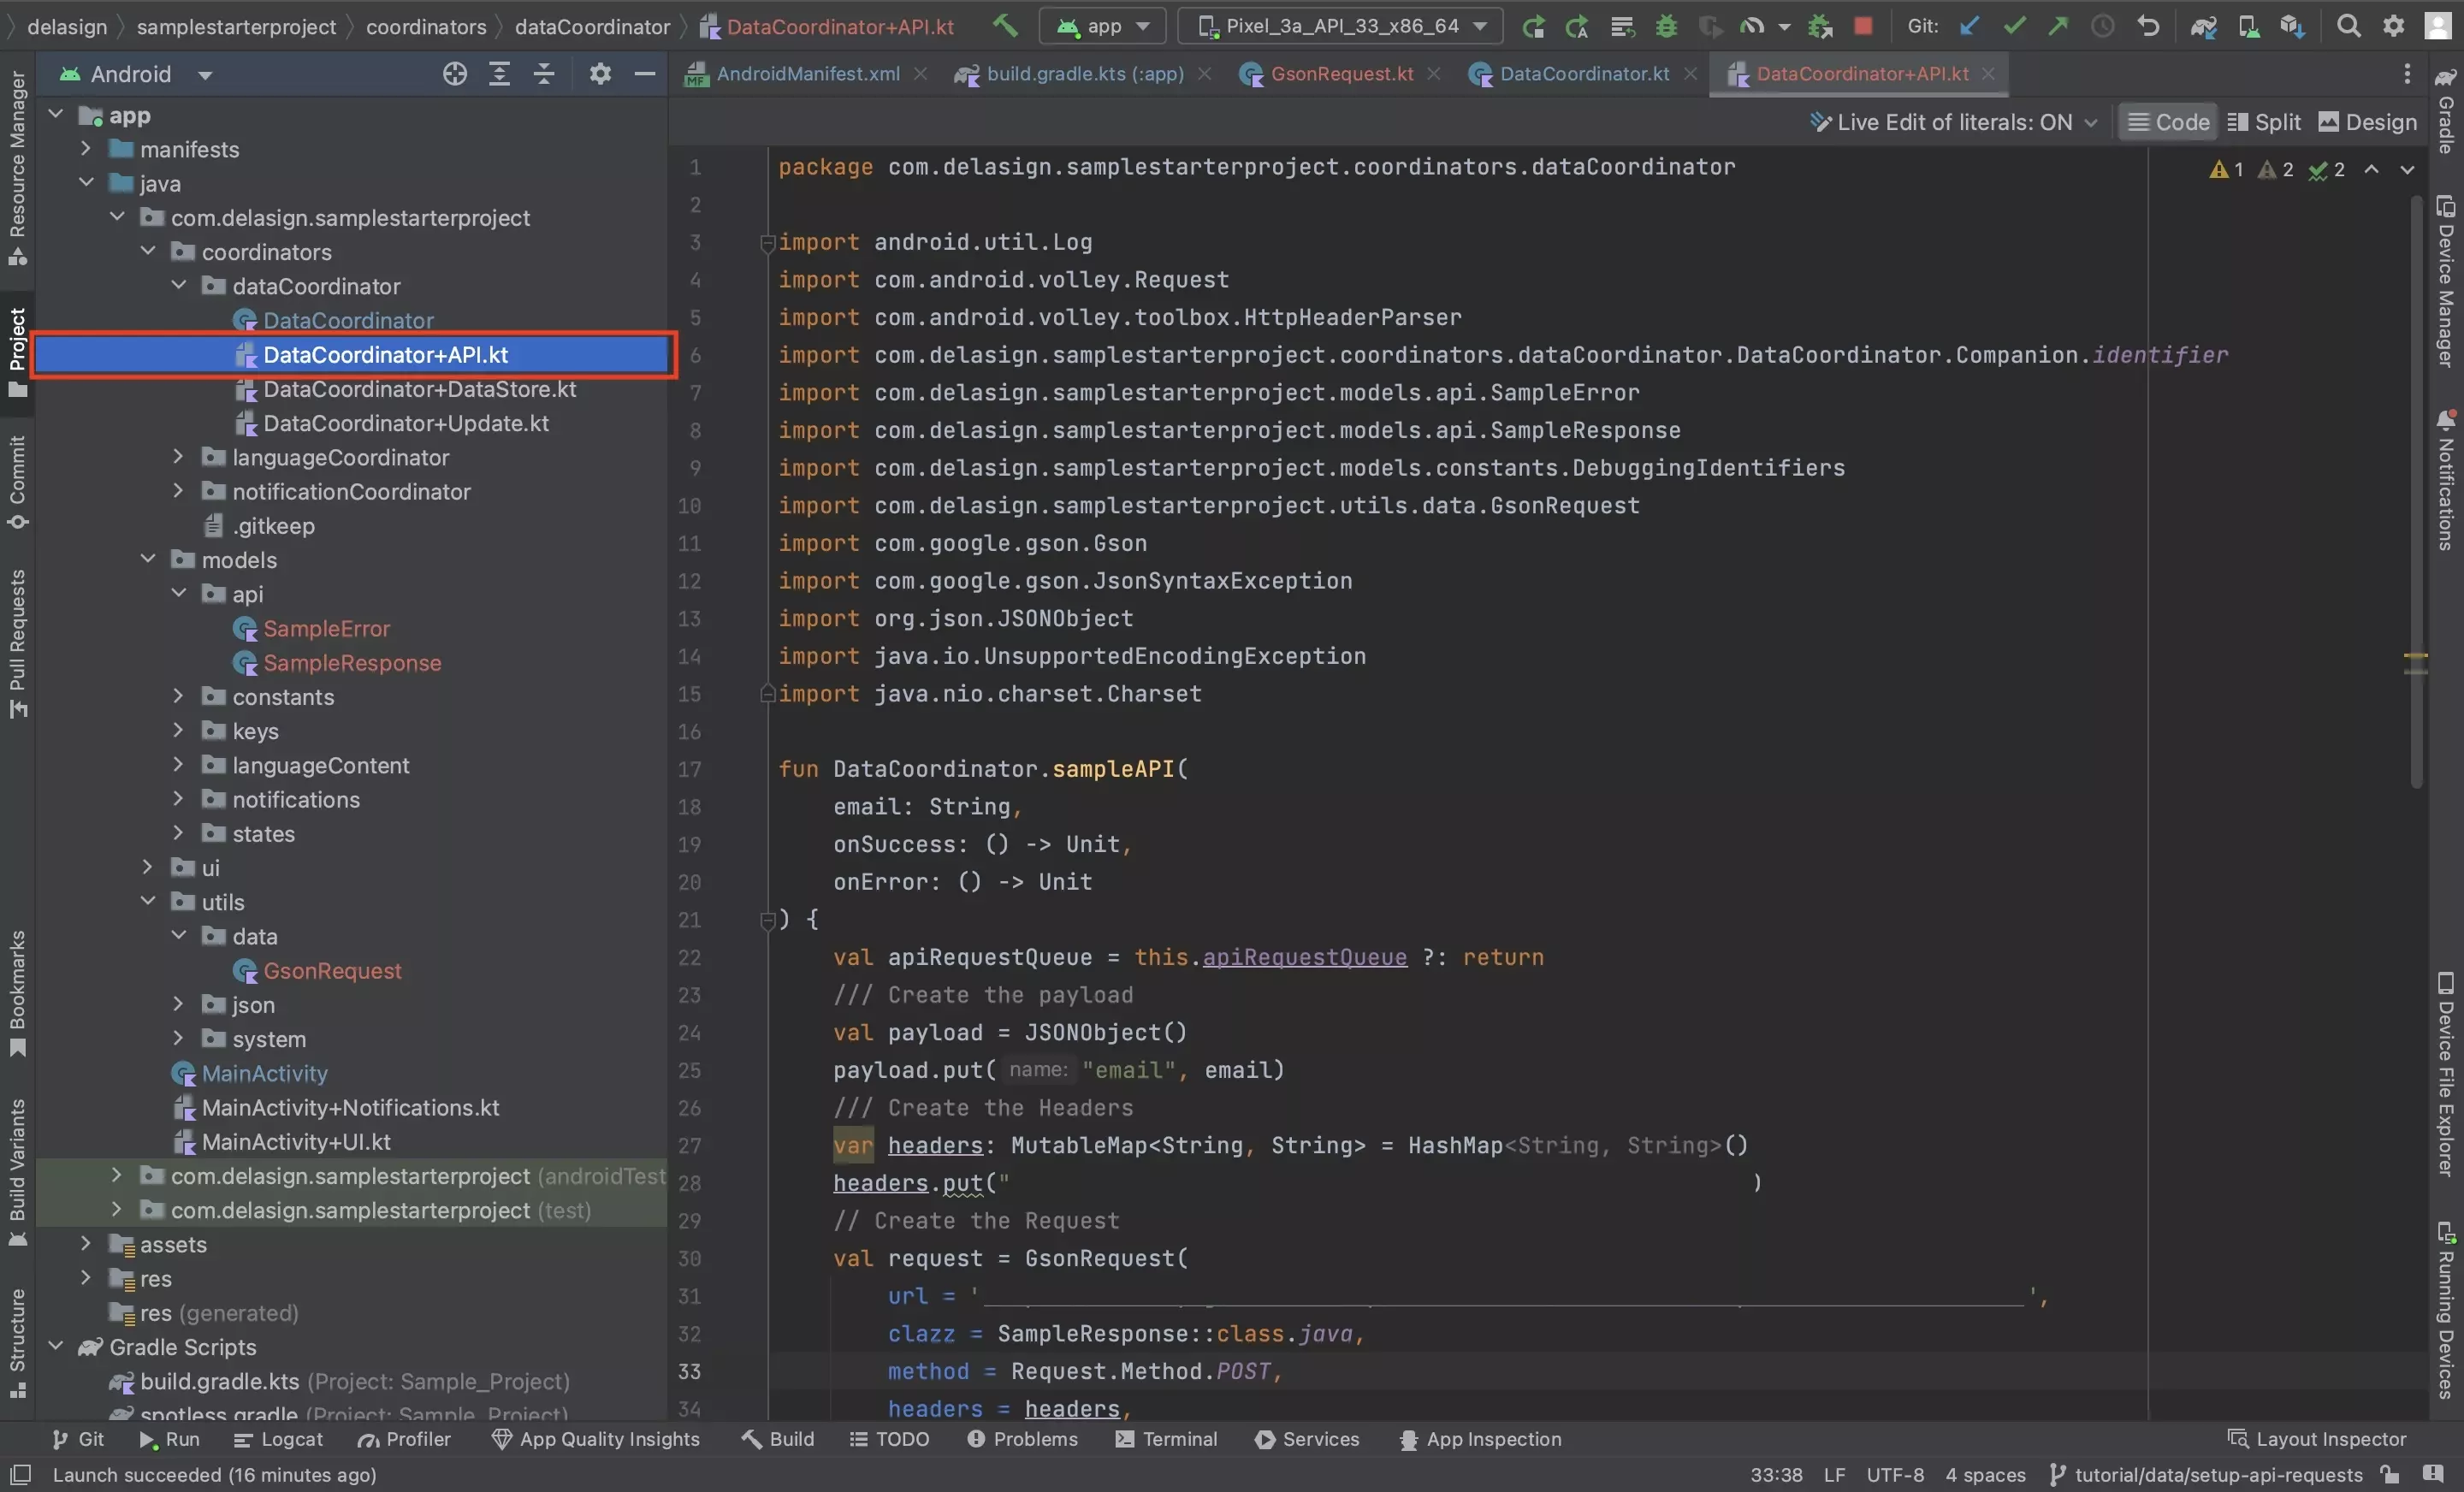
Create a function to handle your API call and all the associated details.
We recommend that you do this in a manager such as the DataCoordinator and include callbacks, with data if needed, for the relevant cases.
Step Nine: Make the API call
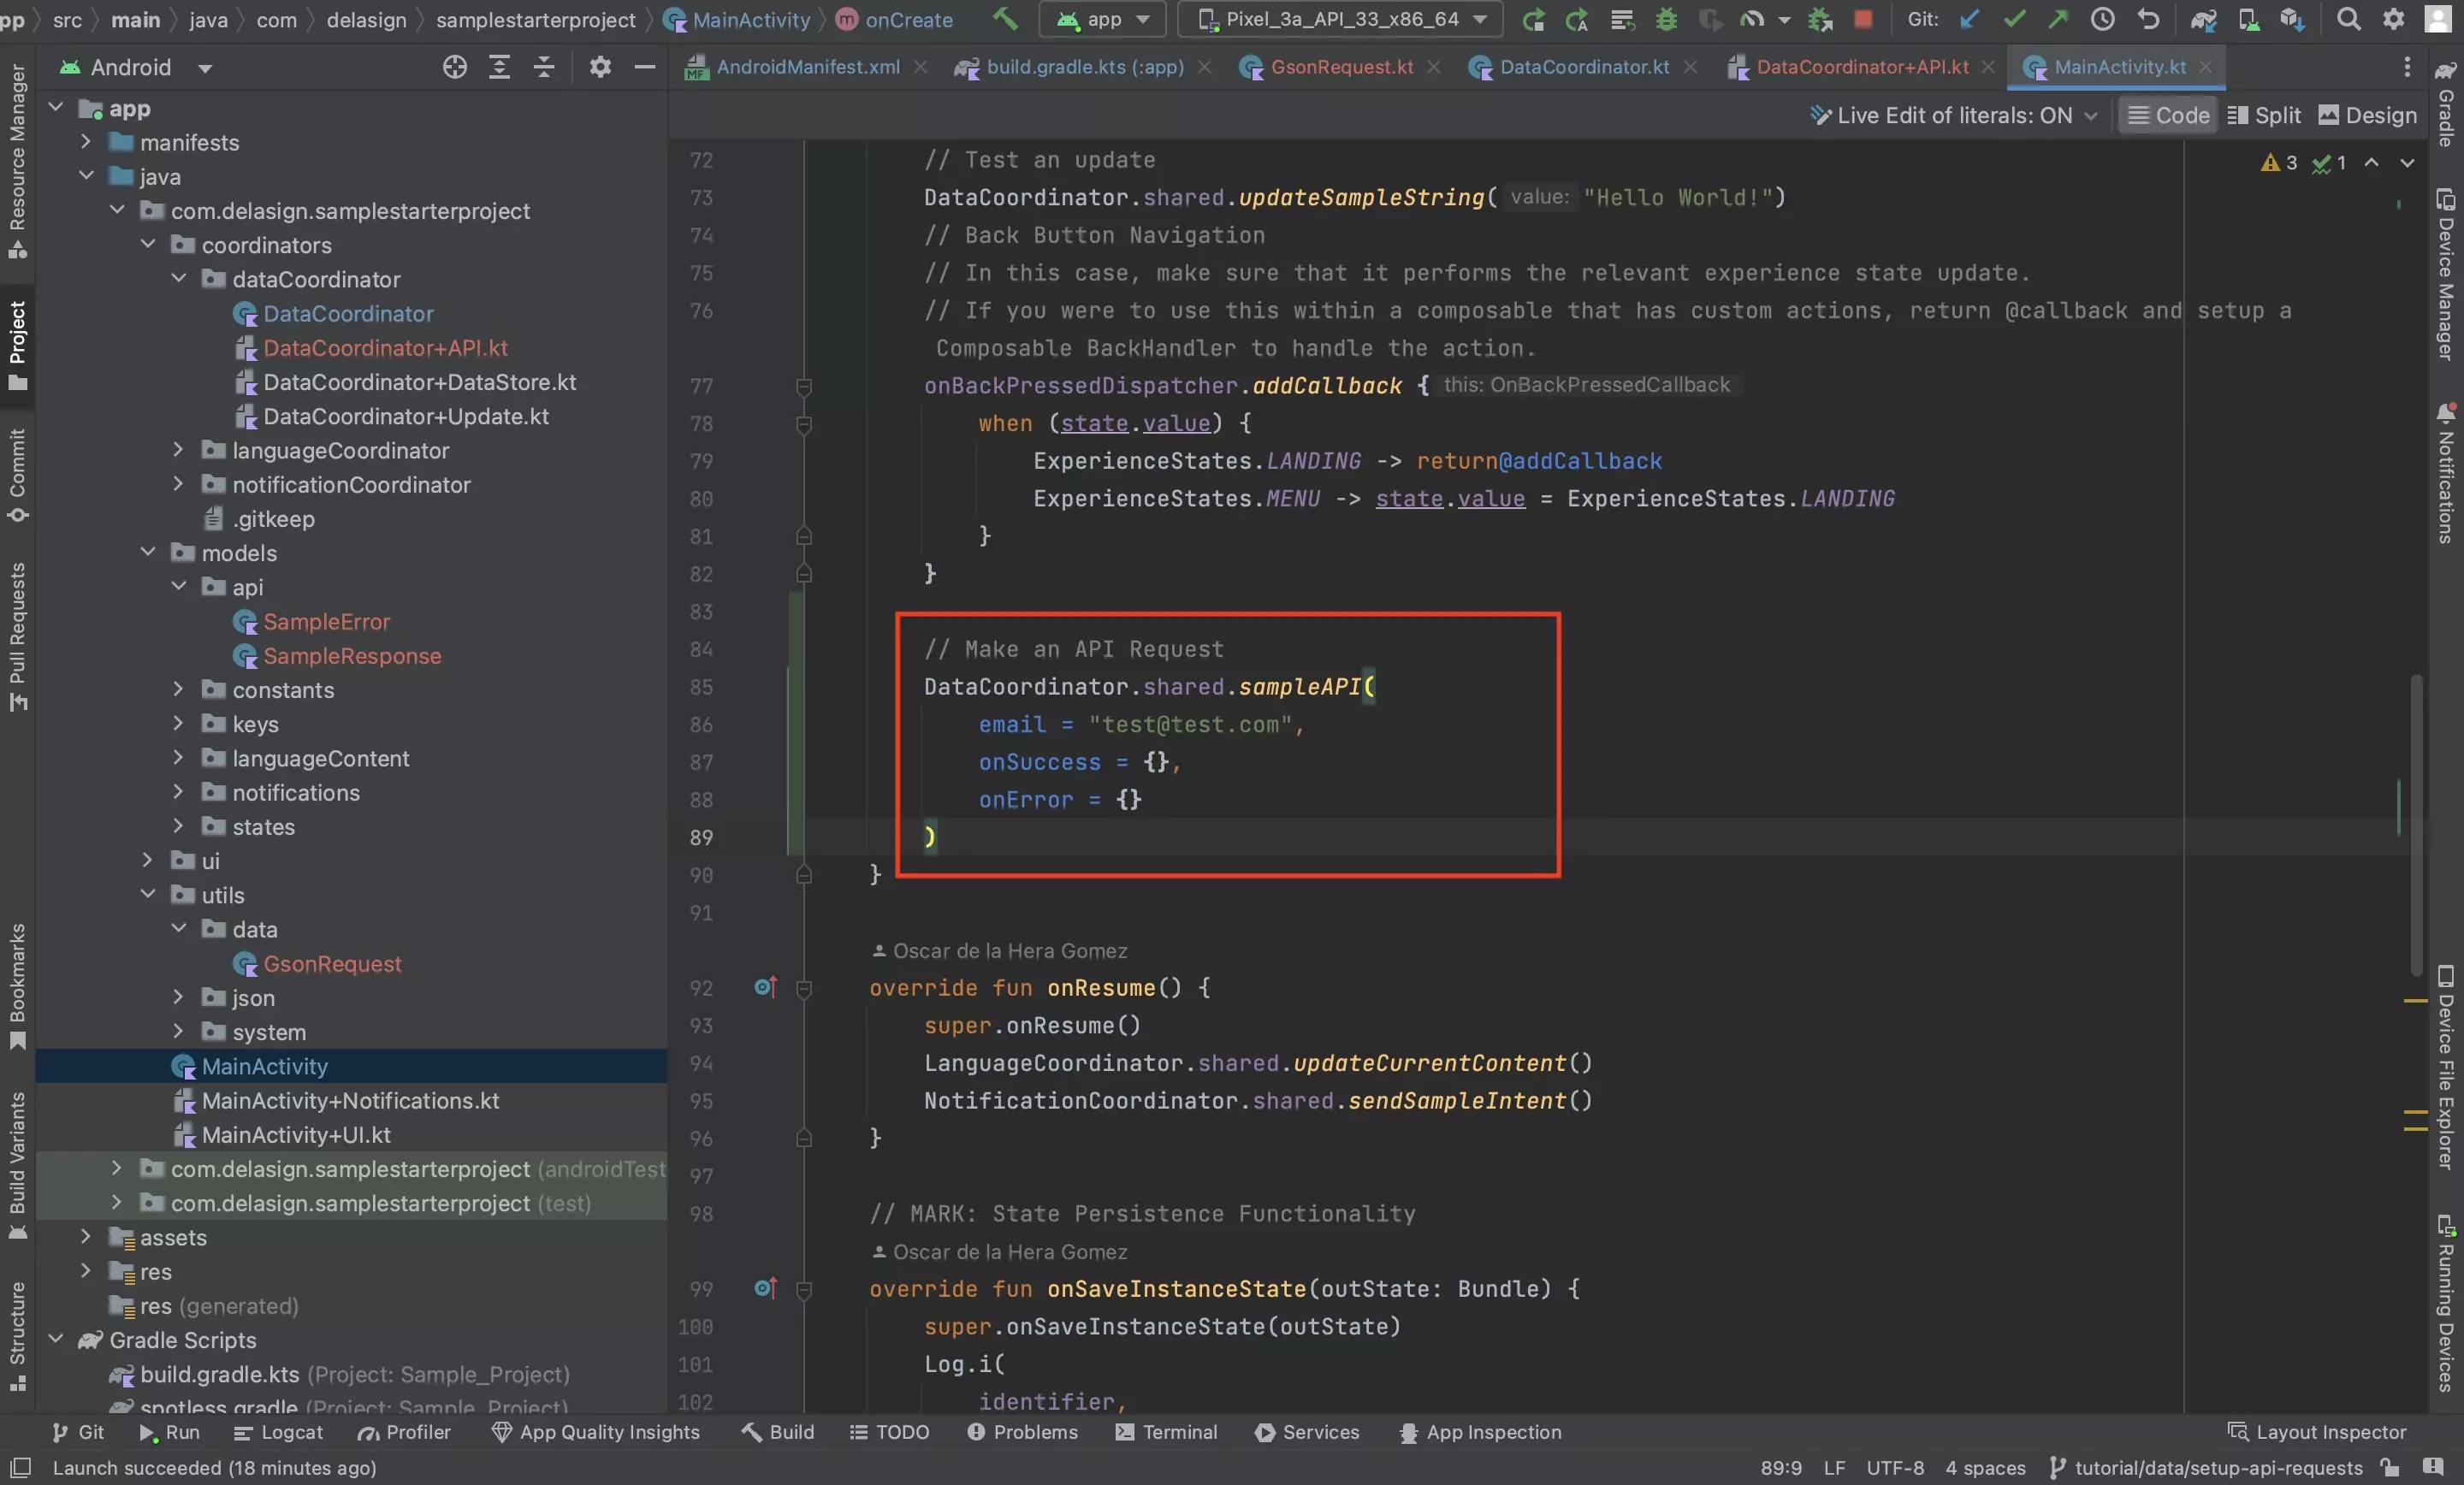
Call the function created in Step Eight, wherever you wish to make the API call in your project.
Step Ten: Test
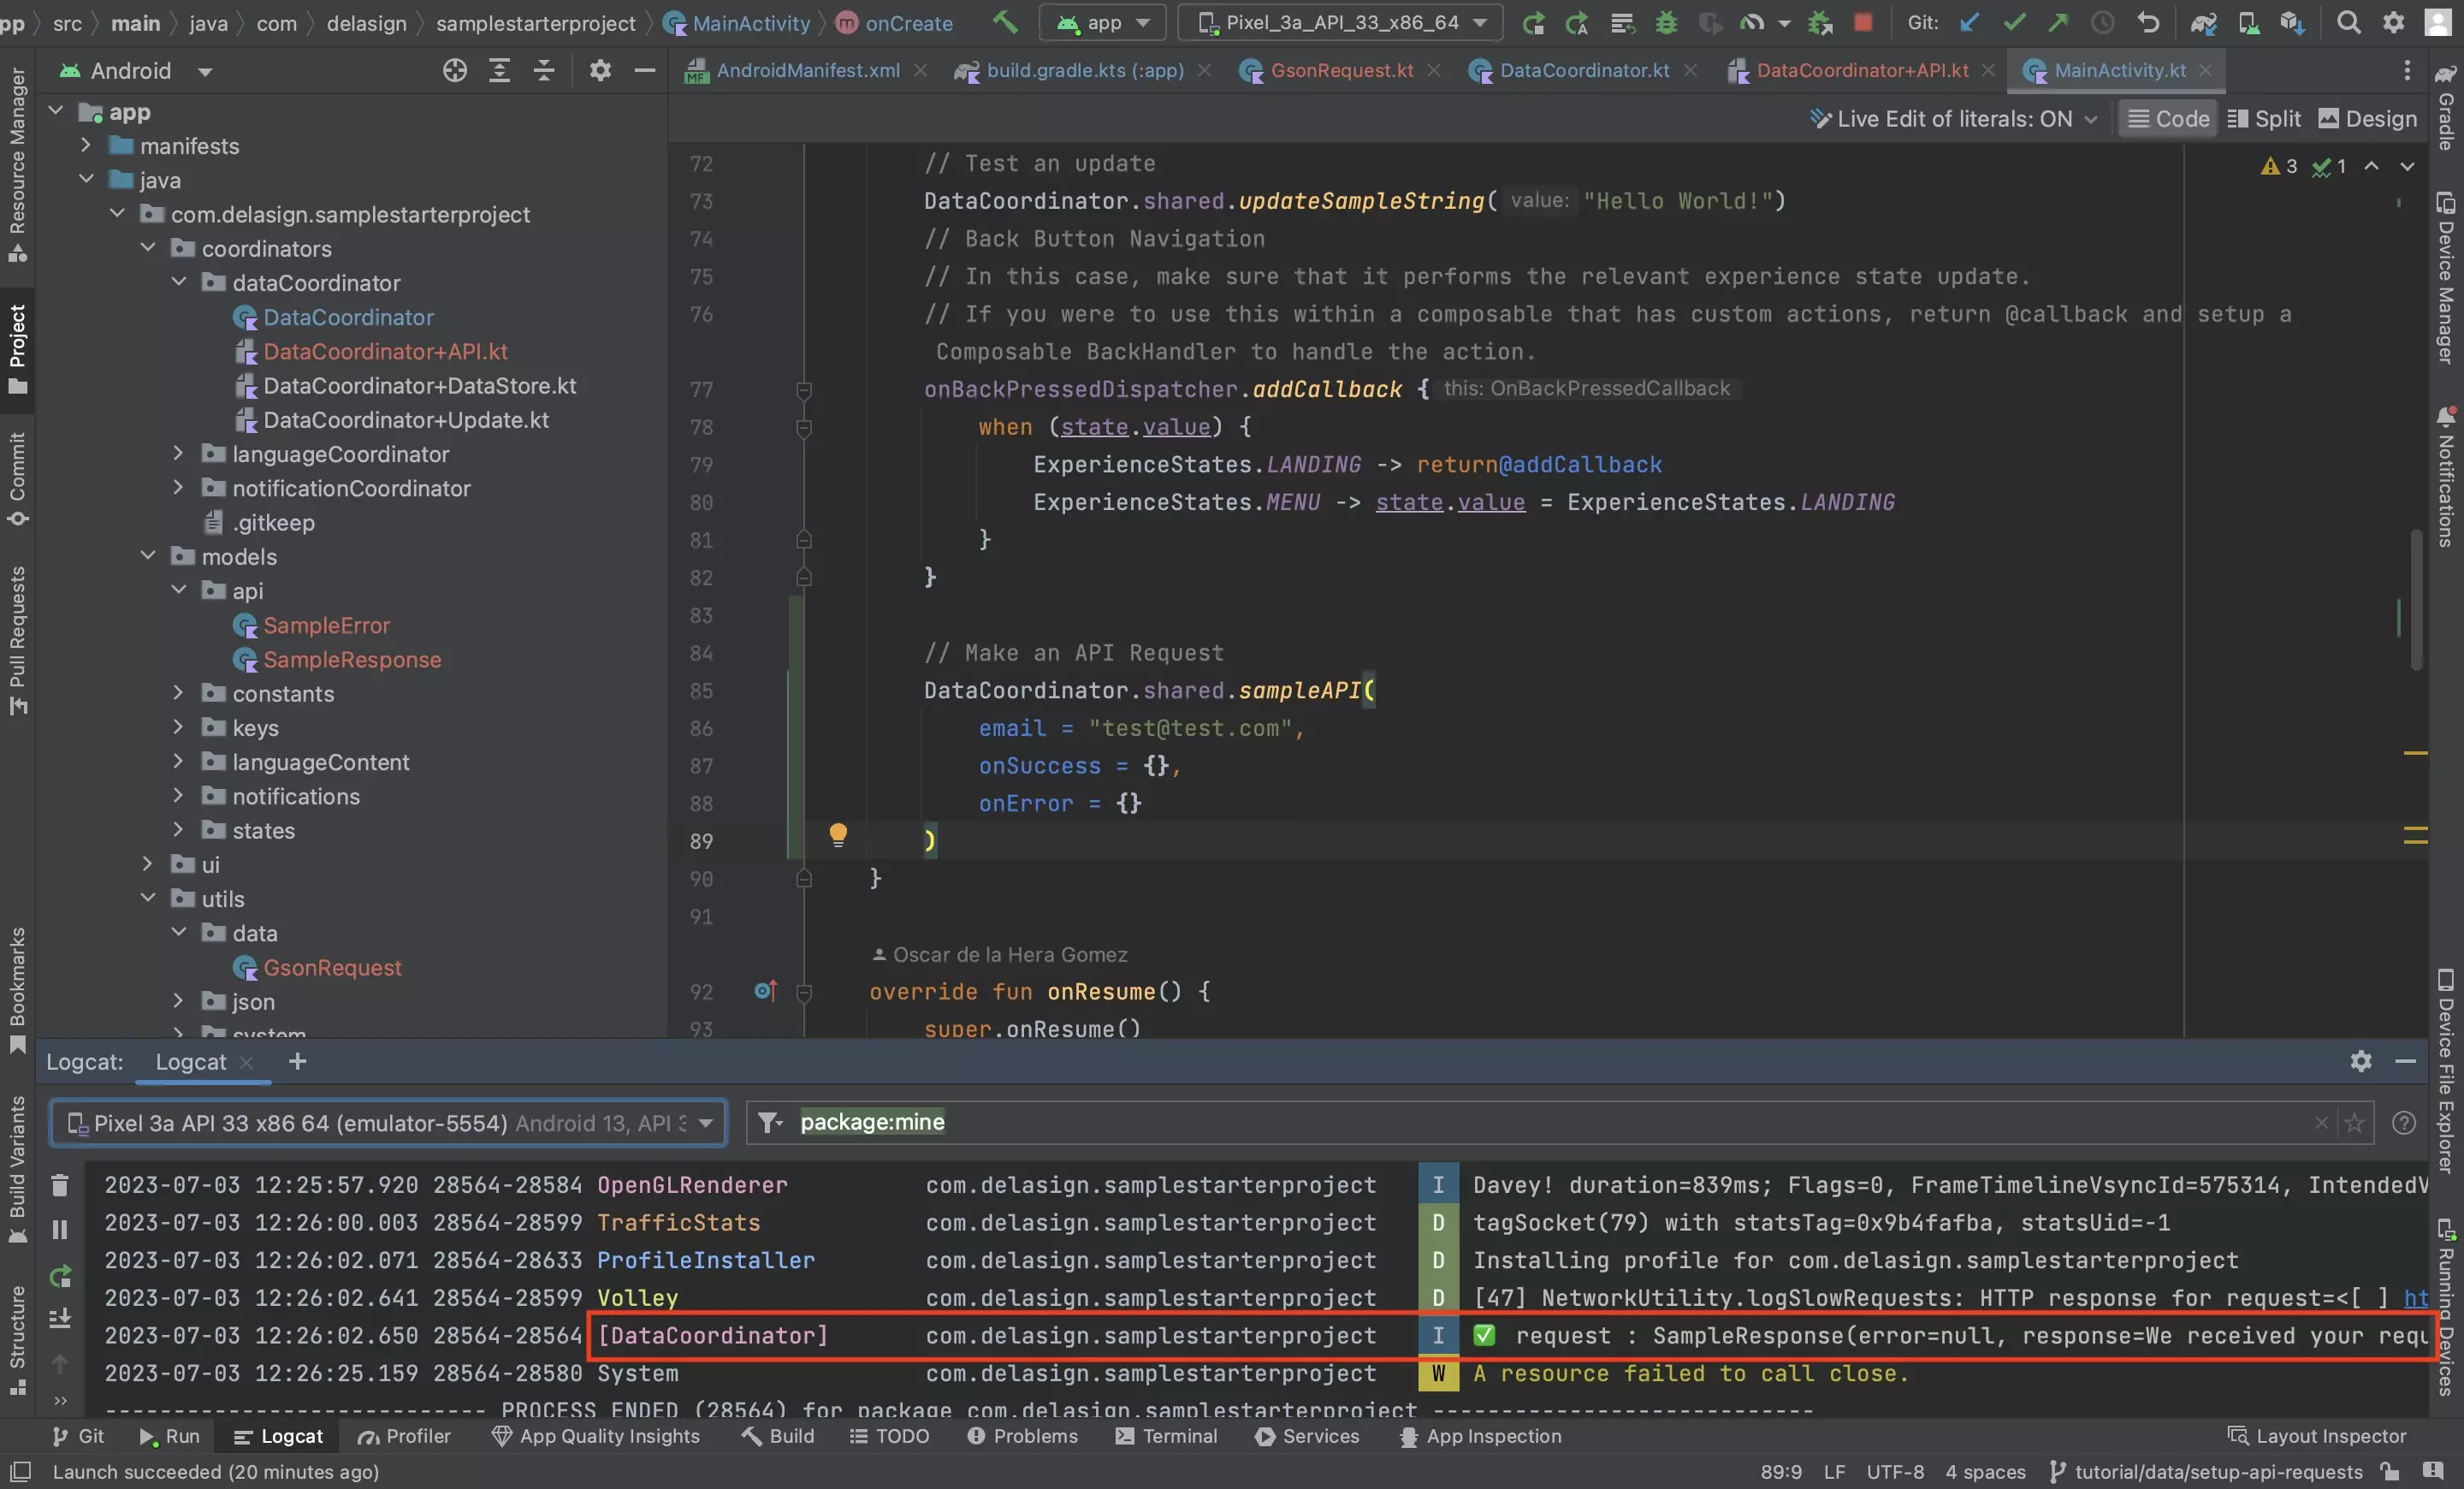
Run the app to check that the API goes through successfully.
Step Eleven: Test an Error
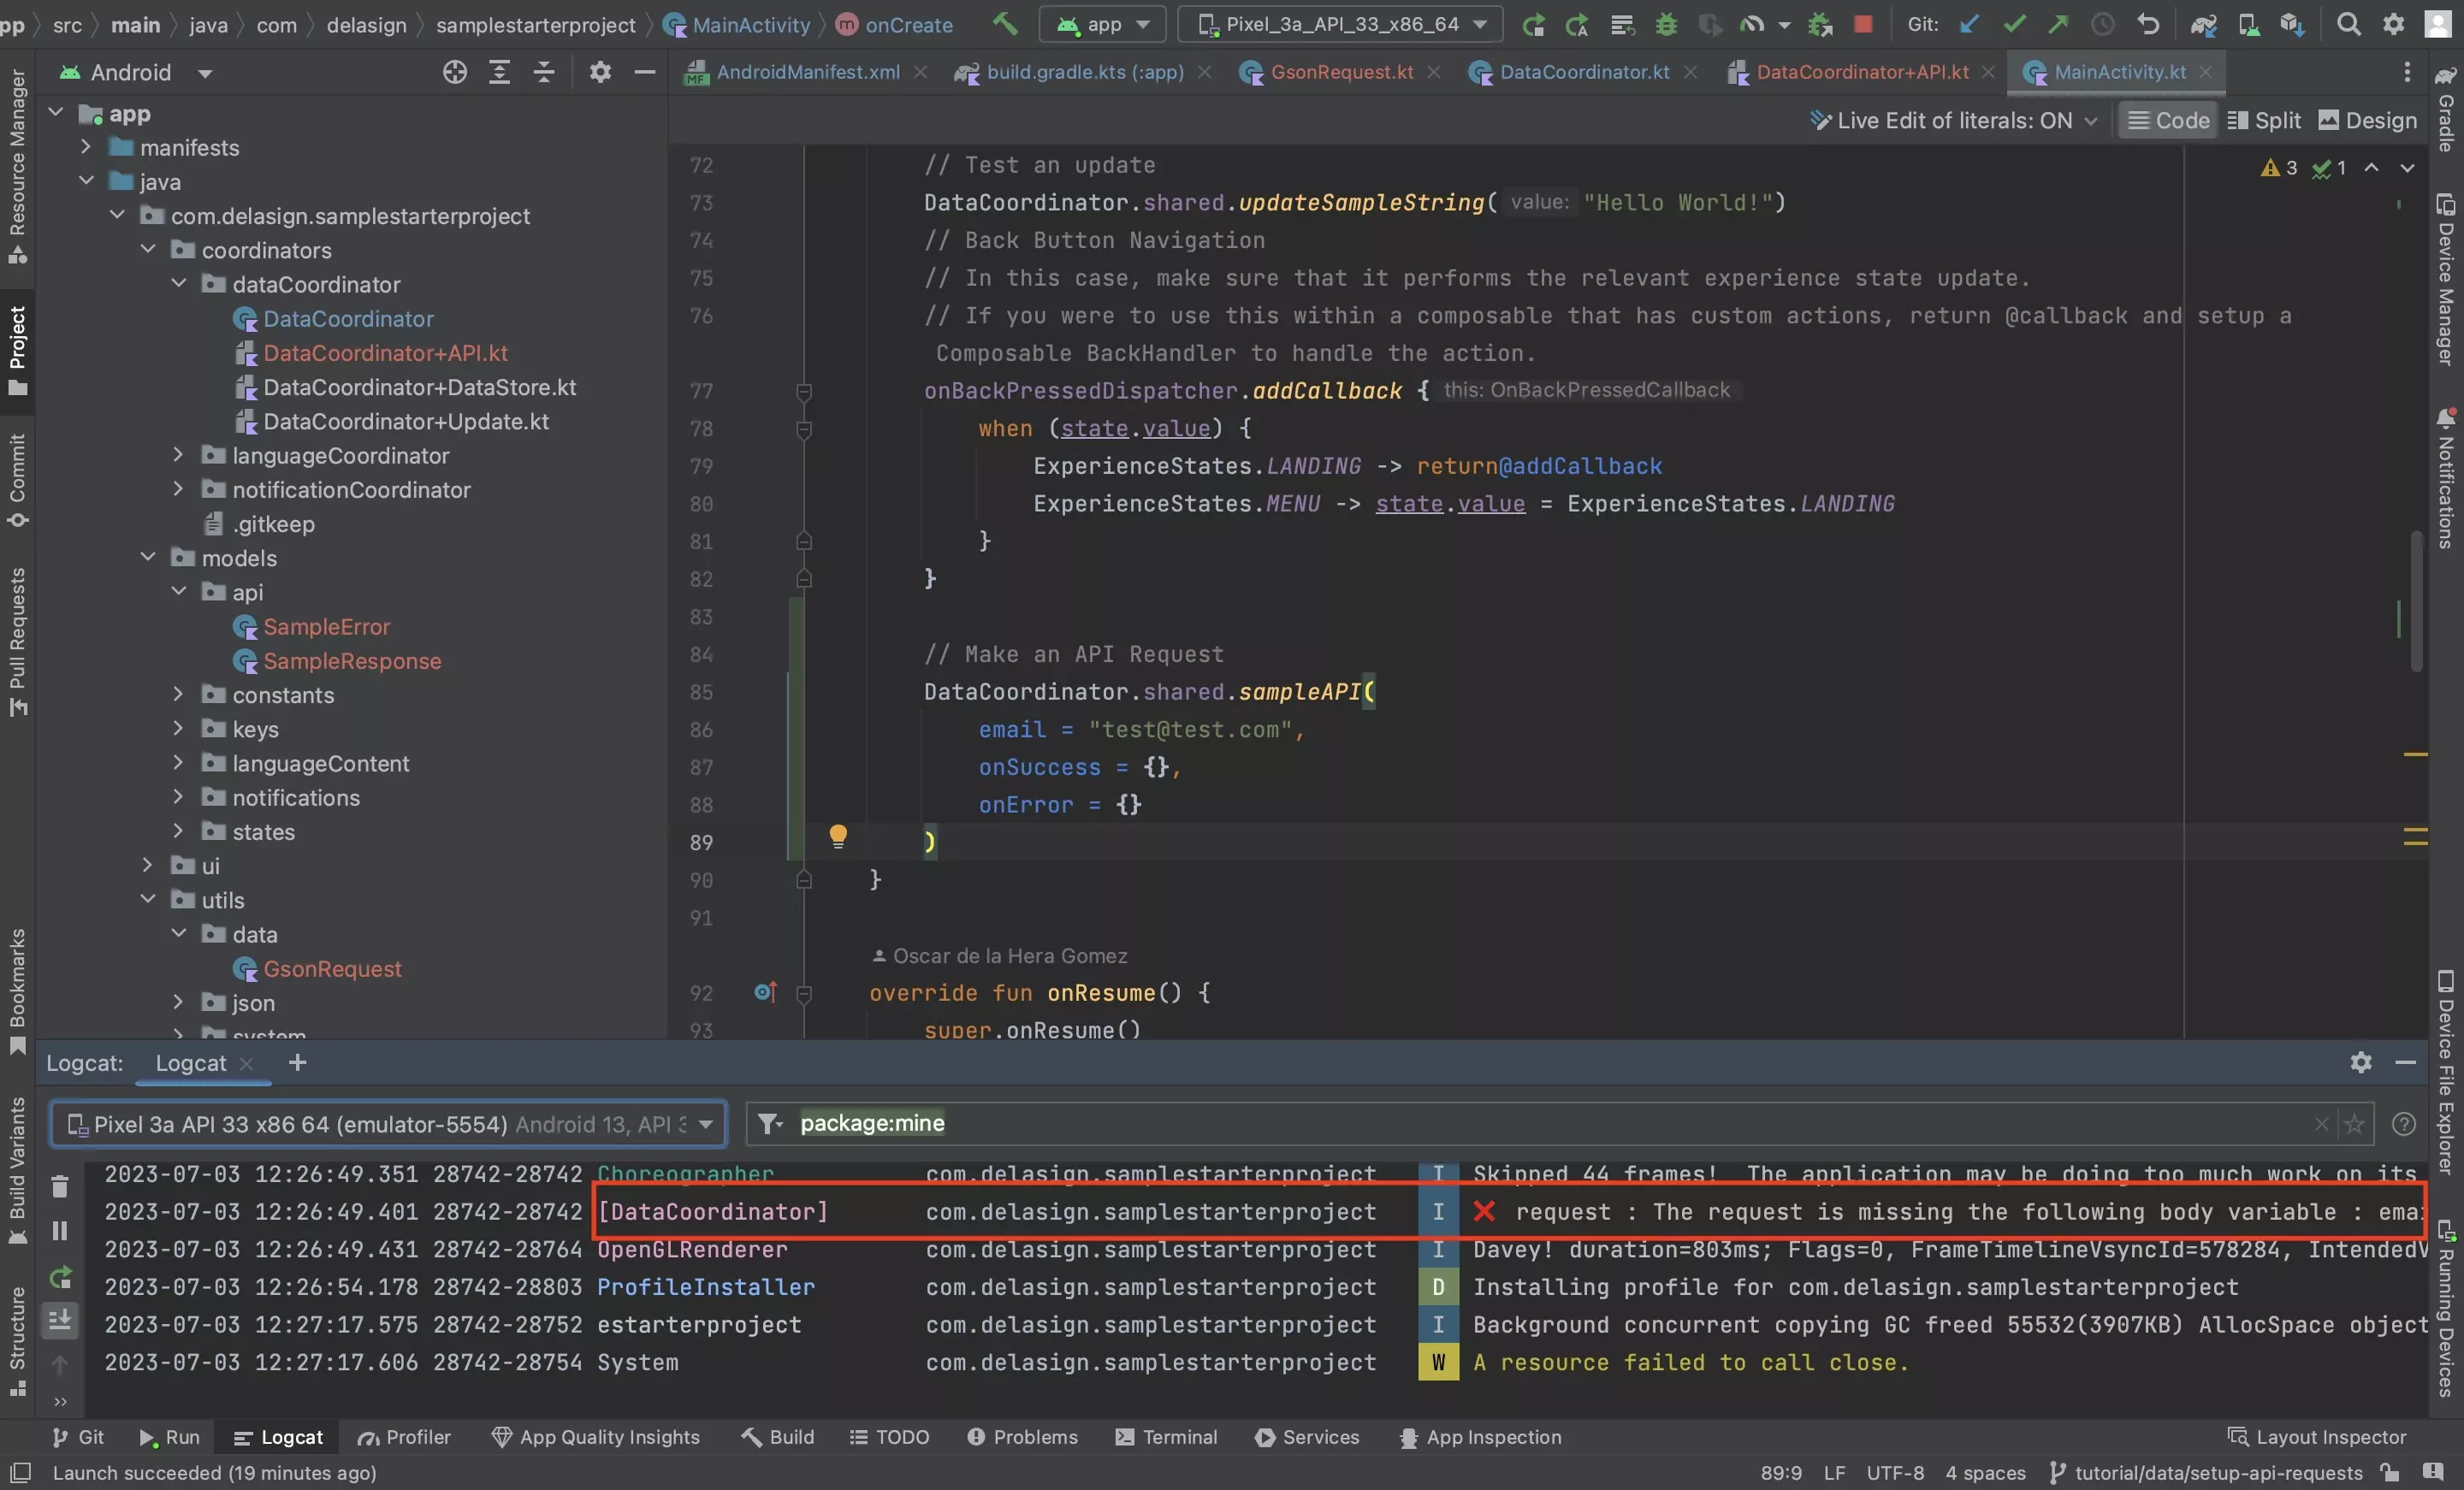
Make a modification to the function in Step Eight (Such as remove the JSON Payload) and test that you can receive errors correctly.