How to create a custom button using Jetpack Compose and Kotlin
A step by step tutorial on creating a custom button in Android Studio using Jetpack Compose and Kotlin.

Written by Oscar de la Hera Gomez
First published on 06/27/2023 at 17:07
Last Updated on 06/27/2023 at 17:51
A step by step tutorial on creating a custom button in Android Studio using Jetpack Compose and Kotlin.
SubscribeDownload Open Source Kotlin Starter ProjectStep One: Create the Composable
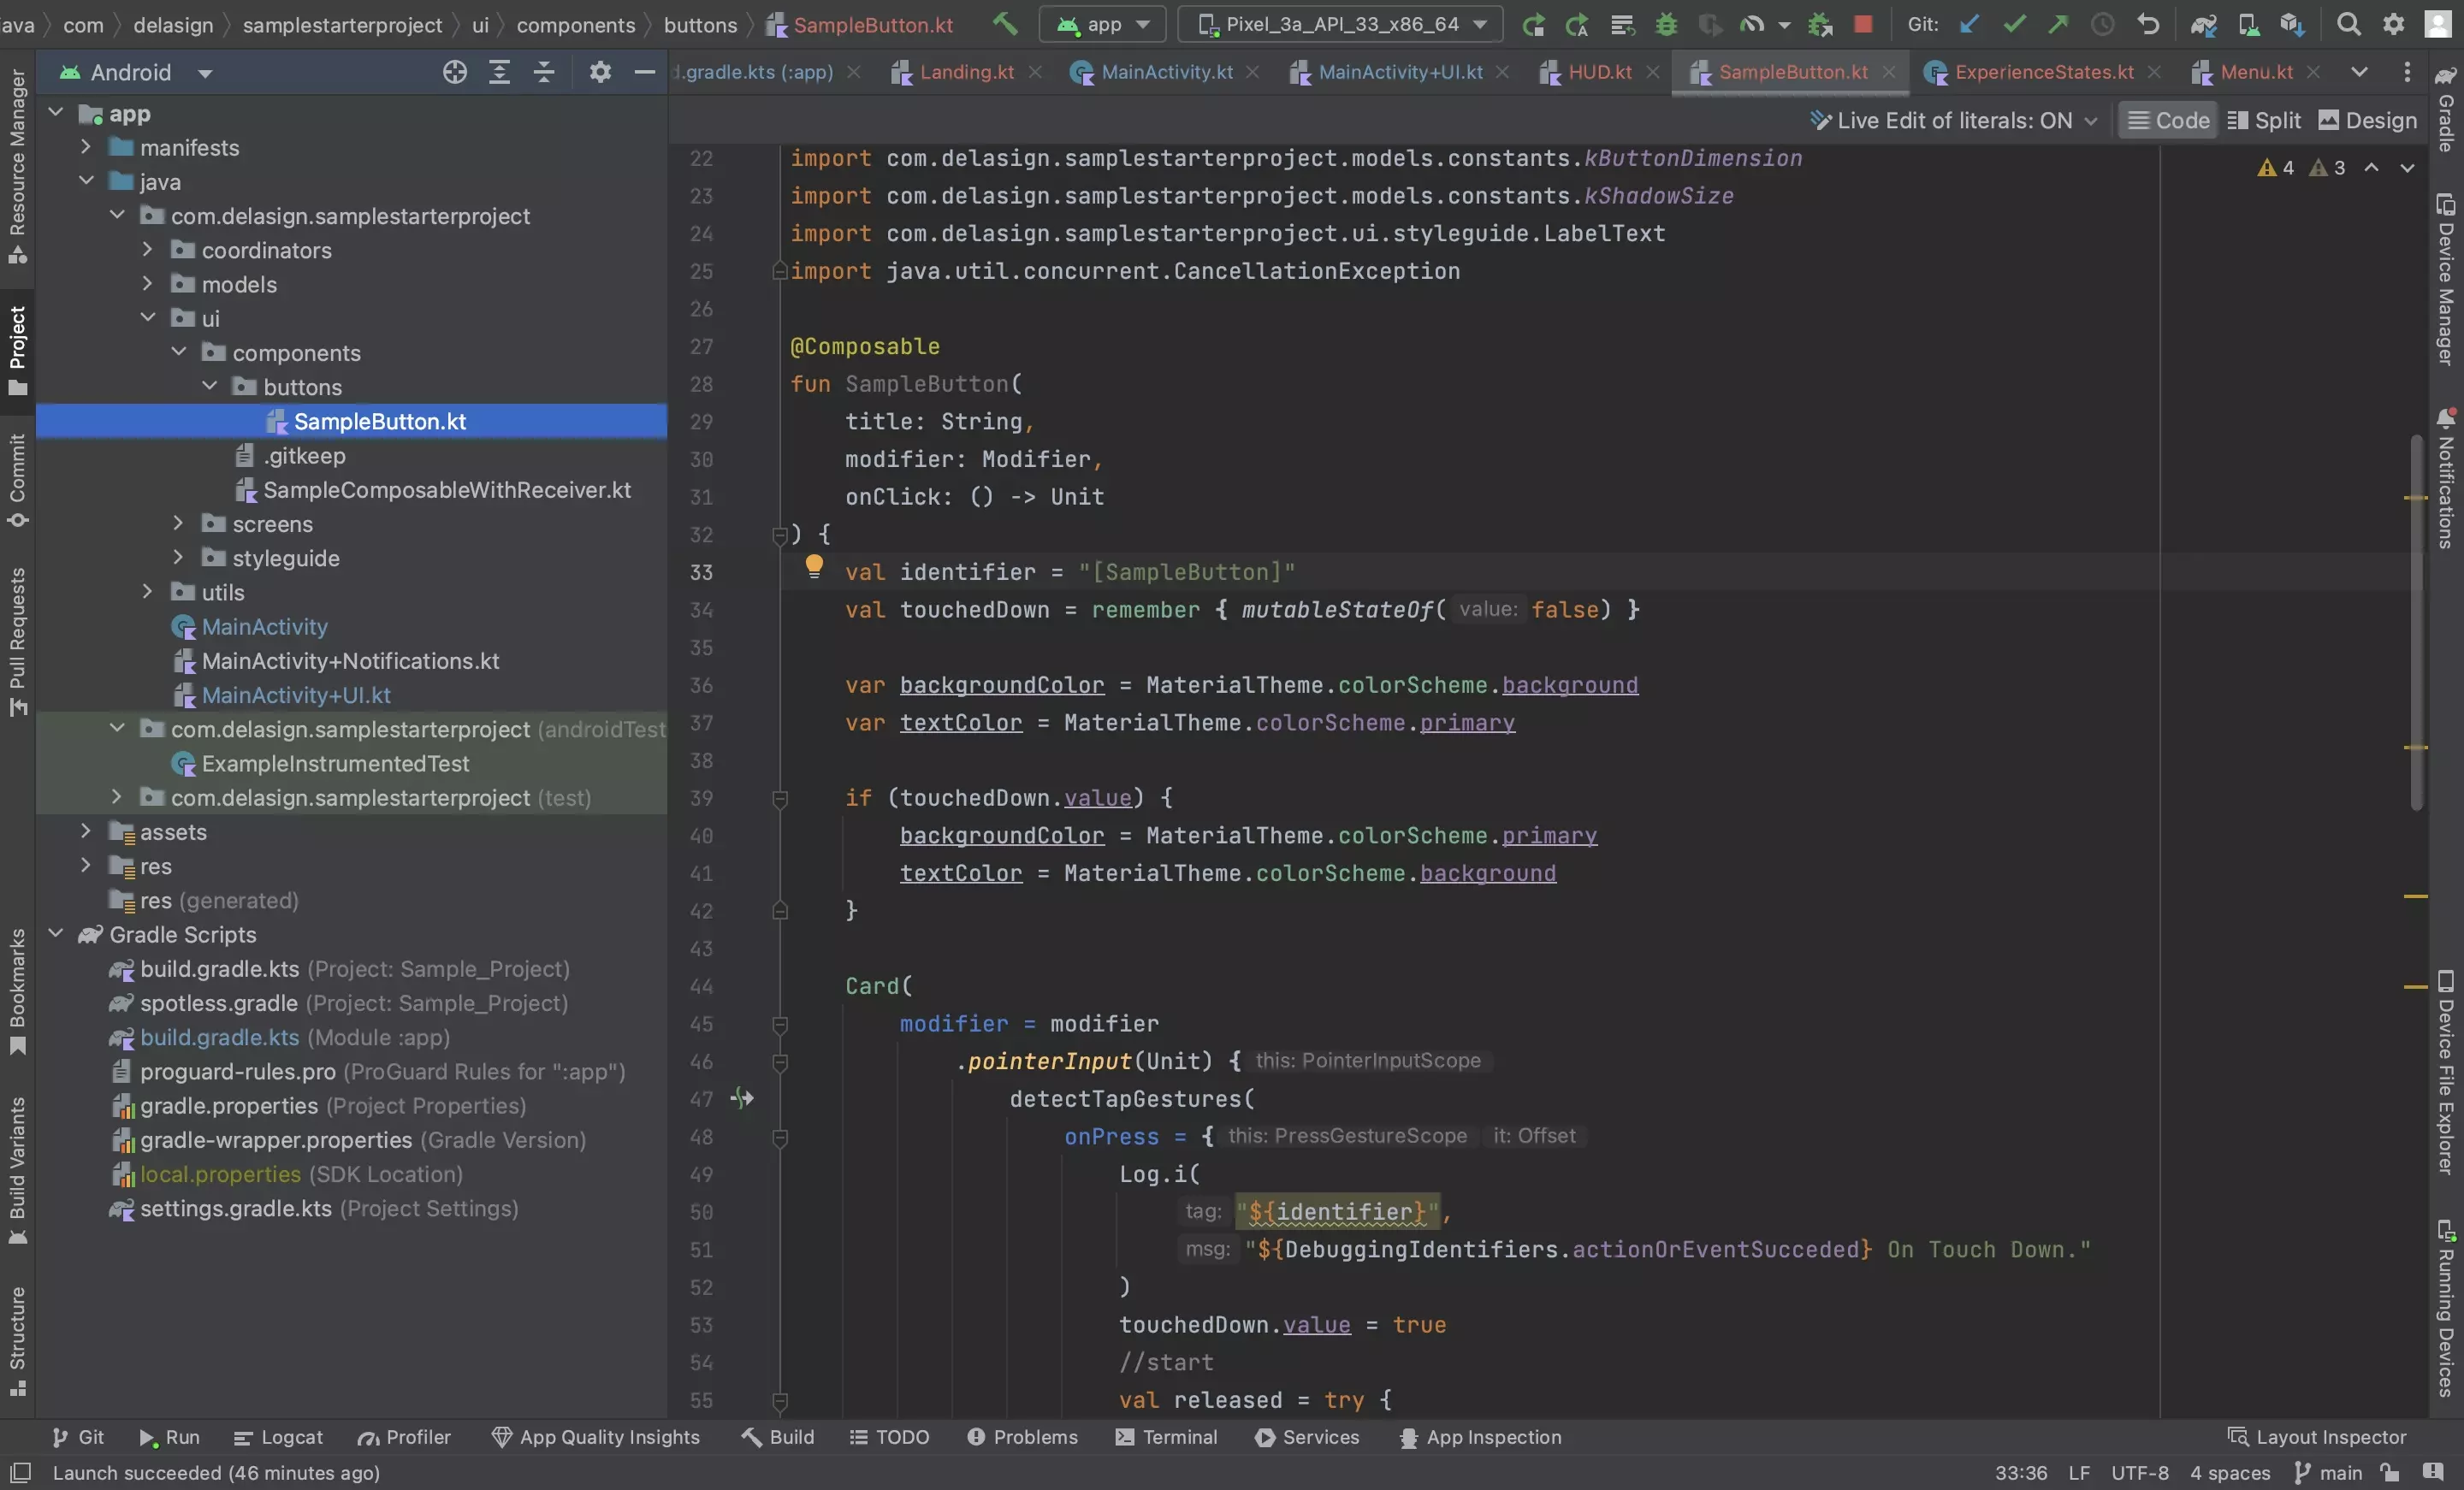
Using the code below as reference, create the custom button.
The pointerInput modifier is what manages the touch events.
Step Two: Add to UI
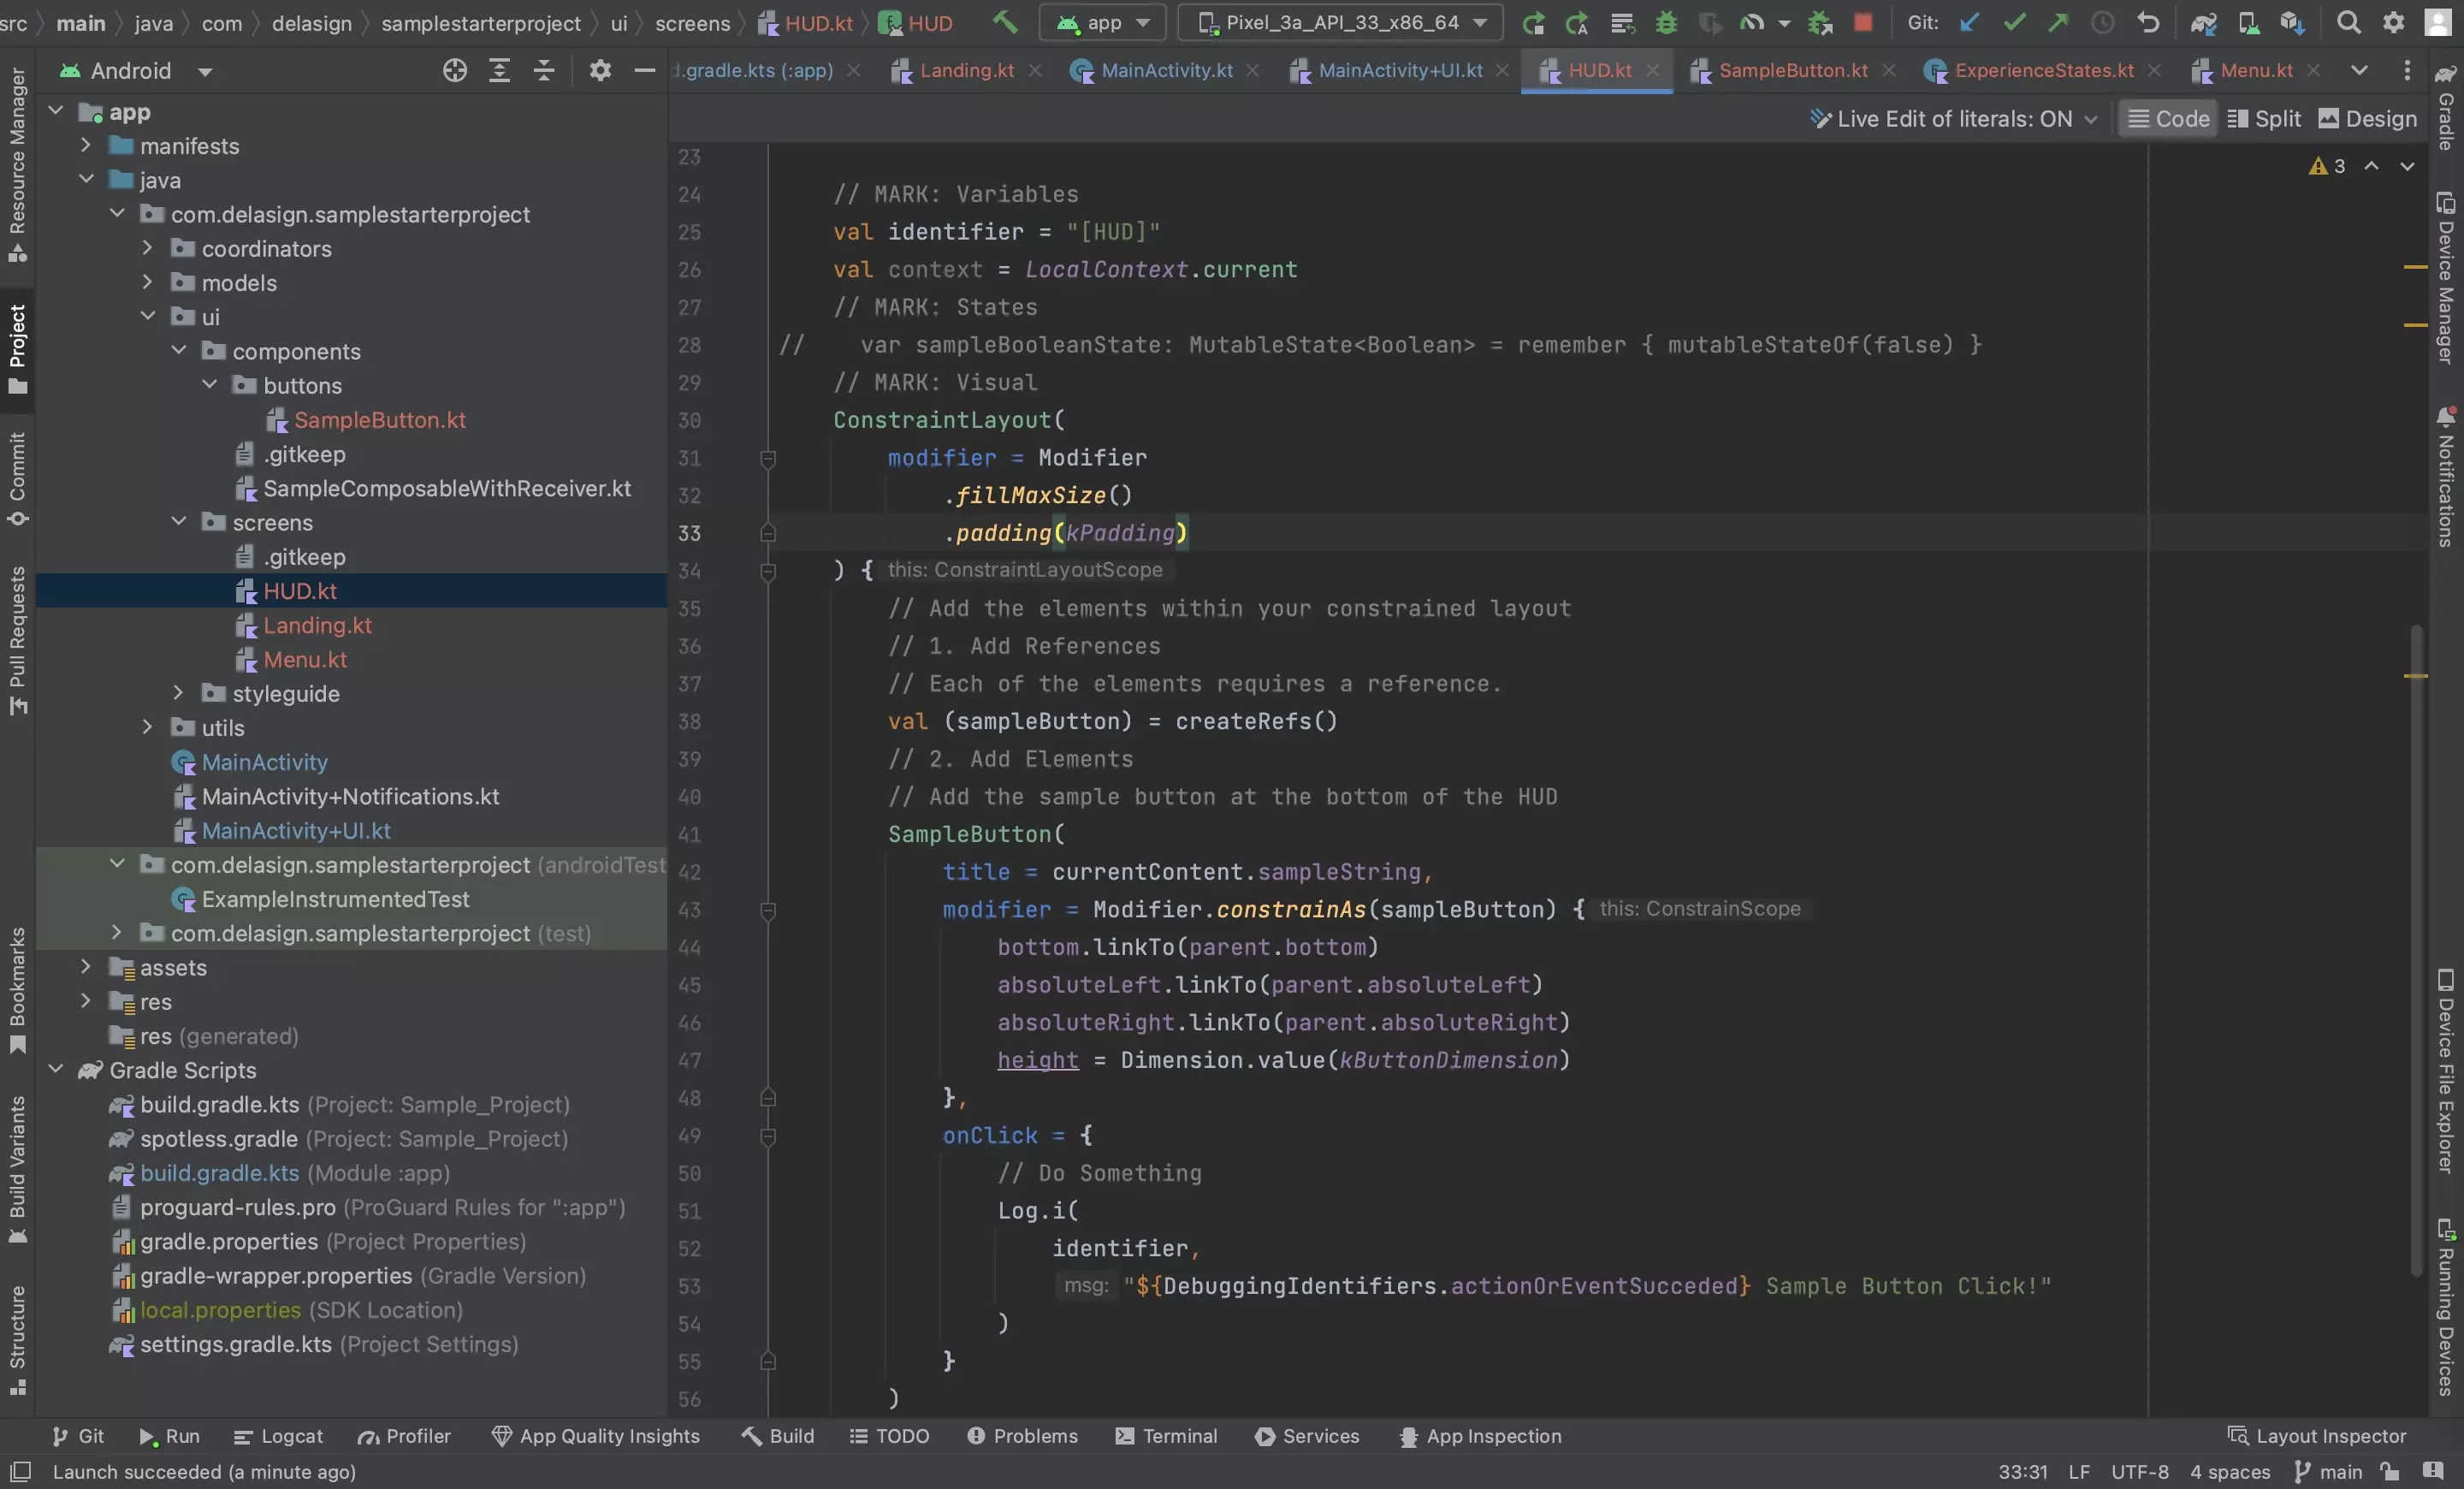
Add the button to the UI.
Step Three: Test
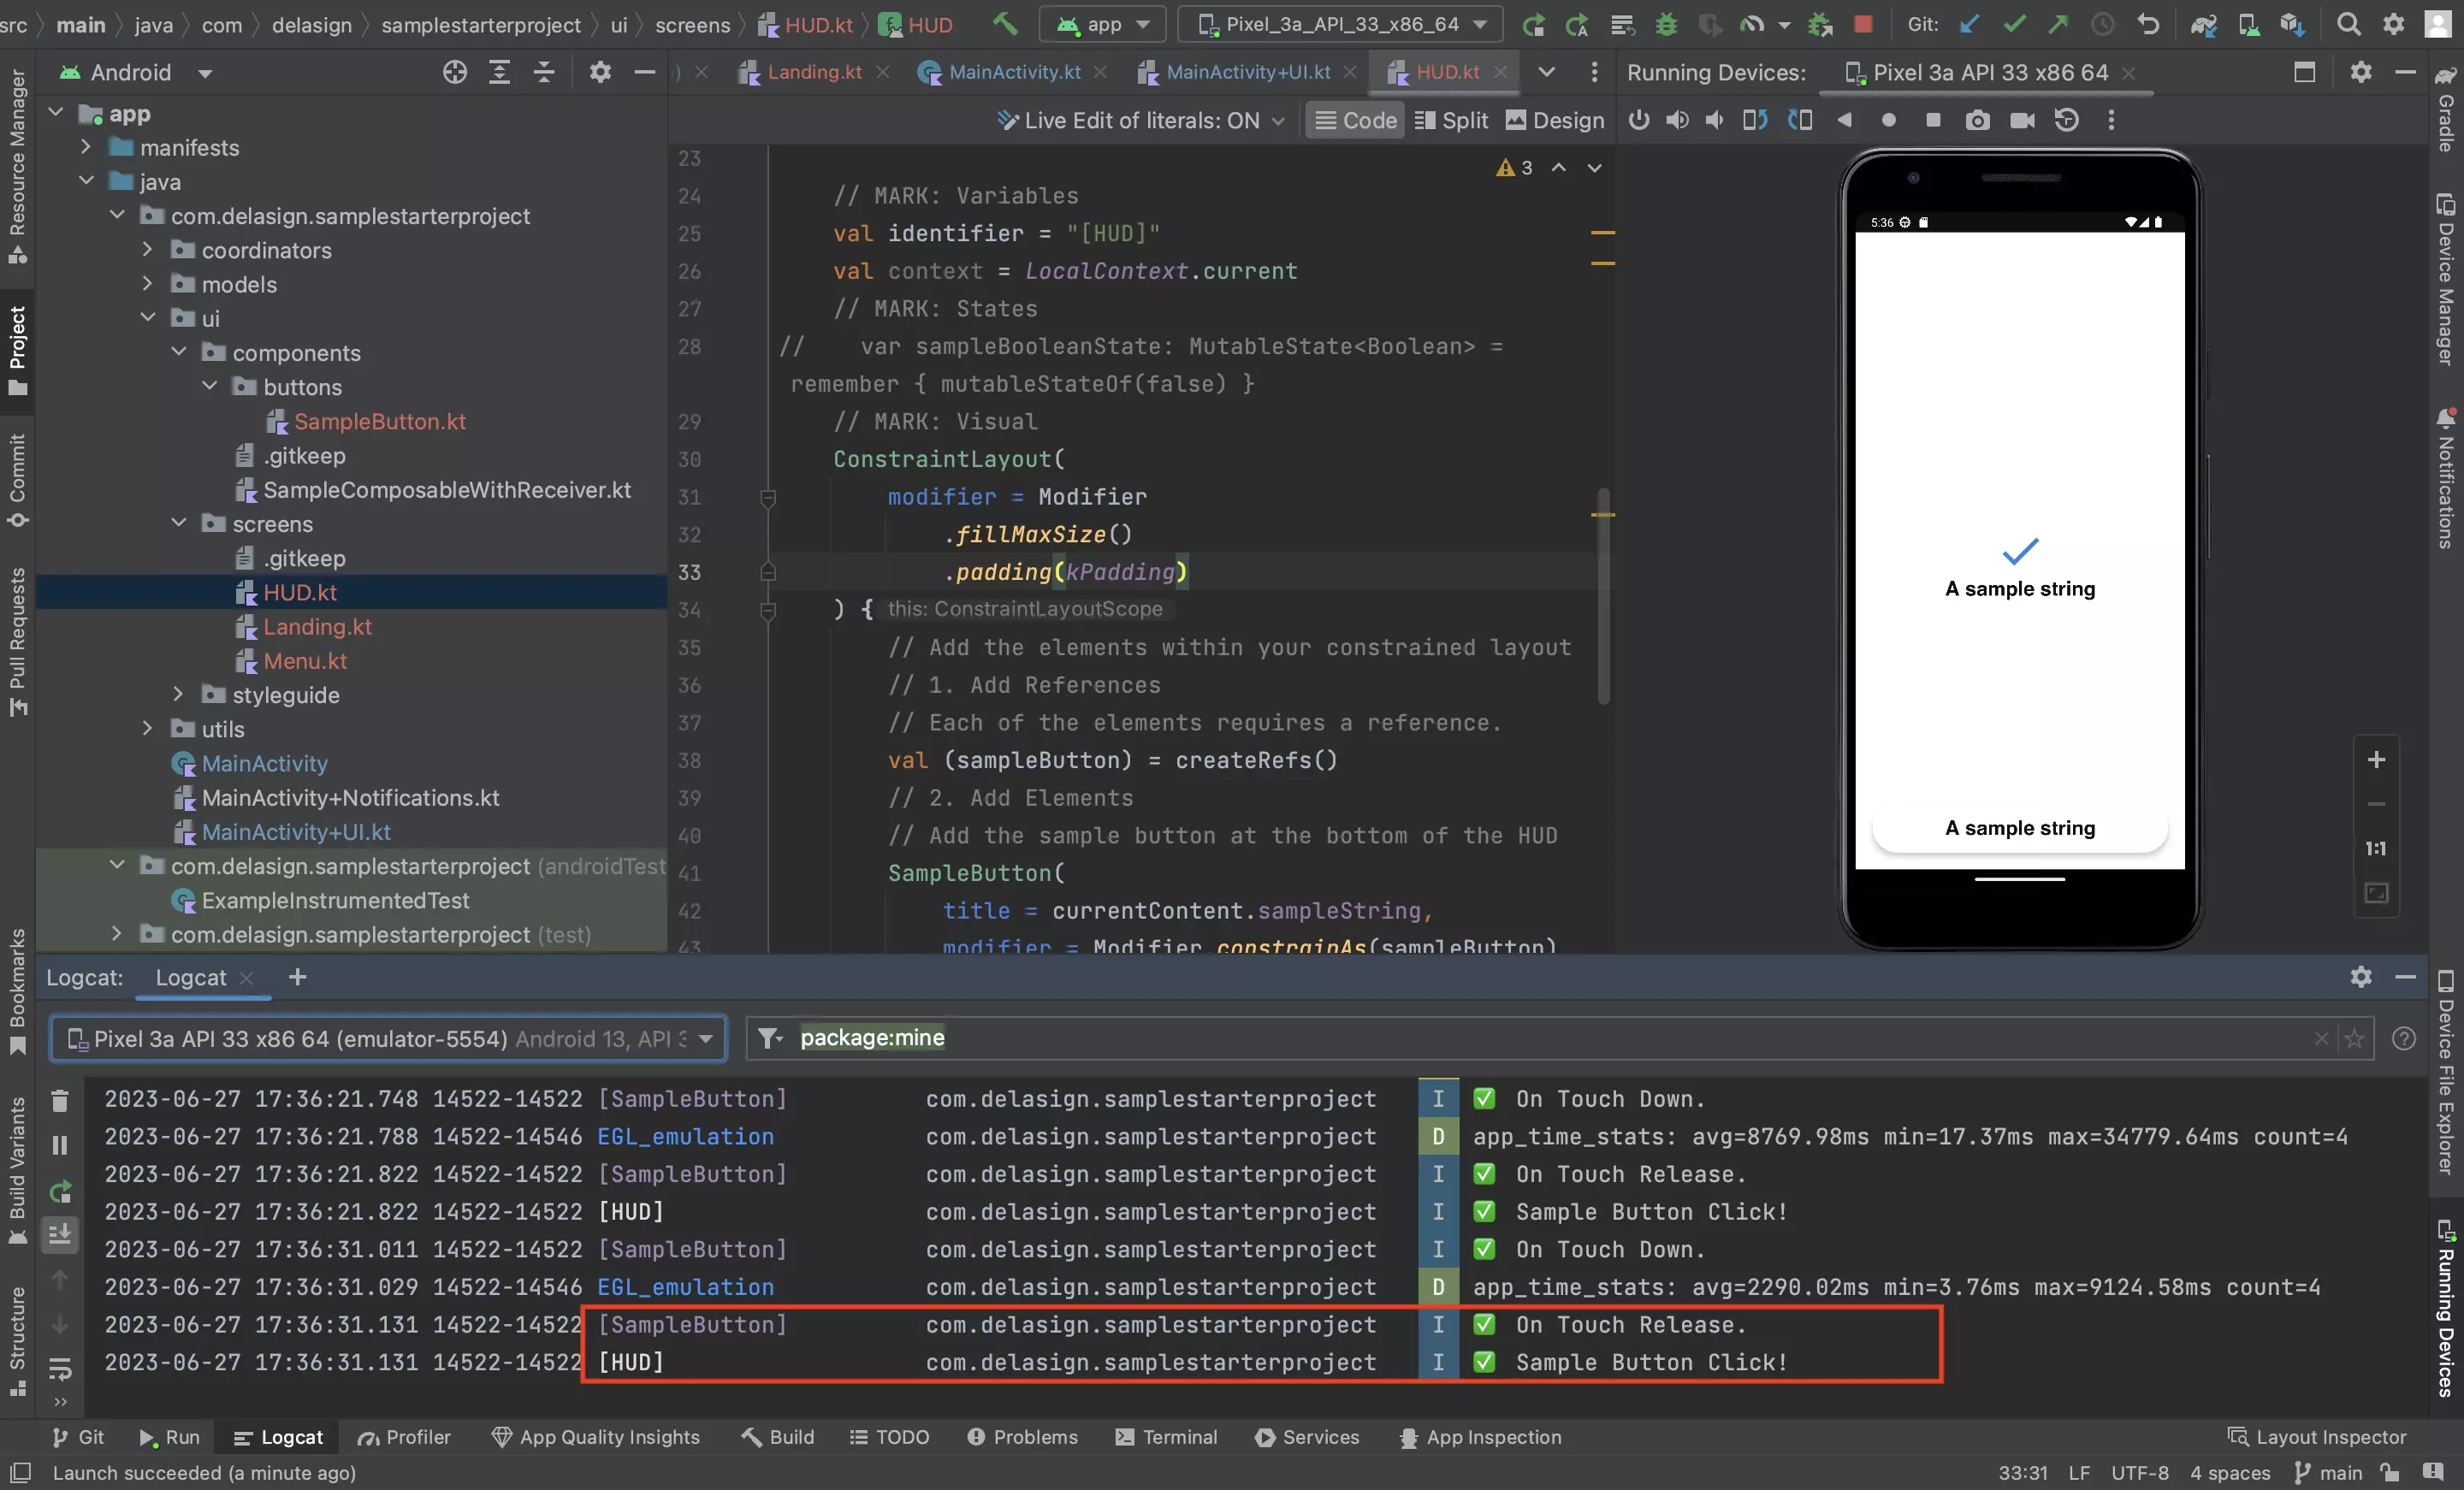
Run the app and confirm that everything works as expected.
Any Questions?
We are actively looking for feedback on how to improve this resource. Please send us a note to inquiries@delasign.com with any thoughts or feedback you may have.
SubscribeContact UsVisit our BlogView our ServicesView our Work