How to setup a camera in an Android app using Jetpack Compose
A step by step guide on setting up a bare bones Android CameraX feed using Jetpack Compose, Kotlin and Android Studio.
A step by step guide on setting up a bare bones Android CameraX feed using Jetpack Compose, Kotlin and Android Studio.
SubscribeDownload Open Source Kotlin Starter ProjectThe following tutorial builds on our Open Source Kotlin project which can be downloaded using the link below, and aims to walk you through how to create a Composable that dynamically adapts to fit its content.
The composable CameraX feed that we create is very similar to the first version that we created for Price After.
We recommend that you checkout the main branch and carry out the steps described below. The changes that took place can be found on the tutorial/jetpack-compose/camerax/setup.
git clone git@github.com:delasign/kotlin-android-starter-project.gitStep One: Add the Feature and Permission
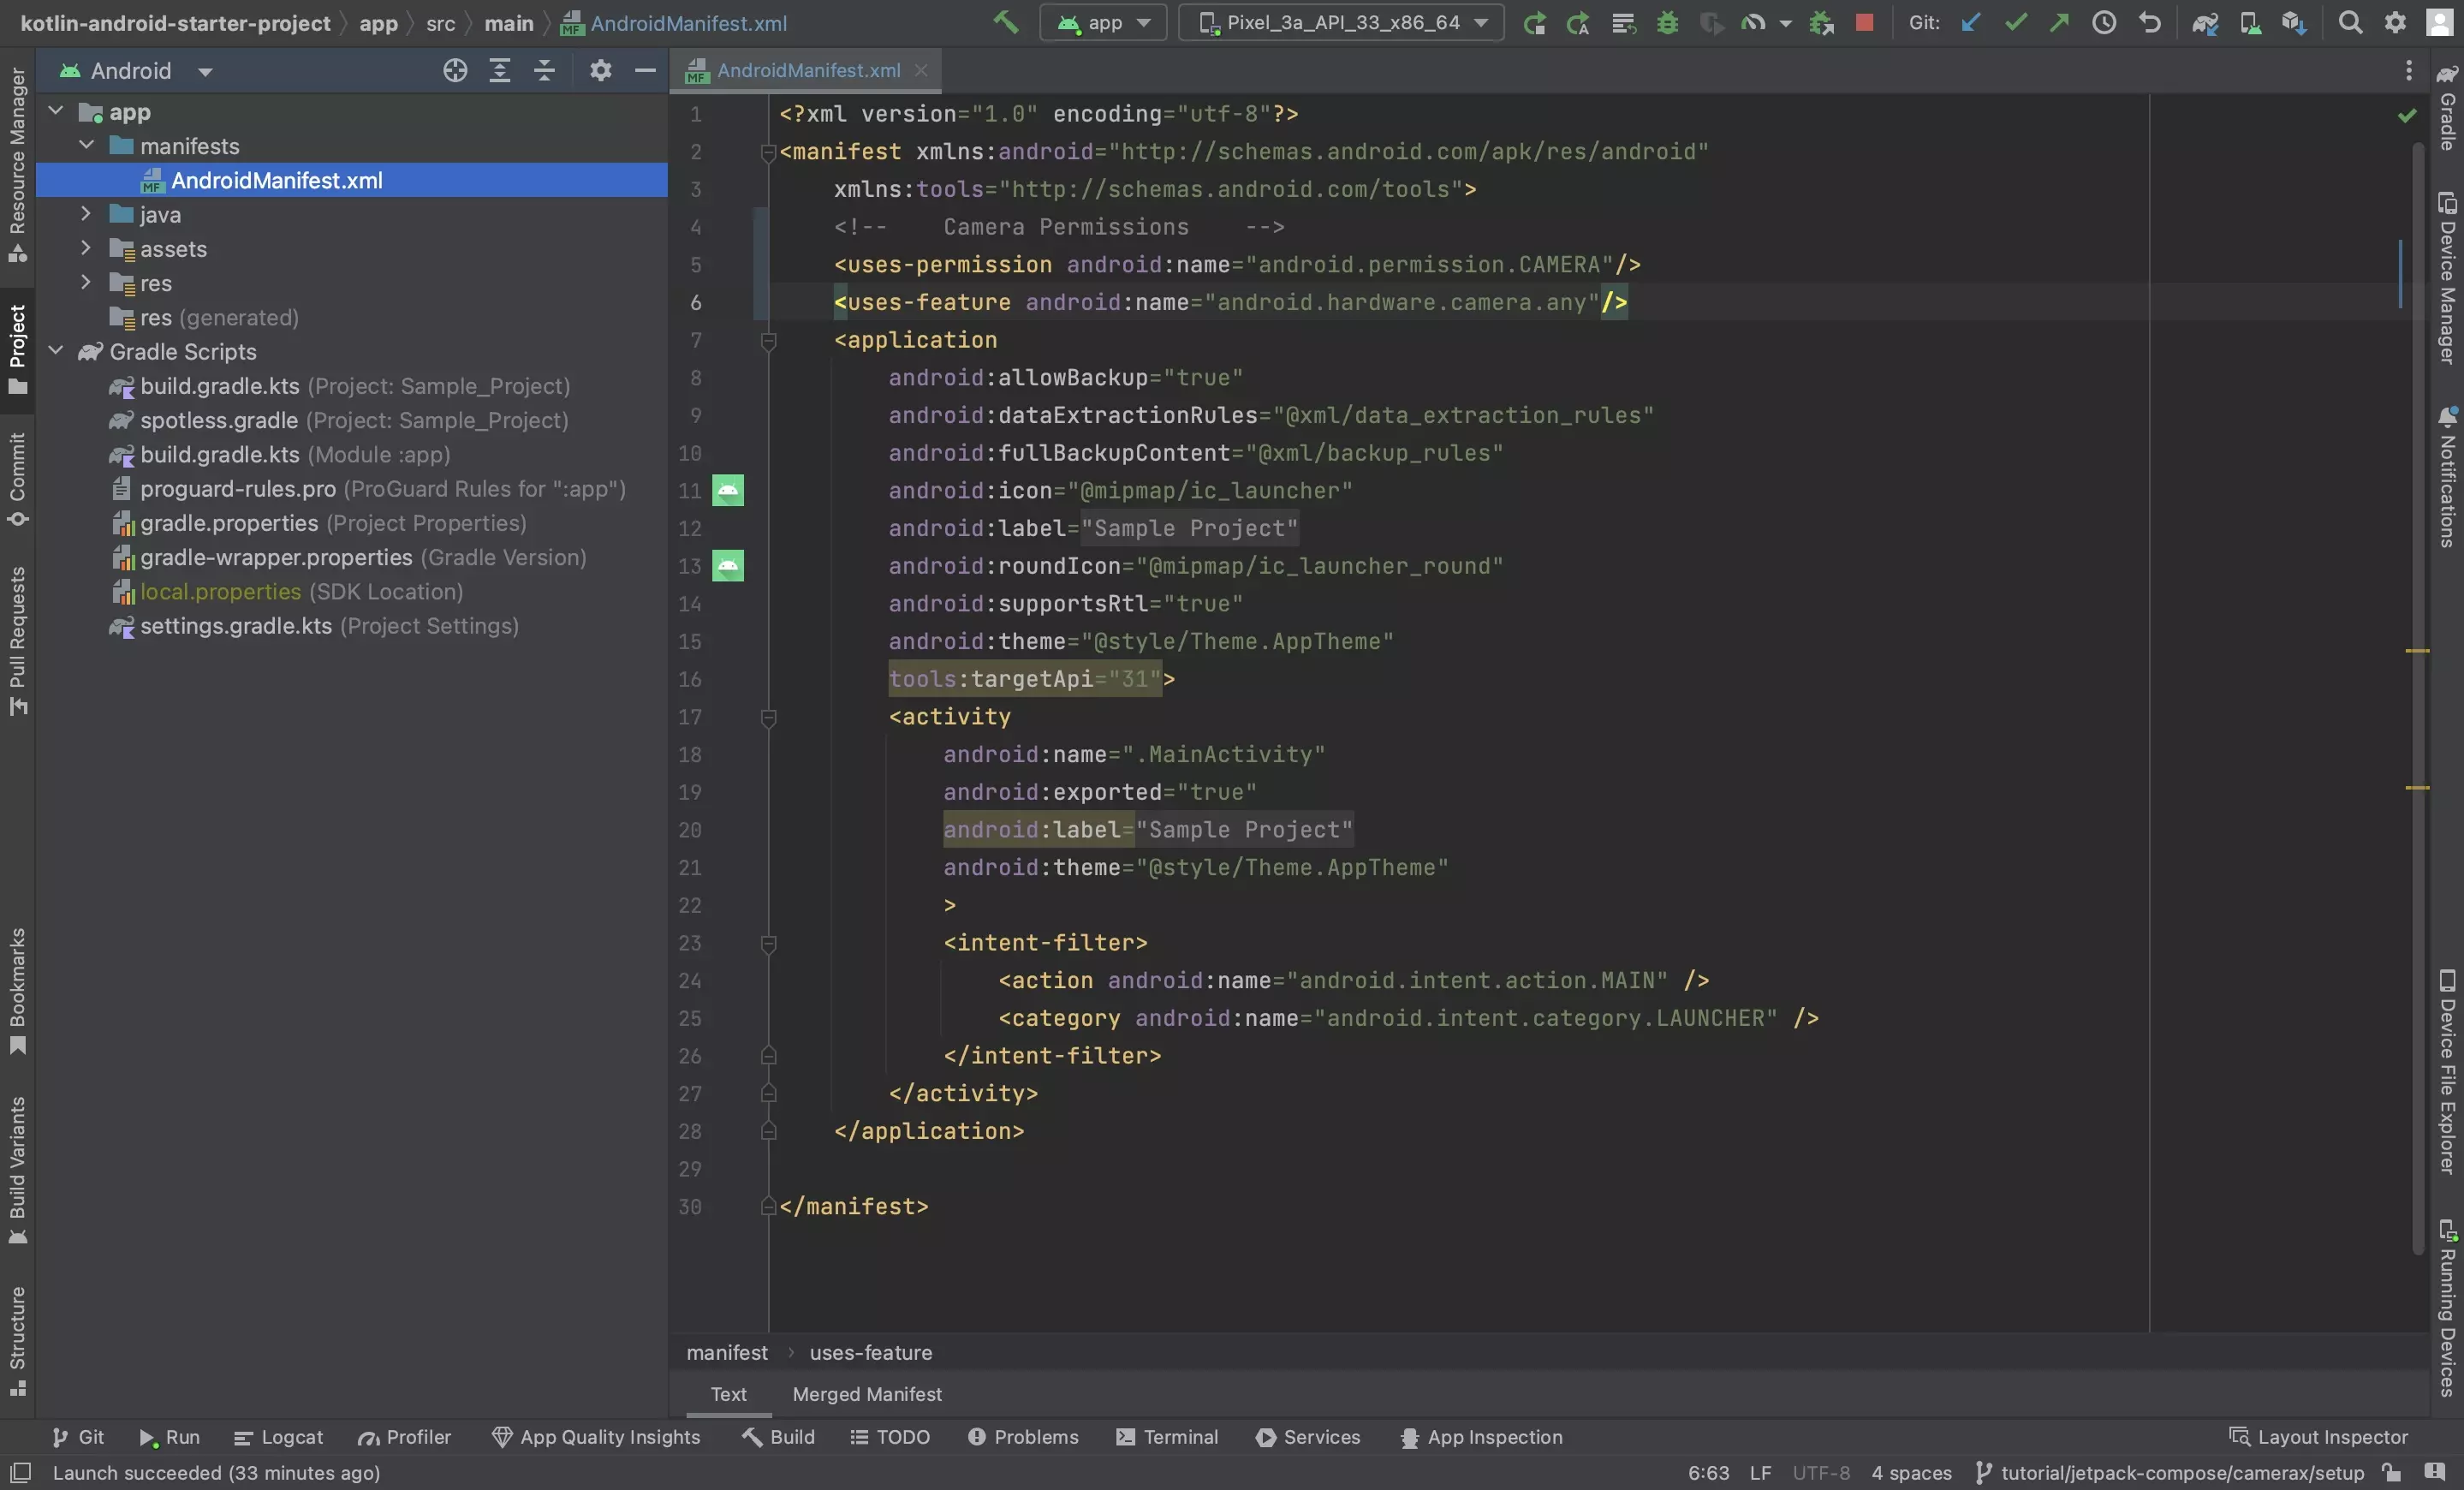
In the projects AndroidManifest.xml file, add the following feature & permission:
<uses-permission android:name="android.permission.CAMERA"/>
<uses-feature android:name="android.hardware.camera.any"/>
Step Two: Add the Dependencies
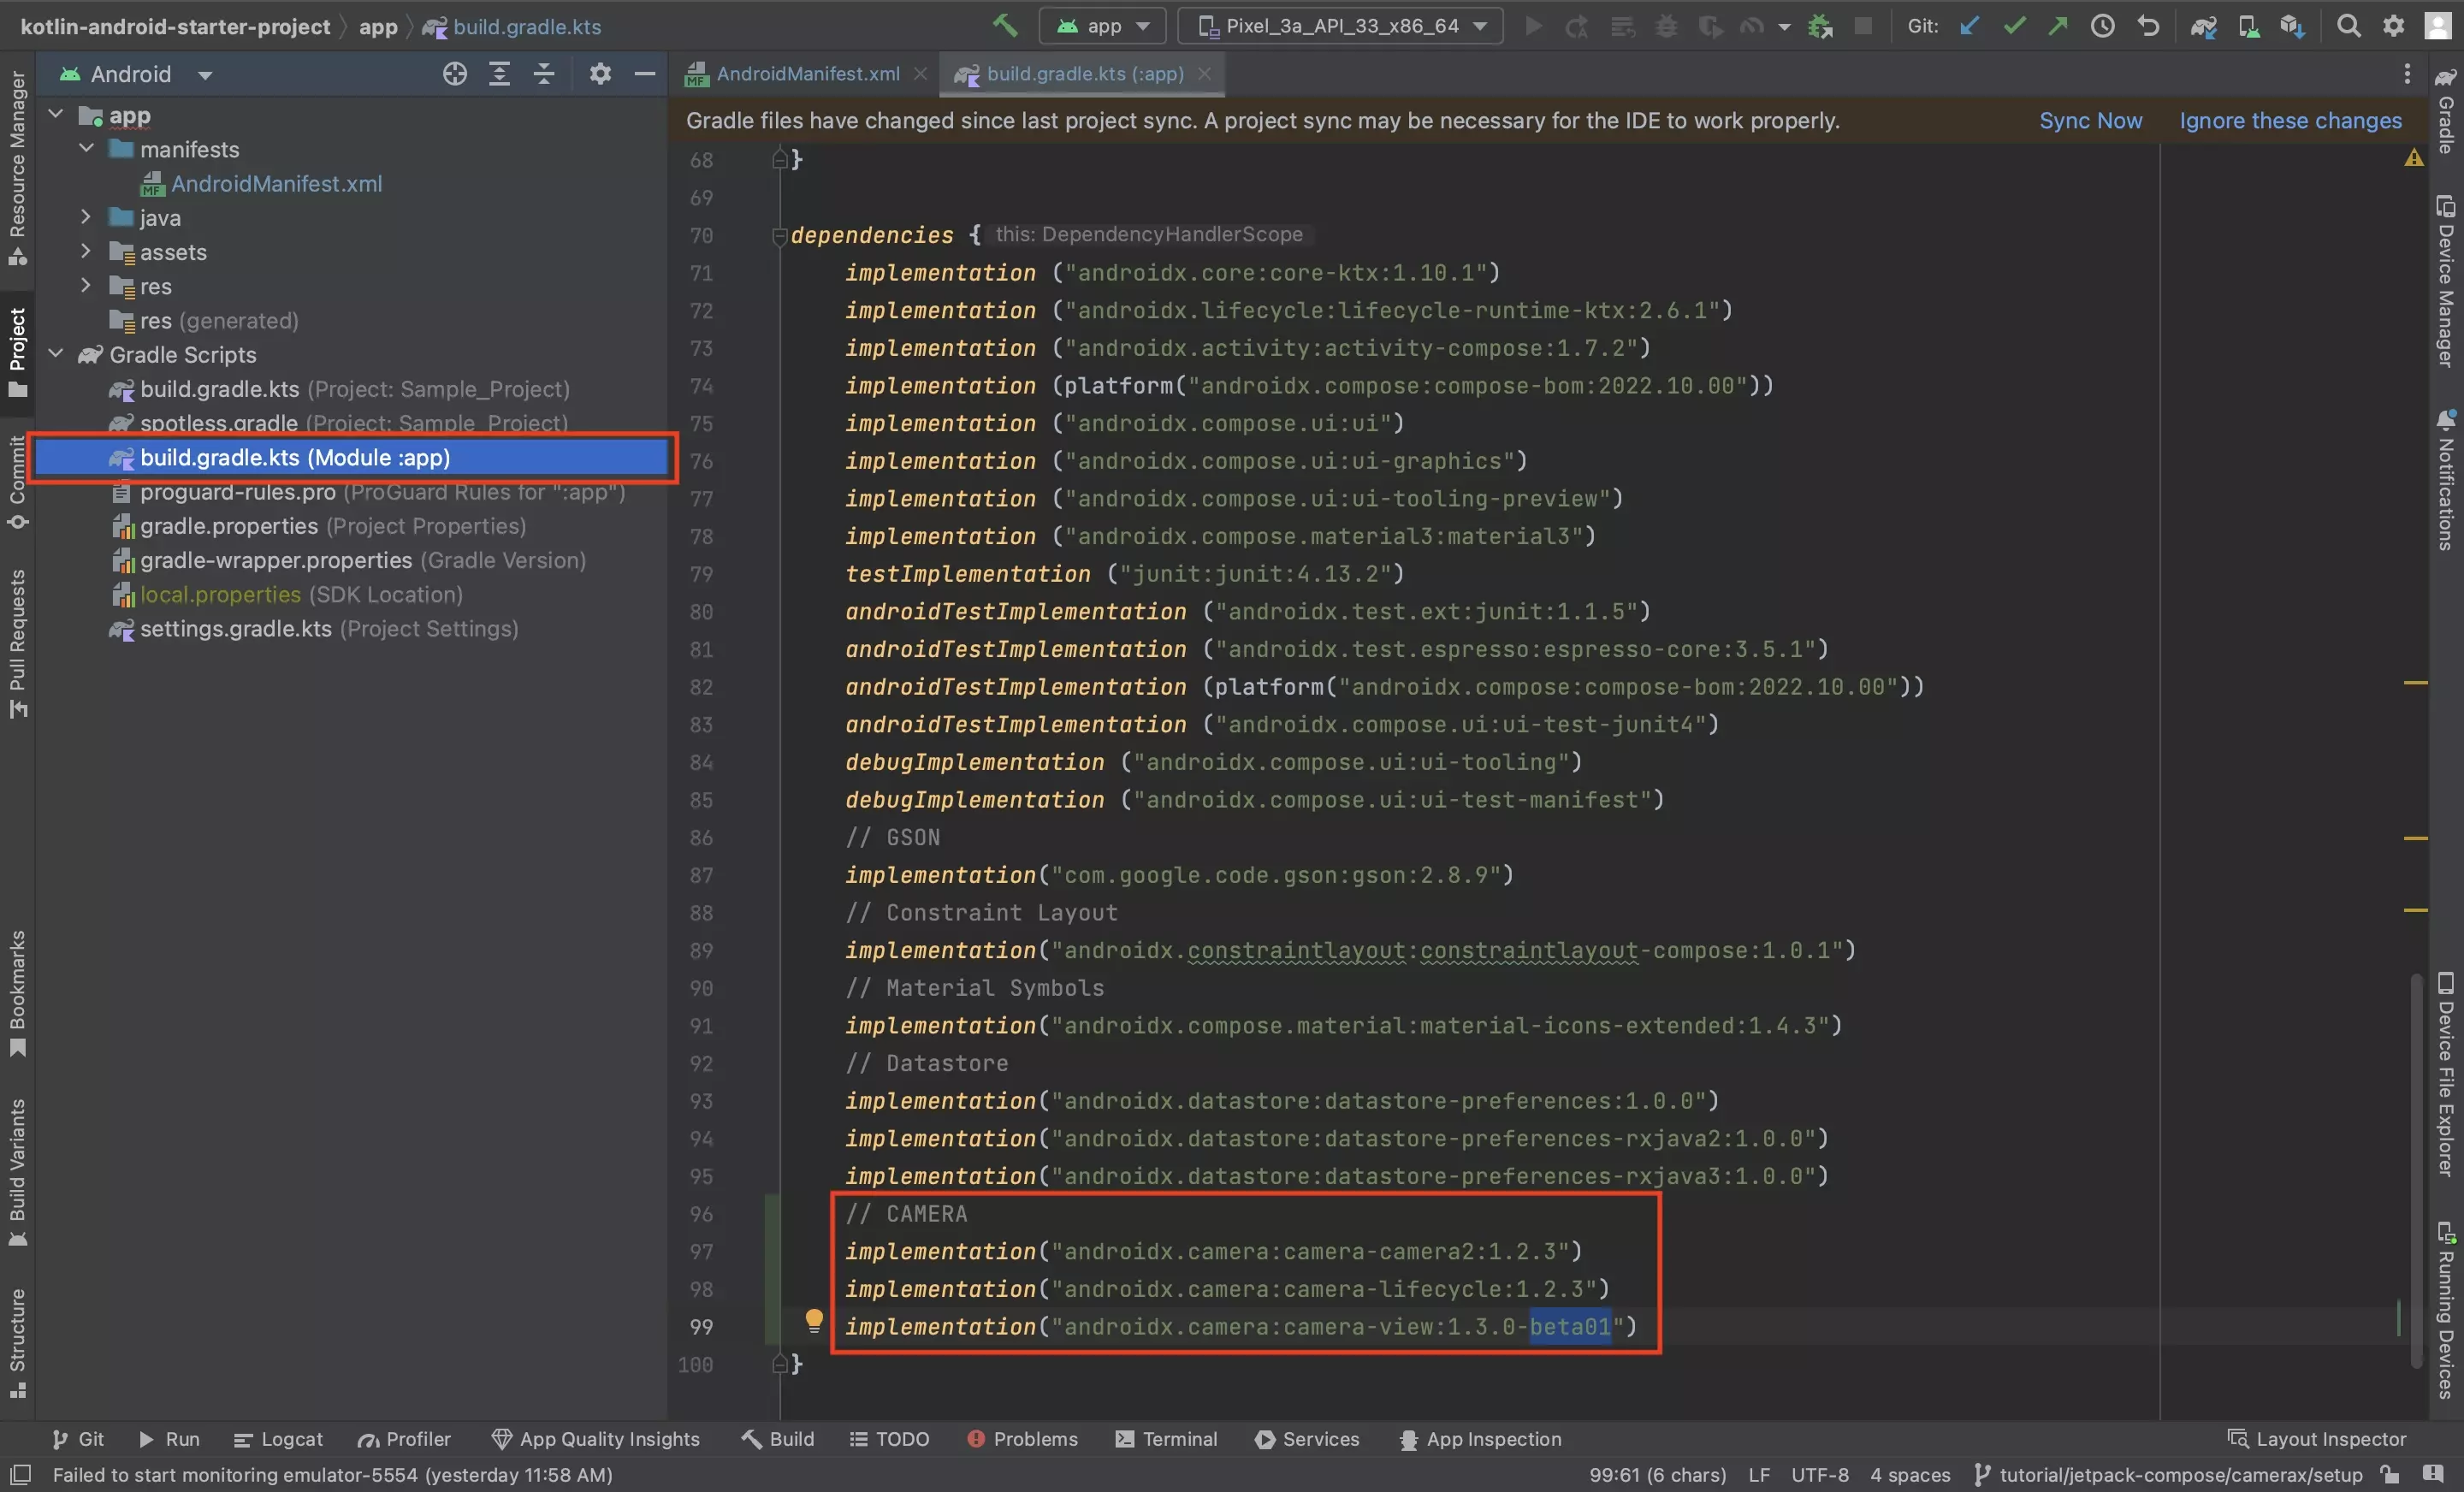
In the App Level build.gradle.kts file, add the following dependencies:
implementation("androidx.camera:camera-camera2:1.2.3")implementation("androidx.camera:camera-lifecycle:1.2.3")implementation("androidx.camera:camera-view:1.3.0-beta01")Please note that versions displayed above may not be the latest versions, please update the code above to the latest version in your Android Studio project.
Step Three: Sync the Gradles
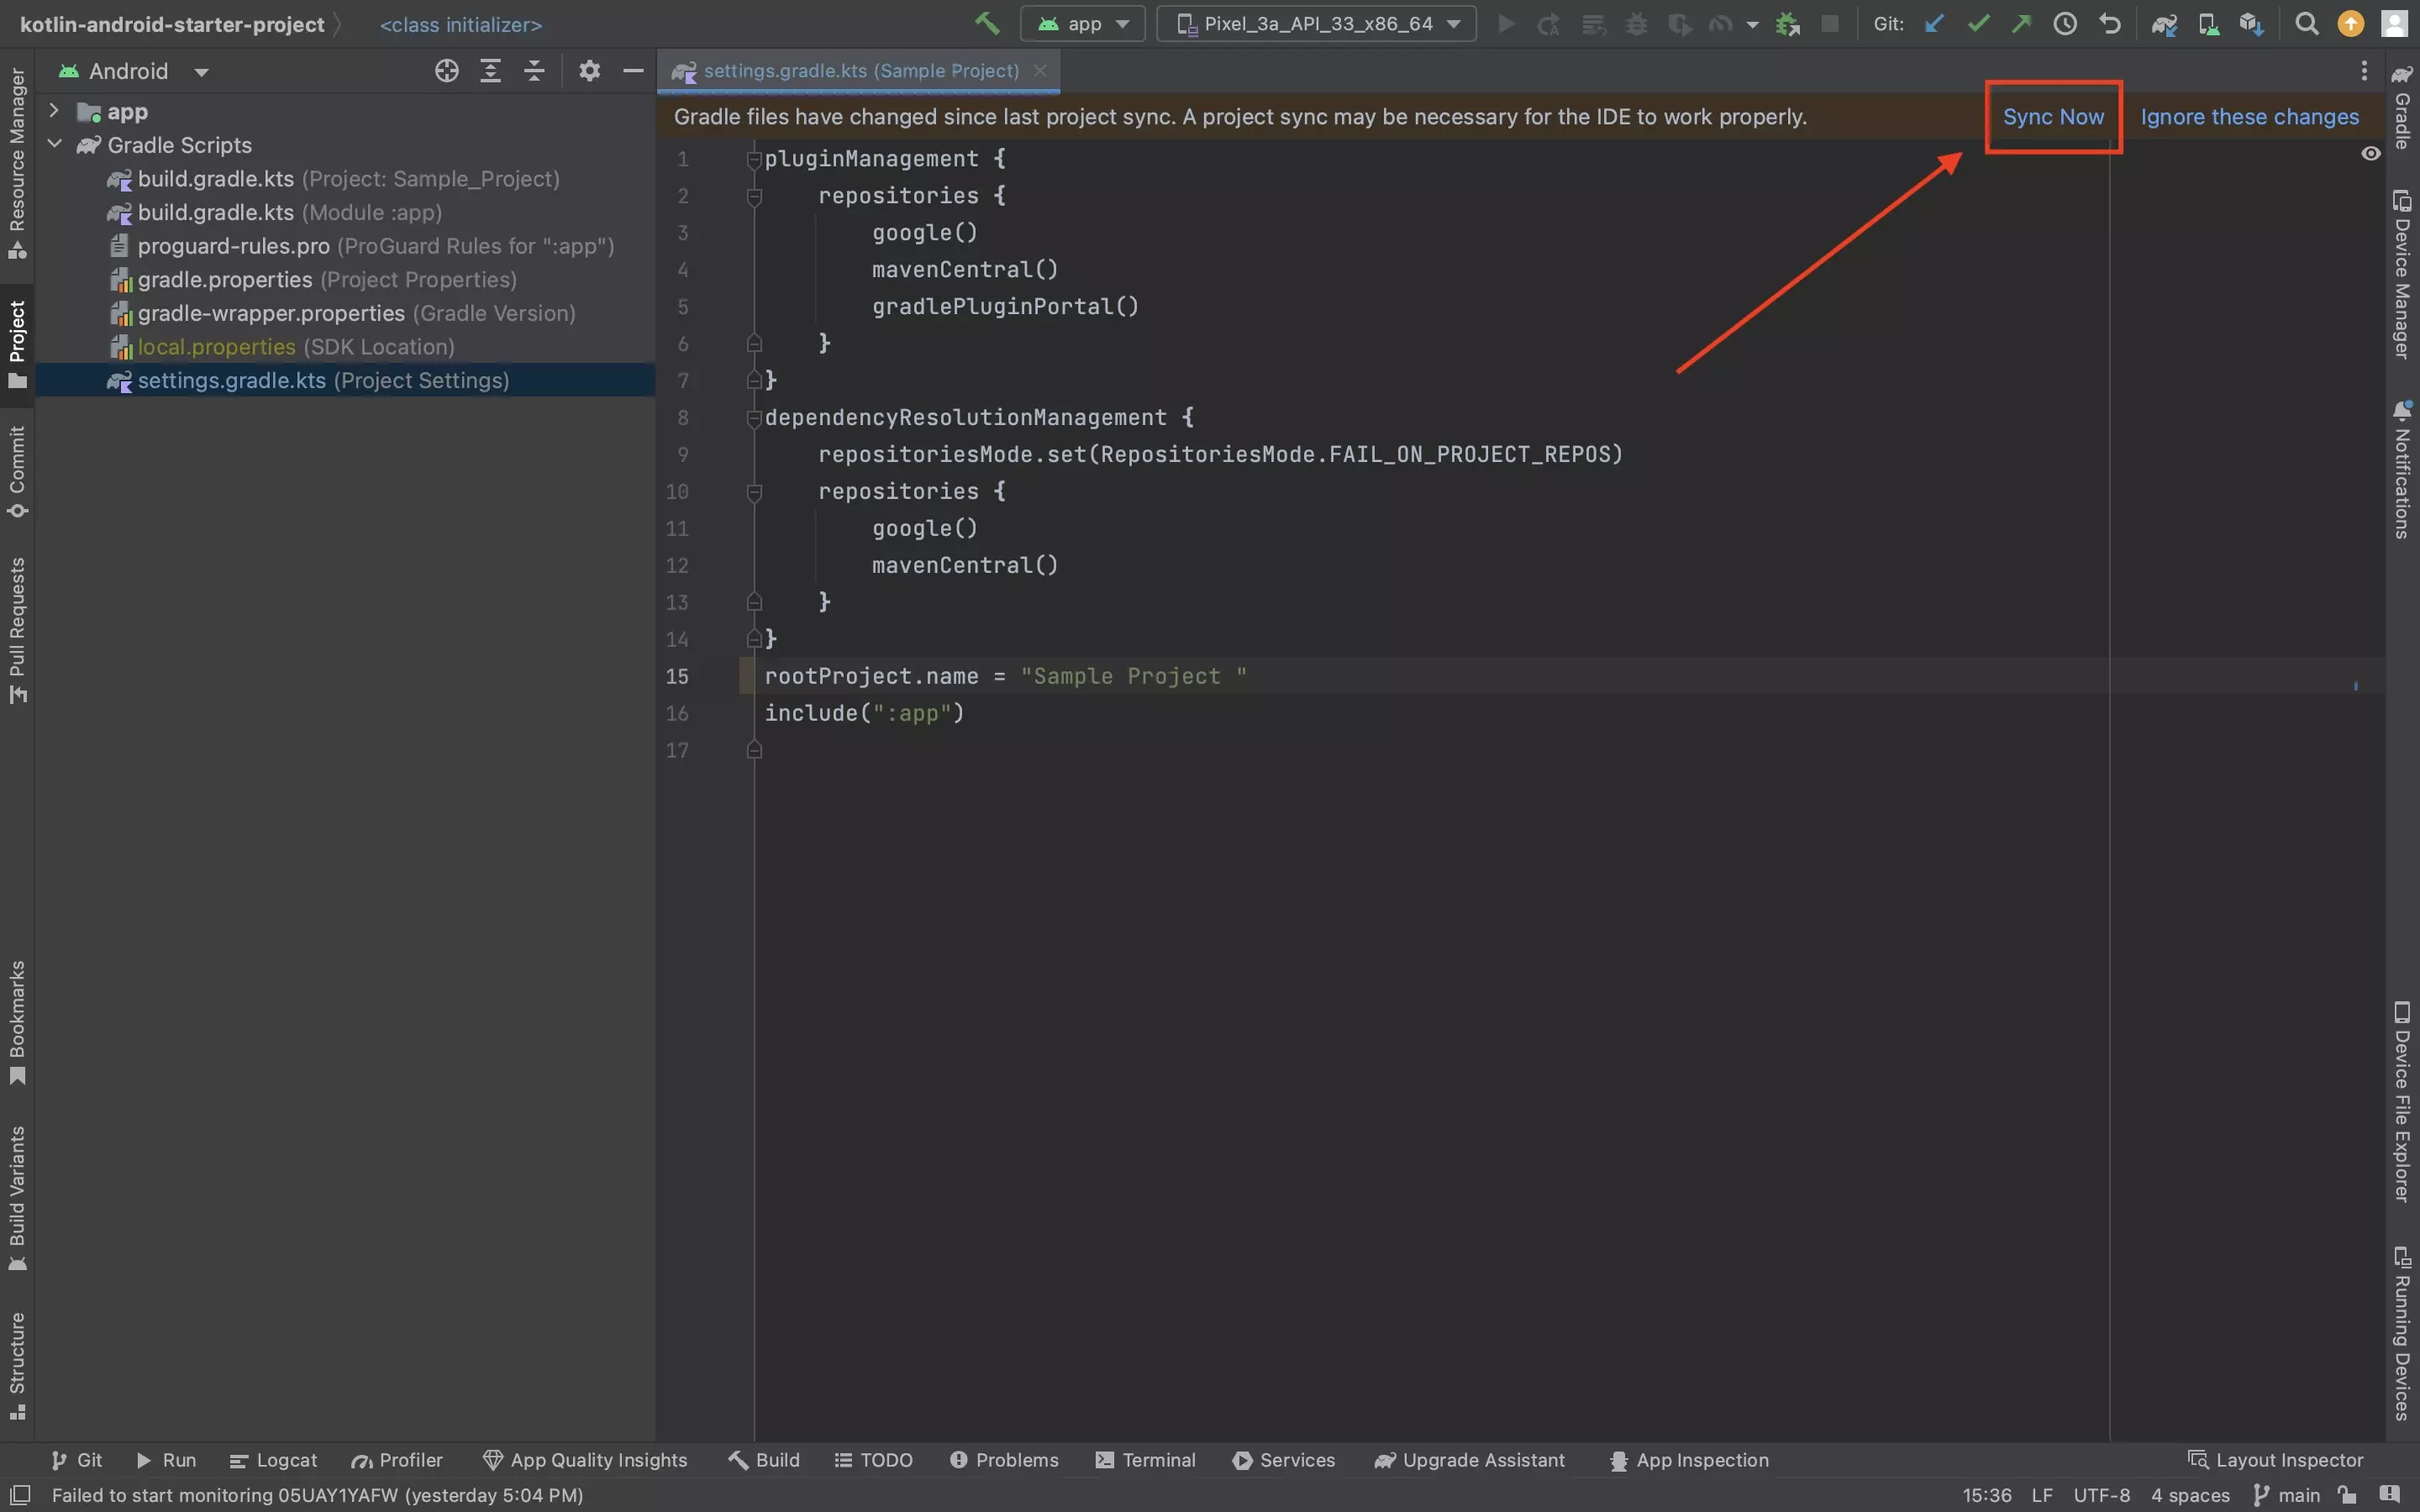
Press Sync Now in the bar above the Gradle to update the project dependencies.
Step Four: Request Permissions
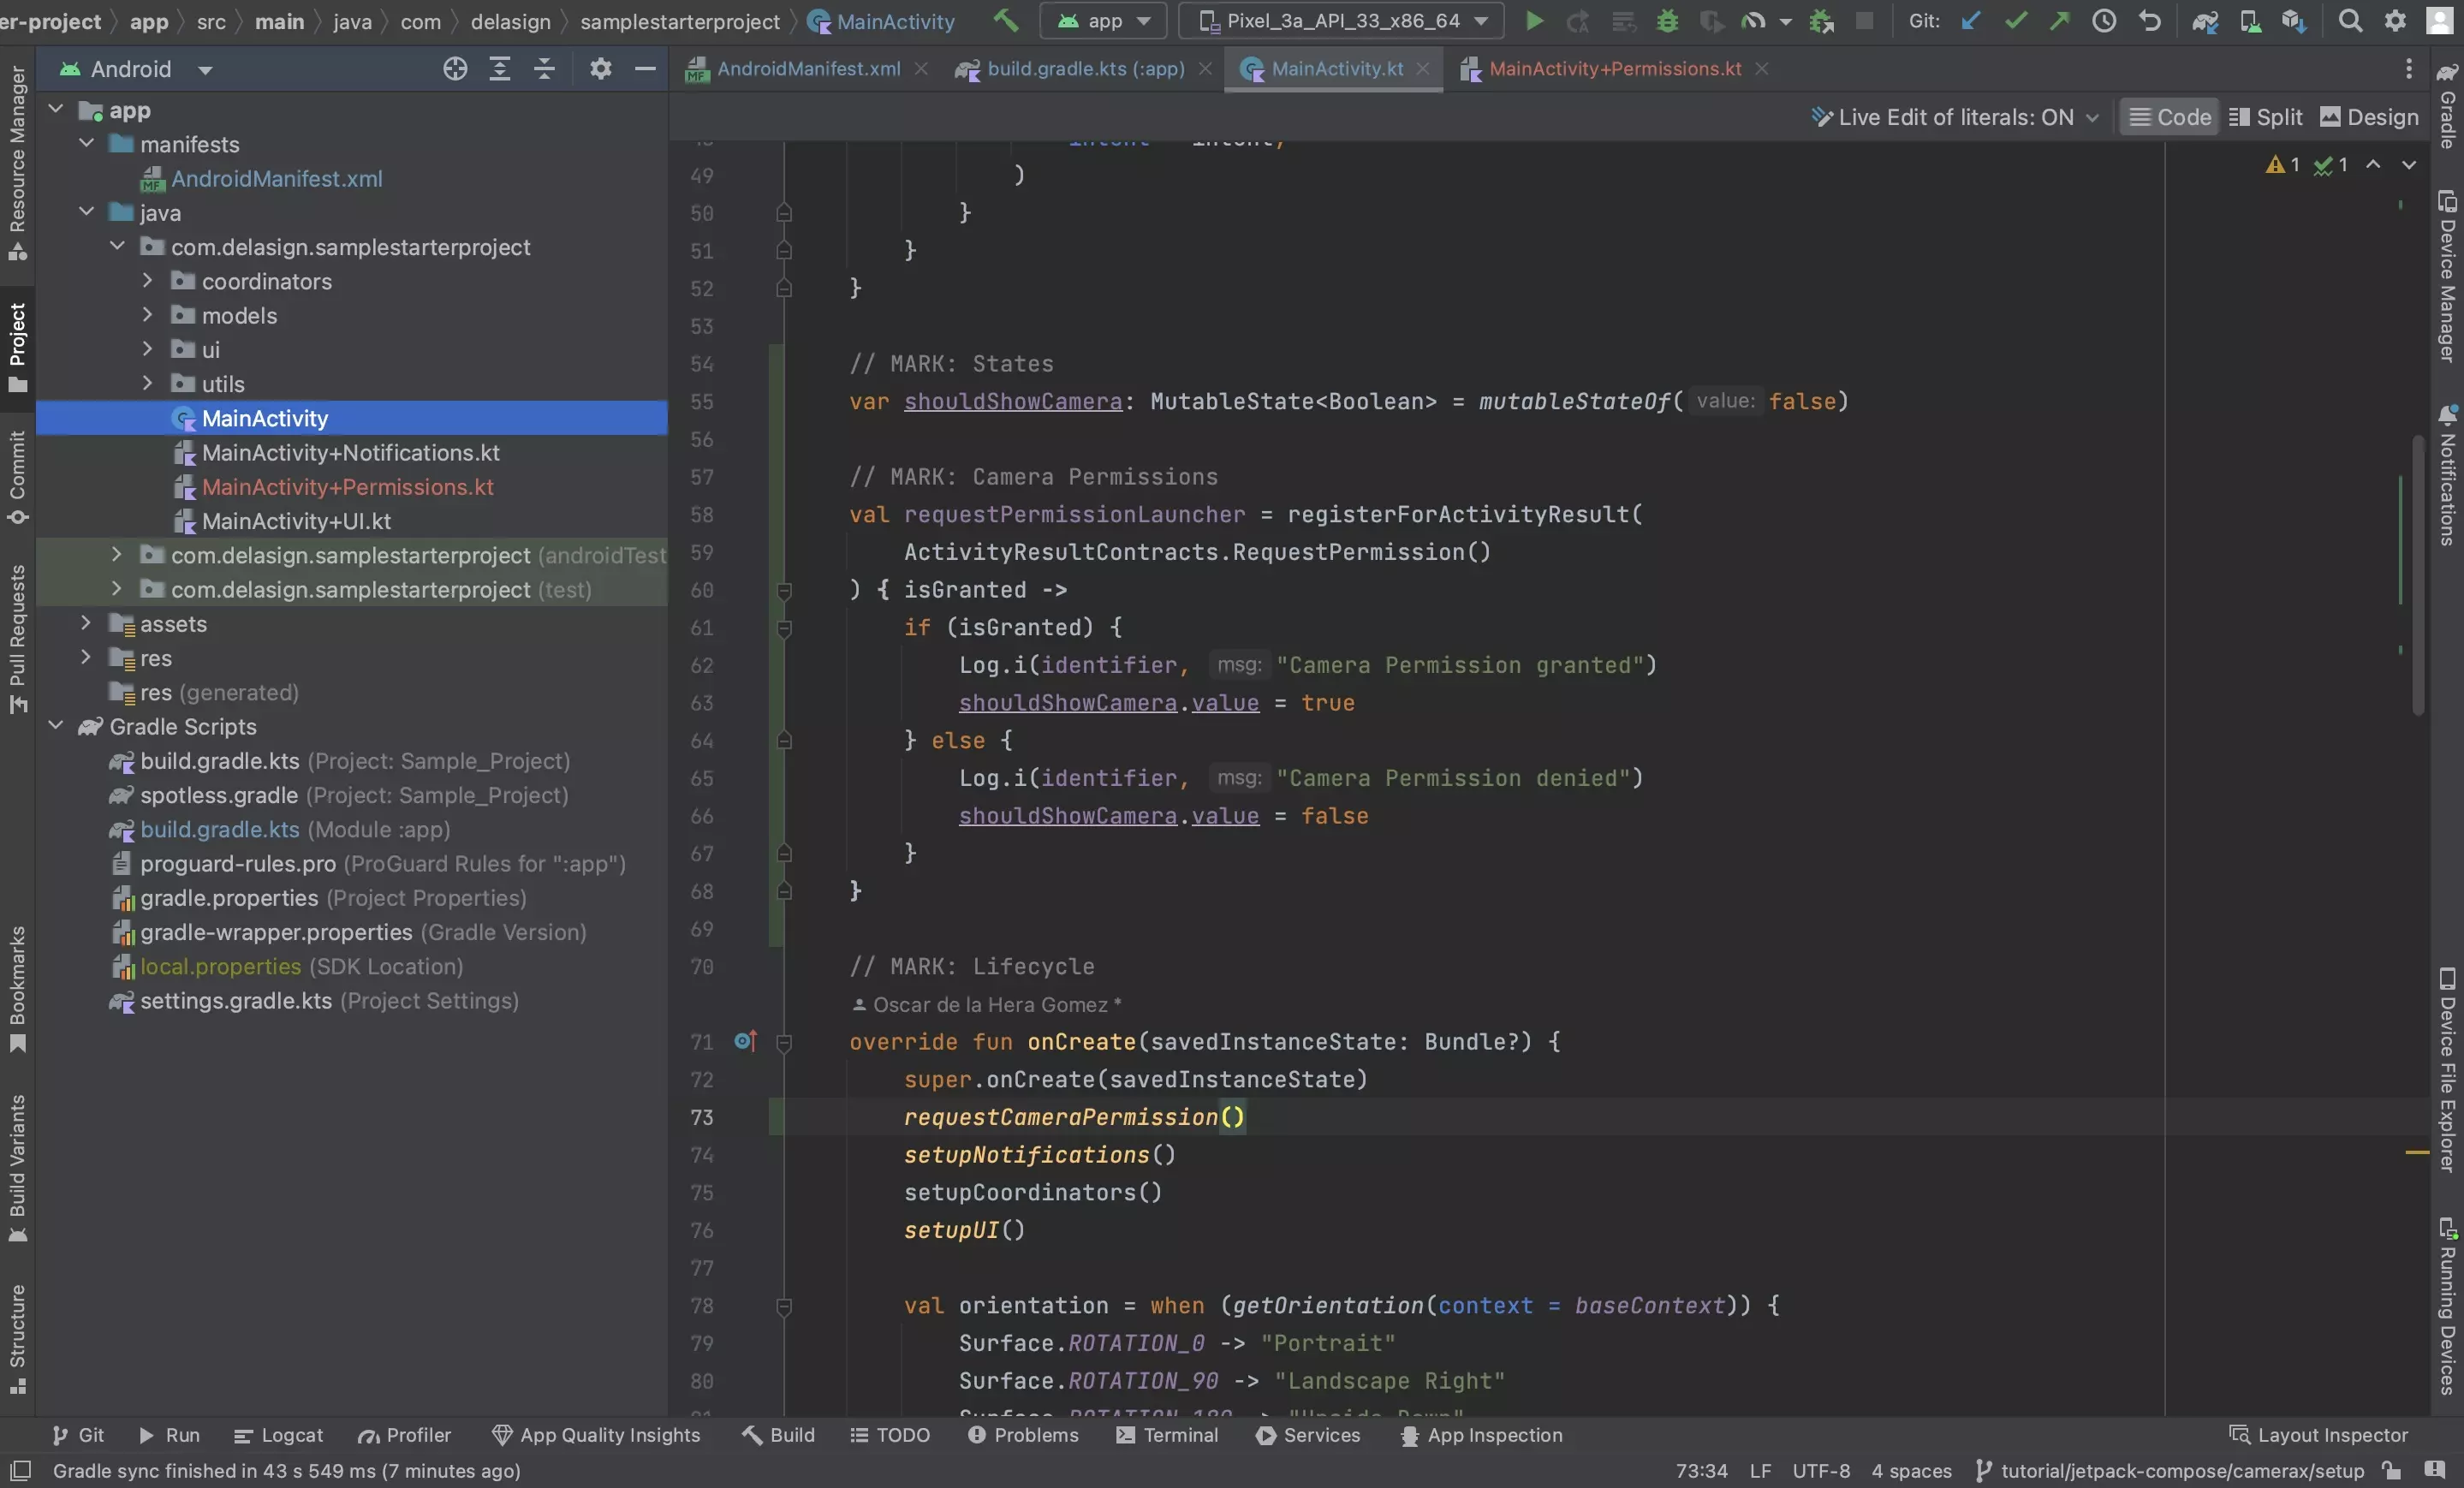
The following step walks you through how to setup permissions for an Android Camera.
A | Create the should show camera state
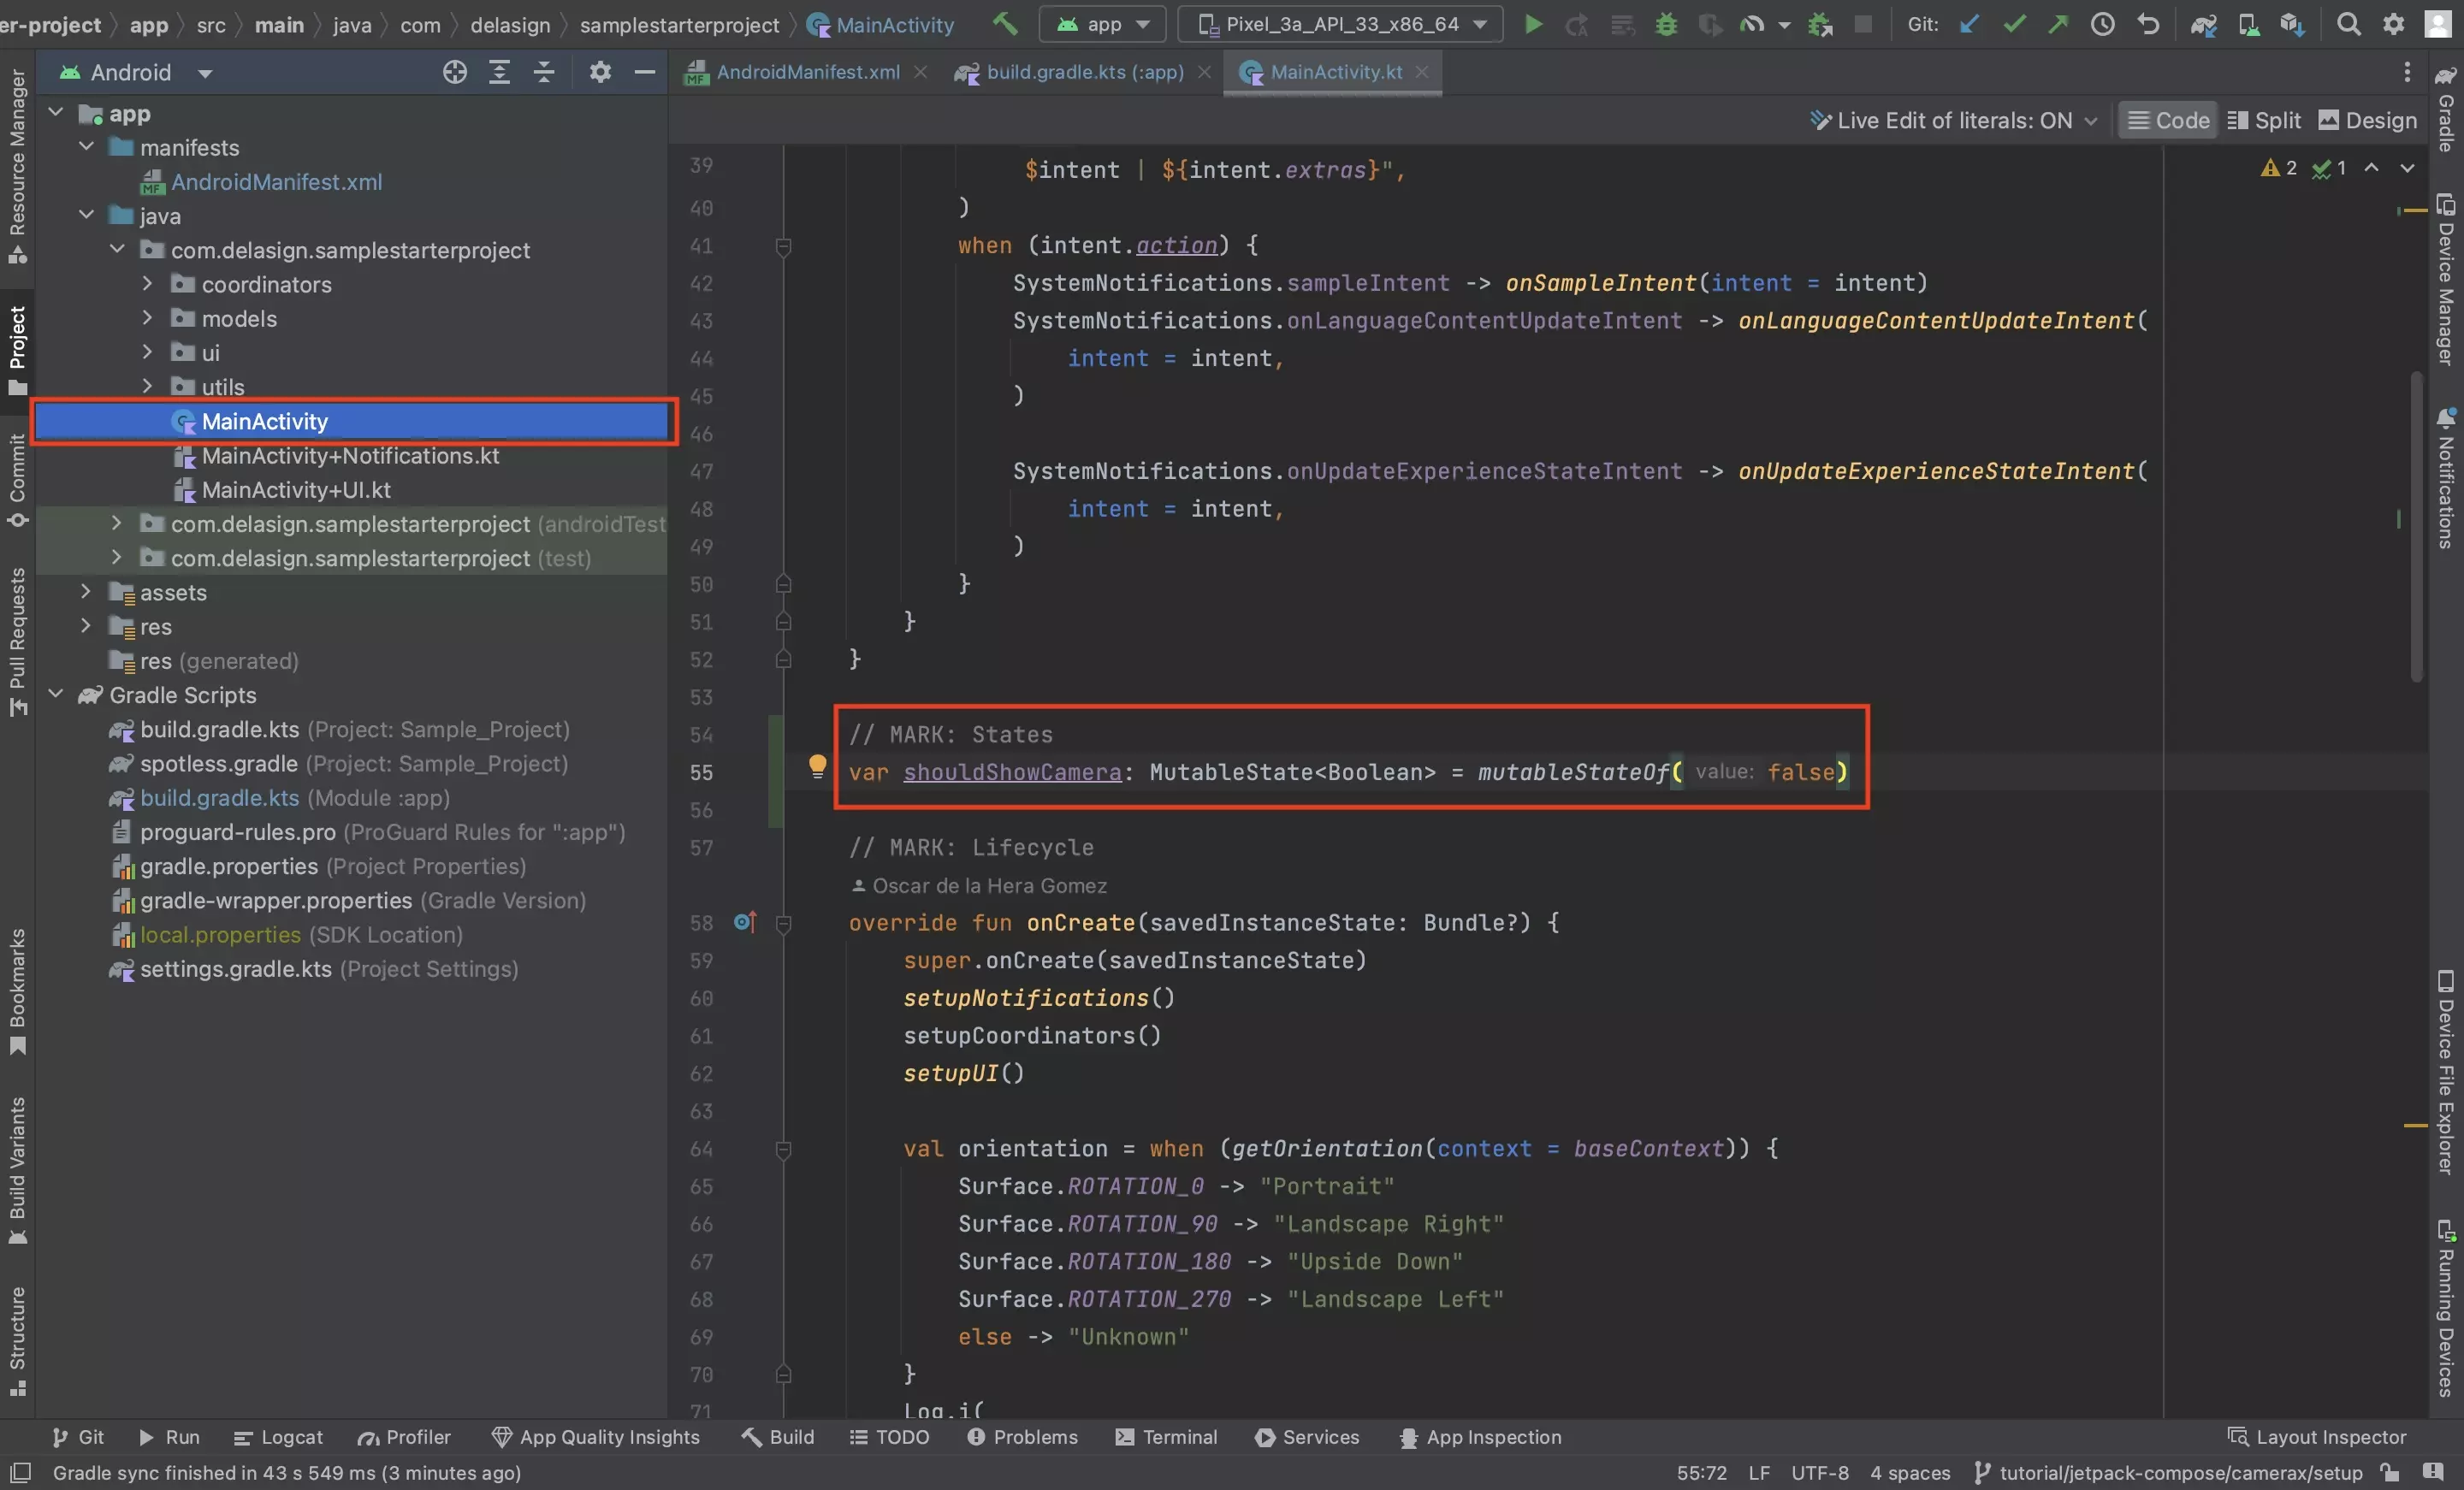
In the activity, add a mutable state to dictate when the camera has permissions or not.
The logic behind this is to only show the camera, if permissions have been granted.
var shouldShowCamera: MutableState = mutableStateOf(false)B | Create the Permissions Launcher
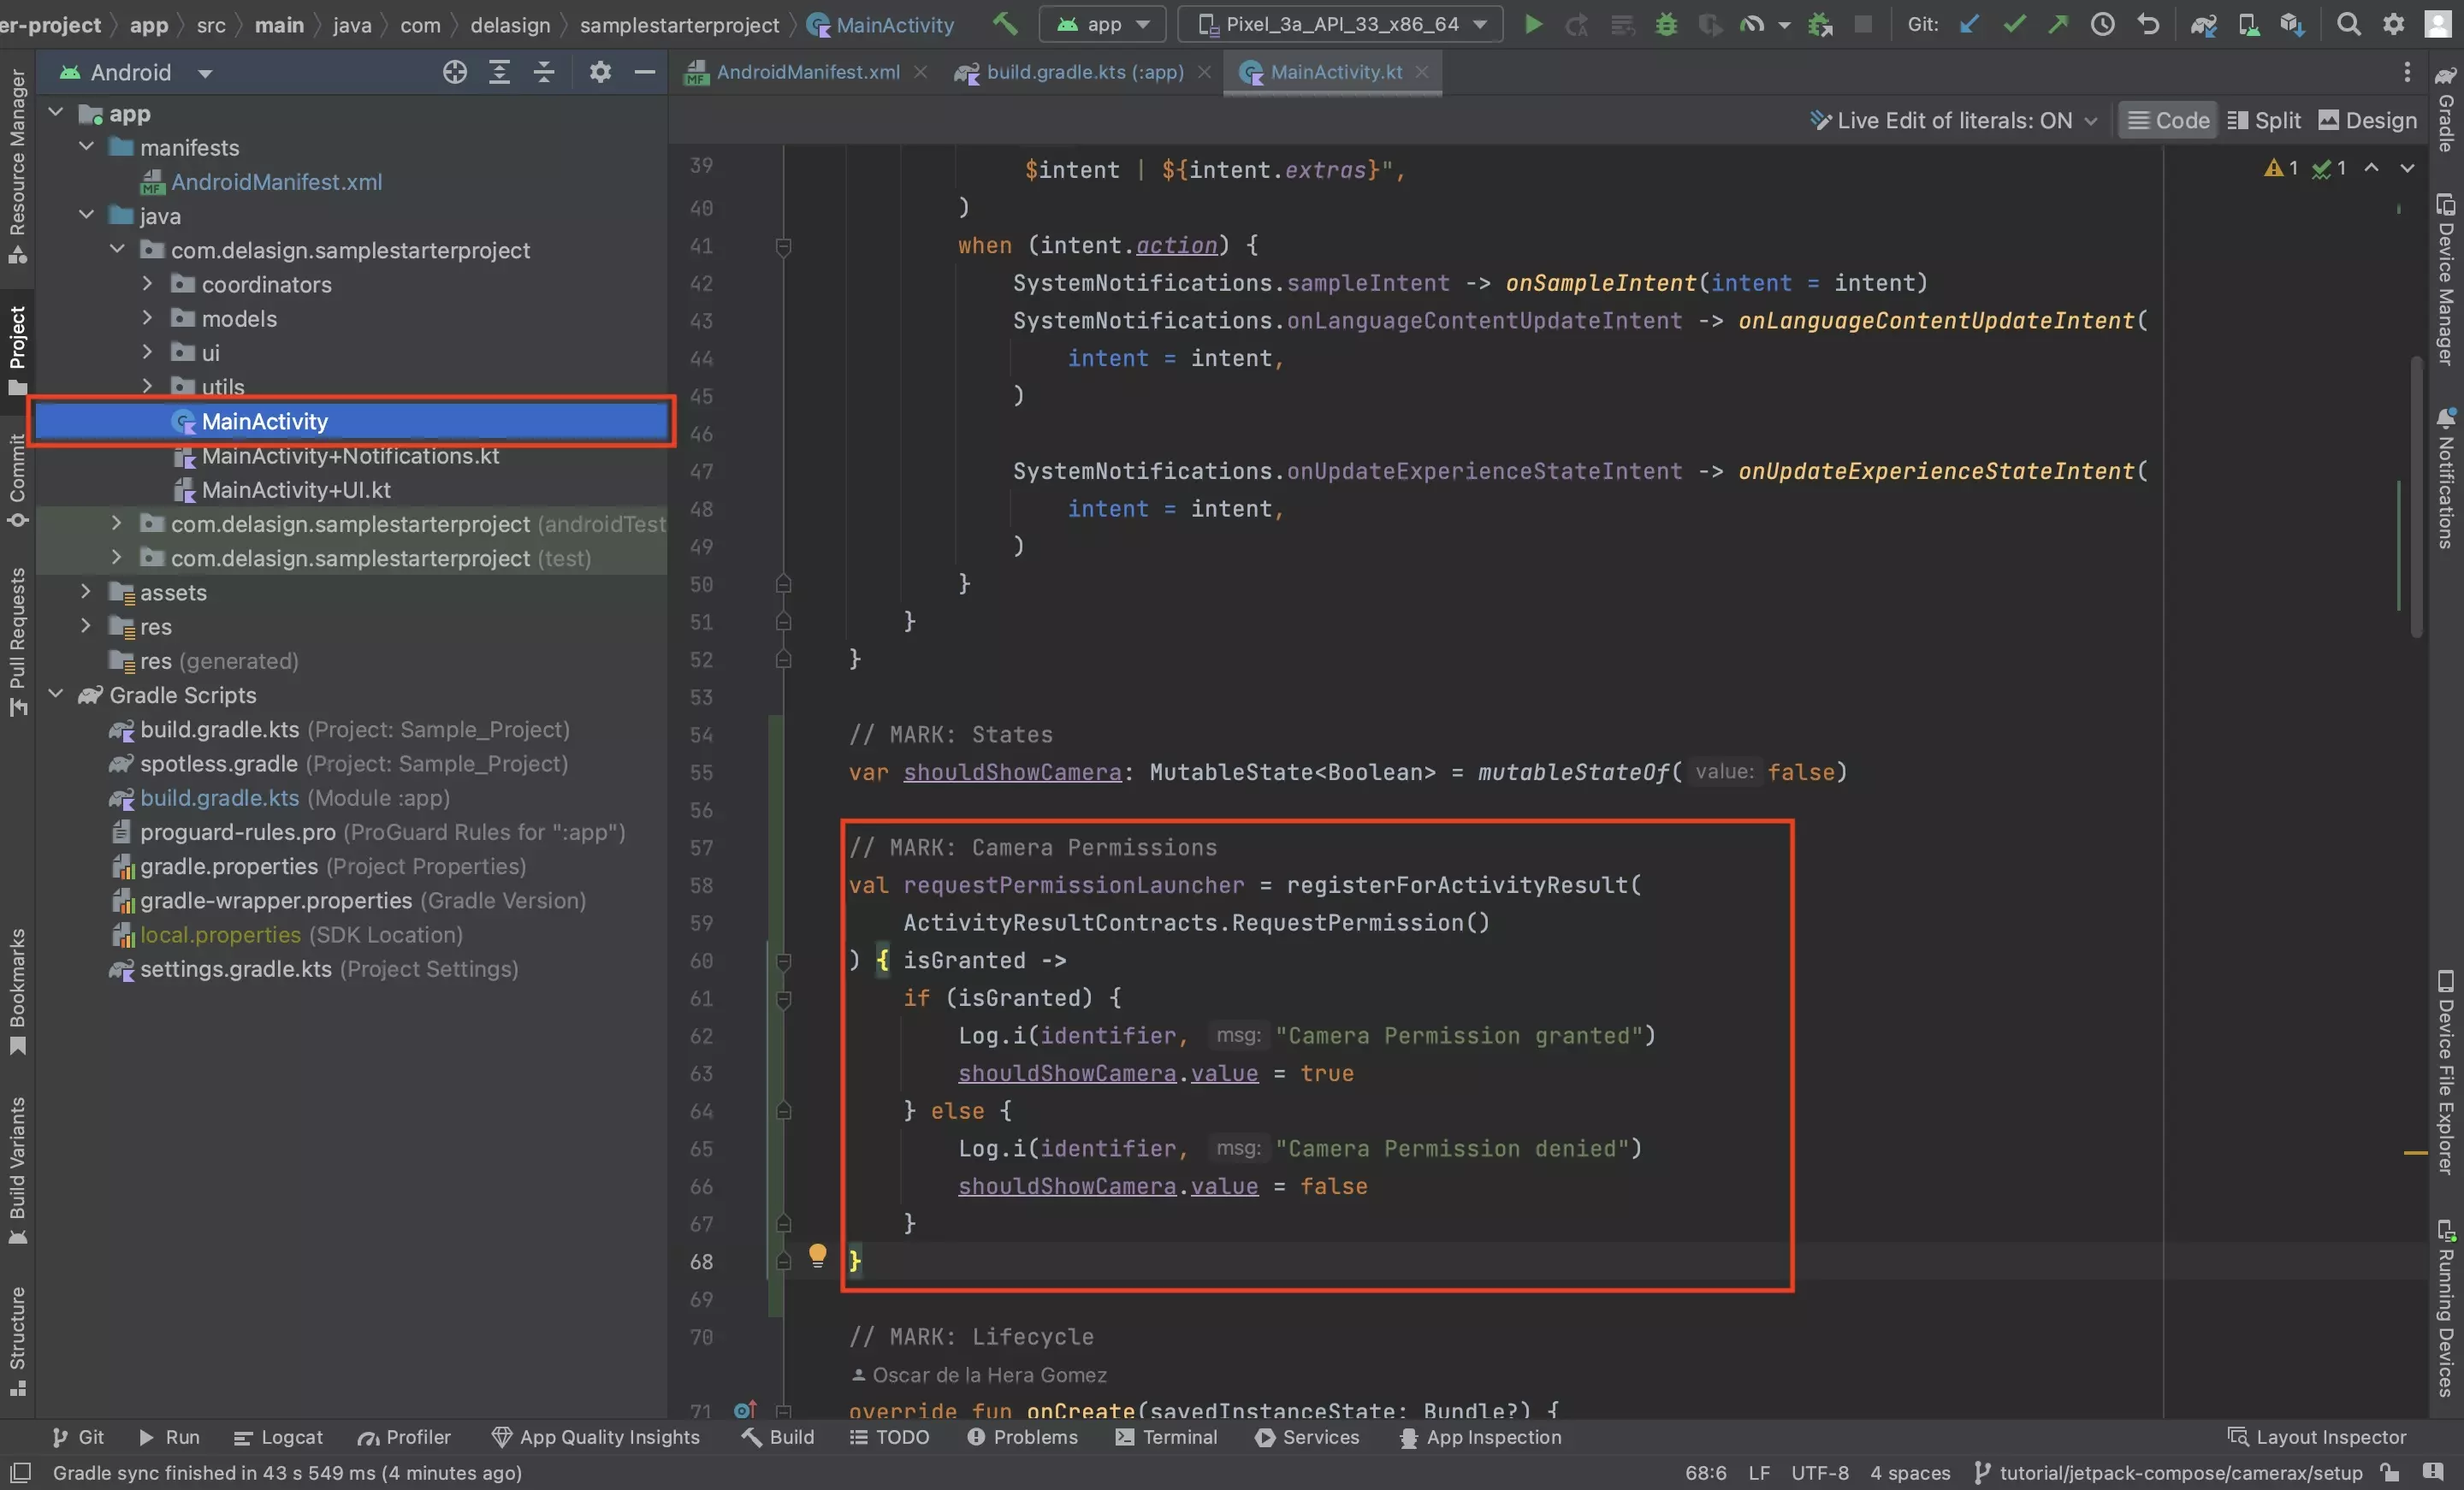
Create a camera permissions launcher that will be used to determine what permissions that app has.
C | Create the request permissions functionality
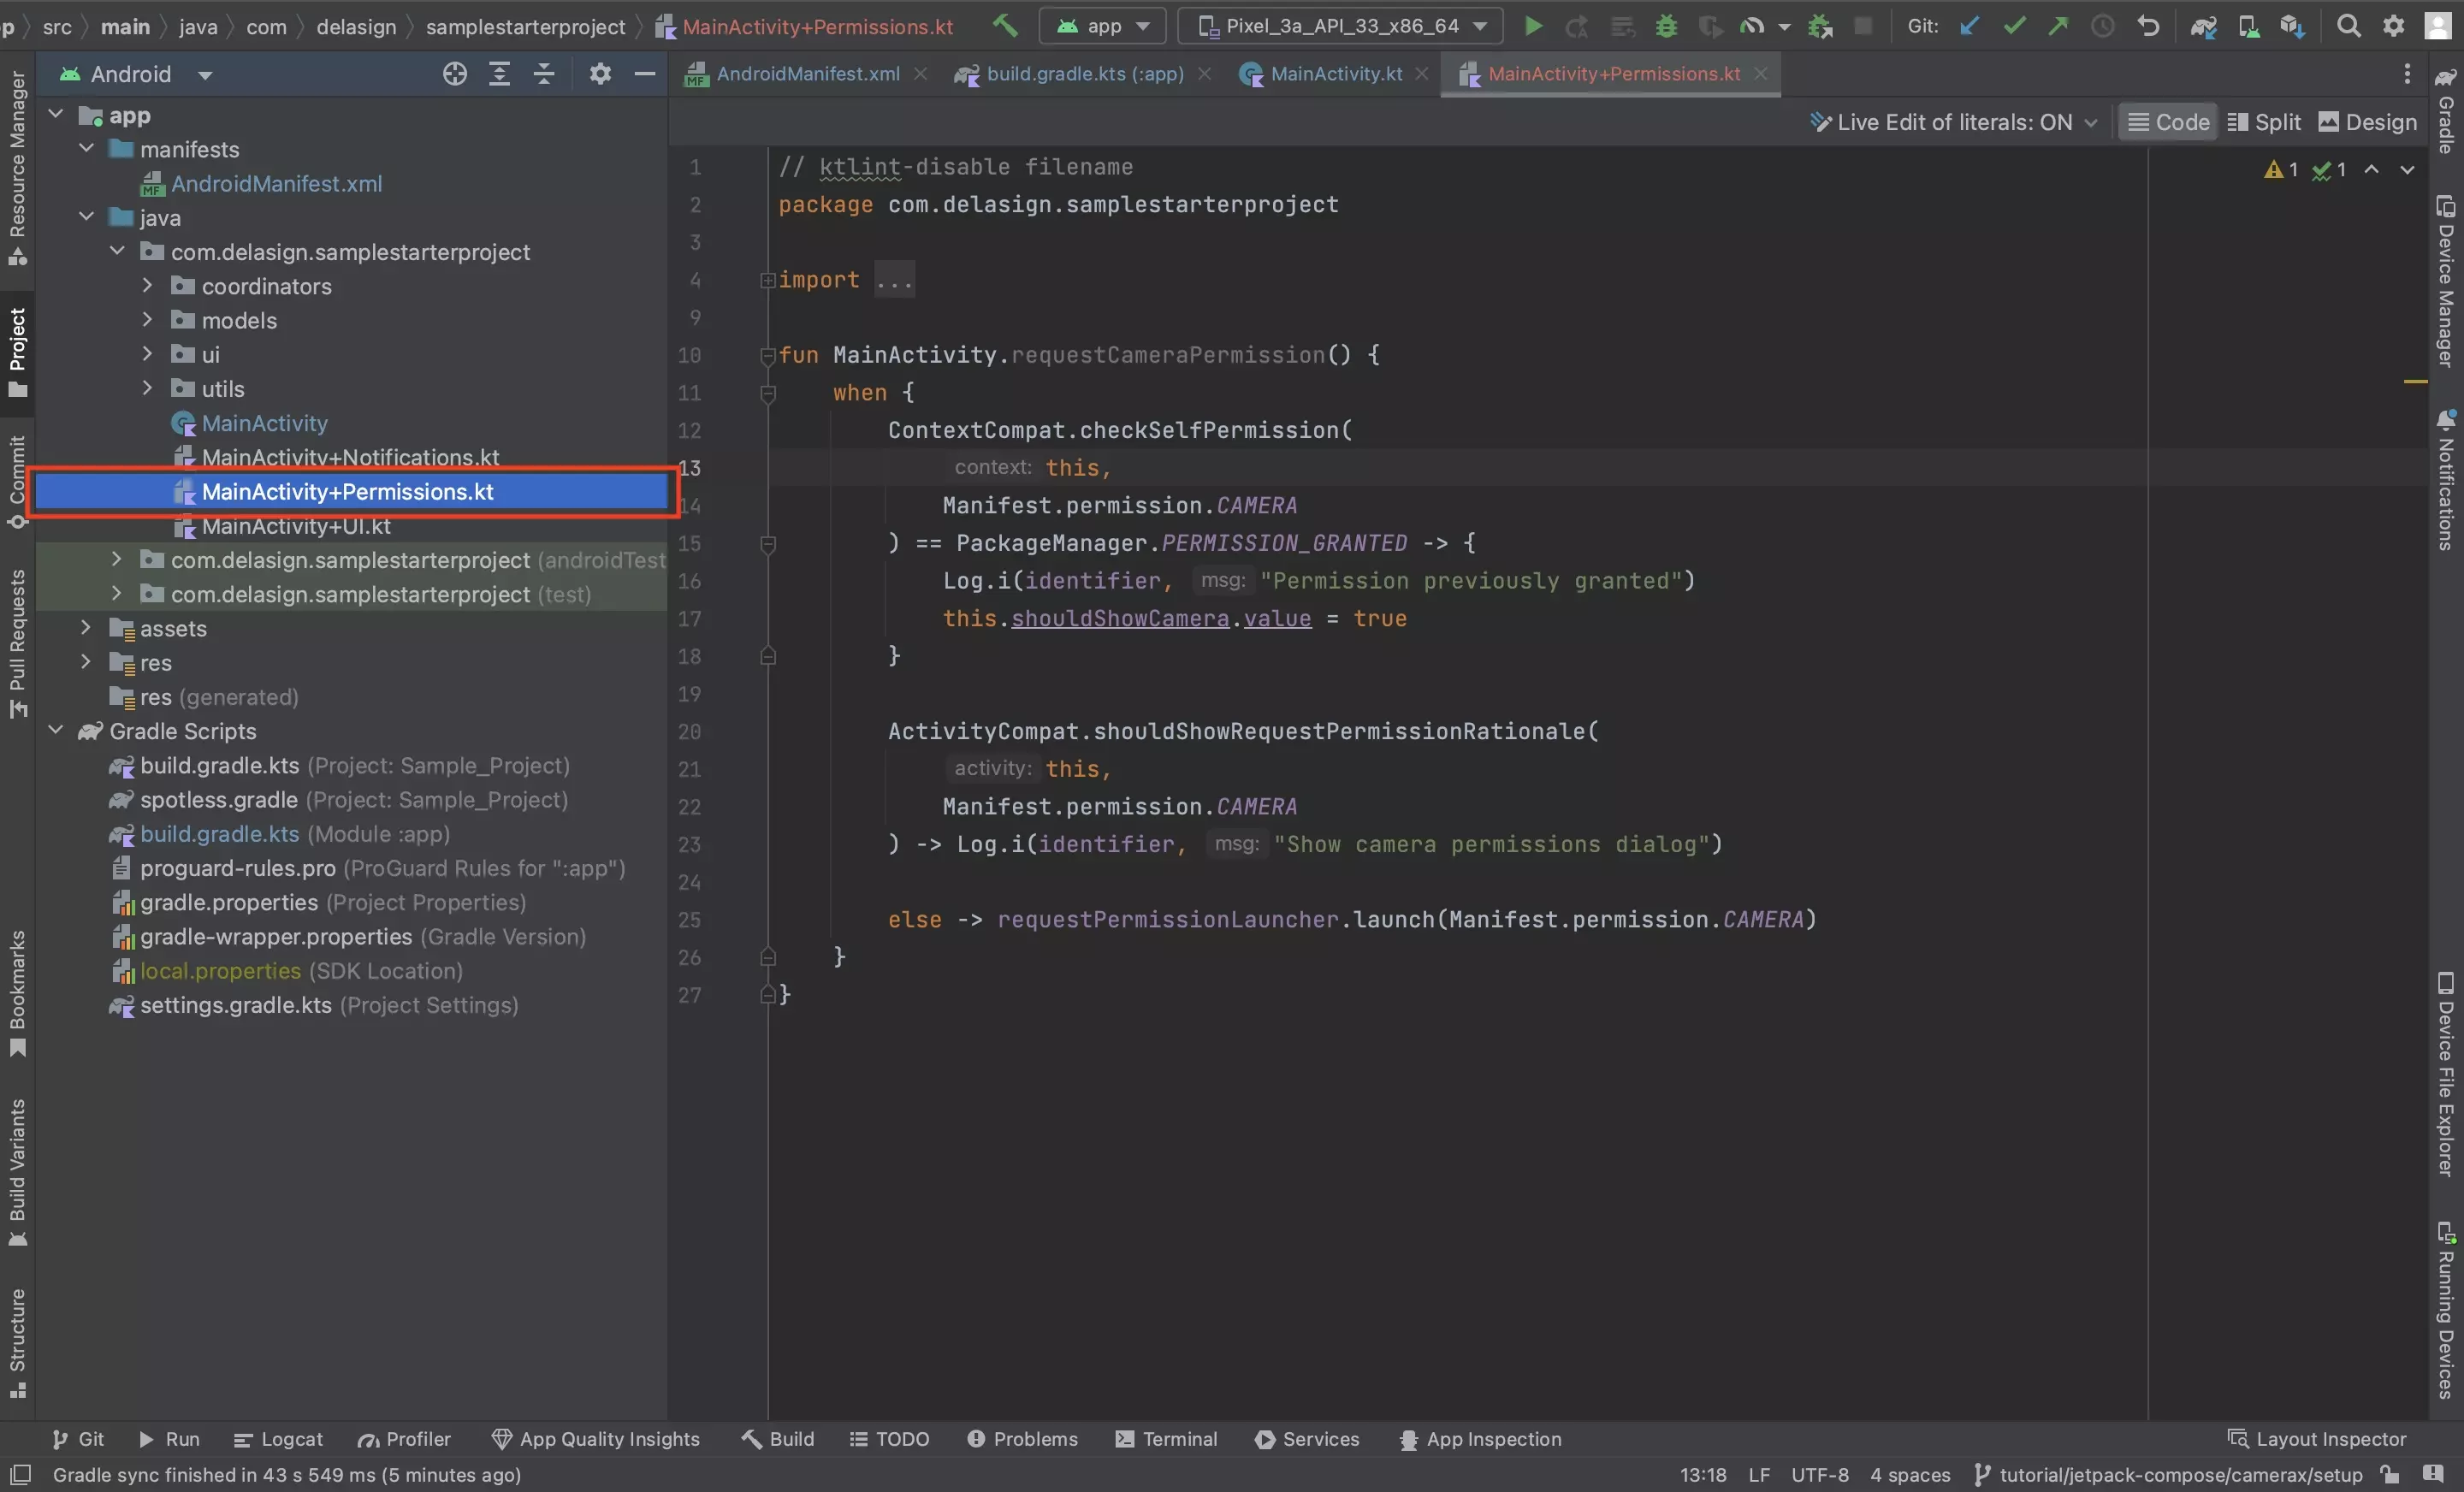
Add the function below to the app.
Its purpose is to determine if the app already has camera permissions or if they have been denied, and if not to request camera permissions.
D | Request permissions on create
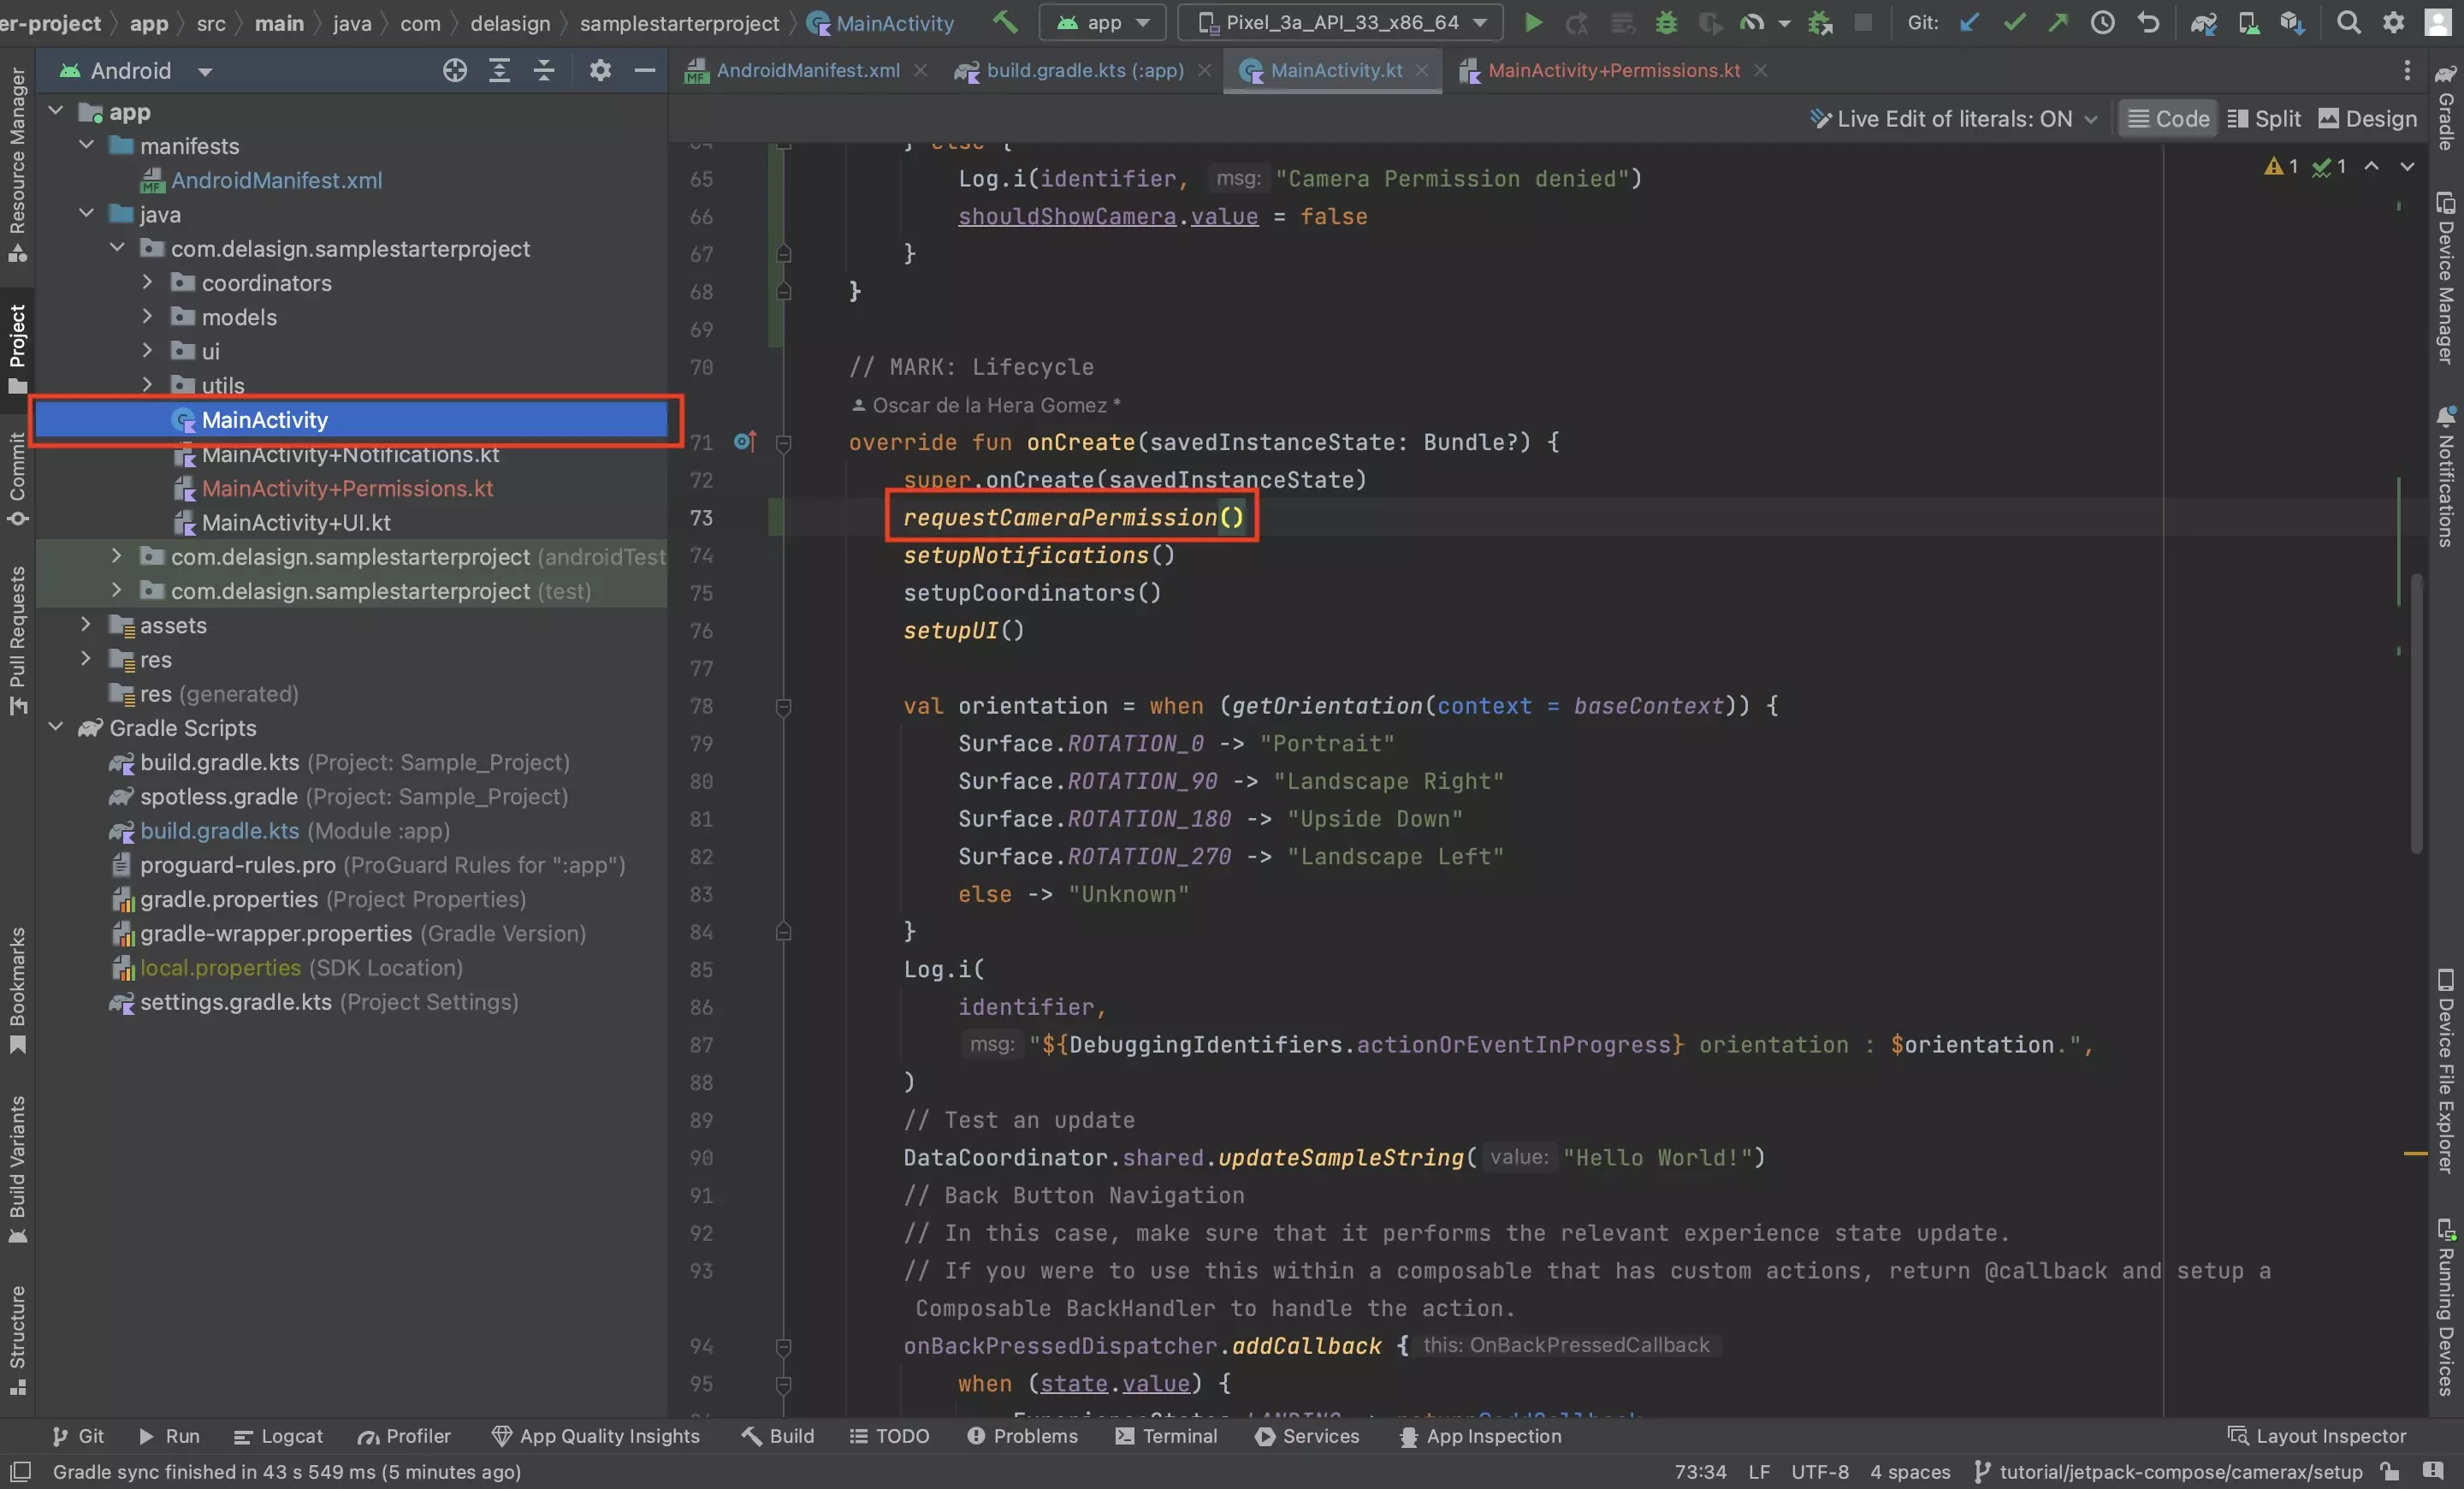
In the activity, in the onCreate lifecycle function, call the requestCameraPermission() function.
E | Request permissions on resume
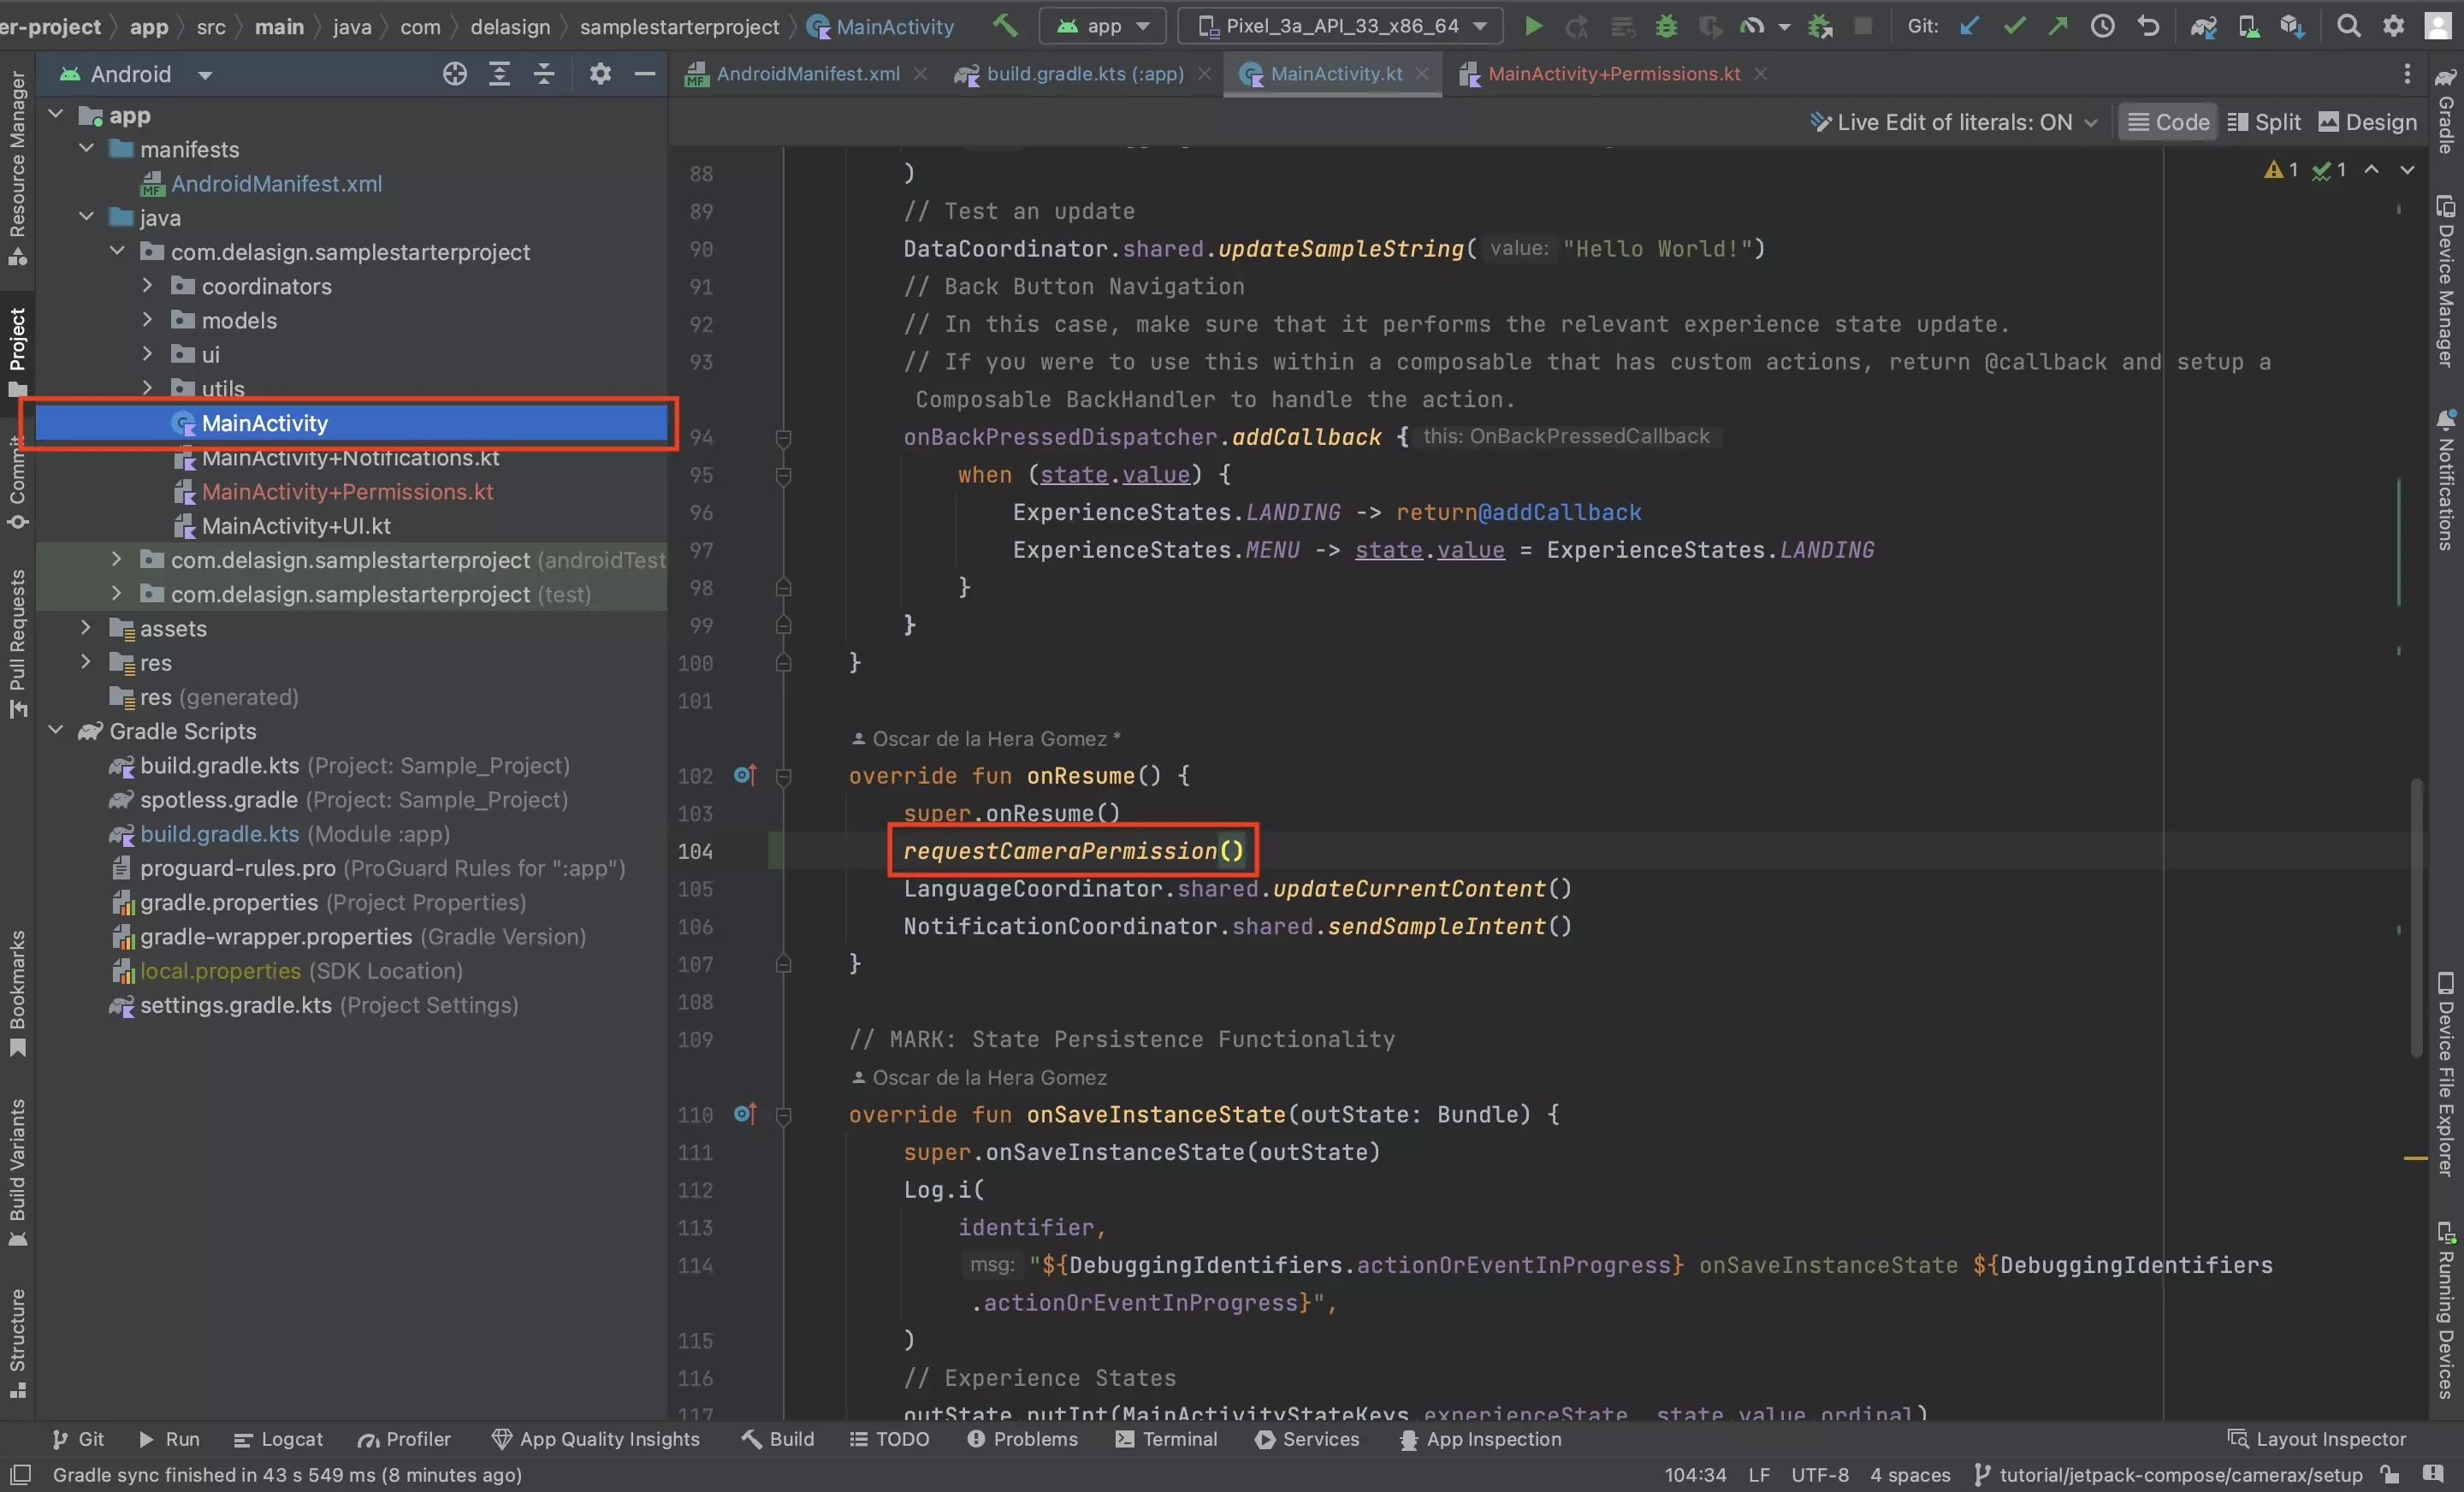
In the activity, in the onResume lifecycle function, call the requestCameraPermission() function.
Step Five: Create the Camera Composable
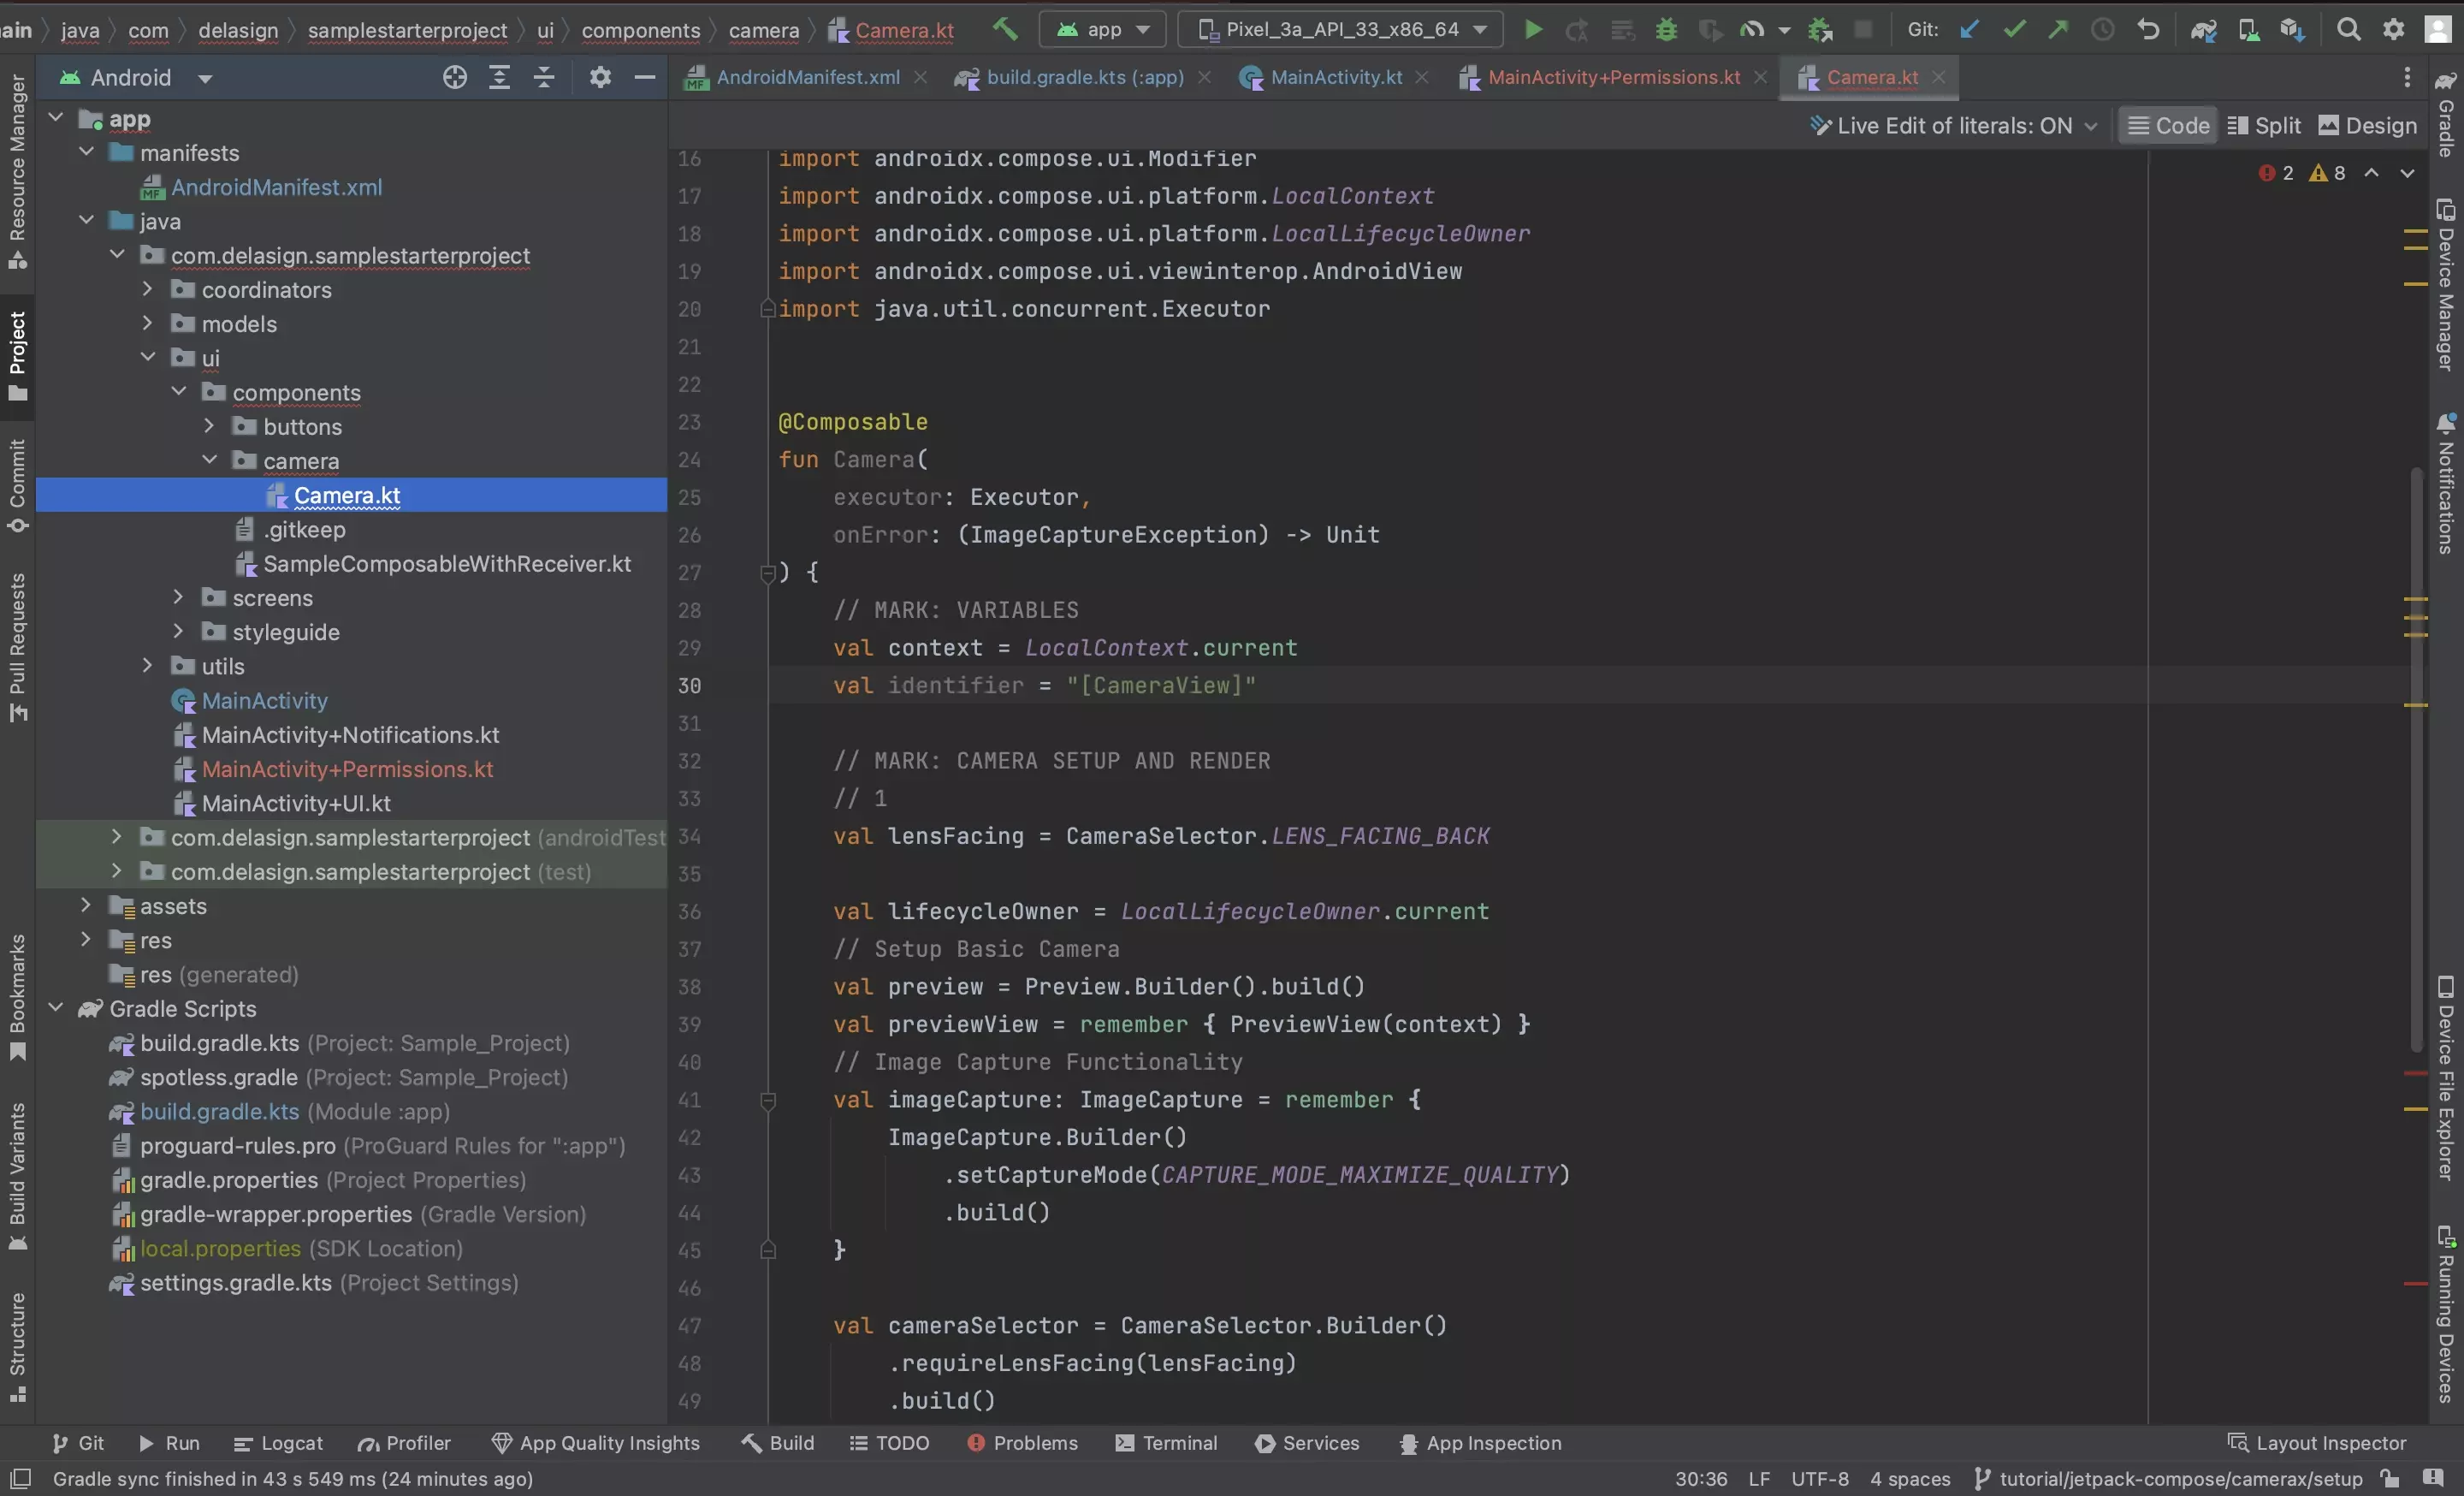
Create a new file called Camera.kt and paste in the code below
Step Six: Add the remaining Camera functionality
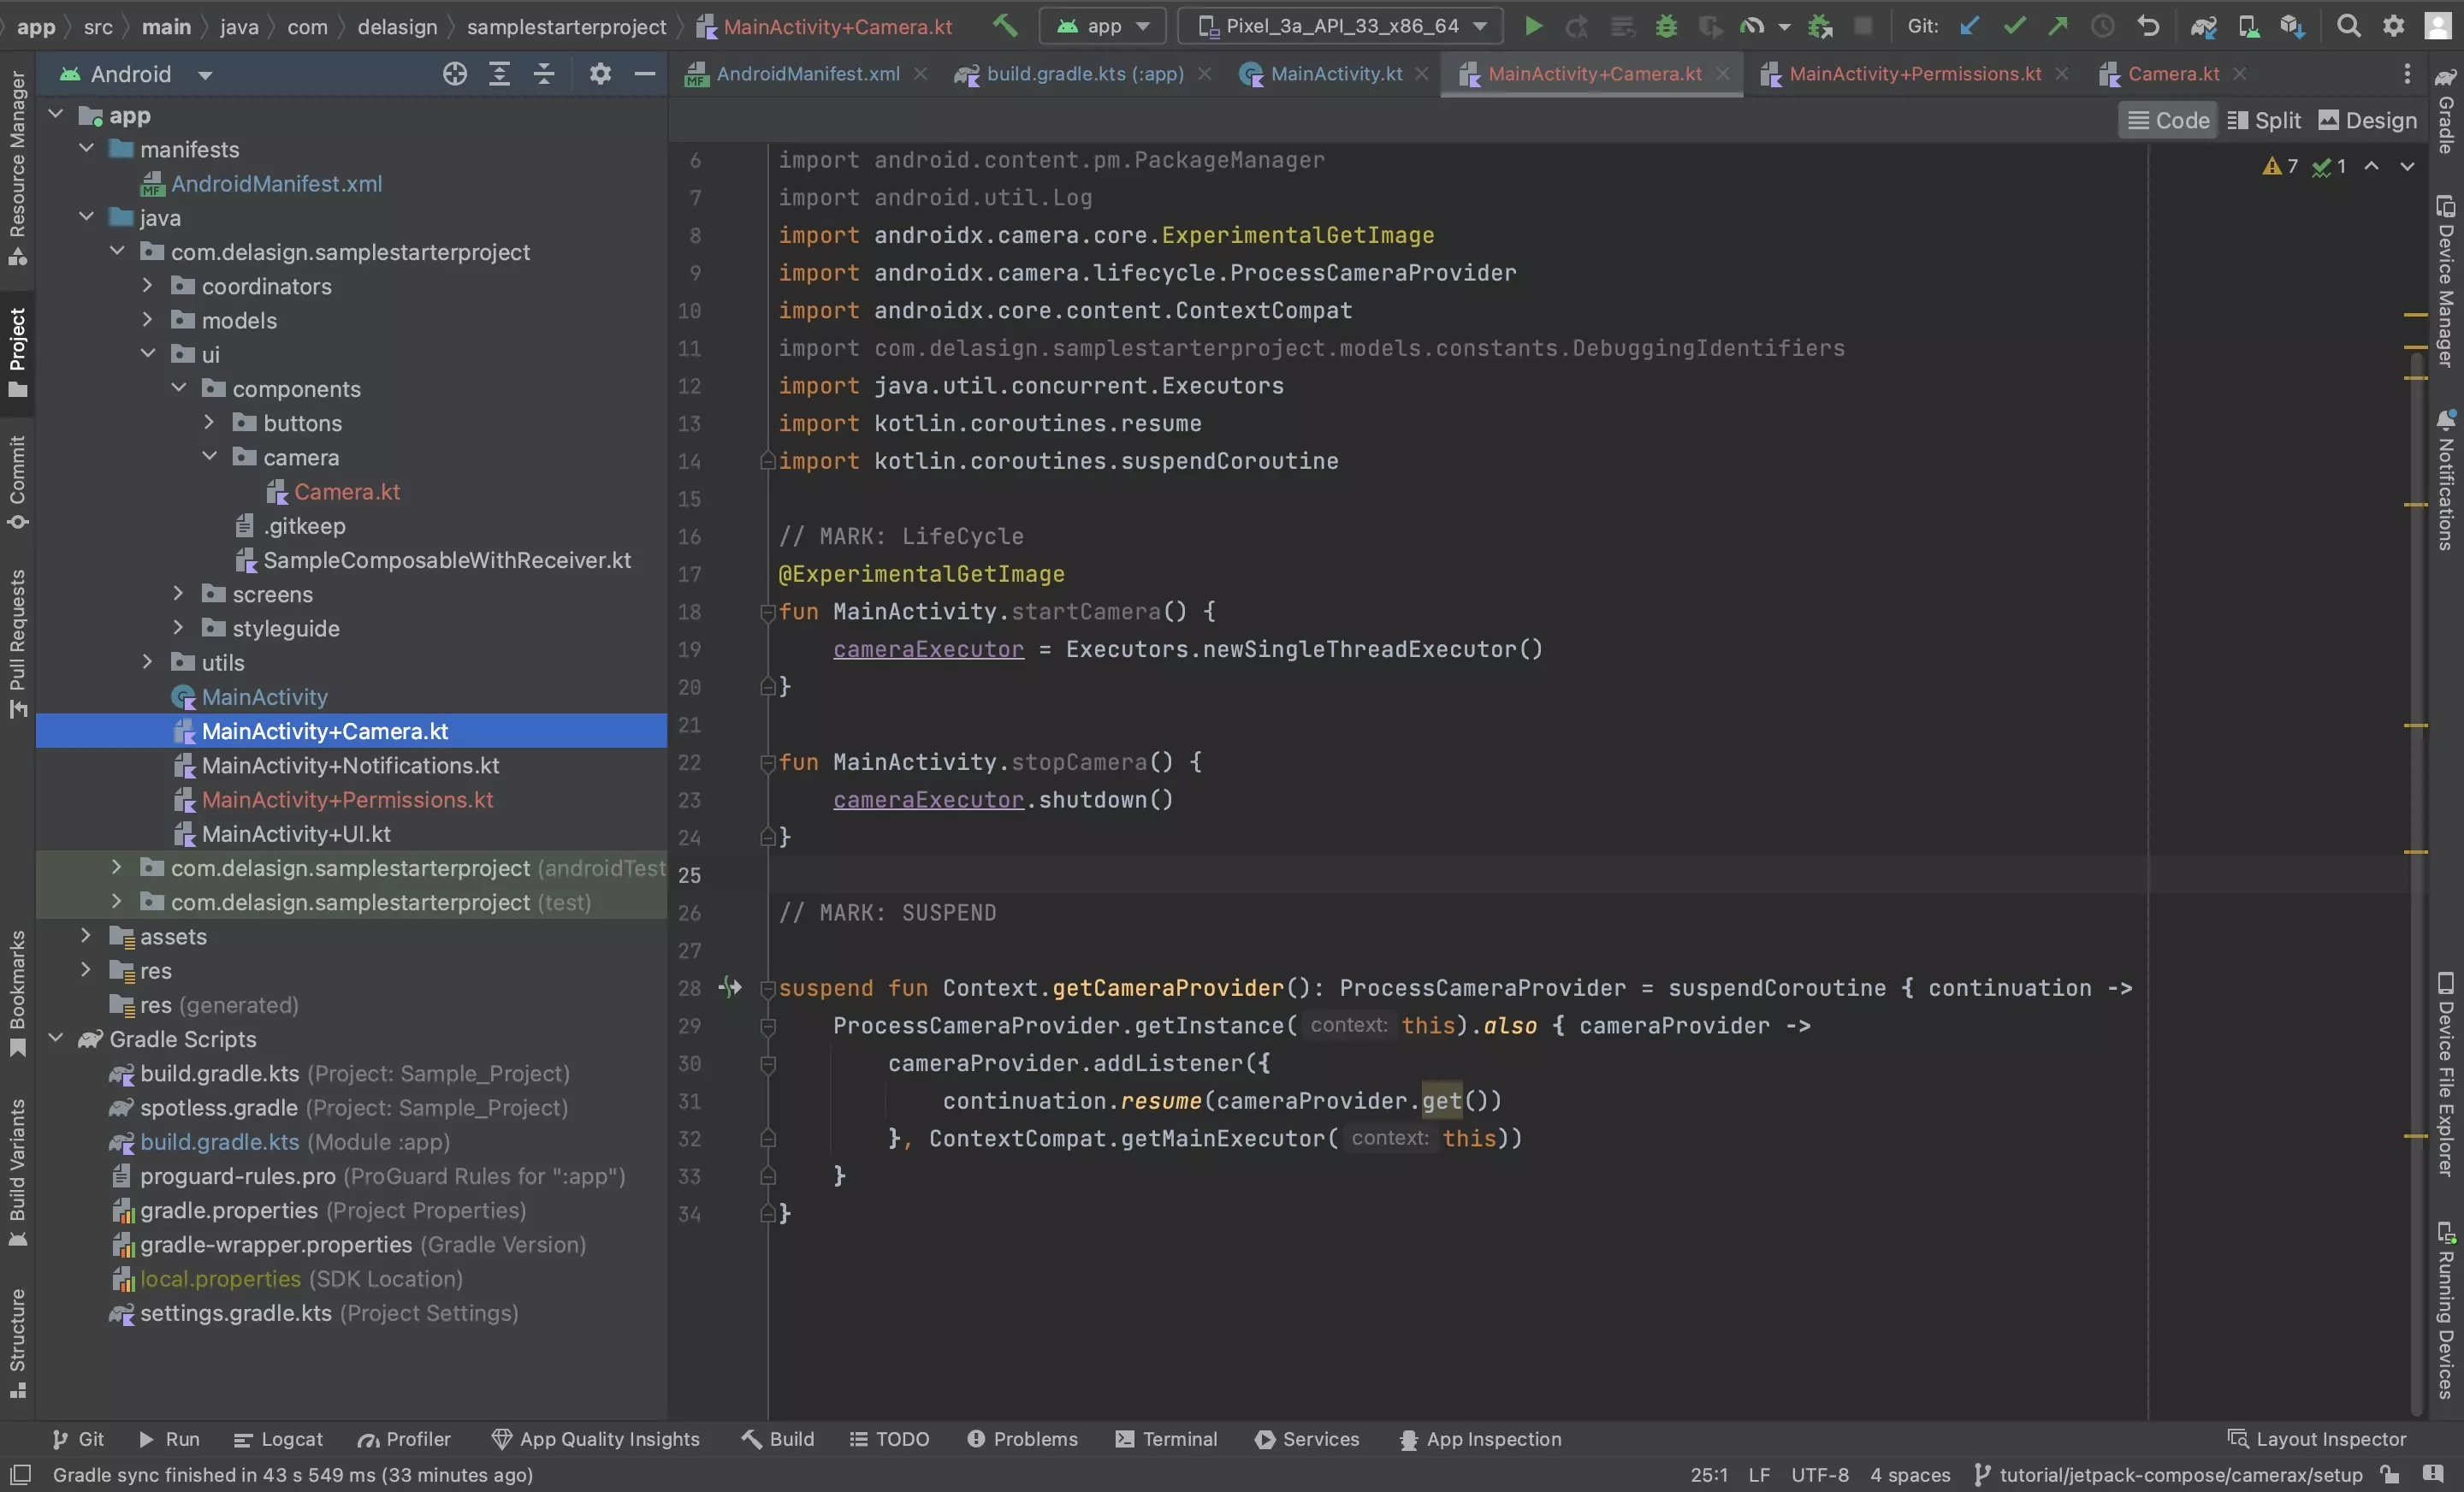
The following step walks you through how to create the necessary functionality to start and stop the camera, as well as the remaining functionality required for the camera to work.
A | Add the Executor
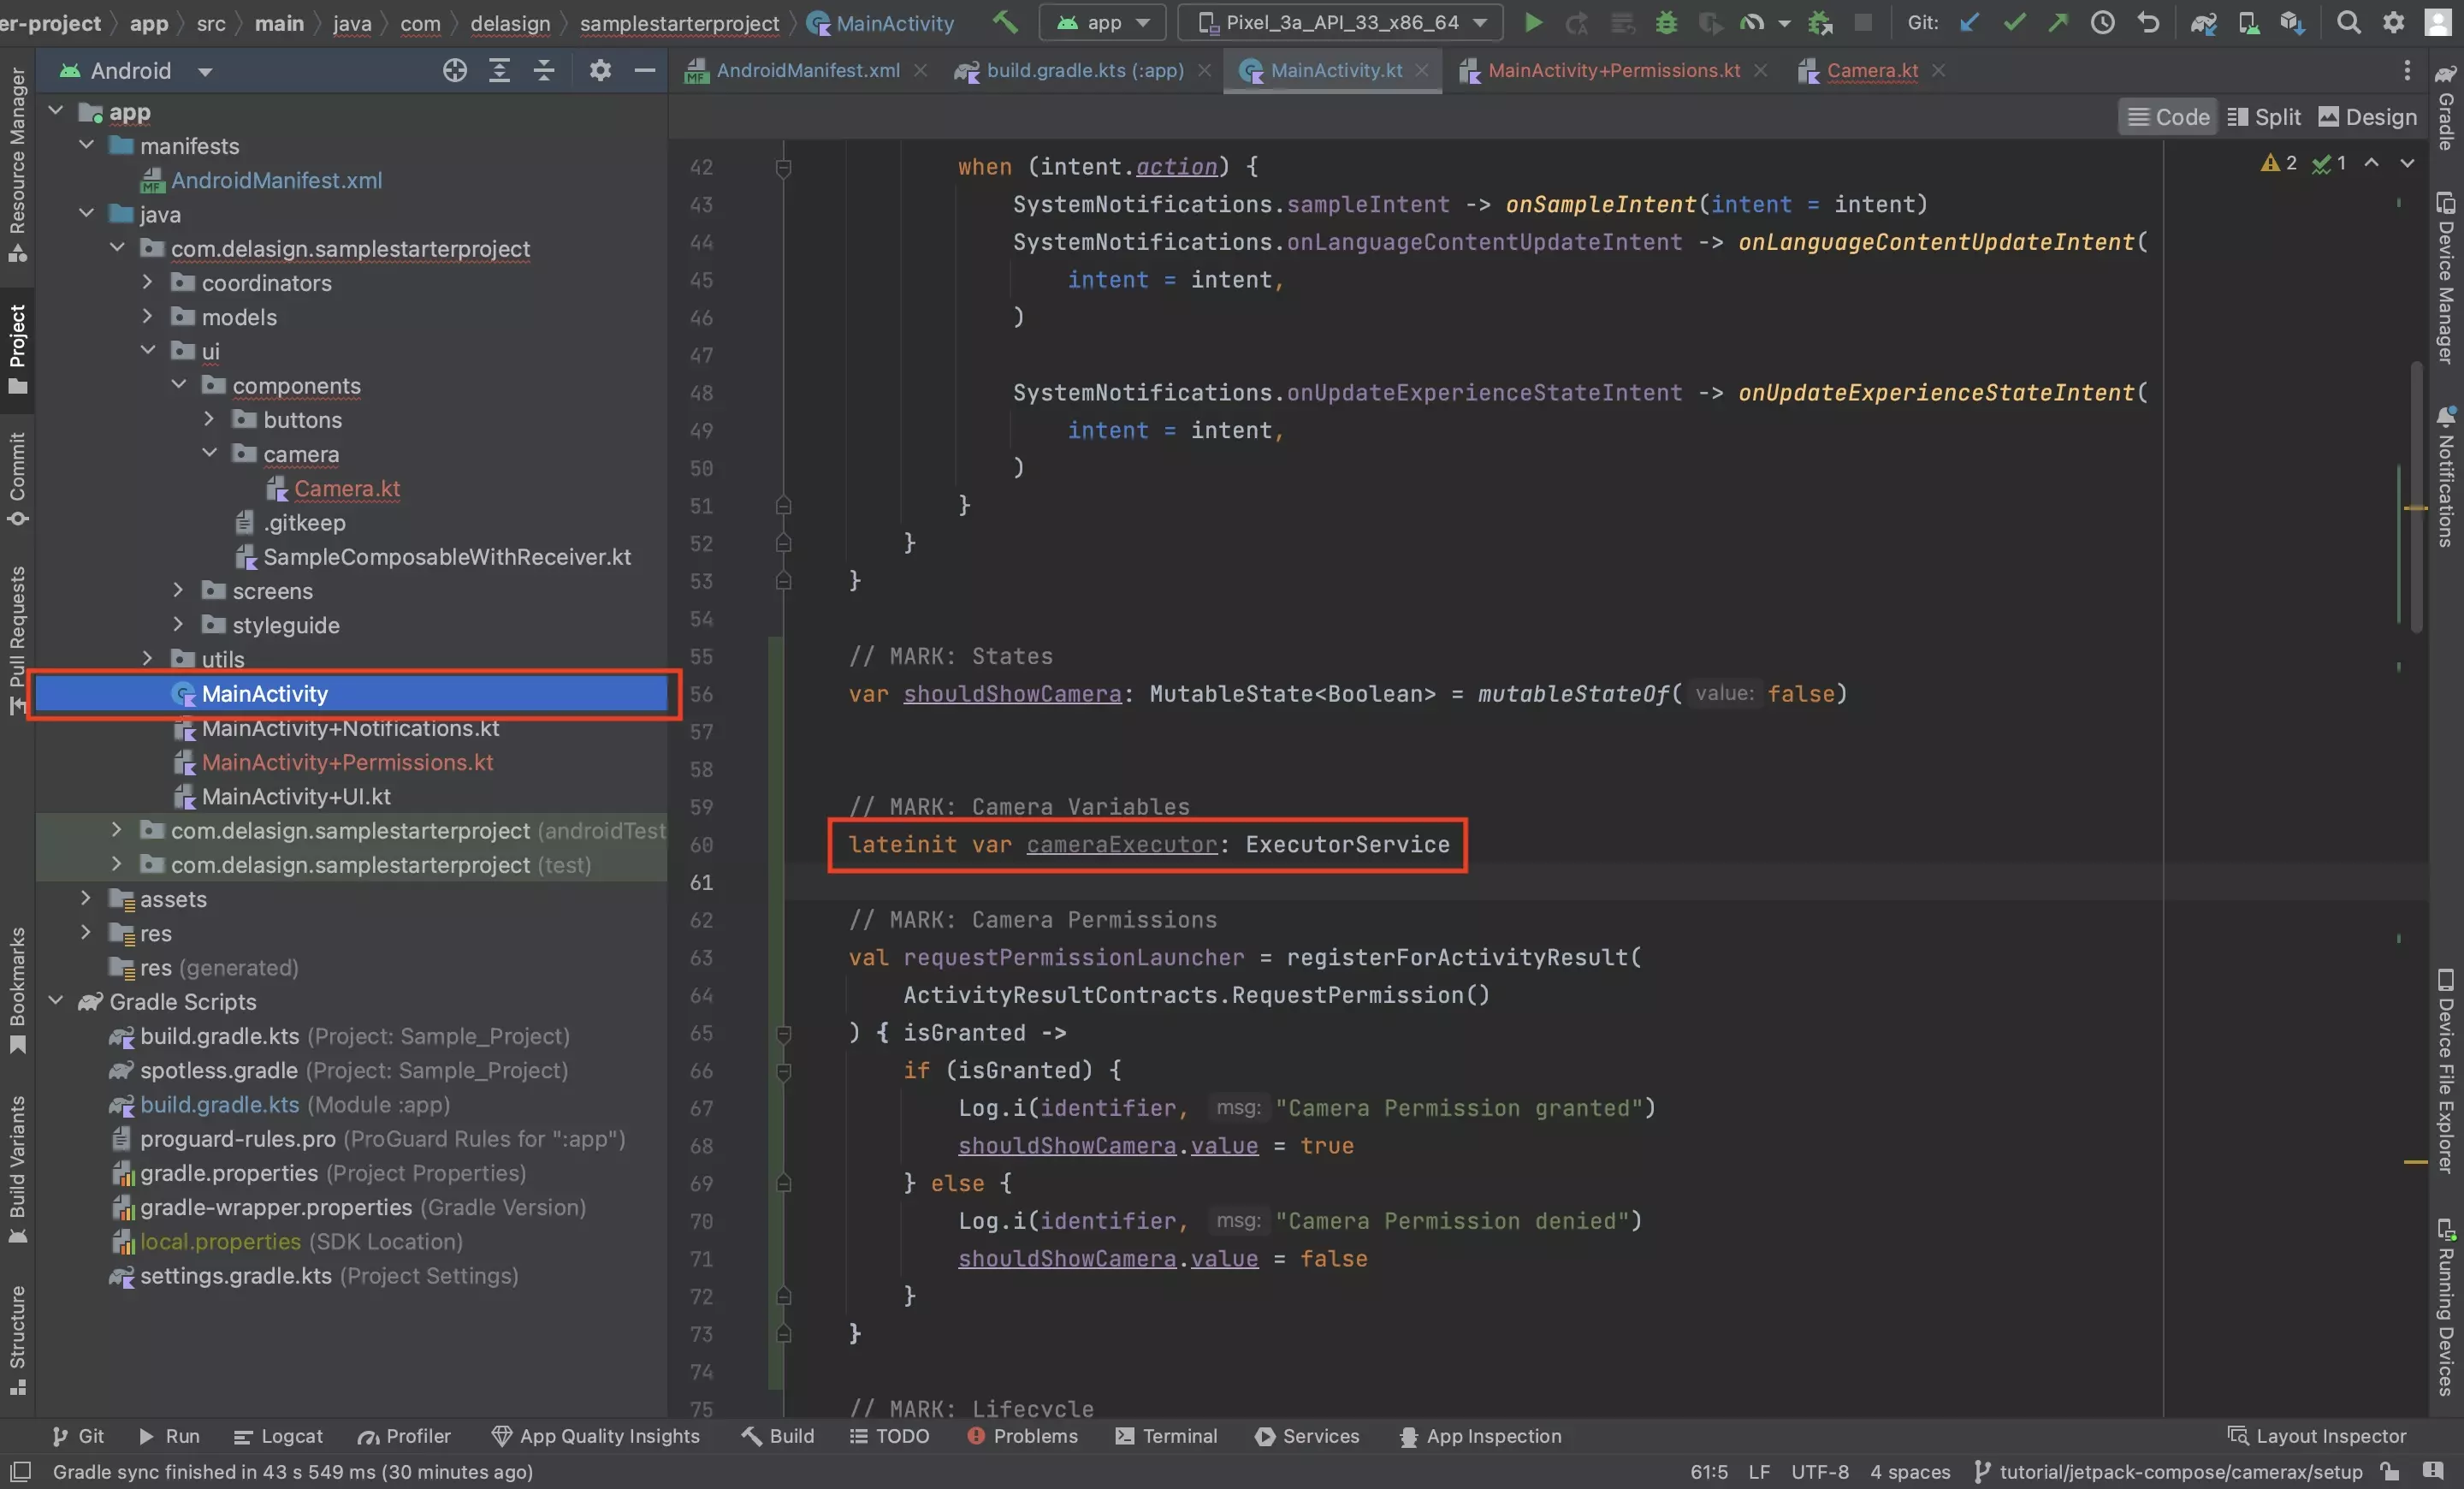
In the Activity, create the following variable:
lateinit var cameraExecutor: ExecutorServiceB | Add the Camera extension

Add the functionality below to the app.
The purpose of this functionality is to allow the app to start and stop the camera, as well as to create a camera provider which is required for the Camera Composable created in Step Five.
C | Start and Stop the Camera
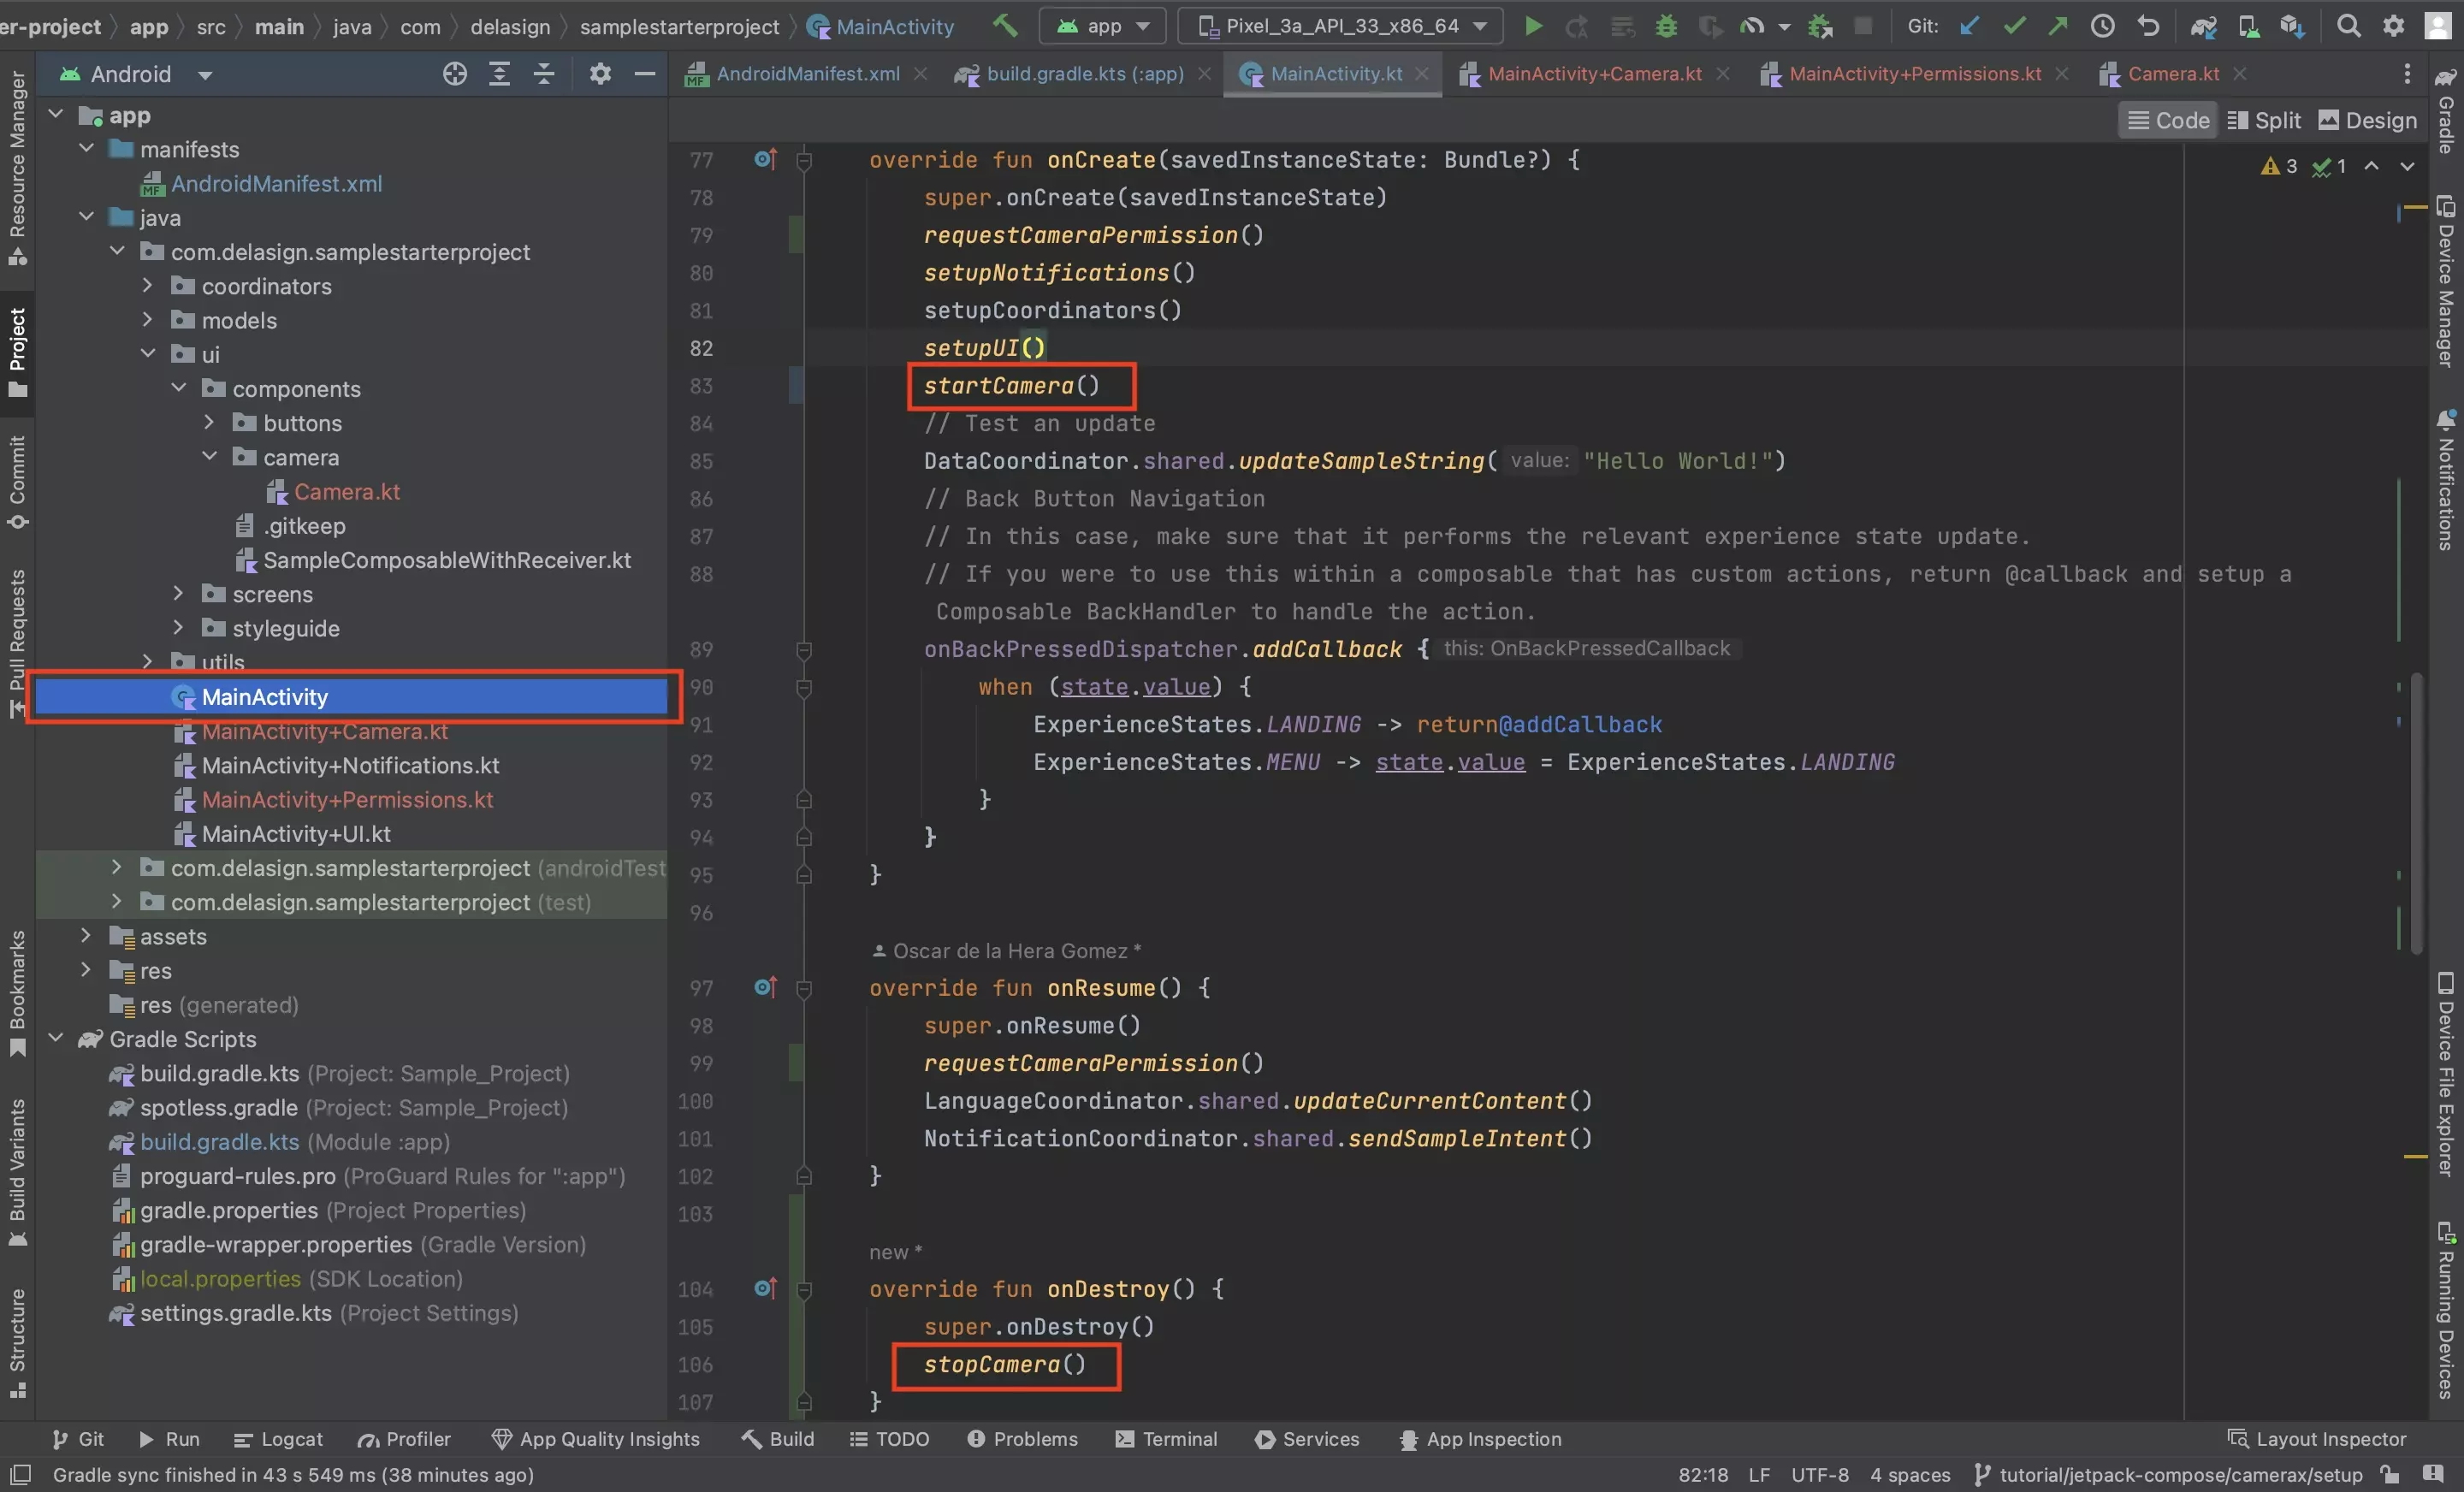
In the Activity:
- Call startCamera() in the onCreate lifecycle function.
- Call stopCamera() in the onDestroy lifecycle function.
Step Seven: Add the Camera to the UI
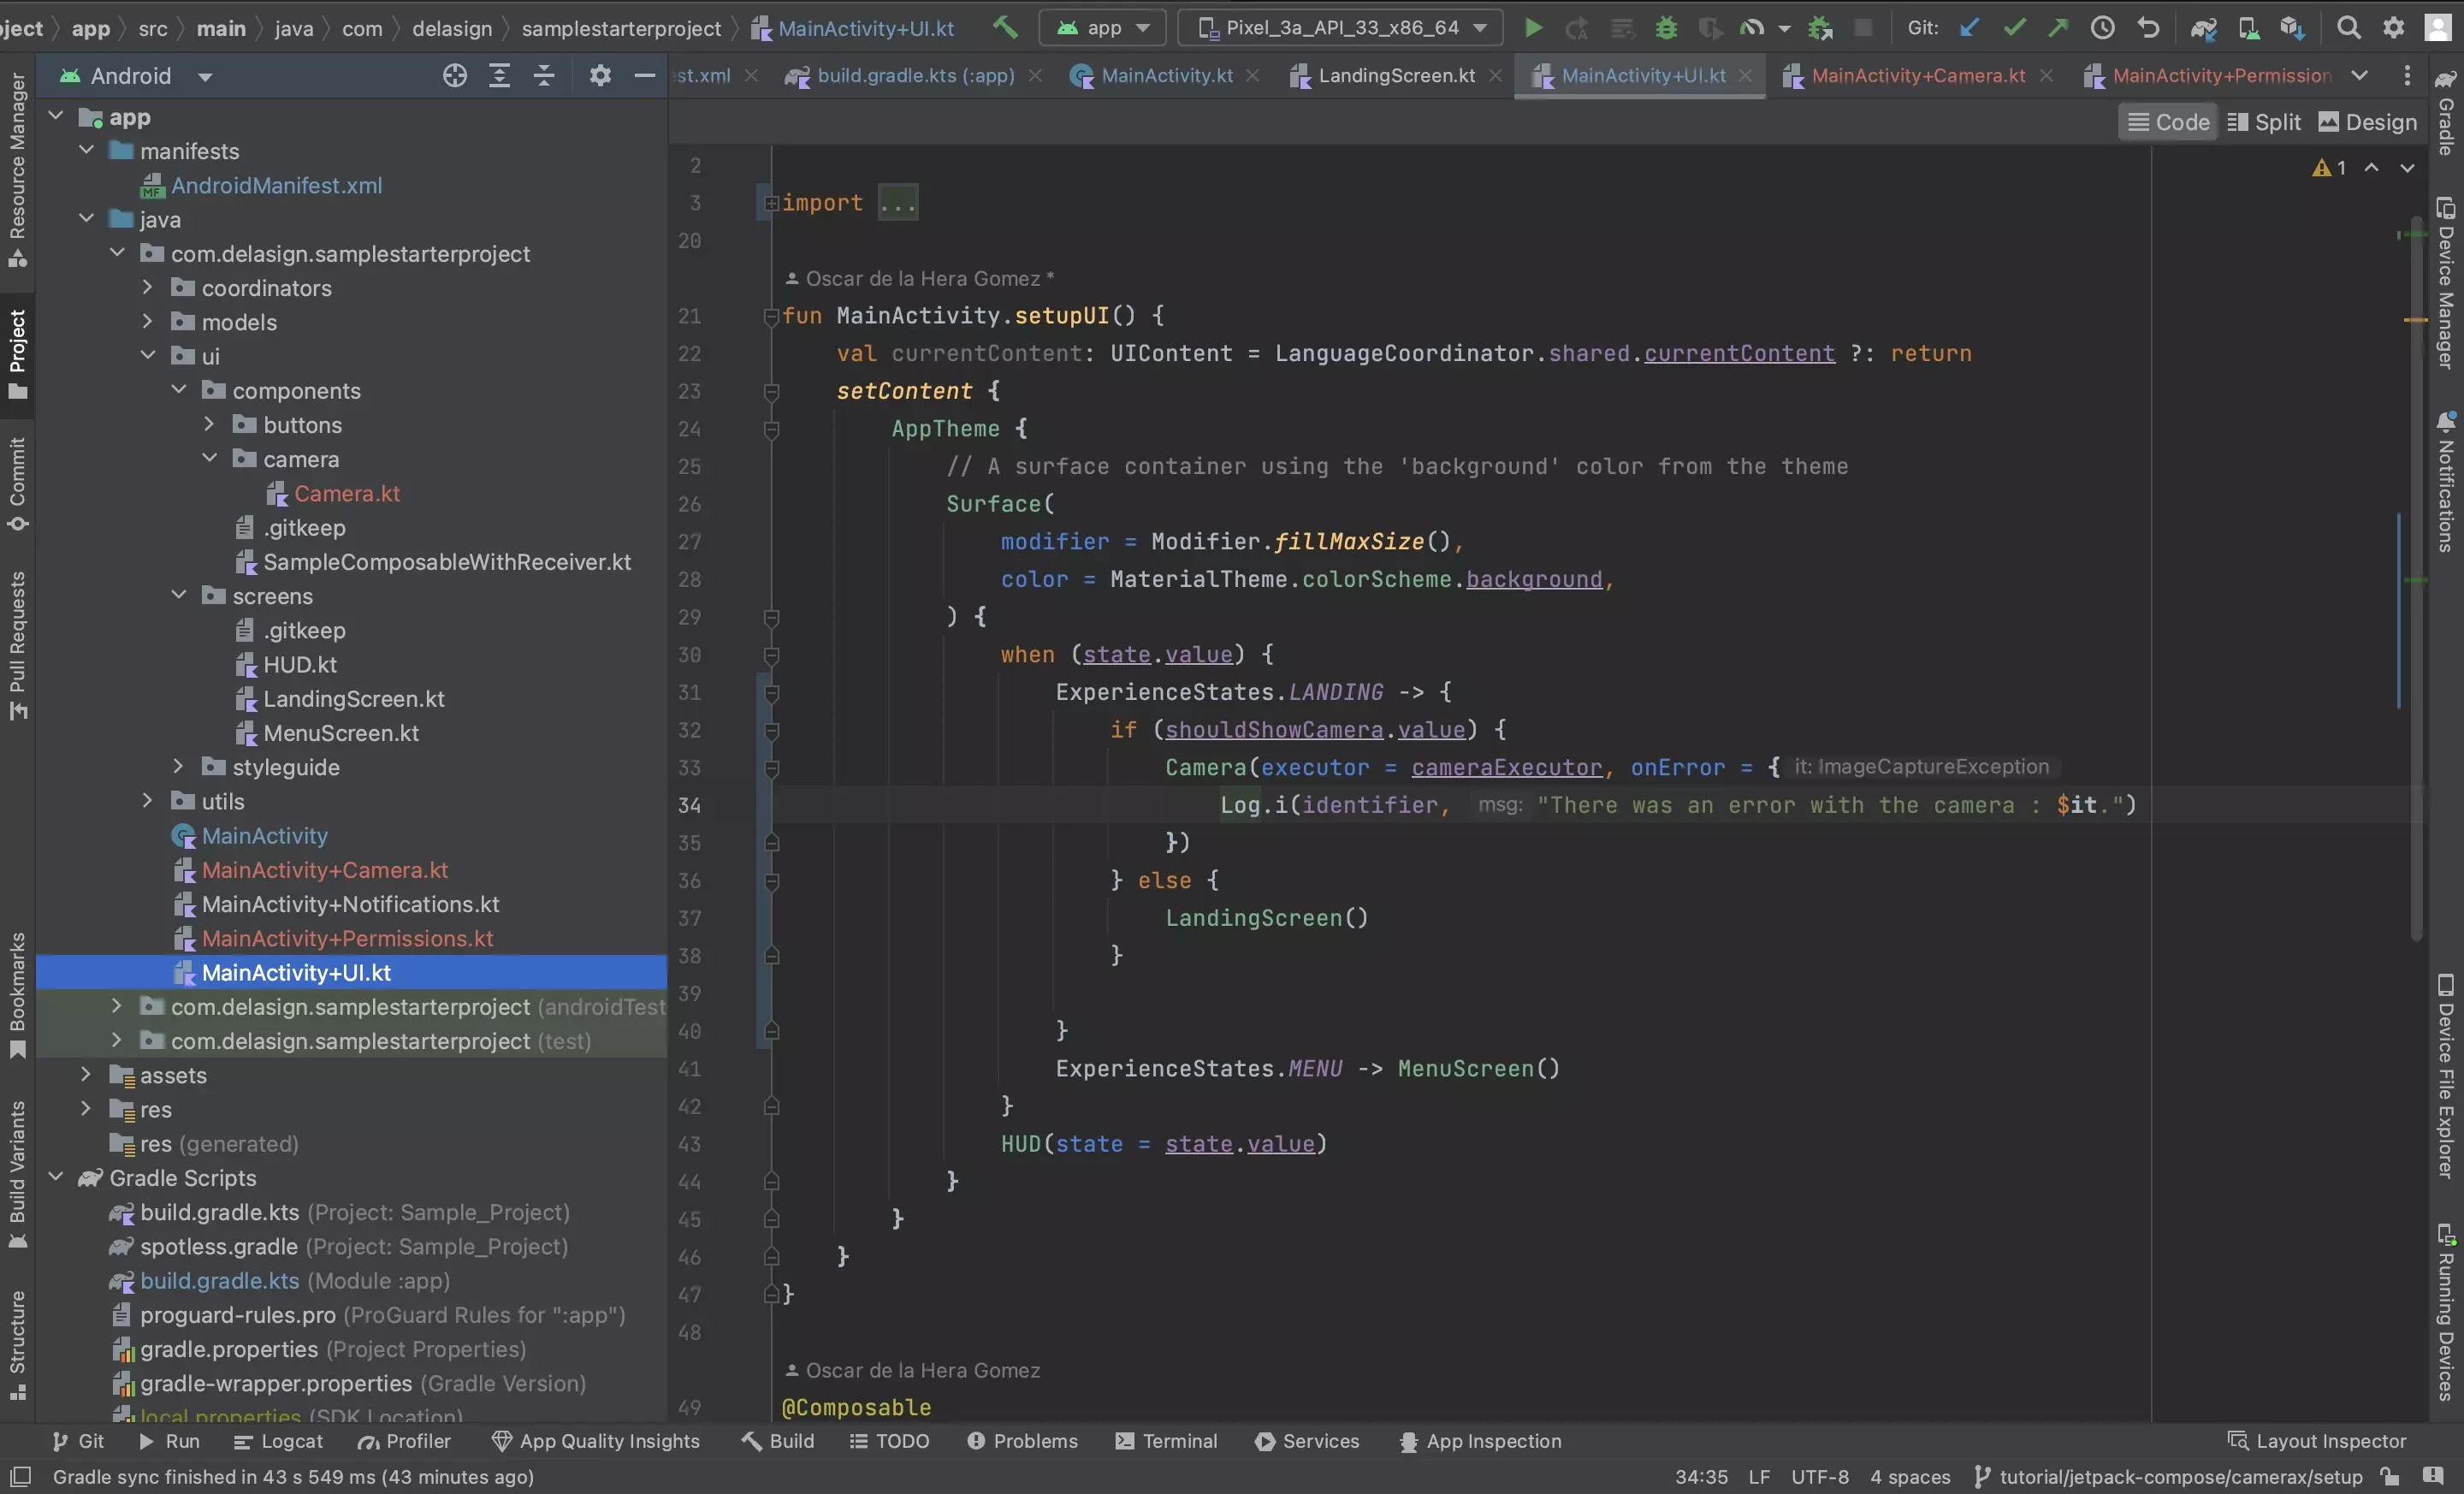
Add the CameraX composable created in Step Five to the apps UI.
Step Eight: Test
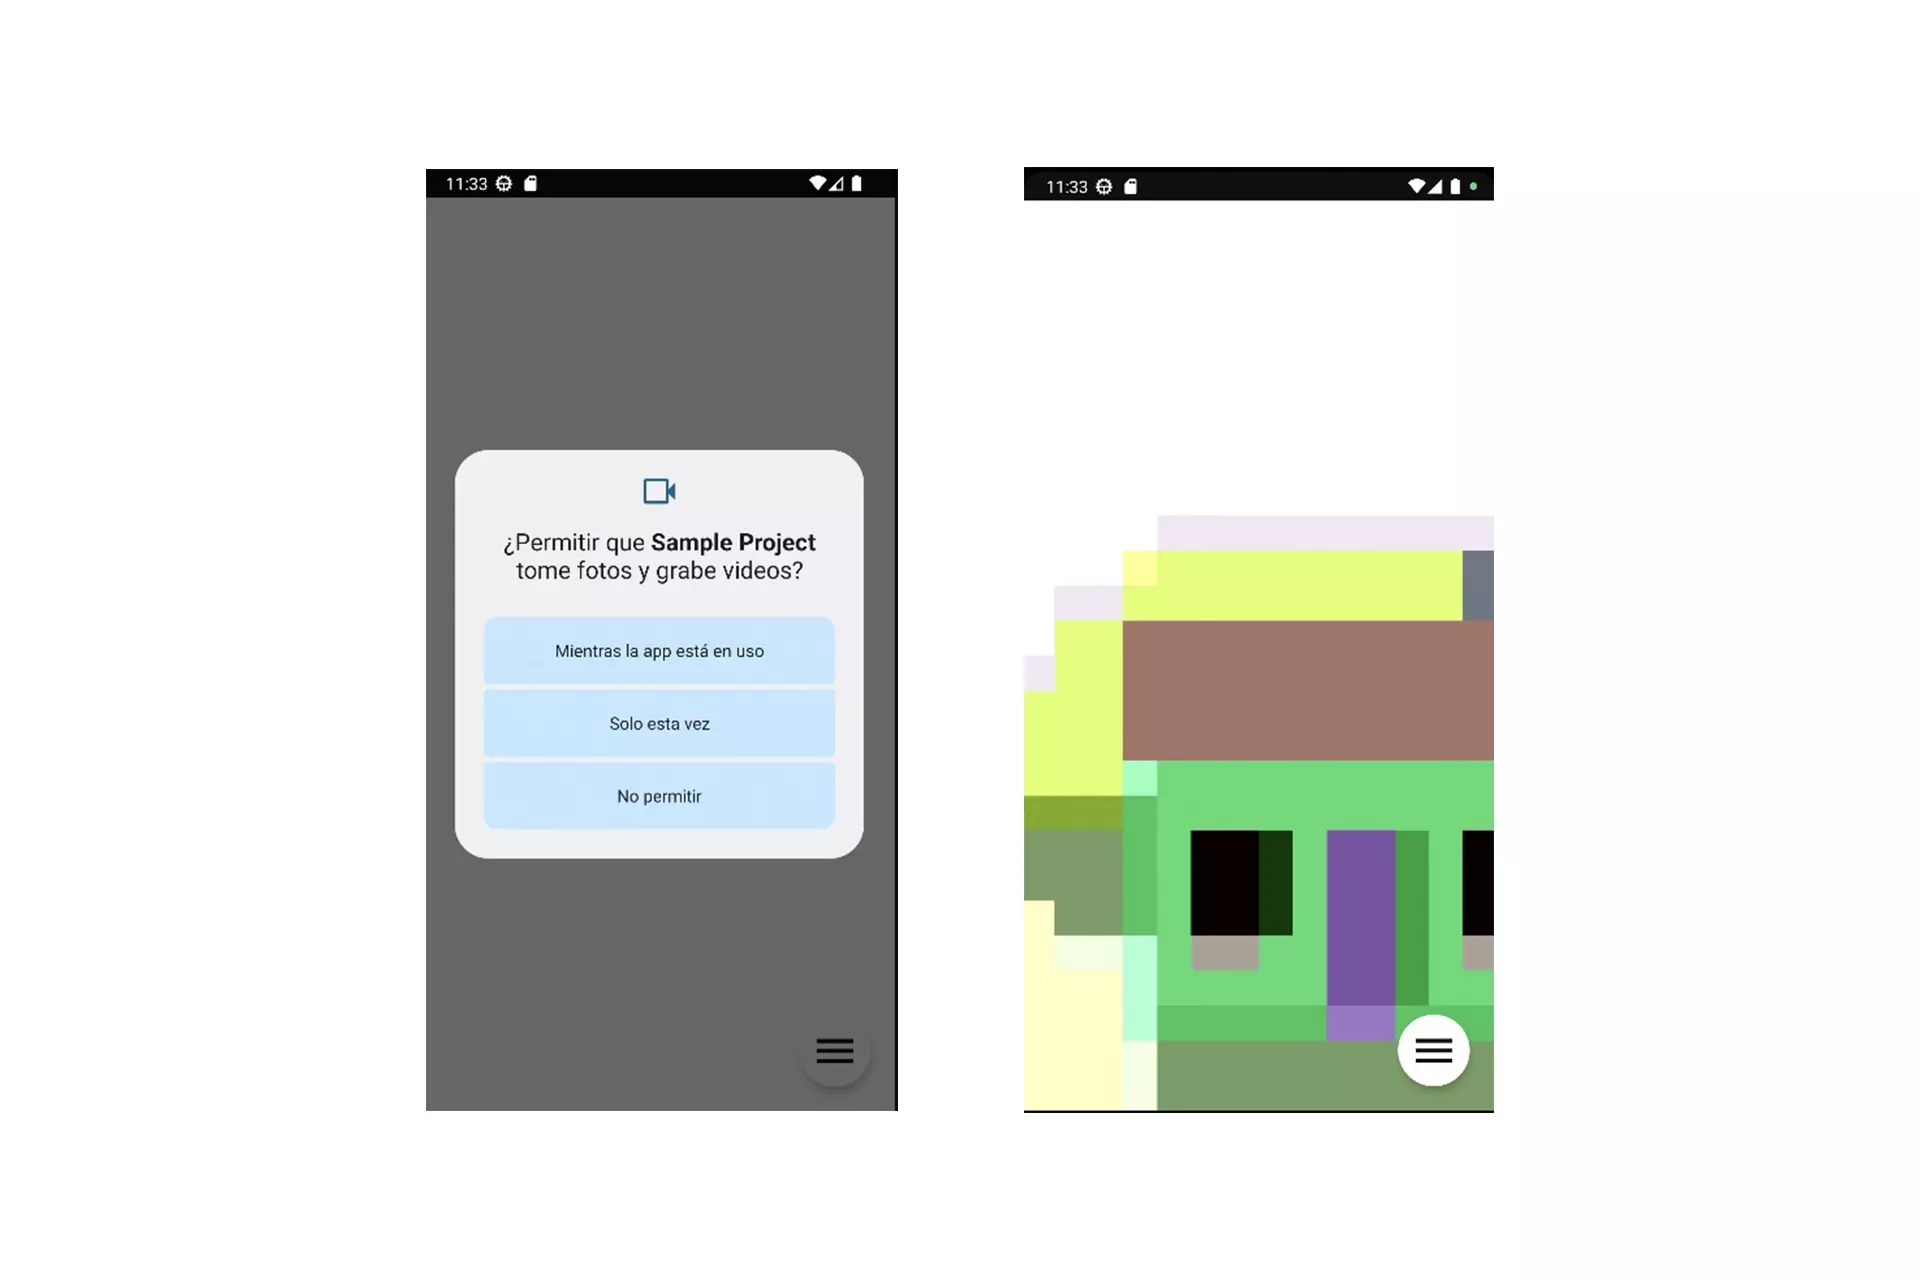
Run the code and confirm that the permissions and camera work.
Looking to craft a premium experience ?
Follow Google I/O's Building high quality Android camera experiences to learn more.