How to add and use custom colors in an Android project
A step by step guide on adding and using custom colors in a Kotlin, Jetpack Compose, Android project using Android Studio.
A step by step guide on adding and using custom colors in a Kotlin, Jetpack Compose, Android project using Android Studio.
SubscribeDownload Open Source Kotlin Starter ProjectWe recommend that you clone our Open Source Kotlin Starter Project, checking out the main branch and carrying out the steps below. The changes can be found on the tutorial/basics/custom-color branch.
git clone git@github.com:delasign/kotlin-android-starter-project.gitPlease note that this tutorial covers how to add and use custom colors for both the colors.xml file as well as the Color.kt file. Each of these files use a different type of color value: ARGB Hexadecimals and android.graphics.Color.
Step One: Determine the ARGB color value
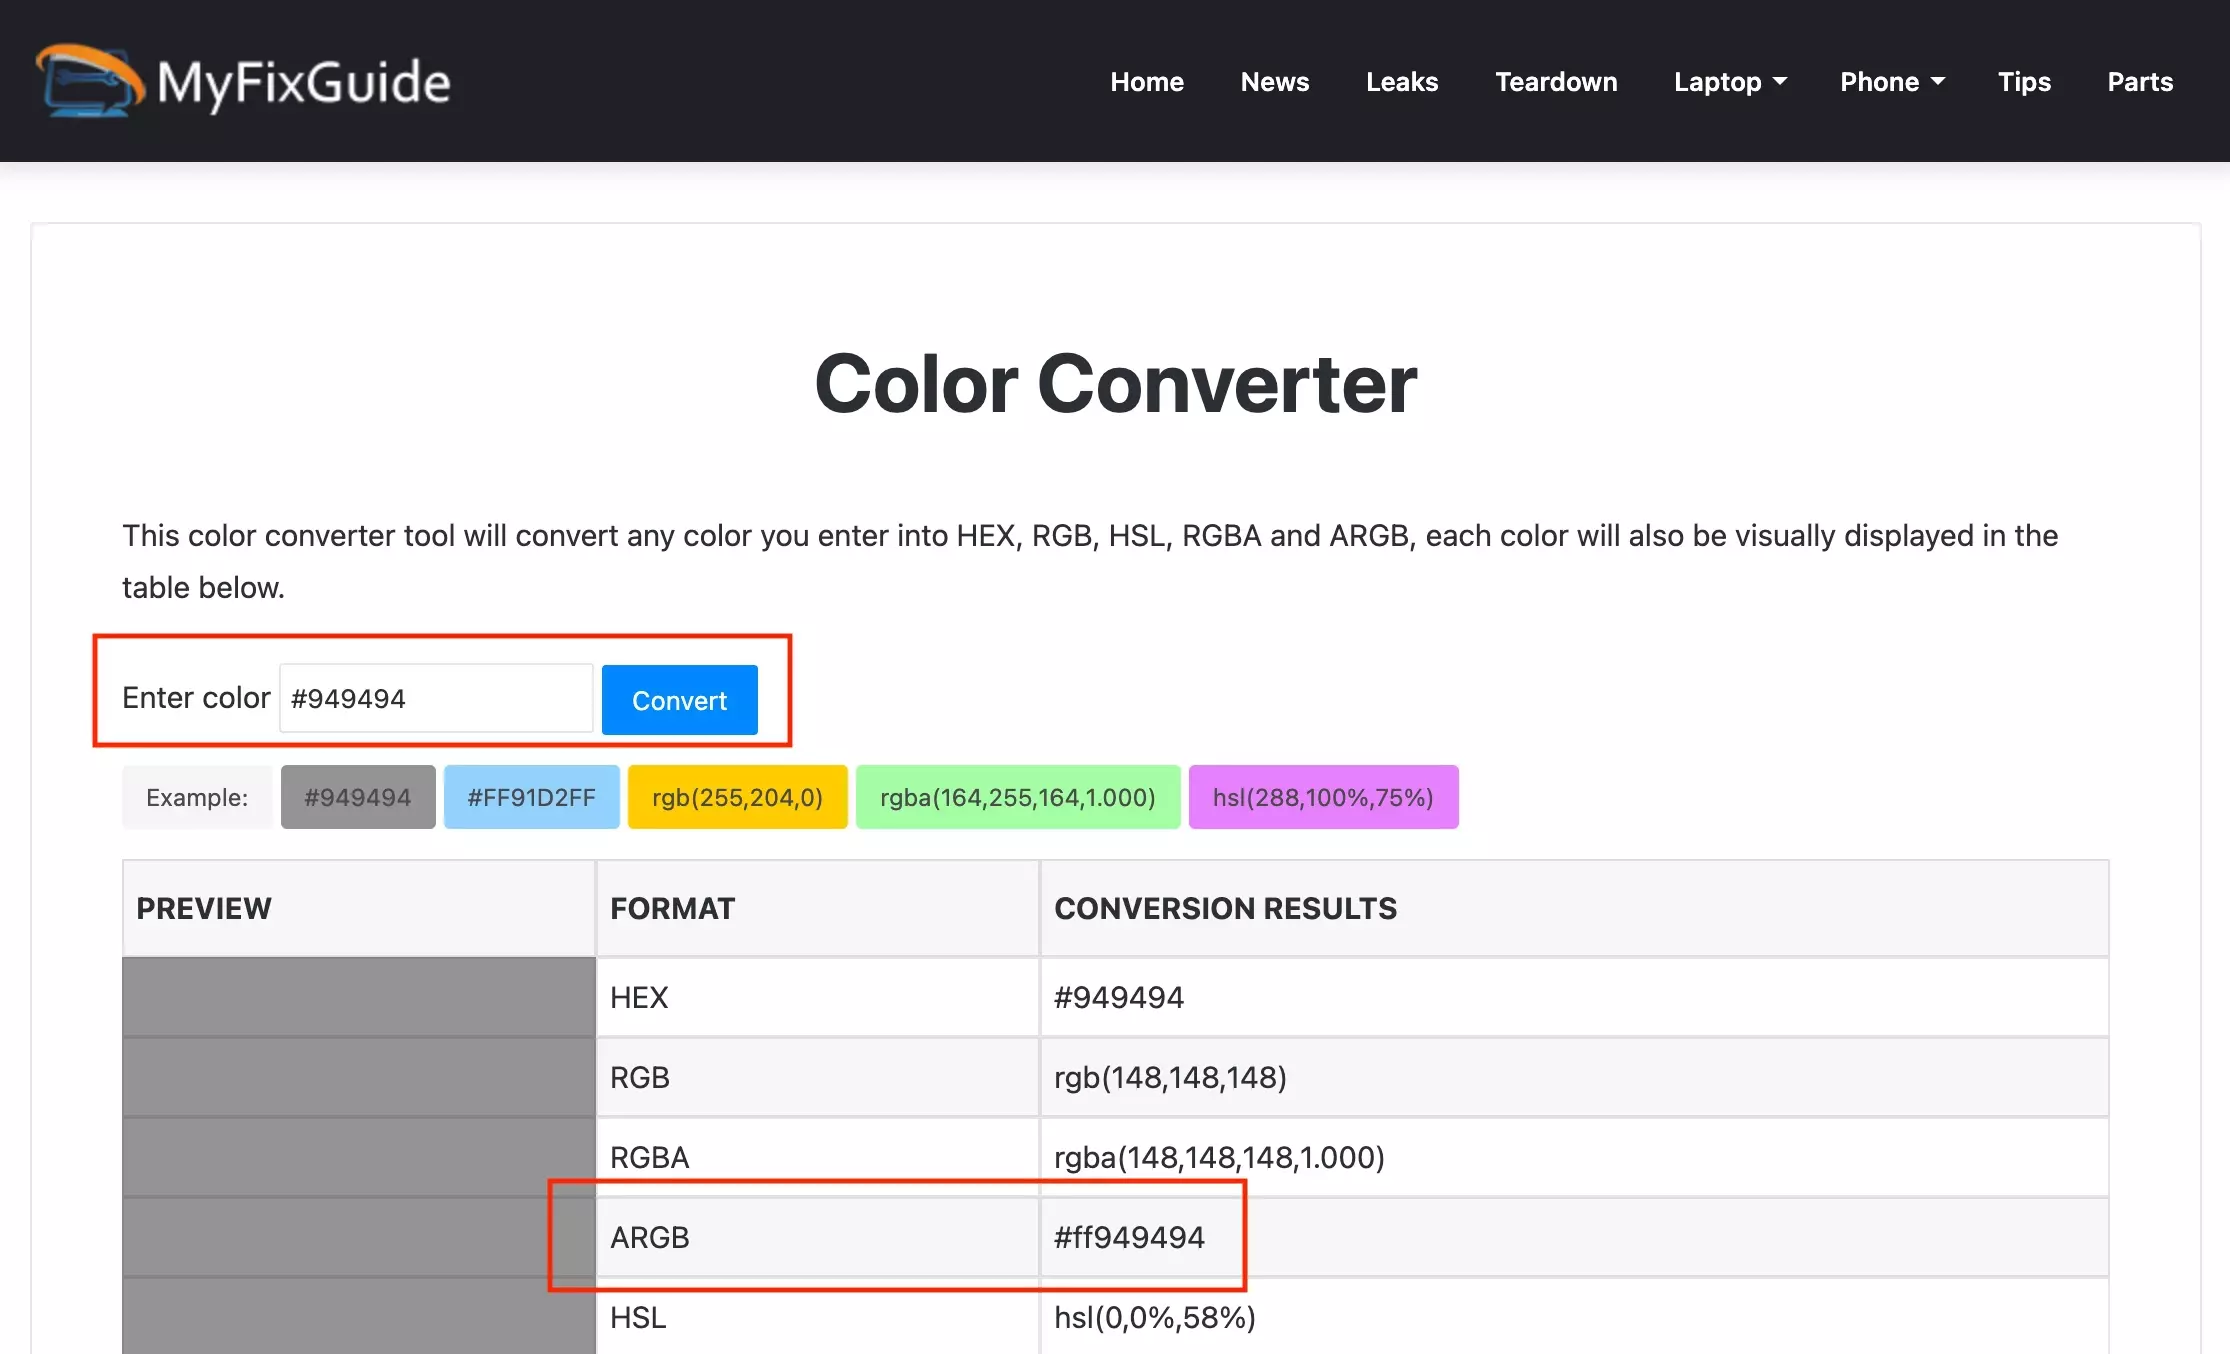
Android's color.xml file uses ARGB hexadecimals.
Use the link below to convert your color to an ARGB hexadecimal.
Make sure you copy the ARGB value.
Step Two: Add the color to the color values
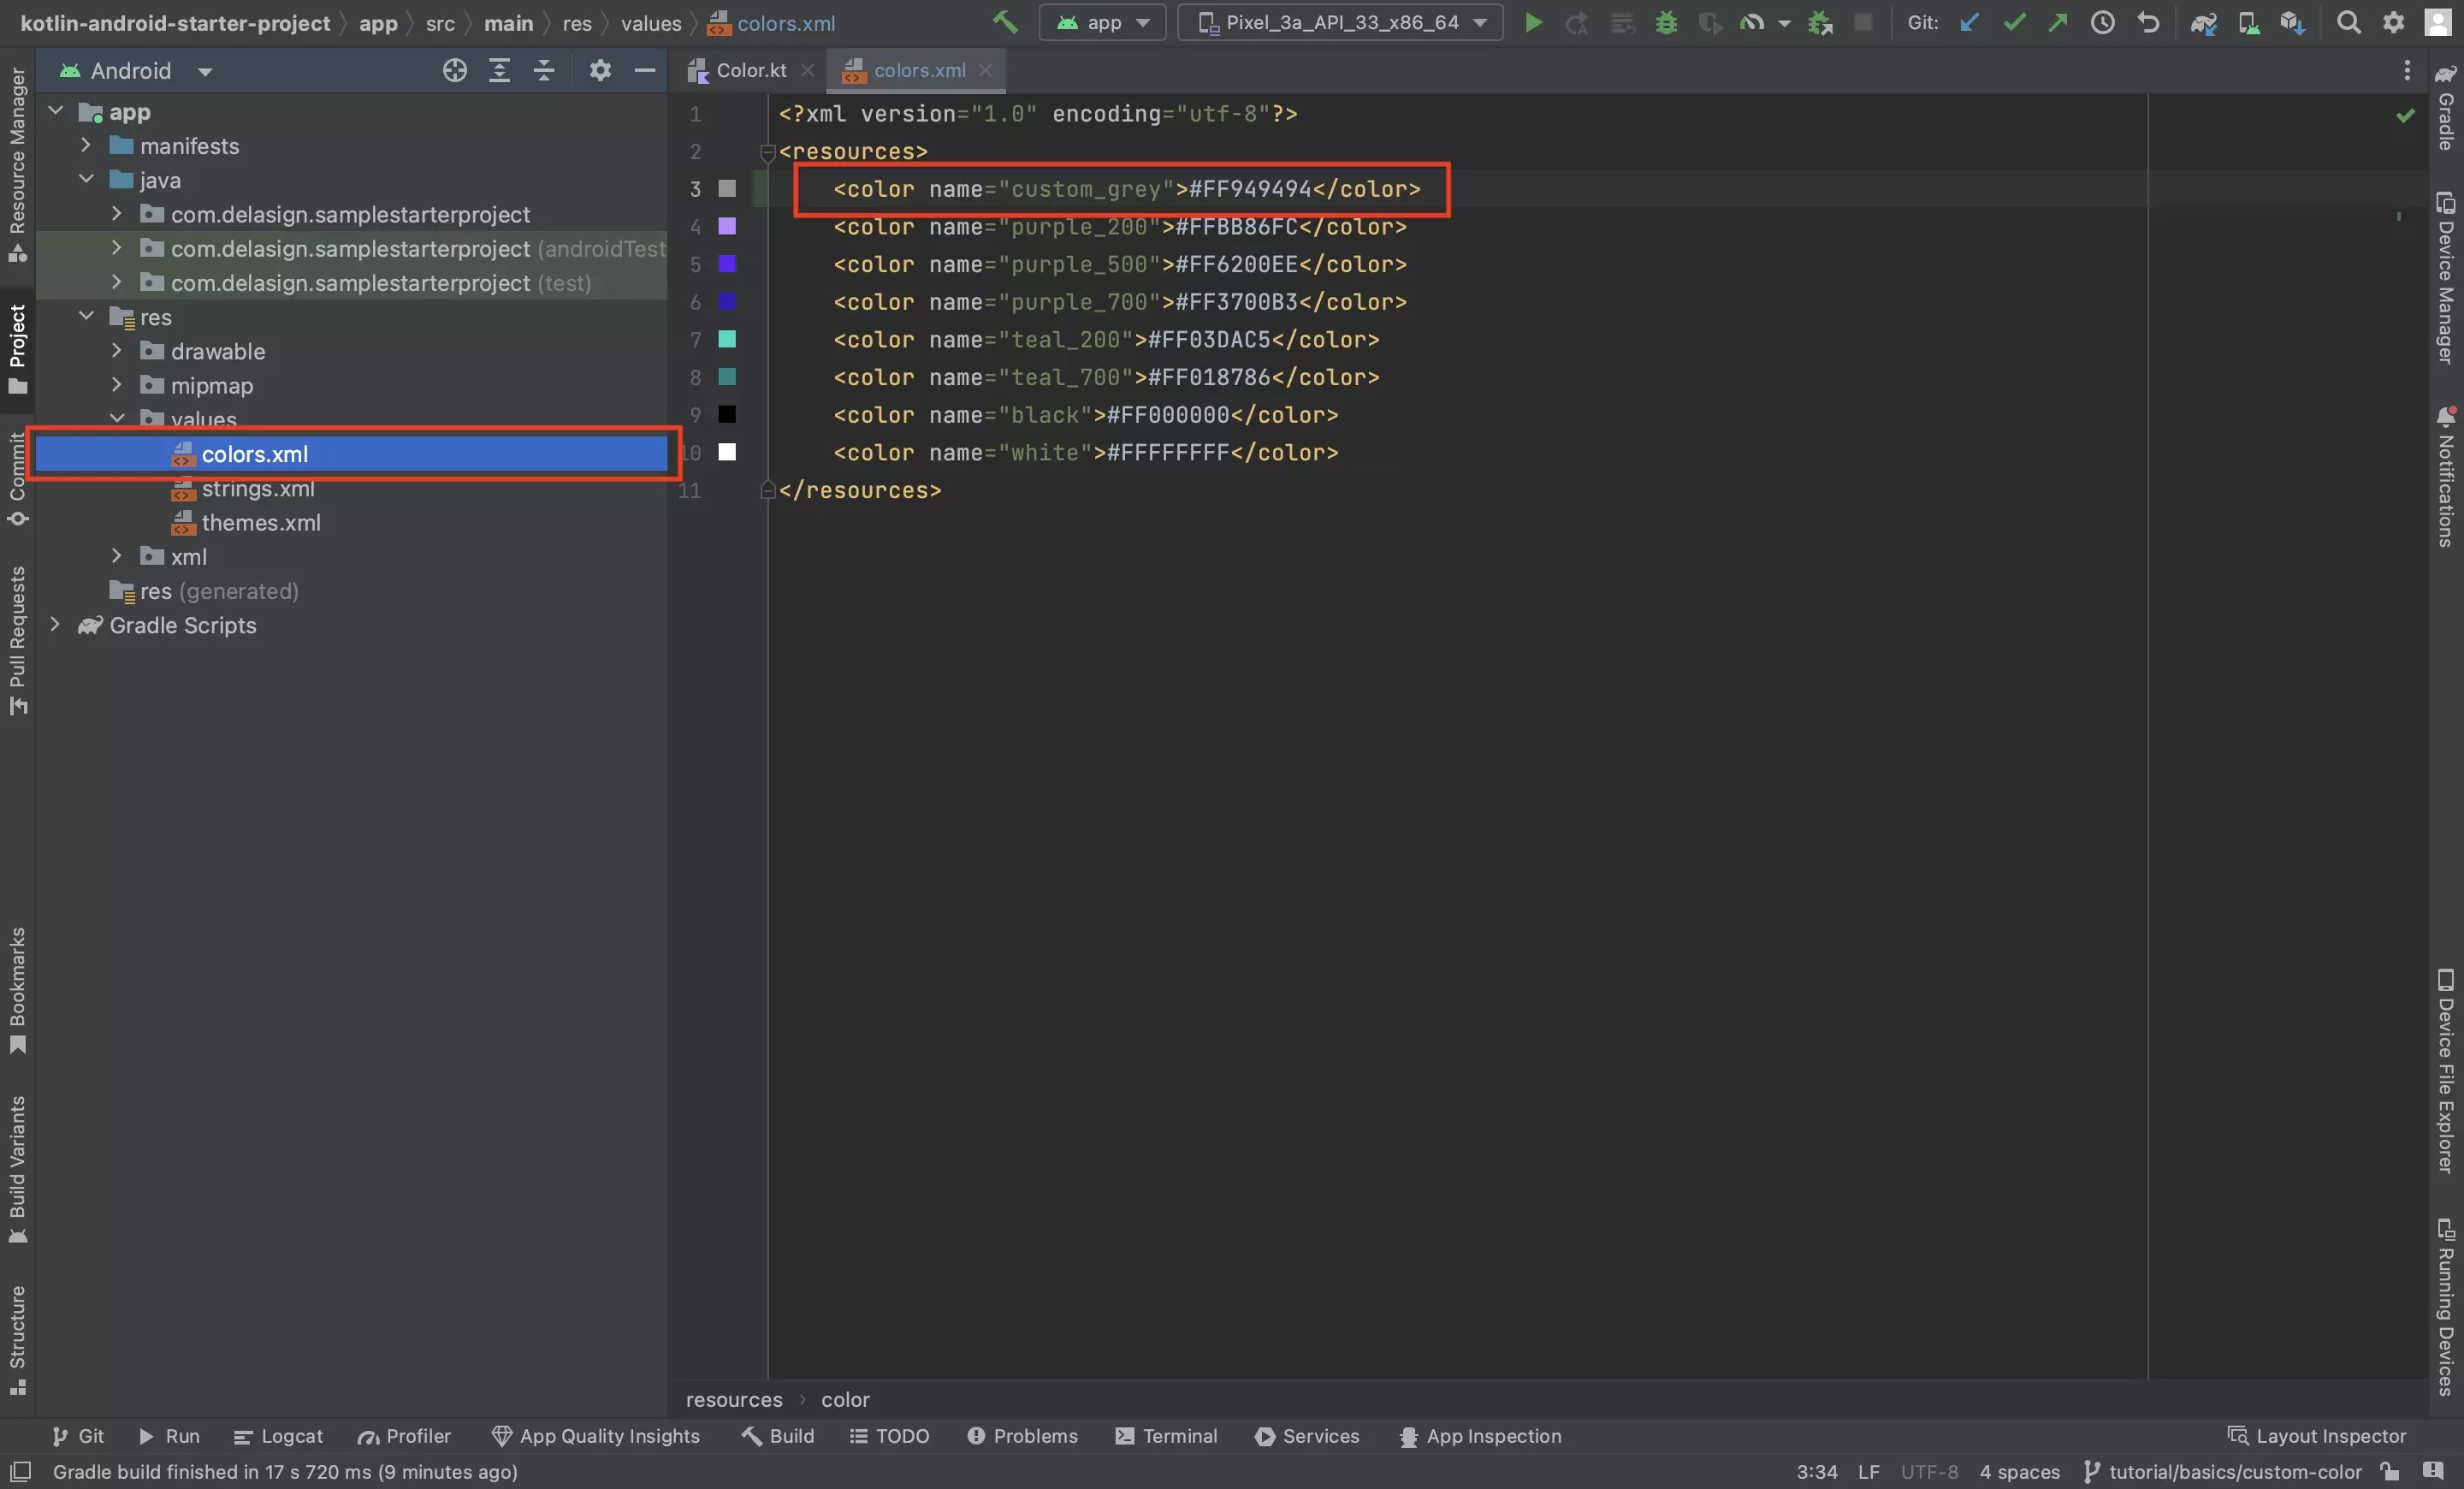
In res > values > color.xml, add your color using code similar to the one below.
How to use this color value

This color can be used in your code using "@color/custom_grey", where custom_grey is the name of the color that you added.
Please note that this color type is only to be used in xml files. To use colors as part of Jetpack Compose Composables, follow the next two steps.
Step Three: Determine the Android Graphics Color
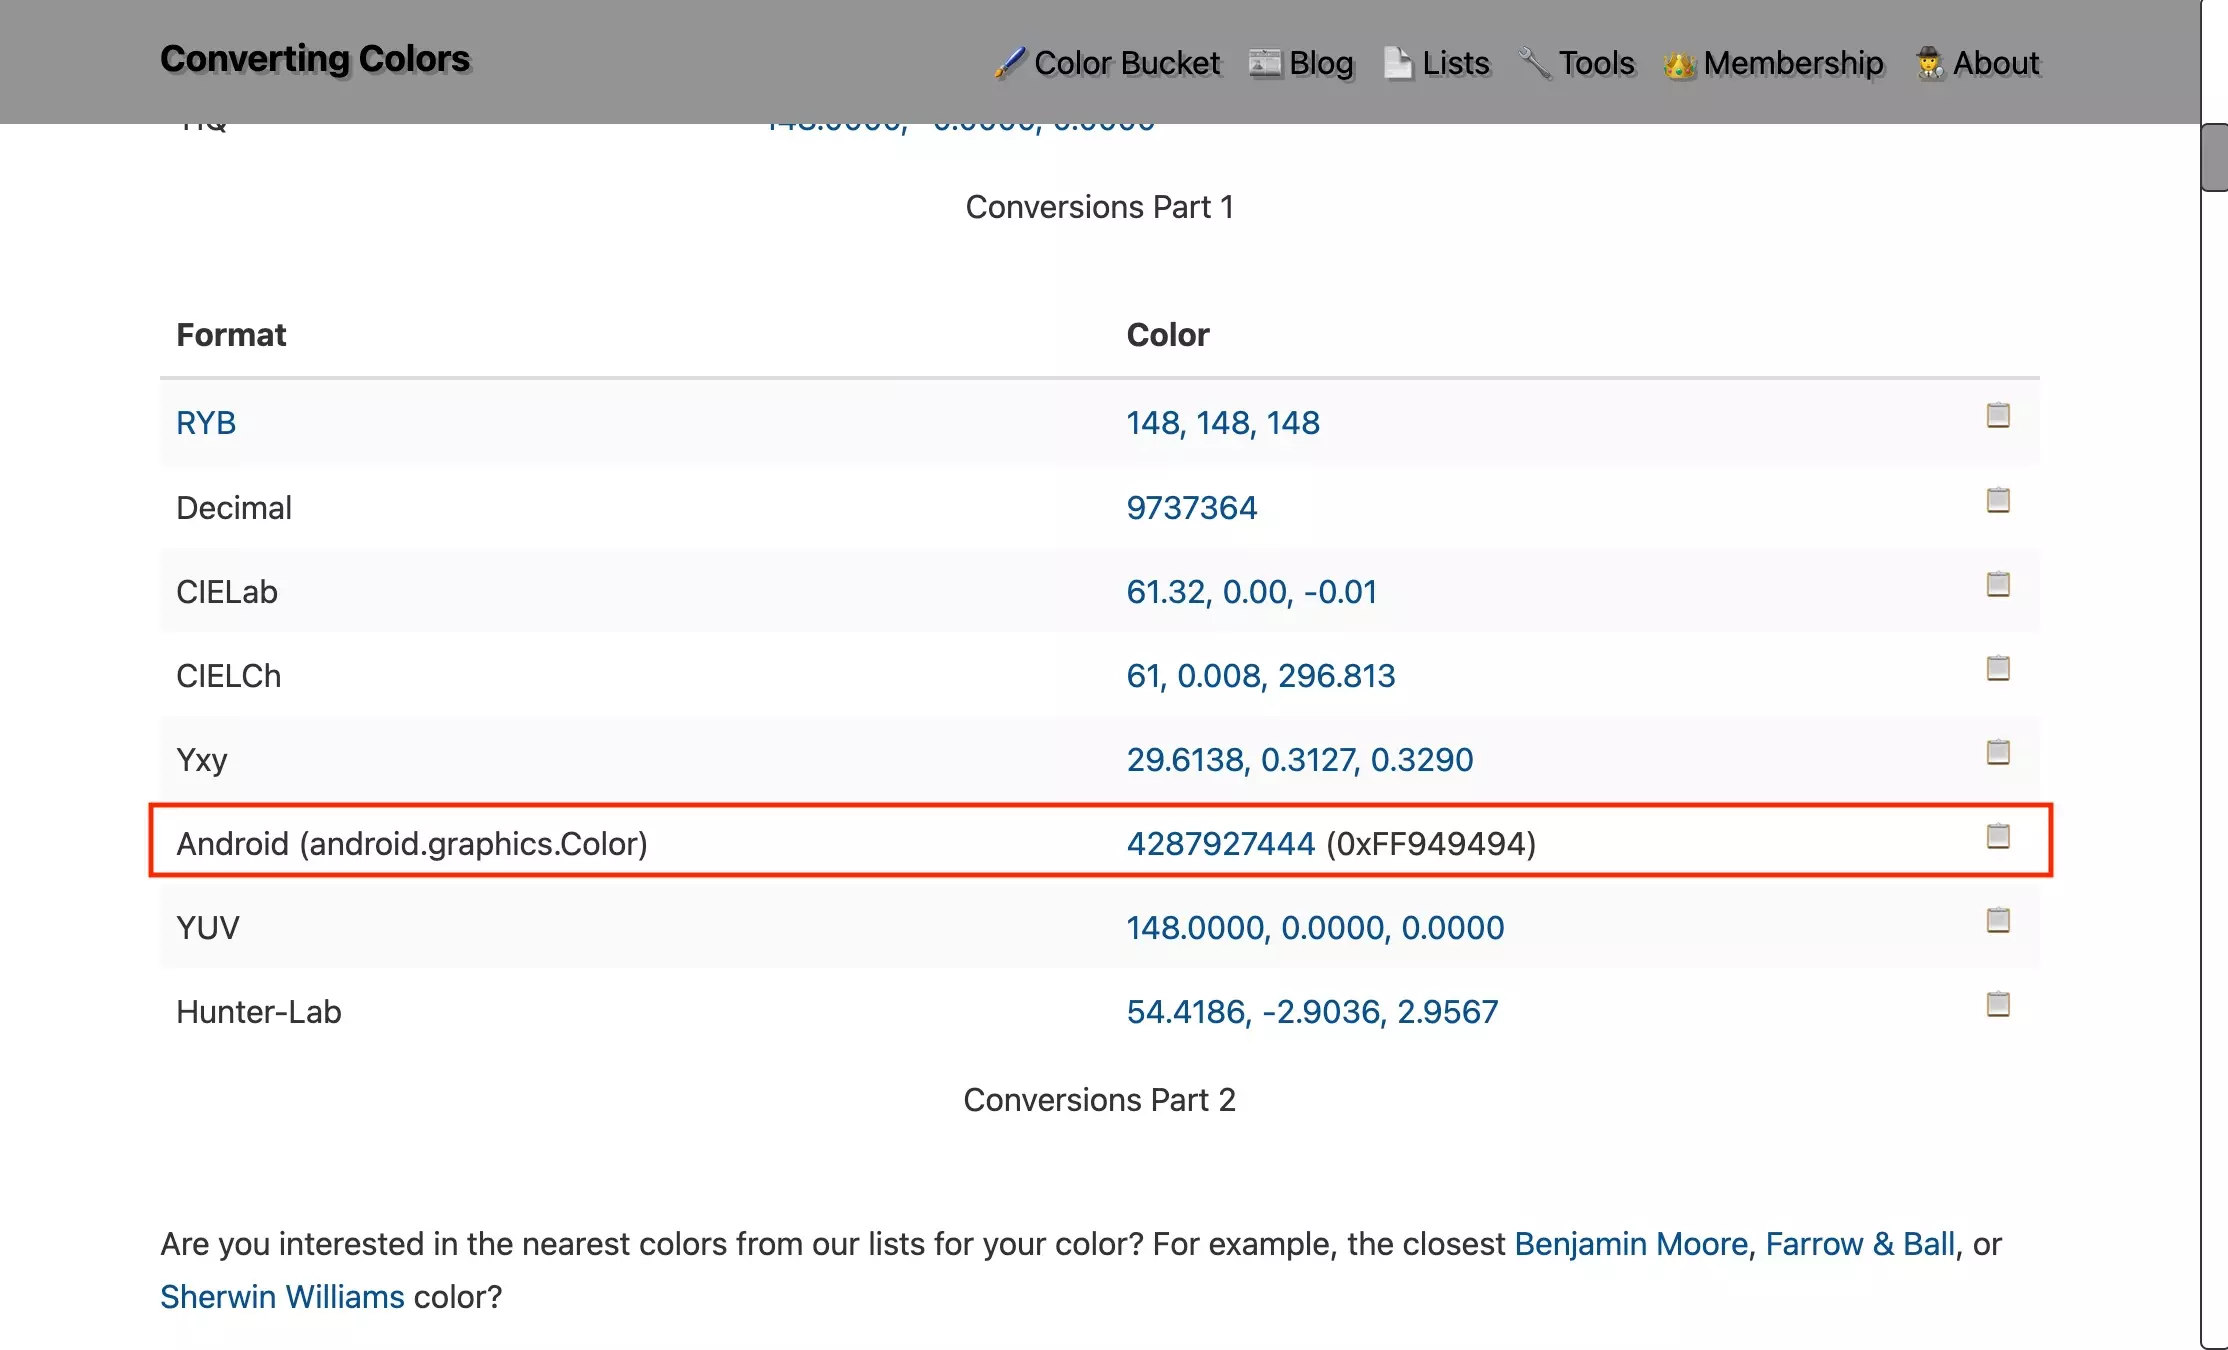
Android's Color.kt file uses android.graphics.Color values.
Use the link below to convert your color to an android.graphics.Color.
Make sure you copy the Android value.
Step Four: Add to Colors
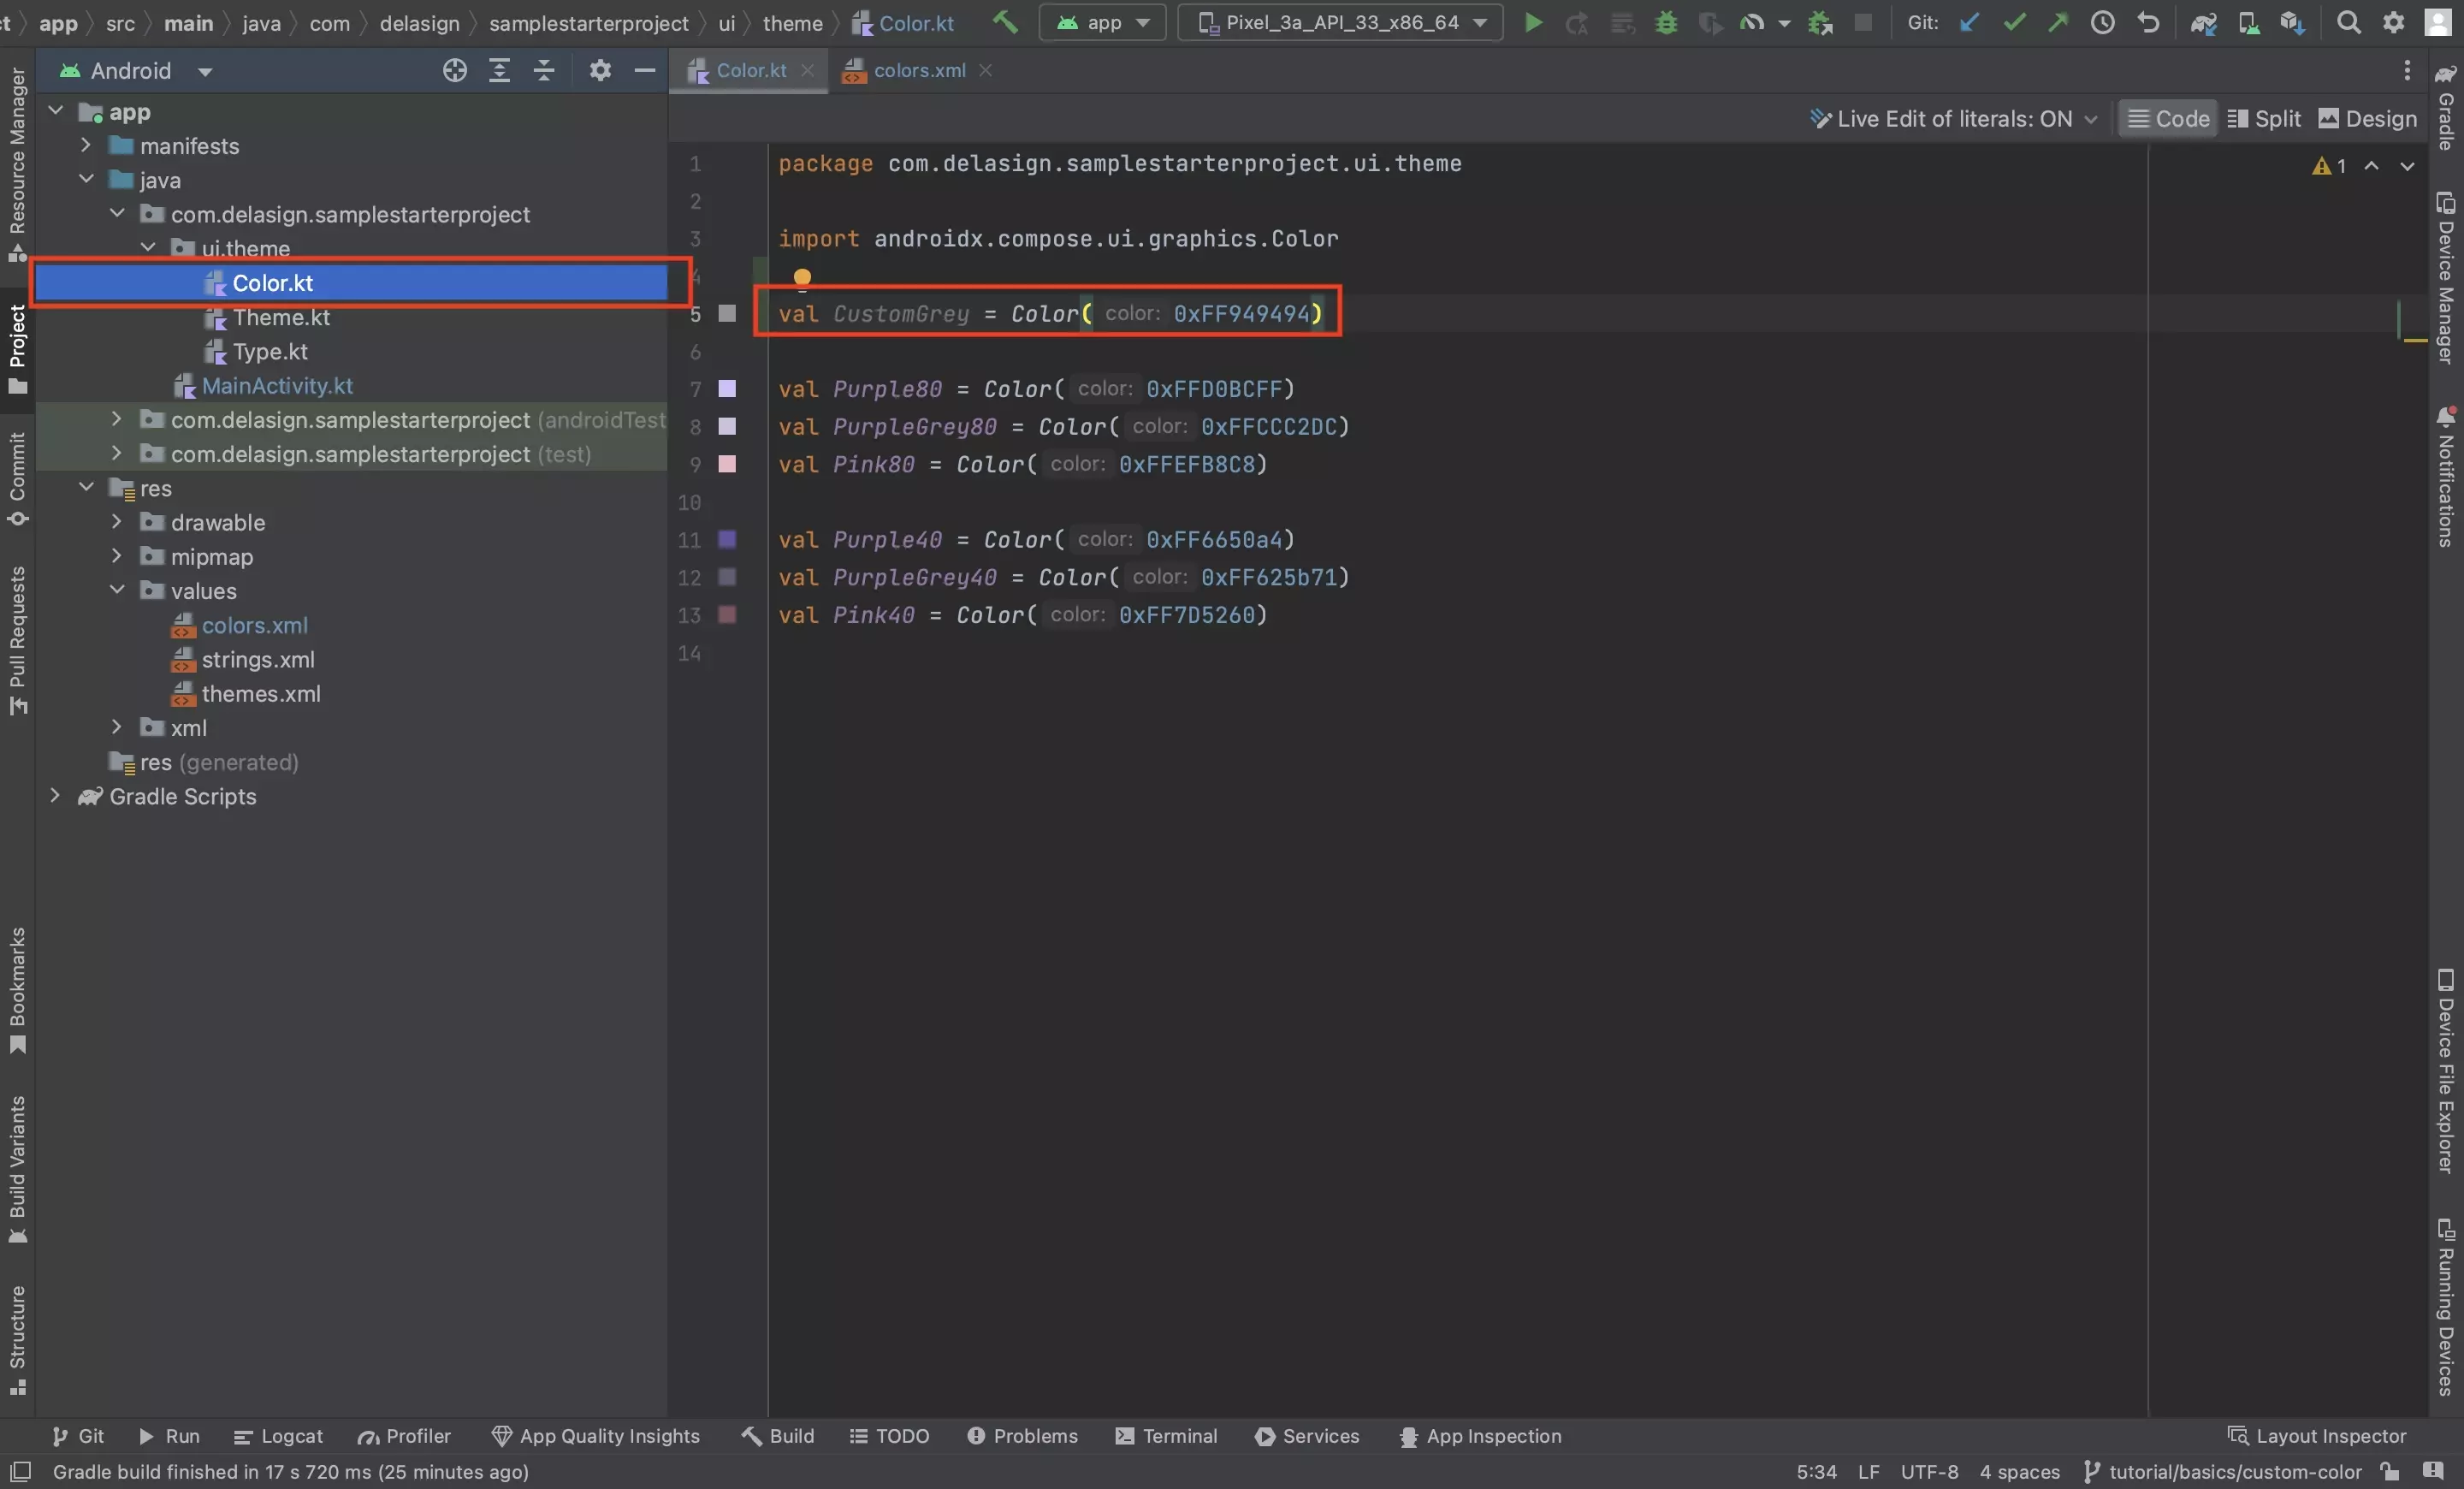
Under ui.theme > Colors.kt, add the android.graphics.color using code similar to the one below.
If you are using our open source project, please note that the theme folder is now found under the styleguide folder in our main branch as it forms part of the Styleguide.
val CustomGrey = Color(0xFF949494)How to use this color value
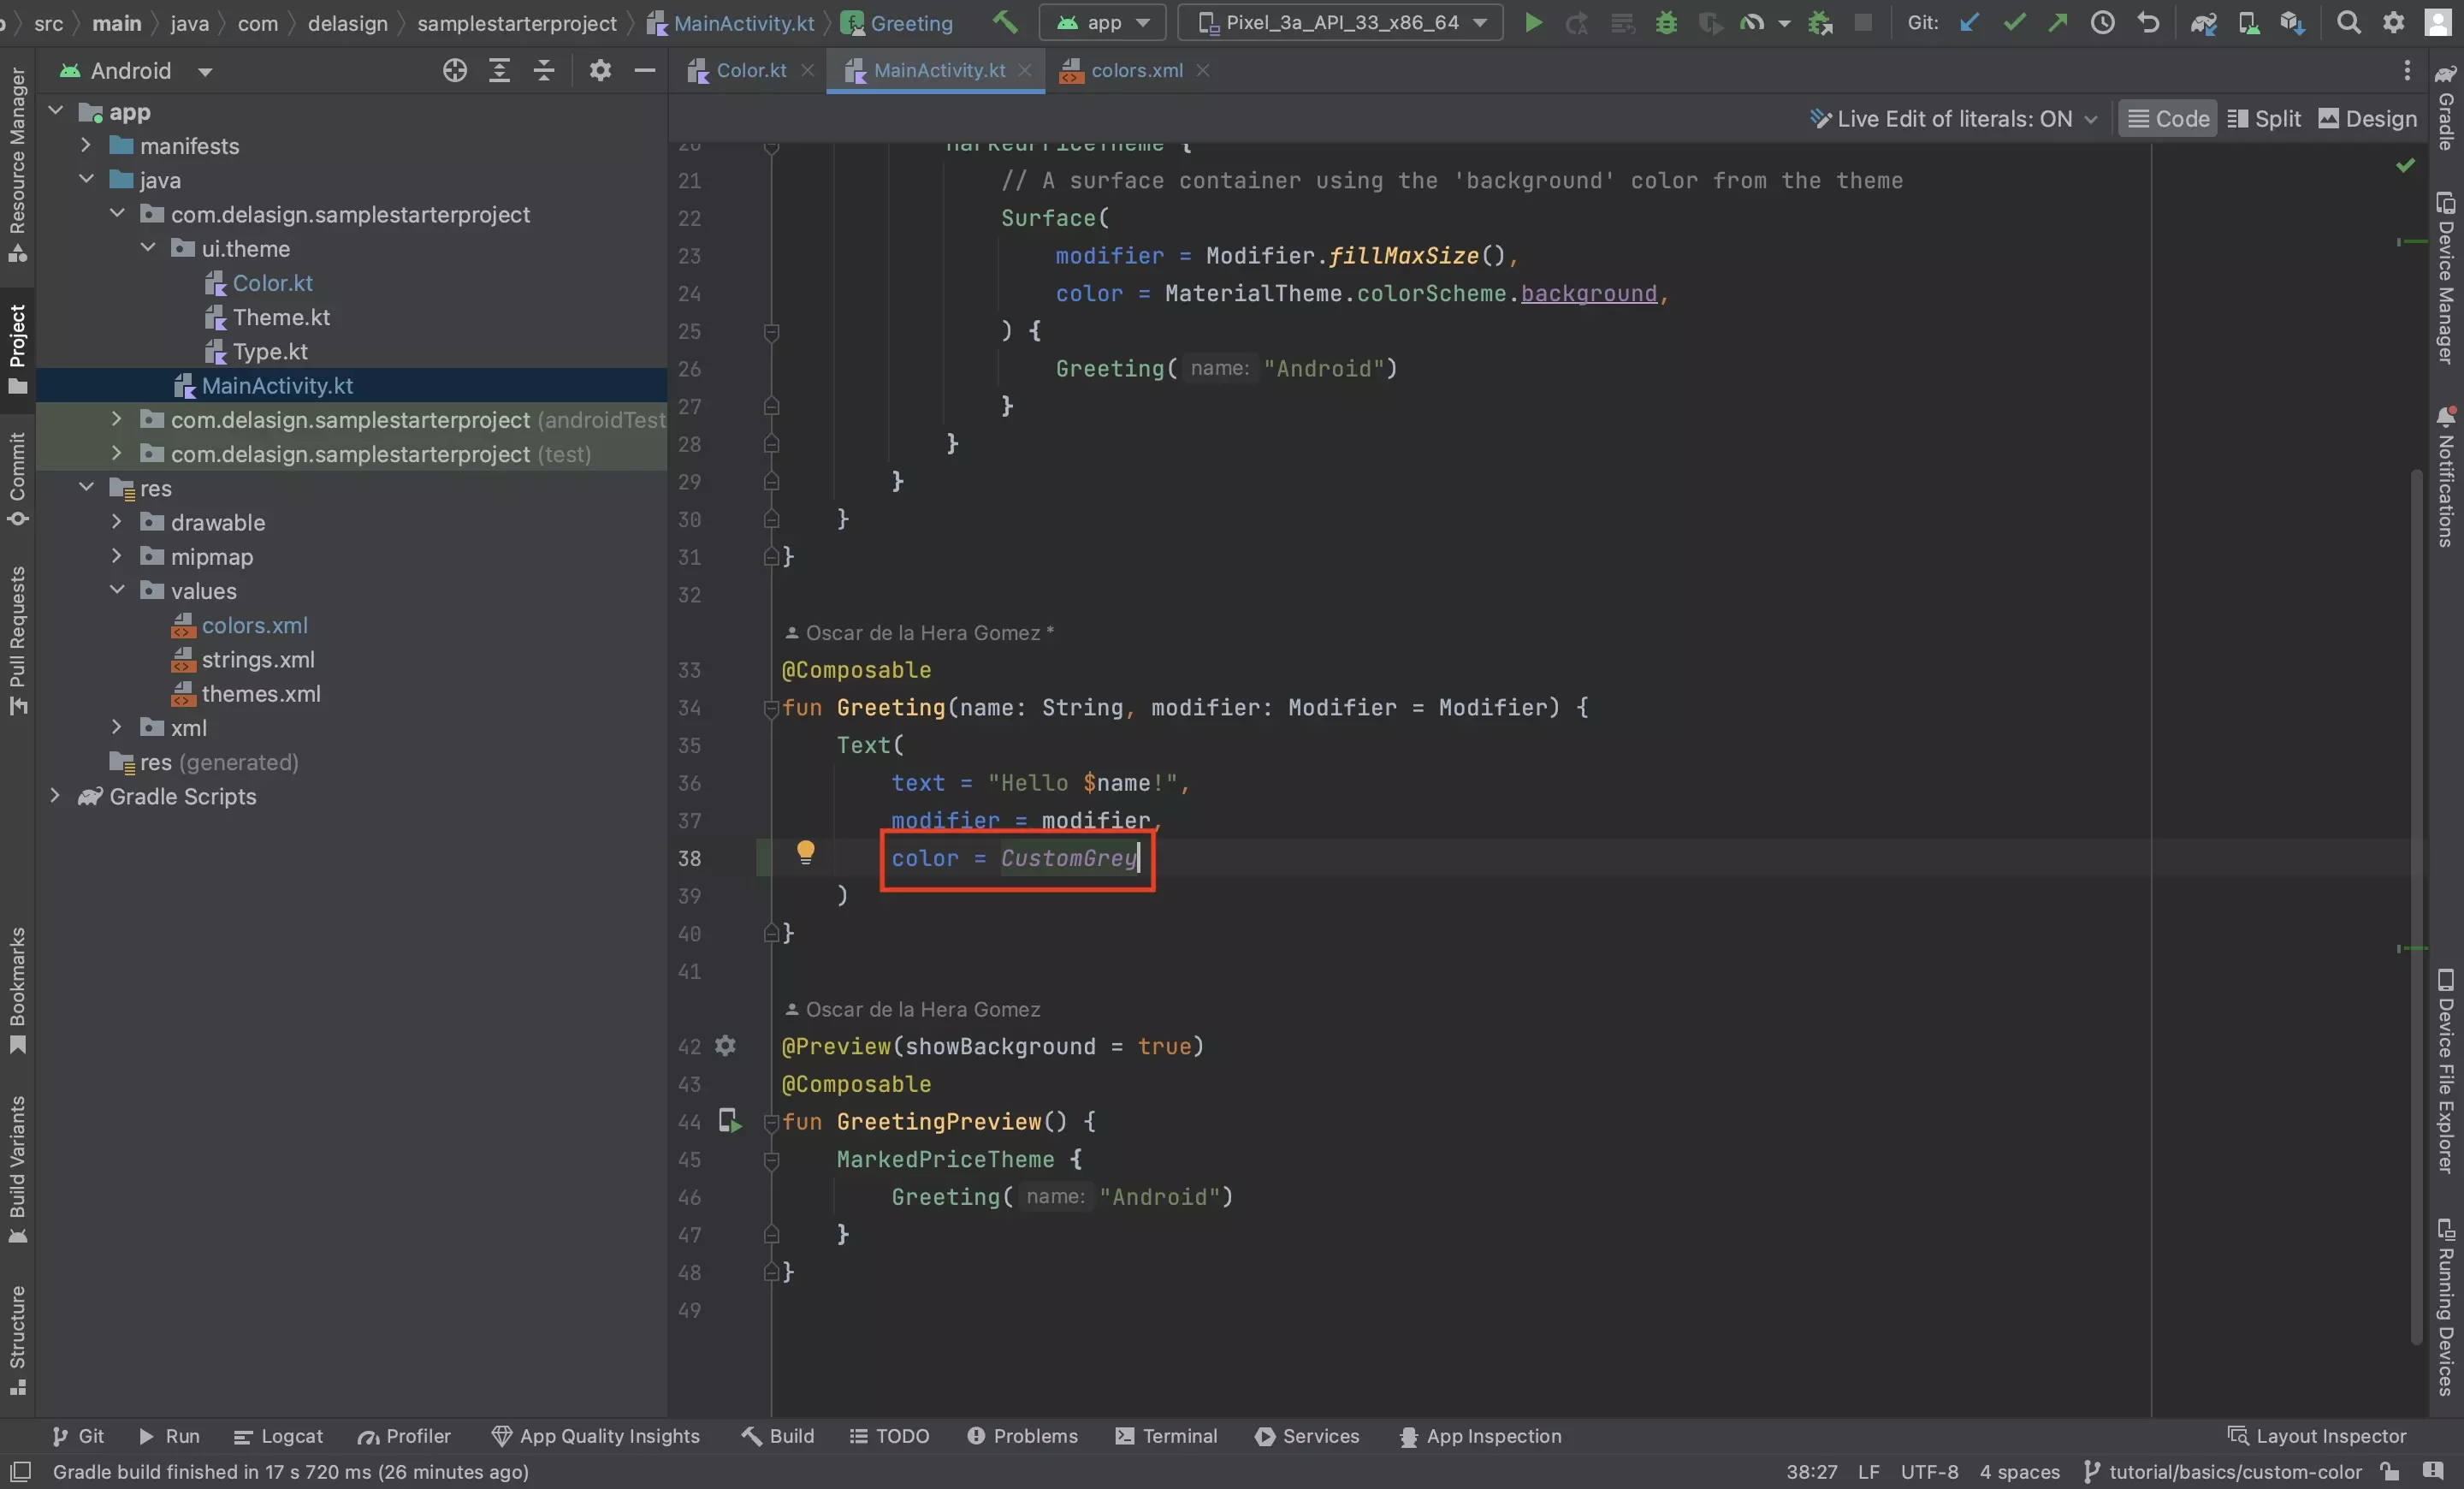
To use this color value, provide the name to a Color parameter within a Composable.
Looking to implement light mode or dark mode?
To learn how to use dark mode or light mode, consult the tutorial below.