How to setup custom Algolia Instant Search in Gatsby
The following tutorial will walk you through how to setup Algolia Instant Search using custom React components in GatsbyJS.
The following tutorial will walk you through how to setup Algolia Instant Search using custom React components in GatsbyJS.
If you are new to working with Algolia in Gatsby, we recommend that you read our article on Algolia & read Gatsby's Adding Search With Algolia.
Gatsby's guide will offer you to a starter project that can be accessed via the following command line command:
$ gatsby new gatsby-algolia-guide https://github.com/gatsbyjs/gatsby-starter-blogThis starter project demonstrates how to integrate OOTB Algolia React Components, but Algolia's documentation does not support custom cases, which are covered in this tutorial.
Step One: Add the Plugin
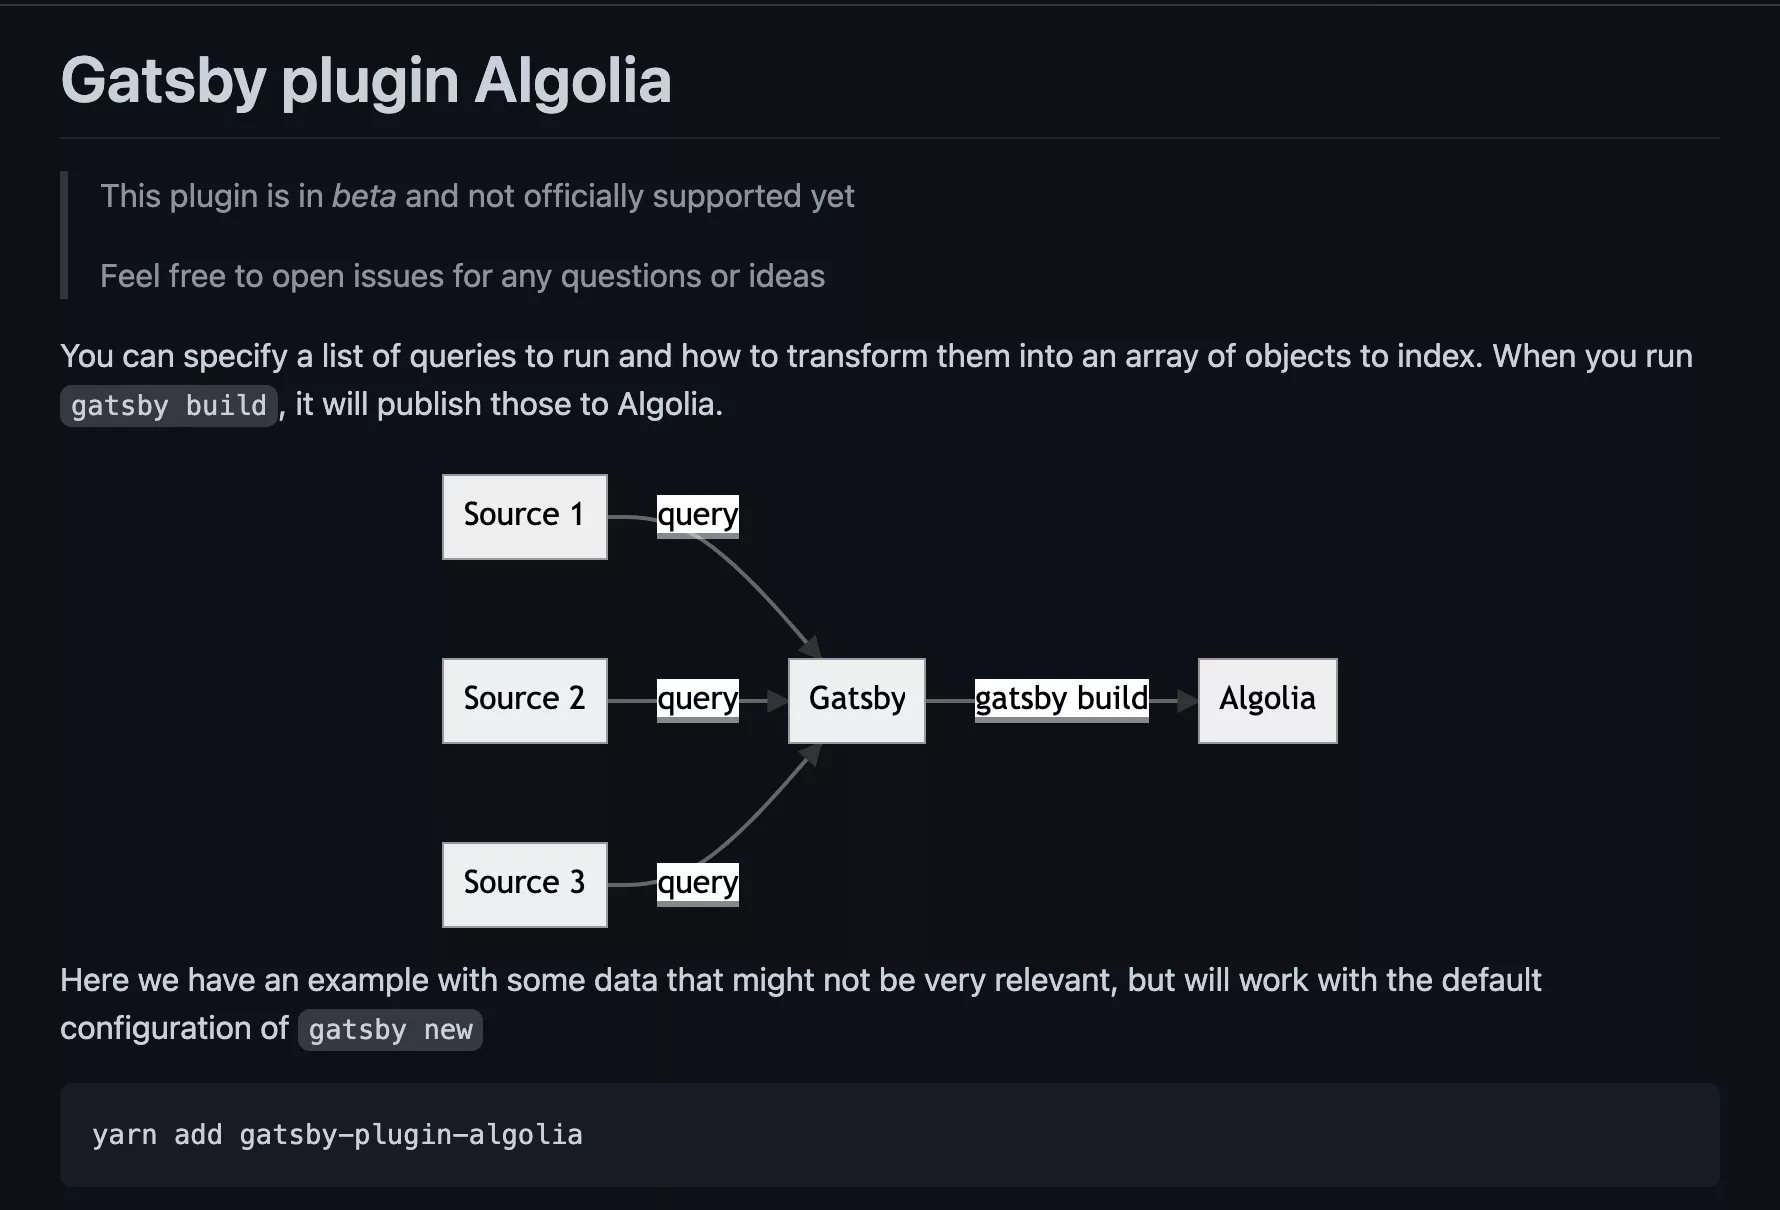
In Terminal, in the current directory of your project, run the following line
yarn add gatsby-plugin-algoliaStep Two: Find your API Keys
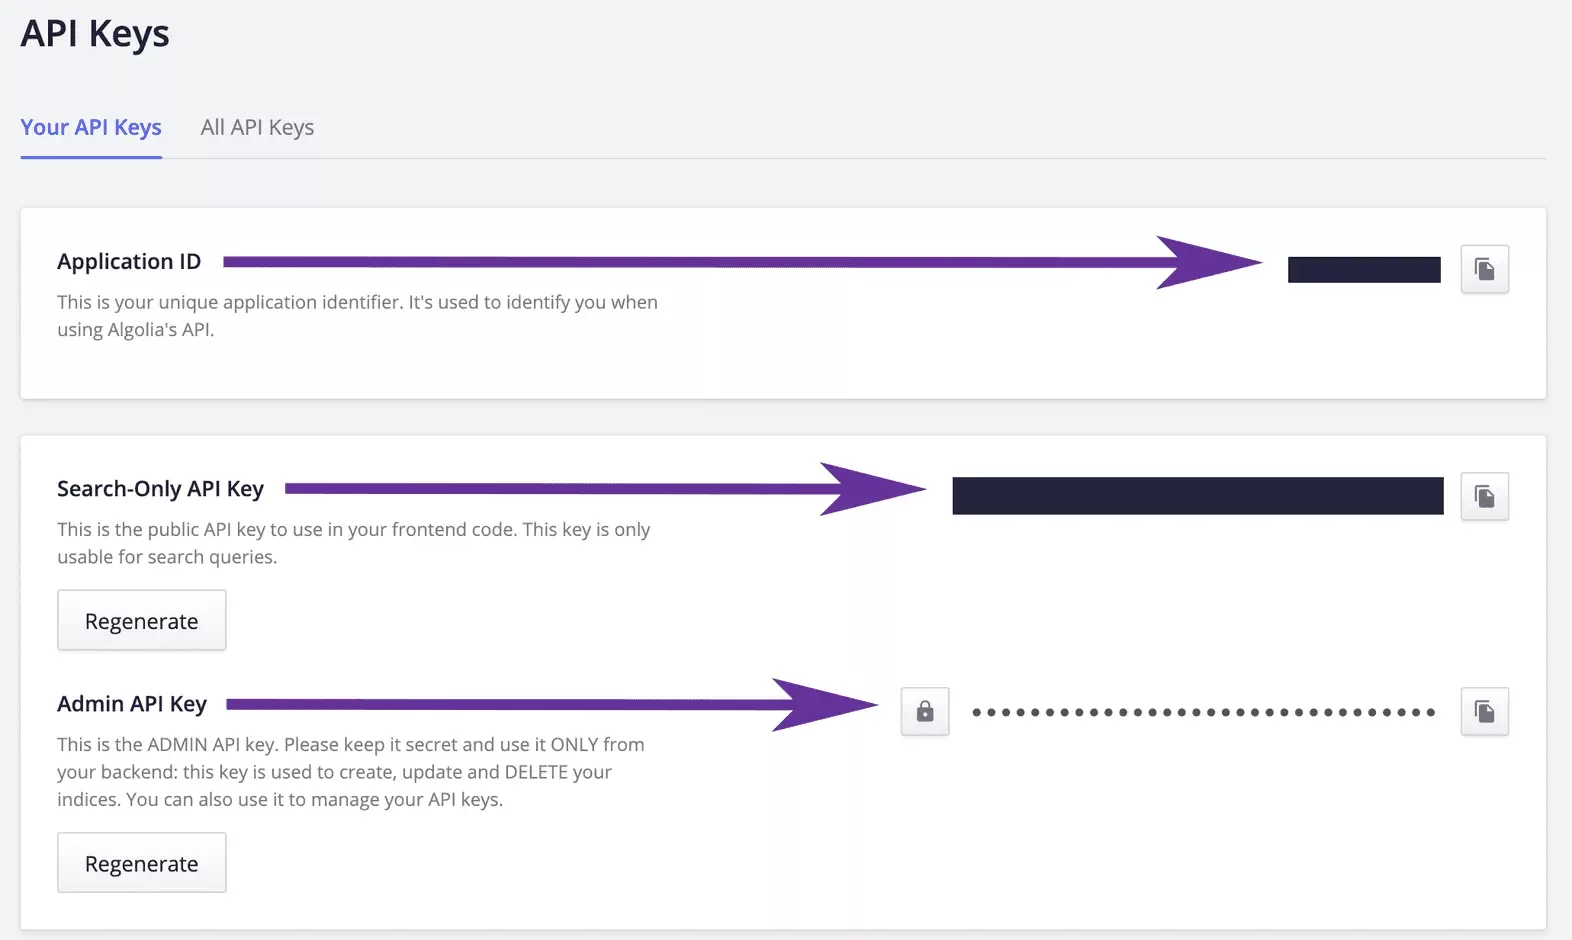
In Algolia, Go to Settings -> API Keys
Step Three: Add the env variables
If you do not already have one, create a .env file at the root of your directory and add the following environment variables and associated keys from Step 2.
GATSBY_ALGOLIA_APP_ID=<App ID>
GATSBY_ALGOLIA_SEARCH_KEY=<Search-Only API Key>
ALGOLIA_ADMIN_KEY=<Admin API Key>
Step Four: Add dotenv to your gatsby-config.js
If you do not yet have dotenv, please run the following line in Terminal, in the current directory of your project:
yarn add dotenvOnce you have it please add it to the top of your gatsby-config.js using the following line:
require("dotenv").config()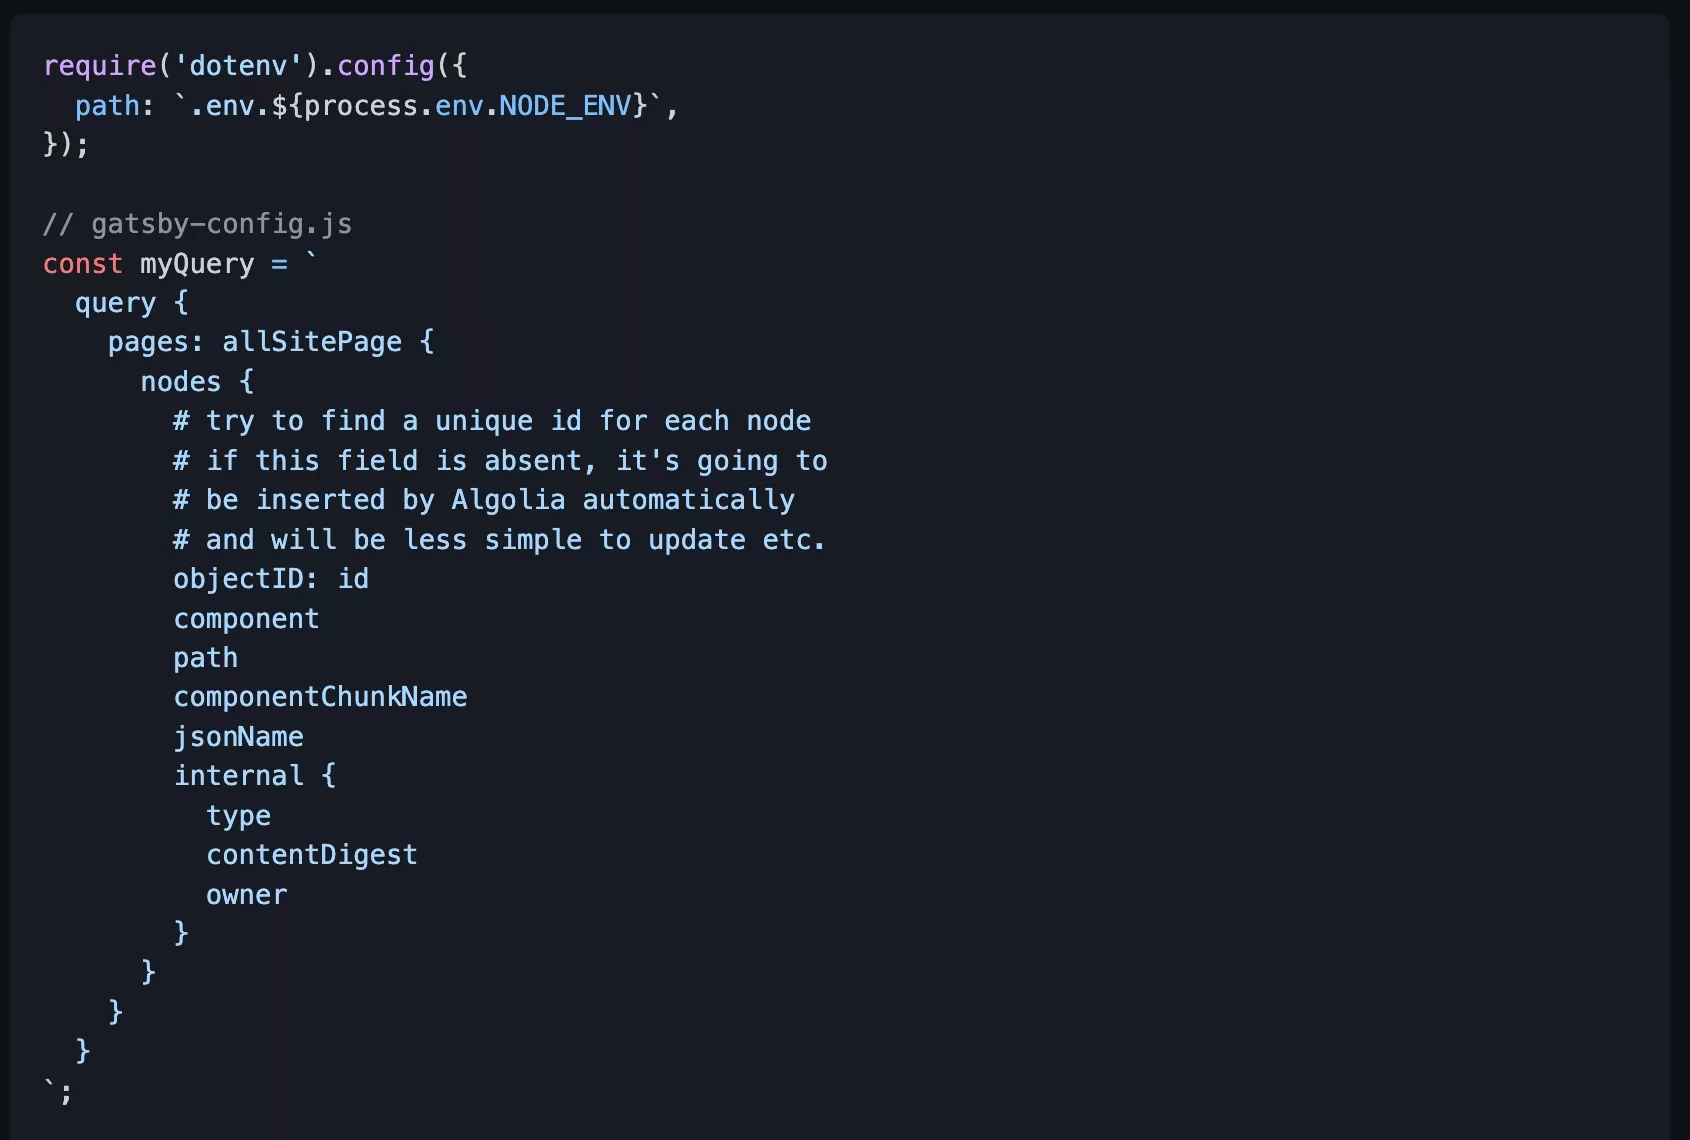
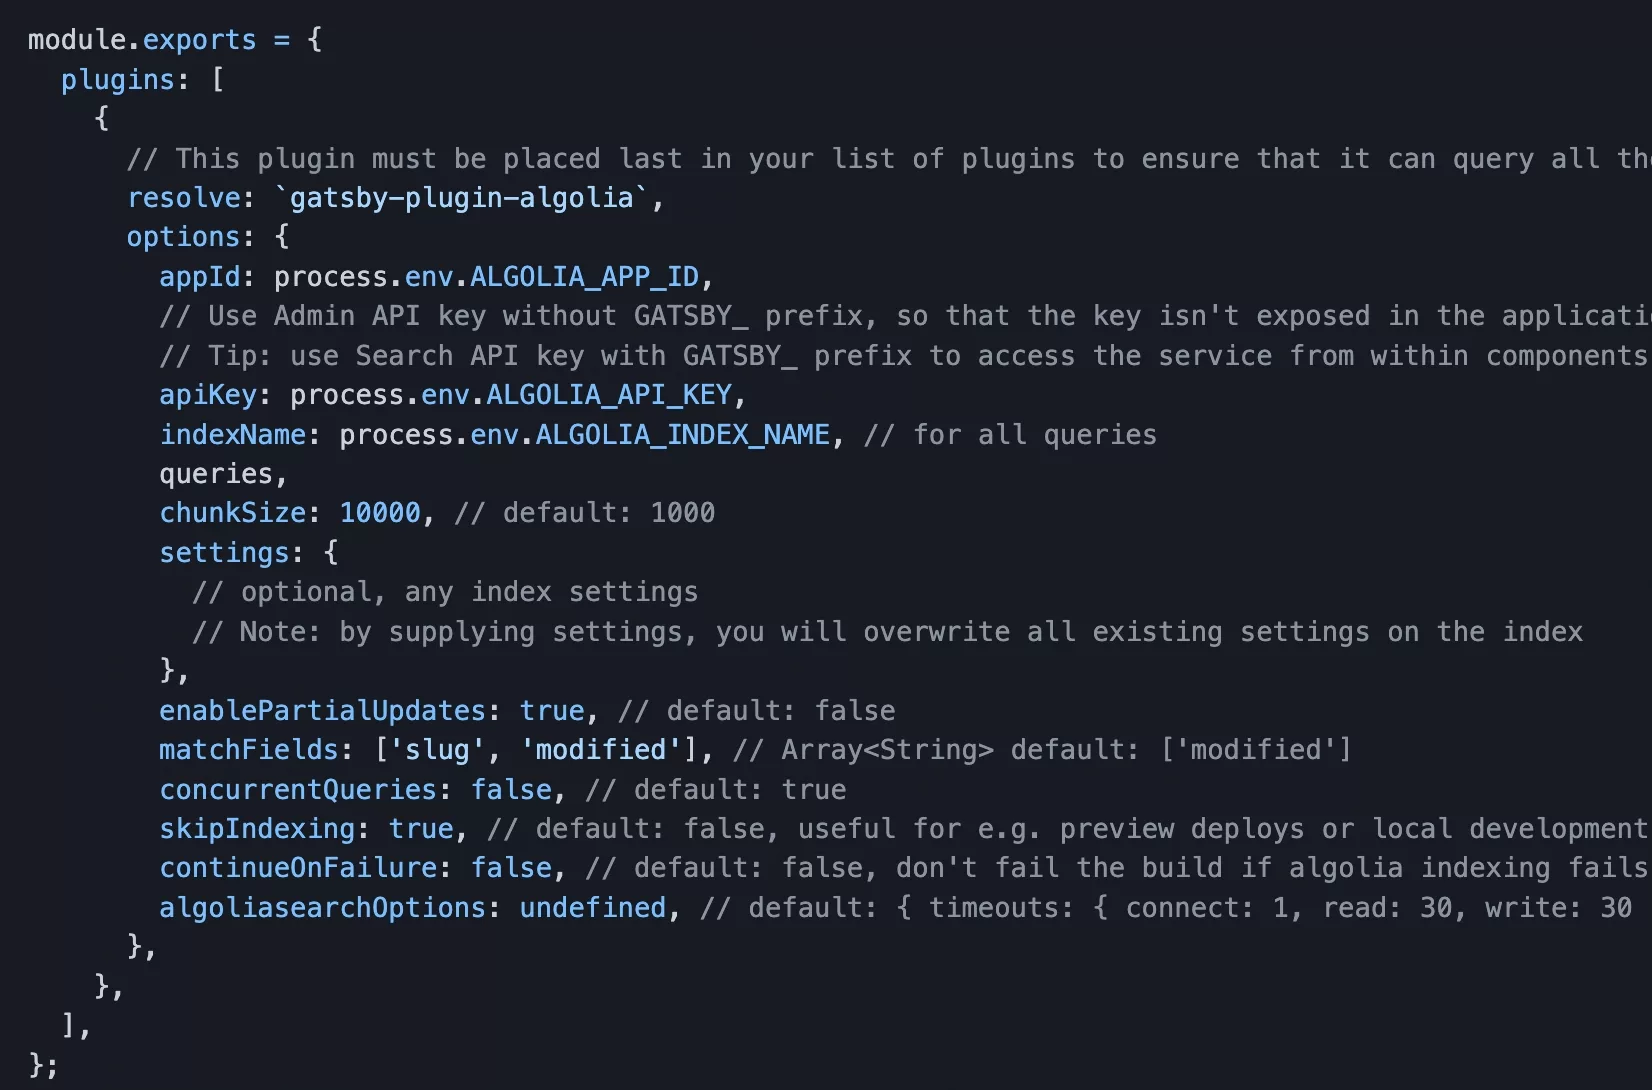
Step Five: Add the configuration
In your gatsby-config.js, under the module.exports add the following item.
{
  resolve: `gatsby-plugin-algolia`,
  options: {
   appId: process.env.GATSBY_ALGOLIA_APP_ID,
   apiKey: process.env.ALGOLIA_ADMIN_KEY,
   queries: require("./algolia/queries"),
  },
 }
Step Six: Add your Algolia Queries
Create an algolia folder at the base level & create a queries.js file.

Step Seven: Write your Algolia Query
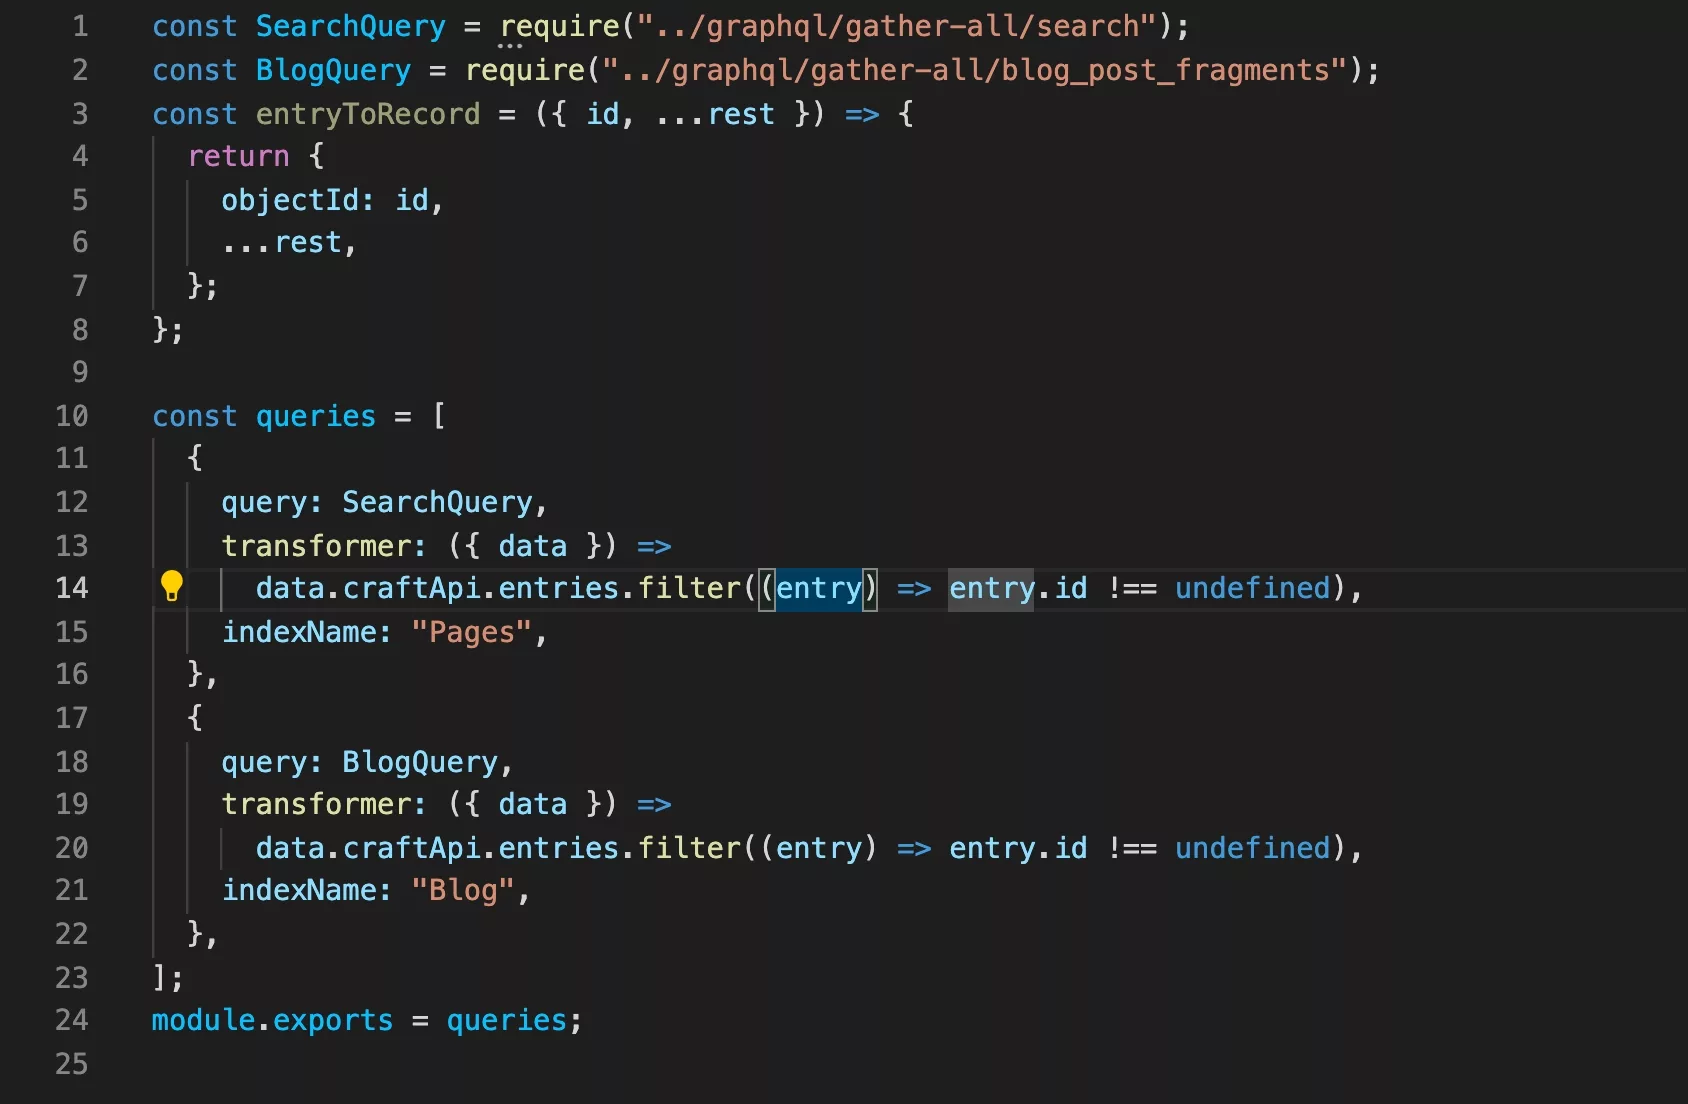
In the newly created queries.js, paste the following code
This javascript file creates two queries for Algolia to index:
- Blog Index - which creates an index of all the blog pages.
- Pages - which creates an index of all the pages in delasign.com
If you are new to GraphQL fragments, please visit the following page.
Step Eight: Build your website
In Terminal, in the current directory of your project, run the line below.
yarn buildOnce its complete you should see something like this:

Algolia prints a post-build message similar to the above.
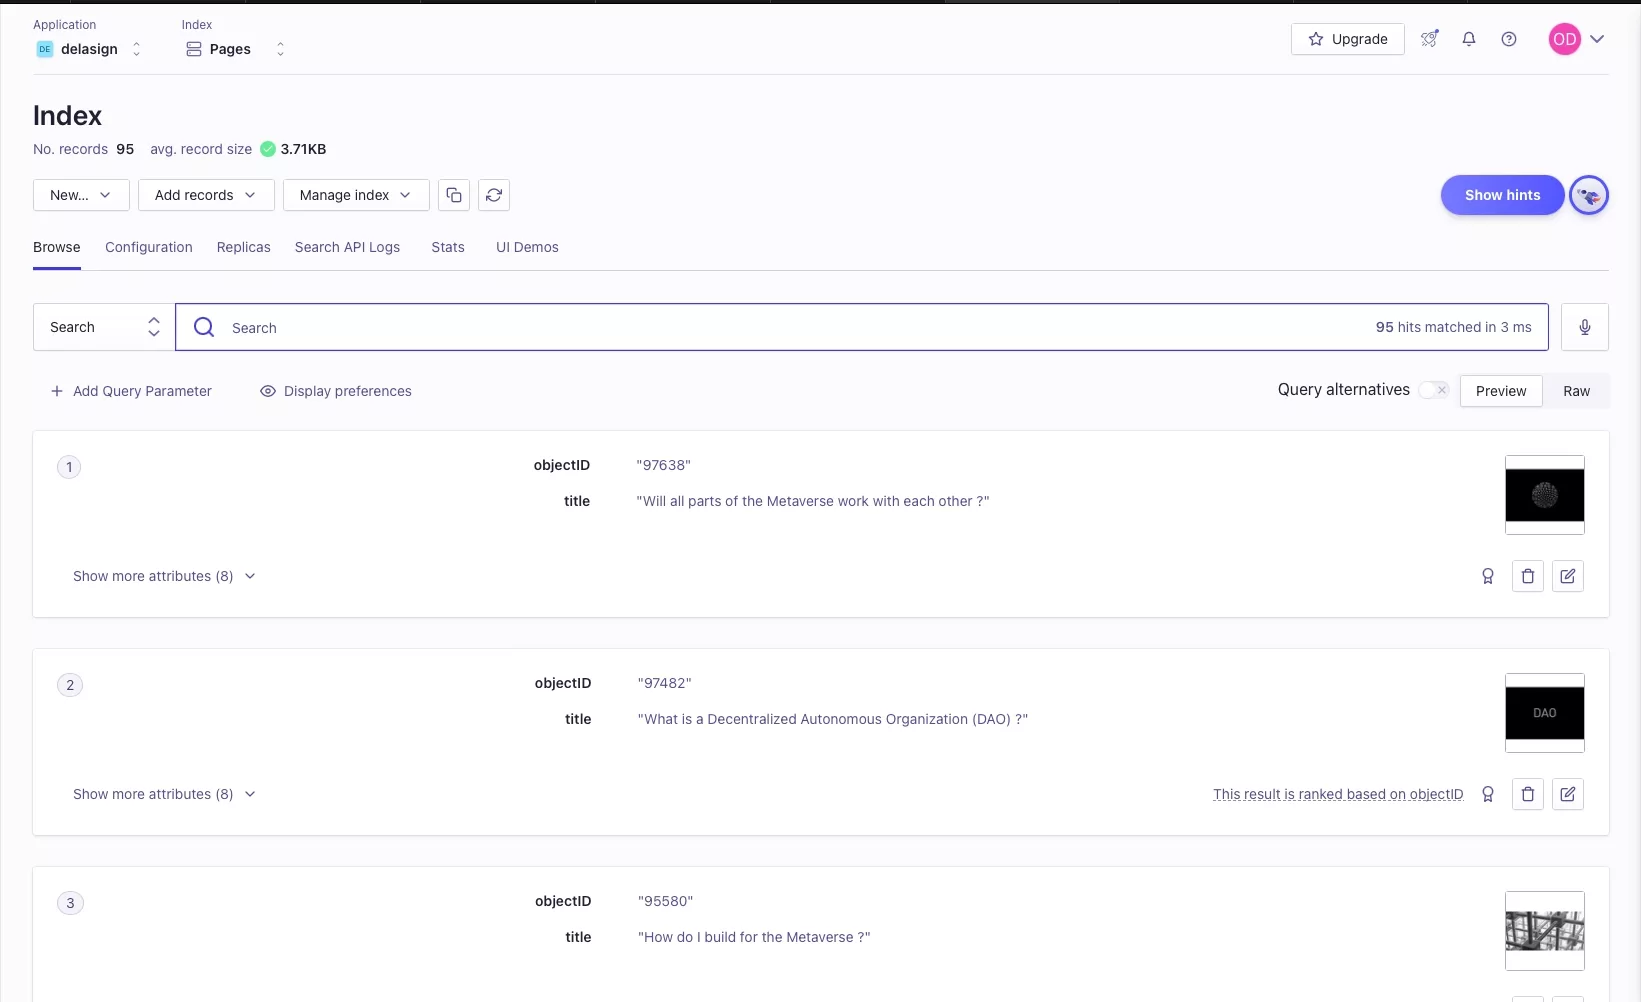
Step Nine: Verify that your query showed up in Algolia.
Navigate to your app in Algolia, and confirm that your results show up.
Step 10: Add Algolia's NPM Package
In Terminal, in the current directory of your project, run the following line
yarn add algoliasearch Step 11: Add the Algolia Instant Search API Call
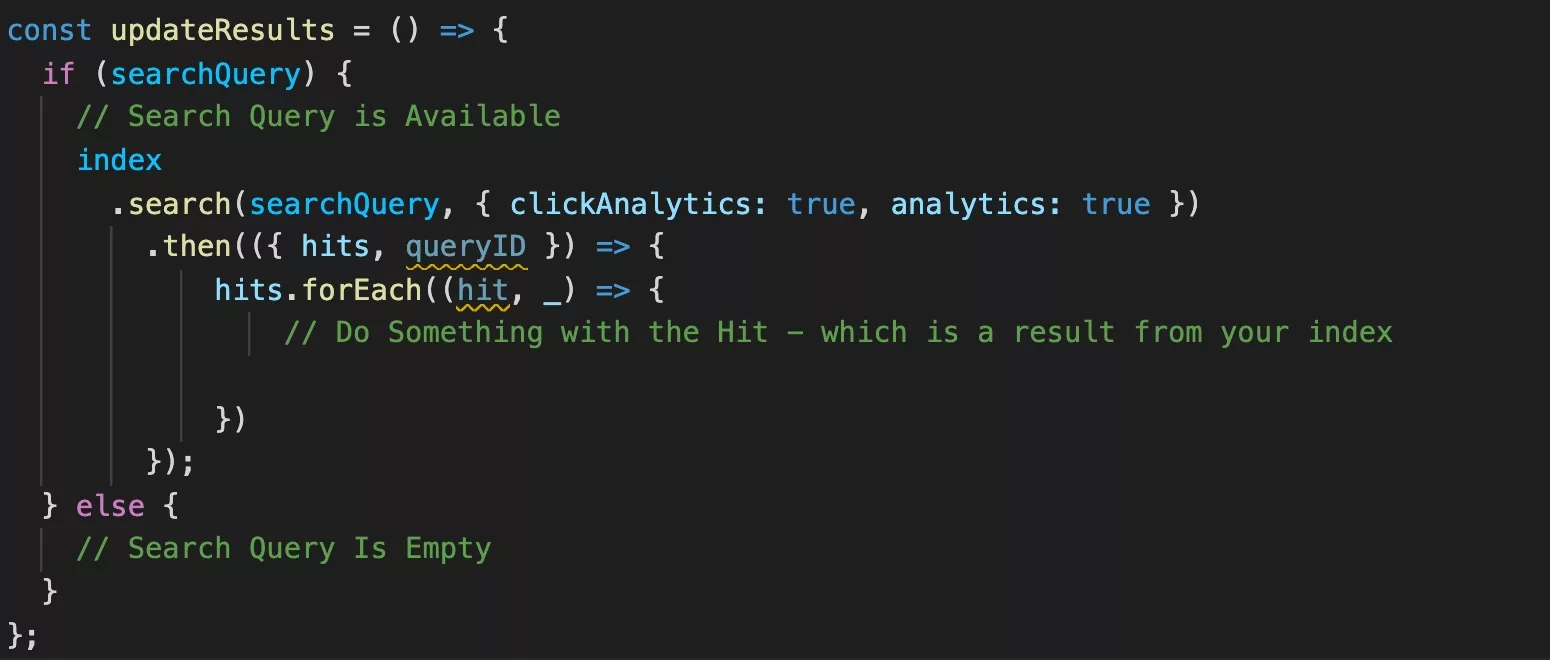
Add the following code to your custom search component, please note that searchQuery is the query gathered from the search UI & queryID is Algolia's reference to the search that's required for Analytics.
Add custom Algolia Analytics to your Gatsby ProjectStep 12: Verify that the search works
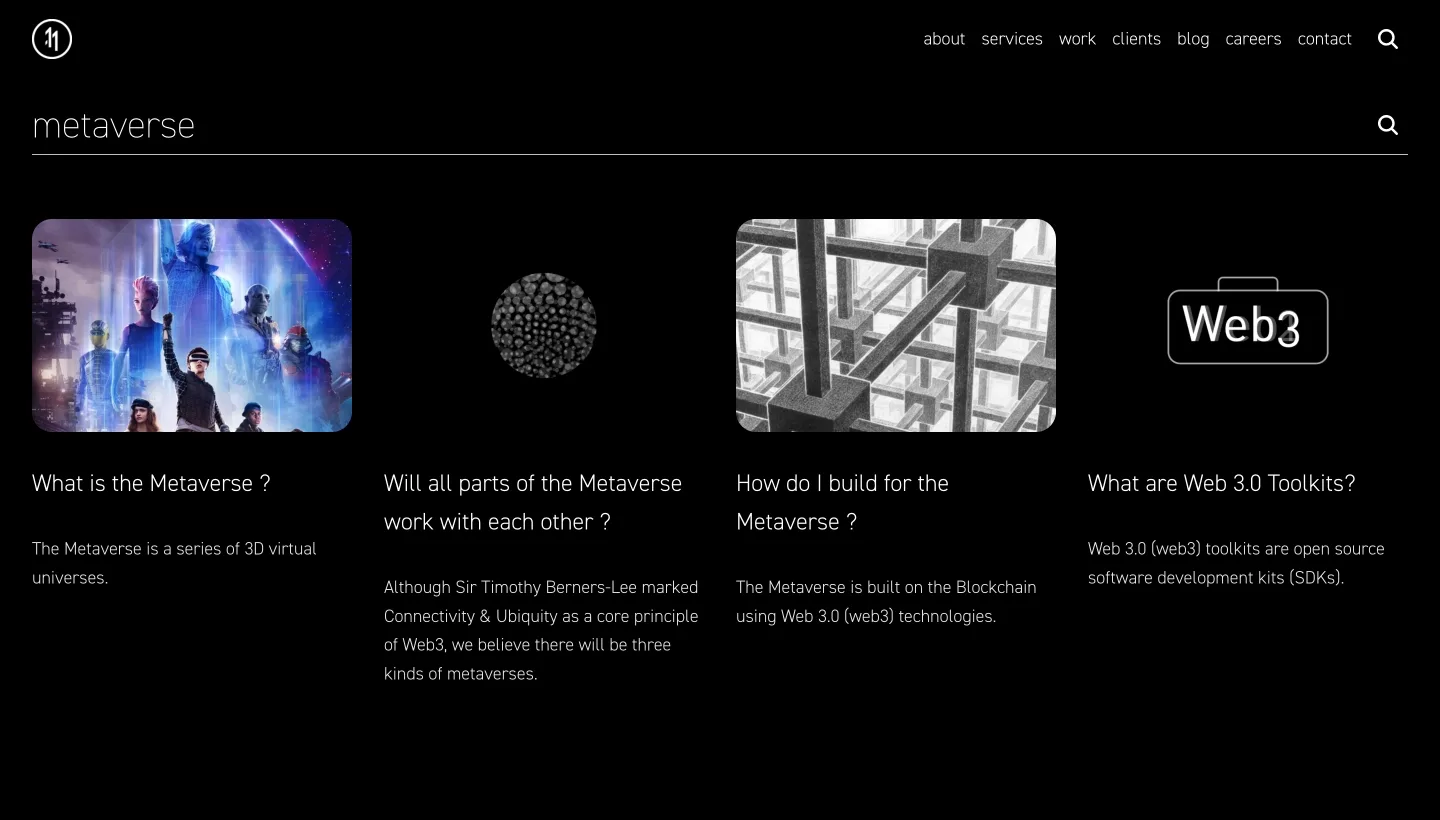
In your UI write a search term and verify that it filters results accurately. In the example below that term that we used is metaverse.
Any Questions?
We are actively looking for feedback on how to improve this resource. Please send us a note to inquiries@delasign.com with any thoughts or feedback you may have.